1380691911 6489endnote x7 tutorial
Bạn đang xem bản rút gọn của tài liệu. Xem và tải ngay bản đầy đủ của tài liệu tại đây (3.13 MB, 50 trang )
Introduction to
EndNote X7
[Type the document subtitle]
[Pick the date]
University of Salford
Anne Sherwin
Anne Sherwin
Academic Support Librarian for Research
Contents
Part 1 : Introduction ...................................................................................................................................................... 3
What is EndNote? ...................................................................................................................................................... 3
How to obtain EndNote ............................................................................................................................................ 3
EndNote for home use .............................................................................................................................................. 3
EndNote Basic ........................................................................................................................................................... 4
Part 2 : The EndNote Library ........................................................................................................................................ 4
An introduction to EndNote libraries ....................................................................................................................... 4
Library overview ....................................................................................................................................................... 5
Reference overview .................................................................................................................................................. 6
Preferences ............................................................................................................................................................... 8
Creating your own EndNote library ......................................................................................................................... 9
EndNote Sync ............................................................................................................................................................ 9
Adding references manually ................................................................................................................................... 10
Author & editor names ............................................................................................................................................ 11
Attaching images .....................................................................................................................................................12
Part 3 : Importing Records from Databases ...............................................................................................................13
Importing references from Web of Knowledge .................................................................................................... 14
Editing records ........................................................................................................................................................ 16
Importing references from EBSCO ..........................................................................................................................17
Automatic import of PDF articles ........................................................................................................................... 19
PDF automatic renaming ........................................................................................................................................ 20
Attaching PDFs manually .........................................................................................................................................21
Importing PDFs to create new records .................................................................................................................. 22
Automatic import of PDFs ...................................................................................................................................... 24
Annotating PDFs ..................................................................................................................................................... 25
Importing references from Google Scholar ........................................................................................................... 26
Using the online search for book records ............................................................................................................. 27
Part 4 : Organising Your References ......................................................................................................................... 30
Using groups ........................................................................................................................................................... 30
Creating a custom group ........................................................................................................................................ 30
Creating a smart group ........................................................................................................................................... 32
Creating a group set ............................................................................................................................................... 33
Duplicate records .................................................................................................................................................... 34
Part 5 : Cite While You Write ...................................................................................................................................... 35
Inserting citations & bibliographies into a document ........................................................................................... 35
Which style to use?.................................................................................................................................................. 37
Editing citations ...................................................................................................................................................... 38
Direct quotations and page numbers .................................................................................................................... 38
Changing the citation format .................................................................................................................................40
Adding multiple citations ........................................................................................................................................ 42
Creating secondary citations .................................................................................................................................. 43
Deleting citations .................................................................................................................................................... 45
Inserting images into your document .................................................................................................................... 45
Exporting a bibliography ........................................................................................................................................ 47
Electronic submission .............................................................................................................................................48
Part 6 : PowerPoint .....................................................................................................................................................49
Part 7 : Getting Help .................................................................................................................................................... 50
2
Part 1 : Introduction
What is EndNote?
EndNote is a reference management software package, which is used to manage
bibliographies and references when writing theses, essays and articles. The software is
available for both PC and Mac.
EndNote allows you to:
o
Store all the references that you find during your research. They can be entered
manually or downloaded from most databases.
o
Store PDF files, pictures, graphs, tables, etc.
o
Add citations to your work and create bibliographies in any output style (e.g. APA,
Chicago, MLA, and Vancouver). There are 5,000 styles to choose from.
How to obtain EndNote
EndNote X7 is available on all PCs in the University’s open access PC suites.
If you wish to obtain EndNote X7 for a ‘personal’ University-networked PC in an office or
postgraduate room:
o
Email and ask to be put on the EndNote User Group.
o
You need to tell them your network username and University of Salford email address.
o
If you require EndNote for Macintosh include this in your email to ITS Service Desk
too.
o
You will then be sent instructions on how to download the software onto your
computer.
o
Note: if you have an earlier version of EndNote you should uninstall it before installing
EndNote X7.
EndNote for home use
As a member of Salford University, you are able to purchase a copy of the EndNote software
for home use at a substantially discounted price.
o
o
o
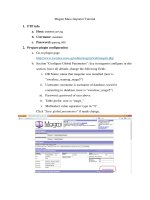
o
Go to: />Click the Login Now button.
If you are using a University of Salford PC you will automatically be recognised as a
member of the University.
If you are using a PC off-campus (e.g. at home) you can access the store by
following the on-screen instructions to select your institution and type in your
Athens username and password.
Choose the option you want (Windows or Mac). It is recommended that you choose a
DELIVERY option, rather than one for immediate download. This way you will have the
software on a CD, should you wish to install it on another machine.
Your licence allows you to install EndNote up to three times.
3
EndNote Basic
EndNote Basic is a Web version of EndNote, which you may prefer to use off-campus. This is
a lot less sophisticated than EndNote X7, but it is FREE.
Groups of records can be transferred easily between EndNote X7 and EndNote Basic, so you
may choose to use the full software when you are University and the Web version when you
are at home. It is highly recommended that you use EndNote Basic to back up your EndNote
references. You can also use EndNote Basic to share references and work collaboratively
with others. Please see p. 8 for information about EndNote Sync.
For more information please see the separate EndNote Web guide, available at:
/>
Part 2 : The EndNote Library
An introduction to EndNote libraries
o
EndNote references are stored in a database called a Library. EndNote libraries
have the file extension .enl.
Each library has a corresponding folder with the extension .Data. This folder
will have the same name as the library, and it is where images, PDF files, etc. are
stored. If you move, copy, rename or delete a Library remember to do the same
with its corresponding .Data folder.
o
o
There is no limit to the number of references you can store in a Library, although it is
recommended that you do not exceed 100,000 to maintain efficient performance of the
database.
o
Although the software allows you to create as many Libraries as you wish, it is strongly
recommended that you keep all your references in just one Library. This way you will
know where to find them, and will no create duplicate records in other Libraries.
o
Within your library you can create Groups (or subsets) to help you organise your
references. Custom Groups are manually created by drag-and-dropping to copy references
into a group. Smart Groups use search criteria to dynamically update groups as existing
references are edited or new references are added to the Library.
o
Each EndNote record stores the information required to reference it in a bibliography.
Other information, to help you with your research, such as keywords, notes, abstracts
and URLs can be stored in a record as well. You can also attach PDF files and images to
EndNote records, and you can annotate PDFs with highlights and your own comments.
4
Library overview
Go to File then New to make a new library, or
Open to open an existing library.
Click the Question Mark (?) icon to
go to EndNote Help.
The EndNote Library screen is split into three panes: a Reference List pane, a Groups pane,
and a Tab pane.
The Reference List Pane.
This shows a list of all your references, each
displayed as a single line.
You can sort the references by clicking on a
column heading.
The Groups Pane.
These are subsets (or folders) of
references saved for easy retrieval.
Click on the title of a group to see its
contents displayed in the Reference
List pane.
The Tabs Pane.
This includes tabs to three commonly used functions –
Reference, Preview and Attached PDF.
The above layout is recommended if you have a wide-screen monitor.
For a conventional monitor you might prefer a layout like this
Click the Layout
button and select
Bottom.
5
Reference overview
To see all the details for a reference you can either use the Reference tab, or
double-click on it in the Reference List pane.
Each reference has its own unique number. EndNote
uses these numbers for formatting, and they cannot
be changed.
The font and size should both be set as Plain, unless
you need a special style for a character. You do NOT
need to set italics or bold; EndNote will do this for you.
When you are typing in numbers,
for example, for pages or
volumes, you do not need to type
v. or pp. before them – just the
numbers.
Use the Aa button if you
need to change case –
for example, for titles
imported all in capitals.
Use the Options button
to hide or display empty
fields in the record, and
display the Ratings tool.
As well as the fields that are required to
format your bibliography, EndNote provides a
number of fields for your own use, for
example, to write your own research notes,
and attach files and images.
How you use these fields is your own choice.
6
If you are manually inputting references, you need to
select the correct Reference Type for the type of
publication you are citing. This will ensure the correct
information and format appears in your bibliography.
EndNote X7 has fifty predefined
Reference Types to choose from.
Records imported automatically
from databases will usually have the
correct Reference Type selected,
but occasionally you will need to
change it to achieve a better
citation.
When you have finished editing a
record, click the small X close button.
This will save any changes you have
made to it.
EndNote has some features to help with your information management.
When you import records into EndNote they will be displayed in bold (unread). To help you
keep track of your workload you can mark records when you have read them, and also assign
a rating to remind yourself how useful you found the paper.
Click the status button to mark
when you have read an article.
The paperclip indicates that a file
has been attached to the record.
Use the Rating tool to mark how useful you have found a
paper. You can either click here to assign stars, or do this in the
Rating field within the open record (see p. 5).
7
Preferences
There are number of ways you can customise EndNote to suit your own needs.
Go to the Edit menu and select Preferences.
Click on the item in
the menu to see
what options are
available – for
example, you might
wish to change the
font of your display
screen, or select
which columns are
displayed.
Use PDF Handling to give your
PDF attachments meangful
filenames, and to set up an
automatic import folder.
See pages 19 and 23 for more
about this.
If you make a mess of your preference changes you
can click the EndNote Defaults button to return
everything to the way it was.
To find out more about the options available to you go to EndNote Help:
o
Select Preferences, Toolbars & Shortcuts from the menu,
o
then EndNote Preferences.
8
Creating your own EndNote library
o
o
o
Go to the File menu and select New.
Give your Library a name and save it to your F: drive. Note that it must be saved as
EndNote Library (*.enl).
Your new Library will have been created and will open automatically.
EndNote Sync
It is highly recommended that you use EndNote Web (Basic, see p. 3) to make a back-up of
your EndNote Library.
Before you start, one of your Libraries (web or software) should be empty – therefore it is a
good idea to set this up before you start saving records.
Go to Preferences (see p. 7).
Click the Sync link, then the Enable Sync
button.
Follow the on-screen instructions to
make yourself a EndNote Basic account.
Once you have made an account,
enter your email address and
EndNote password here.
(If you already have an EndNote
Web account you can use that.)
Tick the Sync Automatically box,
then click the OK button.
Whenever you close your EndNote Library, all the references in it will be backed up to your
Web Library, ready for you to use when you get home – or anywhere else you have internet
access. What’s more, your references will stay there forever (even after you have left
Salford), until you choose to delete them.
9
Adding references manually
Usually, references will be added to your Library by importing them directly from online
databases, but occasionally you will need to make a manual record – for example, for a
webpage, blog or unpublished report which doesn’t have an electronic record for it.
Sometimes, you will also need to edit records that you have imported from databases.
Click the New References button.
A blank form will be displayed.
Select the correct Reference Type for the publication
you wish to cite (see p. 6).
When you have finished
entering all the information,
click on the small cross
(not the red one) to save the
reference.
These should be set to Plain Font and Plain Size unless you
need a special character. Remember that EndNote will do
any standard formatting automatically.
See the next page for
advice about
entering authors.
Type the information into the relevant fields.
Most of the fields you need to produce an
adequate citation are towards the top of the
page.
Many of the fields are provided to help you
organise your research, make useful notes,
etc.
You don’t have to fill them all in.
Use the Scroll Bar or
arrows to display
more fields.
10
Author & editor names
When you have more than one author or editor, each of their names
should be typed on a separate line, i.e. press the <Enter> key after each
name.
Personal authors & editors
o
Author names should be entered with the last name followed by a comma and the first
name (or initials), e.g. Smith, John or de Gaulle, Charles
o
You must type capital letters where required,
e.g. Smith, John (not smith, john) or van der Voordt, Theo
EndNote cannot guess where capital letters are or are not used in names.
o
If you are entering initials instead of full names, be sure to type a full stop or a space
between initials, (for example "Fisher, J.O." or "J O Fisher"), otherwise EndNote
interprets the initials as a single name: "Jo."
Wherever possible, use full names.
o
Corporate authors
o
When entering corporate authors (companies, institutions, organisations, etc.), put a
comma after the name, for example:
University of Salford,
o
This ensures it will be correctly formatted by EndNote.
o
If your corporate author name includes a comma in the name itself, use two commas in
place of the first comma, for example:
Institute for Social Research,, University of Salford
Anonymous works
o
If a reference has no author, you should leave the Author field blank. Do not enter
"Anonymous." The style that you use to format the bibliography determines how
anonymous references are treated.
o
Note that if a work is published with "Anonymous" printed on the title page, most style
guides request that "Anonymous" be entered as though it were the author name – in
which case you should type Anonymous into the author field.
Using et al., etc.
o
Enter all author names for a particular reference. EndNote will truncate the list of authors
with "et al." or "and others" as required by the citation style you have chosen.
o
If you do not know all of the authors’ names, then the last author should be "et al." or
"and others" followed by a comma, e.g. et al.,
New entries for Authors, Editors, Journal Titles and Keywords will appear in red. EndNote has
an auto-complete function which will complete the typing the next time you use that author,
etc.
11
Attaching images
EndNote allows you to embed images, figures, tables, charts, etc. into your references. This
is a useful way to store any graphic material you find in the course of your research.
You can insert a graphic file into the Figure field of any EndNote reference. So, while a
reference to a journal may contain primarily bibliographic information, you can also include
an illustration that appeared with the journal article.
The Figure, Chart or Table, and Equation reference types can be used specifically to catalogue
images and files, and may contain minimal reference information. EndNote can then be used
to insert figures and format a list of figures (if appropriate) in your paper.
Open the record you wish to use, then click the
Attach Figure (drawing pin) icon.
Click the Choose
File button and
browse to
where you have
the image
saved.
Click the OK
button.
Scroll down the reference screen to see
your image.
Add a caption to
describe the image.
Double-click on it to see the full-sized
image.
Remember that if you are using images in your writing you must provide a caption for each
one, and this must include a citation for the source of the image (as in the above illustration).
You can find out more about this in the guide “Referencing Images” which is available on the
Library’s website at:
/>
12
Part 3 : Importing Records from Databases
When you search databases to find journal articles, books and other information it is usually
possible to import the records you find directly into EndNote. This has the advantage of
allowing you to import references accurately without having to re-type all the information
yourself.
Most databases contain a download or export button that will send your search results
directly to EndNote, pick the correct import option, and start the import process
automatically. All you need to do is choose the EndNote library into which the data should be
imported.
In a few databases importing records is a two-step process where you save the results of
your search into a file, then import that file into your EndNote library using an Import Filter.
For instructions about how to import records into EndNote from the databases provided by
the Library, please see the separate guide: “Instructions for Downloading from Databases
into EndNote”, available at:
/>
Please note that with some databases it is not possible to import references automatically
into EndNote. In these cases you will need to either type the information in manually or copy
and paste it into the appropriate reference form, following the instructions on pages 9 & 10
of this guide.
Note: Before you try to import any records into EndNote you should
make sure you have your reference list displayed – like this.
Close any references you have open.
13
Importing references from Web of Knowledge
1. Open Internet Explorer, go to the Student Channel and click the SOLAR Library
Search link.
2. Click the Databases link, then the letter W, then the Web of Knowledge link.
3. Type in your keywords and
click the Search button.
4. At the results
screen, tick some of
the checkboxes next
to the results you
want.
5. Scroll down to the bottom of
the page.
7. Click the EndNote button.
6. Tick the plus Abstract box.
14
8. Depending on the security settings of your PC, you may
see a message like this.
If you do, right-click on it and select Download File.
If you do not already have your EndNote library open you
will be asked to select the library you want to use.
9. Return to your EndNote library. Note that the references you have
just downloaded are in a Group called Imported References.
10. Open one of the records to
see the information that has
been imported.
It is always a good idea to open
each reference and check that
the information has been
imported correctly, while you
still have the database open.
This will make it easier to
correct errors immediately.
15
Editing records
Sometimes the records you import will have titles all in capital letters, or with each word
capitalised. This will create incorrectly formatted references in your bibliography, so you will
need to edit these records.
Open the record and
highlight the text you
wish to correct.
Click the Change Case button and make your selection.
As a general rule, article and chapter titles are in sentence
case, i.e. capital letter for the first word and proper nouns
only.
Book and journal titles usually have a capital letter for all the
main words.
The above reference will now be correctly formatted, as such:
Remember to replace capital letters for any proper nouns!
16
Importing references from EBSCO
o
o
Open Internet Explorer.
Go to />
Click the All other EBSCO
databases link.
We subscribe to a number of EBSCO databases which
cover different subject areas and include many fulltext
articles.
Click the title link for the one you wish to search.
If you’re not sure where to start, select Academic Search
Premier, as this database covers a wide range of
subjects.
Type in your search terms, then click the Search button.
At the results page, click the
Add to folder link for each of
the references you want to
save.
17
When you have finished
making your selection, scroll
up to the top of the page and
click the Folder View link (on
the right-hand side of the
screen).
Click the Select
box, so that all the
records are ticked.
Click the Export icon.
Click the Direct
Export to EndNote,
ProCite … button,
then click the Save
button.
Remember to check that the information that you have just imported into EndNote is correct
and complete. If necessary, edit any records according to the instructions on p.16.
18
Automatic import of PDF articles
EndNote can locate and import fulltext PDF articles. Select one or more references, a group,
or your entire library and have EndNote scan for fulltext available to you. When the fulltext is
found, EndNote downloads it and links it to the appropriate reference automatically.
Please note that the success of this facility will depend on which database you got the
references from, and whether we have access to the fulltext articles. It will also be more
successful when you are using a University-network PC, as the system will recognise that you
are entitled to fulltext access.
Click on one of the items in the Reference List area, so that it is highlighted, then go to the Edit
menu and choose Select All.
This will highlight all the references in the list.
Alternatively, you can select individual records by holding down the <Ctrl> key while you click on
them.
Click the Find Full Text icon.
A copyright notice will be
displayed - click the OK button.
19
If the download has been successful
you will see a paperclip icon in the
Reference List, which indicates there is
a file attached.
If EndNote is unable to attach the PDF
file it will attempt to find and attach
URLs to your records. These can be
used to return to the fulltext article on
the database where it was found.
To read the PDF file click so its record
his highlighted, then click the Open
File icon (yellow folder). This will open
the attachment in a new window.
PDF automatic renaming
If you wish, you can set EndNote to rename your PDF files when they are imported, so that
they have uniform and meaningful file names.
Go to the Edit menu and select Preferences.
Click PDF Handling,
then select the option you want for
your filenames.
Click the OK button.
Wherever possible, EndNote will rename your files in the format you have chosen.
20
Attaching PDFs manually
If EndNote cannot find and attach the PDF for you automatically (see pp. 18-19) you can save
the file then attach it to the reference manually.
Before you start save the file to your PC.
Open the record you wish to use.
Scroll down to the File Attachments field,
and right click in the space below it.
Go to File Attachments
and select Attach File.
Browse to where
you have the file
saved, then click
the Open button.
The file will now be attached to the
EndNote record.
Double-click on the PDF icon to open it.
When you insert a PDF file or an image, EndNote copies the file and places the
copy in a .DATA folder, which is found in the same folder as the main library file.
If you move your library to a different computer, or if you want to share your
library with someone, remember to always copy the .DATA folder along with the
library.
21
Importing PDFs to create new records
EndNote allows you to convert existing collections of PDF files into EndNote records, by
extracting DOI information from the PDF files, matching it with data from CrossRef
(www.crosssref.org) and capturing bibliographic content.
Therefore, to work, the article will need to have the
DOI number printed on it somewhere.
What is a DOI?
A DOI (Digital Object Identifier) is a unique string of characters used to identify an electronic journal
article or (less frequently) an electronic book. Unlike a URL, a DOI is permanent – therefore using a
DOI in a bibliographic reference provides a persistent link to the article.
To retrieve an article where you have the DOI, turn it into a URL by preceding the DOI with the
following:
/>e.g.
/>
Before you start you should your PDF files into a single folder – this will make the importing
quicker.
Go to the File menu,
and select Import.
Select Folder.
(If you only have one PDF
file to import, select File).
22
Click the Choose button and
browse to the folder where
you’ve got your PDF files saved.
For this exercise, go to:
F:\endnote examples\
Select PDF from the Import
Option menu (if it is not already
selected).
Click the Import button.
The PDF files will be imported (you can see this from the paperclip icon) and the
records will be created from the information in each file.
Use the Reference tab to make any
changes you want, or to add information
– for example, you may wish to use the
full journal title.
23
Automatic import of PDFs
EndNote X7 has a new feature which allows you to specify a folder, then whenever you save
PDFs into it, they will convert into EndNote records automatically. As described on p. 20, the
articles will need to have DOIs printed on them to work correctly.
Make yourself a folder.
When you are searching for articles save
the PDF files into this folder.
In EndNote, go to the Edit menu and select Preferences.
Go to PDF Handling.
Click the Select Folder button
and browse to the location of
the folder.
Tick the Enable automatic
importing box.
Click the OK button.
After EndNote runs the import operation, EndNote creates a subfolder called Import within
your “Auto Import Folder”. This helps you (and EndNote) keep track of what has already
been imported into your library.
24
Annotating PDFs
EndNote allows you to easily view and annotate the PDFs you have attached to your
references.
Use these icons to Save, Print or Email
the PDF and your annotations.
Open the record you want to use,
then click the PDF tab.
Use the Highlight icon if
you wish to highlight any
text.
If you would like to write any comments on the PDF click
the Sticky icon, then click where you would like to write
your comment.
A balloon will appear.
Double-click on it.
This will open a box
where you can type
your comments.
When you have
finished click the red
cross in the corner to
close the comment
box.
When you have finished making all your
annotations click the Save icon to save
your changes.
25