Professional Information Technology-Programming Book part 52 pot
Bạn đang xem bản rút gọn của tài liệu. Xem và tải ngay bản đầy đủ của tài liệu tại đây (25.48 KB, 7 trang )
12.1.1.3. Use a traditional profile maker such as Monaco EZcolor
The two profiling kits I'm specifically recommending here, Monaco EZcolor and
ColorVision PrintFIX are both accessibly priced (under $500) and have a
reputation for producing decent results.
Monaco EZcolor is the best route to take if you need one piece of software that can
be adapted to a variety of situations and devices. It can profile cameras, scanners,
monitors, and printers. It's been around for a while (the current version is the XR),
and you can upgrade from any older version, such as the one that comes bundled
with many Epson printers.
Write Things Down
I typically use the base word processor on my operating system to create
a file called "profile notes" that contains all the settings for all my
profiles.
The method described here shows you how to use EZcolor to create a printer
profile. However, it also has the capability of calibrating monitors in a manner
similar to ColorVision's Spyder and OptiCAL.
To create the printer profile, you first have to create a scanner profile for your
flatbed scanner. EZcolor can also profile film scanners, but that requires you to
purchase a separate target, and you'll still need to profile a flatbed scanner in order
to create a printer profile. Profiling a film scanner is similar to profiling a flatbed,
and the program comes with documentation, so we'll only cover profiling a flatbed
in this section.
Here's how you'd typically go about creating a printer profile using Monaco
EZcolor XR:
1. Power on your printer and load the paper you intend to use. Remember, you
have to make a different profile for each printer/paper/ink combination. Be
sure to make note of the combination.
2. Open Monaco EZcolor, select Create Printer Profile, and click the Next
button. Cho
ose RGB as the printer type you plan to output to and click Next.
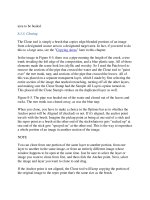
Now, click Print. The Print dialog will appear, as shown in Figure 12-10.
Figure 12-10. The EZcolor Print dialog.
3. From the drop-down menus, choose the following: the paper you will be
printing on; the resolution you will be printing at; Auto Color Correction
options off (see your printer manual if necessary); and 100% as the size to
print the target. Be sure to write down all these settings so you can refer to
them later. In the "Print a Target" dialog, click the Next button. Now save
the printer target file as a TIFF file.
4. Attach the IT8 target that was supplied with EZcolor to the target you just
printed. If you have other targets, don't use themthey won't work. Let the
printed target dry in the dark for an hour or so, then place the attached
targets on your scanner and click the Next button. The Monaco EZcolor
dialog for preparing to scan will appear (see Figure 12-11).
Figure 12-11. The Monaco EZcolor "Prepare to Scan" dialog.
5. Choose the TWAIN or Mac driver for your scanner. (Note that a few
scanners are incompatible with EZcolor, but the program gives you a
workaround if that is the case.)
6. Set the scanner resolution at 200 dpi. Turn off all color correction and
management options in the scanner driver's dialog. Take note off all the
scanner settings that stay in effect so that you can make sure they are
consistent from one profile to the next.
7. Prescan (preview) the targets and then crop them to exclude all whitespace.
8. Click the Scan button and scan the targets. EZcolor will display a thumbnail
of the scanned targets. Make sure the scan is straight and properly cropped.
If it's not, reposition, recrop and rescan. When you've got it right, click Next.
The Select Reference File dialog will appear (see Figure 12-12).
Figure 12-12. The Select Reference File dialog.
9. Locate the proper reference settings in the Select Reference File dialog;
you'll have to refer to the EZcolor manual for directions for locating these
files on your particular OS version. EZcolor then asks you to confirm a
variety of settings for cropping, straightening, scan resolution, etc. Once
you've done that, you can name and save the profile that EZcolor will
automatically generate during the printer profiling process. You can name
the profile whatever you want, but you'll probably want to use something
that describes the printer, model, paper type, printing resolution, and date in
some kind of understandable shorthand. EZcolor also gives you the option to
save the scanner profile that was automatically created by this process.
12.1.1.4. Use ColorVision PrintFIX
The problem with most printer calibrators is that you also need to have a calibrated
scanner. If the scanner is reset, you risk getting unreliable results. What sets
PrintFIX apart is that it comes with its own scanner that is dedicated to doing
nothing but reading a test chart printed on a given printer with a given ink and
paper set, and automatically creating a printer profile that will honor the soft proof
on your calibrated monitor. Since that's the scanner's only job, it becomes an easy,
quick process. Another thing that differentiates PrintFIX is that it runs right inside
Photoshop as an Import plug-in. Here's how it works:
1. Open Photoshop and choose File Import PrintFIX.
From the PrintFIX
dialog, choose the ColorVision color chart for your specific printer (see
Figure 12-13). This is a very specific color chart that is sized and resolved
for the small scanner that comes with PrintFIX (see Figure 12-14).
Figure 12-14. The PrintFIX Patch Reader scanner.
Figure 12-13. The PrintFIX color chart.
2. Choose File Print with Preview and go through the routine you normally
use to choose your printer, print size, paper type, and other settings (some
printer-and model-specific settings are recommended in the PrintFIX
documentation).
3. When the chart is printed, remove it from the printer and trim it precisely to
the dotted lines indicated in the print.
4.
Follow the short routine recommended for cleaning and calibrating the Patch
Reader scanner.
5. Insert the print in the holder made for the Patch Reader and place it in the
scanner slot.
6. Choose File Automate PrintFIX to bring up the dialog shown in
Figure 12-15. Don't change any of the default settings in the dialog.
Figure 12-15. The PrintFIX dialog.
7. Click the Read Patch Reader button. The scanner will read the calibration
chart and display the result in Photoshop. Crop the result so that only a
narrow white margin is visible around the color chart.
8. Choose File Automate PrintFIX. This time, when the PrintFIX dialog
appears, choose Build Profile from the drop-down menu. Leave all the
sliders at their defaults and click OK. When the Save As dialog appears,
name your profile with a name specifying the printer, paper, and ink combo,
and perhaps a six-digit date or a version number to distinguish it from
profiles made at other times.
9. Close Photoshop and reload it so that the profile you just saved will appear
when you need it in the next step.
10. You'll now make a test print. Load the PDI Test Image,
which is an excellent
image to use for making your first print because if you can match all of its
content, then virtually any image should match.
11. Choose File Print with Preview, and be sure that Show More Options is
checked in the resulting dialog. From the Show More Options drop-down
menu, choose Color Management. Choose the Document radio button and
then select the profile you just created from the Profile menu. From the
Intent menu, choose Saturation.
12. Click the Page Preview button. When the first Page Setup dialog appears,
click the Printer button. When the second Page Setup dialog appears, click
the Properties button. In the printer's setup dialog (see Figure 12-
16), choose
any matte paper available on the Media menu, and choose the Best and
Color radio buttons. (You may also want to adjust some of the Advanced
settings.)
Figure 12-16. The setup dialog for the Epson 1270.
13. Click as many OK buttons as it takes to get you back to the main Print with
Preview dialog. Click the Print button; the second Print dialog will appear.
Click the Print button.
14. When the chart is printed, let it dry for at least five minutesideally, a few
hours. Printer dye inks take a bit of time to really stabilize. Then take it over
to the monitor and compare it to the original.
15. Fine-tune your adjustments if necessary.
12.1.1.5. Use a software profile maker such as ColorVision's DoctorPRO
Trying to match color charts by entering numbers in a traditional profile making
application can seem pretty counterintuitive, especially to those of us used to
making all of our adjustments on the fly using traditional darkroom techniques or
the Photoshop commands that emulate them. Happily, there is a tool from
ColorVision that records your adjustments and then has Photoshop apply them to a
profile so that any image you print subsequently can use the same adjustments. It's
not the most precise method for creating a profile that works well on every image,
but it sure is a godsend when you want to cut the number of needed test prints for
those images tha
t just seem to work better when you tweak them manually. It's also
a lifesaver if you just don't have the discipline required for using a traditional
printer profiler. You can use DoctorPRO to tweak a profile you've already created
(for instance, with ColorVision's PrintFIX) or any of the existing profiles in your
system.
NOTE
When using PrintFIX, always choose a matte paper in the printer's setup dialog,
regardless of the paper you are actually going to print on. The surface differences
of other papers are automatically taken into account as a result of the scan.
Here's how to use DoctorPRO:
1. Install the software and restart Photoshop.
2. DoctorPRO requires lots of RAM, so you should be using a system with at
least 512 MB. In Photoshop, choose Edit Preferences Memory &
Image Cache and enter at least 75 percent as the maximum amount of RAM
used by Photoshop (see Figure 12-17). You should also make sure that all
applications other than Photoshop are closed.
Figure 12-17. The Photoshop Memory & Image Cache dialog.
3. Open the image that you want to create a new profile for, open the Actions
palette, and create a new action. Name it something like "DoctorPRO
Profile
Tweak" where Profile is the name of the monitor calibrator or printer profile
that created the image you are going to alter and Tweak is an abbreviated
description of how you made the adjustments. You can use any Photoshop
imageadjustment command in this action. When you've finished making the
adjustments, stop recording the action.
4. Making sure that the name of the action is selected in the Actions palette,
choose File Automate DoctorPRO to bring up the dialog in Figure
12-18.
Figure 12-18. The DoctorPRO dialog.
5. Select the DoctorPRO radio button and choose the name of the profile you
want to modify (this could be your printer's native profile or one you
created). Choose the printer's color printing mode (RGB for most inkjets)
and click OK. A DoctorPRO image of a horse will appear (don't ask why it's
a horseI have no idea) as well as a Save As dialog that opens the folder
where your OS keeps its color management profiles. Create a new profile
name that incorporates the name of the profile you are modifying and its
intent. Finally, click the Save button.
6. Close Photoshop, reopen it, and open the image you want to print with the
new profile. Choose File Page Setup. When the Page Setup dialog
appears, choose the printer and the advanced printer settings that you
normally use for this paper and ink combination.
7. Choose File Print with Preview. Make sure the Show More Options box
is checked, set your Source Space as Document, and choose the profile you
saved from DoctorPRO from the Print Space Profile menu.
8. Verify that your other printer settings are set for the correct paper size,
media, number of copies, and so forth. To print the now correctly profiled
image, click OK.
NOTE
As you've probably figured out by now, you have to quit Photoshop and restart it
whenever you create a new profile. Otherwise, it won't show up in the Profiles
menu when you try to apply it.
Be sure to recalibrate each particular ink and paper combination whenever you get
an unexpected result. Large manufacturers sometimes buy their supplies from more
than one source or improve the formulation as they gain experience with it. Also,
the materials themselves may interact in different ways because of the influence of
atmospheric chemicals, storage temperature, and the plain fact that nothing really
stays static over time.