Professional Information Technology-Programming Book part 34 potx
Bạn đang xem bản rút gọn của tài liệu. Xem và tải ngay bản đầy đủ của tài liệu tại đây (24.5 KB, 6 trang )
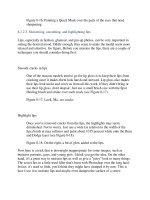
Figure 8-16. Painting a Quick Mask over the parts of the eyes that need
sharpening.
8.2.2.3. Moistening, smoothing, and highlighting lips
Lips, especially in fashion, glamour, and pin-up photos, can be very important in
setting the desired mood. Oddly enough, they seem to make the model seem more
relaxed and attentive. Go figure. Before you moisten the lips, there are a couple of
techniques you should consider doing first:
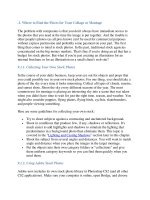
Smooth cracks in lips
One of the reasons models tend to go for lip gloss is to keep their lips from
cracking since it makes them look harsh and stressed. Lip gloss also makes
their lips look moist and saves us from all this work. If they didn't bring or
use their lip gloss, don't despair. Just use a small brush size with the Spot
Healing brush and stroke over each crack (see Figure 8-17).
Figure 8-17. Look, Ma no cracks.
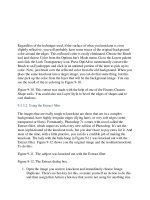
Highlight lips
Once you've removed cracks from the lips, the highlights may seem
diminished. Not to worry. Just use a wide (in relation to the width of the
lips) brush at max softness and paint about 1015 percent white onto the Burn
and Dodge layer (see Figure 8-18).
Figure 8-18. On the right, a bit of glow added to the lips.
Now here is a trick that is downright inappropriate for some images, such as
business portraits, guys, and young girls. I think you get the idea. On the other
hand, it's a great way to moisten lips as well as give a "juicy" look to many things.
The secret lies in a little-used filter that's been with Photoshop over the long haul.
In fact, it's used so little, you'd think they might have dumped it by now. This is
how I use it to moisten lips and maybe even dampen the surface of a street:
1. Select the lip or lips you want to moisten using the Quick Mask mode at a
100 percent, and about an 85 percent Hardness Brush. Size the brush
appropriately and paint over the lips.
2. Click the Standard Mode icon in the Toolbox and then press Cmd/Ctrl-I to
invert the selection, then Cmd/Ctrl-J to lift it to a new layer.
3. Choose Filter Artistic Plastic Wrap. You'll see the Plastic Wrap
dialog. Check the Preview box and lower the settings until the image looks
interesting. It always produces an overdone effect for what we're trying to
do, so don't throw up just yet. Instead, just click OK.
4. Immediately choose Edit Fade. In the dialog, scrub the Opacity slider
(probably all the way down to about 10 percent) until you like what you see.
It should look something like Figure 8-19.
Figure 8-19. Moistened lips.
8.2.2.4. High- and low-key techniques for glamour shots
When it comes to getting a viewer's attention, it's all about the drama. One way to
create this drama is to give the image a different look, such as deviating from the
usual striving for a full range of brightness and just go for the brightest or darkest
tones. Doing this also seems to set a definite mood. If you shoot RAW, I've already
shown you how to get as high- or low-key as possible outside of Photoshop (see
the "Using Camera Raw for Creating Effects" section in Chapter 4). Generally,
though, you'll want to do some fine-tuning in Photoshop. And if you chose not to
shoot RAW, you'll want to use similar adjustments in the Levels adjustment layer
as you would have used in Camera Raw to at least get the tonalities in the image
into the high-key "ballpark."
Now I'll explain the tricks you can use to get the same effects in your own images.
Here's the step-by-step for a low-key rendition:
1. Make sure you output the image from Camera Raw using low- or high-key
settingssee Chapter 4. You'll probably be more pleased with the end result
because you're starting with all your tones in the right basket, so to speak.
Basically, what you want to do is lower the Exposure, then raise the
brightness so that you can see more detail in the midtones. Don't raise the
Brightness so much, however, that you loose the low-key effect. Drag the
Shadow slider all the way to the left so you can see as much detail in the
shadows as possible.
2. Open your image in Photoshop and run the Workflow Layers Action. You
can see the Workflow Layers and one I added as the Layers palette appears
in Figure 8-20.
Figure 8-20. The workflow layers for the low-key image, before I renamed
Layer 1 Skin Smooth.
3. Optional: If there are any highlights in the background of the image that you
don't want to be any brighter, use the Lasso tool to make a selection that
fences them out, then feather the selection. This is more likely to be the case
if you're working with a portrait than with a landscape.
4. In the Levels layer bar, click the Mask icon (which currently contains no
mask). You'll see a frame appear around it. Now click the Mask icon at the
bottom of the Layers palette and the selection you just made now masks the
layer.
5. Double-click the Levels adjustment layer's Levels icon. The Levels dialog
will open and the adjustments you make will be masked so they affect only
the area within what was formerly your selection. The Histogram is probably
pushed off the left end and hits the ground well ahead of the Highlights
slider's arrow. Move that arrow to where the highlights start to rise
significantly.
6. Smooth the skin as explained earlier in the "Smoothing skin" section of this
chapter. Because the skin tones (or the midtones in another category of
images, such as landscapes) are so much darker than normal, blemishes have
a tendency to be especially noticeable.
7. Spot retouch as required.
8. Select the Levels command. There's already a mask in the Levels adjustment
layer, but there's nothing in it. Select the mask (a frame appears around it
when selected) and then use Edit Fill and select Black from the menu in
the dialog. There will almost always be areas of the image that have become
too dark to show much detail. In this case, it's the area around the model's
eyes. Burning and Dodging isn't really appropriate for these areas because
you not only want to change the brightness of the area, but the contrast
within it as well. There even will be times (this isn't one of them) when you
want to change the color balance at the same time.
9. Choose the Brush tool, set the color to 100 percent white, set the Brush's
Hardness to about 75 percent, and paint into the dark areas in the image. It
will appear that nothing is happening, but if you look at the Curves
adjustment layer's mask, you'll start to see little white specs appearing where
the mask should be.
10. Make a Curves adjustment that will brighten the eyes (or whatever else you
want to brighten). Double-click the Curves layer icon, make sure the
preview box is checked so you can see what's happening, and adjust your
"too dark" areas to your liking.
11. Use the Burn and Dodge layers to adjust areas that are too dark.
Figure 8-21 shows the end result.
Figure 8-21. The portrait as it looked after modifying the low-key image as it came
out of Camera Raw.
The high-key version of the same image will look like what you see in Figure 8-22
on the right.
Figure 8-22. The high-key version of Osher's portrait on the right. On the left, you
see the image as it looked straight out of Camera Raw.
Here are the steps that took me to that high-key image:
1. In Camera Raw, I dragged the Exposure slider as far to the right as I could
without blocking any highlight in the skin tones. There are some blocked
highlights in the background, but they seem to simply add to the atmosphere
in the image.
2. In Photoshop, I ran the Workflow Layers Action. I immediately went to the
Levels layer and dragged the Midtone slider to the right to brighten the skin
tones even more. If you're starting here because you didn't have a RAW
shot, use the Levels adjustment layer to get a high-key result similar to the
one on the left of Figure 8-22.
3. I performed the smooth skin layer action.
4. I used the Burn and Dodge layer, mostly to take out the intense shadows
under the eyes, but also to further lighten skin tones in the hand and
shoulders and to darken the knee just enough to see some color and texture. I
also burned to darken the color of her lips a bit.
5. I used the Curves layer for a gentle S-curve that raised overall contrast just a
touch.
8.2.2.5. Using Multiply and Screen modes
Two favorite attention-getting tricks in photography, especially glamour, involve
creating a high- or low-key version of the image, duplicating the layer, and then
using Screen mode for a high-key result or Multiply mode for a low-key result.
This technique is most useful when you want to lighten or darken the image
without losing as much highlight and shadow detail as you would by simply using
a Levels or Curves command. This technique works so well that I often simply use
it instead of the adjustments. It also works extremely well when you want to
brighten or darken only masked areas of the image. To lighten or darken the image
using Screen or Multiply Blend Modes:
Using Diffuse Glow Filter
One technique that has become almost too popular is the use of
Photoshop's Diffuse Glow filter or third-party filters such as Andromeda's
ScatterLight filter. I've seen it used to "define the style" for certain gallery
and portrait artists.
1. Select all the layers that make up the current version of the image and drag
them to the New Layer icon. This will duplicate them and the duplicates will
stay selected.
2. From the Layers palette menu, choose Merge Layers; now you now have a
flattened version of the image as the top layer. If you want a higher-key
version of the image, choose Screen from the Layers palette Blend menu. If
you want a lower-key version of the image, choose Multiply from the Layers
palette Blend menu. Figure 8-23 shows both effects on the same image.
Figure 8-23. The original image (left), with a Screened layer (middle), and
with a Multiply layer (right).
NOTE
There are a couple of ways to further adjust Multiply and Screen layers and they
usually are used in conjunction with one another. You can interactively reduce the
intensity of the effect by lowering the Opacity slider. To increase the intensity of
the effect, drag the screened or multiplied layer to the New Layer icon in the
Layers palette. This will double the intensity of the effect, so you'll probably need
to use the Opacity slider.
8.2.3. Portrait Enhancement Tips
The techniques for enhancing portraits are much the same as for glamour, but
more realistic. Use the same techniques for smoothing skin and brightening eyes
and