Building XNA 2.0 Games- P12 pps
Bạn đang xem bản rút gọn của tài liệu. Xem và tải ngay bản đầy đủ của tài liệu tại đây (1.3 MB, 30 trang )
318
CHAPTER 10
■ MENUS, A HUD, AND DEPLOYMENT
1f - optionFrame[i], GetAlpha(true))),
(1f - optionFrame[i]) * 1f,
new Vector2(160f, 32f), 1f, SpriteEffects.None, 1f);
}
sprite.End();
If we’re not in dead mode, draw the second layer of fog and foreground graphic:
if (menuMode != MenuMode.Dead)
{
sprite.Begin(SpriteBlendMode.Additive);
pan *= 2f;
for (int i = 0; i < fog.Length / 2; i++)
{
sprite.Draw(spritesTex, fog[i] + new Vector2(pan, 0f),
new Rectangle((i % 4) * 64, 0, 64, 64),
new Color(new Vector4(1f, 1f, 1f,
.1f * GetAlpha(false))),
(fog[i].X + fog[i].Y) / 100f,
new Vector2(32f, 32f),
(float)(i % 10) * .5f + 2f,
SpriteEffects.None, 1f);
}
sprite.End();
sprite.Begin(SpriteBlendMode.AlphaBlend);
sprite.Draw(poseForeTex,
new Vector2(Game1.ScreenSize.X - (Game1.ScreenSize.Y
/ 480f) * 616f * GetAlpha(false)
+ (float)Math.Cos((double)frame) * 20f + 20f,
Game1.ScreenSize.Y - (Game1.ScreenSize.Y / 480f)
* 286f),
new Rectangle(0, 0, 616, 286),
new Color(new Vector4(GetAlpha(false),
GetAlpha(false), GetAlpha(false), 1f)), 0f,
new Vector2(), (Game1.ScreenSize.Y / 480f),
SpriteEffects.None, 1f);
sprite.End();
}
}
CHAPTER 10 ■ MENUS, A HUD, AND DEPLOYMENT
319
Options Population
Now, let’s take a look at our PopulateOptions() method. It’s just a bunch of cases again. The
only odd bit is for the main level: if we’re in pause mode, our main level will be a bit different
than for the other modes.
private void PopulateOptions()
{
for (int i = 0; i < option.Length; i++)
option[i] = Option.None;
switch (level)
{
case Level.Main:
if (menuMode == MenuMode.Pause)
{
option[0] = Option.ResumeGame;
option[1] = Option.EndGame;
option[2] = Option.Options;
option[3] = Option.Quit;
totalOptions = 4;
}
else
{
option[0] = Option.NewGame;
option[1] = Option.Continue;
option[2] = Option.Options;
option[3] = Option.Quit;
totalOptions = 4;
}
break;
case Level.Options:
option[0] = Option.Back;
totalOptions = 1;
break;
case Level.Dead:
option[0] = Option.EndGame;
option[1] = Option.Quit;
totalOptions = 2;
break;
default:
totalOptions = 0;
break;
}
}
320
CHAPTER 10
■ MENUS, A HUD, AND DEPLOYMENT
Pausing and Dying
We’ll be using the Pause() and Die() methods from elsewhere in our game to set all of the
appropriate flags to pause or go into you-are-dead mode.
public void Pause()
{
menuMode = MenuMode.Pause;
Game1.GameMode = Game1.GameModes.Menu;
transFrame = 1f;
level = Level.Main;
transType = Trans.All;
}
public void Die()
{
menuMode = MenuMode.Dead;
Game1.GameMode = Game1.GameModes.Menu;
transFrame = 1f;
level = Level.Dead;
transType = Trans.All;
}
}
That concludes our big bad Menu class. We’ve done a lot of coding this chapter, but it has
all been fairly simple, using techniques that are definitely not new. We are going to keep going,
because we need to clean up and update our current classes before we run the game.
Updating the Game
We need to plug everything in to Game1, and we also need to sort out some stuff.
Adding the HUD and Menu to the Game
We’ll start at the class level of Game1 by declaring our HUD and Menu. We also need a new enumer-
ation called GameModes, which we’ll use to define the current state: playing or at the menu.
Remember that paused and dead count as being in the menu.
HUD hud;
public enum GameModes : int
{
Menu = 0,
Playing = 1
}
CHAPTER 10 ■ MENUS, A HUD, AND DEPLOYMENT
321
private static Menu menu;
private static long score = 0;
private static GameModes gameMode;
public static GameModes GameMode
{
get { return gameMode; }
set { gameMode = value; }
}
public static Menu Menu
{
get { return menu; }
set { menu = value; }
}
public static long Score
{
get { return score; }
set { score = value; }
}
From Menu.Update(), we called NewGame() and Quit(). Let’s define them next.
NewGame() clears all characters and particles, sets the map path to start, resets the map
flags, reads the map, sets the map transition direction to Intro, and tells the map that it is tran-
sitioning in. When the map is loaded and the game mode switches over to GameMode.Playing,
our setintroentrance command will see that we are in a TransitionDirection.Intro transition
and plant our new character at the intro location we gave it.
public void NewGame()
{
gameMode = GameModes.Playing;
character[0]
= new Character(new Vector2(100f, 100f),
CharDefs[(int)CharacterDefinitions.Guy],
0,
Character.TEAM_GOOD_GUYS);
character[0].HP = character[0].MHP = 100;
for (int i = 1; i < character.Length; i++)
character[i] = null;
pManager.Reset();
map.Path = "start";
map.GlobalFlags = new MapFlags(64);
map.Read();
map.TransDir = TransitionDirection.Intro;
map.transInFrame = 1f;
322
CHAPTER 10
■ MENUS, A HUD, AND DEPLOYMENT
}
public void Quit()
{
this.Exit();
}
In LoadContent(), we’ll create our new Menu and HUD, sending them all of the right textures.
Since we won’t need our pose, pose foreground, and options textures elsewhere, we can load
them directly in the constructor, rather than loading them in the Game1 scope and passing a
reference.
nullTex = Content.Load<Texture2D>(@"gfx/1x1");
menu = new Menu(
Content.Load<Texture2D>(@"gfx/pose"),
Content.Load<Texture2D>(@"gfx/posefore"),
Content.Load<Texture2D>(@"gfx/options"),
mapBackTex[0],
spritesTex,
spriteBatch);
hud = new HUD(spriteBatch, spritesTex, nullTex, character, map);
Next, we need to do some reorganizing.
Reorganizing the Code
We previously updated all of the game logic in Update() and all of the game-drawing logic in
Draw(). However, now that we have two game modes, we need some more complicated cases
to determine whether we want to update game logic or draw the game, so let’s move the code
into UpdateGame() and DrawGame(), respectively.
The UpdateGame() method (well, most of it) looks like this:
private void UpdateGame()
{
scroll += ((character[0].loc -
new Vector2(400f, 400f)) - scroll) * frameTime * 20f;
if (scroll.Y > yLim) scroll.Y = yLim;
if (map.transOutFrame <= 0f)
{
pManager.UpdateParticles(frameTime, map, character);
if (character[0] != null)
{
CHAPTER 10 ■ MENUS, A HUD, AND DEPLOYMENT
323
}
for (int i = 0; i < character.Length; i++)
{
if (character[i] != null)
{
character[i].Update(map, pManager, character);
if (character[i].dyingFrame > 1f)
{
}
}
}
}
map.Update(pManager, character);
hud.Update();
}
The basic functionality is the same as the code lifted from Update(), but we won’t be
updating the particles or characters if the map is transitioning out. Otherwise, we would be
able to walk to the edge, trigger a transition, and start walking back in the opposite direction,
which would look all wrong! Also, we added a hud.Update() at the end.
Similarly, DrawGame() takes a big chunk from Draw(). The only change we’re doing for now
is to draw the main screen a bit darker if we’re paused or dead. When we start playing with
shaders in the next chapter, we’ll be able to draw the main screen in a grayscale or sepia tone if
the pause menu is overlaid.
private void DrawGame()
{
graphics.GraphicsDevice.SetRenderTarget(0, mainTarget);
graphics.GraphicsDevice.Clear(Color.Black);
map.Draw(spriteBatch, mapsTex, mapBackTex, 0, 2);
graphics.GraphicsDevice.SetRenderTarget(0, null);
spriteBatch.Begin(SpriteBlendMode.None);
spriteBatch.Draw(mainTarget.GetTexture(), new Vector2(),
(gameMode == GameModes.Menu ? Color.Gray : Color.White));
spriteBatch.End();
324
CHAPTER 10
■ MENUS, A HUD, AND DEPLOYMENT
spriteBatch.Begin(SpriteBlendMode.AlphaBlend);
if (QuakeManager.blast.val > 0f)
{
}
spriteBatch.End();
}
Now that we’ve extracted some important functionality from Update() and Draw(), we
need to sort things out within these methods. The sound-updating and frameTime-calculating
stuff is the same, but if we’re in you-are-dead menu mode, we still want to update the game,
albeit slightly slower.
protected override void Update(GameTime gameTime)
{
Sound.Update();
Music.Play("music1");
QuakeManager.Update();
frameTime = (float)gameTime.ElapsedGameTime.TotalSeconds;
if (slowTime > 0f)
{
slowTime -= frameTime;
frameTime /= 10f;
}
switch (gameMode)
{
case GameModes.Playing:
UpdateGame();
break;
case GameModes.Menu:
if (menu.menuMode == Menu.MenuMode.Dead)
{
float pTime = frameTime;
frameTime /= 3f;
UpdateGame();
frameTime = pTime;
}
menu.Update(this);
break;
}
base.Update(gameTime);
}
CHAPTER 10 ■ MENUS, A HUD, AND DEPLOYMENT
325
Our Draw() method shrinks a bit, too. If we’re playing the game, we’ll draw the game and
then draw the HUD. If we’re in menu mode, we’ll draw the menu. If it’s a pause or dead menu,
we’ll make sure the game gets drawn under it. We need to draw the HUD only while we’re
playing the game. If the HUD is shown while the pause or dead menu is up, the interface gets a
bit crowded.
protected override void Draw(GameTime gameTime)
{
graphics.GraphicsDevice.Clear(Color.Black);
switch (gameMode)
{
case GameModes.Playing:
DrawGame();
hud.Draw();
break;
case GameModes.Menu:
if (menu.menuMode == Menu.MenuMode.Pause ||
menu.menuMode == Menu.MenuMode.Dead)
DrawGame();
menu.Draw();
break;
}
base.Draw(gameTime);
}
This should complete the vicious cycle we’ve just introduced. We now have a pause screen,
as shown in Figure 10-11. We also have a you-are-dead screen, as shown in Figure 10-12.
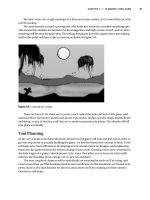
Figure 10-11. Pausing the game
326
CHAPTER 10
■ MENUS, A HUD, AND DEPLOYMENT
Figure 10-12. After death
Lastly, and compared to the rest of this, certainly least, we should implement some sort of
functionality for scoring.
Scoring
We’ll add some fairly basic scoring functionality. Since score is a public static in Game1, it’s
simple enough to set from anywhere. We’ll be setting it from Character.KillMe() and from
HitManager.CheckHit().
Also, we need to add a new field to Character at the class level:
public int LastHitBy = -1;
A Character can use this to determine who hit him last.
In HitManager, after we’ve determined a successful hit, we’ll set lastHitBy to the index of
the hit owner.
if (c[i].InHitBounds(p.Location))
{
float hVal = 1f;
c[i].LastHitBy = p.Owner;
Further down, after we’ve fully calculated hVal, we’ll add some points (50 times hVal) to
the static score value if the hit owner index is 0.
if (c[i].LastHitBy == 0)
Game1.Score += (int)hVal * 50;
CHAPTER 10 ■ MENUS, A HUD, AND DEPLOYMENT
327
In Character, we’ll add more to the score if the character was last hit by character index 0.
public void KillMe()
{
if (DyingFrame < 0f)
{
DyingFrame = 0f;
if (LastHitBy == 0)
Game1.Score += MHP * 50;
}
}
There we have it—scoring is implemented! Our final product is shown in Figure 10-13.
Figure 10-13. In-game scoring
■Note Scoring in The Dishwasher game used a fairly complicated combo system. Any points scored would
feed into a combo score, and combo hits and kills would increase the combo multiplier. Once a combo ended,
the combo score would be multiplied by the combo multiplier, and the final score would be added to the main
player score (think Tony Hawk with buckets of blood). It added a lot of strategy to the combat for players
seeking the best scores. For our Zombie Smashers XNA game, we’ll leave it up to you to implement more
complex scoring, if that interests you.
328
CHAPTER 10
■ MENUS, A HUD, AND DEPLOYMENT
Deploying to Xbox 360
Let’s tackle the fun part: trying the game on Xbox 360. For this, we’ll need to create a new
project and connect the Xbox 360 to XNA Game Studio.
If you have not yet purchased a Creators Club Premium Membership (required to deploy
to Xbox 360), you can do so at You’ll be required
to have a Gamertag and at least a four-month subscription (currently $49).
Creating the Xbox 360 Project
To begin, right-click the ZombieSmashers project in Solution Explorer and select Create Copy of
Project for Xbox 360, as shown in Figure 10-14. You’ll see a dialog informing you that you’ll
have two separate projects to maintain now; click OK. A new Xbox 360 project is created.
Figure 10-14. Choosing to create a copy of the project for Xbox 360
We were a bit put off by the prospect of maintaining two separate projects, but warmed
up to it in time. The files referenced by both projects are the same, and both share a Content
project, so the inconvenience of keeping both projects current typically comes down to a few
rounds of refreshing Solution Explorer with Show All Files enabled, and adding all of the classes
and folders that were newly added in the other project.
Visual Studio creates the new project as Xbox 360 Copy of ZombieSmashers. We renamed it
to ZombieSmashers360. Right-click the new project and select Set as StartUp Project. The Solution
Platforms drop-down list should show x86. Change this to Xbox 360, as shown in Figure 10-15.
CHAPTER 10 ■ MENUS, A HUD, AND DEPLOYMENT
329
Figure 10-15. Choosing Xbox 360 as the solution platform
Connecting to the XBox 360
Now you need to add the Xbox 360 to the Device Center. In the XNA Game Studio Device
Management 2.0 toolbar, click Add New Device. You’re prompted to enter a device name, as
shown in Figure 10-16.
Figure 10-16. Adding a new device
At this point, jog (or swivel) over to your Xbox 360. You’ll need to download an application
called XNA Game Studio Connect.
On your Xbox 360, sign in with your Live-enabled account and navigate to the Market-
place. Select Game Store ➤ All Games ➤ XNA Creators Club. Select and download XNA Game
Studio Connect.
After your download is finished, navigate to the Games blade, select Games Library ➤ My
Games, and find and launch XNA Game Studio Connect. You’ll see a connection key, as shown
in Figure 10-17.
330
CHAPTER 10
■ MENUS, A HUD, AND DEPLOYMENT
Figure 10-17. Running XNA Game Studio Connect
Jog (or swivel) back to your computer. Give your Xbox 360 a name and click Next. You’re
prompted to enter a connection key, as shown in Figure 10-18. Plug in the numbers from XNA
Game Studio Connect and click Next. You should see a dialog saying that you’re ready to go.
Figure 10-18. You’ll need to enter the connection key from XNA Game Studio Connect.
This is a 99% painless process. If you’re using some old analog TV for your Xbox 360 (we
use one of these as a minimum setup test), the numbers on the screen will require a bit of
squinting to decipher—watch out for the zeros and O characters, and the ones and I characters.
Assuming you hit no snags, you should be good to go.
CHAPTER 10 ■ MENUS, A HUD, AND DEPLOYMENT
331
Debugging
Click Debug or press F5, and jog (or swivel) back to your Xbox 360. If all went according to plan,
you should have Zombie Smashers running like a dream on your Xbox 360.
While debugging code on Xbox 360, you can still break and step from your computer, but
you won’t be able to make code changes. We tend to use pause, code, resume programming as
a total crutch. Usually (particularly earlier on), we’ll do 99% of the development work on Windows,
switching over to Xbox 360 every couple of days to make sure we didn’t royally screw anything
up. What can be royally screwed up? The big ones for us have been the safe zone and garbage
collection.
The safe zone is easy enough to work with. It’s the region of a screen that is viewable on
even the cheapest TV: 80% of the entire screen is usually safe; anything beyond 90% is almost
assuredly cut out. On the TV we used to test Zombie Smashers, the hearts were entirely in frame,
but by a thread. It wouldn’t hurt to bump them a little farther into the frame.
Garbage collection (GC), on the other hand, is something we’ve lost sleep over. While
Windows can run GC frequently and with relative ease, Xbox 360 really chokes on GC. It’s not
uncommon to see GC take more than 1000 ms, during which time the game is basically frozen.
It breaks up action a bit!
■Note Through our first experience with GC, we discovered that a bitmap-based text renderer class we
made was the culprit. The class would call ToCharArray() on whatever string it was to render each time,
and then evidently the char array would be flagged as garbage. Rendering at 60 fps and drawing half a dozen
strings per frame would lead to those nasty 1000+ ms GC calls every minute or so.
You can use the XNA Framework Remote Performance Monitor for Xbox 360 (available
on the Start ➤ XNA Game Studio 2.0 ➤ Tools menu) to track collections for clues on when and
how much garbage is being produced. However, what we’ve found to be really helpful is the
CLR Profiler.
The CLR Profiler for the .NET Framework 2.0 is a free application available for download
from Microsoft.com. If you use it to launch the x86 binary (it’s in ZombieSmashersXna/bin/x86),
you’ll end up with an enormous (gigabytes, not megabytes) log file, detailing pretty much
everything that ever occurred since launch. In the Summary section, you can view a timeline of
GC statistics; navigate through all manner of graphs, histograms, and timelines; and, with any
luck, root out GC-related problems.
Still, garbage generation is typically inevitable. What you don’t want is a lot of garbage; a
little you can handle. In order to keep the inevitable bit of garbage low, you can force a collec-
tion at an opportune time, using GC.Collect(). In The Dishwasher, GC is forced every time a
new map is loaded, allowing collection of any garbage that is inadvertently generated without
disrupting game play too much. This is actually a preferred technique, because rather than
introducing interruptions into the game play, you can force a larger interruption when the
player is used to sitting around and waiting. The worst thing you could do is have consistent or
large pauses in the middle of game play.
332
CHAPTER 10
■ MENUS, A HUD, AND DEPLOYMENT
Conclusion
Our primary focus of this chapter was the game interface. We set up the HUD, created a quick
yet somewhat robust menuing system, and rearranged things to work with this new setup. And,
as is usually the case, we added an assortment of supporting functionality, like scoring and
map transitions.
We also jumped into Xbox 360 deployment, both the process (which is quite simple) and
some of the more problematic considerations of console deployment. We briefly looked at
some strategies and tools to use when tackling deployment issues. And by deployment issues,
we’re talking about terrible, horrible, no-good, very bad GC. For information about storage on
Xbox 360, check out Appendix B.
In the next chapter, we’ll be covering some fun graphics effects.
333
■ ■ ■
CHAPTER 11
Postprocessing Effects
Some Graphical Glitz
Let’s be honest: right now, our game is pretty dull in the graphics department. Of course,
considering that we’re creating a 2D game, there’s only so much we can do, but there’s still a
lot of fun to be had. We can add effects like color filters (black and white, sepia tone, and so on),
blurring, bloom, and water.
We’ll use pixel shaders to generate these effects. Pixel shaders—once scary, inaccessible,
complicated bits of programming—are quite easy to work with in XNA Game Studio 2.0.
Here’s what we’ll be doing:
• Create a color filter effect.
• Modify our main game logic to load and implement the color filter.
• Implement a water effect (must be implemented in the map script as well).
• Add refract effects (must be implemented as a type of particle).
The Absolute Minimum You Need to Know About
Pixel Shaders
Very large books have been (and are still being) written about shaders. They’re created by a
very comprehensive and potentially complicated technology that provides the means to add
huge amounts of depth to rich 3D environments. Here, we’ll just be scratching the surface of
this technology.
We’ll be writing a very simple pixel shader, which we’ll refer to as an effect. Our effect will
take as input a texture and an input coordinate, and output a single pixel. This means that our
effect program will be run on every single pixel that we draw to the screen. For example, here is
the pseudocode for producing a photographic negative effect:
float4 color = Input Texture at Input coordinate x, y
return 1 - color
This simple effect would give us a game that looked like the image shown in Figure 11-1
(what it lacks in appeal it makes up for in educational value).
334
CHAPTER 11
■ POSTPROCESSING EFFECTS
Figure 11-1. Photographic negative effect
And really, that’s all the background you should need. So, let’s get started on a shader.
Color Filter Effects
Our game is written with the C# programming language. Shaders, on the other hand, are
written in the High Level Shading Language (HLSL) programming language. It’s a lot like C#.
Let’s take a look at the code for the negative effect you see in Figure 11-1:
//negative.fx
sampler samplerState;
struct PS_INPUT
{
float2 TexCoord : TEXCOORD0;
};
float4 Neg(PS_INPUT Input) : COLOR0
{
float4 col = tex2D(samplerState, Input.TexCoord.xy);
col.rgb = 1 - col.rgb;
return col;
}
CHAPTER 11 ■ POSTPROCESSING EFFECTS
335
technique Negative
{
pass P0
{
PixelShader = compile ps_2_0 Neg();
}
}
From the get-go, it looks fairly cryptic. But if you examine it, you’ll see that all of the func-
tionality of the pseudocode is within the second pair of curly brackets:
float4 Neg(PS_INPUT Input) : COLOR0
{
}
Our Neg() function returns a float4, which is how we refer to colors in our shader program.
The function accepts our defined PS_INPUT struct as input, which sets us up with the correct
texture coordinates. Our input texture is samplerState. The functionality, just as in the pseudo-
code, involves grabbing the float4 color from the input texture at the input texture coordinate,
calculating one minus the color’s RGB value, and returning the result. That’s some heavy math!
The technique Negative function sets up our techniques and passes for the shader. When
we call it from our program, we can specify which pass of which technique we’ll be using. For
simplicity’s sake, we will use only one technique with one pass per shader file.
Add this file as negative.fx in the ZombieSmashers Content project, under an fx folder.
To load it into ZombieSmashers, we’ll start by declaring the Effect object in the Game1
class level:
Effect negEffect;
In LoadContent(), we’ll use the content manager to load our effect:
negEffect = Content.Load<Effect>(@"fx/negative");
Moving along, we’ll modify our DrawGame() function. Currently, there is a block that looks
like this:
graphics.GraphicsDevice.SetRenderTarget(0, null);
spriteBatch.Begin(SpriteBlendMode.None);
spriteBatch.Draw(mainTarget.GetTexture(), new Vector2(),
(gameMode == GameMode.Menu ? Color.Gray : Color.White));
spriteBatch.End();
A fairly commonly used effect is to draw the game with a different shader—like blurred or
low saturation—when the pause menu is drawn over it. No one ever uses the negative, so let’s
start a trend. We’ll modify the block like this:
if (gameMode == GameMode.Menu)
{
negEffect.Begin();
336
CHAPTER 11
■ POSTPROCESSING EFFECTS
spriteBatch.Begin(SpriteBlendMode.None,
SpriteSortMode.Immediate,
SaveStateMode.SaveState);
EffectPass pass = negEffect.CurrentTechnique.Passes[0];
pass.Begin();
spriteBatch.Draw(mainTarget.GetTexture(),
Vector2.Zero, Color.White);
pass.End();
spriteBatch.End();
negEffect.End();
}
else
{
spriteBatch.Begin(SpriteBlendMode.None);
spriteBatch.Draw(mainTarget.GetTexture(),
Vector2.Zero, Color.White);
spriteBatch.End();
}
The final product, as shown in Figure 11-2, is interesting, though probably not one we’ll
keep.
Figure 11-2. Using a negative effect in our pause menu
CHAPTER 11 ■ POSTPROCESSING EFFECTS
337
A Blurry Grayscale Pause Effect
Let’s create a better-looking pause effect. Our pause effect will blur the image by combining
each pixel with its neighbors, and then compute the grayscale by averaging the RGB values.
Here’s the code:
//pause.fx
sampler samplerState;
We’ll use an array of float2’s (basically the same thing as a Vector2) as a lookup table to
store the offsets for our neighbors—it will basically save us a lot of trig calculations.
const float2 offsets[12] =
{
-0.326212, -0.405805,
-0.840144, -0.073580,
-0.695914, 0.457137,
-0.203345, 0.620716,
0.962340, -0.194983,
0.473434, -0.480026,
0.519456, 0.767022,
0.185461, -0.893124,
0.507431, 0.064425,
0.896420, 0.412458,
-0.321940, -0.932615,
-0.791559, -0.597705,
};
struct PS_INPUT
{
float2 TexCoord : TEXCOORD0;
};
For our main function, we’ll sum all of our neighbors’ color values, compute the average
of the sum’s RGB values, turning it into a grayscale sum, and then compute the average of the
grayscale sum and return that value as the new color’s RGB value.
float4 Pause(PS_INPUT Input) : COLOR0
{
float4 col = 0;
for (int i = 0; i < 12; i++)
{
col += tex2D(samplerState, Input.TexCoord + 0.005 *
offsets[i]);
}
float a = (col.r + col.g + col.b) / 3.0f;
a /= 12.0f;
col.rgb = a;
338
CHAPTER 11
■ POSTPROCESSING EFFECTS
return col;
}
technique PauseTechnique
{
pass P0
{
PixelShader = compile ps_2_0 Pause();
}
}
Let’s plug it in. Just as with the negative effect, create a new Effect in the Game1 class level
as pauseEffect, load it in LoadContent(), and in Game1.DrawGame(), change all instances of
negEffect to pauseEffect. Our pause screen should now look like Figure 11-3.
Figure 11-3. Blur and grayscale in a pause effect
This is a much more fitting look for our pause screen. It’s official: we’re next-gen!
Blurry grayscale pause menu? Check. What else do we need? Why, bloom and earth tones,
of course!
CHAPTER 11 ■ POSTPROCESSING EFFECTS
339
A Little Bloom Never Hurt Anyone
For our bloom effect file, we’ll use a strategy similar to what we used with our pause effect.
We’ll average a pixel with its neighbors and return the value with a reduced alpha. Also, we’re
using the parameter v to determine how far we’ll reach out when comparing a pixel with its
neighbors.
Parameters declared at the class level of an HLSL file can be changed on the fly from the
game—from Game1 in our case. We can set v from Game1 to give us a pulsing bloom effect. Here’s
the file:
//bloom.fx
sampler samplerState;
float v = 0.01f;
float a = 0.25f;
const float2 offsets[12] = {
-0.326212, -0.405805,
-0.840144, -0.073580,
-0.695914, 0.457137,
-0.203345, 0.620716,
0.962340, -0.194983,
0.473434, -0.480026,
0.519456, 0.767022,
0.185461, -0.893124,
0.507431, 0.064425,
0.896420, 0.412458,
-0.321940, -0.932615,
-0.791559, -0.597705,
};
struct PS_INPUT
{
float2 TexCoord : TEXCOORD0;
};
float4 Bloom(PS_INPUT Input) : COLOR0
{
float4 col = tex2D(samplerState, Input.TexCoord);
for (int i = 0; i < 12; i++)
col += tex2D(samplerState, Input.TexCoord + v *
offsets[i]);
col /= 13.0f;
col.a = a;
340
CHAPTER 11
■ POSTPROCESSING EFFECTS
return col;
}
technique BloomTechnique
{
pass P0
{
PixelShader = compile ps_2_0 Bloom();
}
}
From Game1, our strategy for using the effect will be a little complex. Our previous loop
looked like this:
• Set render target to mainTarg
• Draw the game
• Set render target to backbuffer
•Draw mainTarg
•Draw HUD
•Present
Our new loop will look like this (new bits are italicized):
• Set render target to mainTarg
• Draw the game
• Set render target to bloomTarg[0]
•Draw mainTarg with bloom effect
• Set render target to bloomTarg[1]
• Draw mainTarg with bloom effect
• Set render target to gameTarg
•Draw mainTarg
•Draw bloomTarg[0]
•Draw bloomTarg[1]
• Set render target to backbuffer
•Draw gameTarg
•Draw HUD
•Present
CHAPTER 11 ■ POSTPROCESSING EFFECTS
341
When we create bloomTarg in LoadContent(), we’ll create the two surfaces with the
following code:
bloomTarget = new RenderTarget2D[2];
bloomTarget[0] =
new RenderTarget2D(GraphicsDevice,
128, 128, 1, SurfaceFormat.Color);
bloomTarget[1] =
new RenderTarget2D(GraphicsDevice,
256, 256, 1, SurfaceFormat.Color);
This gives us a 128 u 128 render target and a 256 u 256 render target.
We’ll be changing DrawGame() around a bit. We’ll use a float[] called bloomPulse to
determine how far each pixel will reach out when looking for neighbors; as v increases and
decreases, glowing objects will have a pulsing effect. We’re using two bloom targets to give a
smoother effect.
private void DrawGame()
{
graphics.GraphicsDevice.SetRenderTarget(0, mainTarget);
graphics.GraphicsDevice.Clear(Color.Black);
map.Draw(spriteBatch, mapsTex, mapBackTex, 2, 3);
for (int i = 0; i < 2; i++)
{
graphics.GraphicsDevice.SetRenderTarget(0, bloomTarget[i]);
bloomEffect.Parameters["a"].SetValue(.25f);
bloomEffect.Parameters["v"].SetValue((float)(i + 1) * 0.01f *
((float)Math.Cos((double)bloomPulse[i]) * .25f + 0.7f));
bloomEffect.Begin();
spriteBatch.Begin(SpriteBlendMode.None,
SpriteSortMode.Immediate,
SaveStateMode.SaveState);
EffectPass pass = bloomEffect.CurrentTechnique.Passes[0];
pass.Begin();
spriteBatch.Draw(mainTarget.GetTexture(),
new Rectangle(0, 0, 128 * (i + 1), 128 * (i + 1)),
Color.White);
pass.End();
spriteBatch.End();
bloomEffect.End();
}
342
CHAPTER 11
■ POSTPROCESSING EFFECTS
graphics.GraphicsDevice.SetRenderTarget(0, gameTarget);
if (gameMode == GameMode.Menu)
{
}
else
{
spriteBatch.Begin(SpriteBlendMode.None);
spriteBatch.Draw(mainTarget.GetTexture(), new Vector2(),
Color.White);
spriteBatch.End();
We’ll overlay our bloom targets with additive blending:
spriteBatch.Begin(SpriteBlendMode.Additive);
for (int i = 0; i < 2; i++)
spriteBatch.Draw(bloomTarget[i].GetTexture(),
new Rectangle(0, 0, (int)ScreenSize.X,
(int)ScreenSize.Y), Color.White);
spriteBatch.End();
}
graphics.GraphicsDevice.SetRenderTarget(0, null);
spriteBatch.Begin(SpriteBlendMode.None);
spriteBatch.Draw(gameTarget.GetTexture(), Vector2.Zero,
Color.White);
spriteBatch.End();
spriteBatch.Begin(SpriteBlendMode.AlphaBlend);
if (QuakeManager.blast.val > 0f)
{
for (int i = 7; i >= 0; i )
{
spriteBatch.Draw(gameTarget.GetTexture(),
}
}
spriteBatch.End();
}