Building XNA 2.0 Games- P4 potx
Bạn đang xem bản rút gọn của tài liệu. Xem và tải ngay bản đầy đủ của tài liệu tại đây (828.47 KB, 30 trang )
CHAPTER 4 ■ THE MAP EDITOR
77
The Grid
We’ll define the grid in the Map class, and then add functionality for viewing and editing it in
Game1.
MapSegment[,] mapSeg;
int[,] col;
In the constructor, initialize col[,] to be a 20-by-20 array:
mapSeg = new MapSegment[3, 64];
col = new int[20, 20];
ReadSegmentDefinitions();
As usual, we add a property to gain access from the outside:
public int[,] Grid
{
get { return col; }
}
Back in Game1, we make a function to draw the grid and collisions:
private void DrawGrid()
{
spriteBatch.Begin(SpriteBlendMode.AlphaBlend);
for (int y = 0; y < 20; y++)
{
for (int x = 0; x < 20; x++)
{
Rectangle dRect = new Rectangle(
x * 32 - (int)(scroll.X / 2),
y * 32 - (int)(scroll.Y / 2),
32,
32
);
if (x < 19)
spriteBatch.Draw(nullTex, new Rectangle(
dRect.X, dRect.Y,
32,
1
), new Color(255, 0, 0, 100));
if (y < 19)
spriteBatch.Draw(nullTex, new Rectangle(
dRect.X, dRect.Y,
1,
32
), new Color(255, 0, 0, 100));
78
CHAPTER 4
■ THE MAP EDITOR
if (x < 19 && y < 19)
{
if (map.Grid[x, y] == 1)
{
spriteBatch.Draw(nullTex, dRect,
new Color(255, 0, 0, 100));
}
}
}
}
spriteBatch.End();
}
We’re using our 1 × 1 white texture again to draw a grid here, filling in grid spaces where
the value of col is 1.
To allow the user to edit the collision map, we’ll need to let the user change the drawing
mode. Currently, the drawing mode allows us to place map segments; we want to be able to
switch to a collision map drawing mode.
Add a new class to the MapEditor project called DrawingMode. When the editor opens, change it
from a class to an enumerator, adding the following values:
enum DrawingMode
{
SegmentSelection,
CollisionMap
}
Then in the Game1 class, add the following field:
DrawingMode drawType = DrawingMode.SegmentSelection;
We’ll make a drawing button sort of like our layer-selection button—ugly yet functional. In
Game1.DrawText(), right next to the layer button, add the following:
switch (drawType)
{
case DrawingMode.SegmentSelection:
layerName = "select";
break;
case DrawingMode.CollisionMap:
layerName = "col";
break;
}
if (text.DrawClickText(5, 25, "draw: " + layerName,
mosX, mosY, mouseClick))
drawType = (DrawingMode)((int)(drawType + 1) % 2);
CHAPTER 4 ■ THE MAP EDITOR
79
Because we don’t want to see our map segment palette while we’re in collision map
editing mode, modify the Game1.Draw() method to look like the following:
map.Draw(spriteBatch, mapsTex, scroll);
switch(drawType)
{
case DrawingMode.SegmentSelection:
DrawMapSegments();
break;
}
DrawGrid();
DrawText();
DrawCursor();
Back in Game1.Update(), we’ll change the block that checks to see if you’re trying to drag a
new segment so that it happens only when the user is in select mode.
if (drawType == DrawingMode.SegmentSelection)
{
int f = map.GetHoveredSegment(mosX, mosY, curLayer, scroll);
if (f != -1)
mouseDragSeg = f;
}
Then, to allow users to edit the collision map, add this:
else if (drawType == DRAW_COL)
{
int x = (mosX + (int)(scroll.X / 2)) / 32;
int y = (mosY + (int)(scroll.Y / 2)) / 32;
if (x >= 0 && y >= 0 && x < 20 && y < 20)
{
if (mState.LeftButton == ButtonState.Pressed)
map.Grid[x, y] = 1;
else if (mState.RightButton == ButtonState.Pressed)
map.Grid[x, y] = 0;
}
}
We’re computing the x and y coordinates by getting the mouse coordinates relative to
scroll, and then dividing them by the grid size to get the proper collision map cells. If the left
button is down, we’ll set the collision map value to 1. If the right button is down, we’ll set the
value to 0.
If you try playing with our current build, you’ll see that clicking the draw button will also
draw a collision square below the button. We’ll need to make a more standard method for
determining whether the user is drawing in a safe draw zone and not below buttons. We can
define this method in Game1:
80
CHAPTER 4
■ THE MAP EDITOR
private bool GetCanEdit()
{
if (mosX > 100 && mosX < 500 && mosY > 100 && mosY < 550)
return true;
return false;
}
In Game1.Update(), we change every occurrence of (mosX < 500) to GetCanEdit(). We
should also draw a rectangle to show users the drawing area.
In Game1.DrawGrid(), add the following code segment after the drawing of the collision
grid:
Color oColor = new Color(255, 255, 255, 100);
spriteBatch.Draw(nullTex, new Rectangle(100, 50, 400, 1), oColor);
spriteBatch.Draw(nullTex, new Rectangle(100, 50, 1, 500), oColor);
spriteBatch.Draw(nullTex, new Rectangle(500, 50, 1, 500), oColor);
spriteBatch.Draw(nullTex, new Rectangle(100, 550, 400, 1), oColor);
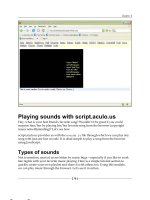
The current state of our build is shown in Figure 4-14.
Figure 4-14. A gridded collision map
CHAPTER 4 ■ THE MAP EDITOR
81
Ledges
The gridded collision map will work really well for all things blocky (like our blocks), but sloping
sections like grass will need a different type of collision definition. We’ll use line strips, which
we’ll call ledges.
We’ll define a new Ledge class in the MapClasses folder as such:
class Ledge
{
Vector2[] nodes = new Vector2[16];
public int totalNodes = 0;
public int flags = 0;
public Vector2[] Nodes
{
get { return nodes; }
}
}
A ledge is a series of points. For simplicity, we’ll assume these points always go from left to
right. Each point is a node. We’re also throwing in a flags variable for good measure. For now,
we’ll say that with flags, 0 is a “soft” ledge and 1 is a “hard” ledge, meaning that the player
cannot drop below it.
Now add ledges to our Map class:
Ledge[] ledges;
public Map()
{
ledges = new Ledge[16];
for (int i = 0; i < 16; i++)
ledges[i] = new Ledge();
}
As usual, we include a property to expose ledge functionality to Game1:
public Ledge[] Ledges
{
get { return ledges; }
}
Now we need to add a new draw type to Game1 to go along with CollisionGrid and
SegmentSelection. This can be done by adding another item, named Ledges, to the DrawingMode
enumeration in Game1.
We’ll also be using a state-based ledge drawing system, where every time the user clicks, a
node will be added to the current ledge. To set this up, add the following to the Game1 class level:
int curLedge = 0;
int curNode = 0;
82
CHAPTER 4
■ THE MAP EDITOR
We’ll need to make sure our new draw type gets drawn and can be selected by clicking on
our fantastically minimal draw button. In Game1.DrawText(), we evaluate drawType and then
draw a button that the user can click to change drawType. Let’s add a new case for ledges and
change the DrawClickText() line as follows:
case DrawingMode.Ledge:
layerName = "ledge";
break;
}
if (text.DrawClickText(5, 25, "draw: " + layerName,
mosX, mosY, mouseClick))
drawType = (drawType + 1) % 3;
Now we can switch the draw type between selection, collision, and ledge. Note that we’ve
changed the DrawClickText() call modulus value to 3, because there are now three draw types.
Let’s create a function in Game1 to draw all ledges.
private void DrawLedges()
{
Rectangle rect = new Rectangle();
spriteBatch.Begin(SpriteBlendMode.AlphaBlend);
Color tColor = new Color();
rect.X = 32;
rect.Y = 0;
rect.Width = 32;
rect.Height = 32;
for (int i = 0; i < 16; i++)
{
if (map.Ledges[i] != null && map.Ledges[i].TotalNodes > 0)
{
for (int n = 0; n < map.Ledges[i].TotalNodes; n++)
{
Vector2 tVec;
tVec = map.Ledges[i].Nodes[n];
tVec -= scroll / 2.0f;
tVec.X -= 5.0f;
if (curLedge == i)
tColor = Color.Yellow;
else
tColor = Color.White;
spriteBatch.Draw(iconsTex, tVec, rect,
tColor, 0.0f, Vector2.Zero,
0.35f, SpriteEffects.None, 0.0f);
CHAPTER 4 ■ THE MAP EDITOR
83
if (n < map.Ledges[i].TotalNodes - 1)
{
Vector2 nVec;
nVec = map.Ledges[i].Nodes[n + 1];
nVec -= scroll / 2.0f;
nVec.X -= 4.0f;
for (int x = 1; x < 20; x++)
{
Vector2 iVec = (nVec - tVec)
* ((float)x / 20.0f) + tVec;
Color nColor = new Color(255, 255, 255, 75);
if (map.Ledges[i].Flags == 1) nColor =
new Color(255, 0, 0, 75);
spriteBatch.Draw(iconsTex, iVec, rect,
nColor,
0.0f, Vector2.Zero, 0.25f,
SpriteEffects.None, 0.0f);
}
}
}
}
}
spriteBatch.End();
}
Here, we have three nested for loops:
• The outermost iterates through all ledges.
• The middle loop iterates through all nodes within the current ledge, drawing each node.
• The innermost loop iterates through a series of midpoints between every adjacent pair
of nodes in the current ledge, drawing a makeshift line.
We added some little color niceties as well. We draw the main nodes in yellow if the ledge
is currently selected. We draw the midpoints in red if the ledge’s flag value is 1.
Don’t forget to add a call to DrawLedges() in Game1.Draw(). After the DrawGrid() call, add
the following:
DrawLedges();
In Game1.Update(), in the block where we check for hovered segments, we put our
functionality for adding ledge nodes:
else if (drawType == DrawingMode.Ledges)
{
if(map.Ledges[curLedge] == null)
map.Ledges[curLedge] = new Ledge();
84
CHAPTER 4
■ THE MAP EDITOR
if (map.Ledges[curLedge].TotalNodes < 15)
{
map.Ledges[curLedge].Nodes[map.Ledges[curLedge].TotalNodes] =
new Vector2(mosX, mosY) + scroll / 2.0f;
map.Ledges[curLedge].TotalNodes++;
}
}
All we’re doing is setting the node at index TotalNodes to the current location we’ll give it
(we’re factoring in scroll), and then incrementing TotalNodes by one.
Let’s add a ledge palette for selecting ledges and changing ledge flag values by creating a
new method, Game1.DrawLedgePalette(), which we call from the Game1.Draw() method.
private void DrawLedgePalette()
{
for (int i = 0; i < 16; i++)
{
if(map.Ledges[i] == null)
continue;
int y = 50 + i * 20;
if (curLedge == i)
{
text.Color = Color.Lime;
text.DrawText(520, y, "ledge " + i.ToString());
}
else
{
if (text.DrawClickText(520, y,
"ledge " + i.ToString(),
mosX, mosY, mouseClick))
curLedge = i;
}
text.Color = Color.White;
text.DrawText(620, y,
"n" + map.Ledges[i].TotalNodes.ToString());
if (text.DrawClickText(680, y, "f" +
map.Ledges[i].Flags.ToString(), mosX, mosY, mouseClick))
map.Ledges[i].Flags = (map.Ledges[i].Flags + 1) % 2;
}
}
The currently selected ledge is drawn in lime green; unselected ledges are drawn as click-
able text. After each ledge button, the number of nodes is drawn, followed by a clickable display
of the ledge’s flag value. It’s all so very ugly, yet functional. Our ledge-editing functionality is
shown in action in Figure 4-15.
CHAPTER 4 ■ THE MAP EDITOR
85
Figure 4-15. Editing ledges
Text Editing
Now we need to add a way to name our map. Editing text is another bit of functionality that’s
ugly to implement due to the fact that XNA does not strictly follow an event-based model, espe-
cially for keyboard, gamepad, and mouse input. We need to track keyboard state changes,
handle pressed keys, and handle special cases, like the Backspace and Enter keys.
Much as we did with drawing, we can simplify the current editing mode with an enumer-
ation in Game1. This time, we have called the enumeration EditingMode. Go ahead and create
this enumeration with the following states:
enum EditingMode
{
None,
Path
}
At the class level of Game1, we’ll add some fields to keep track of previous keyboard state (so
we know when it changes), as well as to keep track of what text is currently being edited.
KeyboardState oldKeyState;
EditingMode editMode = EditingMode.None;
86
CHAPTER 4
■ THE MAP EDITOR
Before we go any further, we also need to add a string in the Map class that represents its path:
private string path = "maps.zdx";
public string Path
{
get { return path; }
set { path = value; }
}
Back in the Game1 class, add two functions for handling keyboard input: UpdateKeys() to
compare the current keyboard state to the previous to check for new key presses, and PressKey() to
handle the key presses.
private void UpdateKeys()
{
KeyboardState keyState = Keyboard.GetState();
Keys[] currentKeys = keyState.GetPressedKeys();
Keys[] lastKeys = oldKeyState.GetPressedKeys();
bool found = false;
for (int i = 0; i < currentKeys.Length; i++)
{
found = false;
for (int y = 0; y < lastKeys.Length; y++)
{
if (currentKeys[i] == lastKeys[y]) found = true;
break;
}
if (!found)
{
PressKey(currentKeys[i]);
}
}
oldKeyState = keyState;
}
private void PressKey(Keys key)
{
string t = String.Empty;
switch (editMode)
{
CHAPTER 4 ■ THE MAP EDITOR
87
case EditingMode.Path:
t = map.Path;
break;
default:
return;
}
if (key == Keys.Back)
{
if (t.Length > 0) t = t.Substring(0, t.Length - 1);
}
else if (key == Keys.Enter)
{
editMode = EditingMode.None;
}
else
{
t = (t + (char)key).ToLower();
}
switch (editMode)
{
case EditingMode.Path:
map.path = t;
break;
}
}
The PressKey() function isn’t great, but it will suffice for our current needs. It will handle
only a–z and 0–9; any other key will add bizarre characters to the string we are working on. If
the Backspace key is pressed, the length of the string is reduced by 1. If the Enter key is pressed,
editingMode will be set to None.
Back in our Game1.DrawText() method, we’ll make another button:
text.Color = Color.White;
if (editMode == EditingMode.Path)
text.DrawText(5, 45, map.Path + "*");
else
{
if (text.DrawClickText(5, 45, map.Path, mosX, mosY, mouseClick))
editMode = EditingMode.Path;
}
Be sure to put a call to Game1.UpdateKeys() in Game1.Update(), and we should be all set.
Immediately at the start of Game1.Update(), add the following:
UpdateKeys();
88
CHAPTER 4
■ THE MAP EDITOR
Saving and Loading
The map editor, admittedly, is at a very ugly, semifunctional state. But creating it should have
taken only about an hour, and the sooner we have a semifunctional map editor, the sooner we
can start work on the tech demo. Our primary goal at this point is to be able to create rudimen-
tary maps and characters as quickly as possible so we can start playing with the actual game
development.
Now we’re ready to add the saving and loading functionality. We’ll start by creating a function
to draw those load and save icons from our icons file (Figure 4-10, shown earlier).
private bool DrawButton(int x, int y,
int index, int mosX, int mosY, bool mouseClick)
{
bool r = false;
Rectangle sRect = new Rectangle(32 * (index % 8),
32 * (index / 8), 32, 32);
Rectangle dRect = new Rectangle(x, y, 32, 32);
if (dRect.Contains(mosX, mosY))
{
dRect.X -= 1;
dRect.Y -= 1;
dRect.Width += 2;
dRect.Height += 2;
if (mouseClick)
r = true;
}
spriteBatch.Begin(SpriteBlendMode.AlphaBlend);
spriteBatch.Draw(iconsTex, dRect, sRect, Color.White);
spriteBatch.End();
return r;
}
Next, add some method calls in the Game1.Draw() function so we can read and save some
files:
if (DrawButton(5, 65, 3, mosX, mosY, mouseClick))
map.Write();
if (DrawButton(40, 65, 4, mosX, mosY, mouseClick))
map.Read();
Let’s make load and save functions in the Map class. We’ll call them Read() and Write(),
and save them as binary files. The BinaryWriter allows us to spew out a series of values, which
we can easily take back in again with the (you guessed it) BinaryReader. There are a few odd
special considerations here. For instance, we write -1 for null map segments (which we’ll need
to take into consideration when we read).
CHAPTER 4 ■ THE MAP EDITOR
89
public void Write()
{
BinaryWriter file = new BinaryWriter(File.Open(@"data/"
+ path + ".zmx",
FileMode.Create));
for (int i = 0; i < ledges.Length; i++)
{
file.Write(ledges[i].TotalNodes);
for (int n = 0; n < ledges[i].TotalNodes; n++)
{
file.Write(ledges[i].Nodes[n].X);
file.Write(ledges[i].Nodes[n].Y);
}
file.Write(ledges[i].Flags);
}
for (int l = 0; l < 3; l++)
{
for (int i = 0; i < 64; i++)
{
if (mapSeg[l, i] == null)
file.Write(-1);
else
{
file.Write(mapSeg[l, i].Index);
file.Write(mapSeg[l, i].Location.X);
file.Write(mapSeg[l, i].Location.Y);
}
}
}
for (int x = 0; x < 20; x++)
{
for (int y = 0; y < 20; y++)
{
file.Write(col[x, y]);
}
}
file.Close();
}
Read() is essentially the opposite. We process the file linearly in exactly the same order in
which we wrote it.
public void Read()
{
BinaryReader file = new BinaryReader(File.Open(@"data/"
+ path + ".zmx",
FileMode.Open));
90
CHAPTER 4
■ THE MAP EDITOR
for (int i = 0; i < ledges.Length; i++)
{
Ledges[i] = new Ledge();
ledges[i].TotalNodes = file.ReadInt32();
for (int n = 0; n < ledges[i].TotalNodes; n++)
{
ledges[i].Nodes[n] = new Vector2(
file.ReadSingle(), file.ReadSingle());
}
ledges[i].Flags = file.ReadInt32();
}
for (int l = 0; l < 3; l++)
{
for (int i = 0; i < 64; i++)
{
int t = file.ReadInt32();
if (t == -1)
mapSeg[l, i] = null;
else
{
mapSeg[l, i] = new MapSegment();
mapSeg[l, i].Index = t;
mapSeg[l, i].Location = new Vector2(
file.ReadSingle(),
file.ReadSingle());
}
}
}
for (int x = 0; x < 20; x++)
{
for (int y = 0; y < 20; y++)
{
col[x, y] = file.ReadInt32();
}
}
file.Close();
}
One interesting detail that we can’t neglect is to create the data folder you see in the file
path. Navigate to MapEditor/MapEditor/bin/x86/Debug and create a data folder. Another way to
do this is to add the data folder to the project, and then add a text file called placeholder to that
folder. Remove the file extension, and set it to be copied to the build folder when it is newer
than the one there. This adds an extra file to the bin folder, but also allows us to create the data
folder automatically.
CHAPTER 4 ■ THE MAP EDITOR
91
■Note The really technically involved folks may want to add a command to the post-build events in Visual
Studio to create the folder. The post-build events take commands just like the Windows command prompt, so
working with it is easy.
With reading and writing in place, we can now create a map to work with. Such a map is
shown in Figure 4-16.
Figure 4-16. Bringing it all together
Figure 4-16 shows a simple map we’ve created and named map, which we will be using for
testing initially. This was our goal: to create a simple map. As the game engine grows more
complex and requires more detail, we’ll put more work into the map editor, but its current state
will suffice for now.
92
CHAPTER 4
■ THE MAP EDITOR
A quick list of some of the improvements that must be added to the map editor is as follows:
• Segment-ordering functionality
• Segment-deleting functionality
• Ledge-deleting functionality
• Script editor
• Map script definition
Conclusion
The map editor we’ve created is not particularly nice-looking or overly user-friendly, but the
focus here is on creating a functional tool in as little time as possible, and to that end, we think
we’ve succeeded with flying colors. We’ve created simple interface elements, a map segment
definition format, drag-and-drop functionality, ledge-creation functionality, collision-map
painting, and reading and writing functionality. We’ve also taken our first step toward the
creation of Zombie Smashers XNA! We hope it wasn’t too exhausting.
The next step will be to build a similarly rudimentary character editor, create a hero and an
enemy, and then start right in on our game engine. Of course, when we create our game engine,
we’ll already have a lot of functionality (map loading and drawing; character loading, animating,
and drawing) in place from our editors, so the amount of work to do will be relatively minimal.
93
■ ■ ■
CHAPTER 5
The Character Editor
The Meat and Bones
The characters in our game will be, quite literally, the most animated aspect of our final product.
Creating a robust character format will allow us to roll out expressive and reactive heroes and
monsters with fluid animations and immersive interactivity. Imagine, for a moment, a first-
person shooter with a lot of explosions, trees, houses, tanks, aliens, and soldiers. Now imagine
that instead of the aliens and soldiers running around, they glide—their limbs not moving a bit,
no matter how fast they run. Without animation, the life of a game is quickly cut short, because
it is one of the most essential aspects of immersing a player.
Much like the map editor, our character editor will be extremely lacking in polish, but should
make up for it in utility. We need to be able to move, rotate, and scale pieces to assemble frames of
animation, edit keyframe parameters, and compose animations.
In this chapter, we’ll do the necessary setup for the new project. Then we’ll take a look at
the design of our character format. It’s a pretty intuitive format that works very well for good-
looking 2D characters. After discussing the planned character format, we’ll look at the structure
it will have to take, and then implement the heck out of it. Once we have all of our character
format definition classes in place, we’ll build a character editor around it, much as we did with
the map editor in the previous chapter.
Creating a New Project: Character Editor
We’ve already started the MapEditor project. Now it’s time to create CharacterEditor. Open your
existing ZombieSmashers solution in Visual Studio and add a new project called CharacterEditor, as
shown in Figure 5-1. As you did with the MapEditor project, set the new project to be the startup
project for the solution.
94
CHAPTER 5
■ THE CHARACTER EDITOR
Figure 5-1. Adding the CharacterEditor project
We can reuse the Text class from MapEditor, but let’s move it to a library so it will be easier
to reuse.
Creating a Windows Game Library
So far, we have been creating Windows Game projects. Now, we will create a Windows Game
Library project. However, what is created by the .NET platform for a library is not that different
from what is produced for a game. The main difference between a game (*.exe) and a library
(*.dll) is that you can double-click a game to run it. The game is an executable (EXE), and the
library is a dynamic link library (DLL). This does not mean that you can’t house a game project
inside a DLL. It just means that Windows doesn’t know how to run it like an EXE. In terms of
referencing, a DLL and an EXE are considered assemblies, and can be referenced by any type
of .NET project.
To create a library, right-click the ZombieSmashers solution in Solution Explorer and choose
Add ➤ New Project. In the Add New Project dialog, select Windows Game Library (2.0). Name
the project TextLib, as shown in Figure 5-2.
CHAPTER 5 ■ THE CHARACTER EDITOR
95
Figure 5-2. Adding the TextLib project
Visual Studio sets us up with a fresh library, complete with a Class1.cs class. We’ll just
need to do a bit of refactoring. In MapEditor, copy the class Text { } block from our Text
class. Paste this over the public class Class1 line in Class1, and add the public modifier,
because we’ll need Text to be public now that it’s in its own library. It should look like this:
.
.
.
using Microsoft.Xna.Framework;
namespace TextLib
{
public class Text
{
private float size;
private Color color;
.
.
.
This should be all we need to do to set up our text library. Now we need to put it in
CharacterEditor. In Solution Explorer, right-click References in the CharacterEditor project
and select Add Reference. In the Add Reference dialog, click the Projects tab. Select TextLib
and click OK.
Finally, in Game1, we need to specify that we’ll be using TextLib. Add the following:
using Microsoft.Xna.Framework.Storage;
using TextLib;
96
CHAPTER 5
■ THE CHARACTER EDITOR
Remember this process; reusable code can be abstracted and put in a central library. When
you have enough code in this central library, you have a framework of your own! Doing this can
help you in the future when you want to make a new game, whether it’s a side-scroller or a first-
person shooter. Having easy access to code that you have tested and maintained greatly decreases
the development time of new projects.
Drawing Text
Now we need to make some additions to CharacterEditor to draw text, much the same as the
code changes we made in Game1 in MapEditor to draw text.
First, add Arial.spritefont to your Content/Fonts folder. Then add a gfx folder to your
Content project.
Next, declare and load our Arial texture and text object in Game1, with the following code:
SpriteBatch spriteBatch;
SpriteFont font;
Text text;
Then load our texture and use it in instantiating our text object:
protected override void LoadContent()
{
spriteBatch = new SpriteBatch(GraphicsDevice);
font = Content.Load<SpriteFont>(@"Fonts/Arial");
text = new Text(spriteBatch, font);
}
We’re good to go now.
At this point, it makes a lot of sense to refactor MapEditor to use TextLib instead of the Text
class it uses. That way, if you need to make any changes to Text, you can do that in one place.
After you’ve made the necessary changes in MapEditor, it’s time to start work on the char-
acter editor.
Creating the Character Editor
The character format is a fairly intuitive hierarchical format that we touched on briefly in
Chapter 3. The breakdown, from the ground up, is as follows:
•A part is a piece of a character, like a head, arm, sword, and so on.
•A frame is a collection of parts arranged into a pose. Frame attack1 could contain a
head, arms, a torso, legs, and a wrench, all arranged into our hero ready to strike.
•A keyframe is a reference to a frame, plus metadata. A keyframe could point to attack1,
indicate a duration of 5 ticks, and play a swooshing sound.
•An animation is made up of a series of keyframes, like attack1 attack2 attack3 attack4.
Figure 5-3 shows a far-too-adorable rendition of this hierarchy.
CHAPTER 5 ■ THE CHARACTER EDITOR
97
Figure 5-3. Character format hierarchy
This should be fairly straightforward. If not, all will become clear as we work through
building the character editor.
The Character Definition
Now it’s time to start some coding. We’ll organize all of our character-related class files into a
Character folder. A quick glance at our planning reveals that we need five class files: CharDef,
Animation, KeyFrame, Frame, and Part. Your solution should end up looking like Figure 5-4.
98
CHAPTER 5
■ THE CHARACTER EDITOR
Figure 5-4. The class files for the character definition
We’ll start from the ground up, with the Part class:
class Part
{
public Vector2 Location;
public float Rotation;
public Vector2 Scaling;
public int Index;
public int Flip;
public Part()
{
Index = -1;
Scaling = new Vector2(1.0f, 1.0f);
}
}
The first three fields—location, rotation, and scaling—have quite a bit of history in 3D
graphics (where they’re known as translation, rotation, and scaling). Location refers to where
the part is. Rotation is the angle of the part in radians. Scaling is the horizontal and vertical
scale of the part; for example (1, 1) is normal, and (5, 0.5) is very wide and flat.
We’ll keep the fields public. The index field is instantiated to -1, meaning that the part
does not exist—when we draw a character, we won’t draw any parts where index < 0.
Moving up, we have Frame:
class Frame
{
Part[] parts;
public string name;
CHAPTER 5 ■ THE CHARACTER EDITOR
99
public Frame()
{
parts = new Part[16];
for (int i = 0; i < part.Length; i++)
parts[i] = new Part();
Name = String.Empty;
}
public Part[] Parts
{
get { return parts; }
}
}
A Frame is made up of parts, so we’re using an array to store them all, made accessible with
a property. The way we’re representing the data, Frame and Animation both will sit in CharDef,
so we’ll need to move laterally and work upward, meeting at CharDef. Let’s start at the bottom
again, with KeyFrame:
class KeyFrame
{
public int FrameRef;
public int Duration;
string[] scripts;
public KeyFrame()
{
FrameRef = -1;
Duration = 0;
scripts = new string[4];
for (int i = 0; i < scripts.Length; i++)
scripts[i] = String.Empty;
}
public string[] Scripts
{
get { return scripts; }
}
}
As we’ve said, KeyFrame contains a frame reference and some metadata. Here, we use
FrameRef to specify the index of the frame this KeyFrame refers to, Duration to specify how many
ticks this KeyFrame occupies, and scripts[] to hold any scripting this KeyFrame may use. We’re
limiting it to four lines, which will probably be enough for any situation.
Moving up, we define Animation as follows:
100
CHAPTER 5
■ THE CHARACTER EDITOR
class Animation
{
public string name;
KeyFrame[] keyFrames;
public Animation()
{
Name = String.Empty;
keyFrames = new KeyFrame[64];
for (int i = 0; i < keyFrames.Length; i++)
keyFrames[i] = new KeyFrame();
}
public KeyFrame[] KeyFrames
{
get { return keyFrames; }
}
}
This class is very straightforward. An Animation consists of an array of up to 64 keyframes
and a name. The animation names are very important. We’ll be using them for scripting and
(gasp) a bit of hard-coding, with names like idle, run, and jump.
Now we can put it all together in CharDef:
class CharDef
{
Animation[] animations;
Frame[] frames;
public string Path;
public int HeadIndex;
public int TorsoIndex;
public int LegsIndex;
public int WeaponIndex;
public CharDef()
{
animations = new Animation[64];
for (int i = 0; i < animations.Length; i++)
animations[i] = new Animation();
frames = new Frame[512];
for (int i = 0; i < frames.Length; i++)
frames[i] = new Frame();
Path = "char";
}
CHAPTER 5 ■ THE CHARACTER EDITOR
101
public Animation[] Animations
{
get { return animations; }
}
public Frame[] Frames
{
get { return frames; }
}
}
Here, we have our frames and animations together, along with a few surprises. One is path,
which doubles as the character definition name and file path. We also have headIdx, torsoIdx,
legsIdx, and weaponIdx, which specify the textures that this character definition will be using.
We still have quite a bit of work to do before we can actually see any of the many fruits of
our labors. We’ve defined the character format, and now we need to make a function to draw a
character definition, but that’s only the tip of the ever-increasing-in-size iceberg.
After we’ve created our draw function in our Game1 class, we’ll need to build an editor, which,
as you’ve probably noticed by now, is the title of this chapter.
Drawing the Character
Before we create the function to draw the character, we again need to set up the class to handle
characters:
using CharacterEditor.Character;
namespace CharacterEditor
{
class Game1 : Game
{
CharDef charDef;
}
}
Next, we create a Game1.DrawCharacter() function. Don’t worry if a few or many of the
members are not declared just yet, as they will all be covered over the course of the chapter.
private void DrawCharacter(Vector2 loc, float scale,
int face, int frameIndex, bool preview, float alpha)
{
Rectangle sRect = new Rectangle();
Frame frame = charDef.Frames[frameIndex];
spriteBatch.Begin(SpriteBlendMode.AlphaBlend);