Tony Bourke Server Load Balancing phần 8 pdf
Bạn đang xem bản rút gọn của tài liệu. Xem và tải ngay bản đầy đủ của tài liệu tại đây (243.67 KB, 19 trang )
126
Chapter 10: F5's BIG-IP
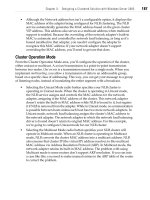
Figure 10-3. Virtual Servers menu
NAT-BasedSLB
To configure the NAT-based SLB implementation, both the external and internal
interfaces must be configured for IP addresses. For our example, they are config-
ured as shown in Table 10-4.
Table 10-4. NAT-based configuration
Unit
IP address (VLAN 1)
Subnet mask
Shared address
Default route
IP address (VLAN 2)
Subnet mask
Shared address
lb-1 (active)
192.168.0.11
255.255.255.0
192.168.0.10
192.168.0.1
10.0.0.2
255.255.255.0
10.0.0.1
lb-2 (standby)
192.168.0.12
255.255.255.0
192.168.0.10
192.168.0.1
10.0.0.3
255.255.255.0
10.0.0.1
Redundancy 127_
With the BIG-IPs, a VIP must exist before a real server can be configured, so click
on the Virtual Servers menu and add the VIPs first. All you need to input is the
address and port. Click on Add to make the addition. To add the rest of the real
servers, click on the Nodes menu. From there, you can click on the Add Node
button at the top to add the remainder of the nodes. You should then be all set for
the NAT-style load-balancing method.
Redundancy
Redundancy between the two units is handled one of two ways: through the net-
work or through a serial fail-over cable. The BIG-IPs can detect if the other unit
has failed, or even if there isn't any network traffic on the active unit. There are
several options for failure detection and fail-over between the boxes; check the
documentation for details.
The configuration files are synced through SSH. SSH allows you to set what is
known as a "host key" for the other unit. This allows you to log into the partner
unit without a password over SSH. The SSH server checks the key sent by the
client, and if they match, the connection is established without a password. This is
how you check to see if sync is configured correctly—by logging into the partner
unit via SSH without a password:
lb-l:/usr/sbin# ssh lb-2
Last login: Fri Sep 8 22:17:29 2000 from 10.24.1.62
Copyright 1996-2000 F5 Networks, Inc. , Seattle, Washington, U.S.A.
All rights reserved.
F5 Networks, Inc. and BIG/ip are registered trademarks of F5 Networks,
Inc. Other product and company names are registered trademarks or
trademarks of their respective holders.
BY USING THIS SOFTWARE YOU AGREE THAT YOU HAVE READ THE LICENSE AND ANY
OTHER RELEVANT LICENSE(S) , THAT YOU ARE BOUND BY ALL TERMS AND THAT IT IS
THE ONLY AGREEMENT BETWEEN US, SUBJECT TO AMENDMENTS, REGARDING THE
SOFTWARE AND DOCUMENTATION. PLEASE NOTE THAT YOU MAY NOT USE, COPY, MODIFY
OR TRANSFER THE PROGRAM OR DOCUMENTATION OR ANY COPY, EXCEPT AS EXPRESSLY
PROVIDED BY AGREEMENT.
For technical support contact:
e-mail:
toll-free: 1 (888) 88-BIGIP
voice: (206) 505-0800
fax: (206) 505-0801
No mail.
Terminal type? [vt100]
Terminal type is vt100.
lb-2:~#
128 Chapter 10: F5's BIG-IP
To fail-over from one unit to the other, you can either use the WUI or the CLI.
With the WUI, the command is on the main page of the active unit. You can only
fail the active unit to the standby and not send the command to the standby unit
to become active. On the CLI, the command is bigpipefo slave on the active unit.
For example:
lb-1: /usr/sbin# bigpipe fo slave
Do not use the command bigpipe fo master on the slave unit. This
will cause serious ARP problems and will likely cause a network
interruption on your VIPs. Only issue the bigpipefo command on the
active unit.
To sync the configurations between two boxes, use the command on the main
page of the WUI. It will take only a few seconds to complete.
Stateful Fail-Over
The BIG-IP unit allows you to perform what is called "stateful fail-over." Stateful
fail-over is when the active unit shares TCP session and persistence table informa-
tion with the standby unit. Under circumstances in which the pair does not share
information, persistence information is lost, and all of the TCP sessions will be
reset, which is a problem if the traffic is HTTP downloads or FTP-related. With
stateful fail-over enabled, all that information is shared. Even if the active box dies,
the TCP sessions will remain active and persistence will be preserved. This feature
can be enabled as a radio button on the main page of the WUI.
Foundry Serverlron
Series
The Foundry Networks, Inc. Serverlron series of load balancers falls into the
switch family of products. They have (at the time of publication) the Serverlron
series of stackable switches and their BigServerlron chassis series of switch/router/
load balancers. Foundry Serverlrons are capable of being the Layer 2 switches that
interconnect the servers. However, in this chapter they operate only as load bal-
ancers attached to a Layer 2 infrastructure. I used model ServerlronXL, code revi-
sion Ironware 07.0.07T12.
Foundry switches are incorporated into a network a little differently than the other
load balancers we've discussed. In a flat-based network, they operate in a bridge-
path, two-armed configuration rather than in a route-path, one-armed configura-
tion. For NAT-based networks, they operate in a one-armed configuration. This
setup may change in later versions of the code, but as of 7.0.0, this is the scenario.
Foundry Serverlrons are completely solid state, with no moving parts. As a result,
they take only a few seconds to boot or reboot. Their configurations and software
images are stored in a flash RAM, again with no moving parts. You can store two
software images, as well as two configuration images. To see what is in your flash
RAM, use the command show flash:
SSH@foundryl#show flash
Code Flash Type: AMD 29F016, Size: 32 * 65536 = 2097152, Unit: 2
Boot Flash Type: ATMEL 29C010A, Size: 1024 * 128 = 131072
Compressed Primary Code size = 1301986, Version 07.0.01T12
Compressed Secondary Code size = 1301986, Version 07.0.01T12
Boot Image Version 06.00.00
SSH@foundryl#
129
11
130 Chapter 11: Foundry Serverlron Series
Command Line Interface (CLI)
The CLI for the Foundry series of load balancers is very similar to Cisco's IOS.
When you first log into a Serverlron, you are in a read-only environment. Just like
IOS, you need to enable the account to become a superuser in order to make
changes to the system and configurations. Any configuration change you make
takes effect immediately. If the current configuration is to remain in effect when
the unit is power cycled, a write mem command must be issued.
There are three basic modes of user administration with Serverlron's Iron Ware: the
read-only mode, the enable mode, and the config mode. When you initially log in,
you'll get the read-only mode. The enable command will get you into superuser
mode, and to make configuration changes, conf term will get you into config
mode. To start off with configuration, you'll need a female DB9 straight-through
cable connection to your serial device. Set your terminal emulation program for
the following settings:
8 bits
No parity
1 stop bit
9600 baud
Connect and hit Enter a few times, and you should get this prompt:
Serverlron>
As with Cisco's IOS, the default login (denoted by the > at the end of the prompt)
is not an account that can make changes. You need to enable in order to make
configuration changes:
ServerIron>enable
No password has been assigned yet
ServerIron#
You'll get a prompt that ends in #, which denotes that you are in superuser mode.
Hostname
It's always a good idea to give any network device a hostname, if for no other
reason than to know into which machine you are logged. The Foundry OS Iron-
Ware puts the hostname in the prompt, making it easier. To give the device a
hostname, go into conf term mode and use the hostname command:
Serverlron#conf t
ServerIron(config)#hostname lb-1
lb-l(config)#
Don't forget to do a write mem to save the configuration changes.
Command Line Interface (CLI) 131
Password
You should definitely configure a password at this point, to keep things secure. It
should be configured through the console connection, rather than Telnet. Unless
you are using SSH or are positive about the network environment from which you
telnet, you should only change passwords via the console connection.
The following command will make your superuser password admin (you should
really pick something else for your password, of course):
lb-l(config)tenable superuser-password admin
You'll also want to set the Telnet password and authentication for when network
connectivity is configured. The following command will set the Telnet password to
admin (which again, you should change to something other than your enable
password):
lb-l(config)tenable telnet password admin
To enable Telnet password authentication, use the following command:
lb-l(config)tenable telnet authentication
Enabling Telnet authentication is important; otherwise, anyone tel-
neting to the ServerIron will automatically be dropped into a non-
privileged shell without being asked for a password. Anyone with
access to your IP can get information on your configuration, or if
they have the enable password, change into superuser mode.
Network Configuration
The next step is to get the device up on the network. With either the flat-based or
NAT-based network architecture, the initial network configuration will apply for
both. Assume that you are using port 1 of the switch. You are going to configure
the device with the IP information shown in Table 11-1.
Table 11-1. ServerIron IP configuration
Unit
IP address
Subnet mask
Default route
lb-1 (active)
192.168.0.10
255.255.255.0
192.168.0.1
lb-2 (standby)
192.168.0.11
255.255.255.0
192.168.0.1
132 Chapter 11: Foundry ServerIron Series
The IP configuration for the ServerIron is very easy. Make sure that you are in conf
term mode and the following commands will take care of all the IP information:
lb-1(config)#ip address 192.168.0.10 255.255.255.0
lb-1(config)#ip default-gateway 192.168.0.1
To add DNS servers, use the ip dns command. For example, lets take the DNS
server addresses of 208.185.43.205 and 208.185.43.206:
ip dns server-address 208.185.43.205 208.185.43.206
The ip dns server-address command allows you to specify more than one DNS
address.
If all is configured correctly, you should now be able to telnet into the switch.
However, see the section "SSH Configuration" if you have an SSH client. This is a
much more secure way of accessing a Serverlron because the passwords and com-
mands are encrypted.
SSH Configuration
The Foundry ServerIron series, as of the 7.0 releases, supports SSH access for com-
mand-line administration. This should be used whenever possible. Remember to
use the console port to configure SSH unless you are 100% sure of your network
surroundings and that no one is snooping during your Telnet session to get pass-
words. To configure SSH, go into the enable and conf term modes. To enable the
RSA key, you'll need to give the machine a domain:
ip dns domain-name vegan.net
Of course, substitute for vegan.net whatever your domain name is. If you don't
have a domain, make something up, since this is a requirement for SSH (it needs a
domain name for the SSH public key). It is usually not critical what you put in for
the domain name, although you should use the same name that your other equip-
ment uses, just to keep things tidy.
Now you can generate the RSA key needed for SSH encryption. Just to be safe,
let's erase any existing RSA key and do a write mem:
lb-1(config)#crypto key zeroize rsa
lb-1(config)#write mem
Now lets generate the key:
lb-1(config)#crypto key generate rsa
The process will take about a minute.
Generating rsa key pair
done!
Flat-Based SLB 733
rsa public_key "1024 37
1649760217440391116615335573740343478522830483458053497899863792567739951119441223
9580361864968528683258995869053052354425464551516081013231328282382286208474108794
6367492373436898956804950147492764743412177726429520954071733644523613364698108210
622032318998918857576903449891522965999309640222221113350677717 "
rsa private_key ****************************
telnet@lb-1(config)#
Don't forget to do a write mem:
lb-l(config)#write mem
SSH is now enabled on your system. Before you can log in, however, you'll need
to create accounts that allow access, since SSH requires a username to log in. To
do this, use the username command:
lb-l(config)#usemame admin privilege 0 password admin
The
syntax
to the
username command
is:
username,
privilege
(0
stands
for
read-write or superuser; 4 stands for port config; 5 stands for read-only),
password. The account created with the previous command made a username of
admin, with a password of admin. That account is capable of making any change
on the system.
To enable this type of local authentication, the command is:
aaa authentication login default local
SSH will now work. If you are using a Unix client to log in, the process looks like
this:
[~] tony@zorak(pts/l)
[5:09pm]# ssh
Host key not found from the list of known hosts.
Are you sure you want to continue connecting (yes/no)? yes
Host '192.168.0.11' added to the list of known hosts.
's password:
SSH@lb-l>
When you are logged in via SSH, you are not automatically enabled as superuser.
You must enable to become superuser and make any changes:
SSH@lb-l>enable
Password:
SSH@lb-l#
Flat-Based SLB
Most of the network configuration has already been presented in the "Getting
Started" section, so there isn't much more prep work needed. For flat-based SLB to
work on a Foundry ServerIron, you must have the ServerIron in the Layer 2 path
134 Chapter 11: Foundry Serverlron Series
of traffic. This is a flat-based, bridge-path, two-armed connection. With these steps
complete, you are now ready to configure the VIPs and real servers.
Real Servers
Configuring the real servers is very simple. First, definer a real server with a name
and IP address:
SSH@lb-l(config)#server real ws-1 192.168.0.100
This will bring your prompt to a hierarchical system under which configuration
changes for this real server can be made. The prompt will reflect what server con-
figuration you are in:
SSH@lb-l(config-rs-ws-1)#
You must define what port or ports this real server will use. Since you are dealing
with web servers, port 80, or port http, will accomplish the same thing:
SSH@lb-l(config-rs-ws-1)#port
http
And now you are done with the configuration for ws-1. Repeat these steps for ws-
2 through ws-4.
VIPs
To configure a VIP, first define it with a name and IP address. You can pick any
name you wish, such as vip-1, or even a domain name such as www.vegan.net.
Go with vip-1, since that is the configuration method being used:
server virtual
vip-1
192.168.0.200
This will bring you into the same type of hierarchical menu as with real servers:
SSH@lb-l(config-vs-vip-1)#
Define which ports are associated with this VIP. Again, since you are dealing with
web servers, use port http:
SSH@lb-l(config-vs-vip-1)#port http
You need to bind the real servers to the VIP. You can bind them one at a time or
all at once. The syntax for the bind command is somewhat complicated; you
specify a port on the virtual server, then a real server, then a port on that real
server:
SSH@lb-l(config-vs-vip-1)#bind http ws-1 http
This binds the HTTP port of ws-1 to the HTTP port of the virtual server. Repeat
this step with ws-2 through ws-3, and the configuration is complete. Point your
browser to the VIP's IP address and you should get the web pages.
NAT-Based SLB 135
NAT-Based SLB
The NAT-based network architecture is a bit more complicated than the flat-based
architecture and is slightly different than other load balancers. With a ServerIron,
use a route-path, one-armed network. Both the private and public networks are on
the same LAN, so there is no need to set up VLAN on the switch.
Private network default route
Configure the 10.0.0.0/24 network to act as the default route for the servers. You
need to set the NAT source address so servers in the internal network have a
default route:
SSH@lb-l(config)#server source-ip 10.0.0.1 255.255.255.0 192.168.0.1
This will route all traffic through the load balancer on the way out. Everything is
complete on the network site, and you are ready to configure your real servers
and VIPs.
Real Servers
Configuring the real servers is very simple. First, define a real server with a name
and IP address:
SSH@lb-l(config)#server
real
ws-1
10.0.0.100
This will bring your prompt to a hierarchical system under which configuration
changes for this real server can be made. The prompt will reflect what server con-
figuration you are in:
SSH@lb-l(config-rs-ws-1)#
You must define what port or ports this real server will use. Since you are dealing
with web servers, port 80, or port http, will accomplish the same thing:
SSH@lb-l(config-rs-ws-1)#port http
You are finished with the configuration for ws-1. Repeat these steps for ws-2
through ws-4.
VIPs
VIP configuration is also very simple. To configure a VIP, first define it with a
name and IP address. You can pick any name you wish, such as vip-1, or even a
domain name such as www.vegan.net. Here we'll use vip-1, in accordance with
the configuration method:
server virtual vip-1 192.168.0.200
136 Chapter 11: Foundry ServerIron Series
This will bring you into the same type of hierarchical menu as with real servers:
SSH@lb-l(config-vs-vip-1)#
You must define what ports are associated with this VIP. Again, since you are
dealing with web servers, use port http:
SSH@lb-l(config-vs-vip-1)#port http
Bind the real servers to the VIP. You can bind them one at a time or all at once.
The syntax for the bind command is somewhat complicated; you specify a port on
the virtual server, then a real server, then a port on that real server:
SSH@lb-l(config-vs-vip-l)#bind
http ws-1 http
This binds the HTTP port of ws-1 to the HTTP port of the virtual server. Repeat
this step with ws-2 through ws-3, and the configuration is complete. Point your
browser to the VIP's IP address and you should get the web pages.
Redundancy
Foundry ServerIrons employ their proprietary protocol known as Hot Standby
Redundancy. To implement this, configure lb-1 as you did earlier. The unit lb-2
will be configured later. First, select a switch port to act as a private link between
the two devices. This is what the protocol will run over. Let's select port 3, since
you've used port 1, and if you are using NAT-based architecture, then you'll have
used port 2 as well. You'll need to get the MAC address of the default route port
of the web servers. If you are using the flat-based architecture, it is port 1; if you
are using NAT-based architecture, then it is port 2. You can get the command by
running show interface:
SSH@lb-1(config)#show interface e 1
FastEthernet1 is up
Hardware is FastEthernet, address is 00e0.5205.8016 (bia 00e0.5205.8016)
Configured speed auto, actual 100Mbit, configured duplex fdx, actual fdx
Member of L2 VLAN ID 1, port is untagged, port state is FORWARDING
STP configured to ON, priority is high, flow control enabled
mirror disabled, monitor disabled
Not member of any active trunks
Not member of any configured trunks
No port name
5 minute input rate: 1264 bits/sec, 2 packets/sec, 0.00% utilization
5 minute output rate: 29856 bits/sec, 5 packets/sec, 0.02% utilization
4522245 packets input, 555055486 bytes, 0 no buffer
Received 411078 broadcasts, 0 runts, 5 giants
5 input errors, 0 CRC, 0 frame, 0 ignored
749024 multicast
7758222 packets output, 3940407493 bytes, 0 underruns
0 output errors, 0 collisions
SSH@lb-1(config)#
Redundancy 137
Use the flat-based architecture for now and get the MAC address of 00e0.5205.80l6
for this particular switch port.
To mark this port as redundant and to set up the protocol, use the following com-
mand:
SSH@lb-l(config)#server backup
ethernet
1
00e0.
5205.8016
With this configuration, one switch will be active while the other switch will be
inactive, not forwarding IP or Layer 2 traffic.
To get lb-2 configured, copy the config from lb-1 to lb-2, changing only the 192.
168.0.11 address to 192.168.0.12. Do a write mem, and then reload the switch.
Assuming it is the secondary unit, the switch will boot up and see that it is indeed
the secondary unit.
To show redundancy status, use the command show server backup:
SSH@lb-l(config)#show server backup
IV
Appendixes
Quick Command
Guide
This appendix provides a quick reference to commonly performed administration
tasks involving the load balancers featured in this book. It is designed to save time
and help in a crisis situation, when reading through a chapter would take too long.
The quick command guide assumes you have set up the SLB units in a manner
consistent with the examples and network architectures detailed in this book; how-
ever, these commands should work in most other circumstances as well. The
syntax and information are based on the software and hardware versions of the
products at the time of writing and may vary depending on your version.
Alteon (WebOS)
These commands are based on WebOS Version 8.0.x, but most will apply to newer versions
and the earlier 6.0.x releases. Unless specified, all changes need to have an apply done to
make them effective. Shortcuts can be used where needed. For example, /info/vrrp can be
shortened to /i/vrpp.
Reboot switch /boot/reset
Fail-over status /info/vrrp
Default to original factory config
Enter:
/boot/conf factory
Then reset the switch.
Take a real server out of production temporarily
Use
/oper/slb/dis
[server
number], such
as
/oper/slb/dis
4, to
disable real server
4
temporarily.
141
A
142 Appendix A: Quick Command Guide
Put a suspended real server back in production
Use
/oper/slb/ena
[server
number] such
as
/oper/slb/ena
4, to
enable real server
4.
Fail-over to standby unit
There is no easy way to fail-over units with Alteons unless the VRRP priorities on both
boxes are the same (which is a bad idea). There are two choices. First, you can change the
VRRP priorities on the standby unit to a higher value than the active unit. This can be quite
tedious, especially if you have many VRRP entries configured.
/cfg/vrrp/vr 1/prio 50
/cfg/vrrp/vr 2/prio 50
/cfg/vrrp/vr 3/prio 50
Alternatively, you can unplug all network connections to the active Alteon unit. The backup
unit will then take over.
Change admin password
The default admin account password is admin. To change it, use the command:
/cfg/sys/user/admpw
Show status of real servers
To show which real servers are up or down, use the following command:
/info/slb/dump
This will dump all of the real, group, and virtual server stats. The first entries will be the
stats for the real server:
Real server state:
1: ws-1, 00:d0:b7:66:9a:10, vlan 1, port 1, health 4, up
2: ws-2, 00:d0:b7:66:9a:6f, vlan 1, port 1, health 4, up
3: ws-3, 00:d0:b7:66:9a:77, vlan 1, port 1, health 4, up
4: ws-4, 00:d0:b7:66:9a:5a, vlan 1, port 1, health 4, up
Show software version
The command /info/sys will give you the version of code that is currently running:
>> Main# /info/sys
System Information at 0:17:09 Sun Sep 10, 2000
ACEswitch 184
sysName:
sysLocation:
Last boot: 14:12:49 Tue Aug 29, 2000 (reset from Telnet)
MAC address: 00:60:cf:45:9d:60 IP (If 1) address: 0.0.0.0
Hardware Revision: B
Hardware Part No: C05_5A-D_6A-D
Software Version 8.0.39 (FLASH image2), active configuration.
>> Information#
Foundry ServerIron Series (Ironware) 143
Foundry Serverlron Series (Ironware)
These configurations apply to Ironware Version 7.0 and, most likely, later versions as well.
All changes take effect immediately, but a write mem is needed to save them to flash so
they are active upon the next boot.
Reboot switch reload
Fail-over
Status
SSH@lb-l(config)#
show
server
backup
Default to original factory config
To go back to the original factory config, use the command erase startup-config and reload
the switch. It will come back up with a blank configuration and no password:
ServerIron# erase startup-config
Take a real server out of production
To take a real server out of production, first go into the virtual server in which the real
server is enabled, and then issue the no command to take the real server (ws-1 in this case)
out of rotation:
SSH@lb-l(config)#
server
virtual
vip-1
SSH@lb-l(config-rs-vip-l)# no bind http ws-1 http
If you'd prefer to make that real server unavailable for all VIPs, simply unconfigure the real
server outright:
SSH@lb-l(config)#
no
server
real
ws-1
Put a suspended real server back in production
To add an already configured real server (back) into production, go into the virtual server
menu and add the server:
SSH@lb-l(config)#
server
virtual
vip-1
SSH@lb-l(config-vs-vip-l)# bind http ws-1 http
And the real server is back in production.
Fail-over to standby unit
The best way to fail-over to a standby is to reboot (or power-cycle) the active unit. The
standby unit will become active and won't become standby again unless the now-active
unit fails.
Change admin password
The default password for the login and superuser accounts is null, so it should be set as
soon as possible:
lb-1(config)# enable superuser-password admin
144 Appendix A: Quick Command Guide
Recovery of a lost password
If you've lost the superuser password for a ServerIron and have console access to the
device, you can recover the password. Plug a serial connection into the switch and hit Enter
a few times to make sure you've got an active connection. Then power-cycle the switch:
Enter 'b' to go to boot monitor
BOOT MONITOR>
Then type "no password" and hit Enter:
BOOT
MONITOR>
no
password
OK! Skip password check when the system is up.
Then give the command boot system flash primary and hit Enter. This will boot the unit.
BOOT
MONITOR>
boot
system
flash
primary
BOOT
INFO:
load
from
primary
copy
BOOT
INFO:
code
decompression
completed
BOOT
INFO:
branch
to
04001500
The
system will
boot
up and you
will
get a
read-only prompt. Type
enable
and
you'll
be
in the privileged-enable mode, where you can reset the superuser password:
ServerIron>enable
No password has been assigned yet
ServerIron#
Show status of real servers
To show the status of a given real server, use the command show server real followed by
the name of the real server (or leave this blank for info on all of the real servers):
SSH@lb-l# show
server
real
ws-1
Real Servers Info
Name : ws-1 Mac-addr: 0800.20c0.7bb0
IP:192.168.0.100 Range:1 State:Active Wt:l Max-conn:1000000
Src-nat
(cfg:op):(off:off)
Dest-nat
(cfg:op):(off:off)
Remote server : No Dynamic : No Server-resets:0
Mem:server: 02009eae Mem:mac: 0458efOO
Port State Ms CurConn TotConn Rx-pkts Tx-pkts Rx-octet Tx-octet Reas
http
default
Server
active
unbnd
Total
0
0
0
0
0
0
0
0
0
0
0
0
0
0
0
0
0
0
0
0
0
0
0
Show
status
of
VIPs
To show the status of a given VIP, use the command show server virtual followed by the
name of the virtual server (or leave this blank for info on all of the virtual servers):
SSH@lb-l# show
server
virtual
vip-1
Virtual Servers Info
Cisco's WebNS (ArrowPoint) 145
Server
Name:
vip-1
IP :
192.168.0.200
: 1
Status: enabled Predictor: least-conn TotConn: 0
Dynamic:
No
HTTP
redirect:
disabled
Intercept: No
ACL:
id = 0
Sym: group
= 1
state
= 5
priority
= 0
keep
= 0
Activates = 1, Inactive= 0
Port
State
Sticky
Concur
Proxy
CurConn TotConn PeakConn
http enabled NO NO NO 0 0 0
default enabled NO NO NO 0 0 0
Show software version
To
show
the
version
of the
software
you are
running,
use the
command
show
version:
SSH@lb-l#show version
SW: Version 07.0.07T12 Copyright (c) 1996-1999 Foundry Networks, Inc.
Compiled on Jul 28 2000 at 11:35:12 labeled as SLB07007
HW: ServerIron Switch, serial number 058016
400 MHz Power PC processor 740 (revision 8) with 32756K bytes of DRAM
24 100BaseT interfaces with Level 1 Transceiver LXT975
2 GIGA Fiber uplink interfaces, SX
256 KB PRAM and 8*2048 CAM entries for DMA 0, version 0807
256 KB PRAM and 8*2048 CAM entries for DMA 1, version 0807
256 KB PRAM and 8*2048 CAM entries for DMA 2, version 0807
256 KB PRAM and 1*2048 CAM entries for DMA 4, version 0104, SEEQ GIGA MAC 8100
256 KB PRAM and 1*2048 CAM entries for DMA 5, version 0104, SEEQ GIGA MAC 8100
128 KB boot flash memory
4096 KB code flash memory
2048 KB BRAM, BM version 10
128 KB QRAM
512 KB SRAM
Octal System, Maximum Code Image Size Supported: 1965568 (0x00ldfe00)
The system uptime is 17 days 21 hours 26 minutes 51 seconds
SSH@lb-l#
Cisco's WebNS (ArrowPoint)
The following commands are for Version 4.0 and later, but most will work with earlier
versions. All changes take effect immediately but must be saved to take effect upon
rebooting.
Reboot switch reboot
Fail-Over Status show redundancy
Default to original factory config
To restore to the no config, you must clear out the running-config (the configuration in
memory) as well as the startup-config (the configuration on the disk):
lb-l# clear running-config
running-config
will
be
permanently
lost.
Continue, [y/n]:y
146 Appendix A: Quick Command Guide
Clearing(\) 100%
lb-l# clear startup-config
startup-config will be permanently lost. Continue, [y/n]:y
lb-l#
If you have used the save_config command, you must also execute the clear archive
startup-config command:
lb-l# c,lear archive startup-config
Then reboot the machine. When it comes back up, it will have no configuration and will
prompt you to use the startup configuration script. Log in with the username and password
configured in the NVRAM.
Take a real server out of production temporarily
To take a real server out of service, go into conf mode and the real server's configured
service. Then give the suspend command:
lb-l(config)# service ws-1
lb-1(config-service[ws-1])# suspend
lb-1(config-service
[ws-1])# show
service
ws-1
With a show service ws-1, we see that the state is now suspended:
Name: ws-1 Index: 1
Type: Local State: Suspended
Rule ( 192.168.0.100 ANY ANY )
Redirect Domain:
Keepalive:
(ICMP
5 3 5 )
Mtu: 1500 State Transitions: 1
Connections: 0 Max Connections: 0
Total Connections: 1 Total Reused Conns: 0
Weight: 1 Load: 255
lb-1(config-service[ws-l])#
Put a suspended real server back in production
To add a real server back into production, go into conf mode and the real server's config-
ured service. Simply give the active command, and the real server is restored into load-
balancing rotation:
lb-1(config)# service ws-1
lb-1(config-service[ws-1])# active
lb-1(config-service[ws-1])#
Fail-over to standby unit
On the standby unit, issue the command redundancy force-master. This will make the
standby unit temporarily active. To switch back, use the same command on the old active
unit (now standby), or the command ip redundancy master.
Change admin password
There is no single administrator superuser account; any account can have superuser access.
There are two places where ArrowPoint keeps username and password information: in the
NVRAM and in the configuration file (encrypted).