LightWave 3D 8 Character Animation phần 7 pot
Bạn đang xem bản rút gọn của tài liệu. Xem và tải ngay bản đầy đủ của tài liệu tại đây (591.35 KB, 50 trang )
you read an inner dialogue through watching your character’s
actions? Do you care about seeing what happens next?
Rework your scenes if necessary, honing points and making
them as strong as they can be.
11.8 Acting, Not Action
What we’re working for is acting, not action. It is important for you
to hone and finesse all the finer points that make animation great.
But these things are learned, then forgotten so that the character
lives and flows freely through you, not from you.
At first, you’ll have all these things to remember — squash and
stretch, drag, follow-through. You’ll be asking yourself, “Is my char-
acter twinning?” Often, it’s easy to lose that crystal of magic amid
what really amounts to a lot of focused work. It’s like learning a
piece of music or a dance. You go through a period of time where
you’re just worried about not hitting a wrong note or making a mis-
step. Then, after you get all the bits and pieces of it down, you can
go on “autopilot” and let the feelings the piece fills you with flow
out through you as you do what you do. You become simply another
observer to the beauty your hands or feet just happen to be
creating.
290
Chapter 11: Advanced Animation Mechanics
Note:
Good animation comes through you, not from you.
When you get done with a scene, take a break. Heave a sigh,
and walk away for a bit. Get a latte or a cup of herbal tea. Do some
-
thing that will take your mind off the long, tense time you just spent
on this labor of love. When you feel like you’ve “walked it off” suffi-
ciently, go back to your scene and look at it as if you’re seeing it for
the first time.
Ask yourself the all-important question, “Is this character alive
for me?” Does he follow the direction of the scene and add to the
story in ways that seem as believable as they are inevitable? When
you acted this scene out, is the feeling you got inside the same feel-
ing you’re getting now as you watch it?
Remember, animation being the art of revision, if something
isn’t working, if the character isn’t emoting, breathing, and living,
break down what the issues are and revise. (Usually there’s just a
couple of things that when they do drop into place, the animation
seems to do a 180; what was “just not coming together” suddenly is
“totally spot-on!”)
Animation is forever. The beings we’re creating will live on long
after we’re gone. They’ll continue to touch people with the dreams
we dreamt while they were being brought into this world. Do every
-
thing you can to make their lives worthy of living.
291
Chapter 11: Advanced Animation Mechanics
Note:
This is actually the secret to all art, really (if art did have such
things as “secrets”). You learn a piece of classical music. You
hear it on the radio and you think, “Man that doesn’t sound
anything like what I’m doing. I know I’m hitting all the right
notes, but ” What you have to do is to pay attention to how
the music you’re hearing on the radio makes you feel as you’re
listening to it. Then, when you’re back at the keys playing,
replay those feelings you felt while listening to the concert pia
-
nist. Your music will suddenly sound a lot more like what you
heard on the radio.
11.9 The Importance of Thumbnails
(Planning Your Scene)
When you get a scene, whether it has been storyboarded or not,
before you start animating you need to take the time to do small
thumbnail drawings of all the poses that will tell the story of your
scene. These quick, loose drawings don’t have to mean anything to
anyone but you. They only need to show you what’s going on during
the scene, how the character feels about what’s going on, and his
outlook on making it through (hopefully) in one piece.
Try to think like a comic strip artist as you do these quick little
drawings. You’re trying to distill an expression or an attitude into a
single drawing. These drawings will have a strong line of action run
-
ning through them, and their silhouettes (it is often a good idea to
shade in the thumbnails) will read with the full impact of the idea
being portrayed.
292
Chapter 11: Advanced Animation Mechanics
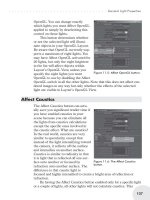
Figure 11.15. Here are some thumbnails for a scene in which the character is
running with a flashlight, slips on a banana peel (does anyone slip on banana
peels anymore?), and lands flat on his back.
Yes, the drawings in Figure 11.15 are rough; they are just a
loose collection of circles and lines that don’t have to mean anything
to anyone but me. Yes, this is how loosely I work when I’m doing
my thumbnails for my scenes. It took less than two minutes for me
to run through three different takes on this scene; there’s so little
time invested in the drawings that I have no qualms about scrapping
the whole idea and starting over. In doing three (or more, if neces
-
sary) versions, I break through the “Man, I have no idea how I’m
going to handle this” phase of ideation. The first set was a mark on
the wall. The second was closer, and the third was what I wanted; it
feels like I felt when I acted it out. (Ow … just kidding!)
293
Chapter 11: Advanced Animation Mechanics
Figure 11.16. These are the thumbnails I’d show to a client. (I redrew what I had
done for myself, tightening up in the process. Like I say, thumbnails don’t usually
mean anything to anyone but you; this set should clarify what’s going on in the
previous set.)
Note:
Thumbnails (storytelling drawings) aren’t the most extreme draw
-
ings; they’re the ones most comfortable for the eye to settle on.
These thumbnails help make sure you have the best presenta
-
tion possible and the most entertainment value to your scene. (It’s
so much easier to erase a quickly scribbled line than it is to rekey a
pose.) You’re thinking out loud, throwing ideas out to see what
sticks. Do a couple of quick versions and see which one reads best.
(For some reason, I find it’s either the first set or the third set that
works best.)
Make sure your character’s attitude reads through every
thumbnail. Even if he’s only walking across the room to get the
door, his attitude and his opinions about getting the door should
remain front and center. Act your scene out. Sit. Ponder. Doodle.
Let yourself open up to the flow of good ideas that come through
you.
Thumbnails will also vastly reduce the time it takes to get a
good pose in 3D. When you do sit down with the software, there’ll
be very little guesswork as to how this guy should be posed out.
You’ll probably find ways of pushing that loose, little drawing fur
-
ther, making it read better, stronger, and more on character. In that
quick little scribble, you have a signpost that tells you how to
quickly get to where you want to be. When your character reads
with the same vibrancy as in that loose collection of circles and
lines, you’ll know you’re there and you can move on!
294
Chapter 11: Advanced Animation Mechanics
Note:
No matter how “artistic” a client may think he is, never show
him anything he would have to use his creativity to figure out.
This goes for thumbnails, animations-in-progress, whatever.
Most often, clients just won’t get it and start complaining about
how it just doesn’t seem to be working the way they’d hoped.
Never mind that you told them this is just a rough draft. Or, on
the other side of things, they could get grandiose ideas that
there’s no way you would have time to implement. It’s a good
idea to only show the client things that leave as little room for
interpretation as possible.
11.10 Pacing
As the number of things you can do as an animator increases and as
you add “riffs” to your repertoire, it is only natural to want to show
as many of these awesome little things as you can in a scene.
Remember …easy power. If you give to the scene what it needs,
and you do this with ability that looks effortless and natural, people
will just assume that you could do anything you wanted to. You just
(wisely) chose to show only what you needed to and you left your
audience wanting more.
You don’t want to rush the scene. You want to give the acting
poses (the storytelling poses you thumbnailed, the poses that are
comfortable for the eye to settle on) enough screen time for the
audience to read them. You want the audience to be able to see the
expressions change. You want to give the character time to think,
and the audience time to digest.
You want to have the flow of action in a scene be strong enough
that you keep your audience’s attention too. (If you will eventually
have music scored to your work, music can extend an audience’s
attention, as can waiting for the music to return — the “silence
between the notes”). Achieving this balance between keeping the
scene moving and giving the acting time to connect with the audi-
ence takes practice. Doing the work and revising until it fits within
the scene length requirements and still carries this power is what
will help to hone your own internal sense of pacing.
Watch animation from the great masters of the art. See what
kinds of rhythms they use and what kinds of emotions those
rhythms create. Fill the well. Practice and make it yours. You are
working in a medium where rhythm drives everything. Know
beforehand the kind of rhythmic feel you want for the piece, and
then stay true to your vision. Let that vision read clear and strong
to the audience.
295
Chapter 11: Advanced Animation Mechanics
This page intentionally left blank.
Chapter 12
Taking a Scene from
Start to Finish
Okay, so now you’ve got a scene assigned to you; what do you do?
We’re going to work here as if it came through the channels of a large
production, where you’ve got departments, PAs (production assis
-
tants), PMs (production managers), APMs (assistant production
managers), and the whole nine yards. But you can make these steps
work whatever the size of your production, even if it’s just you and
your trusty computer at your side. It’s all about breaking what can be
a formidable task into small, manageable, “bite-sized” bits.
12.1 Do Your Homework
Whether this is your first scene in this production or your one-
hundred-and-first, you need to make sure you do your homework
before jumping in with both feet. There are few things worse than
doing some beautiful, brilliant work and having the director come by
and tell you that, yes, it is beautiful but it doesn’t fit with what the
story needs, or that it doesn’t link up with the previous and/or follow
-
ing scenes.
By “doing your homework,” I mean “research.” Go back through
and reread the part of the script that contains this scene. Walk around
and look at the storyboards. Find out what got the character(s) into
this place to begin with. Find out how they feel and think about being
in the situation they are in. Find out how they plan to move onward,
out of your scene.
297
Look at animations that have been completed and approved that
go around your scene, and watch the Leica reel (the timed story
-
boards made into a movie, also known as an animatic). Get a feel for
the timings and pacings of scenes that have already been finalized.
Understand your character’s timing, pacing, posing, and acting so
you can begin to feel the same things he does.
Get a clear picture of things before going to the director. If you
have any questions about the scene, curiosities, comments, what
-
ever, write them down! A meeting with a director can be a
whirlwind. Make sure all the questions you can think of pertaining
to your character’s development through this particular scene are
asked. You don’t want to get back to your desk and remember those
one or two (or ten) vitally important questions that just happened to
slip your mind during the conversation.
12.2 Talk with the Director
After you’ve got a clear vision and feel for the scene, sign up for
time to talk with the director. Have your list of questions handy, and
check the items off as they get talked about. Make notes! Do every-
thing you can to retain what you learn about the director’s vision for
the scene. The director is counting on your abilities as an actor and
an artist, but in order for the show to succeed, it has to have one,
clear (good, confident, worthy, etc.) point of focus from which the
entire story radiates, and that is the director.
Listen to what he has to say. If you don’t understand something,
ask him to explain it another way. (Did I already mention taking
notes? Unfortunately, you may need to *ahem* “remind” a director
of an agreement on characterization or planning the two of you
made earlier.) A good director will always listen to what you have to
say, too. Talk through your feelings about timing, pacing, and acting.
Make sure the two of you are seeing the same vision for the scene
and its place within the film.
298
Chapter 12: Taking a Scene from Start to Finish
12.3 Scene Planning
If there is a background already built for you, or if your character is
going to be interacting within pre-shot footage, talk with the scene
planning people about how your character will interact with and
within it. Get a clear vision of how you see your character moving
within the background. Make sure that the elements that are there
permit his freedom to interact and emote in character and to fulfill
the requirements of the scene. If it looks like your acting and the
background may clash, talk to the scene planning people about it.
If you’re the one who has to build the background yourself,
sketch out a floor plan and notate your character’s blocking. Find
out where the camera will stand and where you’re going to have to
hang lights to get the desired shot and lighting. Look to see if there
are going to be any elements of the background conflicting with the
character’s movements or drawing attention away from his acting.
299
Chapter 12: Taking a Scene from Start to Finish
Note:
The rule of thumb I use for nearly everything — animation,
character design, set design, lighting design, you name it —
came from a character in the film L.A. Story. Trudi (Marilu
Henner) was telling another woman how she coordinates her
fashion accessories. (Bear with me now.) She said that when
she thinks she’s ready to go, she turns away from the mirror,
then turns back quickly. The first thing that catches her eye, she
removes. (I would suggest doing this several times.) What she
ends up with is a complete, contiguous ensemble with every
-
thing working together. As weird as it may sound, this is the
very best technique I’ve found for analyzing nearly anything
artistic. If it jumps out at you, if it stands out abruptly, it is like a
jitter in an otherwise smooth curve. Everything should work as a
unit — even the things that are meant to draw your attention!
If you are setting up your own background, there’s one key bit
of advice I’d like to give you on lighting and setting up your camera:
Pretend you’re on a practical (real) set. Pretend you’ve got to light
it with real lights and that you’re bound by the same physical
limitations with which to shoot. We, the audience, have grown
accustomed to certain conventions established by both still photog
-
raphy and motion pictures. Working within these conventions, we
more easily form a connection with the viewers because they are
preconditioned to understand the “language” you’re using. This can
be said for “steadycam” shots, too — save the flying camera for the
high-dollar, mega-impact shots! (Hitchcock shot most of his sus
-
pense films from medium and long setups. When he hits you with
the one or two close-ups in the film, those shots make you jump out
of your skin because you haven’t been numbed to close-ups!)
300
Chapter 12: Taking a Scene from Start to Finish
Note:
If you can tell a story with the camera left, unmoving, on its
tripod, you really understand storytelling and the story you’re
telling.
Note:
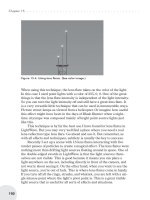
I use mostly shadow-mapped klieg lights (spotlights) to light my
scene; they’re what I’d have if I were on a practical set. I use
spotlights and distant lights (set to not cast shadows) as if they
were shinyboards (also known as skimboards), bouncing dif
-
fused lighting where I need it. I’ll use the occasional light with a
negative intensity to tone down an area, as if I’m using a flag to
block light from hitting an area. I use intensity falloff for lights
and an almost imperceptible bit of black, nonlinear fog to
enhance drama and “realism.”
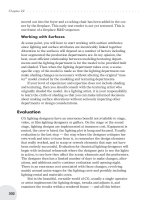
Now that LightWave has radiosity and caustics, we can think a
lot more like a traditional director of photography when construct-
ing our sets and lighting them. Make sure that the final imagery
(colors, tonality, “pools of light,” sharpness or softness of design
elements, curves, angles, shapes, and compositional balance) works
as a whole to convey the mood and direction of the scene. Pay atten
-
tion to silhouette and design elements, just as you will with your
character when he starts interacting within this environment. Areas
of highest contrast (value, color, and saturation) should be where
the character will move, drawing the audience’s eye to these areas
instantly. The composition of the background alone should give you
an instant feel as to what is going to happen in the scene.
When you’re satisfied with how your background will work with
your character to facilitate the best, most riveting presentation of
your scene, it’s time to move on!
301
Chapter 12: Taking a Scene from Start to Finish
Note:
There’s only one real trick to understanding good lighting:
Watch what works, and figure out what makes it do what it
does. I love chiaroscuro (a method of painting with strong light
-
ing and shadows) and film noir, and my lighting styles reflect
this. In beginning photographic portraiture, you learn that in
order to make any object look three-dimensional, you hit the
subject with a warm light on one side and a cool light on the
other. (Subtle variations of “white” will do; you don’t have to
punch the saturation unless you’re going for a specific effect.)
One light should be brighter than the other. That’s it! That’s all
you need to do, but there is more you can do. You should hit
your subject with a light that makes one part of his outline
brighter than the background he’ll be in front of (a “rim” or
“kick” light). Keep in mind the color of the “ambient” light, and
use a shadowless klieg to fill in any overly dark areas. (I turn
ambient lighting off unless I’m using radiosity.) We expect
ambient light from above to be blue, reflected from the sky. We
expect ambient light from below to be golden or green,
reflected from the ground or grass.
12.4 Visualize
Okay, now’s the time to go to that quiet place and let yourself slip
into the world of your character … into his thoughts … into his life.
Turn off the phone. Put out a big “Do Not Disturb, Under Any
Circumstance …. THIS MEANS YOU!” sign and let the rest of the
world go on without you for just a little bit.
This is where you get in touch with the character as he exists
inside of you. Yours is a unique viewpoint on his existence, his
thoughts, his feelings, his actions, his dreams, his desires, his plans
for the future, and his laments about the past. Within the quiet
space of your own mind/heart, you can let go of your own past and
take up his. Let your mind wander …
Imagine the first thing he did when he got up that morning.
How long has it been since he’s eaten? Has he ever been in love?
How does it feel to have those hands, that face? Why do you dress
as you do? Does it make you feel safe? Does it remind you of some-
one you looked up to in your life? These may seem like esoteric
questions, but questions like these are the keys to opening the
doors inside yourself and letting you live as your character for the
length of time you are working on this scene. And that is exactly
what you must do! You have to live his scene. Every subtlety you
feel, every nuance that would touch your own actions having lived a
life like that, being in the surroundings he is, every minute detail
breathes volumes of life into this character and this scene. It is
through these details that the audience will share their own private
selves; it is through these private details that the character gains
his own life.
Wander back in time, back in his time. Live the days of his
youth, his explorations, his sorrows, his joys. Experience the
entirety of his being as a cloak that you wrap around yourself and
get lost in. Know the decisions in his life that have brought him to
the point where your scene begins.
Now, allow the scene you will work with play out before you. As
you let the scene unfold before you, remember how you feel about
what is going on. Remember how it feels to move as you do.
Remember your ideas, your thoughts — both those open to others
and those open only to yourself. Remember how the whole experi
-
ence feels to live, continuing out the end of this scene and slightly
into the next.
302
Chapter 12: Taking a Scene from Start to Finish
The reason I’m asking you to remember how it feels to experi-
ence his life is that for most people, it is hard to remember every
nuance of things that happen as they happen. But feelings,
kinesthetics, and empathy carry much more than just positional or
temporal information. They are the doorways through which we can
live again, in all the detail, the experiences in our past. When you’re
looking at your thumbnails, your action line on your X-sheet, and at
your animation as it takes shape before you, you know if what
you’re looking at gives you the same feeling as what you experi
-
enced in your visualization. All the myriad of subtle cues, the
volumes that would fill shelves upon shelves with information, all
boil down to a single thing: a feeling.
There’s not enough room in this book to cover all the different
techniques for letting yourself live as the character with which you
work, and still cover all the other information that needs covering. I
can, however, recommend two books to you that have helped me
more than words can ever say. They are: To the Actor by Michael
Chekhov and Audition by Michael Shurtleff. I cannot recommend
these books enough. If you are serious about becoming the best
actor/animator you can be, get them, study them, and practice them.
303
Chapter 12: Taking a Scene from Start to Finish
Note:
There’s a thing about actors, especially good stage actors. I’m
not talking about the grandiose ones who fill an auditorium with
their overblown presence. I’m talking about the ones who make
you believe they’re really there in that moment. There are many,
many things you can learn by studying these actors (and studying
acting itself), but what I’d like to make note of is that no matter
how many times a day they may have already gone through the
same material, you feel as if it is only just now happening to
them. You feel as if this set of events is only now coming into
being, and that their responses to these events are natural and
inevitable. They are merely continuing to make the same kinds of
decisions (on a moment-by-moment basis) that they’ve made all
their lives, the same kinds of decisions that have brought them to
this point right now. The “actor” may know what happens at the
end of the line or at the beginning of Act 3, but the character
lives in this one moment as we all do.
“…they are two sides of the same coin…or, being as there are so
many of us…the same side of two coins.”
— The Player, Rosencrantz and Guildenstern Are Dead
12.5 Thumbnail
While your “Do Not Disturb!” sign is still out, sketch out your
ideas. Do this as quickly as you can, still preserving as much of the
echoes of your visualization as you can. When you get done with
one set, do another and another. In the process of doing this
just-being-in-the-moment drawing, not trying to “get it right” or
“perfect,” you again link with the feelings you felt as you lived that
character.
All you’re trying to do is to put into a kind of shorthand the
things you’ll need for your mind to travel back to that place where
you walked with his feet, touched with his hands.
304
Chapter 12: Taking a Scene from Start to Finish
Note:
Small, fluid, strong, these drawings are your pitons; they’ll keep
you from falling.
12.6 Exposure Sheet
Before you go take down that “Get lost, Punk!” sign, reach for your
exposure sheet. Use the action line to make a visual notation of the
timing of the actions you’ve just been living. (If your project doesn’t
use X-sheets, I’ve included a 24 fps sheet in Extras\X-Sheet.jpg.)
Jot down this four-dimensional shorthand for the character and
any other items that may be moving or interacting with him. Notate
any camera motions you envisioned (clear them with the director,
and the scene planning and editorial departments before putting
them into play though). When you run your eyes down the sheet at
a presumed 24 fps, you should get a feeling that rings true to what
you felt in your visualization.
12.7 Animate
Using all you’ve learned, all your skills, and all your easy power,
hold the feelings you felt when you lived this scene close to you as
you work. With your thumbnails and your action line, you’ve got a
lot of the work of animation done already. You can let your mind
wander back to that visualization, and let the feelings you remember
help you to fit the hands into just the right shapes, sculpt the spine
into just the right arc, and swing the knees into just the right angle.
When what you see before you resonates with what you feel inside
you, you know you’re there.
305
Chapter 12: Taking a Scene from Start to Finish
Note:
The action line of your exposure sheet is your four-dimensional
thumbnail.
Note:
You are an actor. You are the character. Enjoy the luxury of
being him for as long as you’re working on this scene!
12.8 Examine
Look at your animation from all angles, not just the camera angle.
Make sure that each part reads plausibly and that the feelings you
get when you watch it are the feelings you felt when you visualized
how it would be to live that situation.
Let the animation play at speed, looping again and again. Let
your eyes focus on one part of his body as the scene repeats itself. If
there’s something in the motion of that part that catches your eye,
slow it down and examine it. Track its movement with dry erase
markers; is the motion exactly as it should be from all angles?
(Sometimes a “pop” is caused by a part of your character moving
improperly in Z, with respect to the camera, when the other two
axes are fine.)
Focus on each part of your character in turn, and then watch
your character as a whole. Are all the parts adding up to a sum that
radiates life and believability? Walk away from your scene for a
while; take a break. When you come back, look at it with fresh eyes.
Does anything jump out that didn’t before?
Examine, revise, repeat. Do this until the scene fits the criteria
both you and the director agreed upon. Do this until the feelings you
get from looking at the scene ring true with what you felt when you,
yourself, lived the same experience.
12.9 Critique
So, now you’re at a point where you want to get comments on your
work, comments from a fresh point of view. Make sure that you
seek comments from someone who knows what they’re talking
about, and that this someone knows how to look at partially com
-
pleted animation (if your work is still a work-in-progress).
Hopefully, these are all the same person, and hopefully, this person
is the director.
306
Chapter 12: Taking a Scene from Start to Finish
Have your notes ready for when the director (and his entourage
of yes-men and yes-women) comes to call. Refer back to your notes
if something doesn’t quite jive with what you thought he said the
last time you spoke. Be prepared to talk about where you are with
the scene, where you see it going, how you feel about where it is.
Talk with him about how it makes him feel. Jot down any notes, and
make sure you understand what he’s saying. If you feel you nailed
this scene spot-on, and the director isn’t quite happy with it yet, talk
about his vision for this scene and how it fits in with his plan for the
sequence. (Compromise is not capitulation, but it is he, the director,
who must be accountable for the vision of this production after all is
said and done.)
If your studio doesn’t incorporate dailies (where they call
together all the animation staff or the entire company to watch what
was completed the previous day or week), see what you can do to
encourage the powers that be to implement them. This is the best
way I know of to boost the quality of a production. Not only is
everyone more inclined to do their absolute best on the work they
did that day because everyone they work with is going to be seeing
it, but everyone shares ideas on how to solve problems from watch
-
ing each others’ works-in-progress. If you do have dailies every
single day, you really get to see how a scene evolves, you get to see
how the other animators think and solve problems, you see how
they develop their ideas. (I’ve also found that things I might not
307
Chapter 12: Taking a Scene from Start to Finish
Note:
Learning how to accept criticism is important. It is an acquired
skill, but it is one that everyone can learn. Remember that ani
-
mation is a team effort; what matters is the piece as a whole.
But also remember to consider the source. If you just asked
your cube-mate for a critique, and he mercilessly shredded all
your hard work, ask yourself if your animation, which you
thought was pretty darn good, threatens him or his position
within the company. (Unfortunately, the more you stick your
head out, the harder some people try to lop it off.) Seek criti
-
cism only from those people qualified to understand what
they’re looking at. Seek critiques only from those who genu
-
inely have your and the production’s best interests at heart.
have noticed to be wrong just make my skin crawl when I have oth
-
ers watch my work in dailies. This is a great flag for problem areas!)
The morale boost, the camaraderie, the learning that goes on in the
showing of dailies is something worth looking into.
12.10 Revise
Make it as perfect as you can. Don’t let anything that isn’t your
absolute best effort leave your desk. (Now and then, everyone does
something they aren’t completely happy with, but make sure you
put every effort into making it the best you can.) Compile the com
-
ments you’ve gotten, put them through the “Do they know what
they’re talking about” filter, and revise.
They say a painting is never finished, that it only stops in inter-
esting places. The same can be said for an animation. Even so,
scenes must move on, production must continue. Learn to work
your piece as a whole, exploring finer and finer details as the entire
scene reaches contiguous levels of quality; don’t fixate on the minu-
tia of a single slice of time. Allow the entirety of your scene to carry
the emotional read you felt in those quiet moments of touching
another’s soul.
308
Chapter 12: Taking a Scene from Start to Finish
Note:
The animation you do will outlast all of us. Make it something
to remember.
Chapter 13
Important Points for
Every Scene
What do you look for when you’re evaluating a scene you’ve done?
Almost every animator who’s been around the block a few times will
have something to say on the matter. And almost all that is to be said
revolves around the points developed by the great masters of
animation.
Use this list as a guideline to evaluate your work. (These points
are signposts to aim you back to Chapters 10 and 11 if you need more
detail on certain issues.) Scrutinize every detail to the best of your
ability. When everything falls together and all the points are properly
addressed, your work will begin to take on the same sheen of crafts-
manship and skill as those in feature-quality animation.
13.1 Composition/Design
When you sit back and look at what you’ve done, really sit back and
look at what you’ve done. Move your chair across your cubicle or
office and watch your work play out at a different size than what
you’ve grown accustomed to. Disassociate yourself from the
“groove” you’ve been working in, and try to see it as if for the first
time. Break it down into its basic compositional elements.
309
Watch your work play out through eyelids closed just enough so
your eyelashes meet. This gets rid of a lot of the detail information
and reduces what you’re seeing to the basic compositional ele
-
ments. This is how many painters break down the complexities of
painting alla prima (all at once, usually on location) into design
shapes they can more easily understand and make use of.
Watch your animation play out as a constantly transforming
composition. Its final presentation will most likely be on the 2D
plane of a screen of one kind of another. Evaluate your work with
the same criteria any other 2D artwork would have to adhere to.
(Your 2D piece just happens to evolve through time, that’s all.)
Watch the balance of positive (character) and negative (back
-
ground) shapes. Watch how wedges and other design elements lead
your eye around the piece as it plays out before you. Is your eye
being led to where you want it to go? Is your focus in the right
places to catch the important cues? Does your eye end up in a good
place to link with the following scene? Does your eye start in a
place that fits well with the preceding scene?
310
Chapter 13: Important Points for Every Scene
Note:
Another great thing you can do to help see what’s “hiding in
plain sight” is to mirror the image horizontally if you have
access to post-processing software. This is what you do when
you flip a drawing over and examine it on a light table. When
you reverse the image like this, every minute error that you
might have been content to live with leaps out at you. This stops
the rationalization of inaccurate balance, weight, and
proportion.
Note:
Use the flow of silhouettes and design elements to lead the
viewer’s eye just as in a still image!
Before you even begin to delve into the finer points of an anima
-
tion, its broad strokes must be strong, solid, and powerful enough to
carry your attention, powerful enough to carry the audience’s atten
-
tion. The audience may never know your usage of design and
composition to manipulate their perceptions; all they’ll know is that
your work feels powerful and they want to see more!
13.2 Appealing Poses
Your characters must first and foremost read clearly with the action
that is taking place. Second, and second only by a hair’s breadth, is
the need for them to appeal to the audience. Remember, appeal does
not mean cutesy! It means your audience must find some way to
relate to and empathize with the character and what he’s doing, how
he’s feeling, and what he’s thinking.
Your characters must read clearly as two-dimensional represen
-
tations of thoughts, ideas, and actions! Your primary tool in this area
is, what else, silhouette.
Squinting your eyes, as mentioned in the previous section, will
help you to lose the surface details of your character and see him
more as a silhouette. You can also render your animation in
Quickshade mode, saving out only the alpha channel and compiling
the frames into an animation to see how your silhouettes are
moving.
Examine your silhouettes for clarity of action, strength of
design (the balance of broad and fine details, curved and straight
lines, and clear shapes orchestrating the viewer’s focus), and appeal.
Your audience needs to understand your posing, find it interesting,
and be able to empathize.
311
Chapter 13: Important Points for Every Scene
Note:
If head and tail scenes (the scenes that sandwich yours) are
available to you as either animatics (timed storyboards with
camera motion) or final renders, compile a movie of all three
together. Watch the flow of your scene as it leaves the previous
one and enters the next.
13.3 Anticipation, Drag, Follow-Through
Do your character’s actions need to express the concepts of drawing
through time?
Do your characters anticipate their actions (in accordance with
who they are)? Do these anticipations help lead the viewer into the
action? Do the anticipations help build, accent, and punctuate the
rhythm of the scene?
Do your character’s body parts exhibit their own mass as their
individual momentums carry them along? Do they drag, unfurl, and
follow-through, each in its own time? Do your overlapping actions
add to the overall, believable fluidity of the piece?
13.4 Weight/Timing
Does your character, and everything you’re animating in the scene,
have the appearance of the weight and mass the audience would
imagine it to have?
Do your timings imply the extra “oomph” needed to get those
massive objects moving and then stopped again? Do your heavy
objects (and body parts) accelerate much more quickly toward the
ground than they do away from it?
Are your characters balanced, taking into account the perceived
mass and motion of the character, his action, and anything he may
be holding?
Have you used squash and stretch to give the audience that
subliminal shorthand of sensation, implying the forces impacting
your character?
312
Chapter 13: Important Points for Every Scene
13.5 Entertainment Value
Imagine looking at your scene through the eyes of someone who’s
never seen this production before. This someone may be consider
-
ing an extra tub of popcorn or another soda. Does your scene have
the riveting pull to keep him in his seat?
Are you presenting this scene in the most unique and entertain
-
ing way that is accurate for the character’s personality?
13.6 Characterization
Do you feel the character’s motivations, thoughts, dreams, and
non-verbal comments through watching him move in the scene?
Does he feel like the same guy you saw in the scene before?
Are his secondary actions serving to support his character? Are
the secondary actions letting the primary idea of the scene shine
through uncluttered?
313
Chapter 13: Important Points for Every Scene
Note:
Would anyone other than your mother want to see
this scene twice?
Note:
Acting, not action, and always in character!
13.7 Character Evolution
Has your character progressed along his story arc from the time
your scene began to the time your scene ends? Have the situations
evolved him subtly, almost imperceptibly?
13.8 Storytelling/The Distillation of
One Main Idea
Scenes in filmmaking serve one of three purposes: to develop the
mood, to develop the character(s), or to tell the story. Everything
else is distraction and should be done away with (hopefully before it
ever touches an animator’s hands). Your scene has one main pur
-
pose in this film. Make sure you understand what that purpose is
before starting work on the scene. And make sure that that one
main idea reads clearly through your scene; everything else is
support.
314
Chapter 13: Important Points for Every Scene
Note:
This can be a tricky one to nail. Subtlety is the key. As the say
-
ing goes, “It’s easier to show the transition of five hours than
five minutes.” Still, your character has to be in a continual state
of evolution in order to remain believable. Change is the only
constant. Your character must continually grow emotionally,
spiritually, and intellectually with everything he encounters in
order to possess that elusive spark of life. Developing an inner
dialogue that no one else need know about can help. But being
attuned to the script and to the overall arc of his character as
you work is key to getting these subtle changes to read, almost
unnoticed, as your scenes play out.
Note:
Is the reason for this scene being in the film clear?