LightWave 3D 8 Character Animation phần 5 docx
Bạn đang xem bản rút gọn của tài liệu. Xem và tải ngay bản đầy đủ của tài liệu tại đây (2.85 MB, 50 trang )
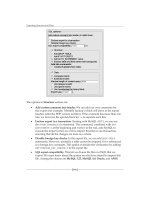
Knees/Elbows
Using IK Booster, you no longer need to rotate an *Elbow or *Knee
control to position the elbows and knees of your character. You can
simply grab the calf or forearm and physically move the knee or
elbow joint where you want it to be. (Doing this actually rotates the
*Knee and *Elbow bones to the applicable bank setting.)
190
Chapter 8: Using the Controls
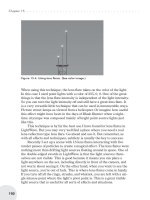
Figure 8.20
Note:
You’ll want to be very watchful when you’re manipulating knee and elbow
joints in this manner. Just as a little twist of the bank heading on the *Knee
and *Elbow controls themselves can swing that character’s knee or elbow
joint all over the place, so can the slightest twitch of your mouse here. It is
best to work in very small moves on only one axis at a time. And if you see
the knee or elbow joint swinging at a funky angle, it’s best to undo your
action and start again — until you click on *Knee or *Elbow in Rotate mode,
there’s no way of knowing if bank has just exceeded +/– 360°.
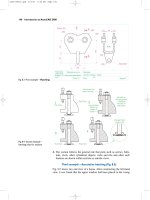
Shoulders/Hips
To shrug the character’s shoulders, or cave or expand his chest, just
grab the tip of a shoulder bone and drag it around.
191
Chapter 8: Using the Controls
Note:
Undoing in IK Booster seems to be a bit odd at the time of publication. When
I hit ^z to undo my last move in IKB, not only is that move undone, but also
the last move done using standard controls is also undone. I’ve found, how
-
ever, that by redoing (by pressing <z>) and then undoing again, the
standard control’s position is restored, and then only the IKB move is undone.
Figure 8.21
By grabbing and moving the base of a shoulder bone, you can tilt
the entire carriage this way and that. (Just remember that when you
do so, if you have chosen to have the Head a child of Spine1, the
Head will stay mostly in place since Spine3 does most of the moving
when manipulating the model in this fashion — it’s a minor tweak to
move the head back squarely on top of the shoulders.)
192
Chapter 8: Using the Controls
Figure 8.22
You can swing the hips and the entire carriage about by drag
-
ging one of the *Knee bones in 3D space.
193
Chapter 8: Using the Controls
Figure 8.23
Spine/Head
You can click and drag on any of the *Spine bones, moving the char
-
acter’s carriage with ease. (I’ve also repositioned the head in this
illustration.)
194
Chapter 8: Using the Controls
Figure 8.24
The Head has its control icon set to Move/Rotate so within IK
Booster it is only able to be moved. (It is recommended that you
control the head through the standard IK way of doing things, but if
you really need to position the head quickly without exiting IKB,
you can use its IKB control to do so.)
195
Chapter 8: Using the Controls
Figure 8.25
Hands/Feet
You can click and drag on the *Hand_Trans controls and move them
about in 3D space (just like the Head).
196
Chapter 8: Using the Controls
Figure 8.26
You can also click and drag on the handle at the tip of *Hand_
Rot to swing the hand up or down.
197
Chapter 8: Using the Controls
Figure 8.27
And, if you pull hard enough on a finger control, you can also get
the hand to swing up or down, following the direction of your pull.
198
Chapter 8: Using the Controls
Figure 8.28
Note:
The IKB controls discussed in Section 8.15 are the only ones I regularly use
under IK Booster. I use standard IK to manipulate all other controls.
Control Order
I’ve had a lot of people ask me which controls to move first when
I’m posing a character. To tell the truth, I don’t think most anima
-
tors think about it that much — we just move whatever needs
moving.
I believe strongly that there is no “right” or “wrong” way to do
anything, so long as it works for the person doing the doing, and
respects those who are affected by the doing.
But I can completely relate to someone who’s never seen this
plethora of controls and ways of working feeling overwhelmed with
the vast spread of choices, so I’ll walk you through how I’d strike a
simple pose.
“Start at the beginning, go on until you get to the end, then stop!”
— The Mad Hatter, Alice in Wonderland
199
Chapter 8: Using the Controls
Figure 8.29. As with all the other life drawing exercises, I’ll be working from a
pose created with the same controls I’ll be using to do the work myself — I know
I can strike this pose if I give myself enough time to do so.
200
Chapter 8: Using the Controls
Figure 8.30. The first thing I do, of course, is load the setup I’ve just completed,
then save it as a file prepped for revisions (*_v001.lws) into a working directory
so I can fiddle with things to my heart’s content.
201
Chapter 8: Using the Controls
Figure 8.31. Then, I swap out Thinguy_F for MrCool_Facial_F, the model used in
the pose I’ll be copying.
202
Chapter 8: Using the Controls
Figure 8.32. Next, I load in the life drawing model from Extras\Life_Drawing\
Objects\ICanFly.lwo. (And make sure I’ve got OpenGL Transparency enabled in
my Display Options.)
203
Chapter 8: Using the Controls
Figure 8.33. The first thing I’ll do is move the object itself to get my own
character close to the position of the life drawing model.
Note:
When I’m animating, I usually leave the object alone once I’ve got it in its
starting position — using only the controls to move the character around the
environment.
204
Chapter 8: Using the Controls
Figure 8.34. Then, moving and rotating Spine1 under standard IK, I line up the
waistline, using the belt as my point of reference.
205
Chapter 8: Using the Controls
Figure 8.35. Next, using Back and Top views, I position the hands with the
*Hand_Trans controls, rotating the hands only on their heading axis at the
moment.
206
Chapter 8: Using the Controls
Figure 8.36. Now, I get the feet into position the same way. (At the moment, I’m
not concerned with perfection, I’m just getting things “in the ballpark.”)
207
Chapter 8: Using the Controls
Figure 8.37. Next, I move and rotate the Head so it comes close to matching the
model.
Figure 8.38. Then, I start getting more precise with the hands and feet (using
heading and bank on *Hand_Trans and pitch on *Hand_Rotate).
208
Chapter 8: Using the Controls
Note:
I’ll often use the Center Selected Item button to help me quickly jump to an
item I want to manipulate in a Perspective viewport, sometimes just quickly
clicking the button on, then off, to “bull’s-eye” it and yet still let me adjust my
view to suit my needs.
Figure 8.39. Now I start using IK Booster and drag the fingers into their proper
positions.
209
Chapter 8: Using the Controls
Figure 8.40. Working on the spine comes next. Switching back and forth between
using IKB and standard IK controls (sometimes even actually moving the bones of
the spine if I feel it’s necessary to sculpt the pose I want), I begin to get more and
more precise with the accuracy.
There are no “right” or “wrong” ways of doing this…so long as
what you see is what you want. This is the way I usually work.
The real knack for this will come when you’ve done all the prac
-
tice exercises in this book, and you know on a gut level what each
control will do and when it is best to use it.
Like my mentor told me when I was working to get a more pol
-
ished, cleaned-up line to my drawings, your line quality will get
better when you know enough to not worry about your line.
210
Chapter 8: Using the Controls
Figure 8.41. Then, it’s just a matter of settling in for the long haul, continuing to
refine your “noodling,” working back and forth between standard IK and IK
Booster controls until the pose is what you want.
Chapter 9
Life Drawing — The
Next Logical Step
Life drawing? In 3D? You betchya! Life drawing is the best way to
learn how to break down shapes and to understand what is actually
going on to create those wonderfully complex and deceptively simple
poses. As you work with life drawing in 3D, you’ll begin to see
exactly what makes a pose look and feel the way it does.
Why does a good animation drawing have the emotional impact it
does? It has that kind of impact solely because of the poses the char-
acters are in. Animators are often considered draftsmen; there is no
more precise art form than animation. (In a standard-sized animation
drawing, the deviation of a line by even 1/32" can completely change
the emotional read of the drawing.) Yet, at the same time, everything
must appear effortless and inevitable. You achieve this level of profi-
ciency by mastering the sets of skills required. You master these
skills to the point that they become so much a part of you, you can’t
do anything but execute them perfectly, precisely, and without think
-
ing. All it takes to get to this level of proficiency in anything
(animation being no exception) is simply to practice at least a little
each and every day, to know where to start and how to proceed —
how to get to the “next logical step.”
211
Finding the next logical step is all getting anywhere with any
-
thing is. All of us can move steadily from one step to the next. We
all start this path the same way. The troublesome thing with these
next logical steps is that it is only when you begin to achieve mas
-
tery that you begin to understand what they are. Looking back from
the plateaus of mastery, you can see where all the steps were and
where you got lost along the way. From the plateaus of mastery, you
can also see the next logical steps that will carry you to where you
would like to be. (No matter how good others may think you are,
you must always, always be looking for that next logical step. There
is always something more.) This is why it is so vitally important for
teachers of anything to not only care about what they’re teaching
and be able to communicate it, but to have achieved a level of mas
-
tery to be able to see these steps. Mastering animation takes
humility, dedication, passion, and time. But with these steps, mas-
tery should not be painful; you should always be able to see your
path before you. Moving from one simple signpost to another, study-
ing and understanding, learning how to see motion, how to
understand the conveyance of feeling. Each step builds on the suc-
cessful completion of the last. Each next logical step has an “Aha!”
factor that is often so simple that it could all too easily hide forever
in plain sight.
And so the next logical step from where you are right now is to
get to know those controls you labored long to create. You need to
know them so well that they become second nature to you. (And if
there is something in the setup you simply cannot work with, go
back and change it until it feels right to your way of working.)
If, after going through the life drawing models in this chapter,
you still feel you need more life drawing experience before moving
on, flip to Chapter 14 where you’ll be directed to many more models
to “draw” from. (Don’t be afraid to go back and revisit these old
models. It’s always good, throughout your career, to go back and
reaffirm the things you know.) Move forward only when you feel
comfortable. Doing so will make the whole process of learning ani
-
mation that much more enjoyable and rewarding.
212
Chapter 9: Life Drawing — The Next Logical Step
9.1 The Standing Model
Posing a character is the art of translating what you have in your
mind into the 3D coordinates that will make your character fit that
vision.
Now, you might be asking, “How do I know where in 3D space
to put these things that I’m seeing on this flat, 2D page?” In very
short order, you’ll get the hang of being able to translate the subtle
-
ties of slight differences in angle and size on a page into 3D
coordinates. (LW’s grid lines are very helpful; I wish all life drawing
classes had their plinths marked with grid lines.) We’ll be starting
with a technique that will have you well on your way before you
know it.
On one project I was given hi-res scans of models I would even
-
tually have to animate. The project didn’t have the budget for
Paraform (a program designed to make animatable NURBS models
from hi-res scan data) and we knew the client was going to be a
stickler for having the models perfect. After reducing the poly count
somewhat with qemLOSS2, just to make the scans manageable on a
500 MHz PII, we changed the surface of the scanned model to be
213
Chapter 9: Life Drawing — The Next Logical Step
Figure 9.1. We’ll be
starting with a standing
model. The pose is
interesting enough to
keep us from getting
bored, but still easy
enough to be recreated
with relative ease.
partially transparent. We then built our subpatch model around that
framework. We could see exactly when our subpatch was passing
through the scanned model’s surface, and it turned out to be a
rather quick way of not only getting an animatable subpatch model,
but also in getting a whole lot better at modeling very quickly. (Run
-
ning my own studio, I’ve had to learn to wear a lot of hats to get jobs
out on time. I’ll always be a better animator and director than I’ll
ever hope to be a modeler, but every new thing you can add to your
set of skills is an asset.)
We’ll be using that same technique to get you started in life
drawing here. You’ll know when you have enough angle here,
enough distance there to support the character’s weight. You’ll
know when your character carries the essence of the pose, and
you’ll know when your character is spot-on. You’ll be able to turn
the view and explore from every angle. You’ll see, right there in
front of you, whether your model covers the drawing model or not!
1. Load in your setup scene and then save the scene as some-
thing that will let you know this is life drawing model 01.
(Scenes\Work\ch09\LifeDrawing_01_w01.lws works for me.)
2. Load in Objects\chapters\Ch_09\LifeDrawingModel_01.lwo.
214
Chapter 9: Life Drawing — The Next Logical Step
Figure 9.2. Your model and the pose you’ll put him into.