Inspection Evaluation And Repair Of Steel structures Part 13 docx
Bạn đang xem bản rút gọn của tài liệu. Xem và tải ngay bản đầy đủ của tài liệu tại đây (390.99 KB, 10 trang )
EM 1110-2-6054
1 Dec 01
GIRDER FLANGE
DIAPHRAGM
FLANGE
CRACK
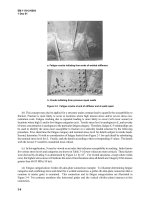
Figure 8-12. Cracked girder tension flange at diaphragm of a lift gate
(3) Repair alternatives.
(a) The ideal crack repair would also improve the fatigue strength of the detail and would eliminate
the out-of-plane distortion. However, to eliminate the displacement shown in Figure 3-5 would require
significant structural modification, and the cracking might not have occurred given connection details
with higher fatigue strength. The fatigue strength of the detail would be improved by providing a smooth
radius between the diaphragm flange and girder flange. This would improve the stress concentration
condition and could theoretically improve the fatigue strength from Category E to Category B (see
condition 16 of Table 2-1). The recommended repair is a combination of crack repair procedures shown
in Figures 8-3 and 8-4. First, repair the crack according to Figure 8-4 while following the guidelines for
welded crack repair given in paragraph 8-4a. Then add the radius plate and drill the hole as shown in
Figure 8-3 and as described in paragraph 8-6a(3).
(b) Another possible alternative would be to install a bolted repair similar to that shown in Figure 8-7
(a similar repair is described in paragraph 8-6c(3)). Before the bolted repair is installed, the crack tip
should be drilled and the diaphragm-flange-to-girder-flange weld should be removed to eliminate the
stress concentration.
(c) In the design of new gates, the low fatigue strength details could be eliminated by installing a skin
plate on the downstream face of the gate. This was done in a recent design of a vertical lift gate. Instead
of downstream bracing members, the new design called for a skin plate on the downstream face of the
gate.
g. Crack in vertical lift gate at uncoped web stiffener.
(1) Description of condition. A through-thickness crack that extends through the tension flange of a
built-up girder on a vertical lift gate is shown in Figure 8-13. The structure had been in service for less
than 2 years at the time the crack was discovered. The crack is located where an uncoped transverse web
stiffener is attached. The crack apparently initiated at the intersection of the three welds (web-to-flange,
8-19
EM 1110-2-6054
1 Dec 01
Figure 8-13. Cracked girder tension flange of a lift gate
stiffener-to-web, and stiffener-to-flange). Figure 8-14 shows the intersection of welds where the girder
web, girder flange, and stiffener are joined.
(2) Cause of cracking. The three intersecting welds (web-to-flange, stiffener-to-web, and stiffener-
to-flange) each contract during cooling and contain tensile residual stresses creating a state of triaxial
tension stress. Under the condition of triaxial tensile stress, steel cannot yield and an extremely brittle
condition exists. Additionally, at locations of intersecting welds, there is often a lack of fusion at the end
of one or both stiffener welds. This results in an embedded discontinuity. The fatigue category
considering girder flexure is a Category C for a stiffener coped per American Association of State
Highway and Transportation Officials (AASHTO) requirements (minimum cope dimension is required to
be at least 4 times the thickness of the web). However, the described condition has much lower fatigue
strength due to the increased brittleness and likelihood of embedded discontinuities. The use of uncoped
stiffeners should always be avoided; however, there are many such cases in existing USACE structures. A
similar condition exists in many vertical lift gates and miter gates where built-up girders and diaphragms
intersect. If the diaphragm web is not coped, intersecting welds exist (girder-web-to-girder-flange weld,
diaphragm-web-to-girder-web weld, and the diaphragm- web-to-girder-flange weld).
(3) Repair alternatives. Prior to cracking, a general retrofit for uncoped stiffeners is to drill a hole in
the stiffener adjacent to the intersection and grind all surfaces smooth. The drilled hole removes the weld
intersection and effectively serves as a cope. A similar type repair has been completed on web connection
plates that intersect with transverse web stiffeners (Fisher 1984). The actual repair of this condition
consisted of a bolted splice plate (Figure 8-15). Ideally, the stiffener should have been drilled near the
intersection (as previously described) before the splice plate was installed. Additionally, the crack tip
should have been located and drilled out. With this repair, the crack is isolated and the fatigue strength is
improved to Category B. It is possible that a welded repair (similar to that described in paragraph 8-6a(3)
for a crack that extends into the web), could have been completed. However, such a weld repair would
have been difficult or impossible with the existing stiffener located adjacent to the crack.
8-20
EM 1110-2-6054
1 Dec 01
Figure 8-14. Intersecting welds at web stiffener of the girder shown in Figure 8-13
Figure 8-15. Bolted repair splice for the girder shown in Figure 8-13
h. Cracked handrails.
(1) Description of condition. After less than 2 years of service, severe cracking occurred at
numerous locations on a welded steel handrail (Figure 8-16). The basic railing configuration is shown in
Figure 8-17. All railing consists of 38-mm (1-1/2-in.) stainless steel pipe. The top rails are continuous
and are fillet welded to the top of vertical posts. The bottom rails consist of segments of pipe fillet
welded at each end to the vertical posts. Considering flexure in the rails, the fatigue strength of the rails at
8-21
EM 1110-2-6054
1 Dec 01
FRACTURED RAIL
Figure 8-16. Cracked steel handrail
Figure 8-17. Steel handrail schematic (1 in. = 2.54 cm; 1 ft = 0.3 m)
the post is similar to Category C. Vertical cracks (perpendicular to the rails) located at the outer edges of
the posts occurred in the top and bottom rails at numerous locations. Several of the cracks propagated
through the pipe.
(2) Cause of cracking. Cracking is attributed to high cycle fatigue. A laboratory analysis was con-
ducted on one of the failed pipes to determine the cause of cracking. The analysis showed that the crack
8-22
EM 1110-2-6054
1 Dec 01
initiated at the weld toe and propagated to failure under high cycle vibration loading. Field observations
confirmed that the rails vibrated with significant midspan displacement when subjected to wind loading.
(3) Repair. The handrails were repaired with bolted tee and cross fittings fabricated to fit snugly
around the intersecting pipes (Figure 8-18). The fittings consist of two pieces that sandwich the pipe like
two halves of a sleeve to form a bolted splice. The first repair fittings were aluminum because steel
fittings were not available. Therefore, corrosion was also a consideration since stainless steel and
aluminum are dissimilar metals. To protect the aluminum from corroding, an electric isolater that
consisted of a thick epoxy-based paint was applied to the inside surface of the fittings. After 2 to 3 years,
the aluminum fittings had corroded significantly. The fittings have since been replaced with custom-
manufactured stainless steel fittings. This repair improved the original fatigue strength from Category C
to Category B. In addition, the rails are now more flexible since their end connections are no longer rigid.
This may improve the vibration problem (similar to the discussion of repair of the trashrack bars in
paragraph 8-6e).
Figure 8-18. Bolted tee connection retrofit of fractured hand rail
8-23
EM 1110-2-6054
1 Dec 01
A-1
Appendix A
References
A-1. Required Publications
ER 1110-2-100
Periodic Inspection and Continuing Evaluation of Completed Civil Works Structures
ER 1110-2-1150
Engineering and Design for Civil Works Projects
ER 1110-2-8157
Responsibility for Hydraulic Steel Structures
EM 1110-2-2105
Design of Hydraulic Steel Structures
EM 1110-2-2701
Vertical Lift Gates
EM 1110-2-2702
Design of Spillway Tainter Gates
EM 1110-2-2703
Lock Gates and Operating Equipment
EM 1110-2-3400
Painting: New Construction and Maintenance
CWGS 05036
Metallizing: Hydraulic Structures
CWGS 09940
Painting: Hydraulic Structures
American Association of State Highway and Transportation Officials 1996
American Association of State Highway and Transportation Officials. 1996. “Standard Specifications for
Highway Bridges,” Designation: AASHTO HB-16, 16
th
ed., Washington, DC.
ANSI/AWS B1.10
American National Standards Institute/American Welding Society. “Guide for the Nondestructive Inspection
of Welds,” Designation: ANSI/AWS B1.10-99, Miami, FL.
ANSI/AWS D1.1
American National Standards Institute/American Welding Society. “Structural Welding Code – Steel,”
Designation: ANSI/AWS D1.1-2000, Miami, FL.
ANSI/AWS QC1
American National Standards Institute/American Welding Society. “Standard for AWS Certification of
Welding Inspectors,” Designation: ANSI/AWS QC1-96, Miami, FL.
EM 1110-2-6054
1 Dec 01
A-2
American Society for Nondestructive Testing 1980
American Society for Nondestructive Testing. 1980. “Recommended Practice No. SNT-TC-1A,” Columbus,
OH.
ASTM A36M-97
American Society for Testing and Materials. “Specification for Carbon Structural Steel,” Philadelphia, PA.
ASTM A435/A435M
American Society for Testing and Materials. “Standard Specification for Straight-Beam Ultrasonic
Examination of Steel Plates,” Philadelphia, PA.
ASTM A514/A514M
American Society for Testing and Materials. “Specification for High-Yield-Strength, Quenched and
Tempered Alloy Steel Plate, Suitable for Welding,” Philadelphia, PA.
ASTM A517/A517M
American Society for Testing and Materials. “Specification for Pressure Vessel Plates, Alloy Steel High-
Strength, Quenched and Tempered,” Philadelphia, PA.
ASTM A572/A517M
American Society for Testing and Materials. “Specification for High-Strength Low-Alloy Columbium-
Vanadium Structural Steel,” Philadelphia, PA.
ASTM A577/A577M
American Society for Testing and Materials. “Standard Specification for Ultrasonic Angle-Beam Examination
of Steel Plates,” Philadelphia, PA.
ASTM D2688
American Society for Testing and Materials. “Standard Test Methods for Corrosivity of Water in the Absence
of Heat Transfer (Weight Loss Methods),” Philadelphia, PA.
ASTM E4
American Society for Testing and Materials. “Practices for Force Verification of Testing Machines,”
Philadelphia, PA.
ASTM E8
American Society for Testing and Materials. “Test Methods for Tension Testing of Metallic Materials,”
Philadelphia, PA.
ASTM E10
American Society for Testing and Materials. “Test Method for Brinell Hardness of Metallic Materials,”
Philadelphia, PA.
ASTM E18
American Society for Testing and Materials. “Test Methods for Rockwell Hardness and Rockwell Superficial
Hardness of Metallic Materials,” Philadelphia, PA.
ASTM E23
American Society for Testing and Materials. “Test Methods for Notched Bar Impact Testing of Metallic
Materials,” Philadelphia, PA.
EM 1110-2-6054
1 Dec 01
A-3
ASTM E30
American Society for Testing and Materials. “Test Methods for Chemical Analysis of Steel, Cast Iron, Open-
Hearth Iron, and Wrought Iron,” Philadelphia, PA.
ASTM E92
American Society for Testing and Materials. “Test Method for Vickers Hardness of Metallic Materials,”
Philadelphia, PA.
ASTM E94
American Society for Testing and Materials. “Guide for Radiographic Testing,” Philadelphia, PA.
ASTM E110
American Society for Testing and Materials. “Test Method for Indentation Hardness of Metallic Materials by
Portable Hardness Testers,” Philadelphia, PA.
ASTM E114
American Society for Testing and Materials. “Practice for Ultrasonic Pulse-Echo Straight-Beam Examination
by the Contact Method,” Philadelphia, PA.
ASTM E142
American Society for Testing and Materials. “Method for Controlling Quality of Radiographic Testing,”
Philadelphia, PA.
ASTM E164
American Society for Testing and Materials. “Practice for Ultrasonic Contact Examination of Weldments,”
Philadelphia, PA.
ASTM E165
American Society for Testing and Materials. “Test Method for Liquid Penetrant Examination,” Philadelphia,
PA.
ASTM E190
American Society for Testing and Materials. “Test Method for Guided Bend Test for Ductility of Welds,”
Philadelphia, PA.
ASTM E208
American Society for Testing and Materials. “Test Method for Conducting Drop-Weight Test to Determine
Nil-Ductility Transition Temperature of Ferritic Steels,” Philadelphia, PA.
ASTM E214
American Society for Testing and Materials. “Practice for Immersed Ultrasonic Examination by the Reflection
Method Using Pulsed Longitudinal Waves,” Philadelphia, PA.
ASTM E242
American Society for Testing and Materials. “Reference Radiographs for Appearances of Radiographic
Images as Certain Parameters Are Changed,” Philadelphia, PA.
ASTM E350
American Society for Testing and Materials. “Test Methods for Chemical Analysis of Carbon Steel, Low-
Alloy Steel, Silicon Electrical Steel, Ingot Iron, and Wrought Iron,” Philadelphia, PA.
EM 1110-2-6054
1 Dec 01
A-4
ASTM E399
American Society for Testing and Materials. “Test Method for Plane-Strain Fracture Toughness of Metallic
Materials,” Philadelphia, PA.
ASTM E709
American Society for Testing and Materials. “Guide for Magnetic Particle Examination,” Philadelphia, PA.
ASTM E747
American Society for Testing and Materials. “Practice for Design, Manufacture, and Material Grouping
Classification of Wire Image Quality Indicators (IQI) Used for Radiology,” Philadelphia, PA.
ASTM E999
American Society for Testing and Materials. “Guide for Controlling the Quality of Industrial Radiographic
Film Processing,” Philadelphia, PA.
ASTM E1025
American Society for Testing and Materials. “Practice for Design, Manufacture, and Material Grouping
Classification of Hole-Type Image Quality Indicators (IQI) Used for Radiology,” Philadelphia, PA.
ASTM E1032
American Society for Testing and Materials. “Method for Radiographic Examination of Weldments,”
Philadelphia, PA.
ASTM E1290
American Society for Testing and Materials. “Test Method for Crack-Tip Opening Displacement (CTOD)
Fracture Toughness Measurement.” Philadelphia, PA.
ASTM E1316
American Society for Testing and Materials. “Terminology for Nondestructive Examinations,” Philadelphia,
PA.
ASTM G46
American Society for Testing and Materials. “Guide for Examination and Evaluation of Pitting Corrosion.”
Philadelphia, PA.
ASTM G96
American Society for Testing and Materials. “Guide for On Line Monitoring of Corrosion in Plant Equipment
(Electrical and Electrochemical Methods),” Philadelphia, PA.
American Society of Mechanical Engineers 1978
American Society of Mechanical Engineers. 1978. “Rules for Inservice Inspection of Nuclear Power Plant
Components.” ASME Boiler and Pressure Vessel Code, Section XI, New York.
American Welding Society 1998a
American Welding Society. 1998a. “Standard Methods for Mechanical Testing of Welds,” Designation B4.0,
Miami, FL.
American Welding Society 1998b
American Welding Society. 1998b. “Standard Symbols for Welding, Brazing and Nondestructive
Examination,” Designation A2.4, Miami, FL.
EM 1110-2-6054
1 Dec 01
A-5
British Standards Institution 1980
British Standards Institution. 1980. “Guidance on Some Methods for the Derivation of Acceptance Levels for
Defects in Fusion Welded joints,” Designation: BS PD6493, London.
Burdekin et al. 1975
Burdekin, F. W., Harrison, J. D., Kanazawa, T., Mashida, S., Ekwall, B., Knokoly, T., and Muncher, L. 1975.
“Proposed Assessment Methods for Flaws with Respect to Failure by Brittle Fracture,” Welding in the World,
IIW-471-74(13).
Canadian Standard Association 1917
Canadian Standard Association. 1917. “Certification of Welding Inspectors,” Designation: CSA W178.2,
Rexdale, ON, Canada.
Greimann, Stecker, and Rens 1990
Greimann, L., Stecker, J., and Rens, K. 1990. “Management System for Miter Lock Gates,” Technical Report
REMR-OM-08,” prepared by Engineering Research Institute, Ames, IA, for U.S. Army Construction
Engineering Research Laboratories, Champaign, IL.
Pennsylvania Department of Transportation 1988
Pennsylvania Department of Transportation. 1988. “Guidelines for Fatigue and Fracture Safety Inspection of
Bridges,” Commonwealth of Pennsylvania, Department of Transportation, Bridge Management Systems
Division.
A-2. Related Publications
American Institute of Steel Construction 1989
American Institute of Steel Construction. 1989. “Allowable Stress Design Manual of Steel Construction,” 9
th
ed., Chicago, IL.
American Institute of Steel Construction 1994
American Institute of Steel Construction. 1994. “Load and Resistance Factor Design Manual of Steel
Construction,” 2
nd
ed., Chicago, IL.
American Railway Engineers Association 1992
American Railway Engineers Association. 1992. “Manual for Railway Engineering, Steel Bridges,”
Washington, DC.
ASTM A6/A6M
American Society for Testing and Materials. “Standard Specification for General Requirements for Rolled
Steel Plates, Shapes, Sheet Piling, and Bars for Structural Use,” Philadelphia, PA.
ASTM A7-33T
American Society for Testing and Materials. “Tentative Specifications for Steel for Bridges,” Philadelphia,
PA.
ASTM A7-39
American Society for Testing and Materials. “Standard Specifications for Steel for Bridges and Buildings,”
Philadelphia, PA.


