C# Bible 2002 phần 8 docx
Bạn đang xem bản rút gọn của tài liệu. Xem và tải ngay bản đầy đủ của tài liệu tại đây (637.58 KB, 55 trang )
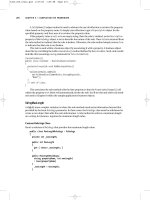
Listing 24-10: Use the FileInfo Class to Delete Files with Ease
using System;
using System.IO;
namespace rm
{
class Class1
{
static void Main(string[] args)
{
string [] cla = Environment.GetCommandLineArgs();
if (cla.GetUpperBound(0) == 1)
{
FileInfo fi = new FileInfo(cla[1]);
fi.Delete();
Console.WriteLine("File : " + cla[1]);
Console.WriteLine("Attributes: " + fi.Attributes.ToString());
Console.WriteLine("File Deleted ");
}
else
Console.WriteLine ("Usage: rm <filename>");
}
}
}
As with the previous examples, you are storing the command-line arguments within a string
array. If that array does not contain the correct number of elements, you simply display a
usage message and exit.
Tip By using the Delete() method of the FileSystemInfo class, you can delete directories as
well as files.
After calling the Delete() method of the FileInfo class, you can display the filename and its
attributes to the user, indicating that it was deleted. Using the Attributes property, you can
safely determine, before the file is deleted, if it has a Read-Only attribute set. If so, you can
prompt the user and/or remove the Read-Only attribute using the Attributes property along
with the FileAttributes enumerator.
After your program is compiled, go to a command prompt and test it. Simply type rm
followed by the filename to delete. The results should resemble those in Figure 24-6.
Moving files
The MoveTo() method of the FileInfo class actually encapsulates two different methods:
CopyTo() and Delete(). After a file is copied to the appropriate filename or directory,
MoveTo() simply deletes the file much as the Delete() method does.
The following sample application accepts two command-line arguments: Source Filename
and Destination Filename. After the file is moved, the program displays when the file was
actually created and where the file was moved to. Neither of these outputs has a practical use
except to demonstrate how the certain attributes can be obtained, such as the creation time
using the CreationTime property.
Figure 24-6: The Delete( ) method of the FileInfo class shows the attributes of the deleted
file.
Start a new C# console application and name this project mv, after the UNIX-based command
of the same name. Listing 24-11
shows the application in its entirety.
Listing 24-11: File Move Implementation
using System;
using System.IO;
namespace mv
{
class Class1
{
static void Main(string[] args)
{
string [] cla = Environment.GetCommandLineArgs();
if (cla.GetUpperBound(0) == 2)
{
FileInfo fi = new FileInfo(cla[1]);
fi.MoveTo(cla[2]);
Console.WriteLine("File Created : " + fi.CreationTime.ToString());
Console.WriteLine("Moved to : " + cla[2]);
}
else
Console.WriteLine ("Usage: mv <source file> <destination file>");
}
}
}
Figure 24-7 shows the output from your File Move utility.
Figure 24-7: Move files with the MoveTo method of the FileInfo class.
Note that in this example, the destination filename can be either a filename or a directory
name. If a directory name is specified, the file is moved. If a filename is present, the file is
renamed and/or moved. The MoveTo() method essentially incorporates copy and rename
functions in one method.
Accessing the Registry
Registry access was rather burdensome with the Windows API. C# provides you with some
class objects that enable you to read and write to and from the Registry with ease. Using the
Registry provides several benefits over older methods, such as text-based INI files. Because
the Registry is indexed, searching for keys is fast. The Registry is a structured "document,"
which allows for structured information, such as a database, just to name one type.
Reading Registry keys
Registry access functionality is contained within the Microsoft.Win32 namespace, so you
need to include this namespace in all your projects by entering the following line at the top of
your source code file:
using Microsoft.Win32;
To read a Registry key, you must use the RegistryKey object. To begin exploring this object,
examine Listing 24-12, an application that retrieves two pieces of information from the
Registry.
Listing 24-12: Retrieve the CPU Type and Speed from the Registry
using System;
using Microsoft.Win32;
namespace CPUInfo
{
class Class1
{
static void Main(string[] args)
{
RegistryKey RegKey = Registry.LocalMachine;
RegKey = RegKey.OpenSubKey(
"HARDWARE\\DESCRIPTION\\System\\CentralProcessor\\0");
Object cpuSpeed = RegKey.GetValue("~MHz");
Object cpuType = RegKey.GetValue("VendorIdentifier");
Console.WriteLine("You have a {0} running at {1}
MHz.",cpuType,cpuSpeed);
}
}
}
When instantiating an instance of the RegistryKey, you set it equal to a member of the
Registry class. The preceding example sets the RegistryKey object equal to the
Registry.LocalMachine field, which enables you access to the HKEY_LOCAL_MACHINE
base key. Table 24-3
contains a list of all public fields within the Registry class.
Table 24-3: Public Fields Within the Registry Class
Field Description
ClassesRoot ClassesRoot defines the types of documents and the properties
associated with those types. This field starts in the Windows
Registry from the key HKEY_CLASSES_ROOT.
CurrentConfig CurrentConfig contains information pertaining to your computer's
hardware. This field starts in the Windows Registry from the key
HKEY_CURRENT_CONFIG.
CurrentUser All preferences for the current user are stored here. This field starts
in the Windows Registry from the key HKEY_CURRENT_USER.
DynData DynData.
LocalMachine LocalMachine contains configuration information for the computer.
This field starts in the Windows Registry from the key
HKEY_LOCAL_MACHINE.
PerformanceData The base key stores performance-related information about the
different software components. This field starts in the Windows
Registry from the key HKEY_PERFORMANCE_DATA.
Users This base key contains information that will be applied to a default
user's configuration. This field starts in the Windows Registry from
the key HKEY_USERS.
After you establish your RegistryKey object, you call its OpenSubKey() method and provide
the key that you want to open. In this particular case, you want to navigate to the
HKEY_LOCAL_MACHINE\HARDWARE\DESCRIPTION\System\Central\Processor\0\
key and read two values from that key. Keep in mind that you must include double backslash
characters in the string, so that they are not interpreted as an escape character.
After you open the subkey, issue the following two lines of code to retrieve the "~MHz" and
"VendorIdentifier" values within that subkey:
Object cpuSpeed = RegKey.GetValue("~MHz");
Object cpuType = RegKey.GetValue("VendorIdentifier");
Now you have the values stored within the appropriate variables, so you can display the
information on the screen. Test the program from a console window, as shown in Figure 24-8.
Figure 24-8: The RegistryKey class simplifies the reading of important information from the
Registry.
Those of you running on multiple processor machines can obtain a list of all processors by
enumerating the CentralProcessor key. You find a subkey within CentralProcessor for each
CPU contained within your machine.
Writing Registry keys
Creating and writing Registry keys is also accomplished using the RegistryKey object.
Several methods in the RegistryKey class are useful when writing keys. Table 24-4 describes
the purpose of some of the more prevalent members.
Table 24-4: Common RegistryKey Members
Name Type Description
SubKeyCount Property This property retrieves a count of the subkeys
for the current key.
ValueCount Property This property retrieves a count of the number of
values for the current key.
Close Method This method closes the current key. If changes
have been made to the key, changes are flushed
to disk.
CreateSubKey Method This method creates a new subkey if one doesn't
exist, or opens the subkey if it does exist.
DeleteSubKey Method This method deletes a subkey. This method is
overloaded and contains a Boolean parameter
that allows an exception to be thrown if the key
cannot be found.
DeleteSubKeyTree Method This method deletes a subkey and all child
subkeys recursively.
DeleteValue Method This method deletes a value from a key. This
method is overloaded and contains a Boolean
parameter that allows an exception to be thrown
if the value is missing.
GetSubKeyNames Method This method returns a string array containing all
subkey names.
GetValue Method This method retrieves a value for a specific key.
This method is overloaded and contains a
parameter that permits a default value. If the
value for a key is not found, the default value
you specify will be returned.
GetValueNames Method This method returns a string array containing all
values for the specified key.
OpenSubKey Method This method opens a subkey for processing
(read/write access).
SetValue Method This method sets a value for a key. To set the
default value for a key, set the subKey
parameter to an empty string.
Caution Writing values can be dangerous and can cause your system to become unresponsive
if care is not taken. Double-check all code before testing any application that writes
values to the Registry.
Listing 24-13 shows a simple application that writes two values to the Registry and then reads
those values back in to display them.
Listing 24-13: Write a Text and DWord Value to the Registry
using System;
using Microsoft.Win32;
namespace WriteRegValues
{
class Class1
{
static void Main(string[] args)
{
RegistryKey RegKeyWrite = Registry.CurrentUser;
RegKeyWrite = RegKeyWrite.CreateSubKey
("Software\\CSHARP\\WriteRegistryValue");
RegKeyWrite.SetValue("Success","TRUE");
RegKeyWrite.SetValue("AttemptNumber",1);
RegKeyWrite.Close();
RegistryKey RegKeyRead = Registry.CurrentUser;
RegKeyRead = RegKeyRead.OpenSubKey
("Software\\CSHARP\\WriteRegistryValue");
Object regSuccessful = RegKeyRead.GetValue("Success");
Object regAttemptNumber = RegKeyRead.GetValue("AttemptNumber");
RegKeyRead.Close();
if ((string)regSuccessful == "TRUE")
Console.WriteLine("Succeeded on attempt # {0}",regAttemptNumber);
else
Console.WriteLine("Failed!");
}
}
}
After you create a RegistryKey object, you can create a new subkey with the CreateSubKey()
method. Ensure that when using this method, you use double backslash characters, so the
compiler doesn't interpret the characters as an escape sequence. In this example, you are
creating a new key under HKEY_CURRENT_USER. Store your values in the
\Software\CSHARP\WriteRegistryValue subkey.
With the new key in place, use the SetValue() method to specify the name of the value and the
actual value. This example, stores text in the Success value and a DWord in the
AttemptNumber value. After the values are set, it's best to close the key in case of a power
outage or similar failure. At this point, the changes have been committed to the Registry. If
you open RegEdit and navigate to the proper key, you should see the values shown in Figure
24-9.
Figure 24-9: RegEdit reveals that your values have been saved.
As with the previous example, you now create a new RegistryKey object and read the values
back in. If the Success value is in fact True, you display the information on the screen, as
shown in Figure 24-10.
Figure 24-10: Keys read from the Registry are displayed on the console.
This application demonstrates a simple technique for writing values to the Registry. This
method would prove useful for keeping track of program settings, recording the last position
and size of your applications interface, and so on. The possibilities are endless.
Enumerating Registry keys
Enumerating Registry keys is a lot like the Find Files feature in Windows. It enables you to
scan from any point in the Registry and retrieve all subkeys and values below that starting
point.
No methods are currently incorporated into .NET to enumerate Registry keys; it is up to you
to build functions to support your needs. Knowing the structure of the keys you want to
enumerate makes things much easier, as you can simply use a loop. If the structure of the
Registry entries is unknown, you have to create a function that can call itself and pass the
starting key in each time it is called.
Listing 24-14 is an example of enumerating Registry keys. In this example, you scan the
Registry for a list of all software installed on the computer. This program lists any application
that shows up in the Add/Remove section of the Control Panel.
Listing 24-14: Enumerating Registry Keys
using System;
using Microsoft.Win32;
namespace Installed
{
class Class1
{
static void Main(string[] args)
{
RegistryKey myRegKey=Registry.LocalMachine;
myRegKey=myRegKey.OpenSubKey
("SOFTWARE\\Microsoft\\Windows\\CurrentVersion\\Uninstall");
String [] subkeyNames = myRegKey.GetSubKeyNames();
foreach (String s in subkeyNames)
{
RegistryKey UninstallKey=Registry.LocalMachine;
UninstallKey=UninstallKey.OpenSubKey
("SOFTWARE\\Microsoft\\Windows\\CurrentVersion\\Uninstall\\" + s);
try
{
Object oValue=UninstallKey.GetValue("DisplayName");
Console.WriteLine(oValue.ToString());
}
catch (NullReferenceException)
{
}
}
}
}
}
After you have created a RegistryKey object, you open the Uninstall subkey, which contains a
list of all programs installed. From here, you use GetSubKeyNames, which returns a string
array of all subkeys. Now that you have your list of subkeys, you use the foreach operator to
iterate through all elements in your subkey string array.
When you iterate through each key, you search for a value called DisplayName. This
DisplayName value is the name that is shown in the Add/Remove Programs section of the
Control Panel. Remember that not all keys will have this value. Therefore, you must
encapsulate your GetValue method with a try catch statement to catch any exceptions that
may occur. After a DisplayName value is found, you retrieve the value and display it on the
screen. The foreach statement then moves on to the next Registry key contained in the string
array.
Press F5 to try the application. You'll probably see a long list of applications scroll by as the
program scans the Registry (see Figure 24-11).
Figure 24-11: Scan all installed applications with a Registry enumerator.
One thing that you did not tackle in this program is arranging the applications alphabetically.
The items in the Registry are not stored in this manner, but to overcome this, you could
simply store the results within a string array and call the Sort method to arrange the output in
any manner allowed.
Summary
The .NET Framework has greatly reduced the amount of code and time it takes to effectively
deal with files and the Windows Registry. Among the many benefits that the .NET
Framework, you now have access to components such as the FileSystemWatcher which
enables you to watch a file system for changes made to any file. You must take care, however,
when writing applications that deal with the Windows Registry because accidentally
removing Registry keys can cause your system to become unstable or even inoperable.
Chapter 25: Accessing Data Streams
In This Chapter
The .NET Framework ships with classes that provide a high level of support for reading and
writing data. Traditionally, languages have provided built-in support for reading and writing
to disk-based files, and have relied on operating system programming interfaces to provide
support for reading and writing to other types of data streams, such as network sockets or
memory-based files. The .NET Framework unifies data I/O by providing a common set of
classes that support data reads and writes regardless of the underlying storage mechanism
used to provide the data access. All of these classes can be used from C# code.
In this chapter, you learn to use streams. You learn how to use readers and writers to read data
from and write data to a stream and how to perform file operations in the background.
Understanding the Data I/O Class Hierarchy
Figure 25-1 illustrates the class hierarchy for the basic .NET Framework classes used in data
I/O work. The classes are grouped into one of three categories: streams, writers, and readers.
Figure 25-1: Data I/O class hierarchy
Using streams
Stream classes provide a mechanism for referring to a data container. Stream classes share a
common base class called Stream, which is defined in a .NET Framework namespace called
System.IO. The Stream base class contains properties and methods that enable callers to work
with the data stream.
The .NET Framework ships with several classes that derive from the base Stream class. Each
class provides a specific implementation of a data stream used for a particular environment.
The FileStream class, for example, provides an imple- mentation that enables callers to work
with streams of data tied to a disk-based file. Similarly, the NetworkStream class provides an
implementation that enables callers to work with streams of data accessed over a network.
Using writers
Streams support data access at the byte level. They include methods called Read() and
Write(), which work with an array of bytes that are processed during the call. However,
working at the byte level might not be ideal for your application. Suppose, for example, that
your application needs to write a series of integers to a stream. Because integers in the 32-bit
implementation are four bytes wide, your C# code would need to translate each integer into a
string of four bytes that could be used in a call to the stream's implementation of Write(). The
.NET Framework includes writer classes that support writing various higher-level data types
to a stream. A writer might support many overloads of a Write() method. For example, a write
can accept such data types as int, long, or double. The writer class implementations translate
the data type into a series of bytes and pass that translated byte stream to a Stream object. This
class design frees your code from having to deal with streams at the byte level. Your C#
application code can simply state, "write this unsigned long into the stream," for example, and
enable the writer class to do the work needed to get the value stored into the stream as a series
of bytes.
Using readers
Reader classes complement the writer classes. Like the writer classes, reader classes provide
support for reading data types that transcend the simple byte array support offered by stream
classes. A matching reader class complements each writer class in the .NET Framework.
Reader classes provide several overloads of a Read() method that enables your application
code to read several types of data, such as strings, integers, longs, and so on.
Working with Streams
Streams support two methods of I/O:
• Synchronous I/O, in which method calls that perform stream I/O do not return to the
caller until the requested I/O operation is complete
• Asynchronous I/O, in which method calls that perform stream I/O return before the
requested operation is complete and notify the caller about the operation's completion
at a later time
Understanding synchronous I/O
Listing 25-1 illustrates synchronous stream I/O. It creates a file and writes 256 bytes of binary
data into the file. It then reads the 256 bytes back from the file and ensures that the data read
matches the data written.
Listing 25-1: Synchronous File I/O
using System;
using System.IO;
class FileTestClass
{
private FileStream BinaryFile;
private byte [] ByteArray;
public FileTestClass()
{
BinaryFile = new FileStream("test.dat", FileMode.Create,
FileAccess.ReadWrite);
ByteArray = new byte [256];
}
public void WriteBytes()
{
int ArrayIndex;
for(ArrayIndex = 0; ArrayIndex < 256; ArrayIndex++)
ByteArray[ArrayIndex] = (byte)ArrayIndex;
BinaryFile.Write(ByteArray, 0, 256);
}
public bool ReadBytes()
{
int ArrayIndex;
BinaryFile.Seek(0, SeekOrigin.Begin);
BinaryFile.Read(ByteArray, 0, 256);
for(ArrayIndex = 0; ArrayIndex < 256; ArrayIndex++)
{
if(ByteArray[ArrayIndex] != (byte)ArrayIndex)
return false;
}
return true;
}
}
class MainClass
{
static public void Main()
{
FileTestClass FileTest = new FileTestClass();
bool ReadTest;
FileTest.WriteBytes();
ReadTest = FileTest.ReadBytes();
if(ReadTest == true)
Console.WriteLine("The readback test was successful.");
else
Console.WriteLine("The readback test failed.");
}
}
Listing 25-1 implements two C# classes: FileTestClass, which contains the stream I/O code,
and MainClass, which contains the application's Main() method. The Main() method creates
an object of the FileTestClass class and asks the object to write and read data.
The FileTestClass class contains a private member representing a FileStream object. The
class's constructor creates a new FileStream object using a constructor that accepts three
arguments:
• The pathname of the file stream to be operated on
• A file operation mode specification
• A file access mode specification
The file operation mode specification is represented by an enumeration named FileMode. The
FileMode enumeration is found in the .NET System.IO namespace and supports the following
enumeration members:
• Append, which instructs the file stream class to open the named file if it exists. If the
named file exists, the file stream class initializes itself to write data to the end of the
existing file. If the named file does not exist, the class creates a new file with the
specified name.
• Create, which instructs the file stream to create the named file. If the file already
exists, it is overwritten.
• CreateNew, which, like Create, instructs the file stream to create the named file. The
difference between CreateNew and Create is how existing files are handled. If the file
already exists when CreateNew is specified as the file mode, the file stream class
throws an exception of class IOException.
• Open, which instructs the file stream to open the named file.
• OpenOrCreate, which instructs the file stream to create the named file. If the named
file already exists, the FileStream object opens the named file.
• Truncate, which instructs the file stream to open the named file and then immediately
truncate it so that its size is zero bytes.
The file access mode specification is represented by an enumeration named FileAccess. The
FileAccess enumeration is also found in the .NET System.IO namespace and supports the
following enumeration members:
• Read, which specifies that the FileStream class should allow read access to the named
file. Data can be read from the file, but not written to the file.
• ReadWrite, which specifies that the FileStream class should allow both read and write
access to the named file.
• Write, which specifies that the FileStream class should allow write access to the
named file. Data can be written to the file, but not read back.
The FileTestClass constructor shown in Listing 25-1
creates a new file stream that manages a
file named test.dat. The file is opened in creation mode for read/write access.
The WriteBytes() method of the FileTestClass populates a 256-byte buffer, which is created
by the class's constructor. It populates the buffer with 256 bytes with values from hex 00 to
hex FF. The buffer is then written to the stream with the file stream method Write(). The
Write() method accepts three arguments:
• A reference to the byte buffer containing the data to be written
• An integer specifying the array element of the first byte in the buffer to be written
• An integer specifying the number of bytes to be written
The Write() method is synchronous, and the method does not return until the data has actually
been written to the stream.
The ReadBytes() method of the FileTestClass reads the 256 bytes written by WriteBytes() and
compares the bytes with the byte pattern implemented by WriteBytes().
The first operation that the ReadBytes() method performs involves moving the stream pointer
back to the beginning of the file. Stream positioning is an important concept and deserves
special mention. Streams support the concept of file positioning. A stream position refers to a
position in the stream where the next I/O operation will take place. Usually, a stream position
is set to the beginning of a stream when the stream is initialized. As data is read from or
written to the stream, the stream position is advanced to the position just beyond the last
operation.
Figure 25-2 illustrates this concept. It shows a stream with six bytes of data.
Figure 25-2: Stream I/O advances the stream position.
When the stream is initially opened, the stream position points to the first byte in the stream.
This is illustrated in the top diagram in Figure 25-2. Suppose that the code that manages the
stream reads three bytes from the file. The three bytes are read, and the stream position will
point to the byte just beyond the last read position. Using this example, the stream position
points to the fourth byte in the stream. This is illustrated in the bottom diagram in Figure 25-2.
The issue with the code in Listing 25-1 has to do with the fact that a file is created and 256
bytes are written to the file. After the bytes are written, they are read back. However, it is
important to remember two stream positioning concepts:
• The file position is updated after every read or write operation to point to a position
just beyond the last operation.
• Read and write operations start at the byte referenced by the stream position.
When the code in Listing 25-1 creates the new file stream, the file position is set to the
beginning of the (empty) file. After the 256 bytes are written, the file position is updated to
reference the position just after the 256 bytes. If the code were to read the 256 bytes just after
the write operation, the read operation would fail because the stream position points to the end
of the file after the write operation, and a read operation would attempt to read 256 bytes
starting at that position, and there are no bytes available for reading at that position. The code
needs to say, "before the read operation begins, adjust the file pointer back to the beginning of
the stream so that the read operation is successful."
A method in the Stream class called Seek() accomplishes this task. The Seek() method
enables your code to move, or seek, the stream position to any available in the stream. The
Seek() method takes two parameters:
• A long integer, specifying a positioning offset in bytes
• A value from an enumeration called SeekOrigin, which specifies the stream position
that should be used as the starting point for the seek operation
The SeekOrigin enumeration is declared in the System.IO namespace and supports the
following values:
• Begin, which indicates that the seek operation should be performed relative to the
beginning of the stream
• Current, which indicates that the seek operation should be performed relative to the
current stream position
• End, which indicates that the seek operation should be performed relative to the end of
the stream
The Seek() method adjusts the stream position so that it points to the stream position
referenced by the SeekOrigin enumeration, which is then offset by the specified number of
bytes. The byte offset used in the Seek() method can be positive or negative. The following
example uses a positive offset value:
File.Seek(4, SeekOrigin.Begin);
The preceding line adjusts the stream pointer to point to four bytes beyond the beginning of
the stream. Positive offset values move the stream pointer toward the end of the stream. The
following example uses a negative offset value:
File.Seek(-2, SeekOrigin.End);
This example adjusts the stream pointer to point to two bytes before the end of the stream.
Negative offset values move the stream pointer toward the beginning of the stream.
The code in Listing 25-1
uses the following seek code before the 256 bytes are read:
BinaryFile.Seek(0, SeekOrigin.Begin);
This call adjusts the stream pointer back to the beginning of the stream. When the read
operation begins, it starts reading from the beginning of the stream.
The ReadBytes() method uses the FileStream method called Read() to perform synchronous
read I/O on the stream. The Read() method accepts three arguments:
• A reference to the byte buffer to be used to contain the bytes read from the stream
• An integer specifying the array element of the first byte in the buffer to contain data
read from the stream
• An integer specifying the number of bytes to be read
The Read() method is synchronous and does not return until the data has actually been read
from the stream. When the read operation is complete, the code checks the byte pattern found
in the array to ensure that it matches the byte pattern that was written.
Understanding asynchronous I/O
Listing 25-2 is a modification of Listing 25-1 that illustrates asynchronous I/O. Unlike
synchronous I/O, in which calls to read and write operations do not return until the operation
is complete, calls to asynchronous I/O operations return soon after they are called. The actual
I/O operation is performed behind the scenes, on a separate thread created by the
implementation of the asynchronous I/O methods in the .NET Framework, and your code is
notified when the operation is complete through a delegate. The advantage to asynchronous
I/O is that your main code need not be tied up waiting for an I/O operation to complete.
Performing lengthy I/O operations in the background frees your application to perform other
tasks, such as processing Windows messages in Windows Forms applications.
Listing 25-2: Synchronous Writing, Asynchronous Reading
using System;
using System.IO;
using System.Threading;
class FileTestClass
{
private FileStream BinaryFile;
private byte [] ByteArray;
private IAsyncResult AsyncResultImplementation;
private AsyncCallback ReadBytesCompleteCallback;
public FileTestClass()
{
AsyncResultImplementation = null;
BinaryFile = new FileStream("test.dat", FileMode.Create,
FileAccess.ReadWrite);
ByteArray = new byte [256];
ReadBytesCompleteCallback = new AsyncCallback(OnReadBytesComplete);
}
public void WriteBytes()
{
int ArrayIndex;
for(ArrayIndex = 0; ArrayIndex < 256; ArrayIndex++)
ByteArray[ArrayIndex] = (byte)ArrayIndex;
BinaryFile.Write(ByteArray, 0, 256);
}
public void ReadBytes()
{
BinaryFile.Seek(0, SeekOrigin.Begin);
AsyncResultImplementation = BinaryFile.BeginRead(ByteArray, 0, 256,
ReadBytesCompleteCallback, null);
}
public void OnReadBytesComplete(IAsyncResult AsyncResult)
{
int ArrayIndex;
int BytesRead;
int Failures;
BytesRead = BinaryFile.EndRead(AsyncResult);
Console.WriteLine("Bytes read : {0}", BytesRead);
Failures = 0;
for(ArrayIndex = 0; ArrayIndex < 256; ArrayIndex++)
{
if(ByteArray[ArrayIndex] != (byte)ArrayIndex)
{
Console.WriteLine("Read test failed for byte at offset
{0}.",
ArrayIndex);
Failures++;
}
}
Console.WriteLine("Read test failures: {0}", Failures);
}
public void WaitForReadOperationToFinish()
{
WaitHandle WaitOnReadIO;
WaitOnReadIO = AsyncResultImplementation.AsyncWaitHandle;
WaitOnReadIO.WaitOne();
}
}
class MainClass
{
static public void Main()
{
FileTestClass FileTest = new FileTestClass();
FileTest.WriteBytes();
FileTest.ReadBytes();
FileTest.WaitForReadOperationToFinish();
}
}
Reading asynchronously
Listing 25-2
builds on the example shown in Listing 25-1 by performing the read operation
asynchronously. The write operation is still performed synchronously. The stream is
initialized in the same manner regardless of the way I/O is performed. Streams can be
operated on in a synchronous manner for all I/O operations, in an asynchronous manner for all
I/O operations, or in a combination of synchronous and asynchronous manners.
The write operations code in Listing 25-2 is handled synchronously, and its code is identical
to the write operations code in Listing 25-1. The read operation, however, is quite different.
The read operations code in Listing 25-2 starts not with a call to the stream's synchronous
Read() method but with a call to the stream's asynchronous BeginRead() method. This call
accepts five parameters. The first three parameters match the parameters accepted by the
synchronous Read() method, but the last two parameters are new:
• A reference to the byte buffer to be used to contain the bytes read from the stream
• An integer specifying the array element of the first byte in the buffer to contain data
read from the stream
• An integer specifying the number of bytes to be read
• Call-specific data
The callback delegate must be an object of a class called AsyncCallback. The AsyncCallback
class is declared in the .NET Framework System namespace and manages a method that
returns nothing and accepts a reference to an interface called IAsyncResult. Listing 25-2
creates an instance of this delegate in the constructor of the FileTestClass class:
ReadBytesCompleteCallback = new AsyncCallback(OnReadBytesComplete);
The FileTestClass class in Listing 25-2 includes a new method called
OnReadBytesComplete(), which is used as the delegate method. The Stream object invokes
this delegate when the read operation is complete.
The IAsyncResult interface, which is used as the parameter to the AsyncCallback delegate, is
defined in the .NET Framework System namespace. It supports four properties that can be
used to obtain more information about the nature of the asynchronous operation:
• AsyncState, which is a reference to the object that was provided as the last parameter
of the BeginRead() method. The asynchronous I/O methods enable you to associate
data with a specific operation in the last parameter to the I/O method. A copy of that
data is available in the AsyncState property. Listing 25-2 has no need for data to be
associated with the call, so it passes null as the last parameter to BeginRead(). As a
result, the AsyncState property also has a value of null. You might want to use this
data, for example, to distinguish one I/O call from another. It is legal for you to use the
same delegate reference in multiple asynchronous I/O calls, for instance, and you
might want to pass along data that distinguishes one call from another.
• AsyncWaitHandle, which is a reference to an object of class WaitHandle. The
WaitHandle class is declared in the .NET Framework System.Threading namespace.
This object encapsulates a synchronization primitive and serves as a base class for
specific primitives, such as mutexes and semaphores. Your code can wait on this
handle to determine when the read operation actually completes. The code in Listing
25-2 does just that.
• CompletedSynchronously, which is a Boolean that is set to True if the BeginRead()
call completed synchronously, and False otherwise. Most stream implementations
return False for this property when the interface references an asynchronous I/O
operation.
• IsCompleted, which is a Boolean that is set to True when the Stream object has
completed the asynchronous operation. The property is set to False until then. Your
code can destroy any stream-related resources after the IsCompleted property returns
True.
An implementation of the IAsyncCallback interface is also returned from the call to
BeginRead(). The code in Listing 25-2 caches the interface reference for later use.
The AsyncCallback method, which, in Listing 25-2, is the OnReadBytesComplete() method,
is called by the Stream object when the asynchronous operation completes. The
implementation shown in Listing 25-2 begins with a call to EndRead(), which returns the
number of bytes actually read from the operation. This number should match the number of
bytes that were requested to be read by BeginRead().
Tip The call to EndRead() in Listing 25-2 is shown so that the number of bytes affected by
the asynchronous operation can be found. If your code does not need this value, you do
not need to call EndRead() at all.
The remainder of the implementation of the OnReadBytesComplete() method checks the byte
pattern read in from the I/O operation and reports its findings to the console.
The Main() method in Listing 25-2 adds a new method call to the code from Listing 25-1,
which is to a private method in the FileTestClass object called
WaitForReadOperationToFinish(). Because the asynchronous read operation is the last
operation in the code, the application could exit before the read operation can complete.
Remember that the processing of the asynchronous I/O operation is performed on a separate
thread. If the main thread exits before the I/O thread has a chance to finish, the code in
OnReadBytesComplete() may not get a chance to finish. The
WaitForReadOperationToFinish() method ensures that the operation completes before it
returns to the caller.
The WaitForReadOperationToFinish() method uses the wait handle in the IAsyncCallback
interface implementation to do its work. The method calls the WaitHandle method WaitOne()
to wait until the wait handle is signaled. The call to WaitOne() does not return until the wait
handle is signaled. The Stream object signals the wait handle only after the I/O operation
completes. After the call to WaitOne() returns, you can be sure that the entire operation has
completed.
Writing asynchronously
Asynchronous write I/O operations are similar to asynchronous read I/O operations. The only
difference is that the BeginWrite() method is used instead of BeginRead(). Listing 25-3
improves on Listing 25-2
by implementing an asynchronous write operation.
Listing 25-3: Asynchronous Writing, Asynchronous Reading
using System;
using System.IO;
using System.Threading;
class FileTestClass
{
private FileStream BinaryFile;
private byte [] ByteArray;
private IAsyncResult AsyncReadResultImplementation;
private IAsyncResult AsyncWriteResultImplementation;
private AsyncCallback ReadBytesCompleteCallback;
private AsyncCallback WriteBytesCompleteCallback;
public FileTestClass()
{
AsyncReadResultImplementation = null;
BinaryFile = new FileStream("test.dat", FileMode.Create,
FileAccess.ReadWrite);
ByteArray = new byte [256];
ReadBytesCompleteCallback = new AsyncCallback(OnReadBytesComplete);
WriteBytesCompleteCallback = new
AsyncCallback(OnWriteBytesComplete);
}
public void WriteBytes()
{
int ArrayIndex;
for(ArrayIndex = 0; ArrayIndex < 256; ArrayIndex++)
ByteArray[ArrayIndex] = (byte)ArrayIndex;
AsyncWriteResultImplementation = BinaryFile.BeginWrite(ByteArray,
0,
256, WriteBytesCompleteCallback, null);
}
public void ReadBytes()
{
WaitForWriteOperationToFinish();
BinaryFile.Seek(0, SeekOrigin.Begin);
AsyncReadResultImplementation = BinaryFile.BeginRead(ByteArray, 0,
256,
ReadBytesCompleteCallback, null);
}
public void OnReadBytesComplete(IAsyncResult AsyncResult)
{
int ArrayIndex;
int BytesRead;
int Failures;
BytesRead = BinaryFile.EndRead(AsyncResult);
Console.WriteLine("Bytes read : {0}", BytesRead);
Failures = 0;
for(ArrayIndex = 0; ArrayIndex < 256; ArrayIndex++)
{
if(ByteArray[ArrayIndex] != (byte)ArrayIndex)
{
Console.WriteLine("Read test failed for byte at offset
{0}.",
ArrayIndex);
Failures++;
}
}
Console.WriteLine("Read test failures: {0}", Failures);
}
public void WaitForReadOperationToFinish()
{
WaitHandle WaitOnReadIO;
WaitOnReadIO = AsyncReadResultImplementation.AsyncWaitHandle;
WaitOnReadIO.WaitOne();
}
public void OnWriteBytesComplete(IAsyncResult AsyncResult)
{
BinaryFile.EndWrite(AsyncResult);
}
private void WaitForWriteOperationToFinish()
{
WaitHandle WaitOnWriteIO;
WaitOnWriteIO = AsyncWriteResultImplementation.AsyncWaitHandle;
WaitOnWriteIO.WaitOne();
}
}
class MainClass
{
static public void Main()
{
FileTestClass FileTest = new FileTestClass();
FileTest.WriteBytes();
FileTest.ReadBytes();
FileTest.WaitForReadOperationToFinish();
}
}
The EndWrite() method does not return a value, unlike the EndRead() method. The two
methods are alike, however, in that they both block until the I/O operation is complete.
Understanding Writers and Readers
The .NET Framework ships with a variety of reader and writer classes that help you work
with data more complicated than simple byte streams. Readers and writers encapsulate a
stream and provide a translation layer that turns values into their byte stream equivalents (for
writers) and vice versa (for readers).
Reader and writer classes in .NET are typically named to reflect the type of formatting that
they perform. For example, the HtmlTextWriter class writes values destined for HTTP
response information sent by ASP.NET, while the StringReader class reads values written
using their string representation.
The writer and reader classes also handle varying encoding schemes, which is not possible
using lower-level stream objects. The classes derived from the abstract TextWriter class, for
example, enable your C# code to write text and have it encoded in the stream using ASCII,
Unicode, UTF7, or UTF8 encoding algorithms.
Writing to streams with BinaryWriter
Listing 25-4 shows the BinaryWriter class in action. The job of the BinaryWriter class is to
translate C# data types to a series of bytes that can be written to an underlying stream.
Listing 25-4: Working with the BinaryWriter Class
using System;
using System.IO;
class FileTestClass
{
private BinaryWriter Writer;
private FileStream BinaryFile;
public FileTestClass()
{
BinaryFile = new FileStream("test.dat", FileMode.Create,
FileAccess.ReadWrite);
Writer = new BinaryWriter(BinaryFile);
}
public void WriteBinaryData()
{
Writer.Write('a');
Writer.Write(123);
Writer.Write(456.789);
Writer.Write("test string");
}
}
class MainClass
{
static public void Main()
{
FileTestClass FileTest = new FileTestClass();
FileTest.WriteBinaryData();
}
}
The code in Listing 25-4 is structured with a class design similar to the design in Listing 25-3.
The code contains a MainClass and a FileTestClass. The constructor of the FileTestClass
class in Listing 25-4 creates a file stream and then creates a BinaryWriter object. A reference
to the file stream is passed to the constructor of the BinaryWriter object, which sets up the
relationship between the binary writer and the stream to which it writes its data. In Listing 25-
4, all data written to the binary writer eventually makes its way to the file stream set up in the
constructor.
The WriteBinaryData() method writes a character, an integer, a double, and a string to the
underlying stream. The BinaryWriter class implements several overloads of a method named
Write(). The Write() method overloads support the writing of the following data types to the
writer class:
• Booleans
• Bytes
• Arrays of bytes
• Characters
• Arrays of characters
• Decimal values
• Double values
• Signed and unsigned short integer values
• Signed and unsigned integer values
• Signed and unsigned long integer values
• Sbytes
• Floating-point values
• Strings
If you compile and execute the code in Listing 25-4, a file called test.dat is created. You can
examine the contents of the new file in a hex editor to verify that binary representations of
values were written to the file.
Reading from streams with BinaryReader
Listing 25-5 adds the BinaryReader class to the code in Listing 25-5. This class reassembles
stream bytes back into their constituent data types and returns the values to the caller.
Listing 25-5: Working with the BinaryReader Class
using System;
using System.IO;
class FileTestClass
{
private BinaryReader Reader;
private BinaryWriter Writer;
private FileStream BinaryFile;
public FileTestClass()
{
BinaryFile = new FileStream("test.dat", FileMode.Create,
FileAccess.ReadWrite);
Writer = new BinaryWriter(BinaryFile);
Reader = new BinaryReader(BinaryFile);
}
public void ReadBinaryData()
{
char ReadCharacter;
double ReadDouble;
int ReadInteger;
string ReadString;
BinaryFile.Seek(0, SeekOrigin.Begin);
ReadCharacter = Reader.ReadChar();
ReadInteger = Reader.ReadInt32();
ReadDouble = Reader.ReadDouble();
ReadString = Reader.ReadString();
Console.WriteLine("Character: {0}", ReadCharacter);
Console.WriteLine("Integer: {0}", ReadInteger);
Console.WriteLine("Double: {0}", ReadDouble);
Console.WriteLine("String: {0}", ReadString);
}
public void WriteBinaryData()
{
Writer.Write('a');
Writer.Write(123);
Writer.Write(456.789);
Writer.Write("test string");
}
}
class MainClass
{
static public void Main()
{
FileTestClass FileTest = new FileTestClass();
FileTest.WriteBinaryData();
FileTest.ReadBinaryData();
}
}
Unlike the BinaryWriter class, which contained one overloaded method for all operations, the
BinaryReader class contains separate read methods for each data type. The code in Listing 25-
5 uses some of these read methods, such as ReadChar() and ReadInt32(), to read values from
the stream written in the WriteBinaryData() method. The values read from the stream are sent
to the console. Executing Listing 25-5 should produce the following output on the console:
Character: a
Integer: 123
Double: 456.789
String: test string
Writing Well-Formed XML Using the XmlWriter Stream
Streams can do more than simply read from and write to various data streams. They can also
add value to the data being sent through the stream. A good example of this technology is the
XmlWriter class, which encapsulates data sent to a stream within well-formed XML elements.
The result is a well-formed XML document that can be processed by any XML document
processor, as shown in Listing 25-6
.
Listing 25-6: Writing XML with the XmlWriter Class
using System;
using System.IO;
using System.Xml;
class XMLStreamWriterClass
{
private XmlTextWriter XmlWriter;
public void WriteXML()
{
XmlWriter = new XmlTextWriter(Console.Out);
XmlWriter.WriteStartDocument();
XmlWriter.WriteComment("This XML document was automatically
generated by
C# code.");
XmlWriter.WriteStartElement("BOOK");
XmlWriter.WriteElementString("TITLE", "C# Bible");
XmlWriter.WriteElementString("AUTHOR", "Jeff Ferguson");
XmlWriter.WriteElementString("PUBLISHER", "Wiley");
XmlWriter.WriteEndElement();
XmlWriter.WriteEndDocument();
}
}
class MainClass
{
static public void Main()
{
XMLStreamWriterClass XMLStreamWriter = new XMLStreamWriterClass();
XMLStreamWriter.WriteXML();
}
}
The code in Listing 25-6 creates a new instance of the XmlWriter class and associates it with
the console's output stream, which sends the stream's output to the application console. The
code simply calls various methods in the XmlWriter class to output data, and the methods
surround the data with XML elements names that are specified when the method is called.
Take a look at the following line from Listing 25-6:
XmlWriter.WriteElementString("AUTHOR", "Jeff Ferguson");
This call instructs the XmlWriter class to write an XML element called <AUTHOR>, which
has a value of Brian Patterson, to the stream output device. The method's implementation
supplies the XML end tag automatically.
Compiling and executing the code in Listing 25-6 sends the following well-formed XML
document to the application console:
<?xml version="1.0" encoding="IBM437"?>
<! This XML document was automatically generated by C# code >
<BOOK>
<TITLE>C# Bible</TITLE>
<AUTHOR>Jeff Ferguson</AUTHOR>
<PUBLISHER>Wiley</PUBLISHER>
</BOOK>
Summary
Streams provide powerful support for both synchronous and asynchronous I/O for your C#
applications. Streams operate at the byte level and require you to read and write blocks of
bytes. Readers and writers encapsulate streams and provide access to data at a higher level.
You can use readers and writers to work with standard C# data types, enabling the readers and
writers to translate between the data type values and their byte representations.
Your C# code will most likely work with readers and writers, as they provide support for
working with the standard data types without forcing you to be concerned about translating
between a data type value and its binary representation. Streams are available, however,
should you feel the need to work with them directly. You might also want to work with
streams if the data that you are reading is in a proprietary format that is not supported by the
standard reader and writer classes shipped with the .NET Framework. You might also