Apress Expert C sharp 2005 (Phần 12) docx
Bạn đang xem bản rút gọn của tài liệu. Xem và tải ngay bản đầy đủ của tài liệu tại đây (980.75 KB, 50 trang )
If you want to use Windows authentication, change the configuration to this:
<add key="CslaAuthentication" value="Windows" />
Of course, that change would require coding changes. To start, the PTPrincipal and PTIdentity
classes should be removed from ProjectTracker.Library, as they would no longer be needed. Also,
the login/logout functionality implemented in this chapter would become unnecessary. Specifically,
the
Login form and the code to display that form would be removed from the UI project.
Local Data Portal
The web.config file also controls how the application uses the data portal. To have the website interact
directly with the database, use the following (with
your connection string changed to the connection
string for your database):
<?xml version="1.0" encoding="utf-8" ?>
<configuration>
<appSettings>
<add key="CslaAuthentication" value="Csla" />
</appSettings>
<connectionStrings>
<add name="PTracker" connectionString="your connection string"
providerName="System.Data.SqlClient" />
<add name="Security" connectionString="your connection string"
providerName="System.Data.SqlClient" />
</connectionStrings>
Because LocalProxy is the default for the data portal, no actual data portal configuration is
required, so the only settings in the configuration file are to control authentication and to provide
the database connection strings.
■Tip In the code download for this book, the PTracker and Security database files are in the solution directory,
not in the website’s
App_Data directory. This means that you can’t use a local data portal from the website without
first copying the database files into the App_Data directory and changing the connection strings accordingly.
Remote Data Portal (with Remoting)
To have the data portal use an application server and communicate using the remoting channel,
the configuration would look like this:
<?xml version="1.0" encoding="utf-8" ?>
<configuration>
<appSettings>
<add key="CslaAuthentication" value="Csla" />
<add key="CslaDataPortalProxy"
value="Csla.DataPortalClient.RemotingProxy, Csla"/>
<add key="CslaDataPortalUrl"
value="http://localhost/RemotingHost/RemotingPortal.rem"/>
</appSettings>
<connectionStrings>
</connectionStrings>
The key lines for the remoting configuration are in bold. Of course, you need to change
localhost to the name of the application server on which the data portal host is installed, and the
RemotingHost text needs to be replaced with the name of your virtual root on that server.
CHAPTER 10 ■ WEB FORMS UI524
6323_c10_final.qxd 2/27/06 1:33 PM Page 524
Before using this configuration, the remoting host virtual root must be created and configured.
I’ll show how this is done in Chapter 12.
Remote Data Portal (with Enterprise Services)
Similarly, to use the Enterprise Services channel the configuration would look like this:
<?xml version="1.0" encoding="utf-8" ?>
<configuration>
<appSettings>
<add key="CslaAuthentication" value="Csla" />
<add key="CslaDataPortalProxy"
value="EnterpriseServicesHost.EnterpriseServicesProxy,
EnterpriseServicesHostcs"/>
</appSettings>
<connectionStrings>
</connectionStrings>
Before using this configuration, an Enterprise Services host must be created and registered
with COM+. The resulting COM+ application must be registered with COM on each client work-
station. The basic steps were discussed in Chapter 4, and I’ll show how this is done in Chapter 12.
Remote Data Portal (with Web Services)
Finally, to use Web Services, the configuration would look like this:
<?xml version="1.0" encoding="utf-8" ?>
<configuration>
<appSettings>
<add key="CslaAuthentication" value="Csla" />
<add key="CslaDataPortalProxy"
value="Csla.DataPortalClient.WebServicesProxy, Csla"/>
<add key="CslaDataPortalUrl"
value="http://localhost/WebServicesHost/WebServicePortal.asmx"/>
</appSettings>
<connectionStrings>
</connectionStrings>
As with remoting, you need to change localhost and WebServicesHost to the actual server name
and virtual root name used by your application. Also, the virtual root and web service
asmx file must
be created and configured. I’ll show how this is done in Chapter 12.
The most important thing to realize about the site configuration is that the data portal can be
changed from local to remote (using any of the network channels) with no need to change any UI
or business object code.
PTWeb Site Setup
The UI application can be found within the ProjectTracker solution. The project is named PTWeb.
The site references the
ProjectTracker.Library project, as shown in Figure 10-8. This causes
Visual Studio to automatically put the associated
Csla.dll files into the Bin directory as well, because
Csla.dll is referenced by ProjectTracker.Library.
CHAPTER 10 ■ WEB FORMS UI 525
6323_c10_final.qxd 2/27/06 1:33 PM Page 525
Hosting in IIS
The PTWeb website will only run within IIS, not within the ASP.NET Development Server (commonly
known as Cassini or VS Host). The reason for this is explained later in the chapter in the “Forms-
Based Authentication” section.
To host a website in IIS during development, you need to take the following steps:
1. Set up a virtual root in IIS that points to the directory containing the PTWeb project files.
2. Set the virtual root to use ASP.NET 2.0, using the ASP.NET tab of the virtual root properties
dialog in the IIS management console.
3. Set the website’s start options using the project properties dialog in Visual Studio 2005.
Change the setting to use a custom server so it starts up using IIS with a URL such as
http://localhost/PTWeb.
With the basic website setup complete, let’s go through the creation of the Web Forms UI. First,
I’ll discuss the use of a master page, and then I’ll cover the process of logging a user in and out using
forms-based authentication.
With the common code out of the way, I’ll discuss the process of maintaining the roles and
project data in detail. At that point, you should have a good understanding of how to create both
grid-based and detail pages.
Master Page
To ensure that all pages in the site have the same basic layout, navigation, and authentication
options, a
master page is used. The master page provides these consistent elements, and all the rest
of the pages in the site are
content pages. This means they fit within the context of the master page
itself, adding content where appropriate.
CHAPTER 10 ■ WEB FORMS UI526
Figure 10-8. Referencing ProjectTracker.Library
6323_c10_final.qxd 2/27/06 1:33 PM Page 526
Look back at Figures 10-6 and 10-7 to see the visual appearance of the pages. Both Default.aspx
and ProjectEdit.aspx are content pages, adding their content to that already provided by
MasterPage.master:
<%@ Master Language="C#" CodeFile="MasterPage.master.cs"
Inherits="MasterPage" %>
<!DOCTYPE html PUBLIC "-//W3C//DTD XHTML 1.1//EN"
" /><html xmlns=" xml:lang="en">
<head id="Head1" runat="server">
<title>Untitled Page</title>
<meta http-equiv="Content-Type" content="text/html;
charset=iso-8859-1" />
</head>
<body>
<form id="form1" runat="server">
<div id="mainTable">
<div id="header">
<asp:Label ID="PageTitle" runat="server">
</asp:Label>
</div>
<div id="navigation">
<div id="navigationContent">
<asp:TreeView ID="TreeView1" runat="server"
DataSourceID="SiteMapDataSource1"
ShowExpandCollapse="False" SkipLinkText="" >
<NodeStyle CssClass="nav" />
</asp:TreeView>
</div>
</div>
<div id="subnavigation">
<div id="logout">
<asp:LoginStatus ID="LoginStatus1"
runat="server" OnLoggingOut="LoginStatus1_LoggingOut" />
</div>
</div>
<div id="content">
<asp:ContentPlaceHolder id="ContentPlaceHolder1"
runat="server">
</asp:ContentPlaceHolder>
</div>
</div>
<asp:SiteMapDataSource ID="SiteMapDataSource1" runat="server"
ShowStartingNode="False" />
</form>
</body>
</html>
MasterPage.master defines the header/title bar at the top of the page. The area immediately
beneath the header/title bar contains the
Login button, and there is a navigation area down the left.
Perhaps most importantly, it also defines a content area containing a
ContentPlaceHolder control:
<asp:ContentPlaceHolder id="ContentPlaceHolder1"
runat="server">
</asp:ContentPlaceHolder>
This is the area where content pages provide their content, and it is the main body of the page.
You’ll see how each content page provides content for this area later in the chapter.
CHAPTER 10 ■ WEB FORMS UI 527
6323_c10_final.qxd 2/27/06 1:33 PM Page 527
Theme Support
ASP.NET 2.0 supports the concept of themes for a website, where the visual appearance of the site is
defined by a
theme: a group of files in a theme-specific subdirectory beneath the App_Themes direc-
tory in the virtual root. A theme is a group of style sheets, graphics, and control skins that describe
the appearance of a site. A given site can have many themes, and you can even allow the user to
choose between them if you so desire.
Notice how all of the regions in the master page are set up using
div tags. No appearance char-
acteristics are specified in the page itself. Instead, the actual appearance is defined by a CSS style
sheet contained within the current theme for the site. The
PTWeb site includes and uses a Basic theme.
The use of the
Basic theme is set up in web.config:
<pages theme="Basic" styleSheetTheme="Basic">
The theme property sets the default runtime theme, while styleSheetTheme sets the theme for use
at design time in Visual Studio. The
styleSheetTheme property should be removed when the website is
deployed to a production server.
The files defining this theme are in the
App_Themes/Basic folder beneath the virtual root. Yo u
should notice that the names of the
css and skin files match the name of the theme folder itself.
Having the names match allows ASP.NET to automatically realize that it needs to use these files when
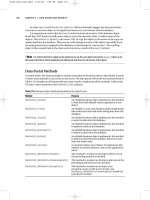
the theme is selected for the website. The files in this theme are listed in Table 10-4.
Table 10-4. Files in the Basic Theme
File Description
Basic.css The style sheet for the site
Basic.skin The skins for GridView, DetailsView, and Login controls
Images\background.jpg The background graphic for the header region
Images\corner.png The graphic for the rounded corner in the upper-left
Combined, these files define the look and feel of the site. This includes defining the appearance
of the regions in
MasterPage.master. For instance, the header region is defined in the css file like this:
#header
{
background-image: url('images/background.jpg');
background-repeat: no-repeat;
height: 64px;
line-height: 60px;
text-align: left;
color: #FFFFFF;
font-family:
Verdana, Arial, Helvetica, sans-serif;
font-size: 36px;
font-weight: bold;
font-style: italic;
padding-left: 10px
}
A control skin defines the appearance of specific controls in the website, such as GridView,
TextBox, and so forth. For instance, the appearance of the Login control is defined in the skin file
like this:
CHAPTER 10 ■ WEB FORMS UI528
6323_c10_final.qxd 2/27/06 1:33 PM Page 528
<asp:Login runat="server" BackColor="#DEDEDE" BorderColor="Black"
BorderStyle="Solid" BorderWidth="1px" Font-Names="Verdana"
Font-Size="10pt">
<TitleTextStyle BackColor="Black" Font-Bold="True"
Font-Names="Verdana" Font-Size="10pt"
ForeColor="White" />
</asp:Login>
Each type of control in Web Forms has different options you can set in a skin file, allowing you
to set the appearance of each control in many ways.
By making the site theme-enabled, you can easily change the appearance of the site later by
creating a new theme directory and similar theme files, and setting the
theme property in web.config
to use the new theme.
Header Region
The header region of the page is the title area across the top. It contains a single Label control named
PageTitle. This control displays the title of the current content page, based on the Title property set
for that page. The following code is included in
MasterPage.master to load this value:
protected void Page_Load(object sender, EventArgs e)
{
PageTitle.Text = Page.Title;
}
As each content page loads, not only does the Load event for the content page run, but so does
the
Load event for the master page. This means that code can be placed in the master page to run
when
any content page is loaded—in this case, to set the title at the top of the page.
Navigation Region
The navigation region displays the navigation links down the left side of each page. To do this,
a
web.sitemap file and associated SiteMapDataSource control are used to load the overall structure
of the site into memory. This data is then data bound to a
TreeView control for display to the user.
The
web.sitemap file is an XML file that contains a node for each page to be displayed in the
navigation region:
<?xml version="1.0" encoding="utf-8" ?>
<siteMap
xmlns=" >
<siteMapNode url="" title="" description="">
<siteMapNode url="~/Default.aspx" title="Home"
description="Main page" />
<siteMapNode url="~/ProjectList.aspx" title="Project list"
description="Project list" />
<siteMapNode url="~/ResourceList.aspx" title="Resource list"
description="Resource list" />
<siteMapNode url="~/RolesEdit.aspx" title="Project roles"
description="Project roles" />
</siteMapNode>
</siteMap>
The site map concept can be used to define hierarchical website structures, but in this case,
I’m using it to define a flat structure. Notice how each
<siteMapNode> element defines a page—
except the first one. That root node is required in the file, but since I’m defining a flat structure, it
really doesn’t represent a page and is just a placeholder. If you were to define a hierarchical page
structure, that node would typically point to
Default.aspx.
CHAPTER 10 ■ WEB FORMS UI 529
6323_c10_final.qxd 2/27/06 1:33 PM Page 529
Notice that MasterPage.master includes a SiteMapDataSource control:
<asp:SiteMapDataSource ID="SiteMapDataSource1" runat="server"
ShowStartingNode="False" />
This special data control automatically reads the data from the web.sitemap file and makes it
available to controls on the page. The
ShowStartingNode property is set to False, indicating that the
root node in
web.sitemap is to be ignored. That’s perfect, because that node is empty and shouldn’t
be displayed.
In this case, a
TreeView control in the navigation region is bound to the SiteMapDataSource,
so it displays the items listed in
web.sitemap to the user.
LoginStatus Control
In the subnavigation region of MasterPage.master, you’ll see a LoginStatus control:
<asp:LoginStatus ID="LoginStatus1"
runat="server" OnLoggingOut="LoginStatus1_LoggingOut" />
This is one of the login controls provided with ASP.NET 2.0, and its purpose is to allow the user
to log into and out of the site. The control automatically displays the word Login if the user is logged
out, and Logout if the user is logged in. When clicked, it also automatically redirects the user to a
login web page defined in
web.config. I’ll cover the web.config options later.
Because the control automatically directs the user to the appropriate login page to be logged
in, no code is required for that process. However, code is required to handle the case in which the
user clicks the control to be logged out. This code goes in the master page:
protected void LoginStatus1_LoggingOut(
object sender, LoginCancelEventArgs e)
{
ProjectTracker.Library.Security.PTPrincipal.Logout();
Session["CslaPrincipal"] =
Csla.ApplicationContext.User;
System.Web.Security.FormsAuthentication.SignOut();
}
This code covers a lot of ground.
First, the
Logout() method of PTPrincipal is called, which sets the current principal on the
current
Thread object to an unauthenticated PTPrincipal object. This was discussed in Chapter 8
and used in
PTWin in Chapter 9.
However, when the user is logged in, their principal object is stored in a
Session field so it can
be easily reloaded on every page request. The details on how this works are discussed later in the
chapter. When the user logs out, that
Session field is updated to reference the new principal object.
■Note If you want to avoid Session, you can choose to reload the user’s identity and roles from the security
database on every page request. While that avoids the use of
Session, it can put a substantial workload on your
security database server. In PTWeb, I have opted to use Session to minimize the load on the database.
The final step is to tell ASP.NET itself that the user is no longer authenticated. This is done by call-
ing
FormsAuthentication.SignOut(). This method invalidates the security cookie used by ASP.NET to
indicate that the user has been authenticated. The result is that ASP.NET sees the user as unauthenti-
cated on all subsequent page requests.
This covers the logout process, but the login process requires some more work. While the
Login➥
Status control handles the details of directing the user to a login page, that page must be created.
CHAPTER 10 ■ WEB FORMS UI530
6323_c10_final.qxd 2/27/06 1:33 PM Page 530
Login Page
Like the PTWin smart client, the PTWeb site is designed to use custom authentication, so I can illus-
trate the custom authentication support provided by CSLA .NET. I’ll also briefly discuss the use of
Windows integrated security and the ASP.NET membership service.
In Web Forms, when using custom authentication, you need to configure the site appropriately
using
web.config, and implement a login web page to collect and validate the user’s credentials.
That’s the purpose behind
Login.aspx.
Forms-Based Authentication
When using forms-based authentication, users are often automatically redirected to a login form
before being allowed to access any other pages. Alternately, anonymous users can be allowed to use
the site, and they can choose to log into the site to gain access to extra features or functionality. The
specific behaviors are defined by
web.config.
Before moving on, remember that the following implementation only works within IIS. The
ASP.NET Development Server provided with Visual Studio has various limitations; among them is
the inability to load custom security objects from assemblies in the
Bin directory. This means you
can’t use the ASP.NET Development Server to test or debug custom principal objects, custom mem-
bership providers, or other custom security objects if they’re in an assembly referenced from the
project.
Though this is an unfortunate limitation, it can be argued that the ASP.NET Development Server
is not intended for anything beyond hobbyist or casual usage, and that IIS should be used for any seri-
ous business development.
■Note An alternative solution is to install the assembly containing your custom principal and identity classes into
the .NET Global Assembly Cache (GAC). For
PTWeb, this would mean giving ProjectTracker.Library a strong
name and using the
gacutil.exe command line utility to install the assembly into the GAC. ProjectTracker.
Library
would need to be updated in the GAC after each time you build the assembly. I find that using IIS is a far
simpler solution than using the GAC.
Configuring the Site
Using forms-based security in ASP.NET means that web.config includes elements like this:
<authentication mode="Forms">
<forms loginUrl="Login.aspx" name="ptracker"/>
</authentication>
<authorization>
<allow users="*"/>
</authorization>
This tells ASP.NET to use forms-based authentication (mode="Forms"), yet to allow unauthenti-
cated users (
<allow users="*"/>).
■Note To require users to log in before seeing any pages, replace <allow users="*"/> with <deny users="?"/>.
It is important that you also ensure that the security on the virtual root itself (within IIS) is con-
figured to allow anonymous users. If IIS blocks anonymous users, then it doesn’t really matter what
kind of security you use within ASP.NET.
CHAPTER 10 ■ WEB FORMS UI 531
6323_c10_final.qxd 2/27/06 1:33 PM Page 531
■Note Remember that IIS security runs first, and then any ASP.NET security is applied.
With the web.config options shown previously, users can use the site without logging in, but the
concept of logging in is supported. The goal is the same as with
PTWin in Chapter 9: allow all users to
do certain actions, and allow authenticated users to do other actions based on their roles.
When a user chooses to log in, the
<forms> tag specifies that they will be directed to Login.aspx,
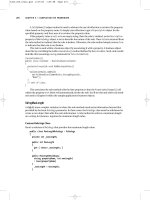
which will collect and validate their credentials. Figure 10-9 shows the appearance of
Login.aspx.
Now this is where things get kind of cool. There is
no code behind Login.aspx. This page uses
the ASP.NET
Login control:
<asp:Login ID="Login1" runat="server">
</asp:Login>
This control is designed to automatically use the default ASP.NET membership provider for
the site.
■Caution The user’s credentials flow from the browser to the web server in clear text—they are not automati-
cally encrypted. Due to this, it is recommended that
Login.aspx be accessed over an SSL (Secure Sockets Layer)
connection so that data traveling to and from the browser is encrypted during the login process.
You can write code to handle the events of the Login control if you desire, but a membership
provider offers a cleaner solution overall. Of course, the membership provider that comes with
CHAPTER 10 ■ WEB FORMS UI532
Figure 10-9. Layout of the Login page
6323_c10_final.qxd 2/27/06 1:33 PM Page 532
ASP.NET doesn’t understand PTPrincipal and PTIdentity objects, so PTWeb includes its own custom
membership provider.
Custom Membership Provider
A membership provider is an object that inherits from System.Web.Security.MembershipProvider
to handle all aspects of membership. These aspects include:
• Validating user credentials
• Adding a new user
• Deleting a user
• Changing a user’s password
• And more . . .
Of course,
PTPrincipal doesn’t understand all these things, and ProjectTracker.Library doesn’t
implement a full set of membership objects either. If you want to support all these capabilities, you
should create your own security library with appropriate objects.
But
PTPrincipal does understand how to validate a user’s credentials. Fortunately, it is possible to
implement a subset of the complete membership provider functionality, and that’s what I do in
PTWeb.
The
PTMembershipProvider class is in the App_Code directory, so ASP.NET automatically compiles
it and makes it available to the website. This class inherits from
MembershipProvider and overrides
the
ValidateUser() method:
public class PTMembershipProvider : MembershipProvider
{
public override bool ValidateUser(
string username, string password)
{
bool result = PTPrincipal.Login(username, password);
HttpContext.Current.Session["CslaPrincipal"] =
Csla.ApplicationContext.User;
return result;
}
// other methods …
}
All other methods are overridden to throw an exception indicating that they aren’t imple-
mented by this provider.
Notice how the
ValidateUser() method already accepts username and password parameters.
This is convenient because the
Login() method of PTPrincipal accepts those parameters as well.
The code simply calls the
Login() method and records the result; true if the user was logged in,
false otherwise.
Remember from Chapter 8 that the
Login() method sets the User property of
Csla.ApplicationContext, thus automatically setting either the Thread object’s
CurrentPrincipal property or the HttpContext.Current.User property to an authenticated
PTPrincipal if the user’s credentials were valid; otherwise, it is set to an unauthenticated
PTPrincipal. Since this code will be running within ASP.NET, it is the HttpContext value that is set
to the user’s principal.
The code then sets a
Session field, CslaPrincipal, to contain this principal value so it will
be available to subsequent pages.
Then the
result value is returned. The ASP.NET membership infrastructure relies on this
return value to know whether the user’s credentials were valid or not.
Before this custom membership provider can be used, it must be defined in
web.config
as follows:
CHAPTER 10 ■ WEB FORMS UI 533
6323_c10_final.qxd 2/27/06 1:33 PM Page 533
<membership defaultProvider="PTMembershipProvider">
<providers>
<add name="PTMembershipProvider"
type="PTMembershipProvider"
enablePasswordRetrieval="false"
enablePasswordReset="false"
requiresQuestionAndAnswer="false"
applicationName="/"
requiresUniqueEmail="false"
passwordFormat="Clear"
description="Stores and retrieves membership
data using CSLA .NET business objects."
/>
</providers>
</membership>
By making PTMembershipProvider the default provider, this definition tells ASP.NET to auto-
matically use it for any membership activities, including validating a user’s credentials.
Reloading the Principal
At this point, you’ve seen how the user can log in or out using the LoginStatus control on the
master page. And you’ve seen how
Login.aspx and the custom membership provider are used
to gather and validate the user’s credentials.
But how does the principal object carry forward from page to page? Remember that the web
technologies are stateless by default, and it is up to the web developer to manually implement state
management as she chooses. Unfortunately, this extends to the user’s identity as well.
The forms-based security infrastructure provided by ASP.NET writes an encrypted cookie to
the user’s browser. That cookie contains a security ticket with a unique identifier for the user, the
user’s name, and an expiration time. This cookie flows from the browser to the web server on each
page request, so that basic information is available.
Notice, however, that the cookie doesn’t include the principal and identity objects. That is
because those objects could be quite large, and in some cases, might not even be serializable.
Though
PTPrincipal and PTIdentity are serializable, they could still be large enough to pose a
problem if you tried to write them to the cookie. Cookies have a size limit, and remember that
PTIdentity contains an array with all the role names for the user. Given a large number of roles
or lengthy role names, this could easily add up to a lot of bytes of data.
■Note It is possible to serialize the principal and identity objects into the cookie (if the objects are serializable).
Doing so isn’t recommended, however, due to the size limitations on cookies.
It is quite possible to reload PTPrincipal and PTIdentity from the security database on every
page request. Remember that the ASP.NET security cookie contains the username value, and you
already know that the user was authenticated. All you would need is another stored procedure in
the database that returns the user information based on username alone; no password would be
provided or checked. Similarly, another
static method like Login() would be implemented in
PTPrincipal to load the objects based only on the username value.
There are two drawbacks to this. First, reloading this data from the security database on every
page request could cause a serious performance issue. The security database could get overloaded
with all the requests. Second, there’s an obvious security risk in implementing methods that allow
loading user identities without having to supply the password. While that functionality wouldn’t
CHAPTER 10 ■ WEB FORMS UI534
6323_c10_final.qxd 2/27/06 1:33 PM Page 534
be exposed to the end user, it makes it easier for accidental bugs or malicious back-door code to
creep into your website.
This is why I use
Session to store the principal object in PTWeb. The user’s credentials are vali-
dated, and the resulting principal object is placed in a
Session field named CslaPrincipal. On all
subsequent page requests, this value is retrieved from
Session and is used to set both the current
Thread and HttpContext object’s principals.
The work occurs in
Global.asax, as this file contains the event handlers for all events leading
up to a page being processed. In this case, it is the
AcquireRequestState event that is used:
protected void Application_AcquireRequestState(
object sender, EventArgs e)
{
System.Security.Principal.IPrincipal principal;
try
{
principal = (System.Security.Principal.IPrincipal)
HttpContext.Current.Session["CslaPrincipal"];
}
catch
{
principal = null;
}
if (principal == null)
{
// didn't get a principal from Session, so
// set it to an unauthenticted PTPrincipal
ProjectTracker.Library.Security.PTPrincipal.Logout();
}
else
{
// use the principal from Session
Csla.ApplicationContext.User = principal;
}
}
The reason for using the AcquireRequestState event, rather than the more obvious
AuthenticateRequest event, is that Session isn’t initialized when AuthenticateRequest is raised,
but it usually is initialized when
AcquireRequestState is raised.
The code first attempts to retrieve the principal object from
Session. This can result in an
exception if
Session doesn’t exist, and so the value would end up being null. Also, if this is the
first page request by the user, the
Session field will return null. So the outcome is either a valid
PTPrincipal object or null.
If the resulting
principal value is null, PTPrincipal.Logout() is called to set the current principal
as an unauthenticated
PTPrincipal, and the HttpContext is set to use that same principal object. This
supports the idea of an unauthenticated anonymous guest user. Both the web and business library
code have access to valid, if unauthenticated, principal objects, and can apply authorization code as
needed. Additionally, by having the current principal be a valid
PTPrincipal object, a remote data
portal can be invoked and the application server will impersonate the unauthenticated user identity
so
that code can apply authorization rules as well.
On the other hand, if a principal object is retrieved from
Session, then that value is set as the
current principal.
CHAPTER 10 ■ WEB FORMS UI 535
6323_c10_final.qxd 2/27/06 1:33 PM Page 535
Using Windows Integrated Security
If you wanted to use Windows integrated security, you wouldn’t need Login.aspx, the custom mem-
bership provider, or the code in
Global.asax because the user’s identity is already known. The user
provided his Windows credentials to the browser, which in turn provided them to the web server.
This means that the virtual root in IIS must be configured to disallow anonymous users, thus
forcing the user to provide credentials to access the site. It is IIS that authenticates the user and
allows authenticated users into the site.
To have ASP.NET use the Windows identity from IIS,
web.config must be configured correctly:
<authentication mode="Windows"/>
<identity impersonate="true"/>
The authentication mode is set to Windows, indicating that ASP.NET should defer all authentica-
tion to the IIS host. Setting the
impersonate property to true tells ASP.NET to impersonate the user
authenticated by IIS.
■Note If you use Windows integrated security, and you are using a remote data portal, you must make sure to
change the application server configuration file to also use Windows security. If the data portal is hosted in IIS, the
virtual root must be set to disallow anonymous access, thereby forcing the client to provide IIS with the Windows
identity from the web server via integrated security.
Using the ASP.NET Membership Service
ASP.NET 2.0 not only supports the broad concept of membership as used previously, but it provides
a complete membership service, including all the code to make it work.
The membership service is most often used with the SQL membership provider that comes with
ASP.NET. This provider requires that you use a predefined database schema, along with the member-
ship objects provided by Microsoft to manage and interact with the database. By default, ASP.NET
will use a Microsoft SQL Server 2005 Express database in the virtual root’s
App_Data directory, but you
can override that behavior to have it use another Microsoft SQL Server database if needed.
The other membership provider shipped with ASP.NET is a connector to Active Directory. It does
the same thing, but stores the user information in AD instead of a SQL database.
Using the Membership Service with a Local Data Portal
If you are running the data portal in the client process, you can use the SQL membership provider
without any special effort. In that case, the web server will interact directly with the database.
Of course, you don’t need
PTPrincipal or PTIdentity, because ASP.NET provides its own principal
and identity types. Similarly, you don’t need to manually handle the logout event of the
LoginStatus
control or put any code in Global.asax.
In short, it just works. All the authorization code in CSLA .NET will use the ASP.NET principal
object to call
IsInRole(), so all the prebuilt authorization functionality just works.
Using the Membership Service with a Remote Data Portal
Things are a bit more complex if you are using a remote data portal on an application server. There
are two things to consider here. First, the SQL membership provider talks directly to the security
database, knowing nothing about application servers. If you want to use the application server, the
approach taken in
PTWeb is better. Second, the data portal will only accept principal objects that
inherit from
Csla.Security.BusinessPrincipalBase, and of course the ASP.NET membership
principal types don’t do that.
CHAPTER 10 ■ WEB FORMS UI536
6323_c10_final.qxd 2/27/06 1:33 PM Page 536
The first problem is one of application architecture, and you need to decide if it makes sense
for you to have the security mechanism talk directly to a database while your business code uses
an application server to talk to the business database.
The second problem can be overcome with just a bit of code. You need to wrap the ASP.NET
membership principal in a CSLA .NET–style principal. There are two parts to this. First, you need
a custom principal class; second, you need to add some code to
Global.asax.
A custom principal class to wrap the ASP.NET principal object would look like this:
[Serializable()]
public class MembershipPrincipal :
Csla.Security.BusinessPrincipalBase
{
private System.Security.Principal.IPrincipal _principal;
public MembershipPrincipal(
System.Security.Principal.IPrincipal principal)
: base(principal.Identity)
{
_principal = principal;
}
public override bool IsInRole(string role)
{
return _principal.IsInRole(role);
}
}
The code in Global.asax takes the ASP.NET principal and wraps it within a MembershipPrincipal:
protected void Application_AcquireRequestState(
object sender, System.EventArgs e)
{
Csla.ApplicationContext.User =
new MembershipPrincipal(HttpContext.Current.User);
}
This code sets the ApplicationContext object’s User property to use the new
MembershipPrincipal. This way, the original user information and list of roles are preserved, but the
actual principal object used by the application inherits from
BusinessPrincipalBase. The result is
that the data portal can impersonate the web user on the application server.
At this point, you should have an understanding of how the website is organized. It references
ProjectTracker.Library and uses a master page and theme to provide a consistent, manageable
appearance for the site. It also uses a mix of ASP.NET login controls and the prebuilt
ProjectTracker
security objects to implement custom authentication.
Now let’s move on and discuss the pages that provide actual business behaviors.
Business Functionality
With the common functionality in the master page, Login.aspx, and Global.asax covered, it is
possible to move on to the business functionality itself. As I mentioned earlier, I’ll walk through the
RolesEdit, ProjectList, and ProjectEdit web forms in some detail. ResourceList and ResourcEdit
are available in the download and follow the same implementation approach.
All of these web forms will be created using the new data binding capabilities built into ASP.NET
2.0 and the
CslaDataSource control discussed in Chapter 5. These capabilities allow the web developer
CHAPTER 10 ■ WEB FORMS UI 537
6323_c10_final.qxd 2/27/06 1:33 PM Page 537
to easily link controls on the form to business objects and their properties. The developer productivity
gained through this approach is simply amazing.
Other key technologies I’ll be using are the
MultiView control and the associated View control.
These controls make it easy for a single page to present multiple views to the user, and are often
very valuable when building pages for editing data.
Finally, remember that all these pages are content pages. That means that they fit within the
context of a master page—in this case,
MasterPage.master. As you’ll see, the tags in a content page
are a bit different from those in a simple web form.
RolesEdit Form
The RolesEdit.aspx page is a content page, so its Page directive looks like this:
<%@ Page Language="C#" MasterPageFile="~/MasterPage.master"
AutoEventWireup="true" CodeFile="RolesEdit.aspx.cs"
Inherits="RolesEdit" title="Project Roles" %>
Notice the MasterPageFile property, which points to MasterPage.master. Also notice the Title
property, which sets the page’s title. It is this value that is used in the master page’s Load event handler
to set the title text in the
header region of the page.
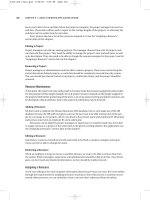
Figure 10-10 shows what the page looks like in Visual Studio.
The grey Content title bar across the top of the main page body won’t be visible at runtime. It is
visible at design time to remind you that you are editing a content area in the page. If you look at the
page’s source, you’ll see that all the page content is contained within a
Content control:
CHAPTER 10 ■ WEB FORMS UI538
Figure 10-10. Layout of the RolesEdit page
6323_c10_final.qxd 2/27/06 1:33 PM Page 538
<asp:Content ID="Content1"
ContentPlaceHolderID="ContentPlaceHolder1" Runat="Server">
<% page content goes here %>
</asp:Content>
The ContentPlaceHolderID property links this content to the ContentPlaceHolder1 control in
the master page. This scheme means that a master page can define multiple content placeholders,
and a content page can have multiple
Content controls—one for each placeholder.
MultiView Control
The MultiView control contains two View controls, named MainView and InsertView. Only one of
these views will be active (visible) at any time, so this form really defines two different views for the
user.
Within your code, you select the view by setting the
ActiveViewIndex property of the MultiView
control to the numeric index of the appropriate View control. Of course, using a numeric value like
this doesn’t lead to maintainable code, so within the page, I define an enumerated type with text
values corresponding to each
View control:
private enum Views
{
MainView = 0,
InsertView = 1
}
The Views type will be used to change the page view as needed.
Error Label
Beneath the MultiView control in Figure 10-10 is a Label control with its ForeColor set to Red. The
purpose behind this control is to allow the page to display error text to the user in the case of an
exception.
As you’ll see, the data access code uses
try catch blocks to catch exceptions that occur dur-
ing any data updates (insert, update, or delete). The text of the exception is displayed in
ErrorLabel
so it is visible to the user.
Using a Business Object as a Data Source
In Chapter 5, I discussed the CslaDataSource control, and how it overcomes the limitations of the
standard
ObjectDataSource control. The RolesEdit page uses this control, making it relatively easy
to bind the
Roles collection from ProjectTracker.Library to a GridView control on the page.
The
RolesDataSource data source control is defined on the page like this:
<csla:CslaDataSource ID="RolesDataSource" runat="server"
TypeAssemblyName="ProjectTracker.Library"
TypeName="ProjectTracker.Library.Admin.Roles"
OnDeleteObject="RolesDataSource_DeleteObject"
OnInsertObject="RolesDataSource_InsertObject"
OnSelectObject="RolesDataSource_SelectObject"
OnUpdateObject="RolesDataSource_UpdateObject">
</csla:CslaDataSource>
The TypeAssemblyName and TypeName properties define the assembly containing the business
class and the business class type, respectively. These two properties provide the control with enough
information so that it can load the
Roles type and determine the properties that will be exposed by
child objects in the collection.
CHAPTER 10 ■ WEB FORMS UI 539
6323_c10_final.qxd 2/27/06 1:33 PM Page 539
OnDeleteObject and similar properties link the control to a set of event handlers in the page’s
code. The code in those event handlers interacts with the business object to perform each requested
action.
Of course, to get this data source control onto the web form, you can simply drag the
CslaDataSource control from the toolbox onto the designer surface and set its properties through
the Properties window in Visual Studio.
Then, when the
GridView and DetailsView controls are placed on the form, you can use their
pop-up Tasks menu to select the data source control, as shown in Figure 10-11.
You can either write the tags yourself, or use the designer support built into Visual Studio as
you choose.
Caching the Object in Session
To optimize the performance of the website, business objects are stored in Session. While they could
be retrieved directly from the database when needed, storing them in
Session reduces the load on the
database server.
To minimize the number of objects maintained in
Session, all pages use the same Session field
to store their business objects:
currentObject. This way, only one business object is stored in Session
at any time, and that is the object being actively used by the current page.
Of course, browsers have a Back button, which means that the user could navigate back to some
previous page that expects to be using a different type of object than the current page. For instance,
the user could be editing a
Project object, and then start editing a Resource object. Session would
have originally contained the
Project, but then would contain the Resource.
If the user then used the Back button to return to the
ProjectEdit page, Session could still have
the
Resource object in the currentObject field. This possibility is very real, and must be dealt with by
checking the type of the object retrieved from
Session to see if it is the type the page actually needs.
If not, then the correct object must be retrieved from the database.
In
RolesEdit, the GetRoles() method performs this task:
private ProjectTracker.Library.Admin.Roles GetRoles()
{
object businessObject = Session["currentObject"];
if (businessObject == null ||
!(businessObject is ProjectTracker.Library.Admin.Roles))
CHAPTER 10 ■ WEB FORMS UI540
Figure 10-11. Choosing a data source for a GridView or DetailsView
6323_c10_final.qxd 2/27/06 1:33 PM Page 540
{
businessObject =
ProjectTracker.Library.Admin.Roles.GetRoles();
Session["currentObject"] = businessObject;
}
return (ProjectTracker.Library.Admin.Roles)businessObject;
}
The code retrieves the currentObject item from Session. If the result is null, or if the resulting
object isn’t a
Roles object, then a new Roles object is retrieved by calling the Roles.GetRoles()
factory method. That newly retrieved object is placed in Session, making it the current object.
In any case, a valid
Roles object is returned as a result.
Selecting an Object
The SelectObject event is raised when the web page needs data from the data source; the Roles
object in this case. The page must handle the event and return the requested data object:
protected void RolesDataSource_SelectObject(
object sender, Csla.Web.SelectObjectArgs e)
{
ProjectTracker.Library.Admin.Roles obj = GetRoles();
e.BusinessObject = obj;
}
The GetRoles() helper method is called to retrieve the Roles collection object. Then the Roles
object is returned to the RolesDataSource control by setting the e.BusinessObject property. The data
source control then provides this object to the ASP.NET data binding infrastructure so it can be used
to populate any UI controls bound to the data control. In this case, that’s the
GridView control in
MainView. That control is declared like this:
<asp:GridView ID="GridView1" runat="server"
AutoGenerateColumns="False"
DataSourceID="RolesDataSource"
DataKeyNames="Id">
<Columns>
<asp:BoundField DataField="Id" HeaderText="Id"
ReadOnly="True" SortExpression="Id" />
<asp:BoundField DataField="Name" HeaderText="Name"
SortExpression="Name" />
<asp:CommandField ShowDeleteButton="True"
ShowEditButton="True" />
</Columns>
</asp:GridView>
The DataSourceID property establishes data binding to the RolesDataSource control.
The
DataKeyNames property specifies the name of the property on the business object that acts
as a primary key for the object. For a
Role object, this is Id. Remember the use of the DataObjectField
attribute on the Id property in Chapter 8, which provides a hint to Visual Studio that this property
is the object’s unique key value.
The first two columns in the
GridView control are bound to properties from the data source:
Id and Name, respectively. The third column is a CommandField, which automatically adds Delete and
Edit links next to each element in the list. The Delete link automatically triggers the
DeleteObject
to delete the specified object. The Edit link puts the row into in-place edit mode, allowing the user to
edit the data in the selected row. If the user accepts their updates, the
UpdateObject event is auto-
matically raised. No code beyond that handling those events is required to support either of these
links.
CHAPTER 10 ■ WEB FORMS UI 541
6323_c10_final.qxd 2/27/06 1:33 PM Page 541
Of course, you don’t have to deal with all these tags if you don’t want to. Most of the code in the
CslaDataSource control exists to support the graphical designer support in Visual Studio. Look back at
Figure 10-10 and notice how the
GridView control displays the Id, Name, and command columns. I con-
figured the control entirely using the Visual Studio designer and setting properties on the controls.
Figure 10-12 shows the Fields dialog for the
GridView control.
Notice that the Available fields box contains a list of the potentially bound fields from the data
source:
Id and Name. The CslaDataSource control’s designer support returns this list by using reflec-
tion against the data source object as discussed in Chapter 5. You can use this dialog to choose which
columns are displayed, to control the way they are displayed, to rearrange their order, and more.
Inserting an Object
The MainView contains not only a GridView control, but also a LinkButton control named
AddRoleButton. This button allows the user to add a new Role object to the Roles collection. To do
this, the current
View is changed to InsertView:
protected void AddRoleButton_Click(object sender, EventArgs e)
{
this.DetailsView1.DefaultMode = DetailsViewMode.Insert;
MultiView1.ActiveViewIndex = (int)Views.InsertView;
}
This changes the page to appear, as shown in Figure 10-13.
Look at the address bar in the browser; see how it is still
RolesEdit.aspx even though the dis-
play is entirely different from Figure 10-10. This illustrates the power of the
MultiView control, which
allows a user to remain on a single page to view, edit, and insert data.
CHAPTER 10 ■ WEB FORMS UI542
Figure 10-12. Fields dialog for a GridView control
6323_c10_final.qxd 2/27/06 1:33 PM Page 542
The control shown here is a DetailsView control, which is data bound to the same
RolesDataSource control as the GridView earlier. This control is declared in a manner very similar to
the
GridView:
<asp:DetailsView ID="DetailsView1" runat="server"
AutoGenerateRows="False" DataSourceID="RolesDataSource"
DefaultMode="Insert" Height="50px" Width="125px"
DataKeyNames="Id" OnItemInserted="DetailsView1_ItemInserted"
OnModeChanged="DetailsView1_ModeChanged">
<Fields>
<asp:BoundField DataField="Id" HeaderText="Id"
SortExpression="Id" />
<asp:BoundField DataField="Name" HeaderText="Name"
SortExpression="Name" />
<asp:CommandField ShowInsertButton="True" />
</Fields>
</asp:DetailsView>
It is bound to RolesDataSource and its DataKeyNames property specifies that the Id property is
the unique identifier for the object. The
<Fields> elements define the rows in the control much as
columns are defined in a
GridView.
If the user enters values for a new role and clicks the Insert link in the
DetailsView control, the
InsertObject event is raised by RolesDataSource. This event is handled in the page to add the new
role to the
Roles collection:
protected void RolesDataSource_InsertObject(
object sender, Csla.Web.InsertObjectArgs e)
{
try
{
ProjectTracker.Library.Admin.Roles obj = GetRoles();
ProjectTracker.Library.Admin.Role role = obj.AddNew();
CHAPTER 10 ■ WEB FORMS UI 543
Figure 10-13. The RolesEdit.aspx page when a new role is being added
6323_c10_final.qxd 2/27/06 1:33 PM Page 543
Csla.Data.DataMapper.Map(e.Values, role);
Session["currentObject"] = obj.Save();
e.RowsAffected = 1;
}
catch (Csla.DataPortalException ex)
{
this.ErrorLabel.Text = ex.BusinessException.Message;
e.RowsAffected = 0;
}
catch (Exception ex)
{
this.ErrorLabel.Text = ex.Message;
e.RowsAffected = 0;
}
}
This code retrieves the current Roles object and then calls its AddNew() method to add a new
child
Role object. Recall that in Chapter 8 the AddNewCore() method was implemented to enable
easy adding of child objects to the collection. The
public AddNew() method ultimately results in
a call to
AddNewCore(), which adds an empty child object to the collection.
This new child object is populated with data using the
DataMapper object from Chapter 5:
Csla.Data.DataMapper.Map(e.Values, role);
All new values entered by the user are provided to the event handler through e.Values. The
Map() method uses reflection to copy those values to the corresponding properties on the object.
If you want to avoid this use of reflection, you can replace this line with code like this:
role.Id = Int32.Parse(e.Values["Id"].ToString());
role.Name = e.Values["Name"].ToString();
For this simple object, this code isn’t too onerous, but for larger objects you could end up
writing a lot of code to copy each value into the object’s properties.
Either way, once the data from
e.Values has been put into the object’s properties, the object’s
Save() method is called to update the database.
■Note This follows the typical web model of updating the database any time the user performs any action,
and results in a lot more database access than the equivalent Windows Forms implementation from Chapter 9.
You could defer the call to
Save() by putting a Save button on the form and having the user click that button
to commit all changes.
Once the Save() method is complete, the resulting (updated) Roles object is put into Session.
This is very important because the result of
Save() is a new Roles object, and that new object must
be used in place of the previous one on subsequent pages. For instance, the newly added role data
generated a new
timestamp value in the database, which can only be found in this new Roles object.
This completes the insert operation, but the
MultiView control is still set to display the
InsertView. It needs to be reset to display MainView. That is done by handing the ItemInserted event
from the
DetailsView control:
protected void DetailsView1_ItemInserted(
object sender, DetailsViewInsertedEventArgs e)
{
MultiView1.ActiveViewIndex = (int)Views.MainView;
this.GridView1.DataBind();
}
CHAPTER 10 ■ WEB FORMS UI544
6323_c10_final.qxd 2/27/06 1:33 PM Page 544
The ActiveViewIndex is changed so that the MainView is displayed when the page refreshes. Also,
the
GridView control in MainView is told to refresh its data by calling its DataBind() method.
Calling
DataBind() causes the GridView to refresh its display so it shows the newly added Role
object. Behind the scenes, this triggers a call to RolesDataSource, causing it to raise its SelectObject
event.
Figure 10-13 also shows a Cancel link. If the user clicks that link, she likewise needs to be returned
to
MainView. When the user clicks Cancel, it triggers a ModeChanged event on the DetailsView control:
protected void DetailsView1_ModeChanged(
object sender, EventArgs e)
{
MultiView1.ActiveViewIndex = (int)Views.MainView;
}
So, whether the user clicks Insert or Cancel, they end up back at the main display of the list
of roles.
Updating an Object
As shown in Figure 10-10, the CommandField column in the GridView control includes both Delete
and Edit links for each row. I’ll get to the Delete link shortly, but for now let’s focus on the Edit link.
When the user clicks the Edit link on a row, the
GridView allows the user to edit that row’s data, as
shown in Figure 10-14.
The user can edit the Name column only. The Id column is set to read-only:
<asp:BoundField DataField="Id" HeaderText="Id"
ReadOnly="True" SortExpression="Id" />
CHAPTER 10 ■ WEB FORMS UI 545
Figure 10-14. The RolesEdit.aspx page when a role is being edited
6323_c10_final.qxd 2/27/06 1:33 PM Page 545
When done, the user can either click the Update or Cancel links on the row. If they click Update,
the
UpdateObject event is raised by RolesDataSource to trigger the data update. This event is handled
in the page:
protected void RolesDataSource_UpdateObject(
object sender, Csla.Web.UpdateObjectArgs e)
{
try
{
ProjectTracker.Library.Admin.Roles obj = GetRoles();
ProjectTracker.Library.Admin.Role role =
obj.GetRoleById(int.Parse(e.Keys["Id"].ToString()));
role.Name = e.Values["Name"].ToString();
Session["currentObject"] = obj.Save();
e.RowsAffected = 1;
}
catch (Csla.DataPortalException ex)
{
this.ErrorLabel.Text = ex.BusinessException.Message;
e.RowsAffected = 0;
}
catch (Exception ex)
{
this.ErrorLabel.Text = ex.Message;
e.RowsAffected = 0;
}
}
This code is quite similar to that for the insert operation discussed earlier, though in this case,
the specific
Role object that was edited is retrieved from the collection:
ProjectTracker.Library.Admin.Role role =
obj.GetRoleById(int.Parse(e.Keys["Id"].ToString()));
e.Keys
contains all the values from the page that correspond to the properties defined in the
GridView control’s DataKeyNames property. Recall that the only property set in DataKeyNames was Id,
so that’s the only value provided through
e.Keys. This value is passed to the GetRoleById() method
to retrieve the correct
Role object.
■Note Update and delete operations require that appropriate business object property names be specified in
the GridView or DetailsView control’s DataKeyNames property.
Since only one property can be edited, I opted not to use DataMapper and to set the property
value manually. However, in a more complex edit scenario in which many properties are edited,
you may choose to use
DataMapper to simplify the code.
Finally, the
Roles object’s Save() method is called to commit the user’s changes to the database.
As with the insert process, the new
Roles object returned from Save() is put into Session for use on
all subsequent page requests.
Deleting an Object
Having seen how the update process works, you can probably guess how the delete process works.
The user can click the Delete link next to a row in the
GridView control. When they do so,
RolesDataSource raises the DeleteObject event, which is handled in the page:
CHAPTER 10 ■ WEB FORMS UI546
6323_c10_final.qxd 2/27/06 1:33 PM Page 546
protected void RolesDataSource_DeleteObject(
object sender, Csla.Web.DeleteObjectArgs e)
{
try
{
ProjectTracker.Library.Admin.Roles obj = GetRoles();
int id = (int)e.Keys["Id"];
obj.Remove(id);
Session["currentObject"] = obj.Save();
e.RowsAffected = 1;
}
catch (Csla.DataPortalException ex)
{
this.ErrorLabel.Text = ex.BusinessException.Message;
e.RowsAffected = 0;
}
catch (Exception ex)
{
this.ErrorLabel.Text = ex.Message;
e.RowsAffected = 0;
}
}
The Id value for the Role object to delete is retrieved from e.Keys and used to call the Remove()
method on the Roles collection. Recall from Chapter 8 that this overload of Remove() accepts the
Id value of the Role object.
Of course, the child object is merely marked for deletion, and isn’t removed until the
Save()
method is called on the Roles object itself. Again, the resulting Roles object returned from
Save() is put into Session for use on subsequent page requests.
At this point, you should understand the basic process for creating a grid-based data form that
supports viewing, inserting, editing and deleting data. The only thing left to do in
RolesEdit is to add
support for authorization.
Authorization
The RolesEdit authorization code is perhaps the simplest in the application. If the user isn’t authorized
to edit the
Roles object, then the CommandField column in the GridView control shouldn’t be shown;
and if the user can’t add a new role, then the
LinkButton for adding a new object shouldn’t be shown.
When the page is loaded, an
ApplyAuthorizationRules() method is called:
protected void Page_Load(object sender, EventArgs e)
{
if (!IsPostBack)
ApplyAuthorizationRules();
else
this.ErrorLabel.Text = "";
}
private void ApplyAuthorizationRules()
{
this.GridView1.Columns[
this.GridView1.Columns.Count - 1].Visible =
ProjectTracker.Library.Admin.Roles.CanEditObject();
this.AddRoleButton.Visible =
ProjectTracker.Library.Admin.Roles.CanAddObject();
}
CHAPTER 10 ■ WEB FORMS UI 547
6323_c10_final.qxd 2/27/06 1:33 PM Page 547
The ApplyAuthorizationRules() method asks the Roles class whether the current user is
authorized to edit the object or add new roles. If the user isn’t authorized, then the appropriate
controls
Visible properties are set to false, and the controls are thereby hidden.
Since the user is then unable to put the
GridView control into edit mode or ask it to delete an
item, the display effectively becomes read-only. Similarly, without the
LinkButton for adding a new
item, the user can’t switch the
MultiView to InsertView; so again the page becomes a simple read-
only page.
As you can see, creating a simple grid-based edit page requires relatively little work. You add
a data control, bind the
GridView and possibly a DetailsView control to the data, and write a bit of
code. Most of the code in this page exists to react to user actions as they indicate that data is to be
inserted, edited, or deleted.
ProjectList Form
The ProjectList web form is responsible for displaying the list of projects to the user and allowing
the user to choose a specific project to view or edit. From this page, the user can also delete a proj-
ect and choose to add a new project. Figure 10-15 shows the layout of
ProjectList.
It is important to realize that the
GridView control actually has three columns: Id, Name, and the
CommandField column with the Delete links:
<Columns>
<asp:BoundField DataField="Id" HeaderText="Id"
SortExpression="Id" Visible="False" />
<asp:HyperLinkField DataNavigateUrlFields="Id"
DataNavigateUrlFormatString="ProjectEdit.aspx?id={0}"
DataTextField="Name" HeaderText="Name" />
<asp:CommandField ShowDeleteButton="True"
SelectText="Edit" />
</Columns>
The Id column has its Visible property set to False, so it is there, but invisible. Also notice that
the
Name column is a HyperLinkField, not a simple BoundField. This makes each project name appear
CHAPTER 10 ■ WEB FORMS UI548
Figure 10-15. Layout of ProjectList
6323_c10_final.qxd 2/27/06 1:33 PM Page 548