ADOBE INDESIGN CS2 REVEALED- P8 doc
Bạn đang xem bản rút gọn của tài liệu. Xem và tải ngay bản đầy đủ của tài liệu tại đây (686.88 KB, 15 trang )
Lesson 2 Create Master Pages INDESIGN 3-23
TIP Pressing and holding [Ctrl] (Win)
or (Mac) creates a spread ruler
guide, which extends across both pages
of the spread.
8. Using the same method, position three more
horizontal guides, one at two inches from
the top of the page, one at six inches from
the top of the page, and one at 6.225 inches
from the top of the page.
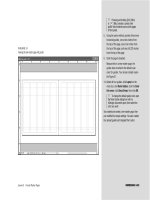
9. Click the page to deselect.
Because this is a new master page, the
guides have reverted to the default cyan
color for guides. Your screen should resem-
ble Figure 31.
10.Select all four guides, click Layout on the
menu bar, click Ruler Guides, click the Color
list arrow, click Grass Green, then click OK.
TIP To change the default guide color, open
the Ruler Guides dialog box with no
InDesign documents open, then select the
color you want.
You created and named a new master page, then
you modified its margin settings. You also created
four spread guides and changed their colors.
FIGURE 31
Viewing the new master page with guides
INDESIGN 3-24 Setting up a Document
Create text frames on a
master page
1. Click the Type Tool , then draw two text
frames on the left page of the B-Body Copy
with Pics master in the same locations
shown in Figure 32.
2. Click the Selection Tool , select the text
frame on the right, click Edit on the menu bar,
then click Copy.
3. Click Edit on the menu bar, then click Paste
in Place.
A copy is pasted exactly above the first
text frame.
4. Press and hold [Shift], then drag the copy of
the text frame to the right page, positioning
it so that it is positioned inside the first two
columns on the right page.
TIP Pressing and holding [Shift] when
dragging an object constrains that object to
the axis on which you are moving it.
5. Deselect all, select the smaller text frame on
the left page, press and hold [Shift][Alt]
(Win) or [Shift][option] (Mac), then drag a
copy to the right page.
(continued)
FIGURE 32
Positioning two text frames on the left page of the B-Body Copy with Pics master
Text frames
are blue
Lesson 2 Create Master Pages INDESIGN 3-25
TIP Pressing and holding [Shift][Alt] (Win)
or [Shift][option] (Mac) when dragging an
object makes a copy of the object.
6. Position the frame so that it is aligned with
the third and fourth columns on the right
page, as shown in Figure 33.
7. Double-click the A-Chapter Right Page,
select the text frame that includes the text
“Chapter title must be two lines,” then
copy it.
8. Double-click B-Body Copy with Pics in the
Pages palette, double-click the left page icon
of the B-Body Copy with Pics master page to
center the left page in the window, click Edit
on the menu bar, then click Paste.
9. Position the text frame in the location shown
in Figure 34.
10.Display the Paragraph palette (if necessary),
then click the Align right button .
You created four text frames on the B master page,
which will be used as placeholders for body copy.
FIGURE 33
Positioning two text frames on the right page of the B-Body Copy with Pics master
FIGURE 34
Positioning a text frame for a headline
Text frames
Text frame
for headline
INDESIGN 3-26 Setting up a Document
Create automatic page
numbering and insert white
space between characters
1. Click the Type Tool , then draw a text
frame on the left page of the B-Body Copy
with Pics master, as shown in Figure 35.
2. Click Type on the menu bar, point to Insert
Special Character, then click Auto Page
Number.
The letter B appears in the text frame. This let-
ter will change on document pages to reflect
the current document page. For example, on
page 4, the B will appear as the number 4.
3. Click Type on the menu bar, point to Insert
White Space, then click Em Space.
4. Type the word Title so that your text box
resembles Figure 36.
5. Click View on the menu bar, then click Fit
Spread in window.
6. Click the Selection Tool , select the text
frame, click Edit on the menu bar, click Copy,
click Edit on the menu bar again, then click
Paste in Place.
(continued)
FIGURE 35
Positioning the left page text frame
FIGURE 36
Viewing the text frame with automatic page numbering
Text frame
Lesson 2 Create Master Pages INDESIGN 3-27
7. Press and hold [Shift], then drag the copy of
the text frame so that it is positioned on the
right page of the B-Body Copy with Pics
master, as shown in Figure 37.
8. Click the Align right button in the
Paragraph palette, then delete the B and the
white space after the B.
9. Click after the word Title, click Type on the
menu bar, point to Insert White Space, then
click Em Space.
10.Click Type on the menu bar, point to Insert
Special Character, then click Auto Page
Number.
Your text box should resemble Figure 38.
You created automatic page numbering on the
left and right pages of the B-Body Copy with
Pics master.
FIGURE 37
Positioning the right page text frame
FIGURE 38
Viewing the right text frame with automatic page numbering
Text frame
INDESIGN 3-28 Setting up a Document
Create graphics frames on a
master page
1. Double-click the left page icon of the B-Body
Copy with Pics master in the Pages palette to
center it in the document window.
2. Click the Ellipse Frame Tool , press and
hold [Shift], then drag the pointer to create
an ellipse frame of any size on the left page,
as shown in Figure 39.
Pressing and holding [Shift] constrains
the Ellipse Frame Tool to create only a per-
fect circle.
TIP The Ellipse Frame Tool may be hidden
beneath the Rectangle Frame Tool or the
Polygon Frame Tool.
3. Type 2 in the Width text box in the
Transform palette, press [Tab], type 2 in
the Height text box, then press [Enter]
(Win) or [return] (Mac).
The size of the frame changes to a diameter
of two inches.
4. Click the center reference point on the
proxy in the Transform palette, double-click
the X Location text box, type 4.65, press
[Tab], type 4 in the Y Location text box, then
press [Enter] (Win) or [return] (Mac).
5. Double-click the right page icon of the
B-Body Copy with Pics master in the Pages
palette to center the page in the window.
6. Click Edit (Win) or InDesign (Mac) on the
menu bar, point to Preferences, click Units
& Increments, click the Origin list arrow,
click Page, then click OK.
(continued)
FIGURE 39
Creating an ellipse frame
Ellipse graphics
frame
Using the Move Pages command and dialog box
As you have learned, if you have a multiple-page document, you can change the
sequence of pages simply by moving them around in the Pages palette. Simple
enough. But for documents with more pages—let's say 100 pages—dragging and
dropping page icons in the Pages palette isn't so simple. Imagine, for example, trying
to drag page 84 so that it moves after page 14. Whew! InDesign CS2 now offers a
Move Pages command and dialog box, available from the Pages palette menu. This
simple but powerful dialog box allows you to specify which pages you want to move
and where you want to move them. Be sure to check it out.
Lesson 2 Create Master Pages INDESIGN 3-29
The horizontal ruler at the top of the window
now measures each page, not the entire spread.
7. Click the Rectangle Frame Tool , draw a
rectangle frame of any size anywhere on the
right master page, then click the top-left
reference point on the proxy in the Transform
palette.
8. In the Transform palette, type 5.125 in the
X Location text box, type 3 in the Y Location
text box, type 2.5 in the Width text box, type
2 in the Height text box, then press [Enter]
(Win) or [return] (Mac).
9. Click View on the menu bar, then click Fit
Spread in Window so that your spread
resembles Figure 40.
10.Double-click A-Chapter Right Page in the
Pages palette, then draw a rectangle frame
in the position shown in Figure 41.
The bottom of the rectangular graphics frame
abuts the top of the text frame beneath it.
11.Select the top-middle reference point on
the proxy in the Transform palette, click to
the immediate right of the value in the
Height text box, then type 25, as shown
in Figure 42.
The current value in the Height text box in
your Transform palette might differ slightly
from the figure.
12.Press [Enter] (Win) or [return] (Mac).
The height of the rectangle frame is reduced
by .25 inches, and only the bottom edge of the
box moves to accommodate the reduction.
You created three frames, which will be used as
placeholders for graphics. You used the Transform
palette to specify the sizes of the frames and their
locations on the master pages.
FIGURE 40
Viewing the spread
FIGURE 42
Entering a calculation in the Transform palette
FIGURE 41
Creating a rectangle frame
Graphics placeholder
frames
Your original height
value may differ
Calculation
Graphics placeholder
frame
INDESIGN 3-30 Setting up a Document
Create a new master page
based on another master page
1. Click the Pages palette list arrow, then click
New Master.
2. Type Copy No Pics in the Name text box of
the New Master dialog box.
The C-Copy No Pics master page will be
applied to pages in the document that do not
have pictures, only text.
3. Click the Based On Master list arrow, click
B-Body Copy with Pics, then click OK.
TIP Since the new master is based on the
B-Body Copy with Pics master, it will include
everything already positioned on the B-Body
Copy with Pics master, such as the auto-
matic page numbering.
The C-Copy No Pics icons display a B in each
of the page icons, as shown in Figure 43.
This indicates that the C-Copy No Pics mas-
ter page is based on the B-Body Copy with
Pics master page.
4. Click the Selection Tool , press and hold
[Shift][Ctrl] (Win) or [Shift] (Mac), click
the ellipse frame, click the headline place-
holder text frame, click Edit on the menu
bar, then click Cut.
The two objects are deleted from the page.
Because the ellipse frame was created on the
B-Body Copy with Pics master, you cannot
select it unless you press and hold [Shift][Ctrl]
(Win) or [Shift] (Mac) while selecting it.
(continued)
FIGURE 43
Viewing the new master in the Pages palette
The B letters in the
Copy No Pics
master page icons
indicate that it is
based on the Body
Copy with Pics
master page
Lesson 2 Create Master Pages INDESIGN 3-31
5. Press and hold [Shift][Ctrl] (Win) or
[Shift] (Mac), click the first text frame
on the right page, click the second text
frame, then click the rectangle frame.
All three objects on the right page are
selected.
6. Click Edit on the menu bar, then click Cut.
7. Click the Type Tool , then draw a text
frame on the right page in the position shown
in Figure 44.
Note that the single text frame covers the
width of four columns.
8. Click the Selection Tool , click Object on
the menu bar, then click Text Frame Options.
9. Type 2 in the Number text box, double-click
the Gutter text box, then type .25, then press
[Tab] so that your Text Frame Options dialog
box resembles Figure 45.
10.Click OK, click the page to deselect all, click
View on the menu bar, point to Grids &
Guides, click Hide Guides, then save your
document and compare your right page to
Figure 46.
You created a new master page based on the
B-Body Copy with Pics master page. You named
the new master C-Copy No Pics and modified it
by deleting items from it and creating a new
two-column text frame.
FIGURE 44
Creating a new text frame
FIGURE 45
Text Frame Options dialog box
FIGURE 46
Viewing the text frame that has two columns
Text frame
Number text box
Text frame with
two columns
Columns
Gutter text box
LESSON 3
What You’ll Do
INDESIGN 3-32 Setting up a Document
Applying Master Pages to
Document Pages
Once you have created master pages, you
then use the Pages palette to apply them to
the document pages. One method for apply-
ing master pages is the “drag and drop”
method. Using this method, you drag the
master page icon or the master page name
in the top section of the Pages palette down
to the page icons in the lower section of the
Pages palette. To apply the master to a sin-
gle page, you drag the master onto the page
icon, as shown in Figure 47. To apply the
master to a spread, you drag the master
onto one of the four corners of the left and
right page icons, as shown in Figure 48.
When you apply a master page to a docu-
ment page, the document page inherits all
of the layout characteristics of the master.
QUICKTIP
You can apply the default None master page to a document
page when you want the document page not to be based
on any master.
A second method for applying master pages
to document pages is to use the Apply
Master to Pages command in the Pages
palette menu. The Apply Master dialog box,
shown in Figure 49, allows you to specify
which master you want to apply to which
pages. This method is a good choice when
you want to apply a master to a series of
consecutive pages. When many pages are
involved, it’s faster than dragging and
dropping.
In this lesson, you will apply master pages
to document pages.
▼
APPLY MASTER PAGES TO
DOCUMENT PAGES
Lesson 3 Apply Master Pages to Document Pages INDESIGN 3-33
FIGURE 47
Applying the C-Copy No Pics master to page 2 only
FIGURE 49
Apply Master dialog box
Dragging
master page
icon onto
document
page icon
FIGURE 48
Applying the C-Copy No Pics master to both pages 2 and 3
Dragging
master page
icon onto
top-left
corner of
page icon
INDESIGN 3-34 Setting up a Document
Apply master pages to
document pages
1. Double-click B-Body Copy with Pics in the
Pages palette, then drag the corresponding
master page icon to the upper-right corner of
the page 3 icon until a black frame appears
around both pages 2 and 3, as shown in
Figure 50, then release the mouse button.
The master is applied to the spread.
2. Double-click C-Copy No Pics in the Pages
palette, then drag the corresponding master
icon on top of the page 4 icon, as shown in
Figure 51.
3. Apply the B-Body Copy with Pics master
page to page 10, then apply the C-Copy No
Pics master page to pages 11 and 12.
(continued)
FIGURE 50
Applying the B-Body Copy with Pics master page to a spread
FIGURE 51
Applying the C-Copy No Pics master page to page 4
Master page icon
Dragging master
page icon onto
top-right corner
of page three icon
Dragging master
page icon onto
page four icon
Lesson 3 Apply Master Pages to Document Pages INDESIGN 3-35
4. Click the Pages palette list arrow, then click
Apply Master to Pages.
5. Click the Apply Master list arrow, click C-Copy
No Pics (if necessary), press [Tab], if necessary,
type 6-8 in the To Pages text box, then click OK .
As shown in Figure 52, the C-Copy No Pics
master page is applied to pages 6, 7, and 8.
You used the Pages palette to explore various
ways for applying master pages to document
pages and spreads.
FIGURE 52
Viewing the masters applied to each page
C-Copy No
Pics master
page applied
to pages 6, 7,
and 8
LESSON 4
What You’ll Do
INDESIGN 3-36 Setting up a Document
Placing Text
Once you have created a text frame—
either on a master page or on a document
page—you can type directly into the
frame, or you can place text from another
document into it. When creating head-
lines, you usually type them directly into
the text frame. When creating body copy,
however, you will often find yourself plac-
ing text from another document, usually a
word processing document.
Placing text in InDesign is simple and
straightforward. Click the Place command
on the File menu, which opens the Place
dialog box. Find the text document that
you want to place, then click Open.
The pointer changes to the loaded text
icon. With a loaded text icon, you can drag
to create a text frame or click inside an
existing text frame. Float the loaded text
icon over an existing text frame, and the
icon appears in parentheses, as shown in
Figure 53. The parentheses indicate that
you can click to place the text into the text
frame. Do so, and the text flows into the
text frame, as shown in Figure 54.
In this lesson, you will place text, thread
text from frame to frame, then view text
threads.
▼
PLACE TEXT AND
THREAD TEXT
Lesson 4 Place Text and Thread Text INDESIGN 3-37
FIGURE 53
Loaded text icon positioned over a text frame
FIGURE 54
Text placed into a text frame
Loaded text icon
floating over a
text frame
Text placed
in text frame
