Web Publishing with PHP and FileMaker 9- P11 doc
Bạn đang xem bản rút gọn của tài liệu. Xem và tải ngay bản đầy đủ của tài liệu tại đây (579.35 KB, 15 trang )
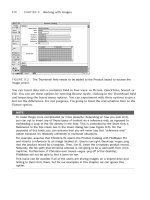
TO, the pointer turns into an double-headed arrow that allows you to drag the TO open a
bit. Do that now so you can view all of the Product fields, as shown in Figure 8.3.
CHAPTER 8 Working with Related Data (Portals)
140
FIGURE 8.3 It can be useful to resize your table occurrences to display all fields.
Now that you can see all the fields in both TOs, we are going to link the ID field in the
Product table to the ID Product field in the Inventory table. The easiest way to do this is
to drag one onto the other.
1. Position your mouse pointer over the ID field in the Product TO.
2. Click and hold your mouse button. You should notice that the pointer changes to
an arrowhead with two connected dots underneath it.
3. Without releasing your mouse button, reposition your mouse pointer over the ID
Product field in the Inventory TO. As you move your mouse, you should see a line
following out of the Product TO.
4. The ID Product field will appear highlighted when your pointer is hovering over it.
When you see the highlight, you can release your mouse button. A relationship line
should now exist between the two TOs (see Figure 8.4).
Adding a Related Table to the Database
141
8
FIGURE 8.4 A relationship has been created between the Product and Inventory table
occurrences.
Creating a Portal
Now that the relationship has been configured, you can click the OK button to dismiss
the Manage Database dialog box. Doing so should return you to the Product layout. I
would like to call your attention to the layout pop-up menu up near the top of the gray
status area on the left side of the window.
If you click on the layout pop-up, you should see that a default layout has been created
for the Inventory table. Select the Inventory option from the list to view the Inventory
layout. The Inventory layout should look similar to Figure 8.5.
FIGURE 8.5 FileMaker creates a default layout whenever you add a table to the database.
What I’m going to do next is explain how to add a portal to a layout. A portal is a layout
object that is used to display records related to the current record. In this case, we are
going to create an Inventory portal on the Product layout to display Inventory records
that are related to whatever Product record we happen to be on. As you flip through
Product records, you will see the contents of the portal change.
The first step is to make room on the layout for the portal:
1. Navigate to the Product layout by selecting it from the layout pop-up menu.
2. Click on the t-square icon at the top of the status area to enter Layout mode.
3. Note that there are three layout parts visible in Layout mode: header, body, and
footer. Increase the size of the body part by dragging its lower border toward the
bottom of the window. See Figure 8.6 for a completed example.
CHAPTER 8 Working with Related Data (Portals)
142
FIGURE 8.6 Before we can add an Inventory portal to the Product layout, we need to make
some room for it.
Now we can insert the portal:
1. Click once in the middle of the empty space that you just created in the body of the
layout. This tells FileMaker where to insert the portal.
2. Select Portal from the Insert menu. You will see the portal appear on the layout and
the Portal Setup dialog box opens.
3. Select Inventory from the Show Related Records From pop-up menu.
4. Activate the Show Vertical Scroll Bar option. The completed Portal Setup dialog box
should look similar to Figure 8.7.
5. Click the OK button to dismiss the Portal Setup dialog box. The Add Fields to Portal
dialog box opens.
6. Double-click the Location field and the Quantity field in the Available Fields area to
move them into the Included Fields area. The completed Add Fields to Portal dialog
box should look similar to Figure 8.8.
7. Click the OK button to dismiss the Add Fields to Portal dialog box. You are returned
to the Product layout with the new Inventory portal on it.
8. Resize the portal and the fields inside of it to look similar to Figure 8.9.
WARNING
When manipulating portals, be very careful to make sure that the fields are completely
contained inside of the first row of the portal. If the fields are even a little bit outside
of the first portal row, the portal will not work correctly.
Adding a Related Table to the Database
143
8
FIGURE 8.7 The completed Portal Setup dialog box.
FIGURE 8.8 The completed Add Fields to Portal dialog box.
CHAPTER 8 Working with Related Data (Portals)
144
FIGURE 8.9 The Product layout with the completed Inventory portal. Note that the portal
fields are completely inside of the first portal row. This is very important because if the fields
are even slightly outside of the portal, the portal will not work correctly.
Adding Related Records
Return to Browse mode by clicking the pencil icon in the status area. You should see the
portal on the layout, but it will be empty because there are no related records yet. Let’s
create a couple of related records now so you can see how the portal looks with data in it:
1. Make note of the ID of the Product record you are on. In my version of the file, I
am on Skeeter’s Egg Beaters and the ID value is 1 (see Figure 8.10).
2. Navigate to the Inventory layout using the layout pop-up in the status area.
FIGURE 8.10 Make note of the current Product ID in your version of the Product Catalog
database. My current ID is 1, but yours might differ.
Adding a Related Table to the Database
145
8
3. Create a new Inventory record by selecting New Record from the Records menu.
4. Type Boston in the Location field.
5. Type 25 in the Quantity field.
6. Type the ID value from the Product record in the ID Product field. In my case, the
value is 1. See Figure 8.11 for the completed Inventory record.
7. Navigate back to the Product layout using the layout pop-up in the status area. You
should now see an Inventory record in the Inventory portal (see Figure 8.12).
FIGURE 8.11 This is a completed Inventory record. Note that I entered 1 in the ID Product
field because that is my current Product ID. You should enter whatever your current Product ID is.
FIGURE 8.12 The portal is now showing an inventory record because the ID of the current
product record matches the value in the ID Product field of the related inventory record.
Repeat this process to create a few more inventory records for this product. After you have
a few records in the portal, switch to the next product in the product table and make
some inventory records for it. Continue until you have at least one inventory record
attached to all of the products in your database so you will have some test data to view
when we move to the PHP work. Speaking of which
Viewing Portal Data with FileMaker.php
In Chapter 6, “Viewing FileMaker Data,” I created a view product page. I am going to
modify that code to include the related portal data. The finished product will look similar
to Figure 8.13.
CHAPTER 8 Working with Related Data (Portals)
146
FIGURE 8.13 The View Product page now displays the related portal records.
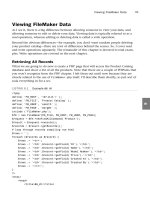
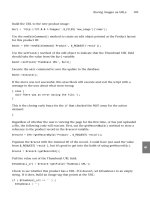
Here is the underlying code for this version of the page:
<?php
define( ‘FM_HOST’, ‘127.0.0.1’ );
define( ‘FM_FILE’, ‘Product Catalog’ );
define( ‘FM_USER’, ‘esmith’ );
define( ‘FM_PASS’, ‘m4rg0t’ );
require_once (‘FileMaker.php’);
$fm = new FileMaker(FM_FILE, FM_HOST, FM_USER, FM_PASS);
$record = $fm->getRecordById(‘Product’, $_GET[‘recid’]);
$id = $record->getField(‘ID’);
$name = $record->getField(‘Name’);
$model_number = $record->getField(‘Model Number’);
$price = $record->getField(‘Price’);
$created_at = $record->getField(‘Created At’);
$created_by = $record->getField(‘Created By’);
$portal_records = $record->getRelatedSet(‘Inventory’);
$portal_html = ‘<table border=”1”>’;
$portal_html .= ‘<tr>’;
$portal_html .= ‘<th>Location</th>’;
$portal_html .= ‘<th>Quantity</th>’;
$portal_html .= ‘</tr>’;
foreach( $portal_records as $portal_record ) {
$portal_html .= ‘<tr>’;
$portal_html .= ‘<td>’.$portal_record->getField(‘Inventory::Location’).’</td>’;
$portal_html .= ‘<td>’.$portal_record->getField(‘Inventory::Quantity’).’</td>’;
$portal_html .= ‘</tr>’;
}
$portal_html .= ‘</table>’;
?>
<html>
<head>
<title>08_01</title>
</head>
<body>
<table border=”1”>
<tr>
<th>ID</th>
<td><?php echo $id; ?></td>
</tr>
<tr>
<th>Name</th>
<td><?php echo $name; ?></td>
</tr>
<tr>
<th>Model Number</th>
<td><?php echo $model_number; ?></td>
</tr>
<tr>
<th>Price</th>
<td><?php echo $price; ?></td>
</tr>
<tr>
<th>Created At</th>
<td><?php echo $created_at; ?></td>
</tr>
<tr>
<th>Created By</th>
<td><?php echo $created_by; ?></td>
</tr>
</table>
<?php echo $portal_html; ?>
</body>
</html>
Viewing Portal Data with FileMaker.php
147
8
Here’s the blow-by-blow commentary:
As usual, the page starts off with the opening PHP tag and the definition of the connec-
tion constants.
<?php
define( ‘FM_HOST’, ‘127.0.0.1’ );
define( ‘FM_FILE’, ‘Product Catalog’ );
define( ‘FM_USER’, ‘esmith’ );
define( ‘FM_PASS’, ‘m4rg0t’ );
Next, we include FileMaker.php and make a new connection to the database.
require_once (‘FileMaker.php’);
$fm = new FileMaker(FM_FILE, FM_HOST, FM_USER, FM_PASS);
Normally, this page would be pulled up as a result of a user clicking a view link in a list of
products. That link would include a value associated with the
recid variable. Here, I am
using this incoming
$recid variable with the getRecordByID() method of the FileMaker
connection object to create a FileMaker record object named
$record.
$record = $fm->getRecordById(‘Product’, $_GET[‘recid’]);
WARNING
If you call
getRecordById() with a NULL or empty string as the recid,
FileMaker.php is going to return a reference to the first record in the database.
In practice, you are going to want to check to make sure the
recid has a value
before calling getRecordById().
After I have a reference to the record, I use the
getField() method to store the values in
appropriately named variables.
$id = $record->getField(‘ID’);
$name = $record->getField(‘Name’);
$model_number = $record->getField(‘Model Number’);
$price = $record->getField(‘Price’);
$created_at = $record->getField(‘Created At’);
$created_by = $record->getField(‘Created By’);
Because the target layout of this connection contains a portal, the record object is going
to have a related set embedded in it. The related set will have the name of the TO upon
which it is based. In our case, the TO is named Inventory, so we get access to the related
record set like so:
$portal_records = $record->getRelatedSet(‘Inventory’);
CHAPTER 8 Working with Related Data (Portals)
148
Next, we begin to compile some HTML into the $portal_html variable.
$portal_html = ‘<table border=”1”>’;
$portal_html .= ‘<tr>’;
$portal_html .= ‘<th>Location</th>’;
$portal_html .= ‘<th>Quantity</th>’;
$portal_html .= ‘</tr>’;
Now we are ready to start looping through the portal records and creating table rows.
Notice that when you use the
getField() method with related records, you have to
preface the field name with the table occurrence name and two colons.
foreach( $portal_records as $portal_record ) {
$portal_html .= ‘<tr>’;
$portal_html .= ‘<td>’.$portal_record->getField(‘Inventory::Location’).’</td>’;
$portal_html .= ‘<td>’.$portal_record->getField(‘Inventory::Quantity’).’</td>’;
$portal_html .= ‘</tr>’;
}
Finally, close the portal table with a closing table tag, and close out the PHP section.
$portal_html .= ‘</table>’;
?>
There is nothing too remarkable about the HTML template section. Just remember to
echo out the contents of the
$portal_html variable, as I’ve done at the very end of the
body section of the document.
<html>
<head>
<title>08_01</title>
</head>
<body>
<table border=”1”>
<tr>
<th>ID</th>
<td><?php echo $id; ?></td>
</tr>
<tr>
<th>Name</th>
<td><?php echo $name; ?></td>
</tr>
<tr>
<th>Model Number</th>
<td><?php echo $model_number; ?></td>
</tr>
<tr>
Viewing Portal Data with FileMaker.php
149
8
<th>Price</th>
<td><?php echo $price; ?></td>
</tr>
<tr>
<th>Created At</th>
<td><?php echo $created_at; ?></td>
</tr>
<tr>
<th>Created By</th>
<td><?php echo $created_by; ?></td>
</tr>
</table>
<?php echo $portal_html; ?>
</body>
</html>
Creating Related Records
Let’s modify the web page to allow users to create related records in the portal by adding
a single row form to the end of the table. When the users enter data in the form and click
the Save button, the related record is created and added to the list. The page will look
similar to Figure 8.14.
CHAPTER 8 Working with Related Data (Portals)
150
FIGURE 8.14 Users can now create new related inventory records directly in the portal.
Here’s the completed code:
<?php
define( ‘FM_HOST’, ‘127.0.0.1’ );
define( ‘FM_FILE’, ‘Product Catalog’ );
define( ‘FM_USER’, ‘esmith’ );
define( ‘FM_PASS’, ‘m4rg0t’ );
require_once (‘FileMaker.php’);
$fm = new FileMaker(FM_FILE, FM_HOST, FM_USER, FM_PASS);
$record = $fm->getRecordById(‘Product’, $_GET[‘recid’]);
if ( isset($_POST[‘new_portal_row’]) ) {
$new_row = $record->newRelatedRecord(‘Inventory’);
$new_row->setField(‘Inventory::Location’, $_POST[‘location’]);
$new_row->setField(‘Inventory::Quantity’, $_POST[‘quantity’]);
$result = $new_row->commit();
$record = $fm->getRecordById(‘Product’, $_GET[‘recid’]);
}
$id = $record->getField(‘ID’);
$name = $record->getField(‘Name’);
$model_number = $record->getField(‘Model Number’);
$price = $record->getField(‘Price’);
$created_at = $record->getField(‘Created At’);
$created_by = $record->getField(‘Created By’);
$portal_records = $record->getRelatedSet(‘Inventory’);
$portal_html = ‘<form action=”08_02.php?recid=’.$record->getRecordId().’”
➥
method=”post”>’;
$portal_html .= ‘<table border=”1”>’;
$portal_html .= ‘<tr>’;
$portal_html .= ‘<th>Location</th>’;
$portal_html .= ‘<th>Quantity</th>’;
$portal_html .= ‘<th> </th>’;
$portal_html .= ‘</tr>’;
foreach( $portal_records as $portal_record ) {
$portal_html .= ‘<tr>’;
$portal_html .= ‘<td>’.$portal_record->getField(‘Inventory::Location’).’</td>’;
$portal_html .= ‘<td>’.$portal_record->getField(‘Inventory::Quantity’).’</td>’;
$portal_html .= ‘<td> </td>’;
$portal_html .= ‘</tr>’;
}
$portal_html .= ‘<tr>’;
$portal_html .= ‘<td><input type=”text” name=”location” value=””></td>’;
$portal_html .= ‘<td><input type=”text” name=”quantity” value=””></td>’;
$portal_html .= ‘<td><input type=”submit” name=”new_portal_row”
➥
value=”Save”></td>’;
$portal_html .= ‘</tr>’;
$portal_html .= ‘</table>’;
$portal_html .= ‘</form>’;
?>
<html>
<head>
<title>08_02</title>
</head>
Creating Related Records
151
8
<body>
<table border=”1”>
<tr>
<th>ID</th>
<td><?php echo $id; ?></td>
</tr>
<tr>
<th>Name</th>
<td><?php echo $name; ?></td>
</tr>
<tr>
<th>Model Number</th>
<td><?php echo $model_number; ?></td>
</tr>
<tr>
<th>Price</th>
<td><?php echo $price; ?></td>
</tr>
<tr>
<th>Created At</th>
<td><?php echo $created_at; ?></td>
</tr>
<tr>
<th>Created By</th>
<td><?php echo $created_by; ?></td>
</tr>
</table>
<?php echo $portal_html; ?>
</body>
</html>
And now, here it is with descriptions inline. This first section is identical to the previous
example:
<?php
define( ‘FM_HOST’, ‘127.0.0.1’ );
define( ‘FM_FILE’, ‘Product Catalog’ );
define( ‘FM_USER’, ‘esmith’ );
define( ‘FM_PASS’, ‘m4rg0t’ );
require_once (‘FileMaker.php’);
$fm = new FileMaker(FM_FILE, FM_HOST, FM_USER, FM_PASS);
$record = $fm->getRecordById(‘Product’, $_GET[‘recid’]);
This next section checks to see whether the user has submitted a new related record.
When the user first navigates to this page from the product list page, the
new_portal_row
CHAPTER 8 Working with Related Data (Portals)
152
element will not exist in the $_POST super global array and this conditional expression
will evaluate to
FALSE.
if ( isset($_POST[‘new_portal_row’]) ) {
Let’s assume, however, that the user has viewed this page once already and has used the
form to submit a new related record. In that case, the conditional expression will evaluate
to
TRUE and the following lines will be executed.
First, use the newRelatedRecord() method to create a reference to the new record and
store that reference in the
$new_row variable. The newRelatedRecord() method takes the
related set name as a parameter, which in this case is Inventory.
$new_row = $record->newRelatedRecord(‘Inventory’);
Now that we have a reference to the new related record, we can use the setField()
method to tell FileMaker what values to put in the record. The setField() parameters are
the field name (with the related set name prefix), and the value to put in the field. In this
example, those values will be coming from the
$_POST array.
$new_row->setField(‘Inventory::Location’, $_POST[‘location’]);
$new_row->setField(‘Inventory::Quantity’, $_POST[‘quantity’]);
The record has not yet been created in the database. We have to call the commit()
method to save the changes to the database.
$result = $new_row->commit();
This next line might look a little familiar, and that’s because we have already called it in
this page. We have to call it again because the first time we called it, the new related
record didn’t exist. To make it show up in the following HTML template, we need to
repull the original record. And with that done, we can close the
if block.
$record = $fm->getRecordById(‘Product’, $_GET[‘recid’]);
}
The next section of code is pulling the field values out of the product record.
$id = $record->getField(‘ID’);
$name = $record->getField(‘Name’);
$model_number = $record->getField(‘Model Number’);
$price = $record->getField(‘Price’);
$created_at = $record->getField(‘Created At’);
$created_by = $record->getField(‘Created By’);
Grab the related set, which will now include the new row that was created previously,
because we updated the
$record variable with the latest information.
$portal_records = $record->getRelatedSet(‘Inventory’);
Creating Related Records
153
8
Start compiling the portal HTML. This time, I am going to wrap the table in a form tag to
accommodate the input fields in the last row.
$portal_html = ‘<form action=”08_02.php?recid=’.$record->getRecordId().’”
➥
method=”post”>’;
Open the table:
$portal_html .= ‘<table border=”1”>’;
Create the header row. Notice the string in the last th element. Browsers will inter-
pret that combination of characters as a nonbreaking space. I am using it here because I
want the
th block to show up empty on the web page (refer to Figure 8.14). I could have
put nothing between the
th tags, but that can lead to unusual results in some browsers.
$portal_html .= ‘<tr>’;
$portal_html .= ‘<th>Location</th>’;
$portal_html .= ‘<th>Quantity</th>’;
$portal_html .= ‘<th> </th>’;
$portal_html .= ‘</tr>’;
Here I am looping through the portal records just like the previous sample page, with the
addition of an empty
td as a placeholder for the third column.
foreach( $portal_records as $portal_record ) {
$portal_html .= ‘<tr>’;
$portal_html .= ‘<td>’.$portal_record->getField(‘Inventory::Location’).’</td>’;
$portal_html .= ‘<td>’.$portal_record->getField(‘Inventory::Quantity’).’</td>’;
$portal_html .= ‘<td> </td>’;
$portal_html .= ‘</tr>’;
}
This is the section of the page where the input fields are created for the new related
record feature. As you can see, the text inputs are named location and quantity to corre-
spond to the references to the
$_POST superglobal array in the setField() lines previ-
ously. Also note that the Submit button is named
new_portal_row, which is the variable
I checked for in the
if conditional previously. In other words, when the new_portal_row
variable shows up in the $_POST array, we can assume that the user clicked the Save
button.
$portal_html .= ‘<tr>’;
$portal_html .= ‘<td><input type=”text” name=”location” value=”” /></td>’;
$portal_html .= ‘<td><input type=”text” name=”quantity” value=”” /></td>’;
$portal_html .= ‘<td><input type=”submit” name=”new_portal_row”
➥
value=”Save” /></td>’;
$portal_html .= ‘</tr>’;
CHAPTER 8 Working with Related Data (Portals)
154