lập trình sharepoint -A SharePoint Developer Introduction – C#
Bạn đang xem bản rút gọn của tài liệu. Xem và tải ngay bản đầy đủ của tài liệu tại đây (2.12 MB, 39 trang )
A SharePoint Developer
Introduction – C#
Microsoft
®
Virtual Labs
A SharePoint Developer Introduction – C#
Table of Contents
A SharePoint Developer Introduction 1
Exercise 1 Hello World 2
Exercise 2 Web Part Interaction 10
Exercise 3 Connecting Web Parts 19
A SharePoint Developer Introduction – C#
Page 1 of 37
A SharePoint Developer Introduction – C#
Objectives
Web Parts are one of the core ASP.NET technologies used by SharePoint to
present dynamic information to users. They are the most common customization
created for SharePoint. A Web Part is a reusable component which exists on a
Web Part Page and can present any type of web-based information.
The objective of this lab is to learn about how to build Web Parts for use in the
SharePoint system.
• Create a basic SharePoint Web Part which displays information from
within the SharePoint site.
• Create a more advanced Web Part utilizing a server postback and the
SPGridView control.
• Create an advanced Web Part leveraging Web Part connection that
displays budget data.
Scenario
In this exercise, you will develop and deploy your first
• Display text on a label within a Web Part
• Allow the text on the label to be edited and colored.
• Create a Web Part that allows users to navigate to sites and lists within a
site collection. This will utilize the SPGridView control. The grid
view will display two columns – one for sites the other for lists. Each
column will contain ButtonField controls that perform a postback when
clicked. This exercise will also demonstrate how to use existing
ASP.NET user controls in SharePoint.
•
Build a Dashboard Web Part that summarizes sales of widgets. Monthly
sales records will be recorded to a custom list. The Dashboard Web
Part will connect to a standard ListView Web Part on the same page.
Estimated Time to
Complete This Lab
60 Minutes
Computers used in this
Lab
Server1
A SharePoint Developer Introduction – C#
Page 2 of 37
Exercise 1
Hello World
Scenario
In this exercise, you will develop and deploy your first Web Part. This Web Part will:
• Display text on a label within a Web Part
• Allow the text on the label to be edited and colored.
Tasks Detailed Steps
Complete the following
tasks on:
Server1
1. Create a SharePoint
Web Part Solution
a.
Open Visual Studio 2005 by going to the Start Menu | Programs | Microsoft Visual
Studio 2005 | Microsoft Visual Studio 2005.
b. From the menu, select File | New | Project.
c. In the New Project dialog box, expand the Visual C# > SharePoint project type and select
Web Part.
d. Enter “C:\SPHOLS\Labs\Lab 01 - Web Parts” for the Location.
e. Enter HelloWorldWebPart for the Name.
f. Enter SPHOL_WebParts for the Solution Name.
g. Click Ok.
h. The HelloWorldWebPart project can now be seen in the solution folder. Note that a
folder called WebPart1 is created and contains a few files.
A SharePoint Developer Introduction – C#
Page 3 of 37
Tasks Detailed Steps
i. Delete the WebPart1 folder from the project. You will create a new Web Part with the
correct name in the next step.
Note: While you can rename the WebPart1 folder and the files within it, is quicker and simpler
to delete and recreate the Web Part.
Note: When using VSeWSS a number of templates are installed. Most of these are created
from the Blank project template but have then had a number of pre-configured project items
added by default. The default files could be customized however for the process of learning it
is a good idea to know how to add project items. This illustrates the process of adding a Web
Part item to a Site Definition for instance.
j. In the Solution Explorer right click the newly created HelloWorldWebPart project and
select Add | New Item.
k. In the Categories area of the Add New Item dialogue box select SharePoint and in the
Templates area select Web Part.
l. Name this Web Part HelloWorld and select Add.
Note: The HelloWorld folder that has been added to the project. This folder contains three
files with the base name of HelloWorld.
m. Right click the HelloWorldWebPart project and select Properties. The Project Properties
will be displayed.
n. Select the Debug tab.
o. Set the Start URL to http://spvm. This is used by VSeWSS to determine the location of
SharePoint when deploying the solution.
A SharePoint Developer Introduction – C#
Page 4 of 37
Tasks Detailed Steps
2. Add Web Part
Customizations
Note: This task will describe the steps to add code to the Web Part. Properties of the Web Part
will be created, including settings which can be changed using the SharePoint browser-based
interface.
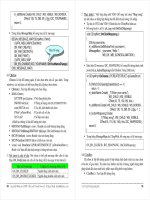
a. Open HelloWorld.webpart. This XML file contains the Web Part definition that will be
deployed to SharePoint.
b. Change the Description property to “A simple Hello World Web Part”.
c. Open the HelloWorld.cs file in Visual Studio and inspect the code. The
CreateChildControls method contains commented code which implements a simple way
to add a label control to the Web Part.
d. Uncomment the default code in the CreateChildControls method. The method should
now resemble the following code.
protected override void CreateChildControls()
{
base.CreateChildControls();
// TODO: add custom rendering code here.
Label label = new Label();
label.Text = "Hello World";
this.Controls.Add(label);
}
Note: CreateChildControls is an overridden method. HelloWorldWebPart requires this
method to provide a specific implementation in which controls are created.
e. The next step is to add properties to the Web Part. Create a new property to allow the user
to define the “Hello World” message to display. Paste the following code into the Web
Part class.
private string _helloWorldText = "Hello SharePoint!";
public string HelloWorldText
A SharePoint Developer Introduction – C#
Page 5 of 37
Tasks Detailed Steps
{
get { return _helloWorldText; }
set { _helloWorldText = value; }
}
f. The Web Part properties must be decorated with a few attributes. Add the following using
statement to the top of HelloWorld.cs.
using System.ComponentModel;
g. In order for SharePoint to display the HelloWorldText property for user modification, you
must add the following attributes to the property.
[WebBrowsable(true),
Personalizable(PersonalizationScope.User),
WebDescription("Hello World Text"),
Category("Hello World"),
WebDisplayName("Text")]
public string HelloWorldText
{
get { return helloWorldText; }
set { helloWorldText = value; }
}
Table 1 – HelloWorldText property explanations
WebDisplayName(
"…")
This attribute defines the text that is used to label the property in the
Web Part task pane.
WebBrowsable(true
)
This is used to allow Editing of the Web Part property. Without this
the property will not be displayed in the Web Part task pane.
Personalizable(Pers
onalizationScope.U
ser)
This attribute should be coupled with WebBrowsable as it allows
saving of modified property values.
WebDescription("
…")
This is an optional attribute and can contain anything you define.
The description is displayed as a tooltip when hovering over the
property in the Web Part task pane.
Category("…") This optional attribute is an organizing mechanism, defining where
the property should reside in the Web Part task pane of SharePoint
and also providing a grouping strategy for logically related properties.
The default category is Miscellaneous.
h. Next, a property should be added to allow the user to select a color for the message. This
will follow a similar process as the steps above.
First, add a reference to System.Drawing. Right click the HelloWorldWebPart project
and select Add Reference.
i. Select System.Drawing from the .NET tab.
A SharePoint Developer Introduction – C#
Page 6 of 37
Tasks Detailed Steps
j. Click OK.
k. Add the following using statement to the top of HelloWorld.cs.
using System.Drawing;
l. Insert the TextColor property using the following code.
private KnownColor _textColor = KnownColor.Black;
[WebBrowsable(true),
Personalizable(PersonalizationScope.User),
WebDescription("Hello World Text Color"),
Category("Hello World"),
WebDisplayName("Text Color")]
public KnownColor TextColor
{
get { return _textColor; }
set { _textColor = value; }
}
Note: KnownColor is an enumeration that contains all the colors of the .NET rainbow. An
enumeration will provide a set of choices in the form of a drop down list for editing the Web
Part in the SharePoint Web Part task pane.
m. The next step is to edit the code within the CreateChildControls method. Before setting
the label.Text you should ensure the property contains some text. Add the following code
before setting the label.Text value.
if (string.IsNullOrEmpty(HelloWorldText))
{
A SharePoint Developer Introduction – C#
Page 7 of 37
Tasks Detailed Steps
HelloWorldText = "Hello SharePoint!";
}
n. Delete the default code that sets the Label Text.
label.Text = "Hello World";
o. Now set the label variables Text property to HelloWorldText and set the label’s
ForeColor property to the TextColor property.
label.Text = HelloWorldText;
label.ForeColor = Color.FromKnownColor(TextColor);
Note: You need to convert the KnownColor enum value to a Color value.
p. The final CreateChildControls method should look like the following.
protected override void CreateChildControls()
{
base.CreateChildControls();
Label label = new Label();
if (string.IsNullOrEmpty(HelloWorldText))
{
HelloWorldText = "Hello SharePoint!";
}
label.Text = HelloWorldText;
label.ForeColor = Color.FromKnownColor(TextColor);
this.Controls.Add(label);
}
3. Deploy and Test
Note: With the Web Part coding complete, this section will deploy it to the SharePoint site.
Then you will test it to ensure that it behaves correctly.
a. Build and deploy the project to SharePoint by right clicking the HelloWorldWebPart
project and selecting Deploy.
b. The Visual Studio status bar should display Deploy succeeded.
c. Open Internet Explorer and navigate to the SharePoint home page, http://spvm.
d. Select Site Actions | Edit Page located at the top right corner of the page.
e. Click Add a Web Part at the top of the Left Web Part zone.
A SharePoint Developer Introduction – C#
Page 8 of 37
Tasks Detailed Steps
f.
Scroll to All Web Parts | Miscellaneous | HelloWorld Web Part and tick the check box.
g. Click Add .
h. The HelloWorld Web Part will be added to the page displaying the default message Hello
SharePoint!
i. To edit the Web Part select the edit button on the newly added Web Part. Select Modify
Shared Web Part.
j. In the Web Part task pane which appears, expand the Hello World section.
k. In the Text box enter the desired text, and select a desired color in Text Color.
Note: The Hello World editing section was defined previously when the Category attribute was
added to the properties.
A SharePoint Developer Introduction – C#
Page 9 of 37
Tasks Detailed Steps
l. Click OK. The Web Part will now display the modifications.
A SharePoint Developer Introduction – C#
Page 10 of 37
Exercise 2
Web Part Interaction
Scenario
Simple Web Parts that display data are very easy to create. However, it is more likely that you will want to enable
some interaction with users. This usually requires a postback to your Web Part.
For this exercise you will create a Web Part that allows users to navigate to sites and lists within a site collection.
This will utilize the SPGridView control. The grid view will display two columns – one for sites the other for lists.
Each column will contain ButtonField controls that perform a postback when clicked. This exercise will also
demonstrate how to use existing ASP.NET user controls in SharePoint.
Tasks Detailed Steps
Complete the following
tasks on:
Server1
1. Set up the Project
a.
In Visual Studio 2005 open the SPHOL_WebPart solution you created in Exercise 1
above.
b. In the Solution Explorer right click the solution and select Add | New Project.
c. From the SharePoint project type, select Web Part.
d. Name the Web Part project SiteNavWebPart.
e. Click OK.
f. Right click the SiteNavWebPart project and select Properties. The Project Properties
will be displayed.
g. Select the Debug tab.
h. Set the Start URL to http://spvm. This is used by VSeWSS to determine the location of
SharePoint when deploying the solution.
A SharePoint Developer Introduction – C#
Page 11 of 37
Tasks Detailed Steps
i.
Once again, Visual Studio has created a default Web Part in the new project called
WebPart1. Delete the WebPart1 folder from the new project.
j. Add a correctly named Web Part to the project by right clicking on SiteNavWebPart and
selecting Add | New Item.
k. From the categories area select SharePoint and then from the Templates section select
Web Part.
l. Enter the name SiteNavigation.
m. Click Add.
n. Open SiteNavigation.webpart and change the Description property to “A Site navigation
Web Part that displays sites and lists”.
o. Build the solution but don’t deploy it yet.
2. Setting up the user
control
Note: In this task you will use an existing ASP.NET user control to display the sites and lists
within a Web Part. User controls have some advantages over Web Part:
• Visual Studio provides a visual designer for user controls, but not Web Parts.
• User Control .ASCX files can be altered without the need to recompile the .NET code
behind.
• User Controls can be dynamically loaded to a Controls collection (as can Server controls
and Web Parts).
• Creation of a user control for use in SharePoint is possible in two main ways:
• Create the user control in a Web Site and migrate the .ASCX file and code behind to the
SharePoint solution.
• Create the user control and code behind in the SharePoint solution.
The second option has the drawback of not being able to test the user control without
deploying it to a SharePoint site.
This task will use a pre-created Web Site project containing a single user control. This simple
site contains a single page, default.aspx hosting a single user control
SiteNavigationUserControl.ascx that uses an SPGridView control.
a. Copy the SiteNav folder from the resources folder “C:\SPHOLS\Labs\Lab 01 – Web
Parts\Resources\CS” to the base folder for the local SharePoint site (http://spvm)
A SharePoint Developer Introduction – C#
Page 12 of 37
Tasks Detailed Steps
“C:\InetPub\wwwroot\wss\VirtualDirectories\80”.
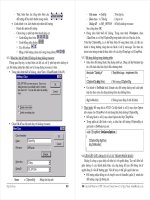
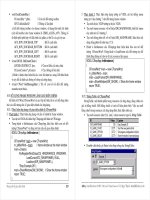
b. The site will need to function as an application in IIS. Select Start | Administrative
Tools | Internet Information Services (IIS) Manager
c. Navigate to Web Sites | SharePoint – 80 and locate the SiteNav directory.
d. Right-Click SiteNav and select Properties
e. In the Directory tab select Create for the Application Name. The outcome looks like the
screenshot below.
A SharePoint Developer Introduction – C#
Page 13 of 37
Tasks Detailed Steps
f. Click Ok.
g. Close IIS Manager.
Note: You should now be able to test the SiteNav Web site.
h. Using Internet Explorer, navigate to http://spvm/SiteNav/default.aspx. You should see
something similar to the following.
Note: This simple site is able to display SharePoint content because it is located in a folder
within the SharePoint site. The SPGridView control that is embedded in the user control,
A SharePoint Developer Introduction – C#
Page 14 of 37
Tasks Detailed Steps
SiteNavigationUserControl.ascx, is aware of the SharePoint context. Sites running outside of
the SharePoint context cannot use SharePoint server controls such as SPGridView.
i. Return to Visual Studio. In the Solution Explorer right-click the Solution Folder and
select Add | Existing Web Site.
j. Select SiteNav from C:\InetPub\wwwroot\wss\VirtualDirectories\80.
k. Click Open.
l. Right-click the SiteNavWebPart project and select Add | New Folder.
m. Name the new folder Templates.
Templates
Templates are a simple way of copying files to the SharePoint
12 folder, unlike modules which are SharePoint Features that
can be activated and deactivated. As such you should only
use Templates to copy files that need to be globally visible to
all sites. User Controls and Themes fall into this category.
In VSeWSS the Templates folder maps directory to the
TEMPLATE folder in the SharePoint 12 folder.
n. Within the Templates folder create another folder called CONTROLTEMPLATES.
o. Copy the SiteNavigationUserControl.ascx file from the newly added SiteNav Web site
folder and paste it into the CONTROLTEMPLATES folder.
Visual Studio will copy the .ASCX and .CS files.
p. Move the SiteNavigationUserControl.ascx.cs file from the CONTROLTEMPLATE
folder to the SiteNavigation folder. The outcome should look like as follows.
A SharePoint Developer Introduction – C#
Page 15 of 37
Tasks Detailed Steps
q. Open the SiteNavigationUserControl.ascx file. There are attributes within the @ Control
directive that need to be modified.
Remove the attribute value CodeFile=”SiteNavigationUserControl.ascx.cs”.
r. Replace the Inherits attribute with the following code – keeping it all on a single line.
Inherits="SiteNavWebPart.SiteNavigationUserControl,
SiteNavWebPart, Version=1.0.0.0, Culture=neutral,
PublicKeyToken=9f4da00116c38ec5"
Note: This specifies the code-behind class that the control inherits. SharePoint requires all
code behind to be installed to the Global Assembly Cache (GAC). As the SiteNavWebPart
project assembly is already being installed to the GAC this is a logical location for the code.
However, there is nothing preventing you from creating a new separate Strongly Names
assembly for the code behind.
s. The PublicKeyToken value must be updated.
To retrieve the PublicKeyToken of your assembly follow these sub-steps:
• Build the project.
• Open an instance of the Visual Studio Command Prompt. This is found under
Start | All Programs | Visual Studio 2005 | Visual Studio Tools menu option or
use the shortcut in the Links folder on the Desktop
• Change to the bin\debug directory of your project, “C:\SPHOLS\Labs\Lab 01 -
Web Parts\SPHOL_WebParts\SiteNavWebPart\bin\Debug”.
• Type SN.exe –Tp SiteNavWebPart.dll.
• Copy the Public key token value – not the long Public key value.
Use the correct value to replace the PublicKeyToken in the ASCX file.
PublicKeyTokens from VSeWSS Project Templates
When using VSeWSS to create projects, the Strong Name Key file
(.SNK) that is used is part of the project template distributed by
Microsoft. Therefore, the PublicKeyToken in this SNK file is the
same for all projects and all users of VSeWSS. You should always
replace this SNK file with one of your own.
t. Open the SiteNavigationUserControl.ascx.cs code file that is located in the
SiteNavigation folder.
u. Surround the SiteNavigationUserControl class with a namespace SiteNavWebPart.
This makes the user control code more consistant with the rest of the Web Part code.
A SharePoint Developer Introduction – C#
Page 16 of 37
Tasks Detailed Steps
namespace SiteNavWebPart
{
public partial class SiteNavigationUserControl : System.Web.UI.UserControl
{
…
}
}
v. Inside the SiteNavigationUserControl class, add a declaration for the SPGridView
control that is embedded in the ASCX file.
This is necessary because the control was created in a file based web site where Visual
Studio does not create a designer file containing these declarations.
public partial class SiteNavigationUserControl :
System.Web.UI.UserControl
{
protected SPGridView SiteNavGridView;
…
}
w. Open SiteNavigation.cs and add the following code to the CreateChildControls method.
This will dynamically load the user control to the Web Parts Controls collection.
protected override void CreateChildControls()
{
base.CreateChildControls();
UserControl uc =
Page.LoadControl("~/_controltemplates/SiteNavigationUserCont
rol.ascx") as
UserControl;
Controls.Add(uc);
}
x. The user control uses a DataTable so you must add a project reference for System.Data.
Right-click the SiteNavigationWebPart project and select Add Reference.
y. Select System.Data from then .NET tab.
z. Click OK.
aa. Switch to the WSP View of the SharePoint solution by selecting View | Other Windows |
WSP View.
bb. Click the Refresh button in the WSP View toolbar. You should see the following.
Note: If the WSP View fails to refresh, you may notice an error displayed in the Visual Studio
A SharePoint Developer Introduction – C#
Page 17 of 37
Tasks Detailed Steps
status bar.
Note: Unfortunately there is a small defect in VSeWSS that prevents it from generating the
manifest if a file based web site is included in the solution.
cc. Remove the SiteNav website from the solution.
dd. Switch to the WSP View and Refresh again.
ee. Open and examine the SiteNavWebPart manifest.xml file. Note that the manifest now
includes a TemplateFiles element to copy the .ASCX file to the
CONTROLTEMPLATES folder.
ff. Save and Build your project.
3. Deploy and Test
a.
In Solution Explorer right click the SiteNavWebPart project and select Deploy.
b. Open Internet Explorer and type in http://spvm.
c. Select Site Actions | Edit Page from the top right corner of the page.
d. Click Add a Web Part buttons in the Left Web Part zone.
e. Scroll to All Web Parts | Miscellaneous | SiteNavigationWebPart Web Part and tick
the check box.
f. Click Add.
g. Click Exit Edit Mode and refresh the Home page.
h. Check that the final display is rendered similar to the Image below.
A SharePoint Developer Introduction – C#
Page 18 of 37
Tasks Detailed Steps
i. Optionally you can create one or more sites under the top level site (http://spvm) by
selecting Site Actions | Create, then Web Pages | Sites and Workspaces. These will
appear in the Site list of the Web Part.
j. Test that clicking a link navigates to the correct location in the site.
A SharePoint Developer Introduction – C#
Page 19 of 37
Exercise 3
Connecting Web Parts
Scenario
In this exercise you will build a Dashboard Web Part that summarizes sales of widgets. Monthly sales records will
be recorded to a custom list. The Dashboard Web Part will connect to a standard ListView Web Part on the same
page.
Tasks Detailed Steps
Complete the following
tasks on:
Server1
1. Creating the Data
List
Note: While it is possible to create a list definition in code using VSeWSS, this is a very
complex task and is not something that you would normally do. Creating lists and views in the
SharePoint browser-based interface is much simpler. The completed list can be exported as a
list template which can be easily provisioned into a site as part of a Feature or manually by a
site administrator.
a. Start Internet Explorer and navigate to the local SharePoint site, http://spvm.
b. From the Site Actions menu select Create.
c. From the Custom Lists column select Import Spreadsheet.
d. Enter the Name WidgetSales.
e. Enter a Description Monthly sales of widgets and the filename C:\SPHOLS\Labs\Lab 01
- Web Parts\Resources\WidgetSales.xlsx.
f. Click Import.
g. After a few moments Microsoft Excel will start and will display the spreadsheet with the
following dialog.
A SharePoint Developer Introduction – C#
Page 20 of 37
Tasks Detailed Steps
h. Select the only range from the Select Range drop down list.
i. Click Import.
j. After a few seconds SharePoint will display the new list.
k. Return to the home page for the site.
l. From the Site Actions menu select Edit Page.
m. Click Add Web Part on the Left Web Part zone.
n. Select WidgetSales from the Libraries and Lists section of the Add Web Parts selection
dialog.
A SharePoint Developer Introduction – C#
Page 21 of 37
Tasks Detailed Steps
o. Click Add. You will now see the list of Widget Sales displayed on the home page.
2. Create the
Dashboard
Note: Now that you have some data to summarize you can go ahead and create a dashboard
Web Part. The Web Part will total sales of each type of widget for a given month. It will then
display the total sales colored red if the sales are less than budgeted or green if they exceed the
budget.
This Web Part will utilize a DropDownList to display a list of months and a SPGridView to
display the sales data.
In Visual Studio 2005 open the SPHOL_WebParts solution you created in previous exercises.
a. Right click the solution in the Solution Explorer and select the Add | New Project option.
Visual Studio will display the New Project dialog window.
b. Expand the Visual C# item and select SharePoint. From the Templates section select
Empty.
c. Name the new Web Part project DashboardWebPart.
d. Click OK.
Note: You will now have an empty project into which you can add any type of project item.
The Empty project template provided by VSeWSS is exactly that – empty! You can add Web
Parts and other types of features to this project and VSeWSS will generate the correct manifest
and feature elements that are required.
e. Right click the new project and select Add | New Item.
f. From the SharePoint category select Web Part.
g. Enter the name Dashboard and click Add.
h. In the Solution Explorer, under the DashboardWebPart project, right click References
and select Add Reference.
i. Select System.Data and System.Drawing from the options available from the .NET tab.
A SharePoint Developer Introduction – C#
Page 22 of 37
Tasks Detailed Steps
j. Click OK.
k. Under the new Dashboard folder select and open the Dashboard.webpart file.
l. Change the Description property to “Summarize monthly widget sales”.
m. Open Dashboard.cs.
n. Add the following namespace references to the Dashboard.cs file.
using System.Collections;
using System.ComponentModel;
using System.Data;
using System.Drawing;
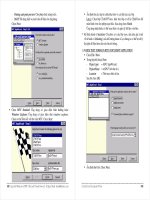
o. Create properties to specify the maximum and minimum budgeted sales. Add the
following code to the Dashboard.cs class file.
private int _budgetedMinimum;
A SharePoint Developer Introduction – C#
Page 23 of 37
Tasks Detailed Steps
[WebDisplayName("Budgeted Sales Minimum"),
WebBrowsable(true),
Personalizable(PersonalizationScope.User),
WebDescription("Budgeted Sales Minimum Value for Widget
Sales"),
Category("Budget Threshold")]
public int BudgetedMinimum
{
get { return _budgetedMinimum; }
set { _budgetedMinimum = value; }
}
private int _budgetedMaximum;
[WebDisplayName("Budgeted Sales Maximum"),
WebBrowsable(true),
Personalizable(PersonalizationScope.User),
WebDescription("Budgeted Sales Maximum Value for Widget
Sales"),
Category("Budget Threshold")]
public int BudgetedMaximum
{
get { return _budgetedMaximum; }
set { _budgetedMaximum = value; }
}
p. The next step is to implement the methods required for the connection to work. Add the
following fields to the Dashboard.cs source file.
private IWebPartTable _provider;
private ICollection _tableData;
q. Paste the following code into your Dashboard.cs source file.
[ConnectionConsumer("Widget Sales Data")]
public void GetConnectionInterface(IWebPartTable provider)
{
TableCallback callback = new TableCallback(ReceiveTable);
_provider = provider;
provider.GetTableData(callback);
}
public void ReceiveTable(object providerTable)
{
_tableData = providerTable as ICollection;
}
Note: GetConnectionInterface is marked by an attribute ConnectionConsumer. This
attribute is necessary for Web Parts to consume data from Web Parts. The single parameter to
this method determines the type of provider that is expected. SharePoint’s Web Part Manager
looks for ConnectionCosumers and determines if there are any providers that can supply the
required interface. The TableCallback delegate defines the method that is invoked
transparently by the ConnectionProvider – in this case ReceiveTable.
r. Add the following protected fields to the source code that will reference the dropdown list