Tài liệu Các Mẫu Thiết Kế Toàn tập part 14 docx
Bạn đang xem bản rút gọn của tài liệu. Xem và tải ngay bản đầy đủ của tài liệu tại đây (924.85 KB, 16 trang )
STEP 1: Bước 1 mỡ một file mới
Mỡ một file mới với tính chất là trong suốt . Mình dùng cỡ 800×600 px size. Nhưng nếu
các bạn muốn làm poster thì phải làm lớn hơn
STEP 2: Create your shade background
Fill your canvas with a dark gray, I used #383838. Then select the brush tool and use a
large blurry (hardness=0%) and use a slightly brighter color, I used #6b6b6b, to brush at
random spots in the canvas. You can also use the gradient tool to achieve this.
STEP 3: Insert your image into the canvas
…Either by dragging or pasting. It is better to use an image with a very simple
background and where to main person or subject sticks out. I used this image:
STEP 4: Go to Image>Adjustments>Brightness/Contrast…
Use the following settings: Brightness: -30, Contrast: +40. These number do not have to
be exact because your original image might already have a high contrast. So if these
numbers are too high, use my example difference to come up with a good number.
STEP 5: Change Blending mode
Select the layer of your image and change the Blending mode from Normal to Darken
(this option can be found in the top of the layers window).
STEP 6: Select the Custom Shape tool from the Tools window
Select the layer of your image and change the Blending mode from Normal to Darken
(this option can be found in the top of the layers window). Then select the ‘Registration
Target 2′ shape from your default custom shapes. This is the shape which resembles sun
rays. Make sure the shape color is White.
While holding Shift, create the shape on the canvas in a way that the main subject of your
design is around the center of the rays.
Then Right click on the shape layer you have just created and select ‘Rasterize Layer,’
and move this layer right under your image layer in the layers window.
STEP 7: Erase the rays from under your image subject
Since you want the rays to go AROUND the subject and not ON them, select the Eraser
tool and use a small blurry brush (hardness=0%) to get rid of the rays that show on the
subject of your image. Then select a grungy or dirty brush for your eraser, and erase a
little here and there around the rays. I used this Grunge brush set
.
STEP 8: Add more Grunge
Create a new layer (on top of all layers). In this new layer use a different grunge or dirty
brush and select the color black to add some grunge on the sides of the image or
wherever you find it fit. For this step, I used this Spray paint brush set
.
STEP 9: Add Hue/Saturation Layer
Select the ‘Create a new fill or adjustment layer’ button which is the little half black half
white circle button in the bottom of the layers window, and choose ‘Hue/Saturation…’
Use the following settings:
You should now have something similar to this:
STEP 10: Add Gradient Map Layer
Once again select the ‘Create a new fill or adjustment layer’ button (half black half white
circle button in the bottom of the layers window) but this time choose ‘Gradient Map…’
Then click on the gradient to edit the colors. In this step you can choose any variation of
colors to determine the gradient map of your design.
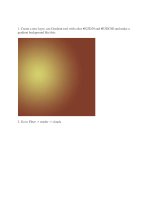
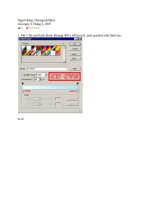
Here are the colors I used along with their gradient Locations (right to left):
#7b0300 at 0%, #a00000 at 2%, #ff7e00 at 38%, #f7ff2a at 100%
STEP 11: Add Border Shadow
Create a new layer. Then Select All (ctrl+A) and go to Edit>Stroke and use the following
settings and make sure the color is Black:
Then go to Filter>Blur>Gaussian Blur and set the radius to 42.0 pixels. Change the
Opacity of this layer to 56%.
You are done!
I added text and some more simple effects finish it off, the font used is Impact.
Remember, you can play around with the gradient colors and get some very cool results.
You can also add brushes and patterns here and there as I did below and achieve a more
complex look.
If you want learn how to achieve that halftone pattern in the background, check out the
Halftone Pattern tutorial
.

