Tài liệu MASTERING SQL SERVER 2000- P14 ppt
Bạn đang xem bản rút gọn của tài liệu. Xem và tải ngay bản đầy đủ của tài liệu tại đây (1.26 MB, 50 trang )
CHAPTER 17 • AUTOMATING ADMINISTRATION
670
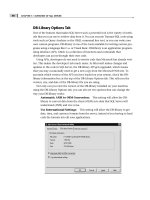
FIGURE 17.13
You can change any of
the aspects of your
plan by bringing up its
properties in Enterprise
Manager.
To view the history of the plan, right-click it and select Maintenance Plan History.
This will display everything the plan has accomplished recently.
2627ch17.qxd 8/22/00 11:00 AM Page 670
Please purchase PDF Split-Merge on www.verypdf.com to remove this watermark.
671
As you can see, maintenance plans are very helpful in keeping your database run-
ning smoothly and efficiently. Now you don’t have to worry about staying late to run
maintenance jobs or which task should be completed first. The plan does it all for you.
However, there are even more automation features that you can take advantage of; for
instance, SQL Mail can e-mail you the results of a query. Let’s see how that works.
Working with SQL Mail
Earlier in this chapter, you learned that by configuring a mail profile and creating an
alert, you can have SQL Server mail you when an error occurs on your server. How-
ever, there will be cases when you need to see more than just an error message. For
example, if there is a query that you run on a regular basis, it may be helpful to create
a job that can run the query and e-mail you the result set. You may want to send SQL
Server an ad hoc query, but you don’t have the tools on the machine on which you
are working currently, so you need to e-mail the query to SQL Server. All of these
things can be accomplished with SQL Mail.
SQL Mail turns the MSSQLServer service into a MAPI (Messaging Application Pro-
gramming Interface) client that is capable of receiving and sending e-mail. This client
can receive queries via e-mail, process those queries, and return the result set back to
the sender of the message. SQL Mail also enables you to send e-mail from a stored
procedure. To make this work, you need to follow the steps from an early section of
this chapter under “Configuring Mail Support.” Once that is done, follow the steps
below:
1. Open Enterprise Manager by selecting it from the SQL Server 2000 group under
Programs on the Start menu.
2. Expand your server, then Support Services.
3. Right-click SQL Mail and select Properties.
4. Select a Profile Name (in this case, it should be SQLService) and click the Test
button.
5. Check the Autostart SQL Mail when SQL Server Starts checkbox so that the SQL
Mail service will be started when the server starts up.
USING THE DATABASE MAINTENANCE PLAN WIZARD
Admninistering SQL
Server
PART
IV
2627ch17.qxd 8/22/00 11:00 AM Page 671
Please purchase PDF Split-Merge on www.verypdf.com to remove this watermark.
CHAPTER 17 • AUTOMATING ADMINISTRATION
672
6. Click OK to apply the changes.
Now that SQL Mail is configured, you are ready to use it. To make SQL Server read
the mail that it has received, you need to run the sp_processmail system stored proce-
dure. This procedure will read the mail in the inbox and process any queries it finds,
after which it will return the mail to the originator of the message. Let’s give that a try
here (in this example, we assume that you have only one machine, so you will be log-
ging in as yourself with the SQLService user account):
1. Open your mail program and create a new message.
2. In the To box, enter the e-mail address of the SQL Server service.
3. Type whatever you like in the subject of the message.
4. In the text of the message, type the following query:
USE Pubs
SELECT * FROM AUTHORS
5. Click the Send button to send the message to SQL Server.
6. If you have a single machine, you may need to log off and log back on as the
SQLService account to receive the mail.
7. After you have received the mail in the SQLService inbox, open Query Analyzer,
and enter and execute the following code:
sp_processmail
8. Once that is complete, check the e-mail box from which you sent the original
query; you should see the result set from the query you e-mailed.
This tool can prove very powerful when necessary, so consider using it whenever
you have a client that requires reports at regular intervals. You could consider using
this for automated billing of clientele or status reports on the state of the databases.
Whatever the case may be, this feature will definitely help you in your quest for
automation.
2627ch17.qxd 8/22/00 11:00 AM Page 672
Please purchase PDF Split-Merge on www.verypdf.com to remove this watermark.
673
Summary
That was a lot of ground to cover, but it is going to save you a lot of time and effort in
server administration and reporting. There were a number of topics discussed in this
chapter, including:
Automation basics: In this section, you learned that there are three main
components to automation: operators, jobs, and alerts. Operators are the indi-
viduals who are notified when there is a problem that needs attention, and
they can be notified via e-mail, pager, or Net Send messages. Jobs are a series of
tasks and schedules that can be automated to activate at any time, and they
can be comprised of Transact-SQL code, command executive code, or scripting
language code.
Configuring mail support: To configure mail support, you learned that
you need a mailbox somewhere (either with an ISP or on a MAPI-compliant
server such as Exchange). Next you need to install Outlook, and then log in as
the SQLService account and create a mail profile. Once that is done, you need
to right-click the SQLServerAgent in Enterprise Manager under Management
and configure the agent to use the newly created profile. Once that is done,
you will be able to send e-mail to operators.
Creating operators: In this section, you learned how to create operators
and configure them to receive e-mail, pager, or Net Send messages. You can also
configure them to be available only at certain times of the day by setting their
availability.
Creating jobs: In this section, you learned how to create local server jobs
and then multiserver jobs.
• Local server jobs run only on the local system, and they can be configured
to run any type of code at any time. They can be configured to inform an
operator when they complete, when they succeed, or when they fail.
• Multiserver jobs are created on a central machine (called the MSX or mas-
ter) and then distributed to multiple remote machines (called targets),
where they are executed. These jobs come in very handy in a multiple-
server environment.
Creating alerts: Alerts are used to notify an operator when an error has
occurred. Not all errors will fire an event, though—only those that are written
to the Windows NT event log and have an alert configured will fire an alert
that notifies someone. In this section, you learned how to create alerts that are
based on the standard error messages that come with SQL Server as well as how
to create your own custom error messages that can be used for any purpose.
WORKING WITH SQL MAIL
Admninistering SQL
Server
PART
IV
2627ch17.qxd 8/22/00 11:00 AM Page 673
Please purchase PDF Split-Merge on www.verypdf.com to remove this watermark.
CHAPTER 17 • AUTOMATING ADMINISTRATION
674
You then learned how to create and use performance alerts to stop problems
before they start.
Using the Database Maintenance Plan Wizard: Many tasks need to be
performed on your server to keep it running smoothly and efficiently. You need
to back up databases and transaction logs, reorganize index and data pages
inside the database files, and check for database integrity regularly. Rather than
trying to remember to do all of that and the order to do it in, use the Database
Maintenance Plan Wizard to automate these processes for you.
Working with SQL Mail: Finally you learned that if you want to e-mail a
query to SQL Server and get a result set back, or have SQL Server e-mail you
from a procedure other than an alert, you need to configure SQL Mail.
Now that you know how to automate the tasks on your system, you need to know
how to secure your system as well. Let’s peer into the depths of SQL Server security in
our next chapter.
2627ch17.qxd 8/22/00 11:00 AM Page 674
Please purchase PDF Split-Merge on www.verypdf.com to remove this watermark.
CHAPTER 18
Security and SQL
Server 2000
FEATURING:
Understanding Security Modes 676
SQL Server Logins 680
Fixed Server Roles 688
Creating Database User Accounts 691
Understanding Permissions 693
Database Roles 698
N-Tier Security 710
Monitoring SQL Server Logins with
SQL Profiler 712
Creating a Security Plan 717
Summary 719
2627ch18.qxd 8/22/00 11:08 AM Page 675
Please purchase PDF Split-Merge on www.verypdf.com to remove this watermark.
P
rotecting information—guarding access to an organization’s data—is much
like protecting a physical structure. For example, imagine that you own a
business and the building that houses it. You do not want the general pub-
lic to gain access to your building—only your employees should have
access. However, you also need restrictions on the areas to which your employees
have access. Because only accountants should have access to the accounting depart-
ment, and almost no one should have access to your office, you must put various
security systems in place.
Protecting SQL Server (your “building”) holds true to this concept: No one gets in
unless they’re granted access, and once users are inside, various security systems keep
prying eyes out of sensitive areas. In this chapter, we will discuss the methods used to
apply security to SQL Server.
Understanding Security Modes
To continue our analogy, for your employees to gain access to the building, they will
need some sort of key, whether a metal key or an electronic access card. For your users
to gain access to SQL Server, you will need to give them a key as well. The type of key
you give them largely depends on the type of lock—authentication mode—you use.
An authentication mode is how SQL Server processes usernames and passwords.
There are two such modes in SQL Server 2000: Windows NT/2000 Authentication
mode and Mixed mode.
Windows NT/2000 Authentication Mode
With this mode, a user can simply sit down at their computer, log on to the Win-
dows NT/2000 domain, and gain access to SQL Server. The process is a little bit dif-
ferent between Windows NT 4 and Windows 2000, though; here is how it works on
Windows NT 4:
1. The user logs on to a Windows NT domain; the username and password are ver-
ified by Windows NT.
2. The user then opens a trusted connection (see Figure 18.1) with SQL Server. This
means that SQL Server trusts Windows NT/2000 to verify the user’s password.
3. SQL Server will then try to match the username or group membership to an
entry in the Syslogins table.
4. Because this is a trusted connection, SQL Server does not need to verify the user
password; that is, SQL Server trusts Windows NT/2000 to perform that function.
2627ch18.qxd 8/22/00 11:08 AM Page 676
Please purchase PDF Split-Merge on www.verypdf.com to remove this watermark.
677
FIGURE 18.1
Using a trusted
connection, SQL
Server trusts
Windows NT/2000
to verify user
passwords.
In a domain that uses Windows 2000, the users can connect to SQL Server using the
Kerberos security protocol. Although an in-depth discussion of Kerberos is beyond the
scope of this book, here is a brief overview of how this security protocol works:
1. When the user logs on, Windows 2000 performs a DNS lookup to locate a Key
Distribution Center (KDC).
2. Once the KDC is located, the user’s machine logs on to the domain.
3. After the user’s machine successfully logs on, the KDC issues a special security
token called a Ticket Granting Ticket (TGT) to the user.
4. To access the SQL Server, the user’s machine presents the TGT to the SQL Server;
if the ticket is accepted, the user is allowed access.
It may be easier to think of Kerberos security as a trip to the carnival. If you have
ever been to a carnival and seen all of the rides, you probably know that to get on one
of those rides, you need a ticket. To get that ticket, you must buy them from a counter
at the gate of the carnival. Once you have those tickets in hand, you can give them to
the ride operator and enjoy yourself on the ride.
In Kerberos security, the services, such as SQL Server, would be considered the rides
that you want to access, but to use the services, you need to present a ticket. The
ticket you present is the Ticket Granting Ticket that you received from the KDC at
logon time, so you can think of the KDC as the counter at the carnival that sells the
tickets. Once you have this TGT, you can access any services to which you have been
given permission, including SQL Server 2000.
The main advantage to Windows NT/2000 Authentication mode is that users do not
have to remember multiple usernames and passwords. That will vastly increase secu-
rity, because there is less danger of users writing their passwords down and storing
SQL Server
Windows
Trusted connection
to SQLpassword
verified by Windows
Password
UNDERSTANDING SECURITY MODES
Administering SQL
Server
PART
IV
2627ch18.qxd 8/22/00 11:08 AM Page 677
Please purchase PDF Split-Merge on www.verypdf.com to remove this watermark.
CHAPTER 18 • SECURITY AND SQL SERVER 2000
678
them in an unsafe place (such as a sticky note on their monitor). This mode also gives
you tighter reign over security, because you can apply Windows NT/2000 password
policies, which will do such things as expire passwords, require a minimum length for
passwords, keep a history of passwords, and so on.
One of the disadvantages is that only users with the proper net-library (Named
Pipes, TCP/IP, or Multi-Protocol) can open a trusted connection to SQL Server. This
means that someone like a Novell client running the IPX net-library cannot use Win-
dows NT/2000 Authentication mode. If it turns out that you have such clients, you
will need to implement Mixed mode.
Mixed Mode
Mixed mode allows both Windows NT/2000 Authentication and SQL Server Authenti-
cation. In SQL Server Authentication:
1. The user logs on to their network, Windows NT/2000 or otherwise.
2. The user opens a nontrusted (see Figure 18.2) connection to SQL Server using a
username and password other than those used to gain network access. It is
called a nontrusted connection because SQL Server does not trust the operating
system to verify the user’s password.
3. SQL Server matches the username and password entered by the user to an entry
in the Syslogins table
FIGURE 18.2
With a nontrusted
connection, SQL
Server verifies user
passwords itself.
SQL Server
Windows
Trusted connection
to SQLpassword
verified by Windows
Password
2627ch18.qxd 8/22/00 11:08 AM Page 678
Please purchase PDF Split-Merge on www.verypdf.com to remove this watermark.
679
The primary advantage here is that anyone can gain access to SQL Server using
Mixed mode, regardless of the net-library used. This means that Mac users, Novell
users, Banyan Vines users, and the like can gain access. You could also consider this to
be a second layer of security, because if someone hacks into the network in Mixed
mode, it does not mean that they have automatically hacked into SQL Server at the
same time.
Ironically, multiple passwords can be a problem as well as an advantage. Consider
that users will have one username and password to log on to the network and a com-
pletely separate username and password to gain access to SQL Server. When users
have multiple sets of credentials, they tend to write them down and thus breach the
security system you have worked so hard to set up.
Setting the Authentication Mode
As an administrator, you will probably set the authentication mode no more than
once, at installation time. The only other time you might need to change the authen-
tication mode would be if changes were made to your network. For example, if you
had set your SQL Server to Windows NT/2000 Authentication mode and needed to
include Macintosh clients, you would need to change to Mixed mode.
It is interesting to note that although most things in SQL Server can be done
through either Enterprise Manager or Transact-SQL (T-SQL), setting the authentica-
tion mode is one of the rare things that can be done only through Enterprise Man-
ager. The next series of steps takes you through setting the authentication mode.
1. Open Enterprise Manager by selecting it from the SQL Server 2000 group under
programs on the Start menu, then right-click your server and select Properties.
2. Select the Security tab.
3. In the Authentication section, select SQL Server and Windows NT/2000. This
will set you to Mixed mode for the rest of the exercises.
UNDERSTANDING SECURITY MODES
Administering SQL
Server
PART
IV
2627ch18.qxd 8/22/00 11:08 AM Page 679
Please purchase PDF Split-Merge on www.verypdf.com to remove this watermark.
CHAPTER 18 • SECURITY AND SQL SERVER 2000
680
4. Click OK to close the Properties dialog box.
Now that you have set the proper authentication mode, it is time to move forward
and give your users a key to your building with SQL Server logins.
NOTE On Windows 9x you will not be able to change the authentication type from the
default.
SQL Server Logins
Once you have decided what type of lock (authentication mode) to use on your build-
ing, you can start handing out keys so that your employees can gain access. A real key
will give your employees access to the building as a whole, but to none of the resources
2627ch18.qxd 8/22/00 11:08 AM Page 680
Please purchase PDF Split-Merge on www.verypdf.com to remove this watermark.
681
(such as filing cabinets) inside. In the same way, a SQL Server key—a login—will give
your users access to SQL Server as a whole, but not to the resources (such as databases)
inside. If you are a member of the sysadmin or securityadmin fixed server roles (dis-
cussed later in this chapter), you will be able to create one of two types of logins: stan-
dard logins (such as the metal key in our analogy) and Windows NT/2000 logins
(such as the newer electronic access card).
Standard Logins
You learned earlier in this chapter that only clients using the Named Pipes, Multi-
Protocol, or TCP/IP net-libraries can make trusted connections to SQL Server (where
SQL Server trusts Windows NT/2000 to validate the user’s password). If the user
(such as a Macintosh or Novell client) for whom you are creating a login cannot
make a trusted connection, you must create a standard login for them. In the next
series of steps, you will create two standard logins that will be used later in the
chapter.
NOTE Although you can create standard logins in Windows NT/2000 Authentication
mode, you won’t be able to use them. If you try, SQL Server will ignore you and use your
Windows NT/2000 credentials instead.
1. Open Enterprise Manager and expand your server by clicking the + sign next to
the icon named after your server.
2. Expand Security and click the Logins icon.
3. Choose Action ➢ New Login.
4. In the Name box, type SmithB.
5. In the Authentication section, select SQL Server Authentication.
6. In the Password textbox, type password.
7. Under Defaults, select pubs as the default database.
SQL SERVER LOGINS
Administering SQL
Server
PART
IV
2627ch18.qxd 8/22/00 11:08 AM Page 681
Please purchase PDF Split-Merge on www.verypdf.com to remove this watermark.
CHAPTER 18 • SECURITY AND SQL SERVER 2000
682
8. Click OK.
9. In the Confirm New Password textbox, type password.
10. Click OK and notice your new Standard type login in the contents pane.
2627ch18.qxd 8/22/00 11:08 AM Page 682
Please purchase PDF Split-Merge on www.verypdf.com to remove this watermark.
683
11. Choose Action ➢ New Login.
12. In the Name box, type GibsonH.
13. In the Authentication section, select SQL Server Authentication.
14. In the Password textbox, type password.
15. Under Defaults, select pubs as the default database.
16. Click OK.
17. In the Confirm New Password textbox, type password.
Now you are ready to test your new logins to make sure they work; let’s do that
now with the SmithB login:
1. To test the new login, open Query Analyzer by selecting it from the
SQL Server 2000 group under Programs on the Start menu.
2. Under Connection Information, select Use SQL Server Authentication.
3. In the Login Name box, type SmithB.
4. In the Password box, type password.
5. Click OK and notice the title bar. It should read “sqlserver.pubs.SmithB.”
WARNING A standard login, sa, is created at installation time with a blank default
password. Because the system administrator (sa) has godlike power over the system, you
should choose a new password immediately.
SQL SERVER LOGINS
Administering SQL
Server
PART
IV
2627ch18.qxd 8/22/00 11:08 AM Page 683
Please purchase PDF Split-Merge on www.verypdf.com to remove this watermark.
CHAPTER 18 • SECURITY AND SQL SERVER 2000
684
Windows NT/2000 Logins
Creating Windows NT/2000 logins is not much different from creating standard logins.
Although standard logins apply to only one user, however, a Windows NT/2000 login
can be mapped to one of the following:
• A single user
• A Windows NT/2000 group an administrator has created
• A Windows NT/2000 builtin group (for example, Administrators)
Before you create a Windows NT/2000 login, you must decide to which of these
three you want to map it. Generally you will want to map to a group that you have
created. This will help you a great deal in later administration. For example, suppose
you have an Accounting database to which all 50 of your accountants require access.
You could create a separate login for each of them, which would require you to man-
age 50 SQL Server logins. On the other hand, if you create a Windows NT/2000 group
for these 50 accountants and map your SQL Server login to this group, you will have
only 1 SQL Server login to manage.
The first step in creating Windows NT/2000 logins is to create user accounts in the
operating system itself. In this next set of instructions, you will create some user
accounts and groups:
1. Open User Manager for Domains, click the User menu, and select New User. If
you are using Windows 2000, you need to open Active Directory Users and
Computers, click the Action menu, point to Create New, and select User. (Active
Directory Users and Computers is located in the Administrative Tools group
under Programs on the Start menu.)
2. Create six new users with the criteria from the following list:
Username Description Password Must Change Never Expires
MorrisL IT Password Uncheck Check
ThompsonA Administration Password Uncheck Check
JohnsonK Accounting Password Uncheck Check
JonesB Accounting Password Uncheck Check
ChenJ Sales Password Uncheck Check
SamuelsR Sales Password Uncheck Check
3. While in User Manager, create a Local group called Accounting. If you are using
Windows 2000, make this a Domain Local Security group.
2627ch18.qxd 8/22/00 11:08 AM Page 684
Please purchase PDF Split-Merge on www.verypdf.com to remove this watermark.
685
4. Add the new users you just created with a Description of Accounting.
5. While still in User Manager, create a Local group named Sales. If you are using
Windows 2000, make this a Domain Local Security group.
6. Add all the users with a Description of Sales.
7. While still in User Manager, choose Policies ➢ User Rights.
8. Select Log on Locally from the Rights list and add Everyone.
9. Click OK to return to User Manager.
10. Close User Manager.
11. If you are using Windows 2000, open Local Security Policy from the Administra-
tive Tools group under Programs on the Start menu.
12. Expand Local Policies and click User Rights Assignment.
13. Double-click the Log on Locally right and click Add.
14. Select the Everyone group, click Add, click OK, then click OK again.
15. Close the Local Policies tool and open Enterprise Manager.
With your user accounts and groups created, you are ready to create SQL Server
logins that map to these accounts:
1. Open Enterprise Manager, expand your server, expand Security, and click the
Logins folder.
2. From the Actions menu, select New Login.
3. In the Name box, type Accounting (the name of the Local group created earlier).
4. Select Windows NT/2000 Authentication and select your domain from the
drop-down list next to Domain.
5. Under Defaults, select pubs as the default database.
SQL SERVER LOGINS
Administering SQL
Server
PART
IV
2627ch18.qxd 8/22/00 11:08 AM Page 685
Please purchase PDF Split-Merge on www.verypdf.com to remove this watermark.
CHAPTER 18 • SECURITY AND SQL SERVER 2000
686
6. Click OK and notice the Accounting login of type NT Group.
7. From the Actions menu, select New Login.
8. In the Name box, type Sales (the name of the Local group created earlier).
9. Select Windows NT/2000 Authentication and select your domain from the
drop-down list next to Domain.
10. Under Defaults, select pubs as the default database.
11. Click OK and notice the Accounting login of type NT Group.
12. Go back into the New User dialog by selecting New User from the Action menu.
13. Fill in the Name field with ThompsonA.
14. Select Windows NT/2000 Authentication and select your domain from the list.
15. Under Defaults, select pubs as the default database.
2627ch18.qxd 8/22/00 11:08 AM Page 686
Please purchase PDF Split-Merge on www.verypdf.com to remove this watermark.
687
16. Click OK and notice the new login for ThompsonA of type NT User.
17. Go back into the New User dialog by selecting New User from the Action menu.
18. Fill in the Name field with MorrisL.
19. Select Windows NT/2000 Authentication and select your domain from the list.
20. Under Defaults, select pubs as the default database.
Now that you have some Windows NT/2000 group and user logins to work with,
let’s test them. First you will log in as a member of one of the groups that you created,
then you will log in as a specific user:
1. Log off Windows NT/2000 and log back on as JonesB.
2. Open Query Analyzer and select Use Windows NT/2000 Authentication. Notice
the title bar displays “sqlserver.pubs.domain\accounting,” because JonesB is a
member of the Windows NT/2000 Accounting group.
3. Close Query Analyzer, log off NT, and log back on as ThompsonA.
4. Open Query Analyzer and select Use Windows NT/2000 Authentication. The
title bar displays “sqlserver.pubs.domain \ThompsonA,” because you created an
account specifically for ThompsonA rather than making them a member of the
Accounting group.
SQL SERVER LOGINS
Administering SQL
Server
PART
IV
2627ch18.qxd 8/22/00 11:08 AM Page 687
Please purchase PDF Split-Merge on www.verypdf.com to remove this watermark.
CHAPTER 18 • SECURITY AND SQL SERVER 2000
688
Items Common to All Logins
You may have noticed that some things are common to all the logins that you created.
The first is the default database. When a user first logs in to SQL Server, they will
connect to the default database. This is just a starting point, because users can’t use
the default database without a database user account; all they can do is connect to it.
If you do not set the default database, it will be master—which is not the best place
for your users to get started. You will want to change that to a different database—for
example, an Accounting database if you are working with an accounting user. You can
also set a default language, which will not need frequent changing, because the
default is the server’s language. A different language can be set here for users who
require it.
In all types of logins, you can grant database access at create time. On the Database
Access tab in the Enterprise Manager New Login dialog box, all you need to do is
check the database to which this login will require access; this automatically creates a
database user account. Although you didn’t do that in the exercises, as an administra-
tor, you will want to grant access to databases at create time.
WARNING If you create a Windows NT/2000 NT login using sp_grantlogin, you can-
not set the default database or language.
In addition, you can add users to a fixed server role at the time you create them;
this is done on the Server Roles tab in Enterprise Manager. Fixed server roles—limita-
tions on access—are discussed next.
Fixed Server Roles
Back to our analogy: As the owner, when you walk into your building, you are
allowed to do whatever you want (after all, you do own it). When members of the
accounting department walk in, however, they are limited in what they can do. For
example, they are not allowed to take keys away from other workers, but they may be
allowed to do other administrative tasks, such as signing checks.
That is what fixed server roles are used for—to limit the amount of administrative
access that a user has once logged in to SQL Server. Some users may be allowed to do
whatever they want, whereas other users may only be able to manage security. There
2627ch18.qxd 8/22/00 11:08 AM Page 688
Please purchase PDF Split-Merge on www.verypdf.com to remove this watermark.
689
are seven server roles to which you can assign users. The following list starts at the
highest level and describes the administrative access granted:
Sysadmin: Members of the sysadmin role have the authority to perform any
task in SQL Server. Be careful whom you assign to this role, because people who
are unfamiliar with SQL Server can accidentally create serious problems. This
role is only for the database administrators (DBAs).
Serveradmin: These users can set serverwide configuration options, such as
how much memory SQL Server can use or how much information to send over
the network in a single frame. If you make your assistant DBAs members of this
role, you can relieve yourself of some of the administrative burden.
Setupadmin: Members here can install replication and manage extended
stored procedures (these are used to perform actions not native to SQL Server).
Give this to the assistant DBAs as well.
Securityadmin: These users manage security issues such as creating and
deleting logins, reading the audit logs, and granting users permission to create
databases. This too is a good role for assistant DBAs.
Processadmin: SQL Server is capable of multitasking; that is, it can do more
than one thing at a time by executing multiple processes. For instance, SQL
Server might spawn one process for writing to cache and another for reading
from cache. A member of the processadmin group can end (or kill as it is called
in SQL Server) a process. This is another good role for assistant DBAs and devel-
opers. Developers especially need to kill processes that may have been triggered
by an improperly designed query or stored procedure.
Dbcreator: These users can create and make changes to databases. This may
be a good role for assistant DBAs as well as developers (who should be warned
against creating unnecessary databases and wasting server space).
Diskadmin: These users manage files on disk. They do things such as mir-
roring databases and adding backup devices. Assistant DBAs should be mem-
bers of this role.
Now let’s apply this knowledge by assigning some users to fixed server roles,
thereby limiting their administrative authority:
1. Open Enterprise Manager by selecting it from the SQL Server 2000 group under
Programs on the Start menu, expand Security, and select Server Roles.
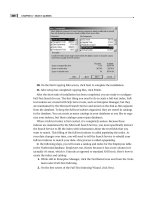
2. Double-click System Administrators to open the Sysadmin Server Role Properties.
FIXED SERVER ROLES
Administering SQL
Server
PART
IV
2627ch18.qxd 8/22/00 11:08 AM Page 689
Please purchase PDF Split-Merge on www.verypdf.com to remove this watermark.
CHAPTER 18 • SECURITY AND SQL SERVER 2000
690
3. Click Add, select MorrisL, and click OK.
4. Click the Permissions tab and notice the extensive list of permissions granted to
this role.
5. Click OK to exit the Server Role Properties dialog box.
6. Double-click Server Administrators to open the Serveradmin Server Role Properties.
7. Click Add, select GibsonH, and click OK.
8. Click OK to exit the Server Role Properties dialog box.
2627ch18.qxd 8/22/00 11:08 AM Page 690
Please purchase PDF Split-Merge on www.verypdf.com to remove this watermark.
691
TIP If you do not want users to have any administrative authority, do not assign them to
a server role. This will limit them to being just normal users.
TIP Builtin\Administrators is automatically made a member of the sysadmin server
role, giving SQL Server administrative rights to all of your Windows NT/2000 administra-
tors. Because not all of your Windows NT/2000 administrators should have these rights,
you may want to create a SQLAdmins group in Windows, add your SQL Server administra-
tors to that group, and make the group a member of the sysadmins role. Afterward you
should remove Builtin\Administrators from the sysadmin role.
Now you are ready to grant your users access to the databases that reside on your
SQL Server by creating database user accounts.
Creating Database User Accounts
Now that your employees have access to your building as well as the proper adminis-
trative access once they are inside, they will need access to other resources to do their
work. For example, if you want to give your accounting department access to the
accounting files, you need to give them a new key—one to the file cabinet. Your
employees now have two keys, one for the front door and one for the file cabinet.
In much the same way, you need to give users access to databases once they have
logged in to SQL Server. This is accomplished by creating database user accounts and
then assigning permissions to those user accounts (permissions are discussed later).
Once this process is complete, your SQL Server users will also have more than one key,
one for the front door (the login) and one for each file cabinet (database) to which they
need access. In the next set of steps, you will give users access to the pubs database by
creating database user accounts:
1. Open Enterprise Manager and expand your server.
2. Expand Databases by clicking the + sign next to the icon.
3. Expand the pubs database.
4. Click the Users icon.
5. From the Action menu, select New Database User.
6. In the Login Name box, view all the available names; note that only logins that
you have already created are available.
7. Select Sqldomain\Accounting.
CREATING DATABASE USER ACCOUNTS
Administering SQL
Server
PART
IV
2627ch18.qxd 8/22/00 11:08 AM Page 691
Please purchase PDF Split-Merge on www.verypdf.com to remove this watermark.
CHAPTER 18 • SECURITY AND SQL SERVER 2000
692
8. In the Login Name box, leave Sqldomain\Accounting and click OK to create the
user account.
9. Click OK. You now have a new user named Sqldomain\Accounting.
10. Repeat steps 5 through 9 for Sales, ThompsonA, MorrisL, GibsonH, and SmithB.
2627ch18.qxd 8/22/00 11:08 AM Page 692
Please purchase PDF Split-Merge on www.verypdf.com to remove this watermark.
693
You may have noticed that two user accounts already exist in your databases, DBO
and Guest. Members of the sysadmin fixed server role automatically become the DBO
(database owner) user in every database on the system. In this way, they can perform
all the necessary administrative functions in the databases, such as adding users and
creating tables. Guest user is a catch-all database user account used for people who
have a SQL Server login but not a user account in the database. These users can log in
to the server as themselves and access any database where they do not have a user
account. The guest account should be limited in function, because anybody with a
SQL Server login can make use of it.
NOTE Whenever a member of the sysadmin fixed server role creates an object (such as
a table), it is not owned by that login. It is owned by the DBO. If MorrisL created a table, it
would not be referred to as MorrisL.table, but as dbo.table instead.
Now that you have created user accounts for everyone, you need to restrict what they
are capable of doing with the database. This is done by assigning permissions directly to
the users or adding the users to a database role with a predefined set of permissions.
Understanding Permissions
To continue our business analogy, it would be unthinkable for the sales department to
go over to the accounting department and start writing themselves large checks. In
most businesses today, the sales department does not have permission to even look at
the checkbook. To take the analogy one step further, not all the people in the
accounting department have full access to the checkbook; some have permission to
only read from it, while others have permission to write checks from it.
You see the same situation in SQL Server. Not all your users should be able to access
the accounting or human resources databases, because they contain sensitive informa-
tion. Even users who are allowed in to these sensitive databases should not necessarily
be given full access. To enforce these restrictions, you need to grant permissions.
Statement Permissions
In your building, do you allow the contractors who constructed it to come in and
use your files, copiers, and various other resources? No, you gave them permission to
construct the building initially and make renovations over time—but not to use the
files and other such resources inside.
UNDERSTANDING PERMISSIONS
Administering SQL
Server
PART
IV
2627ch18.qxd 8/22/00 11:08 AM Page 693
Please purchase PDF Split-Merge on www.verypdf.com to remove this watermark.
CHAPTER 18 • SECURITY AND SQL SERVER 2000
694
In SQL Server, this constraint would be akin to granting the contractors statement
permissions. Statement permissions have nothing to do with the actual data; they
allow users to create the structure that holds the data. It is important not to grant
these permissions haphazardly, because it can lead to such problems as broken owner-
ship chains (discussed later) and wasted server resources. It is best to restrict statement
permissions to DBAs, assistant DBAs, and developers. The next set of instructions will
demonstrate the mechanics of applying the following statement permissions:
• Create Database
• Create Table
• Create View
• Create Procedure
• Create Index
• Create Rule
• Create Default
NOTE When you create a new database, a record is added to the sysdatabases system
table, which is stored in the master database. Therefore the Create Database statement
can be granted on only the master database.
1. To prepare SQL Server for the following exercises, you need to remove all per-
missions from the public role, because the existing permissions will interfere
with your work. Open Query Analyzer and execute the following query:
USE pubs
REVOKE ALL from public
2. Close Query Analyzer and do not save the changes.
3. Open Enterprise Manager and expand your server, then expand Databases.
4. Right-click the pubs database and select Properties.
5. In the Properties dialog box, select the Permissions tab.
6. Grant ThompsonA the Create Table permission by clicking the checkbox under
Create Table until a black check mark appears.
7. Grant Accounting the permission to Backup DB and Backup Log.
8. If the Guest user has any permissions granted, remove them by clicking each
checkbox until it is cleared.
2627ch18.qxd 8/22/00 11:08 AM Page 694
Please purchase PDF Split-Merge on www.verypdf.com to remove this watermark.