Adobe® InDesign® CC Help - Nguồn: Internet
Bạn đang xem bản rút gọn của tài liệu. Xem và tải ngay bản đầy đủ của tài liệu tại đây (17.16 MB, 657 trang )
<span class='text_page_counter'>(1)</span><div class='page_container' data-page=1></div>
<span class='text_page_counter'>(2)</span><div class='page_container' data-page=2></div>
<span class='text_page_counter'>(3)</span><div class='page_container' data-page=3>
<b>Contents</b>
<b>Chapter 1: Introduction to InDesign</b>
New features summary . . . .1
Create documents . . . .5
System requirements | InDesign . . . 11
<b>Chapter 2: Workspace and workflow</b>
GPU Performance . . . 19
Workspace basics . . . 21
Sync Settings using Adobe Creative Cloud . . . 34
Default keyboard shortcuts . . . 38
Set preferences . . . 52
Create new documents | InDesign CC 2015 and earlier . . . 54
Touch workspace . . . 57
Convert QuarkXPress and PageMaker documents . . . 59
Work with files and templates . . . 63
Understand a basic managed-file workflow . . . 68
Toolbox . . . 75
Share content . . . 81
Customize menus and keyboard shortcuts . . . 87
Recovery and undo . . . 90
PageMaker menu commands . . . 91
Assignment packages . . . 97
Adjust your workflow . . . 100
Work with managed files . . . 102
View the workspace . . . 107
Save documents . . . 111
<b>Chapter 3: Layout and design</b>
Create a table of contents . . . 117
Create book files . . . 123
Add basic page numbering . . . 129
Generate QR codes . . . 130
Create text and text frames . . . 133
About pages and spreads . . . 139
Create new documents (Chinese, Japanese, and Korean only) . . . 142
Create an index . . . 145
Create documents . . . 158
Text variables . . . 160
Create type on a path . . . 164
Linked content . . . 168
Align and distribute objects . . . 172
Format grids . . . 176
</div>
<span class='text_page_counter'>(4)</span><div class='page_container' data-page=4>
Clipping paths . . . 182
Grids . . . 186
<b>Chapter 4: Text</b>
Threading text . . . 189
Wrap text around objects . . . 194
Endnotes . . . 199
Glyphs and special characters . . . 204
Bullets and numbering . . . 212
Find/Change . . . 221
Anchored objects . . . 236
Footnotes . . . 246
Format CJK characters . . . 253
Spell-check and language dictionaries . . . 259
Text Frame fitting options | CC, CS6 . . . 270
Add text to frames . . . 272
Edit text . . . 280
Captions . . . 292
Track and review changes . . . 294
Add editorial notes in InDesign . . . 296
<b>Chapter 5: Styles</b>
Paragraph and character styles . . . 299
Object styles . . . 307
Drop caps and nested styles . . . 313
Work with styles . . . 320
<b>Chapter 6: Typography</b>
Tabs and indents . . . 322
Text composition . . . 329
Format paragraphs . . . 334
Align text . . . 342
Using fonts . . . 347
Arabic and Hebrew features in InDesign . . . 354
Format text . . . 354
Format characters . . . 357
Leading . . . 364
Kerning and tracking . . . 366
Work with Typekit fonts . . . 369
<b>Chapter 7: Tables</b>
Format tables . . . 371
Create tables . . . 375
Table and cell styles . . . 380
Select and edit tables . . . 385
</div>
<span class='text_page_counter'>(5)</span><div class='page_container' data-page=5>
<b>Chapter 8: Interactivity</b>
Hyperlinks . . . 395
Dynamic PDF documents . . . 401
Bookmarks . . . 405
Buttons . . . 407
Interactive web documents for Flash . . . 416
Animation . . . 423
Cross-references . . . 428
Structure PDFs . . . 435
Page transitions . . . 439
Movies and sounds . . . 441
<b>Chapter 9: Drawing and painting</b>
Apply line (stroke) settings . . . 445
Draw with lines and shapes . . . 450
Edit paths . . . 451
Understand paths and shapes . . . 458
Draw with the Pencil tool . . . 461
Change corner appearance . . . 463
Draw with the Pen tool . . . 465
Compound paths and shapes . . . 469
<b>Chapter 10: Color</b>
Apply color . . . 475
Use colors from imported graphics . . . 485
Work with swatches . . . 487
Mix inks . . . 494
Tints . . . 496
Understand spot and process colors . . . 498
Gradients . . . 500
<b>Chapter 11: Transparency</b>
Flatten transparent artwork . . . 505
Add transparency effects . . . 513
Blend colors . . . 522
<b>Chapter 12: Export and publish</b>
Publish Online . . . 526
Adobe PDF options . . . 533
Export content to HTML . . . 543
Export to Adobe PDF . . . 548
Export to JPEG format . . . 553
Export XML . . . 554
<b>Chapter 13: Printing</b>
Print booklets . . . 557
Printer’s marks and bleeds . . . 562
</div>
<span class='text_page_counter'>(6)</span><div class='page_container' data-page=6>
Inks, separations, and screen frequency . . . 574
Overprinting . . . 580
Create PostScript and EPS files . . . 583
Preflight files before handoff . . . 588
Print thumbnails and oversized documents . . . 595
Prepare PDFs for service providers . . . 597
Prepare to print separations . . . 599
Trap presets . . . 604
Trapping documents and books . . . 609
Print graphics and fonts . . . 613
Manage color . . . 615
Adjust ink options for trapping . . . 618
<b>Chapter 14: Digital publications</b>
Export content for EPUB . . . 621
Liquid layouts and Alternate layouts | CC, CS6 . . . 629
DPS and AEM Mobile overview . . . 635
<b>Chapter 15: Automation</b>
Data merge . . . 636
Plug-ins . . . 645
Scripting . . . 646
</div>
<span class='text_page_counter'>(7)</span><div class='page_container' data-page=7>
<b>Chapter 1: Introduction to InDesign</b>
<b>New features summary</b>
<b>Endnotes</b>
You can now add endnotes and quickly reference annotations within long documents. You can either insert endnotes
in the document or in a story, a single endnote frame is created for the document. You can also control the numbering,
formatting, and layout of the endnotes. The numbering auto-adjusts based on the rearrangements of the endnotes in
the text.
Now, you can also import a word document having endnotes using import option. All the endnotes are imported and
added in a new text frame.
For more information, see <b>Endnotes</b>
<b>Paragraph border</b>
Paragraph border enables you to create a border around one or more paragraphs. You can customize corner designs to
highlight the paragraph with beautiful effects.
For more information, see <b>Format paragraphs.</b>
<b>Object height, width styles</b>
Set and modify object size and position across pages in a document with Object Styles. Easily resize the width and
height and reposition multiple objects across a document using Object Styles.
The Object Style dialog box now provides an option to choose and set the desired values for position (X and Y
coordinates) and size (height and width) for an object.
This option is available as <b>Size and Position Options</b> in Object Style Options dialog.
The October 2017 release of InDesign CC focuses on improving the user experience with more control over
commonly used features and workflows. Read on for a quick introduction to these features and links to resources
offering more information.
</div>
<span class='text_page_counter'>(8)</span><div class='page_container' data-page=8>
<b>Size</b>
There are three options available for size:
• Width only
• Height only
• Height & Width
You can modify height and width based on the selection made from these options.
For example, if you choose Width only then you can modify width only. The option to modify height will be
unavailable.
<b>Position</b>
Similarly, there are three options available for position:
• X only
• Y only
• X and Y
You can modify X and Y based on the selection made from these options.
</div>
<span class='text_page_counter'>(9)</span><div class='page_container' data-page=9>
<i>Transform Options</i>
<b>Duden Integration (German only)</b>
Duden, a trusted German brand for dictionaries, is now integrated natively in InDesign. Now, you can use Duden for
more accurate German hyphenation and spell checking.
For more information, see Duden dictionary .
<b>Add and share text assets using Creative Cloud Libraries</b>
Now, you can add text objects from your InDesign documents to Creative Cloud libraries and then share them with
other users and across applications. Text assets in a library retain the character/paragraph styles and other attributes
originally applied to them. You can reuse text assets in libraries across InDesign or Illustrator documents. However, if
a text object has effects and appearances applied to it, you must add it to the library as a graphics asset to preserve them.
For more information, see <b>Creative Cloud libraries in InDesign .</b>
<b>Font-related features</b>
While searching for fonts, you can narrow down the results by filtering fonts by classification, such as Serif, Sans Serif,
and Handwritten.
You can also search for fonts based on visual similarity. Fonts closest in visual appearance to the font you're searching
for appear on top of the search results. A status strip in the font menu displays the information about the applied filters.
For more information, see <b>Organize and filter fonts .</b>
<b>PDF Accessibility enhancements</b>
In this release of InDesign CC several enhancements have been made in PDF accessibility at export. Following tagging
support has been introduced in PDF exports.
<b>Alt-Txt: </b>Earlier, you couldn't tag InDesign native objects and graphics as figures. Now, the alternate text added to
graphics is exported to tagged PDF and the corresponding alternate text is read by screen reader for the graphics.
</div>
<span class='text_page_counter'>(10)</span><div class='page_container' data-page=10>
<b>Support for footnote: </b>Proper footnote tagging is now supported in tagged PDF.
<b>Anchored text frames and anchored groups tagging: </b>Support for anchored objects tagging, which was not available
earlier, has been added. Now, you get tags for anchored text frames and anchored groups in exported PDF.
<b>Master pages tagging </b>Any page object on master page is not tagged in exported PDF and has an artifact tag in contents
panel of Acrobat. Overriding master page items shows the tags of page items in exported PDF.
<b>Index tagging: </b>Earlier, you were able to create index but the index tag was not exported to PDF. Now, this can be done
and index tagging, which was previously role mapped to paragraph, is now mapped to index only.
<b>List tag language: </b>Earlier, list tag language was set to English by default in the exported PDF. Now, the correct list
language gets exported in the tagged PDF as set by the user.
<b>List tagging: </b>Earlier, nested list tag structure was contained in LBody of primary list which was read incorrectly. Now,
the correct structure of nested list tagging is implemented.
<b>Caption tagging: </b>InDesign now supports Live Caption tagging. Figure captioned with live caption gets a caption tag as
a child of figure tag.
<b>TOC: </b>Support for TOC tagging structure is implemented, which was previously mapped to paragraph tagging. Also,
now it is mandatory for a TOC containing hyperlinks to have tags.
<b>HTML export improvements</b>
Now, there is an option in the HTML export dialog which tells InDesign to not include classes in the HTML. It removes
the class and id attributes present in the tag during HTML Export. Any redundant div tags present in the HTML are
also removed to provide a clean looking HTML and remove unnecessary grouping of content.
For more information, see <b>Export content to HTML.</b>
<b>New Document dialog for MENA versions</b>
Now, while creating a document in MENA (Middle East and North Africa) version of InDesign, instead of beginning
with a blank document, you can choose from a wide variety of templates which were earlier available for Roman feature
set.only. This includes <b>Arabic</b>, <b>Hebrew</b>, and <b>French (Morocco)</b> locales.
To access the new dialog, do one of the following:
• Select File > New.
• Use the following keyboard shortcut:
• (Mac) Cmd+N
• (Windows) Ctrl+N
<b>Other enhancements</b>
<b>1</b> InDesign now has the capability to add or move gradient swatches in a color group. You can create a gradient swatch
directly inside a color group or drag an existing swatch to a color group.
</div>
<span class='text_page_counter'>(11)</span><div class='page_container' data-page=11>
<i>Remove Forced Line Break</i>
<b>Create documents</b>
While creating a document in InDesign, instead of beginning with a blank document, you can choose from a wide
variety of templates, including templates from Adobe Stock. Templates include assets that you can build on to complete
your project. When you open a template in InDesign, you can work with it just as you would work with any other
InDesign document.
In addition to templates, you can also create a document by selecting one of the numerous presets available in InDesign.
<b>Templates and presets</b>
<b>Templates </b>provide rich, inspirational, and reusable content for your documents. You can download templates from
Adobe Stock that include quality graphics and illustrations right within InDesign. You can then build on these
templates to easily create documents that share common settings and design elements. InDesign also provides blank
templates with predefined dimensions and settings for common tasks, such as designing business cards or brochures.
Templates open as .indd files in InDesign.
<b>Blank Document Presets </b>are blank documents with predefined dimensions and settings. Presets make designing for
specific device form factors or use cases easier. For example, you can use a preset to quickly start designing for the iPad.
Blank document presets have predefined size, pages, column, orientation, positioning, margin, and bleed settings. You
can modify these settings before creating a document using the preset.
Templates and presets are categorized into these sets:
• <b>Print</b>
</div>
<span class='text_page_counter'>(12)</span><div class='page_container' data-page=12>
<b>Access the New Document dialog</b>
<b>1</b> Launch InDesign
<b>2</b> Do one of the following:
• Select <b>File</b> > <b>New</b>.
• Click <b>New</b> or <b>Start New</b> in the <b>Start</b> workspace.
• Use the following keyboard shortcut:
• (Mac) Cmd+N
• (Windows) Ctrl+N
• Right-click the tab for an open document and choose <b>New Document</b> from the in-context menu.
<i>New document from the in-context menu</i>
<b>Overview: New Document dialog</b>
Among other operations, the New Document dialog lets you:
• Create documents using selected templates from Adobe Stock across several categories: <b>Print</b>, <b>Web</b>, and <b>Mobile</b>
• Search for more templates on Adobe Stock and create documents using them
• Quickly access files, templates, and items that you've have recently accessed (<b>Recent</b> tab)
• Quickly access templates that you've downloaded from Adobe Stock (<b>Saved </b>tab)
</div>
<span class='text_page_counter'>(13)</span><div class='page_container' data-page=13>
<i>Print tab | New Document dialog</i>
<b>Create documents using presets</b>
<b>1</b> In the<b> New Document </b>dialog box, click a category tab: <b>Print</b>, <b>Web</b>, or <b>Mobile.</b>
<b>2</b> Select a preset.
<b>3</b> Optionally, change the settings for the selected preset in the <b>Preset Details</b> pane on the right.
<b>4</b> Click <b>Create</b>. InDesign opens a new document based on the preset.
<b>Modify presets</b>
Before opening a document using the preset, you can modify its settings in the right pane.
<b>1</b> Specify a name for the document
<b>2</b> Specify the following options for the selected preset:
<b>Width and Height: </b>Specify the size of the document.
<b>Units: </b>Specify the measurement unit for the document.
<b>Orientation: </b>Specify a page orientation for the document: Landscape or Portrait.
<b>Pages: </b>Specify the number of pages to create in the document.
<b>Facing pages: </b>Select this option to make left and right pages face each other in a double-page spread.
<b>Start#: </b>Specify which number the document starts on. If you specify an even number (such as 2) with Facing Pages
selected, the first spread in the document begins with a two-page spread.
<b>Primary Text Frame: </b>Select this option to add a primary text frame on the master page.
</div>
<span class='text_page_counter'>(14)</span><div class='page_container' data-page=14>
<b>Column Gutter: </b>Specify the amount of whitespace between columns.
<b>Margins: </b>Specify the margins for each side of the document. To use different values for different sides, delink the
dimensions by clicking the chain icon.
<b>Bleed and Slug: </b>Specify the position of the bleed and slug along each side of the document. To use different values
for different sides, delink the dimensions by clicking the chain icon.
<i>Modify presets</i>
<b>3</b> Click <b>Create </b>to open a document with the preset settings.
<b>Create documents using templates from Stock</b>
InDesign comes with a variety of templates from Adobe Stock, including templates for tablets, mobiles, letterheads,
envelopes, business cards, and many more. Templates with font layers use basic fonts or fonts that can be synced from
Adobe Typekit.
To create a document using a template, do the following:
<b>1</b> In the New Document dialog, click a category tab: <b>Print, Web, Mobile.</b>
<b>2</b> Select a template.
</div>
<span class='text_page_counter'>(15)</span><div class='page_container' data-page=15>
<i>Preview of the template</i>
<i>Download preset</i>
</div>
<span class='text_page_counter'>(16)</span><div class='page_container' data-page=16>
InDesign prompts you to license the template from Adobe Stock. See Adobe Stock Help for more information about
licensing and related considerations. After the template has been licensed using asset entitlements or credits in your
account, you can open it as an InDesign document (.indd) for you to work on.
<b>5</b> After the template has downloaded, click <b>Open</b>. While opening the template, if you are prompted to sync some fonts
from Typekit, click <b>OK</b>.
You can now work with the open document in InDesign just as you would work with any other .indd document.
<i><b>Note: </b>Downloaded templates are added to a Creative Cloud library called <b>Stock Templates</b>. You can access this library in </i>
<i>the <b>CCLibraries</b> panel.</i>
<i><b>Note: </b>InDesign templates carry the .indt filename extension. However, when you open a template, an instance of it is </i>
<i>opened as a document with the <b>.indd</b> extension. Changes made to that <b>.indd</b> document don't affect the original .indt </i>
<i>template.</i>
<b>Search for more templates from Adobe Stock</b>
Aside from the pre-selected templates from Adobe Stock, you can search for and download numerous other such
templates directly from within the New Document dialog.
• While working in the New Document dialog, enter a search string in the <b>Find More Templates On Adobe Stock</b>
box. Alternatively, simply click <b>Go</b> to browse the full selection of available templates.
</div>
<span class='text_page_counter'>(17)</span><div class='page_container' data-page=17>
<i><b>Note: </b>For more information about Adobe Stock, see:FAQ | Adobe Stock basicsFAQ | Usage and licensingUsing Adobe Stock</i>
<b>Use the legacy New Document experience</b>
If necessary, you may disable the latest New Document experience and revert to the experience that InDesign provided
by default in versions CC 2017 and earlier.
<b>1</b> Select <b>Preferences</b> > <b>General</b>.
<b>2</b> Select<b> Use Legacy New Document Dialog.</b>
<b>3</b> Click <b>OK</b>.
<i><b>Note: </b>See Create new documents | InDesign CC 2015 and earlierfor more information about options in the legacy New </i>
<i>Document dialog.</i>
<b>System requirements | InDesign</b>
<b>System requirements | October 2017 (13.0) release of InDesign CC</b>
<b>Windows</b>
ã Intelđ Pentiumđ 4 or AMD Athlonđ 64 processor
</div>
<span class='text_page_counter'>(18)</span><div class='page_container' data-page=18>
ã 2 GB of RAM (8 GB recommended)
• 2.6 GB of available hard-disk space for installation; additional free space required during installation (cannot install
on removable flash storage devices)
• 1024 x 768 display (1280 x 800 recommended) with 32-bit video card; supports HiDPI display
• To use the new InDesign Touch workspace, you must have a touch screen enabled tablet/monitor running Windows
8 or above (such as Microsoft Surface Pro 3) with the screen resolution set to 2160 x 1440 or more
ã Adobeđ Flashđ Player 10 software required to export SWF files
• Internet connection and registration are necessary for required software activation, validation of subscriptions, and
access to online services.†
* October 2017 release of InDesign CC is not supported on Windows 10 version 1507.
<b>macOS</b>
• Multicore Intel processor
• mac OS version 10.13 (High Sierra), macOS version 10.12 (Sierra), or Mac OS X version 10.11 (El Capitan)
• 2 GB of RAM (8 GB recommended)
• 2.5 GB of available hard-disk space for installation; additional free space required during installation (cannot install
on a volume that uses a case-sensitive file system or on removable flash storage devices)
• 1024 x 768 display (1280 x 800 recommended) with 32-bit video card; supports Retina display
• Optional: To use GPU Performance, your Mac should have a minimum of 1024 MB of VRAM (2 GB
recommended), and your computer must support OpenGL version 4.0 or greater.
• Supported machines iMac 4K iMac 5K MacBook Pro Retina Mac Pro connected to a HiDPI monitor
Mac mini connected to a HiDPI monitor
• To check for VRAM value, choose Mac > About This Mac (Graphics information).
• To find out if your computer supports the required OpenGL version (4.0 or later), see this Apple Support
document.
ã Adobeđ Flashđ Player 10 software required to export SWF files.
ã Internet connection and registration are necessary for required software activation, validation of subscriptions, and
access to online services.†
† NOTICE TO USERS: Internet connection, Adobe ID, and acceptance of license agreement required to activate and
use this product. This product may integrate with or allow access to certain Adobe or third-party hosted online
services. Adobe services are available only to users 13 and older and require agreement to additional terms of use and
the Adobe Privacy Policy. Applications and services may not be available in all countries or languages and may be
subject to change or discontinuation without notice. Additional fees or membership charges may apply.
<b>Language versions</b>
InDesign CC is available in the following languages:
Dansk
</div>
<span class='text_page_counter'>(19)</span><div class='page_container' data-page=19>
Franỗais*
Hebrew*
Hungarian
Italiano
Nederlands
Norwegian
Polish
Portuguờs (Brasil)
Suomi
Svenska
Turkish
Ukrainian
etina
????**
???
????
????
???
** Arabic and Hebrew supported in a Middle Eastern version with full right-to-left language support, Arabic/Hebrew
features, and an English interface; also in a North African French (Franỗais*) version with full right-to-left language
support, Arabic/Hebrew features, and a French interface.
<b>InDesign CC (2017) system requirements</b>
<b>Windows</b>
• Intel Pentium 4 or AMD Athlon 64 processor
• Microsoft Windows 7 with Service Pack 1, Windows 8, Windows 8.1, or Windows 10
• 2 GB of RAM (8 GB recommended)
• 2.6 GB of available hard-disk space for installation; additional free space required during installation (cannot install
on removable flash storage devices)
• 1024 x 768 display (1280 x 800 recommended) with 32-bit video card; supports HiDPI display
• To use the new InDesign Touch workspace, you must have a touch screen enabled tablet/monitor running Windows
8 or above (such as Microsoft Surface Pro 3) with the screen resolution set to 2160 x 1440 or more
</div>
<span class='text_page_counter'>(20)</span><div class='page_container' data-page=20>
• Internet connection and registration are necessary for required software activation, validation of subscriptions, and
access to online services.*
<b>macOS</b>
• Multicore Intel processor
• macOS 10.10, 10.11, or 10.12
• 2 GB of RAM (8 GB recommended)
• 2.5 GB of available hard-disk space for installation; additional free space required during installation (cannot install
on a volume that uses a case-sensitive file system or on removable flash storage devices)
• 1024 x 768 display (1280 x 800 recommended) with 32-bit video card; supports Retina display
• Optional: To use GPU Performance, your Mac should have a minimum of 1024 MB of VRAM (2 GB
recommended), and your computer must support OpenGL version 4.0 or greater.
• Supported machines iMac 4K iMac 5K MacBook Pro Retina Mac Pro connected to a HiDPI monitor
Mac mini connected to a HiDPI monitor
• To check for VRAM value, choose Mac > About This Mac (Graphics information).
• To find out if your computer supports the required OpenGL version (4.0 or later), see this Apple Support
document.
ã Adobeđ Flashđ Player 10 software required to export SWF files.
ã Internet connection and registration are necessary for required software activation, validation of subscriptions, and
access to online services. *
* NOTICE TO USERS: Internet connection, Adobe ID, and acceptance of license agreement required to activate and
use this product. This product may integrate with or allow access to certain Adobe or third-party hosted online
services. Adobe services are available only to users 13 and older and require agreement to additional terms of use and
the Adobe Privacy Policy. Applications and services may not be available in all countries or languages and may be
subject to change or discontinuation without notice. Additional fees or membership charges may apply.
<b>Language versions</b>
InDesign CC is available in the following languages:
Dansk
</div>
<span class='text_page_counter'>(21)</span><div class='page_container' data-page=21>
Polish
Português (Brasil)
Suomi
Svenska
Turkish
Ukrainian
čeština
Русский
????*
???
????
????
???
* Arabic and Hebrew supported in a Middle Eastern version with full right-to-left language support, Arabic/Hebrew
features, and an English interface; also in a North African French (Franỗais*) version with full right-to-left language
support, Arabic/Hebrew features, and a French interface.
<b>InDesign CC (2015) system requirements</b>
<b>Windows</b>
• Intel Pentium 4 or AMD Athlon 64 processor
• Microsoft Windows 7 with Service Pack 1, Windows 8, Windows 8.1, or Windows 10
• 2 GB of RAM (8 GB recommended)
• 2.6 GB of available hard-disk space for installation; additional free space required during installation (cannot install
on removable flash storage devices)
• 1024 x 768 display (1280 x 800 recommended) with 32-bit video card; supports HiDPI display
• To use the new InDesign Touch workspace, you must have a touch screen enabled tablet/monitor running Windows
8 or above (such as Microsoft Surface Pro 3) with the screen resolution set to 2160 x 1440 or more
ã Adobeđ Flashđ Player 10 software required to export SWF files
• Internet connection and registration are necessary for required software activation, validation of subscriptions, and
access to online services.*
<b>Mac OS</b>
• Multicore Intel processor
• Mac OS X v10.9, v10.10, or v10.11
</div>
<span class='text_page_counter'>(22)</span><div class='page_container' data-page=22>
• 2.5 GB of available hard-disk space for installation; additional free space required during installation (cannot install
on a volume that uses a case-sensitive file system or on removable flash storage devices)
• 1024 x 768 display (1280 x 800 recommended) with 32-bit video card; supports Retina display
• Optional: To use GPU Performance, your Mac should have a minimum of 1024 MB of VRAM (2 GB
recommended), and your computer must support OpenGL version 4.0 or greater.
• Supported machines iMac 4K iMac 5K MacBook Pro Retina Mac Pro connected to a HiDPI monitor
Mac mini connected to a HiDPI monitor
• To check for VRAM value: <b>Mac 10.9: </b>Choose Mac > About This Mac > More Info (Graphics information). <b>Mac </b>
<b>10.10, 10.11</b>: Choose Mac > About This Mac (Graphics information).
• To find out if your computer supports the required OpenGL version (4.0 or later), see this Apple Support
document.
ã Adobeđ Flashđ Player 10 software required to export SWF files.
• Internet connection and registration are necessary for required software activation, validation of subscriptions, and
access to online services. *
* NOTICE TO USERS: Internet connection, Adobe ID, and acceptance of license agreement required to activate and
use this product. This product may integrate with or allow access to certain Adobe or third-party hosted online
services. Adobe services are available only to users 13 and older and require agreement to additional terms of use and
the Adobe Privacy Policy. Applications and services may not be available in all countries or languages and may be
subject to change or discontinuation without notice. Additional fees or membership charges may apply.
<b>Language versions</b>
InDesign CC is available in the following languages:
Dansk
Deutsch
English
Espaủol
Franỗais
Franỗais*
Hebrew*
Hungarian
Italiano
Nederlands
Norwegian
Polish
Portuguờs (Brasil)
Suomi
</div>
<span class='text_page_counter'>(23)</span><div class='page_container' data-page=23>
Ukrainian
etina
????*
???
????
????
???
* Arabic and Hebrew supported in a Middle Eastern version with full right-to-left language support, Arabic/Hebrew
features, and an English interface; also in a North African French (Franỗais*) version with full right-to-left language
support, Arabic/Hebrew features, and a French interface.
<b>InDesign CC (2014) system requirements</b>
<b>Windows</b>
• Intel Pentium 4 or AMD Athlon 64 processor
• Microsoft Windows 7 with Service Pack 1, Windows 8, or Windows 8.1
• 2 GB of RAM (8 GB recommended)
• 2.6 GB of available hard-disk space for installation; additional free space required during installation (cannot install
on removable flash storage devices)
• 1024 x 768 display (1280 x 800 recommended) with 32-bit video card; supports HiDPI display
ã Adobeđ Flashđ Player 10 software required to export SWF files
• Internet connection and registration are necessary for required software activation, validation of subscriptions, and
access to online services.*
<b>Mac OS</b>
• Multicore Intel processor
• Mac OS X v10.7, v10.8, v10.9, or v10.10
• 2 GB of RAM (8 GB recommended)
• 2.6 GB of available hard-disk space for installation; additional free space required during installation (cannot install
on a volume that uses a case-sensitive file system or on removable flash storage devices)
• 1024 x 768 display (1280 x 800 recommended) with 32-bit video card; supports Retina display
ã Adobeđ Flashđ Player 10 software required to export SWF files.
ã Internet connection and registration are necessary for required software activation, validation of subscriptions, and
access to online services.*
</div>
<span class='text_page_counter'>(24)</span><div class='page_container' data-page=24>
<b>Windows</b>
• Intelđ Pentiumđ 4 or AMD Athlonđ 64 processor
ã Microsoftđ Windowsđ 7 with Service Pack 1, Windows 8 or Windows 8.1
• 2 GB of RAM (8 GB recommended)
• 2.6 GB of available hard-disk space for installation; additional free space required during installation (cannot install
on removable flash storage devices)
• 1024 x 768 display (1280 x 800 recommended) with 32-bit video card
• Adobeđ Flashđ Player 10 software required to export SWF files
ã Internet connection and registration are necessary for required software activation, membership validation, and
access to online services.*
<b>Mac OS</b>
• Multicore Intel processor
• Mac OS X v10.6.8, v10.7, v10.8, or v10.9
• 2 GB of RAM (8 GB recommended)
• 2.6 GB of available hard-disk space for installation; additional free space required during installation (cannot install
on a volume that uses a case-sensitive file system or on removable flash storage devices)
• 1024 x 768 display (1280 x 800 recommended) with 32-bit video card. Supports Retina display.
• Adobe Flash Player 10 software required to export SWF files
• Internet connection and registration are necessary for required software activation, membership validation, and
access to online services.*
</div>
<span class='text_page_counter'>(25)</span><div class='page_container' data-page=25>
<b>Chapter 2: Workspace and workflow</b>
<b>GPU Performance</b>
The Graphics Processing Unit (GPU), found on video cards and as part of display systems, is a specialized processor
that can rapidly execute commands for manipulating and displaying images. GPU-accelerated computing offers faster
performance across a broad range of design, animation, and video applications. This means that you get a significant
performance boost: InDesign runs faster and more smoothly than ever before.
<b>System requirements</b>
To use GPU Performance, your Mac should have a minimum of 1024 MB of VRAM (2 GB recommended), and your
computer must support OpenGL version 4.0 or greater.
<b>Supported machines</b>
• iMac 4K
• iMac 5K
• MacBook Pro Retina
• Mac Pro connected to a HiDPI monitor
• Mac mini connected to a HiDPI monitor
To check for VRAM values:
• <b>Mac 10.9</b>: Choose Mac > About This Mac > More Info (Graphics information).
• <b>Mac 10.10, 10.11</b>: Choose Mac > About This Mac (Graphics information).
To find out if your computer supports the required OpenGL version (4.0 or later), see this Apple Support document.
<b>What is the benefit of GPU for InDesign?</b>
HiDPI monitors are becoming the standard. With the high monitor resolutions, it is getting difficult for CPU to handle
the rendering.
Also, InDesign’s default display performance has always been set to Typical Quality. Due to this you do not see the
images placed in the document in their full fidelity. This was done to provide you with optimum performance when
you perform operations like zooming, scrolling, panning etc.
This is where the GPU comes into play. Rendering on high-density displays is best handled by the GPU. GPU
acceleration makes the rendering of the documents faster while zooming, scrolling, and panning. With the GPU
enhancements, InDesign now shows images in their fullest fidelity without compromising the performance.
If your system has a compatible GPU card, InDesign renders the document using the GPU by default and sets the
Display Performance to High Quality.
</div>
<span class='text_page_counter'>(26)</span><div class='page_container' data-page=26>
Select the zoom tool (Z), and do one of the following:
• Press and hold down the mouse button (long press) to zoom in to the center. Press Option and hold down the mouse
button (long press) to zoom out.
• Press and drag the pointer to the right to zoom in or to the left to zoom out.
• Press Shift to switch to marquee zoom mode.
<b>Enable GPU Performance</b>
After making sure your computer meets the System requirements for GPU Performance, follow these instructions to
enable the feature in InDesign.
<b>1</b> In the application bar, click the GPU Performance icon to display the GPU Performance settings in the
Preferences panel.
<b>2</b> Select (to enable) or clear (to disable) the GPU Performance check box and click OK.
<b>Toggle between preview modes</b>
When the GPU Performance feature is enabled, you can switch (Ctrl + E) between the GPU Preview mode and the CPU
Preview mode.
• To switch to GPU Preview, choose <b>View > GPU Preview</b>.
• To switch to CPU Preview, choose <b>View > Preview on CPU</b>.
You can also toggle between GPU preview mode and Overprint preview mode by using the
<b>Command+Option+Shift+Y</b> shortcut.
<b>GPU Performance settings</b>
</div>
<span class='text_page_counter'>(27)</span><div class='page_container' data-page=27>
<i>GPU preferences</i>
Besides enabling or disabling GPU Performance, here are other GPU Performance settings you can modify in the
Preferences panel:
• <b>Animated Zoom</b>: Select this check box to make zoom actions smooth and animated.
<b>Workspace basics</b>
</div>
<span class='text_page_counter'>(28)</span><div class='page_container' data-page=28>
<b>Start workspace</b>
The Start workspace in InDesign gives you convenient access to your recently used files, libraries, and presets.
The Start workspace is displayed when:
• InDesign is launched
• No documents are open
Use the Start workspace to:
• <b>Get started quickly</b>
• Click <b>Recent </b>to view the files that you have recently modified.
• Click <b>CC Libraries </b>to view a list of Libraries associated (own and shared) with your Creative Cloud account. The
assets in your Libraries are displayed in the integrated Libraries panel.
• Click <b>Presets </b>to view the available starter templates for new InDesign documents. Click a template to start a new
document with a predefined canvas size.
• <b>View assets conveniently</b>
• List view . view a list of asset names.
• Thumbnail view . View thumbnails of assets.
• <b>Interact with your Libraries</b>
• Use the integrated Libraries panel to quickly view, work with, or edit assets in your own or shared Creative Cloud
Libraries.
</div>
<span class='text_page_counter'>(29)</span><div class='page_container' data-page=29>
<i>To disable the Start workspace from the Preferences dialog, deselect the <b>Show Start Workspace When No Documents </b></i>
<i><b>Are Open</b> check box (<b>Preferences</b> > <b>General</b>). The keyboard shortcuts Ctrl/Cmd + O and Ctrl/Cmd + N continue to </i>
<i>be available for use.</i>
<b>Create documents</b>
When you create a document in InDesign, instead of beginning with a blank document, you can choose from a wide
variety of templates, including templates from Adobe Stock. Templates include assets that you can build on to complete
your project. When you open a template in InDesign, you can work with it just as you would work with any other
InDesign document.
In addition to templates, you can also create a document by selecting one of the numerous presets available in InDesign.
For more information, see Create documents.
<i>New Document dialog | Templates from Adobe Stock and presets</i>
<b>Recent Files workspace</b>
Use the Recent Files workspace to review a list or thumbnail view of the files you have been working on recently. Select
<b>Recent Files</b> from the Workspace Switcher menu to view Recent Files workspace.
</div>
<span class='text_page_counter'>(30)</span><div class='page_container' data-page=30>
<i>Recent Files workspace</i>
<i>This feature is disabled by default. To enable the Recent Files workspace from the Preferences dialog, select the <b>Show </b></i>
<i><b>The Recent Files Workspace While Opening A File</b> check box (<b>Preferences</b> > <b>General</b>).</i>
<b>Workspace overview</b>
• The Application frame groups all the workspace elements in a single, integrated window that lets you treat the
application as a single unit. When you move or resize the Application frame or any of its elements, all the elements
within it respond to each other so none overlap. Panels don’t disappear when you switch applications or when you
accidentally click out of the application. If you work with two or more applications, you can position each
application side by side on the screen or on multiple monitors. If you are using a Mac and prefer the traditional,
free-form user interface, you can turn off the Application frame. Select <b>Window</b> > <b>Application Frame</b> to toggle it on or
off.
• The Application bar across the top contains a workspace switcher, menus (Windows only), and other application
controls. On Mac, the application bar is available only when Application frame is off. You can toggle it on or off using
the Window menu.
• The Tools panel contains tools for creating and editing images, artwork, page elements, and so on. Related tools are
grouped.
• The Control panel displays options for the currently selected object.
• The Document window displays the file you’re working on. Document windows can be tabbed and, in certain cases,
grouped and docked.
</div>
<span class='text_page_counter'>(31)</span><div class='page_container' data-page=31>
<i>Default InDesign workspace</i>
<i><b>A </b>Tabbed Document windows <b>B </b>Publish Online <b>C </b>Switch to Touch workspace <b>D </b>Workspace switcher <b>E </b>Panel title bar <b>F </b>Search bar <b>G </b>Control </i>
<i>panel <b>H </b>Collapse To Icons button <b>I </b>Panel groups in vertical dock <b>J </b>Status bar <b>K </b>Tools panel </i>
<b>Set UX color</b>
You can change the interface to one of the four available color options: <b>Dark</b>, <b>Medium Dark</b>, <b>Medium Light</b>, and
<b>Light</b>.
<b>1</b> Do one of the following:
• (Windows) Choose <b>Edit</b> > <b>Preferences</b> > <b>Interface</b>
• (macOS) Choose <b>InDesign</b> > <b>Preferences</b> > <b>Interface </b>
<b>2</b> Choose the desired interface color from the following Color Themes:<b> Dark, Medium Dark, Medium Light, </b>and
<b>Light.</b>
<i>Available color themes</i>
</div>
<span class='text_page_counter'>(32)</span><div class='page_container' data-page=32>
<b>Manage windows and panels</b>
<b>Hide or show all panels</b>
• To hide or show all panels, including the Tools panel and Control panel, press <b>Tab</b>.
• To hide or show all panels except the Tools panel and Control panel, press <b>Shift</b>+<b>Tab</b>.
<i>You can temporarily display hidden panels if <b>Auto-Show Hidden Panels</b> is selected in Interface preferences. Move the </i>
<i>pointer to the edge of the application window (Windows) or to the edge of the monitor (macOS) and hover over the strip </i>
<i>that appears. </i>
<b>Display panel options</b>
• Click the panel menu icon in the upper-right corner of the panel.
<i><b>Note: </b>You can open a panel menu even when the panel is minimized.</i>
<b>Adjust panel brightness</b>
• In Interface preferences, you can customize the interface to sport one of the four available color themes designed for
optimal user experience: <b>Dark, Medium Dark, Medium Light, </b>and<b> Light.</b>
<i><b>Note: </b>The pasteboard color in InDesign is matched to the theme color by default. Deselect <b>Preferences</b> > <b>Interface</b> > </i>
<i><b>Appearance</b> > <b>Match Pasteboard To Theme Color </b>option to change the pasteboard color to white.</i>
<b>Reconfigure the Tools panel</b>
You can display the tools in the Tools panel in a single column, or side by side in two columns.
• Click the double arrow at the top of the Tools panel.
<i>You also can switch from single-column to double-column or single-row from <b>Preferences</b> > <b>Interface</b> > <b>Panels</b> > </i>
<i><b>Floating Tools Panel</b>.</i>
<b>Rearrange, dock, or float document windows</b>
When you open more than one file, the Document windows are tabbed.
• To rearrange the order of tabbed Document windows, drag a window’s tab to a new location in the group.
• To undock (float or untab) a Document window from a group of windows, drag the window’s tab out of the group.
• To dock a Document window to a separate group of Document windows, drag the window into the group.
• To create groups of stacked or tiled documents, drag the window to one of the drop zones along the top, bottom, or
sides of another window. You can also select a layout for the group by using the Layout button on the Application bar.
• To switch to another document in a tabbed group when dragging a selection, drag the selection over the document’s
tab for a moment.
<b>Dock and undock panels</b>
A <i>dock</i> is a collection of panels or panel groups displayed together, generally in a vertical orientation. You dock and
undock panels by moving them into and out of a dock.
</div>
<span class='text_page_counter'>(33)</span><div class='page_container' data-page=33>
• To remove a panel or panel group, drag it out of the dock by its tab or title bar. You can drag it into another dock or
make it free-floating.
<i>Links panel being dragged out to new dock, indicated by blue vertical highlight</i>
<i>Links panel now in its own dock</i>
<i>You can prevent panels from filling all the space in a dock. Drag the bottom edge of the dock up so it no longer meets </i>
<i>the edge of the workspace.</i>
<b>Move panels</b>
As you move panels, you see blue highlighted <i>drop zones</i>, areas where you can move the panel. For example, you can
move a panel up or down in a dock by dragging it to the narrow blue drop zone above or below another panel. If you
drag to an area that is not a drop zone, the panel floats freely in the workspace.
<i><b>Note: </b>The position of the mouse (rather than the position of the panel), activates the drop zone, so if you can’t see the drop </i>
<i>zone, try dragging the mouse to the place where the drop zone should be.</i>
</div>
<span class='text_page_counter'>(34)</span><div class='page_container' data-page=34>
<i>Narrow blue drop zone indicates Color panel will be docked on its own above the Layers panel group.</i>
<i>Press Ctrl (Windows) or Command (Mac OS) while moving a panel to prevent it from docking. Press Esc while moving </i>
<i>the panel to cancel the operation.</i>
<b>Add and remove panels</b>
If you remove all panels from a dock, the dock disappears. You can create a dock by moving panels to the right edge of
the workspace until a drop zone appears.
• To remove a panel, right-click (Windows) or Control-click (Mac) its tab and then select Close, or deselect it from
the Window menu.
• To add a panel, select it from the Window menu and dock it wherever you want.
<b>Manipulate panel groups</b>
• To move a panel into a group, drag the panel’s tab to the highlighted drop zone in the group.
<i>Adding a panel to a panel group</i>
• To rearrange panels in a group, drag a panel’s tab to a new location in the group.
</div>
<span class='text_page_counter'>(35)</span><div class='page_container' data-page=35>
<b>Stack floating panels</b>
When you drag a panel out of its dock but not into a drop zone, the panel floats freely. The floating panel allows you to
position it anywhere in the workspace. You can stack floating panels or panel groups so that they move as a unit when
you drag the topmost title bar.
• To stack floating panels, drag a panel by its tab to the drop zone at the bottom of another panel.
• To change the stacking order, drag a panel up or down by its tab.
<i><b>Note: </b>Be sure to release the tab over the narrow drop zone between panels, rather than the broad drop zone in a title bar.</i>
• To remove a panel or panel group from the stack, so that it floats by itself, drag it out by its tab or title bar.
<b>Resize panels</b>
• To minimize or maximize a panel, panel group, or stack of panels, double-click a tab. You can also double-click the
tab area (the empty space next to the tabs).
• To resize a panel, drag any side of the panel. Some panels, such as the Color panel in Photoshop, cannot be resized
by dragging.
<b>Collapse and expand panel icons</b>
You can collapse panels to icons to reduce clutter on the workspace. In some cases, panels are collapsed to icons in the
default workspace.
<i>Panels collapsed to icons</i>
<i>Panels expanded from icons</i>
• To collapse or expand all panel icons in a column, click the double arrow at the top of the dock.
• To expand a single panel icon, click it.
• To resize panel icons so that you see only the icons (and not the labels), adjust the width of the dock until the text
disappears. To display the icon text again, make the dock wider.
</div>
<span class='text_page_counter'>(36)</span><div class='page_container' data-page=36>
<i>If you select <b>Auto-Collapse Icon Panels</b> from <b>Preferences</b> > <b>Interface</b> > <b>Panels</b>, an expanded panel icon collapses </i>
<i>automatically when you click away from it.</i>
• To add a floating panel or panel group to an icon dock, drag it in by its tab or title bar. (Panels are automatically
collapsed to icons when added to an icon dock.)
• To move a panel icon (or panel icon group), drag the icon. You can drag panel icons up and down in the dock, into
other docks (where they appear in the panel style of that dock), or outside the dock (where they appear as floating
icons).
<b>Use panel menus</b>
Access the panel menus using the icon on the upper-right corner of the panel.
<i>Panel menu (Swatches panel)</i>
<b>Save and switch workspaces</b>
By saving the current size and position of panels as a named workspace, you can restore that workspace even if you
move or close a panel. The names of saved workspaces appear in the workspace switcher in the Application bar.
<b>Save a custom workspace</b>
<b>1</b> Choose <b>Window</b> > <b>Workspace</b> > <b>New Workspace</b>.
<b>2</b> Type a name for the workspace.
</div>
<span class='text_page_counter'>(37)</span><div class='page_container' data-page=37>
<b>Menus or Menu Customization </b>Saves the current set of menus.
<b>Display or switch workspaces</b>
• Select a workspace from the workspace switcher in the Application bar.
<b>Delete a custom workspace</b>
• Select Delete Workspace from the workspace switcher, select the workspace, and then click Delete.
• Choose <b>Window</b> > <b>Workspace</b> >Delete Workspace, select the workspace, and then click Delete.
<b>Restore the default workspace</b>
• Select <b>Window</b> > <b>Workspace</b> > <b>Reset</b>[Workspace Name].
<b>About screen modes</b>
You can change the visibility of the document window using the Mode buttons at the bottom of the toolbox or by
choosing commands from the <b>View </b>><b> Screen Mode</b> menu. When the toolbox is displayed in a single column, you can
select view modes by clicking the current mode button and selecting a different mode from the menu that appears.
<b>Normal Mode </b>
Displays artwork in a standard window with all visible grids and guides showing, non-printing objects showing, and a
white pasteboard.
<b>Preview Mode </b>
Displays artwork as if it were output, with all non-printing elements suppressed (grids, guides, non-printing objects),
and the pasteboard set to the preview background color defined in Preferences.
<b>Bleed Mode </b>
Displays artwork as if it were output, with all non-printing elements suppressed (grids, guides, non-printing objects),
the pasteboard set to the preview background color defined in Preferences, and any printing elements within the
document's bleed area (defined in Document Setup) showing.
<b>Slug Mode </b>
Displays artwork as if it were output, with all non-printing elements suppressed (grids, guides, non-printing objects),
the pasteboard set to the preview background color defined in Preferences, and any printing elements within the
document's slug area (defined inDocument Setup) showing.
<b>Presentation Mode </b>
Displays artwork as if it were a slideshow presentation, with no menus, panels, or tools displayed. See Use Presentation
Mode.
<b>Use the status bar</b>
The status bar at the lower left of a document window shows information about the status of a file and lets you turn to
a different page. Click the status bar menu to do any of the following:
• Show the current file in the file system by choosing Reveal In Explorer (Windows) or Reveal In Finder (macOS).
• Show the current file in Adobe Bridge by choosing Reveal in Bridge.
</div>
<span class='text_page_counter'>(38)</span><div class='page_container' data-page=38>
<b>Control panel overview</b>
The Control panel (<b>Window</b> > <b>Control</b>) offers quick access to options, commands, and other panels related to the
current page item or objects you select. By default, the Control panel is docked to the top of the document window;
however, you can dock it to the bottom of the window, convert it to a floating panel, or hide it altogether.
Options displayed in the Control panel vary depending on the type of object or tool you select:
• When you select a frame, the Control panel displays options for resizing, repositioning, skewing, and rotating the
frame, or applying an object style.
• When you select text inside a frame, the Control panel displays either character or paragraph options. Click the
paragraph and character icons on the left side of the Control panel to determine whether paragraph or character
options are displayed. If your monitor size and resolution allows, the Control panel displays additional options. For
example, if the character icon is selected, all the character options are displayed, and some paragraph options appear
on the right of the Control panel. If you click the paragraph icon, all paragraph options are displayed, and some
character options appear on the right.
• When you select a table cell, the Control panel displays options for adjusting row and column dimensions, merging
cells, aligning text, and adding strokes.
As the options in the Control panel change, you can get more information about each option by using <i>tool tips</i>—pop-up
descriptions that appear when you hover over an icon or option label with the pointer.
<i>Control panel with tool tip displayed</i>
<i>Control panel menu</i>
</div>
<span class='text_page_counter'>(39)</span><div class='page_container' data-page=39>
<b>Dock or float the Control panel</b>
? Do one of the following:
• Drag the vertical bar on the left side of the Control panel until the toolbar is docked to the top or bottom of the
application window (Windows) or screen (Mac OS).
• Choose Dock At Top, Dock At Bottom, or Float from the Control panel menu.
<b>Customize the Control panel</b>
<b>1</b> To open the Customize Control Panel dialog box, do one of the following:
• Click Customize Control Panel icon located on the right side of the Control panel.
• Choose Customize from the Control panel menu located on the right side of the Control panel.
<b>2</b> Specify options that you want to display or hide, and then click OK.
<b>Use context menus</b>
Unlike the menus that appear at the top of your screen, context-sensitive menus display commands related to the active
tool or selection. You can use context menus as a quick way to choose commonly used commands.
<b>1</b> Position the pointer over the document, object, or panel.
<b>2</b> Click the right mouse button.
<i><b>Note: </b>(macOS) If you don’t have a two-button mouse, you can display a context menu by pressing the Control key as you </i>
<i>click with the mouse.</i>
<b>Change Interface preferences</b>
<b>1</b> Choose <b>Edit </b>> <b>Preferences</b> > <b>Interface</b> (Windows) or <b>InDesign</b> > <b>Preferences</b> > <b>Interface</b> (macOS).
<b>2</b> Choose the settings you want to specify, and click OK.
<b>Color Theme </b>Select the color theme for InDesign interface. Choose from <b>Dark</b>, <b>Medium Dark</b>, <b>Medium Light</b>, or
<b>Light</b> Color Theme.
<b>Match Pasteboard To Theme Color </b>Select this option to match pasteboard color with the theme color of interface.
<b>Tool Tips </b>Tool tips appear when you hold the pointer over interface items such as tools in the toolbar and options in
the Control panel. Choose None to turn off tool tips.
<b>Show Thumbnails On Place </b>When you place a graphic, a thumbnail of the image appears in the loaded graphics cursor.
Similarly, a thumbnail of the first few lines of text appears in the loaded text cursor. Deselect this option if you don’t
want thumbnails to appear when placing graphics or text.
<b>Show Transformation Values </b>When you’re creating, sizing, or rotating an object, the cursor displays the [x,y]
coordinates, width and height, or rotation information.
<b>Enable Multi-Touch Gestures </b>Select this option to allow Windows and Mac OS multi-touch mouse gestures to work in
InDesign. For example, when you use the Magic Mouse in Mac OS, the swipe gesture scrolls up or down or moves to
the previous or next page or spread, and the rotate gesture rotates the spread.
<b>Highlight Object Under Selection Tool </b>Select this option to highlight the frame edges of objects when the direct
selection tool is moved over it.
</div>
<span class='text_page_counter'>(40)</span><div class='page_container' data-page=40>
<b>Auto-Collapse Icon Panels </b>When this option is selected, clicking the document window closes the open panel
automatically.
<b>Auto-Show Hidden Panels </b>When you hide panels by pressing Tab, holding the pointer over the side of the document
window temporarily reveals the panels if this option is selected. If this option is not selected, you must press Tab again
to display panels.
<b>Open Documents As Tabs </b>When this option is deselected, documents you create or open appear as floating windows
rather than tabbed windows.
<b>Enable Floating Document Window Docking </b>If this option is selected, you can dock floating documents with each
other as tabbed windows. If this option is deselected, floating document windows aren’t docked with other document
windows, unless you hold down Ctrl (Windows) or Command (Mac OS) while dragging.
<b>Large Tabs </b>Select this option to increase the height of panel and document tabs.
<b>Hand Tool </b>To control whether to greek text and images when you scroll a document, drag the Hand Tool slider to the
desired level of performance versus quality.
<b>Live Screen Drawing </b>Select an option to determine whether the image redraws as you drag an object. If Immediate is
selected, the image redraws while you drag. If Never is selected, dragging an image moves only the frame, and then
image is moved when you release the mouse button. If Delayed is selected, the image redraws only if you pause before
dragging. Delayed offers the same behavior as in InDesign CS4.
<b>Sync Settings using Adobe Creative Cloud</b>
<b>Note</b>: Sync Settings has been removed in InDesign CC 2015.2. The existing service in InDesign CC and CC 2014 will
become unavailable in the near future. See the information Migrate settings from one major version to another to
migrate your presets/settings from an earlier version of InDesign CC to the latest one or from one computer to another.
<b>Migrate settings from one major version to another</b>
By default, when you install InDesign CC, Creative Cloud migrates your presets and preferences from earlier versions.
To choose not to migrate presets and preferences, deselect Advanced Options > Import Previous Version Settings And
Preferences in the confirmation dialog that appears after you click Update in the Creative Cloud desktop app.
If you choose not to migrate your settings when you install Photoshop CC, or if you're upgrading to InDesign CC from
an older version of InDesign, you can select Edit > Migrate previous local settings… to enable preset and preference
migration at any point in time.
For an introduction to preset migration, see the following video.
<b>Note: </b>The main preference file is not migrated when you run the Migrate Presets menu command.
The information below is relevant only for InDesign CC versions earlier than 2015.1.
<b>Introduction</b>
</div>
<span class='text_page_counter'>(41)</span><div class='page_container' data-page=41>
The new Sync Settings feature enables individual users to sync their settings using Creative Cloud. If you use two
computers, for example, one at home and another at work, the Sync Settings feature makes it easy for you to keep those
settings synchronized on these two computers. Also, if you have replaced your old computer with a new one and have
reinstalled InDesign, you can get the application set up quickly with all your settings in place by just pressing a button.
<b>Note</b>: At any given time, you can activate InDesign on two computers only.
The syncing happens via your Adobe Creative Cloud account. All the settings are uploaded to Creative Cloud and then
are downloaded and applied on the other computer.
All sync operations are initiated by users. They cannot be scheduled or performed automatically (such as at launch or
during shutdown).
<b>Prerequisites for this feature to work</b>:
• Computers should be connected to the Internet.
• You have signed into your Adobe Creative Cloud account on both computers.
<b>Sync settings at first launch</b>
After installation, when you launch the application and create a document or open an existing document for the first
time, you will see a prompt asking whether you want to start the sync.
<i>Prompt asking whether you want to start the sync</i>
• Click Sync Settings Now to initiate the sync.
• Click <b>Disable Sync Settings</b> to disable the feature.
• Click <b>Advanced</b> to open the Preferences dialog, where you can choose and customize what items are synchronize.
<b>Use the sync settings feature</b>
Do any one of the following:
• [Recommended] Click the Sync Settings icon ( ) at the lower-left corner of the InDesign active document
window, and then click <b>Sync Settings Now</b>.
• ClickEdit (Mac:InDesign) > {<b>AdobeID logged in</b>} > <b>Sync Settings Now</b>.
<b>Sync settings on successive launches</b>
</div>
<span class='text_page_counter'>(42)</span><div class='page_container' data-page=42>
<i>Prompt asking whether you want to sync the setting from the cloud</i>
The settings are downloaded to your local computers and are updated in the application. If you change glyph sets,
keyboard shortcuts, custom workspaces, or PDF presets, you should initiate sync before you close the application. You
can see the sync status in the left-bottom corner of the document status bar. Click the Sync Settings icon ( ) in the
status bar and then click Sync Settings Now.
<i>Sync status</i>
<b>Manage sync</b>
<b>What gets synced</b>
• Workspaces
• Menu sets
• PDF presets
• Keyboard shortcuts
• Glyphs sets
<b>Choose what you want to sync</b>
Navigate to the Preferences > Sync Settings tab:
</div>
<span class='text_page_counter'>(43)</span><div class='page_container' data-page=43>
<i>Select the settings you want to sync</i>
Select the checkboxes for the settings that you want to sync. You can also choose what to do in case of conflict.
<i><b>Note: </b>To sync your settings successfully, you must change the settings only from within the application. The sync settings </i>
<i>feature does not sync any file that is manually placed in a folder location.</i>
<b>Choose an option in case of conflict</b>
There are situations when the system could detect sync conflicts. Sync conflicts occur when the system is unable to
determine whether you want a setting from Creative Cloud or from your local computer to be retained since both have
been changed after the last sync operation.
</div>
<span class='text_page_counter'>(44)</span><div class='page_container' data-page=44>
<i>Sync conflict prompt</i>
• Sync Local: Sync local settings on this computer to the cloud; overwrite the cloud version with the local version of
settings.
• Sync Cloud: Sync from the cloud to this local computer; ignore changes made to the local settings and replace them
with the settings in the cloud.
<b>What’s not supported</b>
• Keyboard shortcuts created for Windows will only sync with a Windows computer. Mac keyboard shortcuts will
only sync with a Mac computer.
• Assets saved to a custom location are not synced.
• Any modifications (for example: rearrangement of panel) made after creation of the Workspace will not be synced.
For Workspace syncing, first set up your working environment and then create a workspace and initiate the sync
process.
<b>Default keyboard shortcuts</b>
Adobe InDesign provides shortcuts to help you quickly work in documents without using the mouse. Many keyboard
shortcuts appear next to the command names in menus. You can use the default InDesign shortcut set, the
QuarkXPress 4.0 or Adobe PageMaker 7.0 shortcut set, or a shortcut set that you create. You can share shortcut sets
with others using InDesign on the same platform.
InDesign provides shortcuts to help you quickly work in documents without using the mouse. Many keyboard
shortcuts appear next to the command names in menus. You can use the default InDesign shortcut set or a shortcut set
that you create. You can share shortcut sets with others using InDesign on the same platform.
<b>Keys for tools</b>
<i>You can generate a list of the current keyboard set by choosing Show Set in the Keyboard Shortcuts dialog box. This </i>
<i>option is especially useful for printing a copy of your custom shortcuts.</i>
This table isn’t a complete list of keyboard shortcuts. It lists only those shortcuts that aren’t displayed in menu
commands or tool tips.
</div>
<span class='text_page_counter'>(45)</span><div class='page_container' data-page=45>
<b>Tool</b> <b>Windows</b> <b>Mac OS</b>
Selection tool V, Esc V, Esc
Direct Selection tool A A
Toggle Selection and Direct Selection tool Ctrl+Tab Command+Control+Tab
Page tool Shift+P Shift+P
Gap tool U U
Pen tool P P
Add Anchor Point tool = =
Add Anchor Point tool = = (on the numeric pad)
Delete Anchor Point tool -
-Delete Anchor Point tool
-Convert Direction Point tool Shift+C Shift+C
Type tool T T
Type On A Path tool Shift+T Shift+T
Pencil tool (Note tool) N N
Line tool \ \
Rectangle Frame tool F F
Rectangle tool M M
Ellipse tool L L
Rotate tool R R
Scale tool S S
Shear tool O O
Free Transform tool E E
Eyedropper tool I I
Measure tool K K
Gradient tool G G
Scissors tool C C
Hand tool H H
Temporarily selects Hand tool Spacebar (Layout mode), Alt (Text mode), or
Alt+Spacebar (both)
Spacebar (Layout mode), Option (Text mode),
or Option+Spacebar (both)
Zoom tool Z Z
Temporarily selects Zoom In tool Ctrl+Spacebar Command+Spacebar
Toggle Fill and Stroke X X
Swap Fill and Stroke Shift+X Shift+X
Toggle between Formatting Affects Container
and Formatting Affects Text
</div>
<span class='text_page_counter'>(46)</span><div class='page_container' data-page=46>
<b>Keys for selecting and moving objects</b>
This table isn’t a complete list of keyboard shortcuts. It lists only those shortcuts that aren’t displayed in menu
commands or tool tips.
Apply Color , [comma] , [comma]
Apply Gradient . [period] . [period]
Apply No Color / /
Switch between Normal View and Preview
Mode
W W
Frame Grid tool (horizontal) Y Y
Frame Grid tool (vertical) Q Q
Gradient Feather tool Shift+G Shift+G
<b>Result</b> <b>Windows</b> <b>Mac OS</b>
Temporarily select Selection or Direct
Selection tool (last used)
Any tool (except selection tools)+Ctrl Any tool (except selection tools)+ Command
Temporarily select Group Selection tool Direct Selection tool+Alt; or Pen, Add Anchor
Point, or Delete Anchor Point tool+Alt+Ctrl
Direct Selection tool+Option; or Pen, Add
Anchor Point, or Delete Anchor Point
tool+Option+Command
Select container of selected content Esc or double-click Esc or double-click
Select content of selected container Shift+Esc or double-click Shift+Esc or double-click
Add to or subtract from a selection of multiple
objects
Selection, Direct Selection, or Group Selection
tool+Shift–click (to deselect, click center
point)
Selection, Direct Selection, or Group Selection
tool+Shift–click (to deselect, click center
point)
Duplicate selection Selection, Direct Selection, or Group Selection
tool+Alt–drag*
Selection, Direct Selection, or Group Selection
tool+ Option–drag*
Duplicate and offset selection Alt+Left Arrow, Right Arrow, Up Arrow, or
Down Arrow key
Option+Left Arrow, Right Arrow, Up Arrow, or
Down Arrow key
Duplicate and offset selection by 10 times** Alt+Shift+Left Arrow, Right Arrow, Up Arrow,
Down Arrow key
Option+Shift+Left Arrow, Right Arrow, Up
Arrow, Down Arrow key
Move selection** Left Arrow, Right Arrow, Up Arrow, Down
Arrow key
Left Arrow, Right Arrow, Up Arrow, Down
Arrow key
Move selection by 10th** Ctrl+Shift+Left Arrow, Right Arrow, Up Arrow,
Down arrow key
Command+Shift+Left Arrow, Right Arrow, Up
Arrow, Down arrow key
Move selection by 10 times** Shift+Left Arrow, Right Arrow, Up Arrow,
Down Arrow key
Shift+Left Arrow, Right Arrow, Up Arrow,
Down Arrow key
Select master page item from document page Selection or Direct Selection tool+Ctrl+Shift–
click
Selection or Direct Selection tool+
Command+Shift–click
Select next object behind or in front Selection tool+Ctrl–click, or Selection
tool+Alt+Ctrl–click
Selection tool+Command–click or Selection
tool+Option+ Command–click
</div>
<span class='text_page_counter'>(47)</span><div class='page_container' data-page=47>
<b>Keys for transforming objects</b>
This table isn’t a complete list of keyboard shortcuts. It lists only those shortcuts that aren’t displayed in menu
commands or tool tips.
<b>Keys for editing paths and frames</b>
This table isn’t a complete list of keyboard shortcuts. It lists only those shortcuts that aren’t displayed in menu
commands or tool tips.
Select next or previous frame in story Alt+Ctrl+Page Down/ Alt+Ctrl+Page Up Option+Command+Page Down/
Option+Command+Page Up
Select first or last frame in story Shift+Alt+Ctrl+Page Down/
Shift+Alt+Ctrl+Page Up
Shift+Option+Command+Page Down/
Shift+Option+Command+Page Up
*Press Shift to constrain movement to 45°
angles.
**Amount is set in Edit > Preferences > Units &
Increments (Windows) or InDesign >
Preferences > Units & Increments (Mac OS).
<b>Result</b> <b>Windows</b> <b>Mac OS</b>
Duplicate and transform selection Transformation tool+Alt–drag* Transformation tool+Option–drag*
Display Transform tool dialog box Select object+double-click Scale tool, Rotate
tool, or Shear tool in Toolbox
Select object+double-click Scale tool, Rotate
tool, or Shear tool in Toolbox
Decrease scale by 1% Ctrl+, Command+,
Decrease scale by 5% Ctrl+Alt+, Command+Option+,
Increase scale by 1% Ctrl+. Command+.
Increase scale by 5% Ctrl+Alt+. Command+Option+.
Resize frame and content Selection tool+Ctrl–drag Selection tool+Command–drag
Resize frame and content proportionately Selection tool+Shift+Ctrl–drag Selection tool+Shift+Command–drag
Constrain proportion Ellipse tool, Polygon tool, or Rectangle
tool+Shift–drag
Ellipse tool, Polygon tool, or Rectangle
tool+Shift–drag
Switch image from High Quality Display to
Fast Display
Ctrl+Alt+Shift+Z Command+Option+Shift+Z
*After you select a transformation tool, hold
down the mouse button, and then hold down
Alt (Windows) or Option (Mac OS) and drag.
Press Shift to constrain movement to 45°
angles.
</div>
<span class='text_page_counter'>(48)</span><div class='page_container' data-page=48>
<b>Keys for tables</b>
This table isn’t a complete list of keyboard shortcuts. It lists only those shortcuts that aren’t displayed in menu
commands or tool tips.
<b>Keys for finding and changing text</b>
This table isn’t a complete list of keyboard shortcuts. It lists only those shortcuts that aren’t displayed in menu
commands or tool tips.
<b>Result</b> <b>Windows</b> <b>Mac OS</b>
Temporarily select Convert Direction Point
tool
Direct Selection tool+Alt+Ctrl, or Pen tool+Alt Direct Selection tool+Option+ Command, or
Pen tool+Option
Temporarily switch between Add Anchor
Point and Delete Anchor Point tool
Alt Option
Temporarily select Add Anchor Point tool Scissors tool+Alt Scissors tool+Option
Keep Pen tool selected when pointer is over
path or anchor point
Pen tool+Shift Pen tool+Shift
Move anchor point and handles while
drawing
Pen tool+spacebar Pen tool+spacebar
Display the Stroke panel F10 Command+F10
<b>Result</b> <b>Windows</b> <b>Mac OS</b>
Insert or delete rows or columns while
dragging
Begin dragging row or column border, and
then hold down Alt as you drag
Begin dragging row or column border, and
then hold down Option as you drag
Resize rows or columns without changing the
size of the table
Shift–drag interior row or column border Shift–drag interior row or column border
Resize rows or columns proportionally Shift–drag right or bottom table border Shift–drag right or bottom table border
Move to next/previous cell Tab/Shift+Tab Tab/Shift+Tab
Move to first/last cell in column Alt+Page Up/ Alt+Page Down Option+Page Up/ Option+Page Down
Move to first/last cell in row Alt+Home/ Alt+End Option+Home/ Option+End
Move to first/last row in frame Page Up/Page Down Page Up/Page Down
Move up/down one cell Up Arrow/Down Arrow Up Arrow/Down Arrow
Move left/right one cell Left Arrow/Right Arrow Left Arrow/Right Arrow
Select cell above/below the current cell Shift+Up Arrow/ Shift+Down Arrow Shift+Up Arrow/ Shift+Down Arrow
Select cell to the right/left of the current cell Shift+Right Arrow/ Shift+Left Arrow Shift+Right Arrow/ Shift+Left Arrow
Start row on next column Enter (numeric keypad) Enter (numeric keypad)
Start row on next frame Shift+Enter (numeric keypad) Shift+Enter (numeric keypad)
Toggle between text selection and cell
selection
</div>
<span class='text_page_counter'>(49)</span><div class='page_container' data-page=49>
<b>Keys for working with type</b>
This table isn’t a complete list of keyboard shortcuts. It lists only those shortcuts that aren’t displayed in menu
commands or tool tips.
<b>Result</b> <b>Windows</b> <b>Mac OS</b>
Insert selected text into Find What box Ctrl+F1 Command+F1
Insert selected text into Find What box
and finds next
Shift+F1 Shift+F1
Find next occurrence of Find What text Shift+F2 or Alt+Ctrl+F Shift+F2 or Option+Command+F
Insert selected text into Change To box Ctrl+F2 Command+F2
Replace selection with Change To text Ctrl+F3 Command+F3
<b>Result</b> <b>Windows</b> <b>Mac OS</b>
Bold (only for fonts with bold face) Shift+Ctrl+B Shift+Command+B
Italic (only for fonts with italic face) Shift+Ctrl+I Shift+Command+I
Normal Shift+Ctrl+Y Shift+Command+Y
Underline Shift+Ctrl+U Shift+Command+U
Strikethrough Shift+Ctrl+/ Control+Shift+Command+/
All caps (on/off ) Shift+Ctrl+K Shift+Command+K
Asian language hyphenation Shift+Ctrl+K Shift+Command+K
Small caps (on/off ) Shift+Ctrl+H Shift+Command+H
Tate-chu-yoko setting Shift+Ctrl+H Shift+Command+H
Superscript Shift+Ctrl+(+) [plus sign] Shift+Command+(+) [plus sign]
Subscript Shift+Alt+Ctrl+(+) [plus sign] Shift+Option+Command+(+) [plus sign]
Reset horizontal or vertical scale to 100% Shift+Ctrl+X or Shift+Alt+Ctrl+X Shift+Command+X or
Shift+Option+Command+X
Basic letter group setting or detail setting Shift+Ctrl+X or Shift+Alt+Ctrl+X Shift+Command+X or
Shift+Option+Command+X
Align left, right, or center Shift+Ctrl+L, R, or C Shift+Command+L, R, or C
Justify all lines Shift+Ctrl+F (all lines) or J (all but last line) Shift+Command+F (all lines) or J (all but last
line)
Align both ends or equal spacing Shift+Ctrl+F (align both end) or J (equal
spacing)
Shift+Command+F (align both ends) or J
(equal spacing)
Increase or decrease point size* Shift+Ctrl+> or < Shift+Command+> or <
Increase or decrease point size by five times* Shift+Ctrl+Alt+> or < Shift+Command+ Option+> or <
Increase or decrease leading (horizontal text)* Alt+Up Arrow/ Alt+Down Arrow Option+Up Arrow/ Option+Down Arrow
Increase or decrease leading (vertical text)* Alt+Right Arrow/ Alt+Left Arrow Option+Right Arrow/ Option+Left Arrow
Increase or decrease leading by five times
(horizontal text)*
</div>
<span class='text_page_counter'>(50)</span><div class='page_container' data-page=50>
<b>Keys for navigating through and selecting text</b>
This table isn’t a complete list of keyboard shortcuts. It lists only those shortcuts that aren’t displayed in menu
commands or tool tips.
Increase or decrease leading by five times
(vertical text)*
Alt+Ctrl+Right Arrow/ Alt+Ctrl+Left Arrow Option+Command+Right Arrow/
Option+Command+Left Arrow
Auto leading Shift+Alt+Ctrl+A Shift+Option+Command+A
Align to grid (on/off ) Shift+Alt+Ctrl+G Shift+Option+Command+G
Auto-hyphenate (on/off ) Shift+Alt+Ctrl+H Shift+Option+Command+H
Increase or decrease kerning and tracking
(horizontal text)
Alt+Left Arrow/Alt+Right Arrow Option+Left Arrow/ Option+Right Arrow
Increase or decrease kerning and tracking
(vertical text)
Alt+Up Arrow/ Alt+Down Arrow Option+Up Arrow/ Option+Down Arrow
Increase or decrease kerning and tracking by
five times (horizontal text)
Alt+Ctrl+Left Arrow/ Alt+Ctrl+Right Arrow Option+Command+Left Arrow/
Option+Command+Right Arrow
Increase or decrease kerning and tracking by
five times (vertical text)
Alt+Ctrl+Up Arrow/ Alt+Ctrl+Down Arrow Option+Command+Up Arrow/
Option+Command+Down Arrow
Increase kerning between words* Alt+Ctrl+\ Option+Command+\
Decrease kerning between words* Alt+Ctrl+Backspace Option+Command+Delete
Clear all manual kerning and reset tracking to
0
Alt+Ctrl+Q Option+Command+Q
Increase or decrease baseline shift**
(horizontal text)
Shift+Alt+Up Arrow/ Shift+Alt+Down Arrow Shift+Option+Up Arrow/ hift+Option+Down
Arrow
Increase or decrease baseline shift** (vertical
text)
Shift+Alt+Right Arrow/ Shift+Alt+Left Arrow Shift+Option+Right Arrow/
Shift+Option+Left Arrow
Increase or decrease baseline shift by five
times (horizontal text)
Shift+Alt+Ctrl+Up Arrow/
Shift+Alt+Ctrl+Down Arrow
Shift+Option+Command+Up Arrow/
Shift+Option+Command+Down Arrow
Increase or decrease baseline shift by five
times (vertical text)
Shift+Alt+Ctrl+Right Arrow/
Shift+Alt+Ctrl+Left Arrow
Shift+Option+Command+Right Arrow/
hift+Option+Command+Left Arrow
Automatically flow story Shift–click loaded text icon Shift–click loaded text icon
Semi-automatically flow story Alt–click loaded text icon Option–click loaded text icon
Recompose all stories Alt+Ctrl+/ Option+Command+/
Insert current page number Alt+Ctrl+N Option+Command+N
*Press Shift to increase or decrease kerning
between words by five times.
**Amount is set in Edit > Preferences > Units &
Increments (Windows) or InDesign >
Preferences > Units & Increments (Mac OS).
</div>
<span class='text_page_counter'>(51)</span><div class='page_container' data-page=51>
<b>Keys for viewing documents and document workspaces</b>
This table isn’t a complete list of keyboard shortcuts. It lists only those shortcuts that aren’t displayed in menu
commands or tool tips.
<b>Result</b> <b>Windows Action</b> <b>Mac OS Action</b>
Move to right or left one character Right Arrow/ Left Arrow Right Arrow/ Left Arrow
Move up or down one line Up Arrow/ Down Arrow Up Arrow/ Down Arrow
Move to right or left one word Ctrl+Right Arrow/ Ctrl+Left Arrow Command+Right Arrow/ Command+Left
Arrow
Move to start or end of line Home/End Home/End
Move to previous or next paragraph Ctrl+Up Arrow/ Ctrl+Down Arrow Command+Up Arrow/ Command+Down
Arrow
Move to start or end of story Ctrl+Home/ Ctrl+End Command+Home/ Command+End
Select one word Double-click word Double-click word
Select one character right or left Shift+Right Arrow/ Shift+Left Arrow Shift+Right Arrow/ Shift+Left Arrow
Select one line above or below Shift+Up Arrow/ Shift+Down Arrow Shift+Up Arrow/ Shift+Down Arrow
Select start or end of line Shift+Home/ Shift+End Shift+Home/ Shift+End
Select one paragraph Triple-click or quadruple-click paragraph,
depending on Text Preferences setting
Triple-click or quadruple-click paragraph,
depending on Text Preferences setting
Select one paragraph before or after Shift+Ctrl+Up Arrow/ Shift+Ctrl+Down Arrow Shift+Command+Up Arrow/
Shift+Command+Down Arrow
Select current line Shift+Ctrl+\ Shift+Command+\
Select characters from insertion point Shift–click Shift–click
Select start or end of story Shift+Ctrl+Home/ Shift+Ctrl+End Shift+Command+Home/
Shift+Command+End
Select all in story Ctrl+A Command+A
Select first/last frame Shift+Alt+Ctrl+Page Up/ Shift+Alt+Ctrl+Page
Down
Shift+Option+ Command+Page Up/
Shift+Option+ Command+Page Down
Select previous/next frame Alt+Ctrl+Page Up/ Alt+Ctrl+Page Down Option+Command+Page Up/
Option+Command+Page Down
Delete word in front of insertion point (Story
Editor)
Ctrl+Backspace or Delete Command+Delete or Del (numeric keypad)
Update missing font list Ctrl+Alt+Shift+/ Command+Option+Shift+/
Result Windows Mac OS
Temporarily select Hand tool Spacebar (with no text insertion point),
Alt-drag (with text insertion point), or
Alt+spacebar (in both text and non-text
modes)
Spacebar (with no text insertion point),
Option–drag (with text insertion point), or
Option+spacebar (in both text and nontext
modes)
Temporarily select Zoom In tool Ctrl+spacebar Command+spacebar
</div>
<span class='text_page_counter'>(52)</span><div class='page_container' data-page=52>
<b>Keys for working with XML</b>
This table isn’t a complete list of keyboard shortcuts. It lists only those shortcuts that aren’t displayed in menu
commands or tool tips.
Zoom to 50%, 200%, or 400% Ctrl+5, 2, or 4 Command+5, 2, or 4
Redraw screen Shift+F5 Shift+F5
Open new default document Ctrl+Alt+N Command+Option+N
Switch between current and previous zoom
levels
Alt+Ctrl+2 Option+Command+2
Switch to next/previous document window Ctrl+~ [tilde]/ Shift+Ctrl+F6 or Ctrl+Shift+~
[tilde]
Command+F6 or Command+~ [tilde]/
Command+Shift+~ [tilde]
Scroll up/down one screen Page Up/Page Down Page Up/Page Down
Go back/forward to last-viewed page Ctrl+Page Up/ Ctrl+Page Down Command+Page Up/ Command+Page Down
Go to previous/next spread Alt+Page Up/ Alt+Page Down Option+Page Up/ Option+Page Down
Fit spread in window Double-click Hand tool Double-click Hand tool
Activate the Go To command Ctrl+J Command+J
Fit selection in window Ctrl+Alt+(+) [plus sign] Command+Option+(+) [plus sign]
Display the entire object Ctrl+Alt+(+) [plus sign] Command+Option+(+) [plus sign]
Go to master page while \ panel is closed Ctrl+J, type prefix of master, press Enter Command+J, type prefix of master, press
Return
Cycle through units of measurement Shift+Alt+Ctrl+U Shift+Option+Command+U
Snap guide to ruler increments Shift–drag guide Shift–drag guide
Switch between page and spread guides
(creation only)
Ctrl–drag guide Command–drag guide
Temporarily turn on/off snap to Control-drag object
Create vertical and horizontal ruler guides for
the spread
Ctrl–drag from zero point Command–drag from zero point
Select all guides Alt+Ctrl+G Option+Command+G
Lock or unlock zero point Right-click zero point and choose an option Control–click zero point and choose an option
Use current magnification for view threshold
of new guide
Alt–drag guide Option–drag guide
Select buttons in alert dialog boxes Press first letter of button name, if underlined Press first letter of button name
Show information on installed plug-ins and
InDesign components
Ctrl+Help > About Design Command+InDesign menu > About InDesign
<b>Result</b> <b>Windows</b> <b>Mac OS</b>
Expand/Collapse element Right Arrow/Left Arrow Right Arrow/Left Arrow
</div>
<span class='text_page_counter'>(53)</span><div class='page_container' data-page=53>
<b>Keys for indexing</b>
This table isn’t a complete list of keyboard shortcuts. It lists only those shortcuts that aren’t displayed in menu
commands or tool tips.
<b>Keys for panels</b>
This table isn’t a complete list of keyboard shortcuts. It lists only those shortcuts that aren’t displayed in menu
commands or tool tips.
Move XML selection up/down Up Arrow/ Down Arrow Up Arrow/ Down Arrow
Scroll structure pane up/down one screen Page Up/ Page Down Page Up/ Page Down
Select first/last XML node Home/ End Home/ End
Extend selection to first/last XML node Shift+Home/ Shift+End Shift+Home/ Shift+End
Go to previous/next validation error Ctrl+Left Arrow/ Ctrl+Right Arrow Command+Left Arrow/ Command+Right
Arrow
Automatically tag text frames and tables Ctrl+Alt+Shift+F7 Command+Option+Shift+F7
<b>Result</b> <b>Windows</b> <b>Mac OS</b>
Create index entry without dialog box
(alphanumeric only)
Shift+Ctrl+Alt+[ Shift+Command+Option+[
Open index entry dialog box Ctrl+7 Command+7
Create proper name index entry (last name,
first name)
Shift+Ctrl+Alt+] Shift+Command+Option+]
<b>Result</b> <b>Windows</b> <b>Mac OS</b>
Delete without confirmation Alt-click Delete icon Option-click Delete icon
Create item and set options Alt-click New button Option-click New button
Apply value and keep focus on option Shift+Enter Shift+Enter
Activate last-used option in last-used panel Ctrl+Alt+~ [tilde] Command+Option+~ [tilde]
Select range of styles, layers, links, swatches,
or library objects in a panel
Shift-click Shift-click
Select nonadjacent styles, layers, links,
swatches, or library objects in a panel
Ctrl-click Command-click
Apply value and select next value Tab Tab
Move focus to selected object, text, or
window
Esc Esc
Show/Hide all panels, Toolbox, and Control
panel (with no insertion point)
Tab Tab
Show/Hide all panels except the Toolbox and
Control panel (docked or not)
Shift+Tab Shift+Tab
Open or close all stashed panels Ctrl+Alt+Tab Command+Option+Tab
</div>
<span class='text_page_counter'>(54)</span><div class='page_container' data-page=54>
<b>Keys for the Control panel</b>
This table isn’t a complete list of keyboard shortcuts. It lists only those shortcuts that aren’t displayed in menu
commands or tool tips.
Stash a panel group Alt+drag any panel tab (in the group) to edge
of screen
Option+drag any panel tab (in the group) to
edge of window
Select item by name Alt+Ctrl-click in list, and then use keyboard to
select item by name
Option+Command-click in list and then use
keyboard to select item by name
Open the Drop Shadow panel Alt+Ctrl+M Command+Option+M
<b>Result</b> <b>Windows</b> <b>Mac OS</b>
Toggle focus to/from Control panel Ctrl+6 Command+6
Toggle Character/Paragraph text attributes
mode
Ctrl+Alt+7 Command+Option+7
Change reference point when proxy has focus Any key on the numeric keypad or keyboard
numbers
Any key on the numeric keypad or keyboard
numbers
Display the pop-up menu that has focus Alt+Down Arrow
Open Units & Increments Preferences Alt-click Kerning icon Option-click Kerning icon
Open the Text Frame Options dialog box Alt-click Number Of Columns icon Option-click Number of Columns icon
Open the Move dialog box Alt-click X or Y icon Option-click X or Y icon
Open the Rotate dialog box Alt-click Angle icon Option-click Angle icon
Open the Scale dialog box Alt-click X or Y Scale icon Option-click X or Y Scale icon
Open the Shear dialog box Alt-click Shear icon Option-click Shear icon
Open Text Preferences Alt-click Superscript, Subscript, or Small Caps
button
Option-click Superscript, Subscript, or Small
Caps button
Open the Underline Options dialog box Alt-click Underline button Option-click Underline button
Open the Strikethrough Options dialog box Alt-click Strikethrough button Option-click Strikethrough button
Open the Grids Preferences Alt-click Align To Baseline Grid, or Do Not
Align To Baseline Grid button
Option-click Align To Baseline Grid, or Do Not
Align To Baseline Grid button
Open the Drop Caps & Nested Styles dialog
box
Alt-click Drop Cap Number Of Lines, or Drop
Cap One Or More Characters icon
Option-click Drop Cap Number Of Lines, or
Drop Cap One Or More Characters icon
Open the Justification dialog box Alt-click Leading icon Option-click Leading icon
Open Named Grid dialog box Double-click Named Grid icon Double-click Named Grid icon
Open New Named Grid Options dialog box Alt-click Named Grid icon Option-click Named Grid icon
Open Frame Grid Options dialog box Alt-click Number of characters Horizontal,
Number of Characters Vertical, Character Aki,
Line Aki, Vertical Scale, Horizontal Scale, Grid
View, Font Size, Number of Columns, or
Column Gutter icon
Option-click Number of characters Horizontal,
Number of Characters Vertical, Character Aki,
Line Aki, Vertical Scale, Horizontal Scale, Grid
View, Font Size, Number of Columns, or
Column Gutter icon
</div>
<span class='text_page_counter'>(55)</span><div class='page_container' data-page=55>
<b>Keys for type panels and dialog boxes</b>
This table isn’t a complete list of keyboard shortcuts. It lists only those shortcuts that aren’t displayed in menu
commands or tool tips.
<b>Keys for the character and paragraph styles</b>
This table isn’t a complete list of keyboard shortcuts. It lists only those shortcuts that aren’t displayed in menu
commands or tool tips.
<b>Keys for the Tabs panel</b>
This table isn’t a complete list of keyboard shortcuts. It lists only those shortcuts that aren’t displayed in menu
commands or tool tips.
<b>Keys for the Layers panel</b>
This table isn’t a complete list of keyboard shortcuts. It lists only those shortcuts that aren’t displayed in menu
commands or tool tips.
<b>Result</b> <b>Windows</b> <b>Mac OS</b>
Open Justification dialog box Alt+Ctrl+Shift+J Option+Command+Shift+J
Open Paragraph Rules dialog box Alt+Ctrl+J Option+Command+J
Open Keep Options dialog box Alt+Ctrl+K Option+Command+K
Activate Character panel Ctrl+T Command+T
Activate Paragraph panel Ctrl+Alt+T Command+Option+T
<b>Result</b> <b>Windows</b> <b>Mac OS</b>
Make character style definition match text Select text and press Shift+Alt+Ctrl+C Select text and press
Shift+Option+Command+C
Make paragraph style definition match text Select text and press Shift+Alt+Ctrl+R Select text and press
Shift+Option+Command+R
Change options without applying style Shift+Alt+Ctrl-double-click style Shift+Option+Command-double-click style
Remove style and local formatting Alt-click paragraph style name Option-click paragraph style name
Clear overrides from paragraph style Alt+Shift-click paragraph style name Option+Shift-click paragraph style name
Show/hide Paragraph and Character Styles
panels, respectively
F11, Shift+F11 Command+F11, Command+Shift+F11
<b>Result</b> <b>Windows</b> <b>Mac OS</b>
Activate Tabs panel Shift+Ctrl+T Shift+Command+T
</div>
<span class='text_page_counter'>(56)</span><div class='page_container' data-page=56>
<b>Keys for the Pages panel</b>
This table isn’t a complete list of keyboard shortcuts. It lists only those shortcuts that aren’t displayed in menu
commands or tool tips.
<b>Keys for the Color panel</b>
This table isn’t a complete list of keyboard shortcuts. It lists only those shortcuts that aren’t displayed in menu
commands or tool tips.
<b>Keys for using the Separations Preview panel</b>
This table isn’t a complete list of keyboard shortcuts. It lists only those shortcuts that aren’t displayed in menu
commands or tool tips.
<b>Result</b> <b>Windows</b> <b>Mac OS</b>
Select all objects on layer Alt-click layer Option-click layer
Copy selection to new layer Alt-drag small square to new layer Option-drag small square to new layer
Add new layer below selected layer Ctrl-click Create New Layer Command-click Create New Layer
Add new layer to the top of the layer list Shift+Ctrl-click Create New Layer Shift+Command-click Create New Layer
Add new layer to the top of the layer list and
open New Layer dialog box
Shift+Alt+Ctrl-click Create New Layer Cmd+Option+Shift-click Create New Layer
Add new layer and open New Layer dialog box Alt-click Create New Layer Option-click Create New Layer
<b>Result</b> <b>Windows</b> <b>Mac OS</b>
Apply master to selected page Alt-click master Option-click master
Base another master page on selected master Alt-click the master you want to base the
selected master on
Option-click the master you want to base the
selected master on
Create master page Ctrl-click Create New Page button Command-click Create New Page button
Display Insert Pages dialog box Alt-click New Page button Option-click New Page button
Add new page after last page Shift+Ctrl+P Shift+Command+P
<b>Result</b> <b>Windows</b> <b>Mac OS</b>
Move color sliders in tandem Shift-drag slider Shift-drag slider
Select a color for the nonactive fill or stroke Alt-click color bar Option-click color bar
Switch between color modes (CMYK, RGB,
LAB)
Shift-click color bar Shift-click color bar
<b>Result</b> <b>Windows Action</b> <b>Mac OS Action</b>
Turn on Overprint preview Ctrl+Alt+Shift+Y Command+Option+Shift+Y
Show all plates Ctrl+Alt+Shift+~ [tilde] Command+Option+Shift+~ [tilde]
</div>
<span class='text_page_counter'>(57)</span><div class='page_container' data-page=57>
<b>Keys for the Swatches panel</b>
This table isn’t a complete list of keyboard shortcuts. It lists only those shortcuts that aren’t displayed in menu
commands or tool tips.
<b>Keys for the Transform panel</b>
This table isn’t a complete list of keyboard shortcuts. It lists only those shortcuts that aren’t displayed in menu
commands or tool tips.
<b>Keys for resolving conflicts between Mac OS 10.3x and 10.4</b>
This table isn’t a complete list of keyboard shortcuts. It lists only those shortcuts that aren’t displayed in menu
commands or tool tips.
Show Yellow plate Ctrl+Alt+Shift+3 Command+Option+Shift+3
Show Black plate Ctrl+Alt+Shift+4 Command+Option+Shift+4
Show 1st Spot plate Ctrl+Alt+Shift+5 Command+Option+Shift+5
Show 2nd Spot plate Ctrl+Alt+Shift+6 Command+Option+Shift+6
Show 3rd Spot plate Ctrl+Alt+Shift+7 Command+Option+Shift+7
<b>Result</b> <b>Windows</b> <b>Mac OS</b>
Create new swatch based on the current
swatch
Alt-click New Swatch button Option-click New Swatch button
Create spot color swatch based on the current
swatch
Alt+Ctrl-click New Swatch button Option+Command-click New Swatch button
Change options without applying swatch Shift+Alt+Ctrl-double-click swatch Shift+Option+Command-double-click
swatch
<b>Result</b> <b>Windows</b> <b>Mac OS</b>
Apply value and copy object Alt+Enter Option+Enter
Apply width, height, or scale value
proportionally
Ctrl+Enter Command+Enter
<b>Result</b> <b>Mac OS</b>
Open Preferences dialog box Command+K
Open Paragraph Styles panel Command+F11
Open Character Styles panel Command+Shift+F11
Open Swatches panel F5
Open Pages panel Command+F12
Minimize active application window Command+M
Hide application Command+H
</div>
<span class='text_page_counter'>(58)</span><div class='page_container' data-page=58>
<b>Set preferences </b>
<b>About preferences and defaults</b>
Preferences include settings such as panel positions, measurement options, and display options for graphics and
typography. Preference settings specify how InDesign documents and objects behave initially.
<b>Set general preferences</b>
This section covers preference settings in the General tab of the Preferences dialog box. For information on other
preferences, search for the appropriate setting.
<b>1</b> Choose Edit > Preferences > General (Windows) or InDesign > Preferences > General (Mac OS), and then choose
the type of preferences you want to specify.
<b>2</b> In the Page Numbering section, choose a page numbering method from the View menu. (See Display absolute or
section numbering in the Pages panel .)
<b>3</b> In the Font Downloading and Embedding section, specify a threshold to trigger font subsetting based on the
number of glyphs a font contains. This setting affects font downloading options in the Print and Export dialog
boxes.
<b>4</b> In the When Scaling section, you can determine how scaled objects are reflected in panels and how the content of
scaled frames behaves.
• Select Apply To Content if you want the point size to change when a text frame is scaled. (See Scale type.) If this
option is selected when a graphics frame is scaled, the percentage size of the image changes, but the frame reverts
its percentage to 100%. (See Scale objects .)
• Select Adjust Scaling Percentage to display the original point size with the new point size in parentheses when
you scale text. If this option is selected when you scale graphics frames, the percentage size of both the frame and
image changes.
<b>5</b> Click Reset All Warning Dialogs to display all warnings, even the ones you’ve already checked not to display. (As
warnings appear, you can select a check box to prevent the warning from appearing again.)
<b>Set defaults</b>
If you change settings when no documents are open, your changes set the defaults for new documents. If a document
is open when you change settings, the changes affect only that document.
Similarly, if you change settings when no objects are selected, your changes set the defaults for new objects.
<b>Change default settings for new documents</b>
<b>1</b> Close all documents.
<b>2</b> Change any menu items or panel or dialog box settings.
</div>
<span class='text_page_counter'>(59)</span><div class='page_container' data-page=59>
<b>Specify default settings for new objects in a document</b>
<b>1</b> With document open, choose Edit >Deselect All.
<b>2</b> Change any menu items or panel or dialog box settings.
<b>Restore all preferences and default settings</b>
When InDesign is behaving erratically, deleting preferences (also referred to as “trashing preferences” or “removing
preferences”) often solves the problem.
It’s a good idea to make a backup copy of the preference files called InDesign Defaults and InDesign SavedData. Instead
of removing your preferences, you can copy these backup files over the problematic corrupt preference files and not
lose any customizations.
Mike Witherell provides a detailed list of which files are affected when you restore preferences in Adobe InDesign
Presets (PDF, English only).
? Do one of the following:
• (Windows) Start InDesign, and then press Shift+Ctrl+Alt. Click Yes when asked if you want to delete preference
files.
• (Mac OS) While pressing Shift+Option+Command+Control, start InDesign. Click Yes when asked if you want
to delete preference files.
Various program preferences and default settings are stored in the Adobe InDesign preferences files. These files,
including the InDesign Defaults file, are saved each time you exit from InDesign. For manual deletion or renaming, the
locations of the preference files are as follows:
• Mac OS
<b>InDesign SavedData</b>Users/[user]/Library/Caches/Adobe InDesign/Version [version]/InDesign SavedData
<b>InDesign Defaults</b>Users/[user]/Library/Preferences/Adobe InDesign/Version [version]/InDesign Defaults
• Windows XP
<b>InDesign SavedData</b>\Documents and Settings\[username]\Local Settings\Application
Data\Adobe\InDesign\Version [version]\Caches
<b>InDesign Defaults</b>\Documents and Settings\[username]\Application Data\Adobe\InDesign\Version [version]
• Windows Vista or Windows 7
<b>InDesign SavedData</b>Users\[username]\AppData\Roaming\Adobe\InDesign\Version [version]\Caches\InDesign
SavedData
<b>InDesign Defaults</b>C:\Users\[username]\AppData\Roaming\Adobe\InDesign\Version [version]\InDesign
Defaults
<b>About InDesign styles and presets</b>
You can store settings for reuse, including settings for the following items:
• Creating paragraph and character styles. (See Add paragraph and character styles.)
• Creating object styles. (See Object styles.)
• Creating table and cell styles. (See Table and cell styles .)
</div>
<span class='text_page_counter'>(60)</span><div class='page_container' data-page=60>
• Creating print presets. All the attributes in the Print dialog box are included in the style. (See Print a document or
book.)
• Creating trap presets. (See Trap presets.)
• Creating transparency flattener presets. (See Flatten transparent artwork.)
• Creating table of contents styles. (See Create TOC styles for multiple lists.)
• Saving the workspace configuration.
• Creating document presets. (See Define document presets.)
• Creating stroke styles. (See Define custom stroke styles.)
In general, change the feature settings in the dialog box, and then save the settings. Styles and presets are stored in the
document in which they are created. You can use the settings from another document by importing or loading the styles
and presets from that document. In addition, most presets can be exported or saved to a separate file and distributed
to other computers.
Mike Witherell provides a detailed list of presets in Adobe InDesign Presets (PDF, English only).
You can also share styles and presets across all documents in a book file. For more information, see Synchronize book
documents.
<b>Create new documents | InDesign CC 2015 and earlier</b>
<i><b>Note: </b>To create documents from a wide variety of templates and presets, introduced in 2017 release of InDesign CC, see </i>
<i>Create documents.</i>
<b>Create a new document</b>
<b>1</b> Choose File > New > Document.
The New Document dialog box combines the Document Setup and the Margins And Columns dialog boxes, so that
you can set up the page size, margins, and page columns all in one place. You can change these settings at any time.
<b>2</b> Specify document setup options. (See New Document options.)
To specify the dimensions of the bleed and slug areas, click the Arrow button before the Bleed and Slug label. The
bleed and slug areas extend out from the edges of the defined Page Size. To make the bleed or slug areas extend
evenly on all sides, click the Make All Settings The Same icon .
<b>3</b> (Only in InDesign CC) Select the Preview checkbox to see how your new document will look like. Make necessary
changes if required.
<b>4</b> Click OK to open the new document with the settings you specified.
<i>To set default layout settings for all new documents, choose File > Document Setup or Layout > Margins And Columns, </i>
<i>and set options when no documents are open.</i>
<b>New Document options</b>
<b>Document Preset </b>Choose a preset that you have saved earlier.
</div>
<span class='text_page_counter'>(61)</span><div class='page_container' data-page=61>
<b>CS6 and later</b>: Digital publishing intent has been added for publications aimed for the Digital Publishing Suite. You can
also change the intent of the document after it is created.
<b>Number of pages </b>Specify the number of pages to create in the new document.
<b>Start Page # </b>Specify which number the document starts on. If you specify an even number (such as 2) with Facing
Pages selected, the first spread in the document begins with a two-page spread. See Start a document with a two-page
spread .
<b>Facing Pages </b>Select this option to make left and right pages face each other in a double-page spread, such as for books
and magazines. Deselect this option to let each page stand alone, such as when you’re printing flyers or posters or when
you want objects to bleed in the binding.
After you’ve created a document, you can use the Pages panel to create spreads with more than two pages or force the
first two pages to open as a spread. (See Control spread pagination .)
<b>Master Text Frame </b>CS5.5 and earlier: Select this option to create a text frame the size of the area within the margin
guides, matching the column settings you specified. The master text frame is added to the A Master. (See Use text
frames on master pages.)
The Master Text Frame option is available only when you’ve chosen File > New > Document.
<b>Primary Text Frame </b>CS6 and later: select this option to add a primary text frame on the master page. When you apply
a new master page, the story in the primary text frame automatically flows into the primary text frame of the new
master page.
<b>Page Size </b>Choose a page size from the menu, or type values for Width and Height. Page size represents the final size
you want after bleeds or other marks outside the page are trimmed.
<b>Orientation </b>Click Portrait (tall) or Landscape (wide). These icons interact dynamically with the dimensions
you enter in Page Size. When Height is the larger value, the portrait icon is selected. When Width is the larger value,
the landscape icon is selected. Clicking the deselected icon switches the Height and Width values.
<b>Tip</b>: To specify the dimensions of the bleed and slug areas, click the Arrow button before the Bleed and Slug label in the
New Document dialog box. To make the bleed or slug areas extend evenly on all sides, click the Make All Settings The
Same icon .
<b>Bleed </b>The Bleed area allows you to print objects that are arranged at the outer edge of the defined page size. For a page
of the required dimensions, if an object is positioned at its edge, some white may appear at the edge of the printed area
due to slight misalignment during printing or trimming. For this reason, you should position an object that is at the
edge of the page of the required dimensions a little beyond the edge, and trim after printing. Bleed area is shown by a
red line on the document. You can set bleed area settings from Bleed in the Print dialog box.
<b>Slug </b>The slug area is discarded when the document is trimmed to its final page size. The slug area holds printing
information, customized color bar information, or displays other instructions and descriptions for other information
in the document. Objects (including text frames) positioned in the slug area are printed but will disappear when the
document is trimmed to its final page size.
Objects outside the bleed or slug area (whichever extends farther) do not print.
<b>Preview </b>(Only in InDesign CC) Select this checkbox to see how your new document will look like. Make necessary
changes to the options if the preview is not as desired.
</div>
<span class='text_page_counter'>(62)</span><div class='page_container' data-page=62>
<b>Document window overview</b>
Each page or spread in your document has its own pasteboard and guides, which are visible in Normal View mode. (To
switch to Normal View, choose View > Screen Mode > Normal.) The pasteboard is replaced with a gray background
when the document is viewed using one of the Preview modes. (See Preview documents.) You can change the color of
this preview background and guides in Guides & Pasteboard preferences.
<i>Document and guides in Normal View Mode</i>
<i><b>A </b>Spread (black lines) <b>B </b>Page (black lines) <b>C </b>Margin guides (magenta lines) <b>D </b>Column guides (violet lines) <b>E </b>Bleed area (red lines) <b>F </b>Slug area </i>
<i>(blue lines) </i>
Document window notes:
• Lines of other colors are ruler guides which, when present, appear in the layer color when selected. See Layers .
• Column guides appear in front of margin guides. When a column guide is exactly in front of a margin guide, it hides
the margin guide.
<b>Create custom page sizes</b>
You can create custom page sizes that appear in the Page Size menu in the New Document dialog box.
<b>1</b> Choose File > New > Document.
<b>2</b> Choose Custom Page Size from the Page Size menu.
<b>3</b> Type a name for the page size, specify page size settings, and then click Add.
The New Doc Sizes.txt file that lets you create custom page sizes in previous version of InDesign is not available in
InDesign CS5 or later.
<b>Define document presets</b>
You can save document settings for page size, columns, margins, and bleed and slug areas in a preset to save time and
ensure consistency when creating similar documents.
<b>1</b> Choose File > Document Presets > Define.
<b>2</b> Click New in the dialog box that appears.
<b>3</b> Specify a name for the preset and select basic layout options in the New Document Preset dialog box. (See New
Document optionsfor a description of each option.)
<b>4</b> Click OK twice.
</div>
<span class='text_page_counter'>(63)</span><div class='page_container' data-page=63>
<b>Create a document using a preset</b>
<b>1</b> Do one of the following:
• Choose File > Document Preset > [name of preset]. (Hold down the Shift key while choosing the preset to create
a new document based on the preset without opening the New Document dialog box.)
• Choose File > New > Document, and then choose a preset from the Document Preset menu in the New
Document dialog box.
The New Document dialog box displays the preset layout options.
<b>2</b> Make changes to the options (if desired) and click OK.
<i>To skip the New Document dialog box, press the Shift key as you select a preset from the Document Preset menu.</i>
<b>Touch workspace</b>
<i>Use the new Touch workspace to comp layouts in a jiffy with simple gestures! Here's a quick tutorial: <b>Comp layouts in </b></i>
<i><b>a touch environment</b>. </i>
<b>Switching to the Touch Workspace</b>
To switch to the Touch workspace, go to <b>Window</b> > <b>Workspace </b>> <b>Touch</b>, or tap the Touch Workspace icon in the
upper right corner of your current InDesign workspace.
If you detatch the keyboard from your touch-enabled device, InDesign immediately detects this change and switches
the current workspace to the Touch Workspace. If you then attach the keyboard back into your device, InDesign
switches back to the last workspace that you were working in.
Note: Go to InDesign preferences to switch off or switch on this keyboard behavior.
</div>
<span class='text_page_counter'>(64)</span><div class='page_container' data-page=64>
<b>Touch Workspace tools</b>
The Touch Workspace does not include all the tools that come with InDesign. You can, however, open documents that
contain objects that cannot be created in this workspace. Such objects will still display with full fidelity but you will not
be able to edit them. Use any of the following tools to start creating your layouts:
<b> Drawing</b>: This tools is available only in the Touch Workspace. Use the Drawing Tool to start comping your layout
with gestures. See Drawing with gestures .
<b> Type</b>: Use the Type Tool to include text frames in your layout. Text frames can be moved, resized, and changed.
For more information, see Create text frames.
<b> Frame</b>: Include graphics in your layout using the Frame Tool. You can modify a graphic by changing its
relationship to its frame. For more information, see Frames and objects .
<b> Shape</b>: Use the Shape Tool to include shapes in your layout. You can choose from the Rectangle, Ellipse, and
Polygon tools. For more information, see Draw with lines and shapes.
<b>Drawing with gestures</b>
To use gestures for comping your layout:
<b>1</b> Create a new document and select the <b>Drawing Tool</b>, if not already selected.
<b>2</b> Use one of the 16 gestures to create InDesign elements for your layout. See the following image for gestures that you
can use:
</div>
<span class='text_page_counter'>(65)</span><div class='page_container' data-page=65>
<b>3</b> Enhance your components by resizing it or modifying the colors and styles, using the panels available on the right
of your workspace. You can also choose to add your creative assets from a Creative Cloud Library.
<b>Enhance your components</b>
The Touch Workspace also provides you panels to enhance the elements of your layout. You can change properties like
color, opacity, and alignment, among others. Select an element and open the appropriate panel on the right.
Color
Text
Stroke
CC Libraries
Align and Distribute
Context Menu
Opacity
You can switch to other InDesign workspaces to further enhance or complete your Comps and Mocks.
<b>Convert QuarkXPress and PageMaker documents</b>
<b>Open QuarkXPress files in InDesign</b>
InDesign can convert document and template files from QuarkXPress 3.3 or 4.1x. InDesign can also convert document
and template files from multi-language QuarkXPress Passport 4.1x files, so there is no longer any need to save these
files as single-language files first. (To convert documents created with QuarkXPress 5.0 or later, reopen the documents
in QuarkXPress and save them in 4.0 format.)
For more information, see the QuarkXPress Conversion Guide (PDF) at www.adobe.com/go/learn_quarkconv.
<b>Open a QuarkXPress document or template</b>
<b>1</b> Make sure that the original application file is closed.
<b>2</b> To ensure that all links are maintained, copy all linked files to the same QuarkXPress document folder.
<b>3</b> In InDesign, choose File > Open.
<b>4</b> In Windows, choose QuarkXPress (3.3-4.1x) or QuarkXPress Passport (4.1x) from the Files Of Type menu.
<b>5</b> Select a file and click Open.
<i><b>Note: </b>If InDesign cannot convert a file or a specific part of a file, it displays a warning describing the reasons it cannot </i>
<i>convert it and the results of the conversion.</i>
<b>6</b> If a warning dialog box appears, do one of the following:
</div>
<span class='text_page_counter'>(66)</span><div class='page_container' data-page=66>
<b>7</b> To more accurately convert text wrap applied in QuarkXPress, do the following in InDesign:
• Select Text Wrap Only Affects Objects Beneath in the Composition area of the Preferences dialog box.
• Assign the Adobe Single-Line Composer in the Paragraph panel menu to one or more paragraphs.
<i>If you’re experiencing problems with the converted QuarkXPress document, use the Export dialog box to save the </i>
<i>document in InDesign Markup (IDML) format. Then open the IDML file and save it as an InDesign document.</i>
<b>Save a QuarkXPress template as an InDesign template</b>
<b>1</b> Open the template in InDesign.
<b>2</b> Choose File > Save As and specify a location and filename.
<b>3</b> Choose InDesign Template for Save As Type (Windows) or Format (Mac OS), and then click Save.
<b>What gets converted from QuarkXPress</b>
When you open a QuarkXPress file, InDesign converts the original file information to native InDesign information:
• Text boxes are converted to InDesign text frames.
<i>To accurately convert text wrap applied in QuarkXPress, select Text Wrap Only Affects Text Beneath in the </i>
<i>Composition area of the Preferences dialog box.</i>
• Styles are converted to InDesign styles.
• Because QuarkXPress uses different color profiles, they are ignored in InDesign.
• Text and graphics links are preserved and appear in the Links panel.
<i><b>Note: </b>Embedded graphics—those added to the original document using the Paste command—are not converted. For more </i>
<i>information on embedded graphics, see About links and embedded graphics.</i>
<i>InDesign does not support OLE or Quark XTensions. Consequently, when you open files that contain OLE or Quark </i>
<i>XTensions graphics, those graphics will not appear in the InDesign document. If your QuarkXPress document does not </i>
<i>convert, check the original and remove any objects that were created by an XTension; then save, and try to convert again.</i>
• All master pages and layers are converted to InDesign masters and layers.
• All master-page objects, as well as QuarkXPress guides, are placed on the corresponding InDesign master pages.
• Grouped objects remain grouped except where nonprinting items are included in a group.
• All strokes and lines (including paragraph rules) are converted to the stroke styles they most closely resemble.
Custom strokes and dashes are converted to custom strokes and dashes in InDesign.
Colors are converted exactly to InDesign colors, except in the following situations:
• Multi-ink colors from QuarkXPress are mapped to mixed inks in InDesign, unless the multi-ink color does not
contain at least one spot color. In this case, the multi-ink color is converted to a process color instead.
• QuarkXPress 4.1 colors from the color library are converted based on their CMYK values.
• QuarkXPress 3.3 HSB colors are converted to RGB, and colors from the color library are converted based on their
CMYK values.
• QuarkXPress 4.1 HSB and LAB colors are converted to RGB, and colors from the color library are converted based
on their RGB/CMYK values.
</div>
<span class='text_page_counter'>(67)</span><div class='page_container' data-page=67>
<b>Convert PageMaker documents</b>
InDesign can convert document and template files from Adobe PageMaker 6.0 and later. When you open a PageMaker
file, InDesign converts the original file information to native InDesign information. InDesign files are saved with an
.indd filename extension.
<i>For more information, see the PageMaker Conversion Guide (PDF) at www.adobe.com/go/learn_pmconv.</i>
Before opening the document in InDesign, you may want to do the following:
• If the PageMaker file or its linked graphics are located on a network server, floppy disk, or removable drive, it may
not open as expected if an interruption in data transfer occurs. To prevent data transfer problems, copy documents
and their links to the hard disk, preferably in the same folder where the PageMaker publication is stored, before
opening them in InDesign.
• You may want to use Save As in PageMaker to clear unnecessary hidden data.
• To ensure that all links are maintained, copy all linked files to the same folder where the PageMaker publication is
stored.
• Make sure that all necessary fonts are available in InDesign.
• Repair broken graphics links in the PageMaker publication.
• If you have a problem converting a large PageMaker document, convert portions of the PageMaker file separately to
isolate the problem.
<i>If you cannot open a corrupt PageMaker document in PageMaker, try opening it in InDesign. InDesign can recover most </i>
<i>documents that PageMaker cannot open.</i>
<b>Open a PageMaker document or template</b>
<b>1</b> Make sure that the original application file is closed.
<b>2</b> In InDesign, choose File > Open.
<b>3</b> In Windows, choose PageMaker (6.0-7.0) in the Files of Type menu.
<b>4</b> Select a file and click Open.
<i><b>Note: </b>If InDesign cannot convert a file or a specific part of a file, it displays a warning describing the reasons it cannot </i>
<i>convert it and the results of the conversion attempt.</i>
<b>5</b> If a warning dialog box appears, do one of the following:
• Click Save to save a copy of the warnings as a text file, and then open the file in InDesign.
• Click Close to open the file in InDesign without saving the text file.
<i>If you’re experiencing problems with the converted PageMaker document, use the Export dialog box to save the </i>
<i>document in InDesign Markup (IDML) format. Then open the IDML file and save it as an InDesign document.</i>
<b>Save a PageMaker template as an InDesign template</b>
<b>1</b> Open the template in InDesign.
<b>2</b> Choose File > Save As and specify a location and filename.
</div>
<span class='text_page_counter'>(68)</span><div class='page_container' data-page=68>
<b>Common PageMaker conversion issues</b>
Note the following:
• All master pages and layers are converted to InDesign masters and layers. Master pages in PageMaker convert to
master pages in InDesign and retain all objects including page numbering and guides. To maintain the order of
overlapping items, InDesign creates two layers when converting a PageMaker publication: Default and Master
Default. Master Default contains the Master page items.
• PageMaker document guides are placed on the Default layer in InDesign.
• All items on the PageMaker pasteboard appear on the pasteboard of the first spread in the InDesign document.
• All objects designated in PageMaker as Non-Printing are converted with Nonprinting selected in the InDesign
Attributes panel.
• Grouped objects remain grouped except where nonprinting items are included in a group.
<b>Text and tables conversion issues</b>
Note the following:
• Text is converted to InDesign text frames.
• Tables in PageMaker files are converted to InDesign tables.
• Styles are converted to InDesign styles. The [No style] in PageMaker is the equivalent of [No Paragraph Style] in
InDesign. However, [No Paragraph Style] picks up the attributes of a named style if that style was selected before
any typing occurred in the PageMaker publication.
• InDesign uses the Adobe Paragraph Composer for all paragraphs, causing some text to reflow. You can assign the
Adobe Single-Line Composer to one or more paragraphs to create line breaks more similarly to the PageMaker
composition engine, but text may still reflow.
• InDesign uses only Baseline leading. Proportional and Top of Caps leading in PageMaker convert to Baseline
leading in InDesign, possibly resulting in text shifting.
• The First Baseline of converted text may appear different than text created in InDesign. The First Baseline of
converted text is set to Leading, but the First Baseline of text created in InDesign is set to Ascent by default.
• InDesign uses a different hyphenation method than PageMaker, so line breaks may be different.
• Shadow text converts as plain text. Outline text converts as text with a stroke of 0.25 inches and a fill of Paper.
<b>Book, index, and TOC conversion issues</b>
Note the following:
• InDesign ignores Booklists when opening PageMaker publications. If you want to open all the publications on a
Booklist together, run the Build Booklet plug-in in PageMaker with a layout of None selected so that the booked
publications are combined into one. Note that text blocks and frames will no longer be threaded.
• Index entries from a PageMaker publication appear in the InDesign Index panel. Text with cross-references that use
the See Herein or See Also Herein option are mapped as See or See Also.
• Table of Contents text converts as a Table of Contents, with PageMaker TOC Style available in the style pop-up menu
in the InDesign TOC dialog box.
<b>Linking and embedding conversion issues</b>
Note the following:
</div>
<span class='text_page_counter'>(69)</span><div class='page_container' data-page=69>
• If InDesign cannot locate the original link to a graphic, a warning appears asking you to repair the link in
PageMaker.
• InDesign does not support OLE (object linking and embedding). Consequently, when you open files that contain
OLE graphics, those graphics will not appear in the InDesign document.
<b>Color and trapping conversion issues</b>
Note the following:
• Colors are converted exactly to InDesign colors. PageMaker HLS colors are converted to RGB colors, and colors
from other color libraries are converted based on their CMYK values.
• Tints are converted as percentages of the parent color. If the parent color isn’t in the Swatches panel, it’s added during
conversion. When an object with a tint is selected, the parent color is selected in the Swatches panel, and the tint
value appears in the pop-up menu.
• Color profiles for PageMaker files are converted directly. All Hexachrome colors are converted to RGB values.
Profiles that are not ICC-compliant are replaced using the default CMS settings and profiles you specified for
InDesign.
• All strokes and lines (including paragraph rules) are converted to the default stroke styles they most closely
resemble. Custom strokes and dashes are converted to custom strokes and dashes in InDesign.
• InDesign does not support screen patterns or angles applied to TIFF images in Image Control; it drops these from
imported TIFF files.
• When Auto-Overprint Black Strokes or Fills (or both) is selected in the Trapping Preferences dialog box in
PageMaker, the setting carries over to InDesign, but Overprint Stroke or Overprint Fill is deselected in the Attributes
panel.
<i>For information about other PageMaker conversion issues, check the support documents on the Adobe website.</i>
<b>Work with files and templates</b>
<b>Recommended workflow for InDesign documents</b>
You can improve performance and prevent many problems by establishing a good workflow to use with Adobe
InDesign.
<b>Maintain a clean computer system</b>
Over time, changes occur to software and hardware that can lead to performance loss and system problems.
Defragmenting the hard disk, removing older versions of software, updating device drivers, optimizing memory,
running virus protection utilities, and performing other maintenance tasks can prevent applications and files from
becoming damaged. Performing these tasks regularly helps ensure that InDesign opens, displays, and prints documents
as expected.
</div>
<span class='text_page_counter'>(70)</span><div class='page_container' data-page=70>
Before you begin a project, determine which files you’ll need and how you’ll store them. If you’ve experienced problems
with broken links, consider storing your linked files in the same folder as your document. InDesign maintains links to
files you place in a document, but if a link is broken, InDesign looks for the file in the document’s folder. Storing a
document and its linked files in the same folder makes it easy to move them from one computer to another. Storing files
in one folder also ensures that InDesign finds the original graphics when printing a document. If InDesign cannot
locate a linked graphic, it won’t reflect changes you make to the original graphic, and it may print the graphic poorly or
not at all.
If your project consists of multiple documents (for example, chapters in a book), you may find it useful to create a
project folder that contains a folder for each document and its linked files.
<b>Consider using a template</b>
Use a template if you frequently create similar projects. Templates let you create consistent documents more quickly
while protecting the original file. For example, if you create a monthly newsletter, your template might include ruler
guides, page numbers, the newsletter masthead, and styles you want to use in each issue. (See Use document templates.)
<b>Open documents locally</b>
Before you open a document stored on a network volume or on removable media, copy the document and any linked
graphics to your local hard disk. The slower access time and data transfer rate of a network volume or removable media
can cause data to become lost or corrupted, possibly damaging the document. However, be aware of overriding
someone else’s work if you copy the local files back to a network server.
<b>Solve problems before converting a file</b>
Damaged Adobe PageMaker or QuarkXPress® files usually remain damaged when opened in InDesign. If an error or
other unexpected behavior occurs with a converted file, open the original file in the source application and
troubleshoot it for damage.
If the converted file has problems, export it to IDML format, and then open the IDML file and save it as an InDesign
document.
<b>Save documents</b>
Save documents frequently, and create backup copies of important files. You can clear unnecessary data from a
document by using the Save As command. When you use the Save command, InDesign appends new information to
the document but doesn’t remove outdated data, such as information about a deleted graphic. When you use the Save
As command, however, InDesign completely rewrites the document, including only information about objects and
pages currently in the document. A document that contains only necessary data occupies less hard drive space and
redraws and prints more quickly.
<b>Practice good design habits</b>
• Create styles in a document. Creating styles with no documents open can cause duplicate styles to appear when you
create a new document. To share styles in documents, save the styles and load them.
• Use appropriate fonts. When choosing fonts for a document, consider how you intend to format and print the text.
InDesign works well with OpenType®, Type 1 (also called PostScript), and TrueType fonts. Damaged or poorly
constructed fonts can damage an InDesign document or cause it to print with unexpected results, so use reliable
fonts created by established font vendors. If you work with a service bureau, find out its font requirements.
• Avoid using too many text frames. Use as few text frames as possible to keep the document file size smaller and the
</div>
<span class='text_page_counter'>(71)</span><div class='page_container' data-page=71>
<b>Be smart with art</b>
• Use the appropriate graphics file format. When you create graphics for a project, consider how you plan to print the
document. If you intend to print the document at a service bureau, ask the service bureau which graphic formats
work best with the output device it uses. The service bureau can also advise you on the optimal resolution for images.
• Store graphics externally. When you import a graphic file, InDesign creates a link to the graphic by default. Linking
helps minimize the file size of the document and improves the performance of InDesign. When you print the
document, the original graphic file must be available and linked. If InDesign can’t find the original, the graphic may
print as a low resolution preview or as a gray box.
<b>Verify links and fonts before you print</b>
To ensure that a document prints correctly, verify that all links are intact and all fonts are available. A link becomes
broken if you delete, move, or rename the original graphic. Use the Preflight and Package features before handing off
files to a service bureau.
<b>Open InDesign documents</b>
In general, you open document and template files the same way you do in other programs. When you open an InDesign
template, it opens as a new, untitled document by default. Document files use the extension .indd, template files use the
extension .indt, snippet files use the extension .idms, library files use the extension .indl, interchange files use the
extension .inx, markup files use the extension .idml, and book files use the extension .indb.
You can also use the File > Open command to open files from earlier versions of InDesign, InDesign Interchange (.inx)
files, InDesign Markup (.idml) files, Adobe PageMaker 6.0 and later, QuarkXPress 3.3 and 4.1, and QuarkXPress
Passport 4.1 files. In addition, other software vendors may make plug-in software that lets you open other file formats.
<i>To view additional information about an InDesign document, hold down Ctrl and choose Help > About InDesign </i>
<i>(Windows) or hold down Command and choose InDesign > About InDesign (Mac OS).</i>
<b>Use the Open command</b>
<b>1</b> Choose File > Open and select one or more documents.
<b>2</b> Do one of the following, and then click Open:
• Select Normal (Windows) or Open Normal (Mac OS) to open the original document or a copy of a template.
• Select Original (Windows) or Open Original (Mac OS) to open an original document or template.
• Select Copy (Windows) or Open Copy (Mac OS) to open a copy of a document or template.
When you open an InDesign document, you may encounter any of the following messages:
<b>Message indicating newer version of InDesign</b>
In InDesign CS6 and CC, you can send documents to anyone using older versions of InDesign without extra steps like
manually exporting to IDML. Compatibility is built right in, ensuring that your documents always open just as you
would expect.
If you open a document created in a newer version of InDesign, a message is displayed indicating the different version.
To convert the document to the current version of InDesign, do the following:
<b>1</b> To convert the document to the current version of InDesign, click Convert.
The document is uploaded to the Adobe Creative Cloud and then converted to the current version of InDesign.
</div>
<span class='text_page_counter'>(72)</span><div class='page_container' data-page=72>
<b>2</b> After the document is successfully converted to the current version, the Save As dialog box prompts you to save the
document.
<b>Message indicating document color settings different from application</b>
If a warning message appears telling you that the color settings in the document are different from the color settings in
the application, select an option, and click OK.
<i><b>Note: </b>Color warning messages are off by default, but you can show warnings if you change the default settings in the Color </i>
<i>Settings dialog box (Edit >Color Settings.)</i>
<b>Message indicating missing or modified links</b>
If a warning message appears telling you that the document contains missing or modified links, use the Links panel to
fix the links. See Update, restore, and replace links .
<b>Message indicating missing fonts</b>
If a warning message appears telling you that the document contains missing fonts, do one of the following:
• Click OK. InDesign will automatically format the text with a substitute.
• Click Find Font to search for and list fonts used throughout your document.
For more information on finding missing fonts, see Find and change fonts.
<b>Open recent document</b>
? Choose File > Open Recent, and select one of the documents you saved recently.
To specify how many recent documents are displayed, choose Edit > Preferences > File Handling (Windows), or
InDesign > Preferences > File Handling, and then specify a number for Number Of Recent Items To Display. The
maximum number is 30.
<b>Choosing word lists when opening documents</b>
When opening a document, you may see an alert message asking if you want to use the word list in the document or
an exception word list in the user dictionary. An <i>exception</i> word list includes words that were added to the User
Dictionary while the document was worked on. If you know which exception word list you use, click its button. If you’re
not sure, click either button, choose Edit > Spelling > Dictionary to inspect the word lists, and then, if necessary, choose
Edit > Preferences > Dictionary (Windows) or InDesign > Preferences > Dictionary (Mac OS) to reset the word list
used for composition. See Hyphenation and spelling dictionaries.
<b>Convert earlier versions of InDesign documents</b>
? To convert previous versions of InDesign documents to the current version, choose File > Open and open the file.
Keep in mind the following points:
• If you used third-party plug-ins to create an earlier version of a document, check with the manufacturer to make
sure that they are installed correctly for and are compatible with InDesign CS5 before you convert the document.
• When you convert a document, you may see an alert message asking if you want to use the exception word list
in the user dictionary or the one in the document. For information about this alert message, see Choosing word
lists when opening documents.
</div>
<span class='text_page_counter'>(73)</span><div class='page_container' data-page=73>
• Previous versions of InDesign can’t open latest InDesign documents directly. For example, to open an InDesign
CS5 document in InDesign CS4, you must do two things. First, choose File > Export in InDesign CS5 to save the
document in IDML format. Second, update InDesign CS4 with special plug-ins that let you open the IDML file.
(See Save backwards to the previous InDesign version.)
<i>If you’re experiencing problems with a document that was created in a previous version of InDesign, use the Export </i>
<i>dialog box in InDesign CS5 to save the document in InDesign Markup (IDML) format. Then open the IDML file and </i>
<i>save it as an InDesign document.</i>
<b>Use Adobe Bridge with InDesign</b>
Adobe Bridge is a cross-platform application included with AdobeCreative Suite components that helps you locate,
organize, and browse the assets you need to create print, web, video, and audio content. You can start Adobe Bridge
from any Creative Suitecomponent (except Adobe Acrobat®), and use it to access both Adobe and non-Adobe asset
types.
From Adobe Bridge, you can:
• Manage image, footage, and audio files: Preview, search, sort, and process files in Adobe Bridge without opening
individual applications. You can also edit metadata for files, and use Adobe Bridge to place files into your
documents, projects, or compositions.
• View the links inside an InDesign document as thumbnails while in Adobe Bridge, without actually having to open
the InDesign document in InDesign.
• Drag assets from Adobe Bridge into the InDesign document window, or drag assets from the document window
into Adobe Bridge to create snippets. See Use snippets .
• Perform automated tasks, such as batch commands.
• Synchronize color settings across color-managed Creative Suite components.
• Start a real-time web conference to share your desktop and review documents.
<b>Use document templates</b>
Templates are useful starting points for standard documents because you can preset them with layout, graphics, and
text. For example, if you prepare a monthly magazine, you can create a template that contains the layout of a typical
issue, including ruler guides, grids, master pages, custom styles and swatches, placeholder frames, layers, and any
standard graphics or text. That way you can simply open the template each month and import new content.
You create a template the same way you create a regular document; the only difference occurs when you save the
document. When you prepare a template for others to use, you may want to add a layer containing instructions about
the template; hide or delete the layer before printing the document. See Layers .
<i><b>Note: </b>For Chinese versions of InDesign, you can open specially designed templates that include custom mojikumi sets.</i>
<b>Save a document as a template</b>
<b>1</b> Choose File > Save As, and specify a location and filename.
<b>2</b> Choose InDesign CS5 Template for Save As Type (Windows) or Format (Mac OS), and then click Save.
<b>Start a new document from a template</b>
</div>
<span class='text_page_counter'>(74)</span><div class='page_container' data-page=74>
<b>3</b> Select Normal (Windows) or Open Normal (Mac OS), and then click Open.
<b>4</b> Save the new document with its own name.
<b>Edit an existing template</b>
<b>1</b> Choose File > Open.
<b>2</b> Locate and select a template.
<b>3</b> Select Original (Windows) or Open Original (Mac OS), and then click Open.
<b>Review InDesign documents</b>
Adobe offers several methods for reviewing InDesign documents.
<b>Tracking editing changes</b>
As you or another person edits text, InDesign highlights added text and strikes through deleted text when Track
Changes is turned on. Use the Story Editor to view changes. The document owner can go through the edits and accept
or reject changes. See Tracking and reviewing changes .
<b>Using Acrobat to review a PDF file</b>
You can export the InDesign document to PDF and use Adobe Acrobat to set up an email review or a shared review on
Acrobat.com or another server. Reviewers can add comments using the Sticky Note tool and other markup methods.
The document owner can then go through the PDF review comments and edit the original InDesign document. For
more information, see Acrobat Help.
<b>Using CS Review</b>
CS Review is an online subscription service that lets you share your designs on the web so that others can provide
immediate feedback. When you create a review using the CS Review panel, you upload one or more snapshots of the
file to the Acrobat.com workspace. Reviewers can then add comments.
When you create a review, you can divide the review into <i>parts</i> that offer separate areas for review commenting. A
review can consist of parts from different files and applications. As the review progresses, you can add and remove
review parts as part of a dynamic review process.
<b>Design calendars and business cards from templates</b>
One way to create a calendars, business cards, resumes or CVs, and other specialized documents is to use templates.
Adobe provides several templates at the Adobe Marketplace and Exchange site:
www.adobe.com/go/exchange
Use search to locate additional resources for specialty documents.
</div>
<span class='text_page_counter'>(75)</span><div class='page_container' data-page=75>
<b>Share content</b>
The Adobe InCopy LiveEdit Workflow plug-ins let writers and editors develop copy in InCopy at the same time as
designers prepare layouts in Adobe InDesign. This workflow includes container files, called <i>assignments,</i> for grouping
related pieces of content, and file-locking and notification tools for sharing and updating files in InCopy or InDesign
over a shared network or in compressed packages that can be distributed via e-mail.
In the shared network workflow, InDesign users export text and graphics to a shared location on a file system, where
the files become available to InCopy users who will write and edit the content. Selected text frames and graphics frames
are either exported to the assignment or exported as separate InCopy files, where they become part of the managed
process and are linked to the InDesign document. These shared files are referred to as <i>managed files</i>. When users work
in the assignment file or in the InDesign file on a local server, changes to the associated layout or content are
communicated to all users involved in the workflow for that document.
Multiple InCopy or InDesign users can open the same content file simultaneously, and multiple InCopy users can open
the same assignment file simultaneously. However, only one user at a time can <i>check out</i> the InCopy file for editing.
Others can view the file on a read-only basis. The user who checks out a managed InCopy file can share his or her work
with other users by saving the file to the shared server or by returning the file to the InDesign user; however, other users
can’t make changes to the file until it’s checked back in. This system allows multiple users to access the same file but
prevents users from overwriting each other’s work.
For more information, see the InCopy LiveEdit Workflow guide (PDF) at www.adobe.com/go/learn_liveedit.
<b>Ways to work with content in InCopy</b>
<i>Content</i> is either a body of text that flows through one or more frames, or an imported graphic. There are five basic
ways to work on content in InCopy: open an assignment file, open an assignment package, open a linked InCopy file,
open an InDesign file that has linked InCopy files, or compose content entirely in InCopy.
<b>Open assignment files created in InDesign</b>
</div>
<span class='text_page_counter'>(76)</span><div class='page_container' data-page=76>
<i>InDesign document (.indd) with assignment file (.icml) composed of three linked content files (.incx). Assignment and its components are listed </i>
<i>in Assignments panel and are opened in InCopy.</i>
<b>Open assignment packages</b>
The assignment packages workflow is especially useful when designers and writers are working on the same project but
don’t have access to a local server. In such cases, the InDesign user can create one or more packages and send the
compressed files to the assigned InCopy users via e-mail. InCopy users can open the assignment packages, edit the
contents, and return the packages to the InDesign user, who can then update the document.
<b>Open linked InCopy files exported from InDesign</b>
</div>
<span class='text_page_counter'>(77)</span><div class='page_container' data-page=77>
<i>InDesign document (.indd) with three linked but unassigned content files (.icml) opened in InCopy</i>
<b>Open InDesign documents that have linked InCopy files</b>
To see all page items in the context of an entire layout, InCopy users can open and edit an InDesign document in
InCopy. This approach can be useful for editing and copyfitting if seeing the overall layout is important, or for editing
most of the stories in a document rather than a few. After the InCopy user edits the stories, the InDesign user can then
update the links to the modified files. If the InDesign user changes the layout, the InCopy user is notified when the
InDesign document is saved.
<b>Compose content entirely in InCopy</b>
</div>
<span class='text_page_counter'>(78)</span><div class='page_container' data-page=78>
<b>Managed files</b>
For a file to be managed, it must be added to an assignment file, exported from InDesign as InCopy content, or placed
as InCopy content into InDesign. Managed files communicate both content status and ownership. With managed files,
you can:
• Lock and unlock stories to help preserve file integrity.
• Notify InCopy users when the associated InDesign layout is outdated.
• Identify the user working on a file.
• Notify users when an InCopy content file is outdated, being used by someone, or available for editing. Notification
methods include alert messages, frame icons, status icons in the Links panel, and status icons in the Assignments
panel.
<b>Read-only files</b>
Once a content file becomes managed, it’s <i>read-only</i> to all users in the workflow at all times, except to the person who
has checked it out. The software creates a lock file (*.idlk) when a user checks out a content file, giving that user
exclusive editing control. Read-only files have the following characteristics:
• An InCopy user cannot manually format the text in it. However, if text has been assigned character or paragraph
styles, an InDesign user can change the definition of those styles, thereby changing the formatting of the text even
when the file is checked out to someone else. These style definition changes are reflected in the text once the
InDesign user updates the file.
• In general, neither an InCopy nor InDesign user can change objects, such as text and applied styles, in locked
InCopy content. Some objects, such as character and paragraph styles, are only <i>used</i> by the content. For example,
you can’t change how a character style is applied to objects in locked content, but you can change the character style
itself, thereby changing the appearance of the text.
• An InDesign user can change the margins and columns of the text content as well as the shape, location, and number
of text frames the story occupies.
• An InDesign user can change the geometry and formatting of a graphics frame without checking out the graphic.
An InCopy user cannot change a graphics frame or any formatting on the frame. However, both InDesign and
InCopy users have to check out the graphics frame in order to modify the graphic itself (for example, to rotate or
scale it).
<b>Best practices for working with managed files</b>
Use the following practices to make sure that you work with the most up-to-date content and don’t overwrite someone
else’s work:
• Store assignment files on a server where all team members have access. If team members don’t have access to a
server, you can create and distribute assignment packages.
• When you create an assignment, a special folder is created to hold the assignment file and the content. Use these
assignment folders to maintain assignment and content files. They simplify managing the shared files across a
workgroup and help ensure that users open the correct files.
• In InCopy, open the assignment file instead of an individual InCopy story. That way, you can see the copyfit and
layout information in Galley and Layout views. If you export content without using assignment files, you can see
copyfit and layout information only by opening the InDesign file.
</div>
<span class='text_page_counter'>(79)</span><div class='page_container' data-page=79>
• In InDesign, if you must remove files from the workflow (because of a production deadline, for example), you can
unlink them or cancel an assignment package.
<b>Managed-file workflow examples</b>
When you establish workflow management between InCopy and InDesign, writers and editors can compose, rewrite,
expand, and edit documents at the same time that designers prepare the layout. Common workflows include managing
files on a local server, sharing files via e-mail packages, or using some combination of the two methods.
These workflows assume that you have a basic InDesign template with layout geometries, styles, and placeholder text.
Layout geometries include page dimensions as well as text and graphics frames. InCopy uses these items to show proper
copyfit information.
<b>Local server workflow</b>
<b>1.In InDesign, create assignments and add content to them.</b>
This step incorporates exported text and graphics frames into the managed process, where they become available to
InCopy users for writing and editing.
<b>2.Make the assignment files available to InCopy users.</b>
Save the files to a server that all workflow users have access to.
<b>3.In InCopy, open the assignment file, and check out and edit a story or graphic.</b>
In InCopy, the files containing content assigned to you appear in the Assignments panel. Whenever you save the file on
a local server, the changes are saved on the file system and anyone working on that document (the InDesign layout or
another managed content file in the document) receives notification of the changes. Those users can update the content
to view the latest changes. The content remains checked out to you until you check it in.
<b>4.In InDesign, work on the layout. </b>
Regardless of whether the content files are being edited in InCopy, InDesign users can work on the document layout;
they don’t have to check out the document. Whenever the InCopy user saves the checked-out content, the InDesign
user can update that content within the layout to see the latest revisions.
<b>5.In InCopy, continue working. </b>
When finished with your edits, check in the content. Other users are then able to check out the content and work on it.
If a user is modifying the layout in InDesign simultaneously, you can update and view the layout geometry as you work.
<b>6.In InDesign, make sure that all the content is checked in.</b>
The managed workflow makes it possible to know who has checked out files. After content files are checked in,
InDesign users can check out the files to finalize the layout as necessary.
<b>E-mail package workflow</b>
<b>1.In InDesign, create and send assignment packages.</b>
Create assignment packages and assign contents to the appropriate InCopy users, and then send the packages to the
InCopy users. The packaged files are automatically checked out to help avoid editing conflicts.
<b>2.In InCopy, open the assignment package, and check out and edit a story or graphic.</b>
</div>
<span class='text_page_counter'>(80)</span><div class='page_container' data-page=80>
<b>3.In InDesign, work on the layout. </b>
Regardless of whether the content files are packaged, InDesign users can work on the document layout; they don’t have
to check out the document. If you need to update the layout or assignments, you can send an updated package to the
InCopy users.
<b>4.In InCopy, return the edited package. </b>
When finished with your edits, check in the content and return the modified package. Other users are then able to
check out the content, view the latest revisions, and work on the file.
<b>5.In InDesign, make sure that all the content is checked in.</b>
The managed workflow makes it possible to know who has checked out files. After assignment packages are returned,
stories in assignment packages are checked in. InDesign users can check out the files to finalize the layout as necessary.
<b>Enter user identification</b>
All users in the workflow must have a user name. This identification reveals who has checked out a particular file and
makes this information available to other users. It’s also required in order to check out a file for editing.
If you’ve already specified a user name and want to change it, you must check in any content you have checked out.
Otherwise, changing user identification during an editing session would forfeit your ability to edit content that you
have checked out—it would be checked out to you under a different name.
User identification is application-specific; no single user can have multiple user identifications per application.
<i><b>Note: </b>The InCopy Notes and Track Changes features also use the specified name to identify the author of a note or a tracked </i>
<i>change.</i>
<b>1</b> Do either of the following:
• Choose File > User.
• Choose User from the Assignments panel menu.
<b>2</b> Type a unique name and click OK.
If you forget to specify a user name using this method, you’re prompted to enter one when you attempt your first
workflow action.
<i><b>Note: </b>The Color pop-up menu in this dialog box is for identifying editorial notes and tracked changes. You can choose the </i>
<i>color now if you want, but it doesn’t affect anything you do in a managed workflow. </i>
<b>Workflow icons</b>
Icons can appear on text and graphics frames, the Assignments panel, and in the story bar (InCopy only). Edit status
icons appear next to the managed file in the Links panel and Assignments panel, and communicate content status. Icons
appear on frames that contain a linked InCopy story (in the Layout view in both InDesign and InCopy). These icons
also communicate content status and can be used to differentiate between managed and unmanaged content. The
associated tool tip indicates editing status and ownership. To view the frame icons, make sure that frame edges are
showing in InDesign and InCopy (View > Extras > Show Frame Edges).
</div>
<span class='text_page_counter'>(81)</span><div class='page_container' data-page=81>
<i><b>Note: </b>The Out Of Date icon on the Available, In Use, Editing, Text Content, and Graphics Content icons indicates that the </i>
<i>content is out of date; that is, the version on the file system is newer than the version displayed on your computer.</i>
<b>Toolbox</b>
<b>Toolbox overview</b>
Some tools in the toolbox are for selecting, editing, and creating page elements. Other tools are for choosing type,
shapes, lines, and gradients. You can change the overall layout of the toolbox to fit your preferred window and panel
layout. By default, the toolbox appears as a single vertical column of tools. You can also set it up as a double vertical
column or as one horizontal row. However, you can’t rearrange the positions of individual tools in the toolbox. You can
drag the top of the toolbox to move it.
Select a tool from the default toolbox by clicking it. The toolbox also contains several hidden tools related to the visible
tools. Hidden tools are indicated by arrows to the right of the tool icons. Select a hidden tool by clicking and holding
the current tool in the toolbox and then selecting the tool that you want.
The name of the tool and its keyboard shortcut appear when you hold the pointer over the tool—this text is called the
<i>tool tip</i>. You can turn off tool tips by choosing None from the Tool Tips menu in Interface preferences.
<i>Open the Tool Hints panel (choose Window > Utilities > Tool Hints) to see which shortcut and modifier keys work with </i>
<i>the selected tool.</i>
<b>Icon</b> <b>Name</b> <b>Location</b>
Available Assignments panel (InDesign and InCopy),
text frames, and graphics frames
In Use By <i>[name]</i> Assignments panel, text frames, and graphics
frames
Editing Assignments panel, text frames, and graphics
frames
Available And Out Of Date Text and graphics frames
In Use By <i>[name]</i> And Out Of Date Text and graphics frames
Editing And Out Of Date Text and graphics frames
Out Of Date Assignments panel
</div>
<span class='text_page_counter'>(82)</span><div class='page_container' data-page=82>
<i>List of tools in the Toolbox</i>
<i><b>Note: </b>Content Collector and Content Placer tools are not available in CS5.5 or earlier.</i>
<b>Display the toolbox</b>
? Choose Window > Tools.
<b>Display tool options</b>
? Double-click a tool in the toolbox.
This procedure works only for some tools, such as the Eyedropper, Pencil, and Polygon tools.
<b>Display and select hidden tools</b>
</div>
<span class='text_page_counter'>(83)</span><div class='page_container' data-page=83>
<i>Hidden tools menu</i>
<b>Select tools temporarily</b>
<b>1</b> When one tool is selected, hold down the keyboard shortcut of a different tool.
<b>2</b> With the keyboard shortcut still held down, perform an action.
<b>3</b> Release the keyboard shortcut to return to the previous tool.
For example, if the Gap tool is selected, hold down the V key to temporarily use the Selection tool. When you release
the V key, the Gap tool is selected.
<b>View tool hints</b>
The Tool Hints panel describes how modifier keys work with the selected tool.
<b>1</b> Choose Window > Utilities > Tool Hints to display the Tool Hints panel.
<b>2</b> Select a tool in the toolbox to view a description of that tool and its modifier keys and shortcuts.
<b>Change the toolbox layout</b>
<b>1</b> Choose Edit > Preferences > Interface (Windows) or InDesign > Preferences > Interface (Mac OS).
<b>2</b> Choose a layout option from the Floating Tools Panel menu and click OK.
You can also click the double arrow icon at the top of the toolbox to change the toolbox layout.
<b>Tools overview</b>
<b>Type tools </b>Create and format type in standard or customized blocks or paths. (See Create text frames.)
<b>Drawing tools </b>Draw and style simple and complex objects, including rectangles, ellipses, polygons, freeform shapes.
(See Drawing.)
<b>Selection tools </b>Select (activate) objects, points, or lines. (See Selecting objects .)
<b>Transform tools </b>Reshape, reorient, and resize objects. (See Transforming objects .)
<b>Navigation tools </b>Move around in, control the view of, and measure distances in a document. (See Zoom in and outand
Rulers and measurement units .)
</div>
<span class='text_page_counter'>(84)</span><div class='page_container' data-page=84>
<b>Gallery of selection tools</b>
<i>Selection tool lets you select entire </i>
<i>objects.</i>
<i>Direct Selection tool lets you select </i>
<i>points on a path or contents within </i>
<i>a frame.</i>
<i>Page tool lets you create multiple </i>
<i>page sizes within a document.</i>
</div>
<span class='text_page_counter'>(85)</span><div class='page_container' data-page=85>
<b>Gallery of drawing and type tools</b>
<i>Pen </i>
<i>tool lets you draw straight and </i>
<i>curved paths.</i>
<i>Add </i>
<i>Anchor Point tool lets you add </i>
<i>anchor points to a path.</i>
<i>Delete </i>
<i>Anchor Point tool lets you remove </i>
<i>anchor points from a path.</i>
</div>
<span class='text_page_counter'>(86)</span><div class='page_container' data-page=86>
<i>Type </i>
<i>tool lets you create text frames and </i>
<i>select </i>
<i>text.</i>
<i>Vertical Type tools lets you create </i>
<i>vertical text frames and select text.</i>
<i>Type </i>
<i>on a Path tool lets you create and </i>
<i>edit type on paths.</i>
<i>Pencil </i>
<i>tool lets you draw a freeform path.</i> <i>Smooth tool lets you remove excess </i>
<i>angles from a path.</i>
<i>Erase </i>
<i>tool lets you delete points on a path.</i>
<i>Line </i>
<i>tool lets you draw a line segment.</i> <i>Rectangle Frame tool lets you </i>
<i>create a square or rectangle </i>
<i>placeholder.</i>
<i>Ellipse </i>
<i>Frame tool lets you create a circle or </i>
<i>oval placeholder.</i>
<i>Polygon Frame tool lets you create </i>
<i>a multi-sided shape placeholder.</i>
<i>Rectangle tool lets you create a </i>
<i>square or rectangle.</i>
<i>Ellipse </i>
<i>tool lets you create a circle or oval.</i> <i>Polygon tool lets you create </i>
</div>
<span class='text_page_counter'>(87)</span><div class='page_container' data-page=87>
<b>Gallery of transformation tools</b>
<b>Gallery of modification and navigation tools</b>
<b>Share content</b>
<i>Free </i>
<i>Transform tool lets you rotate, </i>
<i>scale, or shear an object.</i>
<i>Rotate </i>
<i>tool lets you rotate objects around a </i>
<i>fixed point.</i>
<i>Scale </i>
<i>tool lets you resize objects around a </i>
<i>fixed point.</i>
<i>Shear </i>
<i>tool lets you skew objects around a </i>
<i>fixed point.</i>
<i>Eyedropper tool lets you sample </i>
<i>color or type attributes from objects </i>
<i>and apply them to other objects.</i>
<i>Measure tool measures the </i>
<i>distance between two points.</i>
<i>Gradient Swatch tool lets you </i>
<i>adjust the beginning and ending </i>
<i>points and angle of gradients </i>
<i>within objects.</i>
<i>Gradient Feather tool lets you fade </i>
<i>an object into the background.</i>
<i>Scissors tool cuts paths at specified </i>
<i>points.</i>
<i>Hand </i>
<i>tool moves the page view within </i>
<i>the document window.</i>
<i>Zoom </i>
<i>tool increases and decreases the </i>
<i>view magnification in the </i>
<i>document window.</i>
</div>
<span class='text_page_counter'>(88)</span><div class='page_container' data-page=88>
<b>Exporting content from InDesign</b>
Exporting content from InDesign to InCopy establishes a link between the two applications. You export InDesign text
frames, graphics frames, and their contents to InCopy using either of two methods:
• Create a container file (*.icma)—called an <i>assignment</i>—and add related groupings of document items (such as the
text and graphics of a story) to the assignment so they can be worked on together. Content within assignments is
exported as *.icml files.
• Export text and graphics frames separately (including placeholder frames) using the Edit > InCopy > Export menu
commands. Exported content is saved as *.icml files.
After content is exported, small icons appear at the top left of exported frames in InDesign and InCopy, and in the
Assignments panel. A link to the exported file appears in the Links panel. These icons indicate the status of managed
frames and they differentiate managed frames from those that aren’t part of the workflow. All exported content appears
in the Assignments panel. Content exported using the Export menu commands appears in the Unassigned InCopy
Content section of the Assignments panel list. While both methods establish a controlled connection between InCopy
content and an InDesign document, the primary method is to use assignment files.
Exporting content makes the content available for users to check out while maintaining a link to the original InDesign
document. (This link is made from within InDesign; you cannot create the link from InCopy.)
Once the content is exported, InCopy users can see (but not change) the page layouts, styles, and so forth as they appear
in the InDesign document.
<i><b>Note: </b>You can also create text or anchored graphics using InCopy and then place them in InDesign.</i>
<b>Assignments panel overview</b>
The primary tool for working with assignments is the Assignments panel (Window > Assignments in InCopy, Window
> Editorial > Assignments in InDesign). The Assignments panel displays the files exported from the currently active
InDesign document, and an icon indicates their status. The Assignments panel menu also contains commands that
control import version and file-management functions between InCopy and InDesign. When you open an assignment
in InCopy, the assignment name and its contents appear in the Assignments panel. You can double-click text and
graphics frames in the Assignments panel to select them in the document window.
</div>
<span class='text_page_counter'>(89)</span><div class='page_container' data-page=89>
<i>InDesign Assignments panel</i>
<i><b>A </b>InCopy content names <b>B </b>InDesign document name <b>C </b>Assignment Out Of Date status <b>D </b>Available And Text Up To Date status <b>E </b>In Use And </i>
<i>Text Out Of Date status <b>F </b>Editing And Text Up To Date status <b>G </b>Unassigned content <b>H </b>User name <b>I </b>Update Content button <b>J </b>Check Out/Check </i>
<i>In Selection button <b>K </b>New Assignment button <b>L </b>Delete Selected Assignments/Remove button </i>
<i>InCopy Assignments panel</i>
<i><b>A </b>InCopy content names <b>B </b>Assignment Out Of Date status <b>C </b>Assignment name <b>D </b>Available And Text Up To Date status <b>E </b>In Use And Text </i>
<i>Out Of Date status <b>F </b>Editing And Text Up To Date status <b>G </b>User name <b>H </b>Update Design button <b>I </b>Update Content button <b>J </b>Check Out/Check </i>
<i>In Selection button </i>
<b>Assignment files</b>
In InDesign, assignment files are containers for organizing collections of page items. For example, you might want to
select all the items in a story (headline, byline, copy, graphics, and captions), and then assign them to one InCopy user.
Adding those items to an assignment provides a convenient way for InCopy users to access only the content for which
they are responsible. Assignment files (*.icma) appear in the file system, in the InCopy story bar, and in status messages.
Only InDesign users can create assignment files; only InCopy users can open them.
When you create an assignment, a folder is created in the same location as the InDesign document by default. This
assignment folder includes the *.icma assignment files and a content subfolder that contains any exported InCopy story
files (in .icml format) that are part of images or other resources. Once the assignment is created, store the project folder
in a location where all users have access to it, or create and distribute an assignment package. If content is exported
before it’s added to an assignment, the files on disk are not moved to the content folder of the assignment file.
Assignment files include the following:
</div>
<span class='text_page_counter'>(90)</span><div class='page_container' data-page=90>
• Any transformations on the graphics included in the assignment, such as moving, scaling, rotating, or shearing.
• Page geometry, so InCopy users can see the layout of the frame and its content that they’re editing without opening
the entire InDesign file.
• Color-coding of assigned frames in the document.
<i>Illustration of page in InCopy showing page geometry and color coding</i>
<b>Create assignments and add content (InDesign)</b>
Only InDesign users can create assignments and add content to them. There are several ways to create assignments.
The method you choose usually depends on whether you have content to add at the time you create the assignment.
• Create empty assignment files. From your InDesign document, you can create a series of empty assignments to act
as templates for content to come later.
• Create assignments and add content at the same time.
• Add content to an existing assignment file. You can add linked content—text and graphics that have already been
exported as InCopy content—or you can add selected page items to become linked InCopy content. If one or more
of the selected frames already contain InCopy content files, and none is part of an assignment, you can add them to
a new or existing assignment file.
By default, the assignment folder you create is saved in the same folder as the InDesign document. You can then place
this folder on a server or create and send a package.
<i><b>Note: </b>If you don’t want InCopy users to place and fit graphics, don’t add graphics frames to an assignment.</i>
<b>Create empty assignment files (InDesign)</b>
<b>1</b> In InDesign, save the document.
<b>2</b> In the Assignments panel, choose New Assignment from the panel menu.
<b>3</b> In the New Assignment dialog box, specify assignment file options and click OK.
<b>Simultaneously create assignments and add content (InDesign)</b>
<b>1</b> In InDesign, create a document that has one or more text frames, graphics frames, or placeholder items, and then
save the document.
<b>2</b> Select the text and graphics frames you want to add.
<b>3</b> Do one of the following:
</div>
<span class='text_page_counter'>(91)</span><div class='page_container' data-page=91>
• Choose Edit > InCopy > Add <i>[option]</i> To Assignment > New.
<b>4</b> In the New Assignment dialog box, specify assignment file options and click OK.
The newly created assignment file includes any frames selected in the document window.
<b>Add content to existing assignments (InDesign)</b>
<b>1</b> Save the InDesign document.
<b>2</b> Select the text and graphics frames you want to add.
<b>3</b> Do one of the following:
• From the Assignments panel menu, choose Add To Assignment, and then select the assignment.
• Drag content from the Unassigned InCopy Content section of the Assignments panel into an existing
assignment.
• Select page items with the Selection tool and drag them to an existing Assignment in the Assignments panel.
• Choose Edit > InCopy > Add <i>[option]</i> To Assignment, and then select the assignment.
<b>4</b> Choose Update All Assignments from the Assignments panel menu to make the content files available to InCopy
users.
<i><b>Note: </b>You can add content only to assignments in the same document. However, you can import the same content into </i>
<i>multiple documents and add it to an assignment in each of those documents. </i>
<b>Assignment file options (InDesign)</b>
When you create or modify an assignment file, you can set the following options:
<b>Assignment Name </b>The unique identification of the assignment in the Assignments panel, for example “Ocean article.”
This name must conform to the file naming conventions of the operating system.
<b>Assigned To </b>The unique identification of the user assigned to the files. The user’s name appears in parentheses
following the assignment name in the Assignments panel. Entering a name here is for informational purposes only; it
doesn’t grant special rights or permissions to the user.
<b>Color </b>Displays a list of colors for adding a distinctive highlight to the frames of the current assignment in the document
window, and to the assignment names in the Assignments panel. This color coding differentiates frames that belong to
one assignment from frames that belong to another, and it differentiates from unassigned frames. To toggle the display
of this color coding, choose View > Extras > Show/Hide Assigned Frames. In InCopy, the color coding is visible only
in Layout view.
<i><b>Note: </b> If toggling the display of assigned frames produces unexpected results, those frames might be tagged for XML and </i>
<i>View > Structure > Show Tagged Frames might be enabled. You cannot show assigned frames and tagged frames at the </i>
<i>same time. </i>
<b>Change </b>Click the Change button to specify the location of the assignments folder. By default, the assignments folder is
created in the same location as the InDesign file.
</div>
<span class='text_page_counter'>(92)</span><div class='page_container' data-page=92>
<b>Assigned Spreads </b>Lets InCopy users see all assigned frames, as well as the entire contents of other frames that aren’t
part of the assignment, on the same spread. In InCopy, content in frames outside an assignment isn’t editable and is
visible only in Layout view.
<b>All Spreads </b>Exports all content in the InDesign document to the assignment file. This option provides the maximum
amount of fidelity; it also provides the slowest performance because the assignment file displays the design and layout
of every page, including pages not relevant to the section a user is editing.
<b>Linked Image Files When Packaging </b>Includes a copy of linked images in the assignment package. Selecting this option
gives InCopy users access to images but increases the package’s file size. InCopy users can include images while
returning a package.
<b>Export content as separate InCopy files (InDesign)</b>
If your workgroup prefers working with separate files rather than using assignments, you can export InCopy content
without using an assignments file. Compared with creating a single assignment file with references to multiple content
files and layout information, this method creates a separate file (.icml) for each text or graphics frame you specify in
the document. To see the context of the content you are editing, you must also open the associated InDesign document
(.indd).
Cater the InDesign document to suit your workflow needs. For example, if you want all of the editor’s comments to be
exported in a single file, create a layer for the editor to make comments. You can then export all the content on the
selected layer.
<i><b>Note: </b>A quick way to export content as separate InCopy files is to use the Selection tool to drag selected frames into the </i>
<i>Unassigned InCopy Content in the Assignments panel.</i>
<b>1</b> In InDesign, create a document with one or more text frames, graphics frames, or placeholder items.
<b>2</b> Do either of the following:
• Select the text or graphics frame of a single story, or Shift-click to select multiple frames.
• Click an insertion point in a story, or select some text in a text frame.
<b>3</b> Choose Edit > InCopy > Export, and then choose one of the following options:
<b>Selection </b>Exports all selected text and graphics frames.
<b>Layer </b>Exports all content on the selected layer.
<b>All Stories </b>Exports every story that has not been exported already.
<b>All Graphics </b>Exports every graphic that has not been exported already.
<b>All Graphics And Stories </b>Exports every story and graphic that has not been exported already.
<i>If you export all content in the document, and then add more text or graphics frames to the same document, you </i>
<i>can save time exporting the new ones by using the Export > All Stories (or All Graphics or All Graphics And Stories) </i>
<i>command again. InDesign exports only the new content.</i>
<b>4</b> Enter a name and location for the files, and then click Save.
The file name you specify is used as a prefix for identifying each exported content file in the file system. If you export
multiple text frames, the first several characters of the text are automatically appended to the file name; for example,
Upcoming cycling events.icml.” For multiple graphics frames, the file names are formed as
“mystory-graphic,” “mystory-graphic-1,” and so on. The file name appears in the file system, in the InCopy story bar, and in
status messages.
</div>
<span class='text_page_counter'>(93)</span><div class='page_container' data-page=93>
The InCopy content is now managed, and is available to be checked out and edited by other users in the workflow.
Shared content appears in the Links panel just like imported graphics. If you move a shared file manually, you can use
the Links panel to update its link.
<i>When you export content, you see the Available icon </i> <i> on the text frame (InDesign and InCopy), and in the </i>
<i>Assignments panel (InCopy). The word [Editing] appears in the story bar (InCopy).</i>
<b>Customize menus and keyboard shortcuts</b>
<b>Customize menus</b>
Hiding and colorizing menu commands is a way to remove menu clutter and emphasize commands you frequently use.
Note that hiding menu commands simply removes the menu command from view; it doesn’t disable any features. At
any time, you can view hidden commands by selecting the Show All Menu Items command at the bottom of a menu,
or you can choose Window > Workspace > Show Full Menus to show all the menus for the selected workspace. You can
include customized menus in workspaces you save.
You can customize the main menu, context menus, and panel menus. Context menus appear when you right-click
(Windows) or Control-click (Mac OS) an area. Panel menus appear when you click the icon in the upper right of a
panel.
<i><b>Note: </b>If you select a different workspace, such as Getting Started, some menu commands are hidden. To display menu </i>
<i>commands, choose Show All Menu Items at the bottom of the menu, or choose a different workspace, such as Advanced.</i>
<b>Create a custom menu set</b>
<b>1</b> Choose Edit > Menus.
You cannot edit the default menu set.
<b>2</b> Click Save As, type the name of the menu set, and click OK.
<b>3</b> From the Category menu, choose Application Menus or Context & Panel Menus to determine which menus are
customized.
<b>4</b> Click the arrows to the left of the menu categories to display subcategories or menu commands. For each command
you want to customize, click the eye icon under Visibility to show or hide the command; click None under Color to
select a color from the menu.
<b>5</b> Click Save, and then click OK.
<b>Select a custom menu set</b>
<b>1</b> Choose Edit > Menus.
<b>2</b> Choose the menu set from the Set menu, and then click OK.
<b>Edit or delete a custom menu set</b>
<b>1</b> Choose Edit > Menus.
<b>2</b> Choose the menu set from the Set menu, and then do one of the following:
</div>
<span class='text_page_counter'>(94)</span><div class='page_container' data-page=94>
• To delete a menu set, click Delete and then click Yes. If you’ve modified the menu set without saving it, you’re
prompted to save the current menu set. Click Yes to save the menu set, or click No to discard changes.
<b>Show hidden menu items</b>
• Choose Window > Workspace > Show Full Menus. This command turns on all menus for the selected workspace.
You can hide the menus again by resetting the workspace.
• Choose Show All Menu Items at the bottom of the menu that includes hidden commands.
<i>Holding down Ctrl (Windows) or Command (Mac OS) and clicking a menu name temporarily displays any menu </i>
<i>commands you’ve hidden by customizing menus.</i>
<b>Missing menu commands</b>
If you can’t find a menu command, it may be hidden. If you select a workspace other than Advanced, some menu
commands are hidden. It’s also possible that you or someone else used the Menus command to hide menu items.
If you can’t find a command you’re looking for, try any of these techniques:
• Choose Show All Menu Items at the bottom of the menu.
• Choose Window > Workspace > Show Full Menus.
• Choose Window > Workspace, and select a different workspace (Advanced shows all menu items).
• Choose Edit > Menus, locate the menu command, and make sure it isn’t hidden.
If menu commands are still missing, try restoring preferences.
<b>Use keyboard shortcut sets</b>
Tool tips provide an instantaneous reference for shortcuts. InDesign also provides a shortcut editor in which you can
view and generate a list of all shortcuts, and edit or create your own shortcuts. The shortcut editor includes all the
commands that accept shortcuts, but some of these commands are undefined in the Default shortcut set.
You can also associate keyboard shortcuts with paragraph or character styles (see Add paragraph and character styles)
or scripts.
Mike Witherell provides a reference guide of keyboard shortcuts on Free keyboard shortcuts (English only).
<b>Change the active shortcut set</b>
<b>1</b> If you want the shortcut set to be active for all documents, make sure that no documents are open.
<b>2</b> Choose Edit > Keyboard Shortcuts.
<b>3</b> Select a shortcut set in the Set menu. For example, select Shortcuts for QuarkXPress® 4.0.
<b>4</b> Click OK.
<b>View shortcuts</b>
<b>1</b> Choose Edit > Keyboard Shortcuts.
<b>2</b> For Set, select a shortcut set.
<b>3</b> For Product Area, select the area containing the commands you want to view.
</div>
<span class='text_page_counter'>(95)</span><div class='page_container' data-page=95>
<b>Generate a list of shortcuts for printing</b>
<b>1</b> Choose Edit > Keyboard Shortcuts.
<b>2</b> For Set, select a shortcut set.
<b>3</b> Click Show Set.
A text file opens with all current and undefined shortcuts for that set.
<b>Create a new shortcut set</b>
<b>1</b> Choose Edit > Keyboard Shortcuts.
<b>2</b> Click New Set.
<b>3</b> Type a name for the new set, select a shortcut set in the Based On Set menu, and click OK.
<b>Create or redefine a shortcut</b>
<b>1</b> Choose Edit > Keyboard Shortcuts.
<b>2</b> For Set, select a shortcut set or click New Set to create a new shortcut set.
<i><b>Note: </b>You cannot edit the Default or the QuarkXPress shortcut sets. Instead, create a new set based on one of these sets, </i>
<i>and then edit the new set.</i>
<b>3</b> For Product Area, select the area containing the command you want to define or redefine.
<b>4</b> In the Commands list, select the command that you want to define or redefine.
<b>5</b> In the New Shortcut box, press the keys for your new keyboard shortcut. If the key sequence is currently being used
for another command, InDesign displays that command under Current Shortcuts. You can choose to change the
original shortcut also, or try another shortcut.
<i><b>Note: </b>Do not assign single-key shortcuts to menu commands, because they interfere with the typing of text. If an </i>
<i>insertion point is active when you type a single-key shortcut, InDesign actives the keyboard shortcut instead of inserting </i>
<i>the character in the text.</i>
<b>6</b> In the Context list, select the context in which you want the keyboard shortcut to function. The context ensures that
the shortcut performs the way you intended. For example, you can assign Ctrl+G to merge table cells (Table context)
and Ctrl+G to insert special characters (Text context).
<i><b>Note: </b>Assign shortcuts in the Default context when you want them to function regardless of the current state of the </i>
<i>document. Shortcuts you assign in other contexts, such as Table or Text, override shortcuts assigned in the Default </i>
<i>context.</i>
<b>7</b> Do one of the following:
• Click Assign to create a new shortcut where none currently exists.
• Click Assign to add another shortcut to a command. Menu commands can have multiple keyboard shortcuts.
<b>8</b> Click OK to close the dialog box, or click Save to keep the dialog box open while you enter more shortcuts.
<b>Copying keyboard shortcut sets</b>
Keyboard shortcut sets (*.indk) are saved in two locations. The application preset shortcuts appear in the Presets folder
in the main application folder. The shortcut sets you create appear in the Shortcut Sets folder in the following locations:
</div>
<span class='text_page_counter'>(96)</span><div class='page_container' data-page=96>
<b>Windows Vista and Windows 7 </b>
Users\[username]\AppData\Roaming\Adobe\InDesign\[Version]\[Language]\InDesign Shortcut Sets
<b>Mac OS </b>Users/[username]/Library/Preferences/Adobe InDesign/[version]/[language]/InDesign Shortcut Sets
If you created a keyboard shortcut set on one computer and want to use it on a different computer, copy the *.indk file
to the same location on the other computer.
You can move a keyboard set from the custom location to the application folder. Doing so makes the custom shortcuts
available to all the users sharing a computer. However, make sure that you do not have two sets with the same name,
one in each place. Make sure that the application keyboard sets and the custom sets have different names.
<b>Recovery and undo</b>
<b>Recover documents</b>
InDesign guards your data against unexpected power or system failures using an automatic recovery feature.
Automatically recovered data exists in a temporary file that is separate from the original document file on disk. Under
normal circumstances you don’t need to think about automatically recovered data, because any document updates
stored in the automatic recovery file are automatically added to the original document file when you choose the Save
or Save As command or exit from InDesign normally. Automatically recovered data is important only if you’re unable
to save successfully before an unexpected power or system failure.
Even though these features exist, you should save your files often and create backup files in case of unexpected power
or system failures.
<b>Find recovered documents</b>
<b>1</b> Restart your computer.
<b>2</b> Start InDesign.
If automatically recovered data exists, InDesign automatically displays the recovered document. The word
[Recovered] appears after the filename in the title bar of the document window to indicate that the document
contains unsaved changes that were automatically recovered.
<i><b>Note: </b>If InDesign fails after attempting to open a document using automatically recovered changes, the automatically </i>
<i>recovered data may be corrupted.</i>
<b>3</b> Do one of the following:
• To save the recovered data, choose File >Save As, specify a location and a new filename, and click Save. The Save
As command keeps the recovered version that includes the automatically recovered data; the word [Recovered]
disappears from the title bar.
• To discard automatically recovered changes and use the most recent version of the document that was explicitly
saved to disk before the failure occurred, close the file without saving it and open the file on disk, or choose File >
Revert.
<b>Change the location of recovered documents</b>
</div>
<span class='text_page_counter'>(97)</span><div class='page_container' data-page=97>
<b>3</b> Specify the new location for the recovered document, click Select (Windows) or Choose (Mac OS), and then
click OK.
<b>Undo mistakes</b>
If necessary, you can cancel a lengthy operation before it’s completed, undo recent changes, or revert to a previously
saved version. You can undo or redo up to several hundred of the most recent actions (the amount is limited by the
amount of RAM available and the kinds of actions you performed). The series of actions is discarded when you choose
the Save As command, close a document, or when you exit from the program.
? Do one of the following:
• To undo the most recent change, choose Edit > Undo <i>[action]</i>. (You cannot undo certain actions, such as
scrolling.)
• To redo an action, choose Edit > Redo <i>[action]</i>.
• To undo all changes made since the last time you saved the project, choose File > Revert (InDesign) or File >
Revert Content (InCopy).
• To close a dialog box without applying changes, click Cancel.
<b>PageMaker menu commands</b>
Browse through these tables to learn where Adobe PageMaker commands are found in Adobe InDesign CS6.
<b>PageMaker File menu commands</b>
<b>PageMaker command</b> <b>InDesign equivalent</b> <b>Additional information</b>
File > New File > New > Document
File > Open File > Open
File > Recent Publications File > Open Recent (Windows®)
File > Close File > Close
File > Save File > Save There is no preference in InDesign to Save
Smaller or Save Faster. Use Save to perform a
fast save and Save Asto compact a document
to the smallest possible size.
File > Save As File > Save As See note above.
File > Revert File > Revert InDesign does not revert to “mini-saved”
versions of a document as PageMaker does;
instead, InDesign offers unlimited levels of
Undo.
File > Place File > Place
File > Acquire No equivalent Scan images using the software that came
with your scanner, and then place the images
in InDesign.
</div>
<span class='text_page_counter'>(98)</span><div class='page_container' data-page=98>
<b>PageMaker Edit menu commands</b>
File > Document Setup File > Document Setup
File > Printer Styles File > Print Presets
File > Print File > Print
File > Preferences > General Edit > Preferences (Windows) or InDesign >
Preferences (Mac OS)
Equivalent settings can be found in
Composition, Units & Increments, Guides &
Pasteboard, and Display Performance
preferences.
File > Preferences > Online No equivalent You can drag objects from a web browser to
InDesign without configuring a proxy.
File > Preferences > Layout Adjustment Layout > Layout Adjustment You specify layout adjustment options and
enable layout adjustment at the same time.
Settings in InDesign match those in
PageMaker almost exactly. Ruler guides follow
their associated column or margin guides by
default. To change this, deselect Allow Ruler
Guides To Move.
File > Preferences > Trapping Window > Output > Trap Presets To specify trapping preferences, create a new
Trap preset.
File > Exit (Windows) or File > Quit (Mac OS) File > Exit (Windows) or InDesign > Quit
InDesign (Mac OS)
<b>PageMaker command</b> <b>InDesign equivalent</b> <b>Additional information</b>
Edit > Undo Edit > Undo InDesign allows unlimited levels of Undo.
Edit > Cut Edit > Cut
Edit > Copy Edit > Copy
Edit > Paste Edit > Paste InDesign does not support OLE; however, you
can set similar options in the Links panel.
Edit > Clear Edit > Clear
Edit > Select All Edit > Select All
Edit > Deselect All Edit > Deselect All
Edit > Editions (Mac OS) No equivalent InDesign does not support Publish/Subscribe;
however, you can set similar options in the
Links panel.
Edit > Paste Multiple Edit > Step And Repeat
Edit > Paste Special Edit > Paste Without Formatting
Edit > Insert Object (Windows) File > Place
Edit > Edit Story Edit > Edit In Story Editor
Edit > Edit Original Edit > Edit Original You can also choose Edit Original in the Links
panel menu.
</div>
<span class='text_page_counter'>(99)</span><div class='page_container' data-page=99>
<b>PageMaker Layout menu commands</b>
<b>PageMaker Type menu commands</b>
Edit > Show Clipboard (Mac OS) No equivalent
Edit > Ruby/Tatechuyoko/Emphasis
Marks/Composite Glyphs
Ruby Placement and Spacing, Tate-chu-yoko,
and Kenten (for emphasis marks) appear on
the Character panel menu. Choose Type >
Glyphs to display the Glyphs panel.
Edit > Vertical Text Type > Writing Direction > Horizontal or
Vertical
You can use the Vertical Type tool in the
toolbox.
<b>PageMaker command</b> <b>InDesign equivalent</b> <b>Additional information</b>
Layout > Go To Page Layout > Go To Page You can also double-click a page icon in the
Pages panel to jump to that page.
Layout > Insert Pages Layout > Pages > Insert Pages
Layout > Remove Pages Layout > Pages > Delete Pages
Layout > Sort Pages Window > Pages Click and drag pages in the Pages panel to sort
them.
Layout > Go Back Layout > Go Back
Layout > Go Forward Layout > Go Forward
Layout > Column Guides Layout > Margins And Columns
Layout > Copy Master Guides No equivalent InDesign master guides from any given
master are always copied to pages that use
that master.
Layout > Autoflow
Press Shift when a loaded text icon is
displayed.
You can flow text manually, automatically
(with autoflow), or semi-automatically.
<b>PageMaker command</b> <b>InDesign equivalent</b> <b>Additional information</b>
Type > Font Type > Font
Type > Size Type > Size
Type > Leading Type > Character or Control panel in
Character mode (Window > Control)
InDesign uses baseline leading by default, as
opposed to proportional leading, which is
PageMaker’s default.
Type > Type Style Type > Character or Control panel in
Character mode (Window > Control)
InDesign displays the type styles available for
the selected font. You can also use Quick
Apply.
Type > Expert Kerning Type > Character or Control panel in
Character mode (Window > Control)
Expert kerning in PageMaker is similar to
optical kerning in InDesign.
Type > Horizontal Scale Control panel in Character mode (Window >
Control)
Type > Character Type > Character
</div>
<span class='text_page_counter'>(100)</span><div class='page_container' data-page=100>
<b>PageMaker Element menu commands</b>
Type > Paragraph Type > Paragraph
Type > Indents/Tabs Type > Tabs
Type > Hyphenation Type > Paragraph Choose Hyphenation from the Paragraph
panel menu.
Type > Alignment Type > Paragraph or Control panel in
Paragraph mode (Window > Control)
Type > Style Type > Paragraph Styles or Type > Character
Styles
InDesign supports both paragraph and
character styles.
Type > Define Styles Type > Paragraph Styles or Type > Character
Styles
Choose New Paragraph Style in the Paragraph
Styles panel to create a paragraph style.
Choose New Character Style in the Character
Styles panel to create a character style.
<b>PageMaker command</b> <b>InDesign equivalent</b> <b>Additional information</b>
Element > Fill Window > Color > Swatches or Window >
Color > Color
InDesign does not support patterned fills. The
Swatches panel in InDesign is equivalent to
the Colors palette in PageMaker.
Element > Stroke Window > Stroke Choose a stroke style in the Stroke panel or
define a custom stroke style.
Element > Fill And Stroke Window > Color > Swatches, Window >
Stroke, and Window > Output > Attributes
Create tints using the Swatches panel. Specify
overprinting in the Attributes panel.
Element > Frame > Attach Content No equivalent InDesign automatically creates a frame for
text files or graphics you import. To paste
content into an existing frame, select the
frame, and then place or paste the content
into it.
Element > Frame > Frame Options Object > Text Frame Options (text frames
only) or Object > Fitting
For text frames, specify columns, vertical
alignment, and inset spacing in the Text
Frame Options dialog box. Set horizontal
alignment in the Paragraph panel (Type >
Paragraph). For graphics and text frames, use
subcommands on the Object > Fitting menu
to fit content to a frame (or vice versa).
Element > Frame > Change To Frame Object > Content > <i>[content type]</i>
Element > Frame > Next Frame View > Extras > Show Text Threads
Element > Frame > Previous Frame View > Extras > Show Text Threads
Element > Frame > Remove From Threads Double-click the in port or out port to break a
thread.
Element > Frame > Delete Content Select content in the frame, and then press
Delete.
Select text with the Type tool. Select graphics
with the Direct Selection tool.
Element > Arrange Object > Arrange
Element > Align Objects (Windows) or
Element > Align (Mac OS)
Window > Object & Layout > Align
</div>
<span class='text_page_counter'>(101)</span><div class='page_container' data-page=101>
<b>PageMaker Utilities menu commands</b>
Element > Group Object > Group
Element > Ungroup Object > Ungroup
Element > Lock Position Object > Lock Position
Element > Unlock Object > Unlock Position
Element > Mask Object > Clipping Path You can also mask a graphic by creating the
masking shape, copying the image you want
to mask, and then pasting it into the shape
(Edit > Paste Into), or by adjusting its graphics
frame.
Element > Unmask Object > Clipping Path See note above.
Element > Image > Image Control No equivalent Use the Edit Original command to change
image control settings in the original
application.
Element > Image > CMS Source Object > Image Color Settings
Element > Image > Photoshop Effects Object > Effects
Element > Polygon Settings Double-click the Polygon tool in the Toolbox
Element > Rounded Corners Object > Corner Options
Element > Link Info Window > Links Choose Link Information on the Links panel
menu.
Element > Link Options Type Preferences or Window > Links In File Handling Preferences, select or deselect
Create Links When Placing Text And
Spreadsheet Files. Or, on the Links panel
menu, choose Unlink.
Element > Non-Printing Window > Output > Attributes
Element > Remove Transformation No equivalent
<b>PageMaker command</b> <b>InDesign equivalent</b> <b>Additional information</b>
Utilities > Plug-ins Help > Configure Plug-ins (Windows) or
InDesign > Configure Plug-ins (Mac OS)
Utilities > Find Edit > Find/Change You can perform Find/Change operations in
Layout view or Story Editor.
Utilities > Find Next Edit > Find Next See note above.
Utilities > Change Edit > Find/Change See note above.
Utilities > Spelling Edit > Spelling > Check Spelling You can check spelling in Layout view or Story
Editor.
Utilities > Book File > New > Book You add, delete, and sort documents in a book
using the Book panel.
Utilities > Index Entry Window > Type & Tables > Index To add an index entry, click the New button in
the Index panel.
</div>
<span class='text_page_counter'>(102)</span><div class='page_container' data-page=102>
<b>PageMaker View menu commands</b>
Utilities > Show Index Index panel in Reference mode (Window >
Type & Tables > Index)
Utilities > Create Index Window > Type & Tables > Index Choose Generate Index on the Index panel
menu.
Utilities > Create TOC Layout > Table Of Contents
Utilities > Define Colors Window > Color > Swatches Choose New Color Swatch in the Swatches
panel menu.
<b>PageMaker command</b> <b>InDesign equivalent</b> <b>Additional information</b>
View > Display Master Items Choose Hide/Show Master Items from the
Pages panel menu
View > Display Non-Printing Items
Select Normal View Mode in the Toolbox
to view nonprinting items. To hide
nonprinting items, select Preview Mode .
You can also create a layer for objects you do
not want to print, and then show or hide that
layer when you print or export.
View > Zoom In View > Zoom In
View > Zoom Out View > Zoom Out
View > Actual Size View > Actual Size
View > Fit In Window View > Fit Page In Window or View > Fit
Spread In Window
View > Entire Pasteboard View > Entire Pasteboard
View > Zoom To Choose a magnification level from the Zoom
menu at the bottom of the document
window.
View > Hide/Show Rulers View > Hide/Show Rulers
View > Snap To Rulers No equivalent
View > Zero Lock Right-click (Windows) or Control-click
(Mac OS) the zero point, and then choose Lock
Zero Point from the context menu that
appears.
View > Hide/Show Guides View > Grids & Guides > Hide/Show Guides
View > Snap To Guides View > Grids & Guides > Snap To Guides
View > Lock Guides View > Grids & Guides > Lock Guides And
View > Grids & Guides > Lock Column Guides
</div>
<span class='text_page_counter'>(103)</span><div class='page_container' data-page=103>
<b>PageMaker Window menu commands</b>
<b>Assignment packages</b>
<b>Create and send packages (InDesign)</b>
Under ideal circumstances, all InDesign and InCopy users on the team have access to a server where assignment files
are stored. However, if one or more users don’t have access to a common server, you can create and distribute
compressed assignment packages. After working on the assignment, the InCopy user repackages the assignment and
returns it to be integrated into the InDesign document. Package files created in InDesign include the .icap extension.
The return package files created in InCopy include the .idap extension.
View > Clear Ruler Guides Using InDesign keyboard shortcuts, Press
Ctrl+Alt+G (Windows) or
Command+Option+G (Mac OS) to select all
guides on the current spread, and then press
Delete.
View > Send Guides To Back Edit > Preferences > Guides & Pasteboard
(Windows) or InDesign > Preferences >
Guides & Pasteboard (Mac OS)
Select the Guides In Back option.
View > Hide/Show Scroll Bars No equivalent
<b>PageMaker command</b> <b>InDesign equivalent</b> <b>Additional information</b>
Window > Arrange Icons (Windows) No equivalent
Window > Tile Window > Arrange > Tile
Window > Cascade Window > Arrange > Cascade
Window > Hide/Show Tools Window > Tools
Window > Hide/Show Control Palette Window > Control
Window > Hide/Show Colors Window > Color > Swatches or Window >
Color > Color
Window > Hide/Show Styles Window > Styles > Paragraph Styles or
Character Styles
Window > Hide/Show Layers Window > Layers
Window > Hide/Show Master Pages Window > Pages
Window > Hide/Show Hyperlinks Window > Interactive > Hyperlinks
Window > Plug-in Palettes No equivalent Plug-ins appear as added options in InDesign
menus or panels, or in InDesign dialog boxes.
Window > <i>[name of open document]</i> Window > <i>[name of open document]</i>
</div>
<span class='text_page_counter'>(104)</span><div class='page_container' data-page=104>
There are two commands for packaging files: Package For InCopy and Package And Email. Use Package For InCopy to
create a compressed package that you can distribute manually; use Package And Email to create a compressed package
that is attached automatically to an e-mail message.
<i><b>Note: </b>Do not confuse an assignment package with the File > Package command in InDesign that lets you bundle and send </i>
<i>a document and its assets to a printer.</i>
<b>Create a package for manual distribution</b>
<b>1</b> Create an assignment and add the content you want to include in the package.
Only content that is checked in can be included in the packaged assignment. If any content is checked out, you’re
prompted to check in content.
<b>2</b> In the Assignments panel, select the assignment and choose Package For InCopy from the panel menu.
<b>3</b> Specify a name and location for the package file, and click Save.
You can attach the package file to an e-mail message, upload it to an FTP server, or copy it to a disk or other external
media.
<i><b>Note: </b>Choosing Edit > Undo after you create a package cancels the package and unlocks the items in the assignment, but </i>
<i>it doesn’t delete the package file from your computer or unsend the e-mail.</i>
<b>Create a package for e-mail (InDesign)</b>
<b>1</b> Create an assignment and add the content you want to include in the package.
Only content that is checked in is included in the packaged assignment. If any content is checked out, you’re
prompted to check in content.
<b>2</b> In the Assignments panel, select the assignment and choose Package For InCopy And Email from the panel menu.
A compressed assignment package is created and attached to an e-mail message of your default e-mail application.
<i><b>Note: </b>If you want to use a different e-mail application, change the default e-mail application. See your system </i>
<i>documentation for details.</i>
<b>3</b> Edit the e-mail message by adding a recipient and providing any instructions. Send the message.
All items in the assignment are checked out to the assigned user. However, the contents of the package itself aren’t
locked, so anyone can open the package and edit them.
<b>Cancel a package</b>
In some cases, the package you send isn’t returned. For example, the message may have gotten lost, or the recipient may
no longer work on the project. In such a situation, you can cancel a package.
<b>1</b> In the Assignments panel, select the packaged assignment, and choose Cancel Package from the panel menu.
<b>2</b> Click OK to cancel the package.
Canceling a package doesn’t remove the package file from your computer.
When a package is cancelled, the package’s contents are available for editing. Be aware that if someone returns a package
that has been cancelled, conflicts may occur.
<b>Update a package</b>
</div>
<span class='text_page_counter'>(105)</span><div class='page_container' data-page=105>
<b>2</b> Select the assignment in the Assignments panel, and do one of the following:
• Choose Update Package from the Assignments panel menu. Specify the name and location of the file. Make the
updated package available to users by placing it on a shared server or by e-mail. Remember to notify InCopy
users that the package has been updated.
• Choose Update Package And Email from the Assignments panel menu, and then send the message.
When InCopy users open the updated package, only new content is added automatically to the assignment; InCopy
users can decide whether to overwrite existing content, allowing them to preserve previous edits.
<b>Receive packages (InCopy)</b>
You may receive a package from an InDesign user who created the package or from an InCopy user who forwarded the
package to you. When you open an assignment package, the package is decompressed, and the contents are copied to
a new subfolder in an InCopy Assignments folder.
<b>Open a package (InCopy)</b>
? To open an InCopy package (*.icap or *.incp), do any of the following:
• Launch the package using the e-mail application. For example, double-click the attachment file.
• Use Explorer or Finder to open the file. For example, double-click the file or drag it to the InCopy application
icon.
• In InCopy, choose File > Open, and double-click the packaged assignment file.
• In InCopy, choose Open Package from the Assignments panel menu, and then double-click the package file.
You can now edit the stories in the package. When you begin editing a story, you’re prompted to check out the contents
of the frame. When you’ve finished editing, save all content and return or forward the package.
<b>Return or forward a package (InCopy)</b>
After you open and edit a package, you can send it to another InCopy user or you can return it to the InDesign user
who created the package. Package files created for other InCopy users include the .icap extension; return package files
created for InDesign users include the .idap extension.
<b>1</b> Edit and check in the content you want to include in the package.
<b>2</b> From the Assignments panel menu, choose one of the following:
<b>Forward For InCopy </b>Create a package for another InCopy user. Specify the name and location of the package file,
and then make it available to the InCopy user.
<b>Forward For InCopy And Email </b>Create and send a package for another InCopy user via e-mail. The package appears
as an attachment in a new message in your default e-mail application. Specify the recipient, provide instructions,
and send the e-mail message.
<b>Return For InDesign </b>Create a package to return to the InDesign user.
<b>Return For InDesign And Email </b>Create and return a package to the InDesign user by e-mail. The package appears as
an attachment in a new message in your default e-mail application. Specify the recipient, provide instructions, and
send the e-mail message.
<b>Receive return packages (InDesign)</b>
? To open an InDesign package (*.idap or *.indp), do any of the following:
</div>
<span class='text_page_counter'>(106)</span><div class='page_container' data-page=106>
• Use Explorer or Finder to open the file. For example, double-click the file or drag it to the InDesign application
icon.
• In InDesign, choose File > Open, and double-click the package file.
• In InDesign, choose Open Package from the Assignments panel menu, and then double-click the package file.
You’re prompted to update all links when opening the package. If a story has been modified since the assignment was
packaged, you can determine whether to update or unlink the content in the InDesign file. When the stories in the files
are returned and checked in, you can check out and edit the content.
<b>Adjust your workflow</b>
<b>Move content between assignments (InDesign)</b>
InDesign users can move content between existing assignments as well as from the Unassigned InCopy Content section
of the Assignments panel. You can also create a new assignment and move content to it.
<b>1</b> Save the InDesign document.
<b>2</b> In the Assignments panel, click the arrow to the left of the assignment name to display the contents of the
assignment.
<b>3</b> Select an item in an assignment.
<b>4</b> Do one of the following:
• Drag the content from one assignment to another.
• To move content to an existing assignment, choose Add To Assignment from the Assignments panel menu, and
then select the desired assignment.
• To create a new assignment as you move content, from the Assignments panel menu, choose Add To
Assignment > New, and then specify options in the New Assignment dialog box.
<b>5</b> Choose Update All Assignments from the Assignments panel menu.
<i>If the assignment lists are short, you might prefer dragging content items to and from assignments and the Unassigned </i>
<i>InCopy Content section.</i>
<b>Delete assignments (InDesign)</b>
? In the Assignments panel, select one or more assignments and choose Delete Assignment in the panel menu.
Deleting assignments accomplishes the following:
• Removes the assignment data from the document.
• Deletes the assignment file from the file system.
• Removes the assignment name from the list.
• Moves any InCopy content to the Unassigned InCopy Content section in the Assignments panel.
</div>
<span class='text_page_counter'>(107)</span><div class='page_container' data-page=107>
<b>Relink missing assignment files (InDesign)</b>
If you move or delete an assignment file from disk, and then open the InDesign document from which it was created,
InDesign won’t know where the assignment file is located. You need to re-create the assignment file so InDesign can
find it.
<b>Re-create the assignment file in the original location</b>
? In the Assignments panel, do one of the following:
• Select the missing assignment (it will still be listed in the panel) and choose Update Selected Assignments from
the panel menu.
• Choose Update All Assignments from the panel menu.
<b>Change the assignment location</b>
? To re-create the assignment file in a new location, do one of the following in the Assignments panel:
• Select the assignment and choose Change Assignment Location from the panel menu. Specify a location and
name for the new file.
• Double-click the assignment name. In the Assignment Options dialog box, click Change and specify a location
and name for the new file.
<b>Correct mistakes</b>
If you make a mistake, you can discard changes made since the last Save command and restore the content from the file
system.
Because InDesign automatically saves every editable InCopy content file when you save the InDesign document, the
Cancel Checkout command restores only versions since the last time the document was changed.
? Do one of the following:
• To undo the most recent change, choose Edit > Undo <i>[action].</i>
• To undo all changes made since the last time you saved the document, choose File > Revert Content.
• To undo changes since the last saved version and remove the lock file, select the content in the Assignments panel
and choose Cancel Check Out from the panel menu. This action makes the content read-only and available for
others to check out.
<b>Overriding locked files (InDesign)</b>
Users might not immediately realize how their actions affect others in the workflow, and might accidentally create
situations where conflicts exist between content status and ownership. If necessary, the InDesign user can resolve
conflicts by unlinking a locked file checked out to a different user and taking control over the file. Unlinking a file stores
the content in the InDesign document, but the content is no longer shared with InCopy.
<b>Unlink content files (InDesign)</b>
</div>
<span class='text_page_counter'>(108)</span><div class='page_container' data-page=108>
<i><b>Note: </b>Unlinking your own checked-out file removes it from the workflow and deletes the lock file from disk. You can </i>
<i>re-export the content and overwrite the file name without conflict.</i>
? To unlink an InCopy content file, select the file (.icml or .incx extension) in the Links panel and choose Unlink from
the panel menu. Unlinking embeds the content into the document and removes the link to the InCopy file on disk.
To relink the file, choose Edit > Undo Unlink.
<i>You can also unlink by deleting a frame, or using the InDesign Links panel to relink a content file to another file. You </i>
<i>can also select the story in the Assignments panel and drag it to the Trash icon.</i>
<b>Placing InCopy files in InDesign documents</b>
Although a typical workflow begins in InDesign, where the basic layout and text and graphics placeholders are defined
and exported to InCopy, a different workflow can start with a stand-alone InCopy content file (.icml or .incx) that you
place in InDesign using the File > Place command.
Consider the following dependencies when you place InCopy content files in an InDesign document:
<b>Styles </b>If the InCopy text file has styles applied, they are added to the InDesign list of styles for the document. In the
event of a style-name conflict, InDesign overwrites the imported style with its existing style.
<b>Layout </b>You can create the basic layout geometry for the content in InDesign, and then create or import the text and
styles from a word-processing application. (Text files placed within InCopy are embedded in the InCopy document and
are not linked to any external file.)
<b>Placing/Duplicating </b>If you place an InCopy content file more than once, each instance of the content appears in the
InDesign Links panel, but they are all managed as one content file. The same is true for any exact copies of a content
file (by any means of duplication).
<i><b>Note: </b>If you copy and paste some, but not all, of the text in a managed InCopy content file, the result is a new content file </i>
<i>that is not connected to the original and has no link to any external file (InCopy or otherwise). The original and the pasted </i>
<i>portions can be edited independently of each other.</i>
<b>Updates/Management </b>Once multiple instances of a managed content file are present in an InDesign document, they
behave as if they were open in two applications. For example, checking out one instance of the content file locks all other
instances so that you can edit only the checked-out instance. In this case, you would use the appropriate Update
command to refresh the other (open) instances of the content.
<b>Work with managed files</b>
<b>Open shared content</b>
Only InCopy users can open assignment files (.inca). If an InCopy user opens an InDesign file that contains
assignments, the user will have access to all the managed content, regardless of assignments.
? Do one of the following.
• In InCopy, choose File > Open, select an assignment file (.icma or .inca), and click Open.
</div>
<span class='text_page_counter'>(109)</span><div class='page_container' data-page=109>
The assignment names and their contents appear in the Assignments panel.
<b>Check out content</b>
When you check out an item, a hidden lock file (.idlk) is placed on the file system. Once the content is checked out, you
have exclusive control over its content, and others are locked out from making changes. You can check out InCopy
content only; you cannot check out InDesign documents with layout information.
If you attempt to close an InDesign document containing one or more InCopy content files that are checked out to you,
an alert message appears, prompting you to check in all content. If you close the document without checking in the
content files, they will still be checked out to you the next time you open the InDesign document. Saving the InDesign
document automatically saves every editable InCopy content file.
<b>Check out content (InDesign)</b>
? Do one of the following:
• In the layout, select the text or graphics frames to edit and choose Edit > InCopy > Check Out.
• In the Assignments panel, select the files and choose Check Out from the panel menu.
When you check out available content in InDesign, you see the Editing icon on the InDesign frame. In InCopy, the
In Use icon appears on the InCopy frame and in the Assignments panel if the assignment files are stored on a local
server.
<b>Check out content (InCopy)</b>
<b>1</b> Do one of the following:
• If the content you want is part of an assignment, choose File > Open and select the assignment file (.icma or
.inca).
• If the content you want was exported as individual files, choose File > Open and select the InCopy file (.icml or
.incx). To see the layout so you can do copyfitting, select the InDesign document.
<b>2</b> Do one of the following:
• To check out a single InCopy content file, choose File > Check Out.
• To check out all content in an assignment at once, select the assignment in the Assignments panel, and choose
Check Out from the panel menu.
• To check out individual items in an assignment, open the assignments list in the Assignments panel, select an
item or multiple items, and choose Check Out from the panel menu.
The Editing icon appears next to the item or items in the Assignments panel, indicating that the content is
checked out to you for your exclusive use.
<b>3</b> If prompted to update the content with changes, click OK.
When you check out available content in InCopy, you see the Editing icon on the InCopy frame, and in the
Assignments panel. In InDesign, the In Use icon appears on the InDesign frame.
<b>Open managed files (InCopy)</b>
</div>
<span class='text_page_counter'>(110)</span><div class='page_container' data-page=110>
<b>Update assignment files (InDesign)</b>
You can save changes to assignments manually or when you close the current document. Updating an assignment file
is the only way to make layout changes available to InCopy users.
? Do one of the following:
• To update selected assignments, select them in the Assignments panel and choose Update Selected Assignments
from the Assignments panel menu.
• To update all out-of-date assignments in the current document, choose Update Out-Of-Date Assignments from
the Assignments panel menu. Only assignments that are out of date are updated.
• To update all assignments in the current document, choose Update All Assignments from the Assignments panel
menu.
<i><b>Note: </b>If an InCopy user has an assignment open when you update the assignment, the Out Of Date icon </i> <i> appears next </i>
<i>to the assignment in the InCopy Assignments panel.</i>
<b>Update content</b>
To make sure that you’re always working on the most up-to-date content, be sure to watch for Out Of Date icons in the
Assignments panel, and then update content accordingly. Updating an InCopy assignment file and its contents or
updating individual content files copies data from the latest file system copy so that the version displayed on your
computer matches the one on the file system. Updating does not require checking in or out and does not give you
editing rights. However, updating can cause problems if another user has deleted your lock.
<i><b>Note: </b>Updating content does not update content in assignment packages that have not been returned.</i>
A typical updating workflow is as follows:
<b>1</b> The InCopy user opens an assignment file or checks out an individual content file and edits the content.
<b>2</b> The InCopy user saves the content file, which updates the copy on the file system, and continues working.
<b>3</b> The InDesign user sees the Out Of Date icon in both the Assignments panel and the Links panel next to the
selection, and the In Use and Text Content Out Of Date icon or Graphics Content Out Of Date icon on
the associated frame.
<i>Assignments panel with In Use and Out Of Date icons (left) and Layout with out-of-date content (right)</i>
<b>4</b> The InDesign user updates the content.
</div>
<span class='text_page_counter'>(111)</span><div class='page_container' data-page=111>
<b>2</b> Click Yes when prompted to update the document with the modified content on the file system.
<b>3</b> Do one of the following:
• To let InDesign update the links, click Fix Links Automatically.
• To fix links manually, click Don’t Fix, and then, in the Links panel, select the file to update and choose Update
Link from the panel menu.
<b>Update content while working (InDesign)</b>
? Do one of the following:
• Select the text or graphics frames in the layout and choose Edit > InCopy > Update Content.
• Select the text or graphics frames in the Links panel, and click the Update Link button or choose Update
Link from the Assignments panel menu.
<b>Update content while working (InCopy)</b>
? Do one of the following:
• Click an insertion point in the text frame to select it, and then choose File > Update Content.
• Select the content in the Assignments panel, and then click the Update Content button or choose Update
Content from the Assignments panel menu.
You can also update content using the Links panel.
<b>Accidentally updating your work</b>
In most cases, the update commands are disabled for content you have checked out, because that content would always
be up to date. However, an undesirable situation can occur if a different user deletes the lock on checked-out content
(by dragging the lock file [.idlk] to the Recycle Bin [Windows] or Trash [Mac OS]), and modifies the content. In this
case, the update commands can become enabled even while the content is checked out to you, essentially allowing two
people to edit the content at the same time. Updating the content results in lost work. For best results, do not delete the
lock files.
<b>Update the InDesign layout</b>
InDesign users can modify the layout (for example, change the size or location of the text frames of a story) and save
the changes while InCopy users are modifying the text of these text frames. In a shared server workflow, the way InCopy
users are notified about layout changes depends on whether they have opened an assignment file or have checked out
individual content files and also opened the linked InDesign file.
Consider the following:
• If an InDesign user changes the layout of frames in an assignment, the user must update the assignment to make the
design changes available to InCopy users. InDesign does not automatically update assignment files when the
document is saved.
</div>
<span class='text_page_counter'>(112)</span><div class='page_container' data-page=112>
Updating the layout in InCopy is useful for copyfitting tasks, because the latest appearance and line breaks are visible
in Layout and Galley views.
? Do one of the following:
• If you have an assignment file open and the Assignments panel shows the Out Of Date icon next to the
assignment name, click the Update Design button , or choose File > Update Design. You cannot undo this
command.
• If you are not working with assignment files and you have more than one InDesign document open, select the
one you want to make active, and choose File > Update Design.
<b>Check in content</b>
When you check in a managed content file, you save it to a shared location on a file system where it can be checked out
by others for editing or other changes. Exporting a text or graphics frame from InDesign also checks it in automatically.
Although a checked-in file is available for editing, it is not actually editable until it is checked out (unless you edit the
content in stand-alone mode in InCopy). Checking in content relinquishes editing control, but does not close the file.
The content remains open on your screen, but in a read-only state.
The LiveEdit Workflow plug-ins do not create multiple file versions. Instead, files are overwritten when updated in
either InCopy or InDesign.
If you are working on an assignment package, return or forward the assignment package after checking it in.
<b>Check in managed content (InDesign)</b>
? Do one of the following:
• Select the content in the layout and choose Edit > InCopy > Check In.
• In the Assignments panel, select the content and choose Check In from the panel menu.
<b>Check in managed content (InCopy)</b>
? Do one of the following:
• Select the content in Layout view and choose File > Check In.
• In the Assignments panel, select the content and choose Check In from the panel menu.
<i><b>Note: </b>You can undo the most recent changes before you check in content.</i>
<i>When you check in a file, the Available icon appears on the text or graphics frame in the InDesign layout, in the </i>
<i>InCopy Layout view, in the Assignments panel, and in the story bar (InCopy).</i>
<b>Save changes (InDesign)</b>
As you work on content you have checked out, you can save your changes and update the file-system copy.
? Do one of the following:
• To save the selected content without saving changes to the InDesign document or any of its linked files, select the
content in the layout and choose Edit > InCopy > Save Content.
</div>
<span class='text_page_counter'>(113)</span><div class='page_container' data-page=113>
• To save the InDesign document under a new name with links to any existing InCopy files, choose File > Save As.
This action causes the assignments in the InDesign file to appear as missing until they are updated.
• To save a copy of the currently active document, choose File > Save A Copy. You can choose to give the copy a
new name and location with links to any existing InCopy files.
<b>Save changes (InCopy)</b>
? Do one of the following:
• To save the InCopy file under the same name and location on the file system, choose File > Save Content. The
file is still checked out to you.
• To save the InCopy content file under a new name, choose File > Save Content As. The newly created content file
is not managed in the workflow. The Save Content As command is available only if you have opened the InCopy
content file (.icml or .incx) directly.
• To save a copy of the currently active InCopy content file, choose File > Save Content Copy. You can choose to
give the copy a new name and location. The saved copy is not managed in the workflow. The Save Content Copy
command is available only if you have opened the InCopy content file (.icml or .incx) directly.
• To save all currently open and checked-out InCopy content files, choose File > Save All Content. This saves all
files to their current locations. The Save All Content command is available only if you have opened an assignment
or InDesign file.
<b>View the workspace</b>
<b>Zoom in and out</b>
Use the Zoom tool or the Zoom commands to magnify the size of documents.
<b>Zoom in or out</b>
• To zoom in, select the Zoom tool and click the area you want to magnify. Each click magnifies the view to the
next preset percentage, centering the display around the point you click. At maximum magnification, the center of
the Zoom tool appears blank. To zoom out, hold down Alt (Windows) or Option (Mac OS) and click the area you
want to reduce. Each click reduces the view.
• To magnify to the next preset percentage, activate the window you want to view and choose View > Zoom In. To
reduce the view to the previous preset percentage, choose View > Zoom Out.
• To set a specific magnification level, type or choose a level in the Zoom Level box in the application bar.
<i>In Mac OS, you can display the zoom percentage in the status bar by hiding the application bar (Window > Application </i>
<i>Bar). In Windows, you cannot hide the application bar.</i>
• To zoom in or out, press Alt (Windows) or Option (Mac OS) while using the mouse scroll wheel or sensor.
• To magnify by dragging, select the Zoom tool and drag around the area you want to magnify.
<b>Use power zoom</b>
</div>
<span class='text_page_counter'>(114)</span><div class='page_container' data-page=114>
You must be in Layout view to use power zoom.
<b>1</b> Click the Hand tool .
To activate the grabber hand, you can also hold down the spacebar or hold down Alt/Option while in text mode.
<b>2</b> With the grabber hand active, click and hold down the mouse button.
The document zooms out so that you can see more of the spread. A red box indicates the view area.
<b>3</b> With the mouse button still held down, drag the red box to scroll through the document pages. Press arrow keys or
use the mouse scroll wheel to change the size of the red box.
<b>4</b> Release the mouse button to zoom in on the new area of the document.
The document window returns to its original zoom percentage or to the size of the red box.
<b>Zoom to Actual Size</b>
• Double-click the Zoom tool.
• Choose View > Actual Size.
• Type or choose a magnification level of 100 in the Zoom Level box in the application bar.
<b>Adjust the view</b>
Focus on the desired area of your document by fitting pages and spreads within the active window and by scrolling the
view.
<b>Fit the page, spread, or pasteboard within the active window</b>
• Choose View > Fit Page In Window.
• Choose View > Fit Spread In Window.
• Choose View > Entire Pasteboard.
<b>Scroll the view</b>
You can easily adjust the degree to which pages or objects are centered in the document window. These techniques are
also useful for navigating between pages.
? Do any of the following:
• Select the Hand tool from the Tools panel, and then click and drag in the document window. Holding down
Alt (Windows) or Option (Mac OS) and pressing the spacebar temporarily activates the Hand tool.
• Click the horizontal or vertical scroll bars or drag the scroll box.
• Press Page Up or Page Down.
</div>
<span class='text_page_counter'>(115)</span><div class='page_container' data-page=115>
<b>Turn pages</b>
InDesign makes it easy to jump from page to page in a document. For example, just as most web browsers provide Back
and Forward buttons to navigate through pages you’ve visited, InDesign keeps track of the order in which you’ve viewed
pages in a document.
? Do any of the following:
• To move through pages in the order in which you viewed them during the current session, choose Layout >Go
Back or Go Forward.
• To go to the next or previous page, click the Next Page button or Previous Page button at the bottom of
the document window, or choose Layout > Next Page or Previous Page.
<i><b>Note: </b>Page navigation controls are sensitive to R or L binding. If the document is read from right to left, for example, </i>
<i>becomes the Next Page button and becomes the Previous Page button.</i>
• To go to the first or last page, click the First Spread button or Last Spread button at the lower left of
the document window, or choose Layout > First Page or Last Page.
• To go to a specific page, choose Layout > Go To Page, specify the page number, and click OK. Or, click the
downward-facing arrow at the right of the page box, and then choose a page.
<i>Choose page from page box to go to specific page</i>
• To go to a master page, click in the page box at the lower left of the document window. Type the first few letters
of the master page name, and press Enter (Windows) or Return (Mac OS). Or, in the Pages panel, double-click a
master page icon.
<b>Work with additional windows</b>
You can open additional windows for the same document or for other InDesign documents. With additional windows,
you can compare different spreads simultaneously, especially spreads that aren’t adjacent. You can also display different
magnifications of the same page, so that you can work closely on details while watching how the changes affect the
overall layout. In addition, you can display a master page in one window, and pages based on it in other windows, to
see how editing the master page affects various parts of the document.
When you reopen the document, only the last-used window appears.
• To create a new window for the same document, choose Window > Arrange > New Window.
• To cascade or tile windows, choose Window > Arrange > Cascade to arrange all windows into a stack, with each
window offset slightly. Or, choose Window > Arrange > Tile to display all windows equally without overlapping.
• To activate a window, click the window tab or title bar. Or, choose the name of the view in the Window menu.
Multiple windows for a document are numbered in the order they were created.
• To close all windows for the active document, press Shift+Ctrl+W (Windows) or Shift+Command+W (Mac OS).
• To close all windows for all open documents, press Shift+Ctrl+Alt+W (Windows) or Shift+Command+Option+W
</div>
<span class='text_page_counter'>(116)</span><div class='page_container' data-page=116>
<b>Use anti-aliasing for smoothing edges</b>
Anti-aliasing smooths the jagged edges of type and bitmap images by softening the color transition between edge pixels
and background pixels. Since only the edge pixels change, no detail is lost.
<b>1</b> Choose Edit > Preferences > Display Performance (Windows) or InDesign > Preferences > Display Performance
(Mac OS).
<b>2</b> From the Adjust View Settings menu, choose the view setting for which you want to turn on anti-aliasing.
You can enable or disable anti-aliasing for each of the view settings. For example, you can enable anti-aliasing for
High Quality view and disable it for Fast view.
<b>3</b> Select Enable Anti-aliasing.
<b>Greek type</b>
When display capabilities are insufficient to show text at a small size, InDesign displays the text as a dimmed bar. This
behavior is called <i>greeking</i> type. Any type at or below the specified type size is replaced on-screen with non-letterforms
that act as placeholders.
<b>1</b> Choose Edit > Preferences > Display Performance (Windows) or InDesign > Preferences > Display Performance
(Mac OS).
<b>2</b> From the Adjust View Settings menu, choose the view setting for which you want to change the Greek Type setting.
You can specify different Greek Type values for each of the view settings.
<b>3</b> For Greek Type Below, type a value, and then click OK.
To control whether to greek text and images when you scroll a document, open the Interface section of the Preferences
dialog box, drag the Hand Tool slider to the desired level of performance versus quality, and then click OK.
<b>Calculate values in panels and dialog boxes</b>
You can perform simple math in any numerical edit box. For example, if you want to move a selected object 3 units to
the right using the current measurement units, you don’t have to work out the new horizontal position—simply type
<b>+3</b> after the current value in the Transform panel.
Panels use the measurement system selected in the Preferences dialog box; however, you can specify values in another
measurement instead.
<b>1</b> In a text box that accepts numerical values, do one of the following:
• To replace the entire current value with a mathematical expression, select the entire current value.
• To use the current value as part of a mathematical expression, click before or after the current value.
<b>2</b> Type a simple mathematical expression using a single mathematical operator, such as + (plus), - (minus),
* (multiplication), / (division), or % (percent).
For example, 0p0+3 or 5mm + 4.
<b>3</b> Press Enter or Return to apply the calculation.
</div>
<span class='text_page_counter'>(117)</span><div class='page_container' data-page=117>
<b>Enter values in panels and dialog boxes</b>
Panels and dialog boxes use the measurement units and increments defined in the Edit > Preferences > Units &
Increments (Windows) or InDesign > Preferences > Units & Increments (Mac OS) dialog box. However, you can
specify values using any of the supported measurement units at any time by temporarily overriding the current
preference settings.
? Do any of the following:
• Type a value in the box, and then press Enter or Return.
• Drag the slider.
• Drag the dial.
• Click the arrow buttons in the panel to change the value.
• Click in the box and then use the up or down arrow keys on the keyboard to change the value.
• Select a value from the menu associated with the box.
<i><b>Note: </b>When you make a change using the arrow buttons, arrow keys, or pop-up menus, InDesign applies the change </i>
<i>immediately.</i>
<b>Save documents</b>
<b>Save documents</b>
Saving a document saves the current layout, references to source files, which page is currently displayed, and the zoom
level. Protect your work by saving often. You can save a file as any of the following:
• A regular document.
• A copy of the document, which creates a duplicate of the document under a different name, leaving the original
document active.
• A template, which normally opens as an untitled document. A template can contain settings, text, and graphics that
you preset as a starting point for other documents.
Saving a document also updates the metadata (or file information) that is part of the InDesign document. This
metadata includes a thumbnail preview, fonts used in the document, color swatches, and all metadata in the File Info
dialog box, all of which enable efficient searching. For example, you might want to search for all documents that use
a particular color.
You can view this metadata in Bridge and in the Advanced area of the File Info dialog box. You can control whether
to update the preview when you save by using a preference setting. The other metadata (fonts, colors, and links) are
updated whenever you save a document.
The Save, Save As, and Save a Copy commands store documents in the InDesign file format. For information about
storing documents in other file formats, see the Index.
</div>
<span class='text_page_counter'>(118)</span><div class='page_container' data-page=118>
<i><b>Note: </b>The information entered in the File > File Info dialog box gets updated in the Metadata tab when you export an </i>
<i>EPUB in the following formats:</i>
• Fixed Layout EPUB
• Reflowable EPUB
? Do one of the following:
• To save a document under a new name, choose File > Save As, specify a location and filename, and click Save.
The newly named file becomes the active document. Using the Save As command might reduce the file size.
• To save an existing document under the same name, choose File > Save.
• To save all open documents to their existing locations and filenames, press Ctrl+Alt+Shift+S (Windows) or
Command+Option+Shift+S (Mac OS).
• To save a copy of a document under a new name, choose File > Save a Copy, specify a location and filename, and
click Save. The saved copy does not become the active document.
<i><b>Note: </b>To avoid problems, avoid reserved characters that have special meanings in some operating systems. For example, </i>
<i>avoid filenames with spaces, tabs, or initial periods, or filenames that use these characters: / \ : ; * ? < > , $ %. Similarly, </i>
<i>avoid using characters with accents (such as ü, ñ, or é), even when using a non-English version of InDesign. Problems may </i>
<i>occur if the file is opened in a different platform.</i>
<i>If you have frequently work with several documents open at the same time and want to save them all at once, use a </i>
<i>keyboard shortcut. Choose Edit > Keyboard Shortcuts, choose Views, Navigation from the Product Area menu, and </i>
<i>select Save All in the Commands list. You can then edit or add a shortcut. You can use Quick Apply to specify the Save All </i>
<i>command.</i>
<b>Include previews in saved documents</b>
Thumbnail previews of documents and templates provide easy identification of those files in Adobe Bridge and Adobe
Mini Bridge. A preview is created when you save a document or template. A document preview includes a JPEG image
of only the first spread; a template preview includes a JPEG image of each page in the template. You can control the size
of the preview and the number of pages to suit your needs. For example, Extra Large 1024x1024 enables you to quickly
scan the contents of a page at high-resolution before you open the file.
You can enable the option in Preferences or in the Save As dialog box. Because previews increase both file size and the
time it takes to save the document, you may prefer to enable the option on demand using the Save Asdialog box.
<b>1</b> Do one of the following:
• To include a preview every time you save a document, choose Edit > Preferences > File Handling (Windows) or
InDesign > Preferences > File Handling (Mac OS).
• To include a preview for a specific document, choose File >Save As.
• To include a preview for a specific document, choose File > Save Content As.
<b>2</b> Select Always Save Preview Images With Documents.
<b>3</b> If you are setting the preview using the Preferences dialog box, choose the number of preview pages from the Pages
menu, and choose an option from the Preview Size menu.
</div>
<span class='text_page_counter'>(119)</span><div class='page_container' data-page=119>
<b>Save an InDesign Markup (IDML) document</b>
In some cases you may want to save an InDesign in interchange markup format. It’s especially useful to save in this
format when you open a QuarkXPress or PageMaker publication in InDesign, when you open a document created in
a previous version of InDesign, or when you’re experiencing problems with your document, such as not being able to
delete color swatches.
<b>1</b> Choose File > Save (CS6) or File > Export (CS5).
<b>2</b> From the Save As Type (Windows) or Format (Mac OS) menu, choose InDesign Markup (IDML).
<b>3</b> Click Save.
You can open the saved IDML file in InDesign CS5 and InDesign CS4 but not in any previous version of InDesign.
For information on using IDML for development purposes, see
www.adobe.com/go/learn_id_indesignmarkup_cs4_en.
<b>Save backwards to the previous InDesign version</b>
To open an InDesign CS6 document in InDesign CS5, in InDesign CS6, Save (File > Save) the document to the
InDesign Markup Language (IDML). (The IDML format replaces the Interchange INX format used for saving
backwards in previous versions.)
To open an InDesign CS5 document in InDesign CS4, in InDesign CS5, export (File > Export) the document to the
InDesign Markup Language (IDML). (The IDML format replaces the Interchange INX format used for saving
backwards in previous versions.)
Ensure that the computer running the previous version of InDesign is updated with the appropriate plug-ins so that it
can open the exported IDML file. The person running the previous version of InDesign can obtain the compatibility
plug-ins by choosing Help > Updates and following the prompts. Plug-ins can also be installed from the Adobe website:
Visit Product updates page on the Adobe website, and choose InDesign from the product list.
Opening a document in a previous version of InDesign is also referred to as “saving down.”
<i><b>Note: </b>Content created using features specific to the later version of InDesign may be modified or omitted when you open </i>
<i>the document in a previous version of InDesign.</i>
<b>1</b> Choose File > Save (CS6) or File > Export (CS5).
<b>2</b> From the File Type (Windows) or Format (Mac OS) menu, choose InDesign Markup (IDML).
<b>3</b> Click Save.
You can open the .idml file in previous version of InDesign to convert it to an untitled InDesign document.
<i><b>Note: </b>To open the InDesign CS5 document in InDesign CS3, open the exported IDML file in InDesign CS4, save it and </i>
<i>export it to InDesign CS3 Interchange (INX), and then open the exported INX file in InDesign CS3. Make sure that all </i>
<i>InDesign versions are up to date.</i>
<b>Work with metadata</b>
<i>Metadata</i> is a set of standardized information about a file, such as author name, resolution, color space, copyright, and
keywords applied to it. You can use metadata to streamline your workflow and organize your files.
</div>
<span class='text_page_counter'>(120)</span><div class='page_container' data-page=120>
Metadata information is stored using the Extensible Metadata Platform (XMP) standard, on which Adobe Bridge ,
Adobe Illustrator, Adobe InDesign, and Adobe Photoshop are built. XMP is built on XML, and in most cases the
metadata is stored in the file. If it isn’t possible to store the information in the file, metadata is stored in a separate file
called a <i>sidecar file</i>. XMP facilitates the exchange of metadata between Adobe applications and across publishing
workflows. For example, you can save metadata from one file as a template, and then import the metadata into other
files.
Metadata that is stored in other formats, such as Exif, IPTC (IIM), GPS, and TIFF, is synchronized and described with
XMP so that it can be more easily viewed and managed. Other applications and features also use XMP to communicate
and store information such as version comments, which you can search using Adobe Bridge.
In most cases the metadata remains with the file even when the file format changes, for example, from PSD to JPG.
Metadata is also retained when files are placed in an Adobe document or project.
<i>You can use the XMP Software Development Kit to customize the creation, processing, and interchange of metadata. </i>
<i>For example, you can use the XMP SDK to add fields to the File Infodialog box. For more information on XMP and the </i>
<i>XMP SDK, visit the Adobe website.</i>
<b>Working with metadata in Adobe Bridge and Adobe Creative Suite components</b>
Many of the powerful Adobe Bridge features that allow you to organize, search, and keep track of your files and versions
depend on XMP metadata in your files. Adobe Bridge provides two ways of working with metadata: through the
Metadata panel and through the File Infodialog box (InDesign) or the Content File Info dialog box (InCopy).
In some cases, multiple views exist for the same metadata property. For example, a property may be labeled Author in
one view and Creator in another, but both refer to the same underlying property. Even if you customize these views for
specific workflows, they remain standardized through XMP.
<b>Add metadata using the File Info dialog box</b>
The File Info dialog box displays camera data, file properties, an edit history, copyright, and author information of the
current document. The File Info dialog box also displays custom metadata panels. You can add metadata directly in the
File Information dialog box. Any information you enter in a field overrides existing metadata and applies the new value
to all selected files.
<b>1</b> Choose File > File Info (InDesign) or File > Content File Info (InCopy).
<b>2</b> Select any of the following from the tabs at the top of the dialog box:
<i>Use the Right and Left arrows to scroll the tabs, or click the down-pointing arrow and choose a category from the list.</i>
<b>Description </b>Lets you enter document information about the file, such as document title, author, description, and
keywords that can be used to search for the document. To specify copyright information, select Copyrighted from
the Copyright Status pop-up menu. Then enter the copyright owner, notice text, and the URL of the person or
company holding the copyright.
<b>IPTC </b>Includes four areas: IPTC Content describes the visual content of the image. IPTC Contact lists the contact
information for the photographer. IPTC Image lists descriptive information for the image. IPTC Status lists
workflow and copyright information.
<b>Camera Data </b>Includes two areas: Camera Data 1 displays read-only information about the camera and settings used
to take the photo, such as make, model, shutter speed, and f-stop. Camera Data 2 lists read-only file information
about the photo, including pixel dimensions and resolution
<b>Video Data </b>Lists information about the video file, including video frame width and height, and lets you enter
information such as tape name and scene name.
</div>
<span class='text_page_counter'>(121)</span><div class='page_container' data-page=121>
<b>Mobile SWF </b>Lists information about mobile media files, including title, author, description, and content type.
<b>Categories </b>Lets you enter information based on Associated Presscategories.
<b>Origin </b>Lets you enter file information that is useful for news outlets, including when and where the file was created,
transmission information, special instructions, and headline information.
<b>DICOM </b>Lists patient, study, series, and equipment information for DICOM images.
<b>History </b>Displays Adobe Photoshop history log information for images saved with Photoshop. The History tab
appears only if Adobe Photoshop is installed.
<b>Illustrator </b>Lets you apply a document profile for print, web, or mobile output.
<b>Advanced </b>Displays fields and structures for storing metadata by using namespaces and properties, such as file
format and XMP, Exif, and PDF properties.
<b>Raw Data </b>Displays XMP text information about the file.
<b>3</b> Type the information to add in any displayed field.
<b>4</b> Click OK to apply the changes.
<b>Export metadata as an XMP file</b>
You can save metadata in an XMP file to share with other users. These XMP files can be used as templates for populating
InDesign documents and other documents created with XMP-enabled applications. Templates you export are stored in
a shared location that all XMP-enabled applications can access. They also appear in the pop-up menu at the bottom of
the File Infodialog box.
<b>1</b> Choose File >File Info (InDesign) or File > Content File Info (InCopy).
<b>2</b> Choose Export from the pop-up menu at the bottom of the dialog box.
<b>3</b> Type a filename, choose a location for the file, and click Save.
<i>To view metadata templates in Explorer (Windows) or the Finder (Mac OS), click the pop-up menu at the bottom </i>
<i>of the File Info dialog box and choose Show Templates Folder.</i>
<b>Import metadata from an XMP file</b>
When you import metadata into a document from an exported XMP template file, you can specify whether to clear all
metadata in the current document and add the new metadata, keep all but the matching metadata, or add matching
metadata to the existing metadata.
? Choose File >File Info (InDesign) or File > Content File Info (InCopy).
• Choose an XMP file from the pop-up menu at the bottom of the dialog box, select an import option, and click
OK.
</div>
<span class='text_page_counter'>(122)</span><div class='page_container' data-page=122>
<b>Edit metadata in image files</b>
When you generate captions of placed images in InDesign, the metadata from the placed image is used. Although you
can edit the metadata of InDesign documents, you cannot edit the metadata of placed files in InDesign. Instead, change
the metadata of placed images using their original applications, using Finder or Explorer, or using Adobe Bridge or
Adobe Mini Bridge.
<b>1</b> In InDesign, right-click (Windows) or Control-click (Mac OS) the image, and then choose Edit Original.
You can also choose Edit With and then choose an application such as Adobe Illustrator or Adobe Photoshop.
<b>2</b> In the original application, choose File > File Info.
<b>3</b> Edit the metadata, and then click OK.
You can also select an image in Adobe Bridge and choose File > File Info to edit the image metadata. See Add metadata
using the File Info dialog box.
<b>Resolving shared network protective shutdown</b>
• Any document that is <100 MB in size and is opened from a network location, InDesign will not perform protective
shutdown even if network connection is lost. When network connection is restored after temporary network
loss, you can continue to work and will be able to save the document on the network. if you try to save the document
while the network is lost, you get an option to save the document locally.
</div>
<span class='text_page_counter'>(123)</span><div class='page_container' data-page=123>
<b>Chapter 3: Layout and design</b>
<b>Create a table of contents</b>
<b>About tables of contents</b>
A table of contents (TOC) can list the contents of a book, magazine, or other publication; display a list of illustrations,
advertisers, or photo credits; or include other information to help readers find information in a document or book file.
One document may contain multiple tables of contents—for example, a list of chapters and a list of illustrations.
Each table of contents is a separate story consisting of a heading and a list of entries sorted either by page number or
alphabetically. Entries, including page numbers, are pulled directly from content in your document and can be updated
at any time—even across multiple documents in a book file.
The process for creating a table of contents requires three main steps. First, create and apply the paragraph styles you’ll
use as the basis for the TOC. Second, specify which styles are used in the TOC and how the TOC is formatted. Third,
flow the TOC into your document.
Table of contents entries can be automatically added to the Bookmarks panel for use in documents exported as
Adobe PDF.
<b>Tips for planning a table of contents</b>
Consider the following when planning a table of contents:
• Some tables of contents are built from content that does not actually appear in the published document, such as a
list of advertisers in a magazine. To do this in InDesign, enter content on a hidden layer and include it when
generating a TOC.
• You can load TOC styles from other documents or books to build new tables of contents with the same settings and
formatting. (You might need to edit an imported TOC style if the names of paragraph styles in the document do not
match those in the source document.)
• You can create paragraph styles for the table of contents’ title and entries, including tab stops and leaders, if desired.
You can then apply these paragraph styles when you generate the table of contents.
• You can create character styles to format the page numbers and the characters separating them from the entries. For
example, if you want the page numbers to be in bold, create a character style that includes the bold attribute, and
then select that character style when you create the table of contents.
<b>Create tables of contents in books</b>
For best results, be sure to do the following before creating a table of contents for a book:
</div>
<span class='text_page_counter'>(124)</span><div class='page_container' data-page=124>
• Be sure to use paragraph styles consistently throughout the book. Avoid creating documents with styles that have
identical names but different definitions. If multiple styles have the same name but different style definitions,
InDesign uses the style definition in the current document (if a definition exists there), or the first occurrence of the
style in the book.
• If the necessary styles do not appear in the pop-up menus in the Table of Contents dialog box, you may need to
synchronize the book so that the styles are copied to the document containing the table of contents.
• If you want number prefixes (such as 1-1, 1-3, and so on) to appear in your table of contents, use section numbering
rather than chapter numbering. Section number prefixes can be included in a table of contents.
<b>Generate a table of contents</b>
Before you generate a table of contents, decide which paragraphs should be included (such as chapter titles and section
headings), and then define paragraph styles for each. Make sure that these styles are applied to all appropriate
paragraphs in the document or booked documents.
When you generate the table of contents, you can also use paragraph and character styles to format the table of contents.
<i>Table of contents without paragraph styles (left) and with paragraph styles applied to entries (right)</i>
If paragraphs that are to be included in the table of contents appear in different stories on the same page, their order in
the TOC is determined by their position on the page.
<b>1</b> Do one of the following:
• If you’re creating a table of contents for a single document, you may want to add a new page at the beginning of
the document.
• If you’re creating a table of contents for multiple documents in a book, create or open the document to be used
for the table of contents, make sure that it’s included in the book, and then open the book file.
<b>2</b> Choose Layout > Table Of Contents.
If you’ve defined a TOC style that has the appropriate settings for your TOC, you can choose it from the TOC Style
menu.
<b>3</b> In the Title box, type a title for your TOC (such as <i>Contents</i> or <i>List of Figures</i>). This title will appear at the top of the
table of contents. To format the title, choose a style from the Style menu.
<b>4</b> Select Include Book Documents to create a single table of contents for all documents in the book list, and to
renumber the book’s pages. Deselect this option if you want to generate a table of contents for the current document
only. (This option is dimmed if the current document is not part of a book file.)
<b>5</b> Determine which content you want to include in the table of contents by double-clicking paragraph styles in the
Other Styles list to add them to the Include Paragraph Styles list.
</div>
<span class='text_page_counter'>(125)</span><div class='page_container' data-page=125>
<b>7</b> Specify options to determine how each paragraph style in the table of contents is formatted.
<i>It’s a good idea to define a TOC style that contains the formatting and other options for your table of contents, </i>
<i>especially if you want to include multiple TOCs in your document. To do so, click Save Style. You can also create </i>
<i>TOC styles by choosing Layout > Table Of Contents Styles.</i>
<b>8</b> Click OK.
A loaded text cursor appears. Before you click or drag, you can move to a different page or create a new page
without losing the loaded text.
<b>9</b> Click or drag the loaded text cursor on a page to place the new table of contents story.
<i><b>Note: </b>Avoid threading the TOC frame to other text frames in the document. If you replace the existing TOC, the entire story </i>
<i>will be replaced by the updated TOC.</i>
<b>Create TOC styles for multiple lists</b>
Use TOC styles if you need to create different tables of contents in your document or book. For example, you can use
one TOC style for a list of contents and another for a list of advertisers, illustrations, or photo credits. Create a TOC
style for each type of list.
Creating TOC styles are also useful if you want to use the same TOC formatting in another document.
<i><b>Note: </b>Don’t confuse TOC styles with paragraph styles that have a “TOC” prefix. TOC-prefixed paragraph styles (for </i>
<i>example “TOC title”) are used to format the table of contents entries themselves. In contrast, a TOC style is a collection of </i>
<i>settings used to automatically create a table of contents.</i>
<b>Create a TOC style</b>
<b>1</b> Choose Layout > Table Of Contents Styles.
<b>2</b> Click New.
<b>3</b> Type a name for the TOC style you are creating.
<b>4</b> In the Title box, type a title for your TOC (such as <i>Contents</i> or <i>List of Figures</i>). This title will appear at the top of the
table of contents. To specify a title style, choose a style from the Style menu.
<b>5</b> From the Other Styles list, select the paragraph styles that represent content you want to include in the table of
contents, then click Add to add them to the Include Paragraph Styles list.
<b>6</b> Specify options to determine how each paragraph style is formatted.
<b>Import TOC styles from another document</b>
<b>1</b> Choose Layout > Table Of Contents Styles.
<b>2</b> Click Load, select the InDesign file containing the TOC styles you want to copy, and then click Open.
<b>3</b> Click OK.
<i><b>Note: </b>If the paragraph styles in your document do not match the paragraph styles in the TOC style you import, you’ll need </i>
<i>to edit the TOC style before generating a table of contents.</i>
<b>Options for formatting a table of contents</b>
</div>
<span class='text_page_counter'>(126)</span><div class='page_container' data-page=126>
<i><b>Note: </b>The settings in the Style section apply only to the style currently selected under Include Paragraph Styles. You can </i>
<i>specify different formatting options for each style.</i>
<b>TOC Style </b>Choose a TOC Style, if you’ve defined a TOC style that has the appropriate settings for your TOC.
<b>Title </b>Type a title for your TOC. This title appears at the top of the table of contents.
<b>Style </b>Choose a style from the Style menu to format the Title.
<b>Include Paragraph Styles </b>Determine which content you want to include in the table of contents by double-clicking
paragraph styles in the Other Styles list to add them to the Include Paragraph Styles list.
<b>Entry Style </b>For each style in Include Paragraph Styles, choose a paragraph style to apply to the associated table of
contents entries.
<b>Page Number </b>You might want to create a character style that formats the page number. You can then select this style
in the Style pop-up list to the right of Page Number. (See Add paragraph and character styles.)
If you want the page numbers of the TOC to include prefixes, or to use a different numbering convention, see Define
section numbering .
</div>
<span class='text_page_counter'>(127)</span><div class='page_container' data-page=127>
<i>Select the existing text in the box before you choose a different special character, to make sure that you don’t include </i>
<i>both characters.</i>
You might want to create a character style that formats the space between the entry and the page number. You can then
select this style in the Style pop-up list to the right of Between Entry And Number. (See Add paragraph and character
styles.)
If the entry’s paragraph style includes a tab leader setting, and if the tab character (^t) is selected, a tab leader appears
in the generated table of contents.
<b>Sort Entries in Alphabetical Order </b>Select this option to sort table of contents entries in the selected style alphabetically.
This option is useful for creating simple lists, such as lists of advertisers. Nested entries (Level 2 or 3) sort alphabetically
within their group (Level 1 or 2, respectively).
<i><b>Note: </b>The sort order for a table of contents is determined by the document’s default language setting. To change the default </i>
<i>language setting, make sure nothing is selected and then choose a language from the Language menu in the Character </i>
<i>panel.</i>
<b>Level </b>By default, each item added to the Include Paragraph Styles box is set one level lower than the item immediately
above it. You can change this hierarchy by specifying a new level number for the selected paragraph style. This option
adjusts only the display in the dialog box. It has no effect on the final table of contents unless the list is alphabetized, in
which case the entries are sorted by level.
<b>Create PDF Bookmarks </b>Select this option if you want the table of contents entries to appear in the Bookmarks panel of
Adobe Acrobat or Adobe Reader® when the document is exported to PDF.
<b>Run-in </b>Select this option if you want all TOC entries to be run into a single paragraph. A semicolon followed by a
space (; ) separates the entries.
<b>Replace Existing Table Of Contents </b>Select this option to replace all existing table of contents stories in the document.
Deselect this option if you want to generate a new table of contents, such as a list of figures.
<b>Include Text On Hidden Layers </b>Select this option only if you want the paragraphs on hidden layers to be included in
your table of contents. This is useful when creating a list of advertisers or illustrations that may not appear as visible
text in the document itself. Deselect this option when you’ve used layers to store various versions or translations of the
same text.
<b>Include Book Documents </b>Select this option to to create a single table of contents for all documents in the book list, and
to re-number the book's pages.
<b>Remove Forced Line Break </b>Select this option to remove the forced line break used to make lines and pages break at
certain points.
<b>Numbered Paragraphs </b>If your table of contents includes a paragraph style that uses numbering, specify whether the
TOC entry includes the full paragraph (both number and text), only the numbers, or only the paragraph.
<b>Create TOC entries with tab leaders</b>
</div>
<span class='text_page_counter'>(128)</span><div class='page_container' data-page=128>
<i>Table of contents with dot leaders</i>
<b>1</b> Create a paragraph style with a tab leader.
<b>2</b> To update the table of contents settings, do one of the following:
• Choose Layout > Table Of Contents Style. Select a TOC style, and click Edit.
• Choose Layout > Table Of Contents (if you are not using a TOC style).
<b>3</b> Under Include Paragraph Styles, select an item you want to appear with a tab leader in the table of contents.
<b>4</b> For Entry Style, select the paragraph style that contains the tab leader.
<b>5</b> Click More Options.
<b>6</b> Verify that Between Entry And Number is set to ^t (representing a tab). Click OK or Save to exit.
<b>7</b> Update the table of contents, if necessary, by choosing Layout > Update Table Of Contents. Otherwise, place the new
table of contents story.
<b>Create a paragraph style with a tab leader</b>
<b>1</b> Choose Window > Styles > Paragraph Styles to display the Paragraph Styles panel.
<b>2</b> In the Paragraph Styles panel, do one of the following:
• Double-click the name of the paragraph style applied to entries in your table of contents.
• From the panel menu, choose New Paragraph Style.
<b>3</b> Enter a name, if necessary, for the paragraph style.
<b>4</b> Click Tabs.
<b>5</b> Select the right-justified tab icon , and then click on the ruler to position the tab stop.
If the paragraphs you’re applying the style to include numbered list items, make sure that you include two tab
settings — the first for the indented number and the second for the tab leader.
<b>6</b> For Leader, type a period (.).
<b>7</b> Select other style options as desired, and click OK.
<b>Update and edit a table of contents</b>
The table of contents is like a snapshot of content in your document. If page numbers in your document change, or if
you edit headings or other elements associated with table of contents entries, you’ll need to regenerate the table of
contents to update it.
<b>Update a table of contents</b>
</div>
<span class='text_page_counter'>(129)</span><div class='page_container' data-page=129>
<b>2</b> Do any of the following:
• To make changes to table of contents entries, edit your document or booked documents, not the table of contents
story itself.
• To change the formatting applied to the table of contents title, entries, or page numbers, edit the paragraph or
character styles associated with these elements.
• To change how pages are numbered (for example, 1, 2, 3 or i, ii, iii), change section numbering in the document
or book. (See Number pages, chapters, and paragraphs in a book.)
• To specify a new title, include other paragraph styles in the table of contents, or further format table of contents
entries, edit the TOC style.
<b>3</b> Select or place the insertion point in the text frame containing the table of contents, and then choose Layout >
Update Table Of Contents.
<b>4</b> If you have multiple tables of contents in your document, such as a list of figures and a list of advertisers, select the
text frame containing a different list, and then choose Layout > Update Table Of Contents.
<b>Editing a table of contents</b>
If your table of contents requires editing, edit the actual paragraphs in the document—not the table of contents story—
and then generate a new table of contents. If you edit the table of contents story, you’ll lose your revisions when you
generate a new table of contents. For the same reason, you should edit the styles used to format the table of contents
entries, rather than formatting the table of contents directly.
<b>Create book files</b>
<b>Create a book file</b>
A <i>book file</i> is a collection of documents that can share styles, swatches, master pages, and other items. You can
sequentially number pages in booked documents, print selected documents in a book, or export them to PDF. One
document can belong to multiple book files.
One of the documents added to a book file is the <i>style source</i>. By default, the style source is the first document in the
book, but you can select a new style source at any time. When you <i>synchronize</i> documents in a book, the specified styles
and swatches from the style source replace those in other booked documents.
Michael Murphy provides a video tutorial about creating books at Book Basics.
<b>1</b> Choose File > New > Book.
<b>2</b> Type a name for the book, specify a location, and then click Save.
The Book panel appears. The book file is saved with the file name extension .indb.
<b>3</b> Add documents to the book file.
<b>Add documents to a book file</b>
When you create a book file, it opens in the Book panel. The Book panel is the working area of a book file, where you
add, remove, or rearrange documents.
</div>
<span class='text_page_counter'>(130)</span><div class='page_container' data-page=130>
<b>2</b> Select the Adobe InDesign document or documents you want to add, and then click Open.
<i>You can drag and drop files onto the Book panel from an Explorer (Windows) or Finder (Mac OS) window. You can </i>
<i>also drag a document from one book to another. Hold down Alt (Windows) or Option (Mac OS) to copy the </i>
<i>document.</i>
<b>3</b> If you included documents created in earlier versions of InDesign, they will be converted to Adobe InDesign CS5
format when added to the book. In the Save As dialog box, specify a new name for the converted document (or leave
the name as is), and then click Save.
<i><b>Note: </b>You must convert Adobe PageMaker or QuarkXPress documents before adding them to the book file.</i>
<b>4</b> If necessary, change the order of the documents in the panel by dragging them up or down to the appropriate
locations in the list.
<b>5</b> To designate a document as the style source, click the box next to the document’s name in the panel.
To open a document in a book file, double-click the document name in the Book panel.
<b>Manage book files</b>
Each open book file appears on its own tab in the Book panel. If multiple books are open at the same time, click a tab
to bring that book to the front and access its panel menu.
Icons in the Book panel indicate a document’s current status, such as open , missing (the document was moved,
renamed, or deleted), modified (the document was edited or its page or section numbers changed while the book
was closed), or in use (if someone else has the document open in a managed workflow). No icon appears next to
closed documents.
<i>To view the pathname of any document in a book, hold the mouse pointer over the document name until a tooltip </i>
<i>appears. Or, choose Document Information from the Book panel menu.</i>
<b>Save a book file</b>
Book files are separate from document files. For example, when you choose the Save Book command, InDesign saves
the changes to the book, not the documents in the book.
? Do one of the following:
• To save a book under a new name, choose Save Book As in the Book panel menu, specify a location and filename,
and click Save.
• To save an existing book under the same name, choose Save Book in the Book panel menu, or click the Save
button at the bottom of the Book panel.
<i><b>Note: </b>If you are sharing book files over a server, make sure that you have a file management system in place so that you </i>
<i>don’t save over each other’s changes accidentally.</i>
<b>Close a book file</b>
• To close a single book, choose Close Book in the book’s panel menu.
• To close all open books docked together in the same panel, click the close button on the Book panel’s title bar.
<b>Remove book documents</b>
<b>1</b> Select the document in the Book panel.
</div>
<span class='text_page_counter'>(131)</span><div class='page_container' data-page=131>
Removing the document from the book file doesn’t delete the file on disk; the document is removed only from the book
file.
<b>Replace book documents</b>
<b>1</b> Select the document in the Book panel.
<b>2</b> Choose Replace Document in the Book panel menu, locate the document you want to replace it with, and then click
Open.
<b>Open a book file in Explorer or Finder</b>
<b>1</b> In the books panel, select a document.
<b>2</b> From the books panel menu, choose Reveal In Explorer (Windows) or Reveal In Finder (Mac OS).
A browser window opens that displays the selected file.
<b>Synchronize book documents</b>
When you synchronize documents in a book, the items you specify—styles, variables, master pages, trap presets,
cross-reference formats, conditional text settings, numbered lists, and swatches—are copied from the style source to the
specified documents in the book, replacing any items that have identical names.
If items in the style source are not found in the documents being synchronized, they are added. Items that are not
included in the style source are left as is in the documents being synchronized.
<b>Select items to synchronize</b>
<b>1</b> Choose Synchronize Options in the Book panel menu.
<b>2</b> Select the items you want to copy from the style source to other book documents.
Be sure to select all styles included in the definition of other styles. For example, an object style may contain
paragraph and character styles, which in turn include swatches.
<b>3</b> Select Smart Match Style Groups to avoid duplicating uniquely named styles that have been moved into or out of
style groups.
Suppose the style source includes a character style in a style group, and the documents being synchronized include
this same character style outside the style group. If this option is selected, the character style is moved into the style
group in synchronized documents.
If this option is not selected, a second instance of the character style is created in the style group with options that
match the style source. The character style outside the style group does not change.
<i><b>Note: </b>If a document contains multiple styles that have the same name (for example, Character Style 1 in a style group </i>
<i>and Character Style 1 outside of a style group), InDesign behaves as if the option is not selected. For best results, create </i>
<i>styles with unique names.</i>
</div>
<span class='text_page_counter'>(132)</span><div class='page_container' data-page=132>
<b>Synchronize documents in a book file</b>
You can synchronize the book while documents in the book are closed. InDesign opens the closed documents, makes
any changes, and then saves and closes the documents. Documents that are open when you synchronize are changed
but not saved.
<b>1</b> In the Book panel, click the blank box next to the document that you want to be the style source; the style source
icon indicates which document is the style source.
<i>Selected style source</i>
<b>2</b> Make sure that the items you want copied from the style source are selected in the Synchronize Options dialog box.
<b>3</b> In the Book panel, select the documents you want to synchronize with the style source document. If no document
is selected, the entire book will be synchronized.
<i>To make sure that no documents are selected, click the blank gray area below the booked documents—you may need </i>
<i>to scroll or resize the Book panel. You can also hold down Ctrl (Windows) or Command (Mac OS) and click a </i>
<i>selected document to deselect it.</i>
<b>4</b> Choose Synchronize Selected Documents or Synchronize Book from the Book panel menu, or click the Synchronize
button at the bottom of the Book panel.
<i><b>Note: </b>Choosing Edit > Undo will undo changes only in documents that are open at the time synchronization occurs.</i>
<b>Synchronize master pages</b>
Master pages are synchronized in the same way as other items—master pages with the same name (such as A-Master)
as those in the style source are replaced. Synchronizing masters is useful for documents that use the same design
elements, such as running headers and footers. However, if you want to preserve page items on a master page in
documents other than the style source, either don’t synchronize master pages or create master pages with different
names.
Any master page items that are overridden on document pages after you synchronize masters for the first time are
detached from the master. Therefore, if you plan on synchronizing master pages in your book, it’s a good idea to
synchronize all the documents in your book at the start of the design process. That way, overridden master page items
will maintain their connection to the master page and will continue to be updated from modified master page items in
the style source.
It’s also a good idea to synchronize master pages using only one style source. If you synchronize from a different style
source, overridden master page items may become detached from the master page. If you need to synchronize using a
different style source, deselect the Master Pages option in the Synchronize Options dialog box before doing so.
<b>Convert book files from previous InDesign versions</b>
</div>
<span class='text_page_counter'>(133)</span><div class='page_container' data-page=133>
<b>Convert a book file for use with InDesign CS5</b>
<b>1</b> In InDesign CS5, choose File > Open.
<b>2</b> Select the book file created in a previous version of InDesign and click OK.
A warning appears if the book file contains documents saved in a previous InDesign format.
<b>3</b> Choose Save Book As from the Book panel menu. Specify a new name for the converted book file, and click Save.
<b>Convert documents in a book file</b>
<b>1</b> Open the book file in InDesign CS5.
<b>2</b> In the Book panel menu:
• If you want the original documents to be overwritten during conversion, select Automatic Document
Conversion.
• If you want to keep the original documents and save the converted documents with new names, deselect
Automatic Document Conversion. (The book list will be updated to include the converted files, not the
originals.)
<b>3</b> Do any of the following to convert the documents:
• Choose Synchronize Book from the Book panel menu. (See Synchronize book documents.)
• Choose Update Numbering > Update All Numbers from the Book panel menu.
<b>4</b> If Automatic Document Conversion is not selected, InDesign prompts you to save each converted document with a
new name.
<i><b>Note: </b>Documents are also converted when you print or export the book to Adobe PDF.</i>
<b>Number pages, chapters, and paragraphs in a book</b>
You can determine how pages, chapters, and paragraphs are numbered in a book. In a book file, the numbering styles
and starting numbers for pages and chapters are determined by each document’s settings in the Numbering & Section
Options dialog box or the Document Numbering Options dialog box. You can open one of these dialog boxes by
choosing Layout > Numbering & Section Options in the document or by choosing Document Numbering Options in
the Book panel menu.
For information on adding page numbering to a document, see Add basic page numbering.
For numbered paragraphs (such as lists of figures), numbering is determined by the numbered list style definition
contained by the paragraph style.
The page range appears beside each document name in the Book panel. By default, InDesign updates page and section
numbering in the Book panel when you add or remove pages in booked documents, or when you make changes to the
book file, such as reordering, adding, or removing documents. If you turn off the setting to automatically update page
and section numbers, you can update numbering in a book manually.
</div>
<span class='text_page_counter'>(134)</span><div class='page_container' data-page=134>
<b>Change page and chapter numbering options for each document</b>
<b>1</b> Select the document in the Book panel.
<b>2</b> Choose Document Numbering Options in the Book panel menu, or double-click the document’s page numbers in
the Book panel.
<b>3</b> Specify the page, section, and chapter numbering options. (See Document numbering options .)
<b>4</b> Click OK.
<i><b>Note: </b>If you specify a starting page number in a booked document instead of selecting Automatic Page Numbering, the </i>
<i>booked document will begin on the specified page; all subsequent documents in the book will be renumbered accordingly.</i>
<b>Start numbering on an odd or even page</b>
You can start document numbering on odd- or even-numbered pages in booked documents.
<b>1</b> Choose Book Page Numbering Options in the Book panel menu.
<b>2</b> Choose Continue On Next Odd Page or Continue On Next Even Page.
<b>3</b> Select Insert Blank Page to add a blank page to the end of any document in which the subsequent document must
begin on an odd- or even-numbered page, and then click OK.
<b>Turn off automatic page numbering in a book</b>
<b>1</b> Choose Book Page Numbering Options from the Book panel menu.
<b>2</b> Deselect Automatically Update Page & Section Numbers, and then click OK.
<b>3</b> To update page numbering manually, choose Update Numbering > Update All Numbers in the Book panel menu.
You can also update only page and section numbers or only chapter and paragraph numbers.
<b>Use sequential paragraph numbering in books</b>
To use sequential paragraph numbering for lists of figures, tables, or other items, you first define a numbered list that
is used in a paragraph style. The numbered list you define determines whether paragraph numbering maintains
sequential numbering across documents in a book.
<b>1</b> Open the document that is used as the style source for the book.
<b>2</b> Choose Type > Bulleted And Numbered Lists > Define Lists.
<b>3</b> Click New to define a list or select an existing list and choose Edit.
<b>4</b> Select both Continue Numbers Across Stories and Continue Numbers From Previous Document In Book.
<b>5</b> Click OK.
<b>6</b> Define a paragraph style that uses a numbered list, and apply it to the text in each document that contains the list.
(See Create a paragraph style for running lists.)
</div>
<span class='text_page_counter'>(135)</span><div class='page_container' data-page=135>
<b>Print or output a book file</b>
One advantage of using a book file is that you can use a single command to output—for print, preflight, package, or
export to EPUB or PDF—selected booked documents or the entire book.
<b>1</b> In the Book panel, do one of the following:
• To output specific documents, select the desired documents.
• To output the entire book, make sure no documents are selected.
<b>2</b> Choose an output command (such as Print Book or Print Selected Documents) in the Book panel menu.
<b>Add basic page numbering</b>
You can add a current page number marker to your pages to specify where a page number sits on a page and how it
looks. Because a page number marker updates automatically, the page number it displays is always correct—even as you
add, remove, or rearrange pages in the document. Page number markers can be formatted and styled as text.
<b>Add a page number marker to a master page</b>
Page number markers are commonly added to master pages. When master pages are applied to document pages, the
page numbering is updated automatically, similar to headers and footers.
<i>Page number on master A (left) and page 5 based on same master (right)</i>
If the automatic page number is on a master page, it displays the master page prefix. On a document page, the automatic
page number displays the page number. On a pasteboard, it displays PB.
<b>1</b> In the Pages panel, double-click the master page to which you want to add your page number. To create master pages,
see .
<b>2</b> Create a text frame large enough to hold the longest page number and any text you want to appear next to it. Position
the text frame where you want the page number to appear.
If your document has facing pages, create separate text frames for the left and right master pages.
<b>3</b> In the page number text frame, add any text that will come before or after the page number (such as “Page “).
<b>4</b> Position the insertion point where you want the page number to appear, and then choose Type > Insert Special
Character > Markers > Current Page Number.
<b>5</b> Apply the master page to the document pages on which you want the page numbering to appear. To apply master
pages, see .
</div>
<span class='text_page_counter'>(136)</span><div class='page_container' data-page=136>
<b>Change the page numbering style</b>
By default, pages are numbered using Arabic numerals (1, 2, 3...); however, you can number pages using upper or
lowercase Roman (i, ii, iii...) or alphanumeric (a, b, c...) numbering. You can also number pages using preceding zeros.
Each part of the document that uses a different numbering style is called a section.
In Japanese, Chinese, or Korean versions, by default, Arabic numerals are used for page numbers. However, if you use
the Numbering & Section Options command, you can specify the style of numbering, such as Roman numerals, Arabic
numerals, Kanji, and so on. The Style option allows you to select the number of digits in the page number, for example,
001 or 0001. Each part of the document that uses a different numbering style is called a section. For more information
on sections, see Define section numbering .
Use the Numbering & Section Options dialog box to change the page numbering style to use a different format. You
can also use this dialog box to restart page numbering or to start page numbering at a number you specify.
<b>1</b> In the Pages panel, select the page where you want the new numbering style section to begin.
<b>2</b> Choose Layout > Numbering & Section Options.
<b>3</b> Specify options, and then click OK. See Document numbering options .
A section indicator icon appears above the page icon in the Pages panel, indicating the start of a new section.
<i><b>Note: </b>If a number or letter appears before the current page number you inserted, it means that a section prefix is included. </i>
<i>If you don’t want this prefix, deselect Include Prefix When Numbering Pages in the Numbering & Section Options dialog </i>
<i>box.</i>
<b>Common page numbering tasks</b>
InDesign offers several different features that help you create page numbering effects.
<b>Generate QR codes</b>
<b>About QR codes</b>
QR codes are machine readable printed representation of data for various industry uses. It has now become common
in consumer advertising. A consumer with a Smartphone can install an app with a QR code scanner that can read and
decode the URL information and redirect the phone’s browser to a company website.
To do this: Do this:
Add page numbering to documents in a book. See Number pages, chapters, and paragraphs in a book.
Add section numbers and chapter numbers. See Add section and chapter numbering .
Create running headers or running footers that use text variables such
as the create date, filename, or the current heading or title.
See Create headers and footers and Create and edit text variables.
Create a “Page x of y” effect in which x is the current page and y is the
total number of pages.
Insert a Current Page Number marker for x, and insert the Last Page
Number text variable for y (choose Type > Text Variables > Insert
Variable > Last Page Number).
</div>
<span class='text_page_counter'>(137)</span><div class='page_container' data-page=137>
After scanning QR codes, users may receive text, add a business card contact to their devices, open a Web hyperlink,
or compose an email or text message.
<b>Manage QR codes in InDesign</b>
You can now generate and edit high quality independent QR code graphics from within InDesign. The generated QR
code is a high-fidelity graphic object that behaves exactly like native vector art in InDesign. You can easily scale the
object and fill it with colors. You can also apply effects, transparency, and printing attributes, such as overprinting, spot
inks, and trappings to the object. You can copy-paste the code graphic as a vector graphic object into a standard
graphics editor tool such as Adobe Illustrator.
<b>Generate QR code</b>
<b>1</b> From the menu, choose Object > Generate QR Code. The Generate QR Code dialog box is displayed.
<i>Generate QR Code dialog box</i>
The Generate/Edit QR Code dialog box has two tabs – Content and Color.
<b>2</b> In the Content tab, select any one of the following data types in the Type drop-down list:
• Web Hyperlink
• Plain Text
• Text Message
• Email
• Business Card
Based on the selected type, one or more fields are displayed to provide the content for which you want to generate
the QR code.
</div>
<span class='text_page_counter'>(138)</span><div class='page_container' data-page=138>
<b>4</b> Click OK.
<b>5</b> If you have selected a Frame before generating the QR code, the code is placed directly in the selected Frame
replacing its content. If you have not selected a frame, the QR code is loaded on the Place Gun and you can place it
just like a traditional EPS object:
• Clicking inside the document places the object in its original/default size – 30 X 30 (cm units).
• Clicking into an existing frame places the code inside the frame with default size. (It replaces its existing content
if you click in the frame with the Alt key pressed.)
• Click and dragging draws a new frame with fixed aspect ratio and releasing the mouse places the code inside the
frame.
Once placed inside a document, the QR code is treated as a traditional EPS object, except that a tooltip appears on
hovering over the object, revealing the content details in the form of the embedded code.
<i>QR code</i>
<b>Edit the content and color of the QR code</b>
<b>1</b> Select the QR code object or the frame: double-click inside the frame.
<b>2</b> From the menu, choose Object > Edit QR Code. You can also right-click and choose Edit QR Code in the context
menu.
<b>3</b> The Edit QR Code dialog box is displayed with the existing content and color information.
<b>4</b> In the Content tab, change the data type and content as appropriate.
<b>5</b> To select a different color for the QR code, click Color tab and select an appropriate color.
<b>6</b> Click OK.
<b>Modify the QR code’s frame attribute</b>
</div>
<span class='text_page_counter'>(139)</span><div class='page_container' data-page=139>
<i>Change the attributes of a QR code</i>
<b>Transform the QR code object</b>
You can move, resize, or rotate the placed QR code object with the Selection tool. When you drag the frame’s box, only
the frame resizes. However, while dragging:
• If you press the Shift key, the aspect ratio of the frame is preserved.
• If you press the Ctrl (on Windows) or Command (on Mac) key, both the frame and the content scales with preserved
aspect ratio.
• If you press the Shift plus Alt (on Windows) or Option (on Mac) keys, the frame scales from its center with
unpreserved aspect ratio. You can press the Shift key to preserve the aspect ratio.
<i>Transform a QR code</i>
<b>Create text and text frames</b>
<b>Create text frames</b>
</div>
<span class='text_page_counter'>(140)</span><div class='page_container' data-page=140>
There are two types of text frames: frame grids and plain text frames. <i>Frame grids</i> are the kind of text frames specific to
Asian-language composition in which character emboxes and spacing are displayed as grids. Empty text frames in
which no grid is displayed are <i>plain text frames</i>.
Like graphics frames, text frames can be moved, resized, and changed. The tool with which you select a text frame
determines the kind of changes you can make:
• Use the Type tool to enter or edit text in a frame.
• Use the Selection tool for general layout tasks such as positioning and sizing a frame.
• Use the Direct Selection tool to alter a frame’s shape.
• Use the Horizontal Grid tool or the Vertical Grid tool to create a frame grid.
• Use the Type tool to create a plain text frame for horizontal text, and the Vertical Type tool to create a plain
text frame for vertical text. Use the same tools to edit existing text in a frame.
Text frames can also be connected to other text frames so that the text in one frame can flow into another frame. Frames
that are connected in this way are <i>threaded</i>. Text that flows through one or more threaded frames is called a <i>story</i>. When
you place (import) a word-processing file, it comes into your document as a single story, regardless of the number of
frames it may occupy.
Text frames can have multiple columns. Text frames can be based on, yet independent of, page columns. In other words,
a two-column text frame can sit on a four-column page. Text frames can also be placed on master pages and still receive
text on document pages.
<i>If you use the same type of text frame repeatedly, you can create an object style that includes text frame formatting such </i>
<i>as stroke and fill colors, text frame options, and text wrap and transparency effects.</i>
When you place or paste text, you don’t need to create a text frame; InDesign automatically adds frames based on the
page’s column settings.
When text is pasted, a plain text frame is automatically created. You can also create an empty plain text frame manually
and input text.
? Do any of the following:
• Select the Type tool , and then drag to define the width and height of a new text frame. Hold down Shift as
you drag to constrain the frame to a square. When you release the mouse button, a text insertion point appears
in the frame.
<i>Dragging to create new text frame</i>
• Using the Selection tool, click the in port or out port of another text frame, and then click or drag to create
another frame.
• Use the Place command to place a text file.
</div>
<span class='text_page_counter'>(141)</span><div class='page_container' data-page=141>
<b>Move and resize text frames</b>
Use the Selection tool to move or resize text frames.
<i>If you want to move or resize a text frame without switching from the Type tool </i> <i> to a selection tool, hold down Ctrl </i>
<i>(Windows) or Command (Mac OS), and then drag the frame. </i>
<b>Move a text frame</b>
• Using the Selection tool, drag the frame.
• Using the Type tool, hold down Ctrl (Windows) or Command (Mac OS) and drag the frame. When you release the
key, the Type tool is still selected.
<b>Resize a text frame</b>
? Do any of the following:
• To resize using the Type tool , hold down Ctrl (Windows) or Command (Mac OS), and drag any frame
handle. If you hold down the mouse button for one second before you begin dragging, the text will recompose
while you resize the frame.
<b>Note</b>: If you click the text frame instead of dragging it, you’ll lose your text selection or insertion point location.
• To resize using the Selection tool , drag any of the frame handles on the frame’s border. Hold down Ctrl
(Windows) or Command (Mac OS) to scale the text within the frame. (See Scale type.)
• To quickly fit the frame to its content, use the Selection tool to select the text frame, and double-click any handle.
For example, if you double-click the center bottom handle, the bottom of the frame snaps to the bottom of the
text. If you double-click the center right handle, the height is preserved while the width narrows to fill the frame.
<b>Tip</b>: You can also double-click a handle on an overset text frame to expand the height or width to fit all text in
the frame. If a text frame includes more overset text than can reasonably fit on the page, the text frame isn’t
resized.
<i>Double-click handle to resize text frame</i>
• To fit the text frame to the content, select the frame using the Selection tool, and choose Object > Fitting > Fit
Frame to Content. The bottom of the text frame fits the contents of the text. If a text frame includes more overset
text than can reasonably fit on the page, the text frame isn’t resized.
</div>
<span class='text_page_counter'>(142)</span><div class='page_container' data-page=142>
<b>Use text frames on master pages</b>
When you start a new document, you can select the Master Text Frame option so that an empty text frame is placed on
the document’s default master page. This frame has the column and margin attributes specified in the New Document
dialog box.
Follow these guidelines for using text frames on master pages:
• Set master text frames when you want each page in your document to contain a page-sized text frame into which
you can flow or type your text. If your document requires more variation, such as pages with different numbers of
frames or frames of different lengths, leave the Master Text Frame option deselected, and use the Type tool to create
text frames on masters.
• Whether or not you select the Master Text Frame option, you can add text frames to a master page to act as
placeholders. You can thread these empty placeholder frames together to establish a flow.
• Flow text into master text frames using the same procedures you would use with frames created on document pages.
• If you need to type text in a master text frame on a document page, hold down Ctrl+Shift (Windows) or
Command+Shift (Mac OS) as you click the text frame on the document page. Then click in the frame using the Type
tool and begin typing.
• You can use Smart Text Reflow to add or remove pages automatically as you type and edit text. By default, when you
type text at the end of a threaded text frame based on a master page, a new page is added, allowing you to continue
typing in the new text frame. You can edit Smart Text Reflow settings.
• If you change the page margins, text frames adjust to the new margins only if the Enable Layout Adjustment option
is selected.
• Selecting the Master Text Frame option does not affect whether new pages are added when you autoflow text.
<b>Change text frame properties</b>
Use Text Frame Options to change settings such as the number of columns in the frame, the vertical alignment of text
within the frame, or the <i>inset spacing</i>, which is the distance of the margins between the text and the frame.
<i>Before (left) and after (right) setting inset and creating two columns in a text frame</i>
<i>If you need to use the same text frame properties for multiple text frames, create an object style that you can apply to </i>
<i>your text frames.</i>
<b>1</b> Using the Selection tool , select a frame, or using the Type tool , click inside the text frame or select text.
<b>2</b> Choose Object > Text Frame Options, or hold down Alt (Windows) or Option (Mac OS) and then double-click the
text frame using a selection tool.
</div>
<span class='text_page_counter'>(143)</span><div class='page_container' data-page=143>
These text frame options are available when you’re defining an object style for text boxes. See Object styles.
<b>Add columns to a text frame</b>
You can create columns within a text frame by using the Text Frame Options dialog box.
<i>You cannot create columns of unequal width in a text frame. To create columns of unequal width or height, add </i>
<i>threaded text frames side-by-side on either a document page or a master page. </i>
<b>1</b> Using the Selection tool, select a frame, or using the Type tool, click inside the text frame or select text.
<b>2</b> Choose Object > Text Frame Options.
<b>3</b> Specify the number of columns, the width of each column, and the spacing between each column (gutter) for the
text frame.
<b>4</b> (Optional) Select Fixed Column Width to maintain column width when you resize the frame. If this option is
selected, resizing the frame can change the number of columns, but not their width.
<i>Fixed column width</i>
<i><b>A </b>Original 2-column text frame <b>B </b>Resized with Fixed Column Width deselected (still 2 columns) <b>C </b>Resized with Fixed Column Width </i>
<i>selected (4 columns) </i>
<b>5</b> (Optional) Select Balanced Columns to make text even at the bottom of a multi-column text frame.
<i>Before and after balancing columns</i>
<b>Change text frame inset spacing (margins)</b>
<b>1</b> Using the Selection tool, select a frame, or using the Type tool, click inside the text frame or select text.
<b>2</b> Choose Object > Text Frame Options.
</div>
<span class='text_page_counter'>(144)</span><div class='page_container' data-page=144>
If the frame you’ve selected has a non-rectangular shape, the Top, Left, Bottom, and Right options are dimmed, and an
Inset option is available instead.
<b>First baseline offset options</b>
To change the first baseline options of a selected text frame, choose Object > Text Frame Options, and click the Baseline
Options tab. The following options appear in the Offset menu under First Baseline:
<b>Ascent </b>The height of the “d” character in the font falls below the top inset of the text frame.
<b>Cap Height </b>The top of uppercase letters touch the top inset of the text frame.
<b>Leading </b>Use the text’s leading value as the distance between the baseline of the first line of text and the top inset of the
frame.
<b>X Height </b>The height of the “x” character in the font falls below the top inset of the frame.
<b>Fixed </b>Specify the distance between the baseline of the first line of text and the top inset of the frame.
<b>Min </b>Select a minimum value for the baseline offset. For example, if Leading is selected and you specify a minimum
value of 1p, InDesign uses the leading value only when it’s greater than 1 pica.
<i>If you want to snap the top of the text frame to a grid, choose either Leading or Fixed so that you can control the location </i>
<i>of the first baseline of text in text frames.</i>
<b>Set baseline grids for a text frame</b>
In some cases, you might want to use a baseline grid for a frame rather than for the entire document. Use the Text Frame
Options dialog box to apply a baseline grid to a text frame. When you set up a baseline grid for a text frame, note the
following:
• The document baseline grid doesn’t appear behind or in front of text frames that use their own baseline grids.
• If Grids In Back is selected in Grids Preferences, then frame-based baseline grids take precedence over
document-based baseline grids. If Grids In Back is not selected, then document-document-based baseline grids take precedence over
frame-based baseline grids.
<b>1</b> Choose View > Grids & Guides > Show Baseline Grid to display all baseline grids, including those in a text frame.
<b>2</b> Select the text frame or place the insertion in a text frame, and then choose Object > Text Frame Options.
If you want the baseline grid to apply to all frames in a thread (even if one or more threaded frames do not include
text), place the insertion point in text, choose Edit > Select All, and then apply the baseline grid settings in the Text
Frame Options dialog box.
<b>3</b> Click the Baseline Options tab.
<b>4</b> Under Baseline Grid, select Use Custom Baseline Grid, and do any of the following:
<b>Start </b>Type a value to offset the grid from the top of the page, the top margin of the page, the top of the frame, or the
top inset of the frame, depending on what you choose from the Relative To menu.
<b>Relative To </b>Specify whether you want the baseline grid to begin relative to the top of the page, the top margin of the
page, the top of the text frame, or the top of the text frame inset.
<b>Increment Every </b>Type a value for the spacing between grid lines. In most cases, type a value that equals your body
text leading, so that lines of text align perfectly to the grid.
</div>
<span class='text_page_counter'>(145)</span><div class='page_container' data-page=145>
<i>If you can’t see the baseline grid in a text frame, choose View > Grids & Guides > Show Baseline Grid to make sure that </i>
<i>baseline grids aren’t hidden. If the baseline grid still doesn’t appear, check the threshold for viewing baseline grids in the </i>
<i>Grids section of the Preferences dialog box. To see the grid, you might need to zoom in on the frame or reduce the threshold </i>
<i>level.</i>
<b>Determine word and character counts</b>
<b>1</b> Place the insertion point in a text frame to view counts for the entire thread of frames (the story), or select text to
view counts only for the selected text.
<b>2</b> Choose Window > Info to display the Info panel.
The Info panel displays the number of characters, words, lines, and paragraphs in a text frame. The position of the
insertion point within the text frame also appears.
<b>Working with additional languages</b>
You can assign languages to different text. Assigning the appropriate language to text is especially useful for
spell-checking and hyphenating. (See Assign a language to text.)
If you need to work with Asian text, special versions of InDesign are available for Japanese, Simplified Chinese,
Traditional Chinese, and Korean. These versions let you create layout grids and frame grids for composing multibyte
characters, and they include a number of features for formatting multibyte text, along with additional fonts.
Similarly, a special version of InDesign is available for formatting Middle Eastern languages, such as Hebrew, Arabic,
Farsi, and Urdu, that use right-to-left text formatting. This version is called InDesign ME.
For more information on purchasing InDesign ME or an Asian-language version of InDesign, see the Adobe website.
<b>About pages and spreads</b>
When you select the Facing Pages option in the File > Document Setup dialog box, document pages are arranged in
</div>
<span class='text_page_counter'>(146)</span><div class='page_container' data-page=146>
<i>Pages panel</i>
<i><b>A </b>Page icons <b>B </b>Page with master “A” applied <b>C </b>Selected spread </i>
When you set the Binding option to Right To Left in the Document Setup dialog box, numbers are attached to the page
icons from right to left in the Pages panel.
<i>In a long document, you can move to a page quickly by choosing Layout > Go To Page. </i>
<b>Change the page and spread display</b>
The Pages panel provides information about and control over pages, spreads, and <i>masters</i> (pages or spreads that
automatically format other pages or spreads). By default, the Pages panel displays thumbnail representations of each
page’s content.
<b>1</b> If the Pages panel isn’t visible, choose Window > Pages.
<b>2</b> Choose Panel Options in the Pages panel menu.
<b>3</b> In the Icons section, specify which icons appear next to the page thumbnails in the Pages panel. These icons indicate
whether transparency or page transitions have been added to a spread, and whether the spread view is rotated.
<b>4</b> In the Pages and Masters sections:
• Select an icon size for pages and masters.
• Select Show Vertically to display spreads in one vertical column. Deselect this option to allow spreads to be
displayed side-by-side.
• Select Show Thumbnails to display thumbnail representations of the content of each page or master. (This option
is not available if certain options are selected for Icon Size.)
<b>5</b> In the Panel Layout section, select Pages On Top to display the page icon section above the master icon section, or
select Masters On Top to display the master icon section above the page icon section.
<b>6</b> Choose an option in the Resize menu to control how the sections are displayed when you resize the panel:
• To resize both the Pages and Masters sections of the panel, choose Proportional.
</div>
<span class='text_page_counter'>(147)</span><div class='page_container' data-page=147>
<b>Target or select a page or spread</b>
You either <i>select</i> or <i>target</i> pages or spreads, depending on the task you are performing. Some commands affect the
currently selected page or spread, while others affect the target page or spread. For example, you can drag ruler guides
only to the target page or spread, but page-related commands, such as Duplicate Spread or Delete Page, affect the page
or spread selected in the Pages panel. Targeting makes a page or spread active and is helpful when, for example, several
spreads are visible in the document window and you want to paste an object onto a specific spread.
? In the Pages panel:
• To both target and select a page or spread, double-click its icon or the page numbers under the icon. If the page
or spread is not visible in the document window, it shifts into view.
<b>Tip</b>: You can also both target and select a page or spread by clicking a page, any object on the page, or its
pasteboard in the document window.
The vertical ruler is dimmed alongside all but the targeted page or spread.
• To select a page, click its icon. (Don’t double-click unless you want to select it and move it into view.)
• To select a spread, click the page numbers under the spread icon.
<i><b>Note: </b>Some spread options, such as those in the Pages panel menu, are available only when an entire spread is selected.</i>
<b>Add new pages to a document</b>
? Do any of the following:
• To add a page after the active page or spread, click the New Page button in the Pages panel or choose Layout >
Pages > Add Page. The new page uses the same master as the existing active page.
• To add multiple pages to the end of the document, choose File > Document Setup. In the Document Setup dialog
box, specify the total number of pages for the document. InDesign adds pages after the last page or spread.
• To add pages and specify the document master, choose Insert Pages from the Pages panel menu or choose
Layout > Pages > Insert Pages. Choose where the pages will be added and select a master to apply.
<b>Create color labels for page thumbnails</b>
You can assign colored labels to the page thumbnails in the Pages panel. For example, you can use color labels to indicate
the status of the pages, such as a green label for complete spreads, a yellow label for spreads being worked on, and a red
label for unstarted spreads.
<b>1</b> In the Pages panel, select the pages to which you want to apply the color labels.
<b>2</b> From the Pages panel menu, choose Color Label, and then choose the color to assign.
The color label appears below the thumbnail in the Pages panel.
</div>
<span class='text_page_counter'>(148)</span><div class='page_container' data-page=148>
<b>Create new documents (Chinese, Japanese, and Korean </b>
<b>only)</b>
Page design begins with the basics: starting a new document, setting up pages, and positioning margins and columns
or changing grid settings.
When creating a document you can select from two workflows, either Layout Grid or Margins and Columns.
<b>note</b>: Whichever workflow you select, the file type of the document will be exactly the same. You can view a layout grid
created in the document using Margins and Columns, or hide a document layout grid created using the Layout Grid
option by switching between views.
The workflow based on typesetting composition using Layout Grid is only available in Asian language versions. When
you select Layout Grid, a grid of squares will be displayed in the document. You can set the number of individual
squares (number of rows or characters) from the page size settings. Page margins will also be determined by this. By
using a layout grid you can position an object accurately on a page using grid cell units.
The Margins and Columns workflow option is the same as in Western workflows. Western workflows are configured
from Margins and Columns, and objects are arranged on pages without layout grids. You can set the writing direction
to horizontal or vertical using either the Margins and Columns or Layout Grid workflow.
<i>A document showing a layout grid (left) A document showing margins and columns (right)</i>
<b>Create a new document</b>
<b>1</b> Choose File > New > Document.
The New Document dialog box combines the Document Setup and the Margins And Columns dialog boxes, so that
you can set up the page size, margins, and page columns all in one place. You can change these settings at any time.
<b>2</b> Specify document setup options. (See New Document options.)
To specify the dimensions of the bleed and slug areas, click More Options. The bleed and slug areas extend out from
the edges of the defined Page Size. To make the bleed or slug areas extend evenly on all sides, click the Make All
Settings The Same icon .
<b>3</b> Click OK to open a new document with the settings you specified.
<i><b>Note: </b>To set default layout settings for all new documents, choose File > Document Setup or Layout > Margins And </i>
<i>Columns, and set options when no documents are open.</i>
<b>Create a new document with a layout grid</b>
</div>
<span class='text_page_counter'>(149)</span><div class='page_container' data-page=149>
<b>2</b> Change the number of pages, page size, and other options. To specify the dimensions of the bleed and slug areas,
click More Options.
<b>3</b> Click Layout Grid Dialog, and then specify the layout grid settings. (See Layout Grid options .)
<b>4</b> Click OK to open a new document with the settings you specified.
The layout grid is for layout purposes only. To add text to your document, add frame grids or text frames.
<b>Create a new document with margins and columns</b>
When creating a document with Western style workflow, use Margins and Columns. If the general layout settings such
as margins and number of columns in a document are already known, use the Margins and Columns dialog box as the
simplest method.
<b>1</b> Choose File > New > Document.
<b>2</b> Specify options using the New Document dialog box. Each option is the same as when creating a document using a
layout grid.
<b>3</b> Click Margins and Columns and select your options using the New Margins and Columns dialog box. The options
are the same as in the Margins and Columns dialog box. (See Change document setup, margins, and columns.)
<b>4</b> Click OK.
Even when a document has been created using Margins and Columns, you can view its layout grid by choosing View >
Grids & Guides > Show Layout Grid, and you can modify the layout grid settings by choosing Layout > Layout Grid.
<i>To set the default settings for all new documents, choose File > Document Setup, Layout > Margins and Columns, or </i>
<i>Layout > Layout Grid Settings, and set options when no documents are open.</i>
<b>New Document options</b>
<b>Document Preset </b>Choose a preset that you have saver earlier.
<b>Intent </b>If you are creating a document to be output to PDF or SWF for the web, choosing the Web option changes
several options in the dialog box, such as turning off Facing Pages, changing the orientation from portrait to landscape,
and using a page size based on monitor resolution. You can edit any of these settings, but you cannot change the Intent
setting after the document is created.
<b>CS6</b>: Digital publishing intent has been added for publications aimed for the Digital Publishing Suite.
<b>Number of pages </b>Specify the number of pages to create in the new document.
<b>Start Page # </b>Specify which number the document starts on. If you specify an even number (such as 2) with Facing
Pages selected, the first spread in the document begins with a two-page spread. See Start a document with a two-page
spread .
<b>Facing Pages </b>Select this option to make left and right pages face each other in a double-page spread, such as for books
and magazines. Deselect this option to let each page stand alone, such as when you’re printing flyers or posters or when
you want objects to bleed in the binding.
After you’ve created a document, you can use the Pages panel to create spreads with more than two pages or force the
first two pages to open as a spread. (See Control spread pagination .)
<b>Master Text Frame </b>CS5.5 and earlier: Select this option to create a text frame the size of the area within the margin
guides, matching the column settings you specified. The master text frame is added to the A-Master. (See Use text
frames on master pages.)
</div>
<span class='text_page_counter'>(150)</span><div class='page_container' data-page=150>
<b>Primary Text Frame </b><i>CS6 only</i>: select this option to add a primary text frame on the master page. When you apply a new
master page, the story in the primary text frame automatically flows into the primary text frame of the new master page.
<b>Page Size </b>Choose a page size from the menu, or type values for Width and Height. Page size represents the final size
you want after bleeds or other marks outside the page are trimmed.
<b>Orientation </b>Click Portrait (tall) or Landscape (wide). These icons interact dynamically with the dimensions
you enter in Page Size. When Height is the larger value, the portrait icon is selected. When Width is the larger value,
the landscape icon is selected. Clicking the deselected icon switches the Height and Width values.
<i><b>Tip</b>: To specify the dimensions of the bleed and slug areas, click More Options in the New Document dialog box. To make </i>
<i>the bleed or slug areas extend evenly on all sides, click the Make All Settings The Same icon </i> <i>. </i>
<b>Bleed </b>The Bleed area allows you to print objects that are arranged at the outer edge of the defined page size. For a page
of the required dimensions, if an object is positioned at its edge, some white may appear at the edge of the printed area
due to slight misalignment during printing or trimming. For this reason, you should position an object that is at the
edge of the page of the required dimensions a little beyond the edge, and trim after printing. Bleed area is shown by a
red line on the document. You can set bleed area settings from Bleed in the Print dialog box.
<b>Slug </b>The slug area is discarded when the document is trimmed to its final page size. The slug area holds printing
information, customized color bar information, or displays other instructions and descriptions for other information
in the document. Objects (including text frames) positioned in the slug area are printed but will disappear when the
document is trimmed to its final page size.
Objects outside the bleed or slug area (whichever extends farther) do not print.
<i><b>Note: </b>You can also click the Save Document Preset icon to save document settings for future use.</i>
<b>Document window overview</b>
Each page or spread in your document has its own pasteboard and guides, which are visible in Normal View mode. (To
switch to Normal View, choose View > Screen Mode > Normal.) The pasteboard is replaced with a gray background
when the document is viewed using one of the Preview modes. (See Preview documents.) You can change the color of
this preview background and guides in Guides & Pasteboard preferences.
<i>Document and guides in Normal View Mode</i>
<i><b>A </b>Spread (black lines) <b>B </b>Page (black lines) <b>C </b>Margin guides (magenta lines) <b>D </b>Column guides (violet lines) <b>E </b>Bleed area (red lines) <b>F </b>Slug area </i>
<i>(blue lines) </i>
Document window notes:
• Lines of other colors are ruler guides which, when present, appear in the layer color when selected. See Layers .
• Column guides appear in front of margin guides. When a column guide is exactly in front of a margin guide, it hides
</div>
<span class='text_page_counter'>(151)</span><div class='page_container' data-page=151>
<b>Create custom page sizes</b>
You can create custom page sizes that appear in the Page Size menu in the New Document dialog box.
<b>1</b> Choose File > New > Document.
<b>2</b> Choose Custom Page Size from the Page Size menu.
<b>3</b> Type a name for the page size, specify page size settings, and then click Add.
The New Doc Sizes.txt file that lets you create custom page sizes in previous version of InDesign is not available in
InDesign CS5 or later.
<b>Define document presets</b>
You can save document settings for page size, columns, margins, and bleed and slug areas in a preset to save time and
ensure consistency when creating similar documents.
<b>1</b> Choose File > Document Presets > Define.
<b>2</b> Click New in the dialog box that appears.
<b>3</b> Specify a name for the preset and select basic layout options in the New Document Preset dialog box. (See New
Document optionsfor a description of each option.)
<b>4</b> Click OK twice.
<i>You can save a document preset to a separate file and distribute it to other users. To save and load document preset files, </i>
<i>use the Save and Load buttons in the Document Presets dialog box.</i>
<b>Create a document using a preset</b>
<b>1</b> Do one of the following:.
• Choose File > Document Preset > <i>[name of preset]</i>. (Hold down Shift while choosing the preset to create a new
document based on the preset without opening the New Document dialog box.)
• Choose File > New > Document, and then choose a preset from the Document Preset menu in the New
Document dialog box.
The New Document dialog box displays the preset layout options.
<b>2</b> Make changes to the options (if desired) and click OK.
<i>To skip the New Document dialog box, press the Shift key as you select a preset from the Document Preset menu.</i>
<b>Create an index</b>
<b>About indexing</b>
</div>
<span class='text_page_counter'>(152)</span><div class='page_container' data-page=152>
When you generate the index, each topic is listed, along with the page on which it was found. The topics are sorted
alphabetically, typically under section headings (A, B, C, and so on). An index entry consists of a topic (the term readers
look up) paired with either a page reference (page number or range) or a cross-reference. A cross-reference, preceded
by “See” or “See also,” points the reader to other entries in the index, rather than to a page number.
<i>Parts of an index</i>
<i><b>A </b>Title <b>B </b>Section heading <b>C </b>Index entry <b>D </b>Subentry <b>E </b>Topic <b>F </b>Page reference <b>G </b>Cross-reference </i>
<b>Tips for creating an index</b>
Creating a well-planned and complete index can help make the information in your document immediately accessible
to your readers. Here are a few guidelines to consider:
• Think about how you want your index to look. How many topic levels will it have? Will it refer the reader to other
related topics? Will a simple keyword index suffice, or do you want a more complex index with cross-references to
related topics and a well-researched list of equivalent terms?
• Anticipate the variety of ways by which your readers might look up information. For instance, one reader may search
for information on animals by looking under <i>beasts</i>; another may look for <i>wildlife</i> or <i>fauna</i>.
• Add index entries when the content of your document is fairly stable. If you delete large portions of your text later,
you may lose some of your indexing work.
• A well-planned index presents topics consistently. Common indexing problems include mixing uppercase and
lowercase (<i>cats</i> and <i>Cats</i>) and singular and plural forms (<i>cat</i> and <i>cats</i>). Use a topic list to keep terms consistent.
• Review your index several times before you generate the final index. Look for duplicate entries, weak subject areas,
misspellings, and inconsistencies in capitalization and wording; for example, InDesign treats <i>Cheetah</i>, <i>cheetah</i>, and
<i>cheetahs</i> as separate entries.
<b>Workflow for creating an index</b>
To create an index, follow these basic steps:
<b>1. Create a topic list (optional) </b>A topic list helps you maintain consistency in your index entries. (See Create a list of
topics for an index.)
<b>2. Add index markers. </b>Add index markers on the pages in your document that you want the index entries to refer to.
(See Add index entries.)
<b>3. Generate the index. </b>Generating the index creates a set of entries for markers and their accompanying page numbers.
(See Generate an index.)
<b>4. Flow the index story. </b>Use the loaded text cursor to flow the index into a text frame. In most cases, you’ll want the
index to start on a new page. After you flow the index, you can format the pages and index.
</div>
<span class='text_page_counter'>(153)</span><div class='page_container' data-page=153>
<b>Index panel overview</b>
You create, edit, and preview the index using the Index panel (Window > Type & Tables > Index). The panel includes
two modes: Reference and Topic. In Reference mode, the preview area displays complete index entries for the current
document or book. In Topic mode, the preview area displays only topics, not page numbers or cross-references. Topic
mode is used primarily for creating the index structure, whereas Reference mode is where you add your index entries.
In Reference mode, index entries are alphabetized and divided into sections by letter. Triangles next to entries let you
expand or collapse the entry to view subentries, page numbers, and cross-references.
The following codes appear in place of page references to indicate index entries that may not be included in the
generated index. You may need to choose Update Preview in the Index panel to view the codes.
<b>PB </b>Indicates index entries on the pasteboard. These entries will not appear in the generated index.
<b>HL </b>Indicates index entries on a hidden layer. When you generate the index, you have the option of including index
entries on a hidden layer.
<b>HT </b>Indicates index entries in a hidden condition. Index entries in hidden conditions are not included in the index.
<b>PN </b>Indicates index entries in overset text. When you include these entries in the generated index, they appear without
page numbers.
<b>Master </b>Indicates index entries on a master page. These entries will not appear in the generated index.
Click a triangle to expand or collapse an individual entry. Alt-click (Windows) or Option-click (Mac OS) a triangle to
expand or collapse all subentries under an entry. Ctrl-click (Windows) or Command-click (Mac OS) a triangle to
expand or collapse all entries.
<i>Choose Update Preview in the Index panel menu to update the preview area. This option is especially useful if you’ve </i>
<i>edited your document extensively or moved index markers in the document window.</i>
<b>Create a list of topics for an index</b>
You can create or import a list of topics to use as a starting point when creating index entries. Later, when you add
entries to the index, you can select topics from the topic list (instead of typing them each time) to ensure that
information is indexed consistently throughout your document or book.
</div>
<span class='text_page_counter'>(154)</span><div class='page_container' data-page=154>
<i>Index panel in Reference mode (left) and Topic mode (right)</i>
Topics in the topic list appear in the New Page Reference dialog box as well. To create an index entry, simply select a
topic and then associate it with a page or cross-reference. Unused topics (those without page or cross-references) are
excluded when you generate an index.
Creating a topic list before you add index entries is optional. Each time you create an index entry, its topic is
automatically added to the topic list for future use.
<i>By default, topics you add to the Topics list do not appear in the Reference list, which displays only the topics that have </i>
<i>been associated with a page. However, to display the topics in the Reference list, you can choose Show Unused Topics </i>
<i>from the Index panel menu in Reference mode.</i>
<b>Add topics to the topics list</b>
<b>1</b> Choose Window > Type & Tables > Index to display the Index panel.
<b>2</b> Select Topic.
<b>3</b> Choose New Topic from the Index panel menu or click the Create New Index Entry icon at the bottom of the panel.
<b>4</b> Do one of the following:
• Under Topic Levels, type the topic name (for example, <i>animals</i>) in the first box. To create a subtopic, type a name
(<i>cats</i>) in the second box. In this example, “cats” is indented under “animals.” To create a subtopic under the
subtopic, type a name (<i>Calicos</i>) in the third box, and so on.
• Select an existing topic. Enter subtopics in the second, third, and fourth boxes.
<b>5</b> Click Add to add the topic, which will now appear in the New Topic dialog box as well as the Index panel.
<b>6</b> Click Done when you’ve finished adding topics.
<i>To delete a topic that you’ve just added, click Done, select the topic in the Index panel, and then click the Delete Selected </i>
<i>Entry button.</i>
<b>Import topics from another InDesign document</b>
<b>1</b> Choose Import Topics in the Index panel menu.
</div>
<span class='text_page_counter'>(155)</span><div class='page_container' data-page=155>
<b>Edit an index topic</b>
Use the Index panel to edit entries before or after you generate an index. Changes you make to your entries in the Index
panel will appear in the next index that you generate, but changes that you make to the generated index story will be
lost when you regenerate the index.
<b>1</b> Open a document containing the index topics.
<b>2</b> In the Index panel, select Topic.
<b>3</b> In the preview area, double-click a topic to edit.
<b>4</b> Edit the topic as desired, and then click OK.
<b>Add index entries</b>
You create index entries using the Index panel in Reference mode. An index entry consists of two parts: a topic and a
reference. Topics can be defined ahead of time using a topic list. References can be page numbers or cross-references to
other topics.
<i>Index panel in Reference mode</i>
<i><b>A </b>Entry <b>B </b>Subentry <b>C </b>Page reference <b>D </b>Cross-reference </i>
An index marker is inserted at the beginning of the word in which text is selected or at the insertion point. You can view
index markers by choosing Type > Show Hidden Characters.
<b>Add an index entry</b>
<b>1</b> Using the Type tool , place the insertion point where you want the index marker to appear, or select text in the
document to use as the basis for an index reference.
When selected text contains inline graphics or special characters, some characters (such as index markers and inline
graphics) are stripped out in the Topic Level box. Other characters, such as em dashes and copyright symbols, are
converted to metacharacters (for example, ^_ or ^2).
<b>2</b> Choose Window > Type & Tables > Index to display the Index panel.
<b>3</b> Select Reference.
<i>If entries added to the Topic list do not appear in the Reference, choose Show Unused Topics from the Index panel </i>
<i>menu. You can then use those topics when adding entries.</i>
</div>
<span class='text_page_counter'>(156)</span><div class='page_container' data-page=156>
<b>5</b> Choose New Page Reference in the Index panel menu. (If this command does not appear, make sure Reference is
selected and that there is an insertion point or text selection in the document.)
<b>6</b> To add text to the Topic Levels box, do any of the following:
• To create a simple index entry (such as cats), type the entry in the first Topic Levels box. (If text was selected, that
text appears in the Topic Levels box.)
• To create entries and subentries, type the parent name (for this example, animals) in the first Topic Levels box,
and type subentries (cats and Calicos) in subsequent boxes. If necessary, click the up and down arrows to change
places with the item above or below the selected item.
<i>Index entry in the Topic Levels box (left) and resulting appearance in the Index (right)</i>
• Double-click any topic in the list box at the bottom of the dialog box.
<b>7</b> To change the way an entry is sorted in the final index, use the Sort By boxes. For example, to sort the topic <i>de la </i>
<i>Vega</i> under <i>V</i> (instead of <i>D</i>), you would type <i>Vega</i> in the Sort By box and <i>de la Vega</i> in the Topic Level box.
You can also select the sort order of numbers, symbols, and languages, and you can edit sort information for Chinese
characters. (See Change the sort order of indexes.)
<b>8</b> Specify the type of index entry:
• To create index entries that have a page number or range (such as <i>cats 82–87</i>), choose an option that describes
the span of the entry in the Type pop-up menu. (See Page range options in indexes.)
• To create an index entry without a page number, choose Suppress Page Range in the Type menu. Although no
page number will appear in the generated index, the page number appears in parentheses in the Index panel.
• To create an index entry which refers to another entry, select one of the cross-reference options (such as <i>See</i> or
<i>See also</i>) from the Type pop-up menu, and input the entry name in the Referenced text box, or drag the existing
entry from the list at the bottom to the Referenced box. You can also customize the See and See also terms
displayed in the cross-reference entries by selecting Custom Cross Reference from the Type pop-up menu. (See
Add “See” or “See also” cross-references to an index.)
<b>9</b> To add emphasis to a particular index entry, select Number Style Override, and then specify a character style.
<b>10</b>To add an entry to the index, do any of the following:
• Click Add to add current entry and leave the dialog box open for additional entries.
• Click Add All to locate all instances of the selected text in the document window and create an index marker for
each one. Add All is available only if text in the document is selected.
• Click OK to add the index entry and close the dialog box.
</div>
<span class='text_page_counter'>(157)</span><div class='page_container' data-page=157>
<b>Index a word, phrase, or list quickly</b>
Using an indexing shortcut, you can quickly index individual words, a phrase, or a list of words or phrases. Adobe
InDesign recognizes two indexing shortcuts: one for standard index entries; the other for proper names. The proper
name shortcut creates index entries by reversing the order of a name so it is alphabetized by the last name. In this way,
you can list a name with the first name first, but have it appear in the index sorted by last name. For example, the name
<i>James Paul Carter</i> would appear in the index as <i>Carter, James Paul</i>.
To prepare a list for indexing, separate each item you want to be indexed with any of the following: a return, a soft return
(Shift + Return key), a tab, a right-indent tab (Shift + Tab), a semicolon, or a comma. The indexing shortcut adds a
marker in front of each entry and places all the items into the index.
<b>1</b> In the document window, select the word or words you want to index.
<b>2</b> Do one of the following:
• For standard words or phrases, press Shift+Alt+Ctrl+[ (Windows) or Shift+Option+Command+[ (Mac OS).
• For proper names that you want indexed by the last name, press Shift+Alt+Ctrl+] (Windows) or
Shift+Option+Command+] (Mac OS).
An index marker using the default settings is added at the beginning of the selection or to the beginning of each
item selected.
<i>To index compound last names or names with a title, include one or more nonbreaking spaces between the words. </i>
<i>For example, if you want to index “James Paul Carter Jr.” by “Carter” instead of “Jr.”, place a nonbreaking space </i>
<i>between “Carter” and “Jr.” (To insert a nonbreaking space, choose Type > Insert White Space > </i>
<i>Nonbreaking Space.)</i>
When you select terms like kanji for which a yomi is required and set the index marker using a shortcut, the New
Page Reference dialog box will open automatically if the yomi has not been input, and the term selected will be
displayed in the Topic Levels dialog box. Input the yomi corresponding to the text input in the Topic Levels box in
the Yomi text box. When the same index entry appears on several pages, the yomi for all the index entries can be
changed in a single step. To change only the index entry selected, select the page number in the Index panel and Page
Reference Options from the Index panel menu.
<b>Create a new entry from an existing one</b>
Often, a subject you’re indexing appears in multiple places in a document or book. When this happens, you can create
multiple index entries based on other entries already in your index to ensure consistency.
<b>1</b> In the document window, click an insertion point, or select text where the index marker will appear.
<b>2</b> In the Index panel, select Reference, and scroll the preview area to the entry you want to copy.
<b>3</b> Do one of the following:
• Drag an entry to the New Entry button to insert an index marker at the insertion point, or at the beginning
of the selection.
• Select an entry in the panel preview area, and then hold down Alt (Windows) or Option (Mac OS) and click the
New Entry button. The New Page Reference dialog box appears, with information about the selected entry. Make
any changes, and then click Add or OK.
</div>
<span class='text_page_counter'>(158)</span><div class='page_container' data-page=158>
<b>Index every occurrence of a word automatically</b>
Using the Add All option is an effective way to index all occurrences of a specified term in a document or a book. When
you click Add All, InDesign creates index markers at every occurrence of the words selected in the document—not the
text specified in the dialog box. (You can later delete entries that point to less significant information.)
When searching for occurrences of the selected text, InDesign considers only whole words, and searches are
case-sensitive. For example, if <i>cheetah</i> is selected, <i>cheetahs</i> and <i>Cheetah</i> will not be indexed.
<b>1</b> In the document window, select the text you want to search for.
<b>2</b> In the Index panel, select Reference.
<b>3</b> To create index entries for any open documents in the book, select Book.
<b>4</b> Choose New Page Reference in the Index panel menu.
<b>5</b> Choose Add All. InDesign adds index markers to all text that matches the selected text, regardless of whether the
text has been indexed, so you may end up with multiple entries for the same word or phrase.
<b>Edit an index entry</b>
To change a topic (such as renaming it or applying a new sort order) and automatically update all entries that use that
topic, use the Index panel in Topic mode. To change one entry at a time, use Reference mode. In Reference mode, you
can also add cross-references or locate the index marker associated with a page reference.
<b>1</b> Open the document containing the index entries.
<b>2</b> In the Index panel, do one of the following:
• Select Topic to edit a topic and automatically update all entries using that topic.
• Select Reference to edit an individual entry.
<b>3</b> In the preview area, select an entry or page reference. To select a page reference, select the page icon below the entry.
<b>4</b> Double-click an entry or page reference to edit.
<b>5</b> Edit the entry, and then click OK.
<b>Page range options in indexes</b>
You can create index entries that include a page range (such as <i>cats 82–87</i>) instead of a single page number. The Type
pop-up menu in the New Page Reference dialog box includes the following page-range options:
<b>Current Page </b>The page range does not extend beyond the current page.
<b>To Next Style Change </b>The page range extends from the index marker to the next change of paragraph style.
<b>To Next Use Of Style </b>The page range extends from the index marker to the page where the next occurrence of the
paragraph style specified in the adjacent paragraph style pop-up menu appears.
<b>To End Of Story </b>The page range extends from the index marker to the end of the current thread of text frames that
contain text.
<b>To End Of Document </b>The page range extends from the index marker to the end of the document.
<b>To End Of Section </b>The page range extends from the index marker to the end of the current section as defined in the
Pages panel. (See Document numbering options .)
</div>
<span class='text_page_counter'>(159)</span><div class='page_container' data-page=159>
<b>For Next # Of Pages </b>The page range extends from the index marker to the end of the number of pages specified in the
adjacent box, or to the end of as many pages as exist.
<b>Suppress Page Range </b>Turn off page range.
<b>Add “See” or “See also” cross-references to an index</b>
Cross-references are index entries that point to related entries, instead of a page number. You create cross-references
using the Index panel. Cross-references can serve different purposes in an index:
• Cross-references associate common terms with equivalents used in your document or book. For example, Fauna.
See Animals. Entries with such cross-references do not contain page references; they simply point to equivalent
terms that are indexed more fully.
• Cross-references point to other entries related to, but not equivalent to, a topic. For example, Cats. See also Wildcats.
In this case, the index entry containing the cross-reference also contains page numbers and/or subentries that are
directly related to the entry’s topic.
<i>Two types of cross-references</i>
A.Cross-reference to related information (See also)B.Cross-reference to an equivalent term (See)
When you create a cross-reference in InDesign, you can also select a cross-reference prefix. “See” and “See also” are
static text. When you choose “See [also],” InDesign automatically assigns the correct prefix to the cross-reference each
time the index is generated:
• Entries with page numbers, subentries, or both are given “See also.”
• Entries without page numbers or subentries are given “See.”
Using the “See [also]” option frees you from the task of manually updating cross-references as the contents of your
index entries change.
<b>1</b> Choose Window > Type & Tables > Index.
<b>2</b> Select Reference.
<b>3</b> (Optional) Select Book to view index entries from any open documents in a book file.
<b>4</b> Choose New Page Reference in the Index panel menu.
<b>5</b> Enter a topic or topics in the Topic Levels boxes.
<b>6</b> In the Type menu, choose a cross-reference prefix (such as See also) from the bottom of the menu.
<b>7</b> Type a topic in the Referenced box, or drag an existing topic from the topic list at the bottom.
<b>8</b> Click Add to add the cross-reference to the index.
Cross-references appear in the Index panel and the generated index, but are not associated with index markers in the
document itself.
</div>
<span class='text_page_counter'>(160)</span><div class='page_container' data-page=160>
<b>Generate an index</b>
Once you’ve added index entries and previewed them in the Index panel, you’re ready to generate an index story to
place in your document for publication.
An index story can appear as a separate document or in an existing document. When you generate an index story,
InDesign compiles index entries and updates page numbers across your document or book. If you add or delete index
entries or update numbering in your document, however, you’ll need to regenerate the index to update it.
If an index marker appears in overset text when you generate the index, you are asked if you would like to include these
markers in the index. If you click Yes, the entry appears in the index without a page number. If an index marker appears
in hidden conditional text, the entry is excluded from the index.
<b>1</b> Do one of the following:
• If you’re creating an index for a single document, you may want to add a new page at the end of the document.
• If you’re creating an index for multiple documents in a book, create or open the document to be used for the
index, and make sure that it’s included in the book.
<b>2</b> Choose Generate Index in the Index panel menu. Specify settings for the following options:
• For Title, type the text that will appear at the top of the index. To determine how the title is formatted, select a
style in the Title Style pop-up menu.
• Select Replace Existing Index to update an existing index. This option is dimmed if you haven’t generated an
index. Deselecting this options lets you create multiple indexes.
• Select Include Book Documents to create a single index for all documents in the current book list and to
renumber the book’s pages. Deselect this option if you want to generate an index for the current document only.
• Select Include Entries On Hidden Layers if you want index markers on hidden layers to be included in your
index.
• To view additional index options, click More Options.
<b>3</b> Click OK. If Replace Existing Index is deselected, a loaded text icon appears. Place the index story as you would any
other text.
<i>If you edit entries in the index story, these changes are overridden when you regenerate the index. For best results, edit </i>
<i>the index in the Index panel, and then generate the index again. </i>
<b>Index formatting options</b>
When you click More Options in the Generate Index dialog box, formatting options appear that let you determine the
style and appearance of the generated index. InDesign includes a number of built-in paragraph and character styles that
you can select to format the generated index, or you can create and select your own styles. After you generate the index,
you can edit these styles in the Paragraph Styles and Character Styles panels.
<i>Index with nested entries</i>
</div>
<span class='text_page_counter'>(161)</span><div class='page_container' data-page=161>
<i>To replace the entry separators (such as the values for Following Topic or Between Entries), select the existing separator </i>
<i>and then type or choose a replacement character.</i>
<b>Nested or Run-in </b>Select Nested if you want the index formatted in the default style, with subentries nested under an
entry as separate indented paragraphs. Select Run-in if you want all levels of an entry to appear in a single paragraph.
The Between Entries option determines which character separates the entries.
<b>Include Index Section Headings </b>Select this option to generate section headings consisting of alphabet characters (A, B,
C, and so on) representing the section that follows.
<b>Include Empty Index Sections </b>Select this option to generate section headings for all letters of the alphabet, even if the
index lacks any first-level entries that begin with a particular letter.
<b>Level Style </b>For each index level, choose a paragraph style to be applied to each level of index entries. You can edit these
styles in the Paragraph Styles panel after you generate the index.
<b>Section Heading </b>Select the paragraph style that determines the appearance of the section headings (A, B, C, and so on)
in the generated index.
<b>Page Number </b>Select the character style that determines the appearance of the page numbers in the generated index.
This setting does not affect index entries you formatted using the Number Style Override option.
<i><b>Note: </b>If you want the page numbers in the index to include prefixes, as in B-1 or II-1, see Define section numbering.</i>
<b>Cross-reference </b>Select the character style that determines the appearance of cross-reference prefixes (such as <i>See</i> and
<i>See also</i>) in the generated index.
<b>Cross-referenced Topic </b>Select the character style that determines the appearance of the topic being referred to (such as
<i>beasts</i> in <i>See also beasts</i>) in the generated index.
<b>Following Topic </b>Type or select a special character to separate the entry from the page number (such as <i>Animals 38</i>).
The default is two spaces. Determine formatting for this character by editing the corresponding Level Style, or by
selecting another.
<b>Between Page Numbers </b>Type or select a special character to separate one page number or range from another. The
default is a comma followed by an en space.
<b>Between Entries </b>If Run-in is selected, type or select a special character to determine how entries and subentries are
separated. If Nested is selected, this setting determines how two cross-references under a single entry are to be
separated.
<b>Before Cross-reference </b>Type or select a special character that appears between a reference and a cross-reference, as in
<i>Animals. See also beasts</i>. The default is a period followed by a space. Determine formatting for this character by
switching or editing the corresponding level style.
<b>Page Range </b>Type or select a special character to separate the first and last numbers in a page range (such as
<i>Animals 38–43</i>). The default is an en dash. Determine formatting for this character by switching or editing the Page
Number style.
<b>Entry End </b>Type or select a special character to appear at the end of entries. If Run-in is selected, the specified character
appears at the end of the last cross-reference. The default is no character.
<b>Change the sort order of indexes</b>
</div>
<span class='text_page_counter'>(162)</span><div class='page_container' data-page=162>
Changing the sort order affects the sort order in the Index panel and in the index stories that are generated afterwards.
You can create multiple indexes with different sort orders. For example, you can generate an index in German, change
the sort order, and then generate a separate index in Swedish — just make sure Replace Existing Index isn’t selected
when you generate the index.
<b>1</b> Choose Sort Options from the Index panel menu.
<b>2</b> Make sure the items you want sorted are selected.
<b>3</b> To determine the type of language script used, click the item under Header Type and choose a different option from
the menu.
For example, for Cyrillic, you can choose Russian, Belarusian, Bulgarian, or Ukrainian. For Chinese, you can choose
Pinyin, which is primarily used for Simplified Chinese, or Stroke Count, which is primarily used for Traditional
Chinese.
<b>4</b> To change the order of a language or symbol, select it in the list, and then click the Up or Down buttons in the lower
right part of the list.
Items that are higher on the list are sorted before lower items. Any characters from languages that aren’t included in
the Sort Options dialog box are sorted under symbols. For example, if you have Greek text in your document but
don’t include Greek under Sort Options, any indexed Greek text will appear under Symbols.
<b>Sort order of Japanese and Korean indexes</b>
When creating index entries for Asian languages, note the following:
• Asian languages use different sorting convention based on their specific typographic rules.
• When making an index for Japanese text, the yomi for index entries in the Topic Level box should be entered in the
Yomi box using full-width hiragana and katakana. It is not necessary to input the yomi for full-width hiragana,
katakana, alphanumeric characters, some symbols, half-width alphanumeric characters, or index entries that only
have symbols in the Yomi box. Entries input in the Topic Level box are sorted. In some cases, when full-width and
half-width symbols are mixed in an entry, sorting may not take place as expected. An appropriate, yomi should be
entered in these cases.
• Half-width katakana or kanji cannot be input in the Yomi text box. However, full-width symbols, such as and ,
can be input.
• Hiragana and katakana are distinguished and hiragana is sorted before katakana. Upper- and lowercase alphabetic
characters are also distinguished, and uppercase characters are sorted before lowercase.
• If the same characters are input in the Topic Level box, they are handled as separate index entries if a different yomi
is entered. For example if “Cat” is input as an index entry with a reading of “Neko” in katakana, and then input a
second time with a reading of “Neko” in hiragana, two index items for “Cat” will be generated. This feature can also
be used to classify the same term under separate index topics. For example, when entering the term “The Cats” in
an index, if “Cats” is input in the Yomi text box and two index entries are created without any input, the term “The
Cats” will be generated under the T and C index topics.
• For Korean sort order, you can specify Korean Consonant or Korean Consonant Plus Vowel.
<b>Sort order of Chinese indexes</b>
You determine the sort order of Chinese characters in two places -- in the Sort Options dialog box, and in the Sort By
field when you create or edit an index entry.
</div>
<span class='text_page_counter'>(163)</span><div class='page_container' data-page=163>
<b>Sort By </b>When you’re creating or editing an index entry, typing Chinese characters in the Topic Levels fields enables
you to edit Chinese sort information.
For Pinyin, if multiple words have the same Pinyin, the order is sorted by (1) tone and (2) stroke count in ascending
order. For Stroke Count, each character is sorted by (1) stroke count, (2) first stroke, and (3) second stroke. You can
either edit the sort information directly in the Sort By field, or you can click the arrow to the right of the Sort By field
to open either the Pinyin Entry dialog box or Stroke Count Entry dialog box. You can edit the fields and click OK.
Repeat this process for each topic level.
<b>Manage an index</b>
After you set up your index and add index markers to your document, you can manage your index in a variety of ways.
You can view all index topics in a book, remove topics from the Topic list that aren’t used in the Reference list, find
entries in either the Reference or Topics list, and remove index markers from the document.
<b>View all index topics in a book</b>
When the Book option is selected, the Index panel displays entries from the entire book, not just the current document.
<b>1</b> Open the book file and all of the documents it contains.
<b>2</b> Select Book at the top of the Index panel.
If others need to access documents in the book while the index is being created, you can create a master list of topics in
a separate document, and then import topics from the master list to each document in the book. Note that if the master
list changes, you will need to import topics to each document again.
<i>When you are indexing a book with multiple documents, you can display the index topics for all the documents listed </i>
<i>by generating the book’s index, including all the documents. Then you don’t have to use Import Topics in the Index menu </i>
<i>to manually import the topics into each document.</i>
<b>Remove unused topics from the Topic list</b>
Once you have created your index, you can delete topics that weren’t included in the index.
<b>1</b> Choose Window > Type & Tables > Index to display the Index panel.
<b>2</b> Choose Remove Unused Topics in the Index panel menu. All topics that do not have page numbers associated with
them are deleted.
<b>Delete index markers</b>
? Do either of the following:
• In the Index panel, select the entry or topic you want to delete. Click the Delete Selected Entry button .
<i><b>Note: </b>If the selected entry is the heading for multiple subheadings, all subheadings are also deleted.</i>
• In the document window, select the index marker and press Backspace or Delete.
<i><b>Note: </b>To view index markers in the document window, choose Type > Show Hidden Characters.</i>
<b>Find an index entry in the Index panel</b>
<b>1</b> Choose Show Find Field in the Index panel menu.
</div>
<span class='text_page_counter'>(164)</span><div class='page_container' data-page=164>
<b>Locate index markers in a document</b>
<b>1</b> Choose Type > Show Hidden Characters to display index markers in the document window.
<b>2</b> In the Index panel, click Reference, and then select the entry you want to locate.
<b>3</b> Choose Go To Selected Marker in the Index panel menu. The insertion point appears to the right of the index
marker. You can then press Shift+Left Arrow to select the marker for cutting, copying, or deleting.
<b>Capitalize index entries</b>
The Capitalize dialog box provides a global solution for editing the capitalization of index entries so that you don’t have
to edit entries one by one. For example, if you’ve indexed some of your entries as lowercase (<i>cats</i>) and others as
uppercase (<i>Cats</i>), these entries will be considered separate topics. You can fix this problem by capitalizing selected
entries.
<b>1</b> In the preview area of the Index panel, select an entry.
<b>2</b> Choose Capitalize in the Index panel menu.
<b>3</b> Select whether you want to capitalize only the selected topic, the selected topic and all subtopics, all Level 1 topics,
or all topics, and then click OK.
<b>Create documents</b>
<b>Customize the pasteboard and guides</b>
You can control the colors used to display guides for page margins and columns, as well as the guides for the bleed and
slug areas on the pasteboard. To make it easier to distinguish between the Normal and Preview modes, you can change
the color of the preview background.
InDesign also lets you control how close an object needs to be to snap to a guide, whether guides should be displayed
in front of or behind objects, as well as the size of the pasteboard.
<b>1</b> Choose Edit > Preferences > Guides & Pasteboard (Windows) or InDesign > Preferences > Guides & Pasteboard
(Mac OS).
<b>2</b> Under Color, choose the desired colors from each of the following menus, or choose Custom to specify a custom
color using the color picker.
<b>Margins </b>Sets the color of the page margins.
<b>Columns </b>Sets the color of the column guides for the page.
<b>Bleed </b>Sets the color of the bleed area (which is set in theDocument Setup dialog box).
<b>Slug </b>Sets the color of the slug area (which is set in theDocument Setup dialog box).
<b>Preview Background </b>Sets the color of the pasteboard when in the Preview mode.
<b>3</b> To set how close an object must be to snap to a guide or grid, specify a value in pixels for Snap To Zone.
<b>4</b> To display guides behind objects, select Guides In Back.
</div>
<span class='text_page_counter'>(165)</span><div class='page_container' data-page=165>
<i>You can change the on-screen color of your paper. With no text or objects selected, double-click the Paper color in the </i>
<i>Swatches panel (choose Window > Swatches). The Paper color appears on-screen only and does not affect output; it is </i>
<i>intended only to simulate designing for nonwhite paper.</i>
<b>Change document setup, margins, and columns</b>
After you create a document, you may change your mind about how you want it set up. For example, you may want
single pages instead of facing pages, or you may want to change the page size or margin settings.
<b>Change document setup</b>
Changing options in the Document Setup dialog box affects every page in the document. If you change page size or
orientation after objects have been added to pages, you can use the Layout Adjustment feature to minimize the amount
of time needed for arranging existing objects. See About automatic layout adjustment.
<b>1</b> Choose File > Document Setup.
<b>2</b> Specify the document options, and then click OK. (See New Document options.)
<b>Change page margin and column settings</b>
You can change column and margin settings for pages and spreads. When you change the column and margin settings
on a master page, you change the setting for all pages to which the master is applied. Changing the columns and margins
of regular pages affects only those pages selected in the Pages panel.
<i><b>Note: </b>The Margins And Columns dialog box doesn’t alter columns inside text frames. Text frame columns exist only within </i>
<i>individual text frames, not on the page itself. You can set up columns within individual text frames by using the Text Frame </i>
<i>Options dialog box. (See Add columns to a text frame.) Text frame columns can also be affected by the Layout Adjustment </i>
<i>feature. </i>
<b>1</b> Do one of the following:
• To change margin and column settings for one spread or page, go to the spread you want to change, or select one
spread or page in the Pages panel.
• To change margin and column settings for multiple pages, select those pages in the Pages panel, or select a master
that controls the pages you want to change.
<b>2</b> Choose Layout > Margins And Columns, specify the following options, and then click OK.
<b>Margins </b>Type values to specify the distance between margin guides and each edge of the page. If Facing Pages is
selected in the New Document or Document Setup dialog box, the Left and Right margin option names change to
Inside and Outside, so that you can specify additional inside margin space to accommodate binding.
<b>Columns </b>Specify the number of columns.
Select Horizontal or Vertical to specify the column direction. This also sets the writing direction of the document
baseline grid.
<b>Create unequal column widths</b>
When you have more than one column on a page, the column guides in the middle appear in pairs. When you drag one
column guide, the pair moves. The space between the column guides is the gutter value you specified; the pair moves
together to maintain that value.
<i><b>Note: </b>You cannot create unequal column widths for columns in a text frame. Instead, created threaded, side-by-side text </i>
<i>frames with different column widths.</i>
</div>
<span class='text_page_counter'>(166)</span><div class='page_container' data-page=166>
<b>2</b> If column guides are locked, choose View > Grids & Guides > Lock Column Guides to deselect it.
<b>3</b> Using the Selection tool , drag a column guide. You can’t drag it past an adjacent column guide or beyond the edge
of the page.
<i>Dragging a column guide to create unequal column widths</i>
<i>To create columns with unequal gutters, create evenly spaced ruler guides and then drag individual guides to the desired </i>
<i>location. (See Create ruler guides .)</i>
<b>Text variables</b>
<b>Create and edit text variables</b>
A <i>text variable</i> is an item you insert in your document that varies according to the context. For example, the Last Page
Number variable displays the page number of the last page of the document. If you add or remove pages, the variable
is updated accordingly.
InDesign includes several preset text variables that you can insert in your document. You can edit the format of these
variables, or you can create your own. Some variables, such as Running Header and Chapter Number, are especially
useful for adding to master pages to ensure consistent formatting and numbering. Other variables, such as Creation
Date and File Name, are useful for adding to the slug area for printing.
<i><b>Note: </b>Adding too much text to a variable may cause overset or compressed text. Variable text does not break across lines.</i>
<b>Create or edit text variables</b>
The options available for creating the variable depend on the type of variable you specify. For example, if you choose
the Chapter Number type, you can specify text to appear both before and after the number, and you can specify the
numbering style. You can create several different variables based on the same variable type. For example, you can create
one variable that displays “Chapter 1” and another that displays “Ch. 1.”
Similarly, if you choose the Running Header type, you can specify which style is used as the basis for the header, and
you can select options for deleting end punctuation and changing the case.
<b>1</b> If you want to create text variables for use in all new documents you create, close all documents. Otherwise, the text
variables you create appear only in the current document.
<b>2</b> Choose Type > Text Variables > Define.
<b>3</b> Click New, or select an existing variable and click Edit.
</div>
<span class='text_page_counter'>(167)</span><div class='page_container' data-page=167>
<b>5</b> From the Type menu, choose a variable type, specify the options for that type, and then click OK.
Different options are available depending on the variable type you select.
<b>Text Before / Text After </b>For all variable types (except Custom Text), you can specify text that will be added before or
after the variable. For example, you can add the word “of ” before the Last Page Number variable and the phrase
“total pages” after the variable to create an “of 12 total pages” effect. You can also paste text into the boxes, but special
characters such as tabs and auto page numbers are stripped out. To insert special characters, click the triangle to the
right of the text box.
<b>Style </b>For all numbered variable types, you can specify the numbering style. If [Current Numbering Style] is
selected, the variable uses the same numbering style selected in the document’s Numbering & Section Options
dialog box.
<b>Variable types</b>
<b>Chapter Number</b>
A variable created with the Chapter Number type inserts the chapter number. You can insert text before or after the
chapter number, and you can specify a numbering style.
If the document’s chapter number is set to continue from the previous document in the book, you may need to update
the book’s numbering in order for the appropriate chapter number to appear.
<b>Creation Date, Modification Date, and Output Date</b>
Creation Date inserts the date or time the document is first saved; Modification Date inserts the date or time the
document was last saved to disk; Output Date inserts the date or time the document starts a print job, exports to PDF,
or packages the document. You can insert text before and after the date, and you can modify the date format for all date
variables.
<b>Date Format </b>You can type date formats directly into the Date Format box, or you can choose format options by clicking
the triangle to the right of the box. For example, the date format “MM/dd/yy” displays as 12/22/07. By changing the
format to “MMM. d, yyyy” the date will display as Dec. 22, 2007.
Date variables use the language applied to text. For example, the creation date may appear in Spanish text as “01
diciembre 2007” and in German as “01 Dezember 2007.”
<b>Abbreviation</b> <b>Description</b> <b>Example</b>
M Month number, no leading zero 8
MM Month number, leading zero 08
MMM Abbreviated month name Aug
MMMM Full month name August
d Day number, no leading zero 5
dd Day number, leading zero 05
E Weekday name, abbreviated Fri
EEEE Full weekday name Friday
yy or YY Year number, last two digits 07
y (Y) or yyyy (YYYY) Full year number 2007
</div>
<span class='text_page_counter'>(168)</span><div class='page_container' data-page=168>
<b>File Name</b>
This variable inserts the name of the current file into the document. It’s commonly added to the slug area of the
document for printing or used in headers and footers. In addition to Text Before and Text After, you can choose the
following options.
<b>Include Entire Folder Path </b>Select to include the full folder path with the file name. The standard path conventions for
either Windows or Mac OS are used.
<b>Include File Extension </b>Select to include the file name extension.
The File Name variable is updated whenever you save the file with a new name or to a new location. The path or
extension does not appear in the document until it’s saved.
<b>Image Name</b>
The Image Name variable is useful for generating automatic captions from metadata. The Image Name variable
includes a Metadata Caption variable type. If a text frame containing this variable is adjacent to or grouped with an
image, the variable displays the metadata of that image. You can edit the Image Name variable to determine which
metadata field is used.
See Define caption variables.
<b>Last Page Number </b>
The Last Page Number type is useful for adding the total number of pages in a document to headers and footers using
the common “Page 3 of 12” format. In this case, the number 12 is generated by the Last Page Number, and it’s updated
whenever pages are added or removed. You can insert text before or after the last page number, and you can specify a
numbering style. From the Scope menu, choose an option to determine whether the last page number in the section or
document is used.
Note that the Last Page Number variable does not count the pages in the document.
<b>Running Header (Paragraph or Character Style)</b>
The Running Header variables insert the first or last occurrence on the page of the text to which the specified style is
applied. If no text on the page is formatted with the specified style, the text from a previous page is used.
See Create variables for running headers and footers .
h Hour, no leading zero 4
hh Hour, leading zero 04
H Hour, no leading zero, 24-hour format 16
HH Hour, leading zero, 24-hour format 16
m Minute, no leading zero 7
mm Minute leading zero 07
s Second, no leading zero 7
ss Second, leading zero 07
a AM or PM, two characters PM
z or zzzz Time zone, abbreviated or expanded PST or Pacific Standard Time
</div>
<span class='text_page_counter'>(169)</span><div class='page_container' data-page=169>
This variable is commonly used for inserting placeholder text, or a text string that may need to be changed quickly. For
example, if you’re working on a project that uses a code name for a company, you can create a custom text variable for
the code name. When you are able to use the real company name, you can simply change the variable to update all the
occurrences.
To insert special characters in a text variable, click the triangle to the right of the text box.
<b>Insert text variables</b>
<b>1</b> Place the insertion point where you want the variable to appear.
<b>2</b> Choose Type > Text Variables > Insert Variable, and then choose the variable you want to insert.
The variable appears on the page as if you’d typed it in the document. For example, the Creation Date variable might
appear as December 22, 2007. If you choose Type > Show Hidden Characters, the variable instance is surrounded by a
box using the current layer color.
<i><b>Note: </b>Text variables do not break across lines.</i>
<b>Delete, convert, and import text variables</b>
Use the Text Variables dialog box to delete, convert, and import text variables.
<b>Delete text variables</b>
If you want to delete an instance of a text variable inserted in a document, simply select the variable and press Backspace
or Delete. You can also delete the variable itself. When you do so, you can decide how to replace the variables inserted
in the document.
<b>1</b> Choose Type > Text Variables > Define.
<b>2</b> Select the variable, and then click Delete.
<b>3</b> Specify how the variable will be replaced by specifying a different variable, converting the variable instances to text,
or deleting the variable instances altogether.
<b>Convert text variables to text</b>
• To convert a single instance, select the text variable in the document window, and then choose Type > Text
Variables > Convert Variable To Text.
• To convert all instances of the text variable in the document, choose Type > Text Variables > Define, select the
variable, and then click Convert To Text.
<b>Import text variables from another document</b>
<b>1</b> Choose Type > Text Variables > Define.
<b>2</b> Click Load, and then double-click the document that has the variables you want to import.
<b>3</b> In the Load Text Variables dialog box, make sure that a check mark appears next to the variables you want to import.
If any existing variable has the same name as one of the imported variables, choose one of the following options
under Conflict With Existing Text Variable, and then click OK:
<b>Use Incoming Definition </b> Overwrites the existing variable with the loaded variable and applies its new attributes to
all text in the current document that used the old variable. The definitions of the incoming and existing variables
are displayed at the bottom of the Load Text Variables dialog box so that you can view a comparison.
</div>
<span class='text_page_counter'>(170)</span><div class='page_container' data-page=170>
<b>4</b> Choose OK, and then click Done.
<i>You can also copy variables to other documents when you synchronize a book file.</i>
<b>Create type on a path</b>
<b>Create type on a path</b>
You can format text to flow along the edge of an open or closed path of any shape. Apply options and effects to type on
a path: Slide it along the path, flip it over to the other side of the path, or use the shape of the path to distort the
characters. Type on a path has an in port and an out port just like other text frames, so you can thread text to and from it.
You can include only one line of type on a path, so any type that won’t fit on the path will be overset (hidden), unless
you’ve threaded it to another path or text frame. You can add inline or above line anchored objects to type on a path.
You can’t create type on a path using compound paths, such as those that result from using the Create Outlines
command.
<i>Type on a path</i>
<i><b>A </b>Start bracket <b>B </b>In port <b>C </b>Center bracket <b>D </b>End bracket <b>E </b>Out port indicating threaded text </i>
<b>1</b> Select the Type On A Path tool . (Click and hold the Type tool to display a menu containing the Type On A Path
tool.)
<b>2</b> Position the pointer on the path until a small plus sign appears next to the pointer , and then follow these steps:
• To type using default settings, click the path. An insertion point appears at the start of the path by default. If the
current default paragraph settings specify an indent, or any alignment other than left, the insertion point may
appear somewhere other than at the start of the path.
• To confine the text to a specific portion of the path, click the path where you would like the text to start, and drag
along the path to where you want the text to end, then release the mouse. (For information about changing the
start and end position of text, see Adjust the type on a path position.)
</div>
<span class='text_page_counter'>(171)</span><div class='page_container' data-page=171>
<i><b>Note: </b>If neither clicking nor dragging seems to work, make sure that the small plus sign appears next to the Type On A </i>
<i>Path tool.</i>
<b>3</b> Type the text you want. If you clicked to place the insertion point on the path, type will appear along the entire length
of the path. If you dragged, type will appear only along the length you dragged.
<i><b>Note: </b>If the path was originally visible, it remains visible after you add type to it. To hide the path, select it with the Selection </i>
<i>or Direct Selection tool, and then apply a fill and stroke of None.</i>
<b>Edit or delete type on a path</b>
You can apply character and paragraph options to type on a path. However, paragraph rules and paragraph spacing
options have no effect on type on a path. The alignment setting in the Paragraph panel controls the alignment of type
on a path.
<b>Edit and format path-type characters</b>
<b>1</b> Using the Type On A Path tool, do one of the following:
• To add an insertion point, click between any two characters in the type on a path.
• To select characters, drag through the type on a path.
<b>2</b> Edit and format the text as needed.
<b>Delete type from a path</b>
<b>1</b> Using the Selection tool or Direct Selection tool , select one or more type-on-a-path objects.
<b>2</b> Choose Type > Type on a Path > Delete Type From Path.
If the path text is threaded, type moves to the next threaded text frame or type-on-a-path object. If the path text isn’t
threaded, text is deleted. The path remains, but loses any type-on-a-path attributes—all brackets, in and out ports, and
threading properties are removed.
<i><b>Note: </b>If the path’s fill and stroke are set to None, the path is invisible after you delete the type. To make the path visible, </i>
<i>press the D key immediately after you choose Type > Type on a Path > Delete Type From Path. This applies the default fill </i>
<i>and stroke to the selected path.</i>
<b>Tighten character spacing around sharp turns and acute angles</b>
<b>1</b> Using the Selection tool or the Type tool, select the type on a path.
<b>2</b> Choose Type > Type on a Path > Options, or double-click the Type On A Path tool.
<b>3</b> For Spacing, type a value in points. Higher values remove the extra space from between characters positioned on
sharp curves or angles.
</div>
<span class='text_page_counter'>(172)</span><div class='page_container' data-page=172>
<i><b>Note: </b>The Spacing value compensates for the way characters fan out around a curve or sharp angle. It has no effect on </i>
<i>characters positioned on straight segments. To change spacing of characters anywhere along the path, select them, and then </i>
<i>apply kerning or tracking.</i>
<b>Adjust the type on a path position</b>
You can change the start or end position of type on a path, slide type, and change the path position in other ways.
<b>Change the start or end position of type on a path</b>
<b>1</b> Using the Selection tool , select the type on a path.
<b>2</b> Position the pointer over the path type’s start or end bracket until a small icon appears next to the pointer . Do
not position it over the bracket’s in port or out port.
<i>Zoom in on the path to more easily select the bracket.</i>
<b>3</b> Drag the start or end bracket along the path.
<i>Position the pointer on start or end bracket, and then drag to reposition boundary of type on a path.</i>
<i><b>Note: </b>If you apply a paragraph indent value, it’s measured from the start and end brackets.</i>
<b>Slide type along a path</b>
<b>1</b> Using the Selection tool , select the type on a path.
<b>2</b> Position the pointer over the path type’s center bracket until a center bracket icon appears next to the pointer .
<i>Zoom in on the path to more easily select the bracket.</i>
<b>3</b> Drag the center bracket along the path.
<i><b>Note: </b>The text won’t move if both the start and end brackets are at the ends of the path. To create some space for dragging </i>
<i>text, drag the start or end bracket away from the ends of the path.</i>
<b>Flip type on a path</b>
<b>1</b> Click the Selection tool , and select the type on a path.
</div>
<span class='text_page_counter'>(173)</span><div class='page_container' data-page=173>
<i>Position pointer on center bracket, and then drag across path to flip type.</i>
You can also flip type on a path using a dialog box. Using the Selection tool or the Type tool, select the type on a
path. Choose Type > Type on a Path > Options. Select the Flip option, and then click OK.
<b>Apply an effect to type on a path</b>
<b>1</b> Using the Selection tool or the Type tool, select the type on a path.
<b>2</b> Choose Type > Type on a Path > Options, or double-click the Type On A Path tool.
<b>3</b> Choose one of the following in the Effect menu, and then click OK:
• To keep the center of each character’s baseline parallel to the path’s tangent, choose Rainbow. This is the default
setting.
<i>Type on a path effects</i>
<i><b>A </b>Rainbow effect <b>B </b>Skew effect <b>C </b>3D Ribbon effect <b>D </b>Stair Step effect <b>E </b>Gravity effect </i>
• To keep characters’ vertical edges perfectly vertical regardless of the path shape, while letting characters’
horizontal edges follow the path, choose Skew. The resulting horizontal distortion is useful for text that appears
to follow waves or go around a cylinder, as on a beverage can label.
</div>
<span class='text_page_counter'>(174)</span><div class='page_container' data-page=174>
• To keep the left edge of each character’s baseline on the path without rotating any characters, choose Stair Step.
• To keep the center of each character’s baseline on the path while keeping each vertical edge in line with the path’s
center point, choose Gravity. You can control this option’s perspective effect by adjusting the arc of the text’s path.
<b>Add anchored objects to type on a path</b>
<b>1</b> Using the Type tool or the Type On A Path tool, click an insertion point in the text where you want the anchor for
the object to appear.
<b>2</b> Add the anchored object. You can add inline or above line anchored objects or frames to the path. (See Anchored
objects.)
<i><b>Note: </b>The options available for above line anchored objects in a text path differ slightly from options for anchored objects </i>
<i>in a regular text frame: the Alignment option is relative to the anchored object marker and the Space Before option is not </i>
<i>available.</i>
<b>Linked content</b>
Replicating content across various pages is no easy task; copy-pasting can be cumbersome and time consuming. Use
linked content features to manage multiple versions of content. You can place and link content within the same
document or even across different documents. Linked content makes it easier to support emerging workflows, where
for example, you design for vertical and horizontal layouts. Linked content also works well for traditional print and
publishing workflows, where you synchronize boilerplate text on different pages or documents.
Linked content behaves similar to traditional links. See Use the Links panel for an overview. You can designate an object
as parent, and then place it at other places as child objects. Whenever you update the parent object, the child objects
are flagged and you can update them to synchronize with the parent.
You can place and link objects using either the Content Collector tools, or choose Place and linkmenu command.
The icon displays on the upper-left corner of linked object. The item is displayed as linked object in the Links panel.
<b>Content Collector tools</b>
Content Collector and Placer tools let you duplicate page items and place them on open InDesign documents. As
content is collected, it is displayed in the Content Conveyor. Use Content Conveyor to easily and quickly place and link
multiple page items within and across open documents.
Click in the toolbox to open the Content Conveyor.
• Use Content Collector tool to select an object and add it to the conveyor
• Use Content Placer to place page object on a page
</div>
<span class='text_page_counter'>(175)</span><div class='page_container' data-page=175>
<i>Content Conveyor</i>
<i><b>A </b>Content Collector tool <b>B </b>Content placer tool <b>C </b>Create link <b>D </b>Map styles <b>E </b>Edit Custom Style Mapping <b>F </b>Place options <b>G </b>Browse <b>H </b>Collect </i>
<i>All Threaded Frames <b>I </b>Load Conveyor </i>
<b>Content Collector </b>Use the Content Collector to add page items to the Content Conveyor.
<b>Content Placer </b>Use the Content Placer to place the items from the Content Conveyor to the document. When you
select this tool, the current item is added to the place gun.
<b>Create Link </b>Enable Create Link to link the placed item to the original location of the collected item. You can manage
the links using the Links panel.
<b>Map Styles </b>Map paragraph, character, table, or cell styles, between the original and placed items. By default, style
names are used for mapping. See Custom Style Mapping.
<b>Edit Custom Style Mapping </b>Define custom style mapping between the original and placed items. Map the styles to
automatically replace original styles in the placed item.
<b>Place Options </b>Specify the Conveyor options while placing items.
• Remove items from the conveyor after you place them
• Place the current item multiple times. The item remains loaded in the place gun.
• Place the item and move to the next item. The item is however kept in the conveyor.
<b>Browse </b>Navigate through the items in the Content Conveyor.
<b>Collect All Threaded Frames </b>Enable this option to collect all threaded frames. The story and all frames are collected. If
this option is disabled, the story is collected in a single frame.
<b>Load Conveyor </b>Use to load the conveyor with items.
• Selection: Use this option to load all selected items
• Pages: Use this option to load all items on the specified pages
• All: Use this option to load items from all pages and pasteboard
Enable Create Single set to group all the items in a single set.
You can collect individual page items, or collect related items as "sets." In some cases InDesign automatically creates
sets to preserve the relational integrity of the page items.
The following are a few method of collecting items as sets, some manual and some automatic:
• Marquee select a number of items
• Use the Load Conveyor option and then select range of pages or all document content or selected items and items
will be accordingly collected in a set.
• Collect an item that has related content such as a part of an interactive button that has other items and states
associated with it, it will collect all related items in a set (this set will always drop in one gesture)
</div>
<span class='text_page_counter'>(176)</span><div class='page_container' data-page=176>
<b>Place and link</b>
<b>1</b> Select a page item by either selecting the frame or place the insertion cursor in the text. You can also select multiple
items by using Shift+Click.
<b>2</b> Choose Edit > Place and Link. The cursor is loaded with the items, and the items display in the Content Conveyor.
<b>3</b> Click on a page or draw a frame to place the linked item.
<b>Specify link options</b>
<b>1</b> In the Links panel, select the linked item.
<b>2</b> From the Links panel menu, choose Link Options.
<i>Link Options</i>
<i>Press Alt (Windows) or Option (Mac OS) to change the Cancel button to Reset. Click Reset to revert to default </i>
<i>options. </i>
<b>3</b> Select the options as required:
<b>Update Link When Saving Document </b>Enable this option to update the link when you save the document.
<b>Warn if Link Update Will Overwrite Local Edits </b>Enable this option to show a warning message if updating the link
will overwrite any local edits made to the linked object.
</div>
<span class='text_page_counter'>(177)</span><div class='page_container' data-page=177>
<b>Remove Forced Line Breaks from Story </b>Enable to remove any forced line breaks in the story. Removing line breaks
lets the text reflow smoothly in the linked frame if it is resized or reformatted.
<b>Define Custom Style Mapping </b>Enable this option if you want to map styles, and automatically apply another style to
the linked content instead. See Custom Style Mapping.
<i>To specify default link options, with all documents closed, open the links panel menu and choose Link Options. </i>
<b>Custom Style Mapping</b>
Text styles (paragraph, character, table, cell) or style groups can be mapped to different styles while linking. The
mapped styles are automatically applied to the linked content, instead of the original styles applied to the parent.
Custom style mapping comes in handy, for example, when you want to use sans serif fonts for digital and serif fonts for
print publications. Or if you want, vary the text style between the horizontal and vertical layouts.
To define custom style mapping, do one of the following:
• In the Link Options dialog box (Links panel > Link Options), enable Define Custom Style Mapping and then click
Settings.
• Click in the Content Conveyor.
<b>Category</b> <b>Examples</b>
Appearance Object style attributes such as Stroke, Fill, Effects. This excludes any
text or text frame related attributes, such as overprinting,
non-printing settings etc
Size and Shape Height, width, transforms, text frame attributes, and other column
size attributes
Interactivity Animation, object States, button actions
Frame Content Image, video, content placed or pasted into frames, and effects
and settings applied directly to such objects.
</div>
<span class='text_page_counter'>(178)</span><div class='page_container' data-page=178>
<i>Custom Style Mapping</i>
<b>1</b> Select a source document and Style type.
<b>2</b> Click New Syle Mapping.
<b>3</b> Choose source and mapped styles or style groups from the list
<i>Press Alt (Windows) or Option (Mac OS) to change the Cancel button to Reset. Click Reset to revert to default options. </i>
<b>Update a linked item</b>
If an original item is modified, symbol displays over the frame and in the Links panel. To update do one of the
following:
• Click near the top-left of the frame
• In the Links panel, double-click symbol
If you have made local edits to a child item, the edits are overwritten with content from the original item. If you set
Warn if Link Update Will Overwrite Local Edits, a warning message displays.
<i>Use the Link Info pane to determine if you’ve made local edits to the story; story status displays “Text Modified” if you’ve </i>
<i>made local edits.</i>
<b>Align and distribute objects</b>
<b>Align panel overview</b>
You use the Align panel (Window > Object & Layout > Align) to align or distribute objects horizontally or vertically
along the selection, margins, page, or spread. Consider the following when working with the Align panel:
</div>
<span class='text_page_counter'>(179)</span><div class='page_container' data-page=179>
• Text alignment is not affected by the Align Objects options. (See Align or justify text.)
• You can use the Keyboard Shortcuts dialog box (Edit > Keyboard Shortcuts) to create custom align and distribute
shortcuts. (Under Product Area, select Object Editing.)
<i>Align panel</i>
<i><b>A </b>Vertical alignment buttons <b>B </b>Vertical distribution buttons <b>C </b>Use Spacing distribution <b>D </b>Horizontal alignment buttons <b>E </b>Horizontal </i>
<i>distribution buttons <b>F </b>Alignment location options </i>
<b>Align or distribute objects</b>
You can use the Align panel to align or space selected objects horizontally or vertically to the selection, margins, page,
or spread.
<i>Objects distributed horizontally to selection (top) and to margins (bottom)</i>
<b>1</b> Select the objects to align or distribute.
<b>2</b> Choose Window > Object & Layout > Align to display the Align panel.
<i>To show or hide additional panel options, choose Show Options or Hide Options from the panel menu.</i>
<b>3</b> From the menu at the bottom of the panel, specify whether you want to align or distribute objects based on the
selection, margins, page, or spread.
<b>4</b> Do one of the following:
• To align objects, click the button for the type of alignment you want.
</div>
<span class='text_page_counter'>(180)</span><div class='page_container' data-page=180>
<i>Using the Distribute Horizontal Centers option for even spacing</i>
<i><b>A </b>Creates even spacing between the centers of each object <b>B </b>Keeps the overall width the same as before the transformation </i>
• To set the space between objects, either center to center or edge to matching edge, select Use Spacing under
Distribute Objects, and then type the amount of space you want to apply. Click a button to distribute the selected
objects along their horizontal or vertical axes.
<i>Using the Distribute Horizontal Centers option and adding a value for Use Spacing</i>
<i><b>A </b>Spaces the objects evenly from their centers by a specified value <b>B </b>Changes the overall width of the objects as a whole </i>
</div>
<span class='text_page_counter'>(181)</span><div class='page_container' data-page=181>
<i>Using the Distribute Horizontal Space option and adding a value for Use Spacing</i>
<i><b>A </b>Creates spaces of a specified value between each object <b>B </b>Changes the overall width of the objects as a whole </i>
When you use spacing with vertical distribution, selected objects are spaced from top to bottom, starting with the
top-most object. When you use spacing with horizontal distribution, selected objects are spaced from left to right, starting
from the left-most object.
<i>You can also use the Smart Spacing feature to align or distribute objects while moving them. For example, if two vertical </i>
<i>objects are 12 points apart, moving a third object 12 points below the second object causes temporary guides to appear, </i>
<i>allowing you to snap the object into alignment.</i>
<b>Align objects using the Gap tool</b>
The Gap tool provides a quick way to adjust the size of a gap between two or more objects. It also lets you resize several
objects that have commonly aligned edges simultaneously, while keeping the gaps between them fixed. It’s a one-step
way to adjust your layout by directly manipulating the space between objects.
The Gap tool ignores locked objects and master page items.
<b>1</b> Select the Gap tool .
<b>2</b> Move the pointer between two objects, and do any of the following actions:
• Drag to move the gap and resize all objects aligned along the gap.
• Shift-drag to move the gap between only the two nearest objects.
• Ctrl-drag (Windows) or Command-drag (Mac OS) to resize the gap instead of moving it. Adding the Shift key
resizes the gap between only the two nearest objects.
• Alt-drag (Windows) or Option-drag (Mac OS) to move the gap and objects in the same direction. Adding the
Shift key moves only the two nearest objects.
• Ctrl+Alt-drag (Windows) or Command+Option-drag (Mac OS) to resize the gap and move the objects. Adding
the Shift key to resize the gap and move only the two nearest objects.
</div>
<span class='text_page_counter'>(182)</span><div class='page_container' data-page=182>
<b>Distribute objects using Live Distribute</b>
When transforming multiple selected objects, you can resize the space between the selected objects proportionally
instead of resizing the actual objects. For example, if you want to change the spacing between five aligned rectangles,
you can do so without using any Distribute commands.
<b>1</b> Select the objects.
<b>2</b> Start dragging a selection handle and hold down the Spacebar while dragging. Continue dragging to change the
spacing between the objects.
<b>Format grids</b>
<b>Named Grids panel overview</b>
Use the Named Grids panel (Window > Type & Tables > Named Grids) to save frame grid settings in <i>named grid</i>
format, and apply those settings to other frame grids. You can apply or change frame grid formats efficiently, and easily
keep the appearance of a document consistent, using grid formats.
<i>Named Grids panel</i>
<i><b>A </b>Grid name <b>B </b>New Grid Format button <b>C </b>Delete icon </i>
In the Named Grids panel, the Layout Grid format is shown by default. The layout grid setting for the currently selected
page is reflected in this grid format. When more than one layout grid is set for a single document, the settings shown
in Layout Grid in the Named Grids panel vary depending on the selected page layout grid contents.
When a frame grid with grid formatting is selected, the current grid format name is highlighted in the Named Grids
panel.
<b>Create named grid formats</b>
Like styles, named grid formats let you save a collection of frame grid settings and apply those settings to other frame
grids.
<b>1</b> To define a new grid format in accordance with the existing frame grid format, select the frame grid with the
selection tool.
<b>2</b> Choose Window > Type & Tables > Named Grids.
<b>3</b> Choose New Named Grid from the Named Grids panel menu.
<b>4</b> Specify options in the Edit Grid Format dialog box, and click OK.
</div>
<span class='text_page_counter'>(183)</span><div class='page_container' data-page=183>
<i>When a new frame grid format is created based on an existing frame grid, changes to format attribute options also are </i>
<i>applied to the selected frame grid. If you do not want to modify the selected frame grid format, deselect the frame grid </i>
<i>before showing the Edit Grid Format dialog box. </i>
<b>Named Grid options</b>
Named Grid options appear when you choose Window > Type & Tables > Named Grids.
<b>Grid Name </b>Enter the name of the grid format.
<b>Font </b>Select the font family and font style, and set the default font for the text to be placed in the grid.
<b>Size </b>Specify individual grid sizes.
<b>Vertical and Horizontal </b>Specify the grid scale for full-width Asian characters in %.
<b>Char Aki </b>Specify the spacing between grid cells in the frame grid. This value will be the grid cell size.
<b>Line Aki </b>Enter a value to specify the grid line spacing. The value used here is the distance between the bottom (or left)
edge of the character embox for the first line to the top (or right) edge of the character embox for the next line.
<b>Line Align </b>Select an option to specify line alignment for the frame grid. For example, if Align Left/Top is selected, the
beginning of each line for a vertical type frame grid will be aligned with the top edge of the frame grid. (See Align or
justify text.)
<b>Grid Align </b>Select an option to specify whether to align the text to the embox, ICF box, or roman baseline. See Align
paragraphs to a baseline grid.
<b>Char Align </b>Select an option to specify the method of aligning small characters to larger characters in a line. (See Align
text of different sizes.)
<b>Apply a named grid to a frame</b>
You can apply a custom named grid or the Layout Grid to a frame grid. If you apply the Layout Grid, the same settings
defined in the Layout Grid dialog box are used in the frame grid.
<b>1</b> Select the frame grid using the Selection tool. You can also use the Type tool to click on the frame and position the
text insertion point or select text.
<b>2</b> Click on the name of the format to be applied in the Named Grids panel or Control panel.
Applying a grid format causes grid format attributes to be set for text in the frame grid, but grid format attributes
will not be set for text which has been given Character or Paragraph styles, or text which has had settings
individually modified from the Character panel or Paragraph panel.
</div>
<span class='text_page_counter'>(184)</span><div class='page_container' data-page=184>
<i>Before and after applying a grid format to the frame grid</i>
<b>3</b> To apply grid format attributes to the entire story, select the frame grid using the Selection tool and select Edit >
Apply Grid Format.
You can also add named grids to object styles. If you add a named grid to the default object style for grid frames, all grid
frames you create appear formatted according to the named grid you specify. (See About object styles.)
<b>Edit named grids</b>
You can change the grid format definitions at any time. When you change the definition of a grid format, all of the frame
grids formatted with that style change to conform with the newly defined style.
<b>1</b> Using the Named Grids panel, select the grid format to be edited, and choose Named Grid Options from the panel
menu, or double-click the grid format you want to edit in the Named Grids panel.
<b>2</b> Change the settings in the Modify Named Grid dialog box. (See Create named grid formats.)
<b>3</b> Click OK.
This modifies the grid format given to the currently selected frame grid. To modify settings for frame grids which are
not currently selected, perform the above operation without selecting any objects in the document, or double-click the
grid format name in the Named Grids panel while holding down Shift+Ctrl+Alt (Windows) or
Shift+Command+Option (Mac OS).
<b>Delete named grids</b>
The formatting applied to text in a frame is unchanged even if a grid format is deleted, but the link to the grid format
is removed.
<b>1</b> Select the name of the grid format you want to delete in the Named Grids panel.
<b>2</b> Choose Delete Named Grids from the panel menu, or click the Delete icon at the bottom of the Named Grids
panel.
When you delete grid formats, the frame grid to which the grid format was applied doesn’t appear to change, but the
format is no longer connected with the grid format.
<b>Import grid formats from other documents</b>
<b>1</b> Choose Load All Named Grids from the Named Grids panel menu.
<b>2</b> Double-click the InDesign document containing the grid formats you want to import.
</div>
<span class='text_page_counter'>(185)</span><div class='page_container' data-page=185>
<b>Lay out frames and pages</b>
For detailed information and instructions, click the links below.
<b>About paths and frames</b>
You can draw objects in a document and use them as paths or as frames. <i>Paths</i> are vector graphics like those you create
in a drawing program such as Adobe Illustrator®. <i>Frames</i> are identical to paths, with only one difference—they can be
containers for text or other objects. A frame can also exist as a <i>placeholder</i>—a container without contents. As containers
and placeholders, frames are the basic building blocks for a document’s layout.
<i>Paths and frames</i>
<i><b>A </b>Path <b>B </b>Frame as graphic container <b>C </b>Frame with placed graphic </i>
You can draw both paths and frames using tools in the Toolbox. You can also create frames by simply placing
(importing) or pasting contents into a path.
<i><b>Note: </b>In QuarkXPress, paths are referred to as lines, and frames are referred to as boxes.</i>
Because a frame is just a container version of a path, you can do anything to a frame that you can do to a path, such as
add a color or a gradient to its fill or stroke, or edit the shape of the frame itself with the Pen tool. You can even use a
frame as a path, or a path as a frame, at any time. This flexibility makes it easy to change your design and provides a
wide range of design choices.
Frames can contain text or graphics. A <i>text frame</i> determines the area to be occupied by text and how text will flow
through the layout. You can recognize text frames by the text ports in their respective upper left and lower right corners.
A frame grid is a text frame, with a basic grid to determine character size and spacing within the frame attached.
A <i>graphics frame</i> can function as a border and background, and can crop or mask a graphic. When acting as an empty
placeholder, a graphics frame displays a crossbar.
<i>Text frame (left) and empty graphics frame (right)</i>
</div>
<span class='text_page_counter'>(186)</span><div class='page_container' data-page=186>
<b>Show or hide frame edges</b>
Unlike paths, you can see the nonprinting strokes (outlines) of frames by default even when the frames aren’t selected.
If the document window is getting crowded, use the Show/Hide Frame Edges command to simplify the screen display
by hiding the frame edges. Doing this also hides the crossbar in a graphics placeholder frame. The display setting for
frame edges doesn’t affect the display of the text ports on text frames.
<i><b>Note: </b>The frame edge is defined as a frame’s stroke, not the outer edge of the stroke’s weight.</i>
? Do any of the following:
• To show or hide frame edges, choose View > Extras > Show/Hide Frame Edges.
• To hide frame edges, click Preview Mode at the bottom of the Toolbox.
• To show or hide a frame grid, choose View > Grids & Guides > Show Frame Grid, or View > Grids & Guides >
Hide Frame Grid.
<b>Use placeholders to design pages</b>
When your final text and graphics are available, you can simply add them to a document; InDesign automatically
creates frames when you import them (unless you’re importing text or graphics directly into existing frames). However,
when you don’t have the content yet or you want to block out the design before adding text and graphics, you can use
frames as placeholders.
<i>Types of placeholders</i>
<i><b>A </b>Graphics frame placeholder <b>B </b>Text frame placeholder </i>
For example, you might use any of these strategies:
• Draw text frames using the Type tool, and draw graphics frames using the drawing tools. Thread empty text frames
together so that importing final text takes just one step.
• Draw empty placeholder shapes using drawing tools. When you’re ready to start designating areas for text and
graphics, redefine the placeholders as either text or graphics frames.
• Set frame fitting options for a placeholder frame so that when you place an image in the frame, the image is cropped
and fit accordingly.
<b>Redefine the purpose of paths and frames</b>
• To use a path or text frame as a graphics placeholder frame, select a path or an empty text frame, and then choose
Object > Content > Graphic.
</div>
<span class='text_page_counter'>(187)</span><div class='page_container' data-page=187>
• To use a text or graphics frame as a path only, select an empty frame, and then choose Object > Content >
Unassigned.
<i><b>Note: </b>When a frame contains text or graphics, you cannot redefine it using the Object > Content menu. However, if you </i>
<i>replace a graphic with text, the content type is automatically redefined. </i>
<b>About automatic layout adjustment</b>
If you use the Document Setup or Margins and Columns commands to make changes to an existing layout, such as
altering column widths or page orientation, you could spend considerable time and effort in rearranging objects to fit
the new layout. The Layout Adjustment feature can do much of that work automatically. For example, you can quickly
reformat a wide four-column document designed for an A4-size page to a tall two-column format on a U.S. legal-size
page. With Layout Adjustment, text and graphics frames are moved and resized as necessary based on the new relative
positions of column guides, page margins, and page edges.
<i><b>Note: </b>Dragging column guides does not trigger layout adjustment.</i>
The Layout Adjustment feature produces more predictable results when a layout is tightly based on a framework of
margins, page columns, and ruler guides, and where objects are snapped to guides. Results are less predictable when
objects don’t adhere to margins, columns, and guides, or when extraneous ruler and column guides clutter a page.
Layout adjustment is not affected by the document grid or the baseline grid.
<i>Page designed vertically, for print (left); page orientation changed for on-screen viewing, with layout automatically refitted by the Layout </i>
<i>Adjustment feature (right)</i>
You can modify the rules in the Layout Adjustment dialog box. The Layout Adjustment feature attempts to approximate
the proportions of the old layout in the new layout by doing the following:
• Adding or removing column guides, if the new layout specifies a different number of columns.
• If the page size changes, moving ruler guides to maintain proportional distances from page edges, margins, or
column guides.
• Moving objects already aligned to any margin, column, bleed/slug, or ruler guide, or to any two guides
perpendicular to each other, so that the objects stay with those guides if the guides move during layout adjustment.
Also, objects already aligned to any page edge or to any page edges perpendicular to each other are moved.
• Proportionally resizing objects already aligned to two parallel margin, column, bleed/slug, or ruler guides or to
guides on three sides, so that the objects stay with those guides if the guides move during layout adjustment. Also,
objects aligned to two parallel page edges or to page edges on three sides are moved.
• Maintain the relative position of objects that are anchored to the text as specified in the Anchored Object Options
dialog box.
</div>
<span class='text_page_counter'>(188)</span><div class='page_container' data-page=188>
<i><b>Note: </b>Layout Adjustment affects columns inside a text frame differently than it does page columns. If the frame itself is </i>
<i>resized by Layout Adjustment and the Fixed Column Width option is not selected in the Object > Text Frame Options </i>
<i>dialog box, text frame columns are resized proportionally. If the Fixed Column Width option is selected, columns are added </i>
<i>or removed as necessary.</i>
<b>Set options for layout adjustment</b>
Note that changing options in the Layout Adjustment dialog box does not immediately change anything. Layout
adjustment is triggered only by changes to page size, page orientation, margins, or column settings, or when a new
master is applied. When you want to restore a layout to its previous state, you must undo the action that triggered the
layout adjustment.
<b>1</b> Choose Layout > Layout Adjustment.
<b>2</b> Select Enable Layout Adjustment.
<b>3</b> Specify the layout adjustment options, and click OK.
<b>Layout Adjustment options</b>
<b>Enable Layout Adjustment </b>Select this option so that layout adjustment will occur whenever you change page size, page
orientation, margins, or columns.
<b>Snap Zone </b>Type a value to specify how near an object must be to the closest margin guide, column guide, or page edge
to snap to that element during layout adjustment.
<b>Allow Graphics And Groups To Resize </b>Select this option to let the Layout Adjustment feature scale graphics, frames,
and groups. When deselected, graphics and groups can be moved by Layout Adjustment, but not resized.
<b>Allow Ruler Guides To Move </b>Select this option when you want ruler guides to be repositioned by the Layout
Adjustment feature.
<b>Ignore Ruler Guide Alignments </b>Select this option when ruler guides are not well positioned for layout adjustment.
Objects will still align to column and margin guides and to page edges.
<b>Ignore Object And Layer Locks </b>Select this option when you want the Layout Adjustment feature to reposition objects
that are locked individually, or locked as a result of being on a locked layer.
<b>Clipping paths</b>
<b>Clipping paths</b>
Clipping paths crop part of the artwork so that only a portion of the artwork appears through the shape or shapes you
create. You can create clipping paths to hide unwanted parts of an image, creating both a path for the image and a frame
for the graphic. By keeping the clipping path and graphics frame separate, you can freely modify the clipping path
without affecting the graphics frame by using the Direct Selection tool and other drawing tools in the toolbox.
You can create clipping paths in the following ways:
• Place already-saved graphics with paths or alpha (mask) channels, which InDesign can use automatically. You can
add paths and alpha channels to graphics using a program such as Adobe Photoshop.
</div>
<span class='text_page_counter'>(189)</span><div class='page_container' data-page=189>
• Use the Pen tool to draw a path in the shape you want, and then use the Paste Into command to paste the graphic
into the path.
When you use one of InDesign’s automatic methods to generate a clipping path, the clipping path is attached to the
image, resulting in an image that is clipped by the path and cropped by the frame.
<i><b>Note: </b>The graphics frame displays the color of the layer it appears on, and the clipping path is drawn in the inverse color of </i>
<i>the layer. For example, if the layer color is blue, the graphics frame will appear as blue, and the clipping path will appear </i>
<i>as orange.</i>
<b>Crop using a graphic’s path or alpha channel</b>
InDesign can crop an imported EPS, TIFF, or Photoshop graphic using the clipping path or alpha channel saved with
the file. When an imported graphic includes more than one path or alpha channel, you can choose which path or alpha
channel to use for the clipping path.
An <i>alpha channel</i> is an invisible channel that defines transparent areas of a graphic. It’s stored inside a graphic with the
RGB or CMYK channels. Alpha channels are commonly used in video-effects applications. InDesign automatically
recognizes Photoshop’s default transparency (the checkerboard background) as an alpha channel. If the graphic has an
opaque background, you must use Photoshop to remove the background, or create and save one or more alpha channels
with the graphic. You can create alpha channels using background-removal features in Adobe Photoshop, such as layer
masks, the Channels panel, the Background Eraser, or the Magic Eraser.
<i>Results of using alpha channels and embedded paths</i>
<i><b>A </b>Original graphic <b>B </b>Alpha channel <b>C </b>Placed graphic <b>D </b>Original graphic <b>E </b>Graphic with embedded path <b>F </b>Placed graphic </i>
<i>When you place a Photoshop file, the Image Import Options dialog box lets you choose to use the default clipping path </i>
<i>or select an alpha channel for clipping.</i>
<b>1</b> Select an imported graphic, and choose Object > Clipping Path.
<b>2</b> In the Clipping Path dialog box, choose either Photoshop Path or Alpha Channel from the Type menu.
<b>3</b> Choose the desired path or alpha channel from either the Path or Alpha menu.
<i><b>Note: </b>If the Alpha Channel menu command is not available, no alpha channels were saved with the graphic. </i>
<b>4</b> To inset the clipping path, specify a value for Inset Frame.
<b>5</b> To switch the visible and hidden areas, select Invert.
</div>
<span class='text_page_counter'>(190)</span><div class='page_container' data-page=190>
<i>To turn off the clipping path, select the imported graphic, and choose Object > Clipping Path. Choose None in the Type </i>
<i>menu, and click OK.</i>
<b>Create a clipping path automatically</b>
If you want to remove the background from a graphic that wasn’t saved with a clipping path, you can do it automatically
using the Detect Edges option in the Clipping Path dialog box. The Detect Edges option hides the lightest or darkest
areas of a graphic, so it works best when the subject is set against a solid white or black background.
<i>Good (left) and bad (right) candidates for automatic clipping path</i>
<b>1</b> Select an imported graphic, and choose Object > Clipping Path.
<b>2</b> In the Clipping Path dialog box, choose Detect Edges in the Type menu. By default, the lightest tones are excluded;
to exclude the darkest tones, also select the Invert option.
<b>3</b> Specify the clipping path options, and click OK.
<b>Clipping path options</b>
<b>Threshold </b>Specifies the darkest pixel value that will define the resulting clipping path. Increasing this value makes
more pixels transparent by extending the range of lightness values added to the hidden area, starting from 0 (white).
For example, if you want to remove a very light drop shadow when using Detect Edges, try increasing the Threshold
until the shadow disappears. If light pixels that should be visible are invisible, the Threshold is too high.
<i>Threshold levels at 25 (left) and 55 (right)</i>
</div>
<span class='text_page_counter'>(191)</span><div class='page_container' data-page=191>
<i>Tolerance levels at 0 (left) and 5 (right)</i>
<b>Inset Frame </b>Shrinks the resulting clipping path relative to the clipping path defined by the Threshold and Tolerance
values. Unlike Threshold and Tolerance, the Inset Frame value does not take lightness values into account; instead, it
uniformly shrinks the shape of the clipping path. Adjusting the Inset Frame value slightly may help hide stray pixels
that could not be eliminated by using the Threshold and Tolerance values. Enter a negative value to make the resulting
clipping path larger than the clipping path defined by the Threshold and Tolerance values.
<i>Inset frame at -0p1 (left) and 0p3 (right)</i>
<b>Invert </b>Switches the visible and hidden areas, by starting the clipping path with the darkest tones.
<b>Include Inside Edges </b>Makes areas transparent if they exist inside the original clipping path, and if their lightness values
are within the Threshold and Tolerance ranges. By default, the Clipping Path command makes only the outer areas
transparent, so use Include Inside Edges to correctly represent “holes” in a graphic. This option works best when the
brightness levels of areas you want to make transparent don’t match any areas that must be visible. For example, if you
choose Include Inside Edges for a graphic of silver eyeglasses, and the lenses become transparent, very light areas of the
eyeglass frame may also become transparent. If areas become transparent when that wasn’t your intent, try adjusting
the Threshold, Tolerance, and Inset Frame values.
<b>Restrict to Frame </b>Creates a clipping path that stops at the visible edge of the graphic. This can result in a simpler path
when you use the graphic’s frame to crop the graphic.
<b>Use High Resolution Image </b>Calculates transparent areas using the actual file, for maximum precision. Deselect this
option to calculate transparency based on the screen display resolution, which is faster but less precise. This option isn’t
available if you chose Alpha Channel, because InDesign always uses an alpha channel at its actual resolution. (See
About transparency.)
</div>
<span class='text_page_counter'>(192)</span><div class='page_container' data-page=192>
<b>Grids</b>
<b>Use grids</b>
Two kinds of nonprinting grids are available: a <i>baseline grid</i> for aligning columns of text, and a <i>document grid</i> for
aligning objects. On the screen, a baseline grid resembles ruled notebook paper, and a document grid resembles graph
paper. You can customize both kinds of grids.
<i>Baseline grid (left) and document grid (right)</i>
When a grid is visible, you can observe the following characteristics:
• The baseline grid covers entire spreads, but the document grid covers the entire pasteboard.
• Baseline grids and document grids appear on every spread and cannot be assigned to any master.
• The document grid can appear in front of or behind all guides, layers, and objects, but cannot be assigned to any
layer.
<b>Set up a baseline grid</b>
Use Grid Preferences to set up a baseline grid for the entire document.
<i>You can set up a baseline grid for a frame by using the Text Frame Options. (See Change text frame properties.)</i>
<b>1</b> Choose Edit > Preferences > Grids (Windows) or InDesign > Preferences > Grids (Mac OS).
<b>2</b> Specify a baseline grid color by choosing a color in the Color menu. You can also choose Custom in the Color menu.
<b>3</b> For Relative To, specify whether you want the grid to start at the top of the page or the top margin.
<b>4</b> For Start, type a value to offset the grid from either the top of the page or the top margin of the page, depending on
the option you choose from the Relative To menu. If you have trouble aligning the vertical ruler to this grid, try
starting with a value of zero.
</div>
<span class='text_page_counter'>(193)</span><div class='page_container' data-page=193>
<i>Baseline grid in document window</i>
<i><b>A </b>First grid line <b>B </b>Increment between grid lines </i>
<b>6</b> For View Threshold, type a value to specify the magnification below which the grid does not appear. Increase the
view threshold to prevent crowded grid lines at lower magnifications.
<i>Baseline grid at magnification below view threshold (left) and above view threshold (right)</i>
<b>7</b> Click OK.
<i><b>Note: </b>The Snap To Guides command controls both snapping to guides and snapping to the baseline grid.</i>
<b>Set up a document grid</b>
<b>1</b> Choose Edit > Preferences > Grids (Windows) or InDesign > Preferences > Grids (Mac OS).
<b>2</b> Specify a document grid color by choosing a color in the Color menu. You can also choose Custom in the Color
menu.
<b>3</b> To set horizontal grid spacing, specify a value for Gridline Every in the Horizontal section of the Document Grid
section, and then specify a value for Subdivisions between each grid line.
<b>4</b> To set vertical grid spacing, specify a value for Gridline Every in the Vertical section of the Document Grid section,
and then specify a value for Subdivisions between each grid line.
<b>5</b> Do one of the following, and click OK:
• To put the document and baseline grids behind all other objects, make sure that Grids In Back is selected.
• To put the document and baseline grids in front of all other objects, deselect Grids In Back.
<i>To put guides behind all other objects, you can also choose Guides In Back in the context menu that appears when you </i>
<i>right-click (Windows) or Control-click (Mac OS) an empty area of the document window.</i>
<b>Show or hide grids</b>
</div>
<span class='text_page_counter'>(194)</span><div class='page_container' data-page=194>
<b>Snapping objects to grids</b>
When snapping is enabled, moving an object within the snap zone of a grid location will cause the object to snap to that
location.
<b>Snap objects to the document grid</b>
<b>1</b> Choose View > Grids & Guides and make sure that Snap To Document Grid is selected (checked). If it is not
selected, click it.
<i><b>Note: </b>The Snap to Guides command controls both snapping to guides and snapping to the baseline grid.</i>
<b>2</b> To specify the snap-to zone, choose Edit > Preferences > Guides & Pasteboard (Windows) or InDesign >
Preferences > Guides & Pasteboard (Mac OS), type a value for Snap to Zone, and click OK. The Snap to Zone value
is always in pixels.
</div>
<span class='text_page_counter'>(195)</span><div class='page_container' data-page=195>
<b>Chapter 4: Text</b>
<b>Threading text</b>
<b>Thread text frames</b>
The text in a frame can be independent of other frames, or it can flow between connected frames. To flow text between
connected frames (also called text boxes), you must first connect the frames. Connected frames can be on the same
page or spread, or on another page in the document. The process of connecting text among frames is called <i>threading </i>
<i>text</i>. It is also referred to as <i>linking text frames</i> or <i>linking text boxes</i>.
Each text frame contains an <i>in port</i> and an <i>out port</i>, which are used to make connections to other text frames. An empty
in port or out port indicates the beginning or end of a story, respectively. An arrow in a port indicates that the frame is
linked to another frame. A red plus sign (+) in an out port indicates that there is more text in the story to be placed but
no more text frames in which to place it. This remaining unseen text is called <i>overset text</i>.
<i>Threaded frames</i>
<i><b>A </b>In port at beginning of story <b>B </b>Out port indicating thread to next frame <b>C </b>Text thread <b>D </b>In port indicating thread from previous frame <b>E </b>Out </i>
<i>port indicating overset text </i>
Choose View > Extras > Show Text Threads to see visual representatives of threaded frames. You can thread text frames
whether or not they contain text.
<b>Add a new frame to the thread</b>
<b>1</b> Using the Selection tool , select a text frame, and then click the in port or out port to load a text icon.
Clicking the in port lets you add a frame before the selected frame; clicking the out port lets you add a frame after
the selected frame.
<b>2</b> Position the loaded text icon where you want a new text frame to appear, and then click or drag to create a new
text frame.
</div>
<span class='text_page_counter'>(196)</span><div class='page_container' data-page=196>
<b>Add an existing frame to the thread</b>
<b>1</b> Using the Selection tool, select a text frame, and then click the in port or the out port to load a text icon.
<b>2</b> Position the loaded text icon over the frame you want to connect to. The loaded text icon changes to the thread icon.
<i>Adding existing frame to thread</i>
<b>3</b> Click inside the second frame to thread it to the first.
When you thread a frame grid to a plain text frame or to another frame grid with different grid settings, the text frame
of the threaded frame is redefined to match the settings of the frame grid threaded from
<i>You can add automatic “continued on” or “continued from” jump lines that track threaded stories as they jump from </i>
<i>frame to frame. (See Add automatic page numbers for story jumps .)</i>
<b>Add a frame inside a sequence of threaded frames</b>
<b>1</b> Using the Selection tool, click the out port at the point in the story where you want to add a frame. When you release
the mouse button, a loaded text icon appears.
<b>2</b> Drag to create a new frame, or select a different text frame. InDesign threads the frame into the series of linked
frames containing the story.
</div>
<span class='text_page_counter'>(197)</span><div class='page_container' data-page=197>
<b>Unthread text frames</b>
When you unthread a text frame, you break the connection between the frame and all subsequent frames in the thread.
Any text that previously appeared in the frames becomes overset text (no text is deleted). All subsequent frames are
empty.
? Using the Selection tool, do one of the following:
• Double-click an in port or out port to break the connection between frames.
• Click an in port or an out port that represents a thread to another frame. For example, in a two-framed thread,
click either the out port of the first frame or the in port of the second frame. Position the loaded text icon over
the previous or next frame to display the unthread icon . Click in the frame you want to remove from the
thread.
<i>Removing frame from thread</i>
<i>To break one story into two stories, cut the text that needs to go in the second story, break the connection between the </i>
<i>frames, and then paste the text into the first frame of the second story. </i>
<b>Cut or delete threaded text frames</b>
Whenever you cut or delete text frames, no text is deleted; the text remains in the thread.
<b>Cut a frame from a thread</b>
You can cut a frame from a thread and paste the frame elsewhere. The frame is removed with a copy of the text, but no
text is removed from the original story. When you cut and paste a series of threaded text frames at once, the pasted
frames maintain their connection to each other, but lose connection to any other frames in the original story.
<b>1</b> Using the Selection tool, select one or more frames (Shift-click to select multiple objects).
<b>2</b> Choose Edit > Cut. The frame disappears, and any text contained in it flows to the next frame in the story. When
you cut the last frame in a story, the text is stored as overset text in the previous frame.
<b>3</b> If you want to use the disconnected frame elsewhere in your document, go to the page where you want the
disconnected text to appear and choose Edit > Paste.
<b>Delete a frame from a thread</b>
When you delete a text frame that is part of a thread, no text is deleted: it is overset or it flows into the next frame in
succession. If the text frame isn’t connected to any other frame, the frame and text are deleted.
<b>1</b> To select the text frame, do one of the following:
• Using a selection tool, click the frame.
</div>
<span class='text_page_counter'>(198)</span><div class='page_container' data-page=198>
<b>Flow text manually or automatically</b>
Your pointer becomes a loaded text icon after you place text or click an in port or out port. The loaded text icon lets
you flow text onto your pages. By holding down a modifier key, you can determine how the text is flowed. The loaded
text icon changes appearance, depending on where it is placed.
When you position the loaded text icon over a text frame, parentheses enclose the icon . When you position the
loaded text icon next to a guide or grid snapping point, the black pointer becomes white .
You can flow text using four methods:
To flow text in frames, InDesign detects horizontal or vertical type. When text is flowed with semi-automatic or
automatic flow, it is flowed according to the frame type and direction set in the Story panel. The icon gives users visual
feedback of which direction the text will flow.
<b>Flow text manually</b>
<b>1</b> Use the Place command to select a file, or click the out port of a selected text frame.
<b>2</b> Do one of the following:
• Position the loaded text icon anywhere within an existing frame or path, and then click. The text flows into the
frame and any other frames linked to it. Note that text always starts filling the frame at the top of the leftmost
column, even when you click in a different column.
• Position the loaded text icon in a column to create a text frame the width of that column. The top of the frame
appears where you click.
• Drag the loaded text icon to create a text frame the width and height of the area you define.
<b>3</b> If there is more text to be placed, click the out port and repeat steps 1 and 2 until all text has been placed.
<i><b>Note: </b>When you place text in a frame that is threaded to other frames, text autoflows through the threaded frames, </i>
<i>regardless of the text flow method you choose.</i>
<b>Flow text semi-automatically</b>
? With a loaded text icon, Alt-click (Windows) or Option-click (Mac OS) a page or frame.
The text flows one column at a time, as in manual flow, but the loaded text icon automatically reloads after each column
is placed.
<b>Method</b> <b>What it does</b>
Manual text flow Adds text one frame at a time. You must reload the text icon to <sub>continue flowing text.</sub>
Semi-autoflow by holding down Alt (Windows) or Option
(Mac OS) when you click.
Works like manual text flow, except that the pointer becomes a loaded
text icon each time the end of a frame is reached, until all text is flowed
into your document.
Autoflow by Shift-clicking.
Adds pages and frames until all text is flowed into your document.
Fixed-page autoflow by holding down Shift+Alt (Windows) or
Shift+Option (Mac OS) when you click.
</div>
<span class='text_page_counter'>(199)</span><div class='page_container' data-page=199>
<b>Flow text automatically</b>
? With the loaded text icon displayed, hold down Shift as you do one of the following:
• Click the loaded text icon in a column to create a frame the width of that column. InDesign creates new text
frames and new document pages until all text is added to the document.
• Click inside a text frame that is based on a master text frame. The text autoflows into the document page frame
and generates new pages as needed, using the master frame’s attributes. (See .)
<b>Flow text automatically without adding pages</b>
? With a loaded text icon, hold down Shift+Alt (Windows) or Shift+Option (Mac OS).
<b>Use Smart Text Reflow</b>
You can use the Smart Text Reflow feature to add or remove pages when you’re typing or editing text. This feature is
useful when you’re using InDesign as a text editor and you want a new page to be added whenever you type more text
than can fit on the current page. It’s also useful in avoiding overset text or empty pages for situations in which the text
flow changes due to editing text, showing or hiding conditional text, or making other changes to the text flow.
By default, Smart Text Reflow is limited to master text frames — text frames that are on a master page. If the document
includes facing pages, master text frames must appear on both left and right master pages, and the master text frames
must be threaded for Smart Text Reflow to work.
You can change settings to allow pages to be added or removed when working in text frames that aren’t based on master
pages. However, a text frame must be threaded to at least one other text frame on a different page for Smart Text Reflow
to work.
Smart Text Reflow settings appear in Type preferences. These settings apply to the current document. To change default
settings for all new documents, close all documents and specify the settings.
<b>1</b> Choose Edit > Preferences > Type (Windows) or InDesign > Preferences > Type (Mac OS).
<b>2</b> Select Smart Text Reflow.
<b>3</b> Select any of the following options and then click OK.
<b>Add Pages To </b>Use this option to determine where the new page is created. For example, suppose you have a three-page
document with text frames on the first two pages and a full-page graphic on the third page. If you’re typing to the end
of page two, you can determine whether the new page is added before or after the full-page graphic on the third page.
Choose End Of Story to add a new page after the second page. Choose End Of Document to add a new page after the
page with the full-page graphic.
In a document with multiple sections, you can choose End Of Section to add the page at the end of the section.
<b>Limit To Master Text Frames </b>If this option is turned off, you can also add or remove pages when editing text frames that
aren’t based on master pages. To prevent unwanted text reflow from occurring, Smart Text Reflow takes effect only if
the text frame you’re editing is threaded to at least one other text frame on a different page.
<i><b>note</b>: When using Smart Text Reflow in text frames that aren’t based on master pages, pages are added with full-page, </i>
<i>single-column text frames, regardless of the attributes of the text frame to which the new frame is threaded.</i>
</div>
<span class='text_page_counter'>(200)</span><div class='page_container' data-page=200>
If your layout includes design elements specific to the right or left side of the spread, turn on this option. If your left
and right pages are interchangeable, you can turn off this option. This option is dimmed if the document does not have
facing pages.
<b>Delete Empty Pages </b>Select this option to delete pages when you edit text or hide conditions. Pages are deleted only if
the emptied text frame is the only object on the page.
<i>To see how Smart Text Reflow can let you use InDesign as a text editor, create a document with Facing Pages turned </i>
<i>off and Master Text Frame selected. In Type preferences, make sure that Smart Text Reflow and Delete Empty Pages are </i>
<i>selected. On the first page, hold down Ctrl+Shift (Windows) or Command+Shift (Mac OS), and click the master text frame </i>
<i>to override it. When you type enough text to fill this text frame, a new page and text frame is added automatically. If you </i>
<i>delete enough text, a page is removed. </i>
<b>Wrap text around objects</b>
<b>Wrap text around objects</b>
You can wrap text around any object, including text frames, imported images, and objects you draw in InDesign. When
you apply a text wrap to an object, InDesign creates a boundary around the object that repels text. The object that text
wraps around is called the wrap object. Text wrap is also referred to as runaround text.
Keep in mind that text wrap options apply to the object being wrapped, not the text itself. Any change to the wrap
boundary will remain if you move the wrap object near a different text frame.
<b>Wrap text around simple objects</b>
<b>1</b> To display the Text Wrap panel, choose Window > Text Wrap.
<b>2</b> Using the Selection tool or Direct Selection tool , select the object you want to wrap text around.
<b>3</b> In the Text Wrap panel, click the desired wrap shape:
<b>Wrap Around Bounding Box </b>
Creates a rectangular wrap whose width and height are determined by the bounding box of the selected object,
including any offset distances you specify.
<b>Wrap Around Object Shape </b>
</div>
<!--links-->
<a href=' />
<a href=' /><a href=' /> xml publishing with adobe indesign
- 110
- 359
- 0


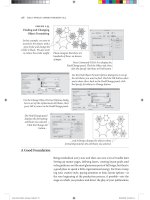

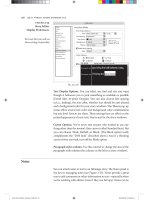
.push({});</script> </div> </div> </div> <div class="vf_link_relate px-2 my-2"> <h2 class="vf_doc_relate text-2xl font-bold my-4">Tài liệu liên quan</h2> <ul class="grid grid-cols-12 gap-2"> <li class="col-span-6 md:col-span-2"> <div class="card-doc " onclick="actionDocRelated(this)"> <a class="card-doc-img" href="https://text.123docz.com/document/1328449-xml-publishing-with-adobe-indesign.htm" title="xml publishing with adobe indesign"> <i class="icon i_type_doc i_type_doc2"></i> <img class="lazy" src="data:image/gif;base64,R0lGODlhAQABAIAAAP///wAAACH5BAEAAAAALAAAAAABAAEAAAICRAEAOw==" data-src="https://media.store123doc.com/images/document/14/ri/sj/medium_sjw1398331656.jpg" width="124" height="179" alt="xml publishing with adobe indesign" onerror="this.src=)