Sửa chữa DAEWOO-LACETTI 2010 - P11
Bạn đang xem bản rút gọn của tài liệu. Xem và tải ngay bản đầy đủ của tài liệu tại đây (128.28 KB, 6 trang )
NUBIRA/LACETTI RUST PREVENTION 10–1
SECTION 10
RUST PREVENTION
CONTENTS
1. ZINC TREATED STEEL PLATE REPAIR 10 – 2. . . . . . . . . . . . . . . . . . . . . . . . . . . . .
2. RUST PREVENTIVE PROCEDURE 10 – 3. . . . . . . . . . . . . . . . . . . . . . . . . . . . . . . . . .
2.1.GENERAL INFORMATION 10–3. . . . . . . . . . . . . . . . . . . . . . . . . . . . . . . . . . . . . . . . . . . . . . . . . . . . . . . . . . . . . . . . . . . . .
2.2.AREA COVERED BY ANTI–RUST AGENTS 10–5. . . . . . . . . . . . . . . . . . . . . . . . . . . . . . . . . . . . . . . . . . . . . . . . . . . . .
2.3.UNDERCOATING DIAGRAM 10–6. . . . . . . . . . . . . . . . . . . . . . . . . . . . . . . . . . . . . . . . . . . . . . . . . . . . . . . . . . . . . . . . . . .
10–2 RUST PREVENTION NUBIRA/LACETTI
1. ZINC TREATED STEEL PLATE
REPAIR
Avoid puttying as much as possible when repairing a
new car. Use alternative methods as much as possible.
.
CAUTION
S Most paints contain substances that are harmful if in-
haled or swallowed. Read the paint label before opening
the container. Spray paint only in a well ventilated area.
S Cover spilled paint with sand, or wipe it up at once.
S Wear an approved respirator, gloves, eye protection and
appropriate clothing when painting. Avoid contact with
skin.
S If paint gets in your mouth or on your skin, rinse or wash
thoroughly with water. If paint gets in your eyes, flush
with water and get prompt medical attention.
S Paint is flammable. Store it in a safe place, and keep it
away from sparks, flames or cigarettes.
Operation Tools/Materials Procedure Remarks
1. Prep the repair
area.
Double–action sander, #80 sand-
paper.
Sand the area with a double–action sander
and #80 sandpaper. Clean with wax and
grease remover.
.
2. Apply putty
Note : Putty can be
applied after priming
as described in step 4.
Epoxy–based putty.
S Mix the putty and hardener ac-
cording to the manufacturer’s di-
recctions.
S Polyester resin putty. Body filler.
Apply in several thin coats if necessary. Try
to avoid leaving pinholes in the putty.
S Follow the manufacturer’s recommenda-
tions for preparaton.
.
3. Sand and clean
the puttied area.
Double–action sander, orbital
sander, hand sanding file, #80,
#120, #240 sandpaper, wax and
grease remover, shop towels.
Rough–sand the area with a double– action
sander and #80 sandpaper, then sand with
#120 sandpaper. Featheredge with #240
sandpaper. Clean with wax and grease re-
mover.
.
4. Coat with primer.
Note : Apply to bare
sheet metal and put-
tied area.
Epoxy–based primer and harden-
er, epoxy thinner.
S Mix and thin the primer accord-
ing to the manufacturer’s direc-
tions.
Apply 2–4 coats, allowing sufficient flash time
between coats.
Force dry at 60–70RC(140–158RF) for at
least 30 minutes.
Spray to
a thick-
ness of
30–35
microns.
5. Sand and clean
the whole area.
Double–action sander, #400
sandpaper, wax and greases re-
mover, shop towels.
Sand the whole area to be repainted with a
double–action sander and #400 sandpaper.
Blow off with compressed air. Clean with wax
and grease remover.
.
6. Coat the whole
area to be repainted
with primer/ surfacer.
Polyester/urethane resin primer/
surfacer.
S Mix and thin the primer accord-
ing to the manufacturer’s direc-
tions.
Apply 2–4 coats, allowing sufficient flash time
between coats.
Force dry at 60–70RC(140–158RF) for at
least 30 minutes.
Spray to
a thick-
ness of
30–35
microns.
7. Sand and clean
the whole area to be
repainted.
Hand sanding file, double–action
sander, #240, #320, #400, #600
sandpaper, wax grease and re-
mover, shop towels.
Sand the repair area by hand with #240
sandpaper until it’s level. Sand the whole
area to repainted with #320– 600 sandpaper.
Clean with wax and grease remover.
.
8. Top–coat the
whole area to re-
painted.
Acrylic urethane resin top coat
paint, hardener, and thinner.
S Mix and thin the paint according
to the manufacturer’s directions.
Apply 2–4 coats, allowing sufficient flash time
between coats.
Force dry at 60–70RC(140–158RF) for at
least 30 minutes.
Spray to
a thick-
ness of
40–50
microns.
NUBIRA/LACETTI RUST PREVENTION 10–3
2. RUST PREVENTIVE PROCEDURE
2–1. GENERAL INFORMATION
.
Corrosion starts immediately after the steel base con-
tacts the atmosphere. The condition is aggravated by
sea wind, road salt, rain, snow and industrial fallout.
There are many ways to protect automobiles against
corrosion. Primers, primer surfacers and paints are ap-
plied by electrodeposition or spray to protect the car
body.
Anti–rust Agents and Spray Guns
Use the following anti–rust agents or equivalents when
making a body repair.
.
CAUTION : ANTI–RUST agents contain substances
that are harmful if you breathe or swallow them, or get
them on your skin. Wear converalls, gloves, eye
protection, and an approved respirator while using
such agents.
.
.
Anti–rust agents:
RUSTOP
DEOX #100
WAXOYL
U.S.A. MARKET
AUTO ARMOR 1031
(made by E.C.P)
To be applied to welded joints
inside body panels.
NOX–RUST 409–20S
SOLTION 1000S
AUTO ARMOR OUTSIDE COATING
(made by E.C.P)
To be appled to under floor
and wheelhouse.
Spray guns:
Use the correct gun for the agent being used.
S Use of a pressure type spray gun is recommended when
work involves a considerable number of cars.
For RUSTOP DEOX#100 For WAXOYL For NOXRUST 409–20S/
SOLTION 1000S
Protectors: Wear gloves, mask and suitable eye protection.
S Use light oil and a rag to clean up spilled anti–rust agents.
10–4 RUST PREVENTION NUBIRA/LACETTI
Precautions:
.
1. Before applying an anti–rust agent, thoroughly clean
the areas to be coated with a steam cleaner, etc., and
let dry.
.
Note : Waxoyl may be applied to wet surface.
.
2. Spray an anti–rust agent sufficiently until the excess
amount oozes out when filling, the doors, etc. Wipe the
excess agent with a clean rag dampened with light oil.
.
3. Do not spray an anti–rust agent to the brake hoses,
brake wheel cylinders, brake drums, exhaust muffler
and its related parts, emission control devices in the en-
gine compartment, ball joint covers, etc. Wipe up spilled
agent at once.
.
4. Heat an anti–rust agent to room temperature[36.5RC
(97.7RF)] by submerging the container in hot water
when outside temperature is below 10RC(50RF).
.
5. Ventilate when spraying an anti–rust agent since it
contains a small amount of organic solvent. Keep
sparks, flames and cigarettes away.
.
CAUTION : The remaining agent will harden in the
passages of the spray gun, making them unservice-
able.
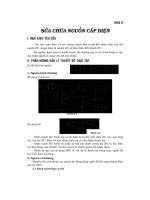
NUBIRA/LACETTI RUST PREVENTION 10–5
2–2. AREA COVERED BY ANTI–RUST AGENTS
Fig. 1