Giới thiệu cơ bản về AAA (config TACAS cisco)
Bạn đang xem bản rút gọn của tài liệu. Xem và tải ngay bản đầy đủ của tài liệu tại đây (849.1 KB, 44 trang )
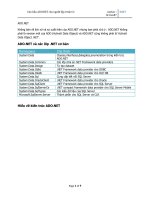
Lab 19-2: Giới thiệu cơ bản về AAA.
AAA quản lý hoạt động cơ bản của user qua các thiết bị như Switch, Router…. Nó được
sử dụng để xác thực, cấp phát quyền, và loggig hay accounting
Authentication (Xác thực).
Để xác định xem user có quền để truy nhập vào thiết bị hay không.
- Ta có thể cấu hình để enable AAA trên Router hay Switch
Router(config)#aaa new-model
- Ta có thể cấu hình user nội bộ trong thiết bị
Router(config)#username username password password
- Định nghĩa TACACS+ hay RADIUS server : AAA server như:Secure Access Control
Server(ACS)
Router(config)#tacacs-server host {hostname | ip-address } [key string]
Ở đây thì key ta cấu hình ở router phải trùng với key cấu hình ở server.
-
Định nghĩa các phương thức truy nhập vào Router qua cac line (console, vty)
Router(config)#aaa authentication login {default | list-name} method1 [method2…]
Có một phương thức như sau
Tacacs+: Mỗi TACACS+ server được cấu hình thì Router sẽ cố gắng theo trình tự được
cấu hình ở trên.
Radius: Tương tự như tacacs
Local: Nó sẽ lấy các user nội bộ bằng lệnh username
Line: Line password có thể được sử dụng cho bất kỳ user nào
Nếu ta sử dụng default thì nó sẽ áp dụng vào tất cả các line, còn đối với name-list thì ta
phải áp dụng nó vào từng line mà ta muốn.
Áp dụng các phương thức vào Line(console hoặc vty) bằng lệnh( list-name khai báo ở
trên)
Router(config-line)#login authentication {default | list-name}
Ta cấu hình bảo vệ bằng enable password ở privilege.
Router(config)#aaa authentication enable default method1 [...[method4]]
Authorization(Xác định thẩm quyền)
Sau khi xác thực xong thì không phải tất cả các user đều có quyền như nhau mà ta sẽ
phân cấp quyền cho các user theo nhiều cấp khác nhau, cho từng mode khác nhau.
Router(config)#aaa authorization {command | configuration | exec | network|
reverse-access} {default | list-name} method1 [method2 …]
Command : Server sẽ trả về quyền cho phép user các lệnh có thể ở privilege level
Config-command: Server sẽ trả về quyền cho phép user có thể sử dụng bất kỳ lệnh nào
trên thiết bị
Exec: Nó sẽ áp dụng các thuộc tính thích hợp với exec terminal session.
Network: Áp dụng cho các kết nối như SLIP, PPP, kết nối ARAP
Reverse-access: Server sẽ trả về quyền được reverse telnet từ Router.
Accounting:
Để cho phép server thu thập thông tin từ thiết bị
Router(config)#aaa accounting {system | exec |command | level} {default | list-name}
{start-stop | stop-only | wait-start | none } metod1 [method2 …]
System : Cung cấp các sự kiện liên quan đên hệ thống như: reload..
Netword: cung cấp các sự kiện liên quan đến kết nối như : PPP, SLIP, ARAP.
Exec:Cung cấp thông tin về exec của user như địa chỉ ip của user, và thời gian của
session.
Start-stop cung cấp sự kiện từ lúc bắt đầu đến lúc kết thúc.
Stop-only: Cung cấp sự kiện chỉ khi kết thúc sự kiện
Wait-start: Các yêu cầu của user chưa đựơc khởi tạo cho đến khi accounting record ack
Cấu hình cho Server(ACS) theo sơ đồ sau:
Trước hết ta tạo aaa client: Khởi đông AAA server: từ của sổ chính ta kích vào Network
configuration thì nó sẽ cho ta cửa sổ sau:
aaa client hostname: ta gỏ host name của router
aaa client address: ta gõ địa chỉ add của router:
Về khóa, ta nhập khóa trùng với key ở router trong lệnh tacacs-server .
Authentication using: chọn tacacs+(cisco ios) nếu sử dung tacacs. Nếu ta muốn dùng
Radius, ta có thể chọn vào Radius:
Tiếp theo ta cấu hình cho user: Trước hết ta kích vào user setup: Rồi các bước làm trình
tự như sau:
Định nghĩa số session mà user có thể log vào được
- Định nghĩa thời gian mà user bị disable hay enable
Xác định max pivilege cho user khi sử dụng authorization
Xác định password cho user
Xác định password cho user
Cấu hình cho router:
authentication
Router
!
hostname Router
!
aaa new-model “enable aaa”
!
aaa authentication login default group tacacs+ local “ cấu hình authentication cho các
line”
aaa authentication enable default group tacacs+ enable “Cấu hình enable cho privilege”
aaa session-id common
enable password cisco
!
username cuong password 0 cisco
memory-size iomem 10
ip subnet-zero
!
no ip domain lookup
!
interface Ethernet0/0
ip address 192.168.2.1 255.255.255.0
full-duplex
!
ip classless
ip http server
!
tacacs-server host 192.168.2.2 key cuong
!
end
Authorization local
Router!
hostname Router
!
aaa new-model
!
aaa authentication login default group tacacs+ local
aaa authentication enable default group tacacs+ enable
aaa authorization exec default local “Cho phép user thực hiện session”
aaa authorization commands 0 default local
aaa authorization commands 7 default local
aaa authorization commands 15 default local
“yêu cầu user authorization ở các level 0,7.,15”
aaa session-id common
enable password cisco
!
username cuong password 0 cisco
username c1 privilege 0 password 0 cisco
username c2 privilege 7 password 0 cisco
username c3 privilege 15 password 0 cisco
!
no ip domain lookup
!
interface Ethernet0/0
ip address 192.168.2.1 255.255.255.0
full-duplex
!
ip classless
ip http server
tacacs-server host 192.168.2.2
tacacs-server key cuong
!
privilege configure level 7 snmp-server “Các lệnh cho phép ở user ở Privilege level 7”
privilege configure level 7 snmp-server enable
privilege configure level 7 snmp-server host
privilege configure level 7 interface
privilege configure level 7 line
privilege configure level 7 host
privilege exec level 7 ping
privilege exec level 7 config terminal
privilege exec level 7 config config
end
Kiểm tra bằng các telnet vào từ một host cho ta kết quả sau:
Ở đây ta thấy user được trả về ở level 7 ta sử dụng lệnh show privilege để kiểm tra
Ta thấy user chỉ có một số lệnh mà ta đã cấu hình trên router.
Introduction
This document explains how to configure Authentication, Authorization, and
Accounting (AAA) on a Cisco router using Radius or TACACS+ protocols. The goal of
this document is not to cover all AAA features, but to explain the main commands
and provide some examples and guidelines.
Note: Please read the section on General AAA Configuration before proceeding with
the Cisco IOS? configuration. Failure to do so may result in misconfiguration and
subsequent lockout.
Before You Begin
Conventions
For more information on document conventions, see the Cisco Technical Tips Conventions.
Prerequisites
To get an overview of AAA, and for complete details about AAA commands and
options, please refer to the IOS 12.2 Security Configuration Guide:Authentication, Authorization,
and Accounting.
Components Used
The information in this document is based on Cisco IOS software release 12.1 main
line.
The information presented in this document was created from devices in a specific
lab environment. All of the devices used in this document started with a cleared
(default) configuration. If you are working in a live network, ensure that you
understand the potential impact of any command before using it.
Network Diagram
General AAA Configuration
Enabling AAA
To enable AAA, you need to configure the aaa new-model command in global
configuration.
Note: Until this command is enabled, all other AAA commands are hidden.
Warning: The aaa new-model command immediately applies local
authentication to all lines and interfaces (except console line line con 0). If a telnet
session is opened to the router after enabling this command (or if a connection times
out and has to reconnect), then the user has to be authenticated using the the local
database of the router. To avoid being locked out of the router, we recommend that
you define a username and password on the access server before starting the AAA
configuration. Do this a follows:
Router(config)# username xxx password yyy
Tip: Save your configuration prior to configuring your AAA commands. Only after you
have completed all your AAA configuration (and are satisfied that it works correctly)
should you save the configuration again. This allows you to recover from unforeseen
lockouts (prior to saving the configuration) by reloading the router.
Specifying the External AAA Server
In global configuration, define the security protocol used with AAA (Radius,
TACACS+). If you do not want to use either of these two protocols, you can use the
local database on the router.
If you are using TACACS+, use the tacacs-server host
If you are using Radius, use the radius-server host <IP address of the AAA server>
<key> command.
AAA Server Configuration
On the AAA server, configure the following parameters:
•
The name of the access server.
•
The IP address the access server uses to communicate with the AAA server.
•
Note: If both devices are on the same Ethernet network then, by default, the
access server uses the IP address defined on the Ethernet interface when sending
out the AAA packet. This issue is important when the router has multiple interfaces
(and hence multiple addresses).
The exact same key <key> configured in the access server.
•
Note: The key is case-sensitive.
The protocol used by the access server (TACACS+ or Radius).
Refer to your AAA server documentation for the exact procedure used to configure
the above parameters. If the AAA server is not correctly configured, then AAA
requests from the NAS will be ignored by the AAA server and the connection may fail.
The AAA server has to be IP reachable from the access server (conduct a ping test to
verify connectivity).
Configuring Authentication
Authentication verifies users before they are allowed access to the network and
network services (which are verified with authorization).
To configure AAA authentication :
1.
2.
First define a named list of authentication methods (in global configuration
mode).
Apply that list to one or more interfaces (in interface configuration mode).
The only exception is the default method list (which is named "default"). The default
method list is automatically applied to all interfaces except those that have a named
method list explicitly defined. A defined method list overrides the default method list.
The authentication examples below use Radius, login and Point-to-Point Protocol (PPP)
authentication (the most commonly-used) to explain concepts such as methods, and
named lists. In all the examples, TACACS+ can be substituted for Radius or local
authentication.
The Cisco IOS software uses the first method listed to authenticate users. If that
method fails to respond (indicated by an ERROR), the Cisco IOS software selects the
next authentication method listed in the method list. This process continues until
there is successful communication with a listed authentication method, or all
methods defined in the method list are exhausted.
It is important to note that the Cisco IOS software attempts authentication with the
next listed authentication method only when there is no response from the previous
method. If authentication fails at any point in this cycle, meaning that the AAA server
or local username database responds by denying the user access (indicated by a
FAIL), the authentication process stops and no other authentication methods are
attempted.
To allow a user authentication, you must configure the username and the password
on the AAA server.
Login Authentication
You can use the aaa authentication login command to authenticate users who
want exec access into the access server (tty, vty, console and aux).
Example 1: Exec Access using Radius then Local
Router(config)# aaa authentication login default group radius local
In the command above:
•
the named list is the default one (default).
•
there are two authentication methods (group radius and local).
All users are authenticated using the Radius server (the first method). If the Radius
server doesn't respond, then the router's local database is used (the second method).
For local authentication, define the username name and password:
Router(config)# username xxx password yyy
Because we are using the list default in the aaa authentication login command,
login authentication is automatically applied for all login connections (such as tty,
vty, console and aux).
Note: The server (Radius or TACACS+) will not reply to an aaa
authentication request sent by the access server if there is no IP connectivity, if the
access server is not correctly defined on the AAA server or the AAA server is not
correctly defined on the access server.
Note: Using the example above, if we do not include the local keyword, we have:
Router(config)# aaa authentication login default group radius
Note: If the AAA server does not reply to the authentication request, the
authentication will fail (since the router does not have an alternate method to try).
Note: The group keyword provides a way to group existing server hosts. The feature
allows the user to select a subset of the configured server hosts and use them for a
particular service. For more information on this advanced feature, refer to the
document AAA Server-Group.
Example 2: Console Access Using Line Password
Let's expand the configuration from Example 1 so that console login is only
authenticated by the password set on line con 0.
The list CONSOLE is defined and then applied to line con 0.
We configure:
Router(config)# aaa authentication login CONSOLE line
In the command above:
•
the named list is CONSOLE.
•
there is only one authentication method (line).
Once a named list (in this example, CONSOLE) is created, it must be applied to a line
or interface for it to come into effect. This is done using the login
authentication list_name command:
Router(config)# line con 0
Router(config-line)# exec-timeout 0 0
Router(config-line)# password cisco
Router(config-line)# login authentication CONSOLE
The CONSOLE list overrides the default method list default on line con 0. You need to
enter the password "cisco" (configured on line con 0) to get console access. The
default list is still used on tty, vty and aux.
Note: To have console access authenticated by a local username and password, use:
Router(config)# aaa authentication login CONSOLE local
Note: In this case, a username and password have to be configured in the local
database of the router. The list must also be applied to the line or interface.
Note: To have no authentication, use
Router(config)# aaa authentication login CONSOLE none
Note: In this case, there is no authentication to get to the console access. The list
must also be applied to the line or interface.
Example 3: Enable Mode Access Using External AAA Server
You can issue authentication to get to enable mode (privilege 15).
We configure :
Router(config)# aaa authentication enable default group radius enable
Only the password will be requested, the username is $enab15$. Hence the
username $enab15$ must be defined on the AAA server.
If the Radius server doesn't reply, the enable password configured locally on the
router will have to be entered.
PPP Authentication
The aaa authentication ppp command is used to authenticate a PPP connection.
It's typically used to authenticate ISDN or analog remote users who want to access
the Internet or a central office through an access server.
Example 1: Single PPP Authentication Method for All Users
The access server has an ISDN interface which is configured to accept PPP dialin
clients. We use a dialer rotary-group 0 but the configuration can be done on the
main interface or dialer profile interface.
We configure
Router(config)# aaa authentication ppp default group radius local
This command authenticates all PPP users using Radius. If the Radius server doesn't
reply, the local database is used.
Example 2: PPP Authentication using a Specific List
To use a named list rather than the default list, configure the following commands:
Router(config)# aaa authentication ppp ISDN_USER group radius
Router(config)# int dialer 0
Router(config-if)# ppp authentication chap ISDN_USER
In this example, the list is ISDN_USER and the method is Radius.
Example 3 : PPP Launched from within Character Mode Session
The access-server has an internal modem card (Mica, Microcom or Next Port). Let's
assume that both aaa authentication login and aaa authentication
ppp commands are configured.
If a modem user first accesses the router using a character mode exec session (for
example, using Terminal Window after Dial), the user is authenticated on a tty line. To
launch into a packet mode session, users must typeppp default or ppp. Since PPP
authentication is explicitly configured (with aaa authentication ppp), the user is
authenticated at the PPP level again.
To avoid this second authentication, we can use the if-needed keyword.
Router(config)# aaa authentication login default group radius local
Router(config)# aaa authentication ppp default group radius local if-needed
Note: If the client starts a PPP session directly, PPP authentication is directly
performed since there is no login access to the access server.
For more information on AAA authentication, refer to the documents IOS 12.2 Security
Configuration Guide: Configuring Authentication and Cisco AAA Implementation Case Study.
Configuring Authorization
Authorization is the process by which you can control what a user can and cannot do.
AAA authorization has the same rules as authentication:
1.
First define a named list of authorization methods.
2.
Then apply that list to one or more interfaces (except for the default method
list).
3.
The first listed method is used. If it fails to respond, the second one is used,
and so on.
Method lists are specific to the authorization type requested. This document focusses
on the Exec and Network authorization types.
For more information on the other types of authorization, please refer to the Cisco IOS
Security Configuration Guide, Release 12.2.
Exec Authorization
The aaa authorization exec command determines if the user is allowed to run an
EXEC shell. This facility might return user profile information such as autocommand
information, idle timeout, session timeout, access-list and privilege and other peruser factors.
Exec authorization is only carried out over vty and tty lines.
The following example uses Radius.
Example 1: Same Exec Authentication Methods for All Users
Once authenticated with:
Router(config)# aaa authentication login default group radius local
All users who want to log in to the access server have to be authorized using Radius
(first method) or local database (second method).
We configure:
Router(config)# aaa authorization exec default group radius local
Note: On the AAA server, Service-Type=1 (login) must be selected.
Note: With this example, if the local keyword is not included and the AAA server
does not respond, then authorization will never be possible and the connection will
fail.
Note: In Examples 2 and 3 below, we don't need to add any command on the router
but only configure the profile on the access server.
Example 2: Assigning Exec Privilege Levels from the AAA Server
Based on Example 1, if a user who logs into the access server is to be allowed to
enter enable mode directly, configure the following Cisco AV-pair on the AAA server:
shell:priv-lvl=15
This means that the user will go directly to the enable mode.
Note: If the first method fails to respond, then the local database is used. However,
the user will not go directly to the enable mode, but will have to enter the enable
command and supply the enable password.
Example 3 : Assigning Idle-Timeout from the AAA Server
To configure an idle timeout (so that the session is disconnected in case of no traffic
after the idle timeout) use the the IETF Radius attribute 28: Idle-Timeout under the
user's profile.
Network Authorization
The aaa authorization network command runs authorization for all network-related
service requests such as PPP, SLIP and ARAP. This section focusses on PPP, which is
most commonly used.
The AAA server checks if a PPP session by the client is allowed. Moreover, PPP
options can be requested by the client: callback, compression, IP address, and so on.
These options have to be configured on the user profile on the AAA server. Moreover,
for a specific client, the AAA profile can contain idle-timeout, access-list and other
per-user attributes which will be downloaded by the Cisco IOS software and applied
for this client.
The following example show authorization using Radius:
Example 1: Same Network Authorization Methods for All Users
The access server is used to accept PPP dialin connections.
Firstly, users are authenticated (as was previously configured) using:
Router(config)# aaa authentication ppp default group radius local
then they have to be authorized using:
Router(config)# aaa authorization network default group radius local
Note: On the AAA server, configure:
•
Service-Type=7 (framed)
•
Framed-Protocol = PPP
Example 2: Applying User-Specific Attributes
You can use the AAA server to assign per-user attributes such IP address, callback
number, dialer idle timeout value or access-list etc.. In such an implementation, the
NAS downloads the appropriate attributes from the AAA server user profile.
Example 3: PPP Authorization with a Specific List
Like for authentication, we can configure a list name rather than using the default
one :
Router(config)# aaa authorization network ISDN_USER group radius local
Then, this list is applied to the interface:
Router(config)# int dialer 0
Router(config-if)# ppp authorization ISDN_USER
For more information on AAA authentication, refer to the documents IOS 12.2 Security
Configuration Guide: Configuring Authentication and Cisco AAA Implementation Case Study.
Configuring Accounting
The AAA accounting feature enables you to track the services that users are
accessing and the amount of network resources that they are consuming.
AAA accounting has the same rules as authentication and authorization:
1.
You must first define a named list of accounting methods.
2.
Then apply that list to one or more interfaces (except for the the default
method list).
3.
The first listed method is used, if it fails to respond, the second one is used
and so on.
The first listed method is used, if it fails to respond, the second one is used and so
on.
•
Network accounting provides information for all PPP, Slip and AppleTalk
Remote Access Protocol (ARAP) sessions: packet count, octects count, session time,
start and stop time.
•
Exec accounting provides information about user EXEC terminal sessions (a
telnet session for instance) of the network access server: session time, start and
stop time.
For more information on the other types of authorization, please refer to the Cisco IOS
Security Configuration Guide, Release 12.2.
The examples below focus on how information can be sent to the AAA server.
Configuring Accounting Examples
Example 1: Generating Start and Stop Accounting Records
For every dialin PPP session, accounting information is sent to the AAA server once
the client is authenticated and after the disconnect using the keyword start-stop.
Router(config)# aaa accounting network default start-stop group radius local
Example 2 : Generating Only Stop Accounting Records
If accounting information has to be sent only after a client's disconnection, use the
keyword stop and configure the following line:
Router(config)# aaa accounting network default stop group radius local
Example 3 : Generating Resource Records for Authentication and
Negotiation Failures
Until this point, AAA accounting provides start and stop record support for calls that
have passed user authentication.
If authentication or PPP negotiation fails, there is no record of authentication.
The solution is to use AAA resource failure stop accounting:
Router(config)# aaa accounting send stop-record authentication failure
A stop record is sent to the AAA server.
Example 4 : Enabling Full Resource Accounting
To enable full resource accounting, which generates both a start record at call setup
and a stop record at call termination, configure:
Router(config)# aaa accounting resource start-stop
This command was introduced in Cisco IOS Software Release 12.1(3)T.
With this command, a call setup and call disconnect start-stop accounting record
tracks the progress of the resource connection to the device. A separate user
authentication start-stop accounting record tracks the user management progress.
These two sets of accounting records are interlinked using a unique session ID for the
call.
For more information on AAA authentication, refer to the documents IOS 12.2 Security
Configuration Guide: Configuring Authentication and Cisco AAA Implementation Case Study.
•
Related Information
Technical Support - Cisco Systems
Contributed by Cisco Engineers
Was this Document Helpful?
Yes No Feedback
Viewers of This Document Also Viewed
•
•
•
•
Configuring Authentication
Authentication Commands
Configuring RADIUS
+ Show 3 More
Let Us Help
•
•
Open a Support Case
(Requires a Cisco Service Contract)
Ready to Replace an Old Switch?
Upgrade your network and get discounts on replacement switches and support
services
Learn How
Share
•
Quản lý router bằng TACACS+ server & Privilege Levels
Posted on July 15, 2013by hnaeht
Mô hình triển khai
TACACS+/ RADIUS server cung cấp khả năng quản lý truy cập các thiết
bị trong mạng một cách tập trung với nhiều tính năng bảo mật tối ưu.
Privilege levels trong router Cisco là sự phân cấp về quyền của từng
user đối với thiết bị.
Dựa vào việc kết hợp hai yếu tố trên để cung cấp một giải pháp quản
lý mềm dẻo và nâng cao tính an toàn cho hệ thống mạng.
Cả TACACS+ và RADIUS đều là hai giao thức có chức năng tương tự
nhau. Vậy câu hỏi đặt ra là tại sao lại chọn TACACS+? Để trả lời câu hỏi
thì ta hãy xem ưu điểm của TACACS+ trong vấn đề quản lý router:
RADIUS không cho phép kiểm soát những lệnh mà user được và không
được phép sử dụng trên router. TACACS+ tỏ ra mềm dẻo và hữu dụng
hơn trong vấn đề quản lý router nhờ vào việc cung cấp 2 phương thức
kiểm soát việc uỷ quyền (authentication) cả trên phương diện user và
group:
Gán những câu lệnh có thể thực thi vào privilege levels và thông
qua TACACS+ server để áp sự phân cấp về quyền này đến user truy
cập vào.
Xác định những lệnh mà có thể thực thi trên router lên user hoặc
group thông qua những cấu hình trên TACACS+ server.
Phần 1: Chỉ sử dụng Privilege Levels
Mặc định trên router có sẵn 3 previlege levels:
Privilege level 0: ít sử dụng. Gồm 5 lệnh: disable, enable, exit,
help và log out.
Privilege level 1: non-privilege. Tương đương “ router>”
Privilege level 15: privilege – tương đương bạn vào chế độ enable
( router#)
Levels từ 2-14 không được cấu hinh mặc định nhưng ta có thể cấu hình
để chuyển đổi những lệnh giữa các levels với nhau. Để biết đang truy
cập router ở level nào, ta gõ lệnhshow privilege. Để biết những lệnh
có thể sử dụng trong level tương ứng thì ta gõ ? khi đang truy cập ở
level cần xác định.
Mô tả yêu cầu
Cài đặt, cấu hình chứng thực và uỷ quyền cho user dựa vào
privilege levels trên TACACS+ server
Cấu hình AAA service trên router.
Dùng client với chương trình terminal kiểm tra kết quả.
Thiết bị & Cài đặt
Router Cisco 2691 được giả lập trên GNS.
Máy ảo VMware cài HĐH Winserver2008 và Windows XP làm client.
Chương trình Cisco Secure ACS 4.2 cài trên Windows Server 2008.
Các bước thực hiện
1. Cài đặt và cấu hình TACACS+ server:
Trước khi cài ta cần chú ý các vấn đề sau:
Dùng Internet Explorer 6SP1 hoặc Nescape 7 trở lên
Cài đặt Java. Link:
Check tất cả các ô trong quá trình cài đặt ACS 4.2
Sau khi cài đặt xong. Click vào biểu tượng ACS admin trên destop để
truy cập vào server thông qua trình duyệt web.
Hình 1: Giao diện chính của chương trình Cisco Secure ACS 4.2
Cấu hình TACACS+ Server
Bước 1: Tạo group
Ở đây chúng ta sẽ tạo ra 2 nhóm.
Nhóm 1 là Administrator có quyền privilege level 15
Nhóm 2 là guest có quyền privilege level 0.
Vào menu Group Setup
Hình 2: Tạo Group
Chọn một group bất kỳ rồi chọn Rename Group. Nhập vào
Administrator rồi Submit.
Hình 3: Tạo Group mang tên Administrator
Làm tương tự để tạo ra thêm một group nữa tên Guest.
Tiếp đến ta phân quyền cho 2 nhóm theo privilege level như đã nói ở
trên.
Trước hết ta phân quyền cho nhóm Administrator.
Chọn Group là Administrator rồi sau đó chọn Edit Settings
Hình 4: Cấu hình cho từng group
Trong cửa sổ Group Setup tiếp theo ta làm lần lượt như sau;
Chọn TACACS+ trong mục Jump to
Check vào Shell (exec)
Check vào Privilege Level và nhập vào thông số 15
Chọn Submit + Restart
Hình 5: Cấu hình cho nhóm Admin ở mức Privilege Level 15
Như vậy, những user nào thuộc group Adminstrator khi kết nối vào
router thông qua TACACS+ server sẽ có bộ quyền ở mức 15.
Việc cấu hình cho nhóm Guest ở Privỉlege Level 0 tương tự như vậy.
Bước 2: Tạo user và add user vào group
Chúng ta sẽ tạo user admin thuộc group Aministrator và user guest
thuộc nhóm Guest
Vào menu User, nhập vào tên balcony, chọn Add/Edit
Hình 6: Thêm user mang tên Admin
Trong màn hình User Setup tiếp theo ta cần nhập các thông số sau:
Password authentication: ACS internet Database
Password cho user admin
Chọn nhóm cho user này là Administrator.
Hình 7: Cấu hình cho user admin
Việc tạo và cấu hình cho user Guest và group Guest ta làm tương tự.
Bước 3: Cấu hình AAA server và Client:
Vào menu Network Configuration. Trước tiên ta cấu hình AAA
client.
Click vào Add Entry trong phần AAA Client
Hình 8: Chọn phần cấu hình AAA Client
Trong cửa sổ tiếp theo ta cần nhập các thông số sau:
AAA Client hostname: hostname của router
AAA IP address: địa chỉ của router 10.145.30.33
Key: khoá thương lượng giữa router và server ( ta chọn tuỳ ý và
cần phải khớp với giá trị sẽ nhập khi cấu hình router)
Authentication Using: Tất nhiên là chọn TACACS+
Sau đó ta chọn Submit + Apply
Hình 9: Cấu hình cho AAA client
Tiếp theo ta sẽ cấu hình cho AAA Server.
Chọn Add Entry trong phần AAA server:
Hình 10: Chọn cấu hình thêm một AAA server.
Nhập vào các giá trị sau:
AAA server name: đặt tùy ý
AAA server IP: địa chỉ IP của máy cài TACACS+
Key: khoá giao trước ( trùng với khoá lúc nãy là 123456)
AAA server type: Chọn TACACS+
Chọn vào Submit + Apply
Hình 11: Cấu hình thông số cho AAA server
2.Cấu hình trên router:
R1(config)#aaa new-model
R1(config)#tacacs-server host 10.145.30.33 //IP của TACACS+ server
R1(config)#tacacs-server key 1234 //key nhập ở trên
R1(config)#aaa authentication login TACACS group tacacs+
R1(config)#aaa authentication login LOCAL local
R1(config)#line vty 0 4
R1(config)#login authentication TACACS
R1(config)#line vty 5 14
R1(config)#login authentication TACACS
R1(config)#line vty 15 20
R1(config)#login authentication LOCAL
R1(config)#aaa authorization exec default group tacacs+
3. Kiểm tra hoạt động:
Sử dụng một client chạy Windows XP và dùng command line telnet vào
router Center để kiểm tra cấu hình bằng hai tài khoản admin (admin)
và Guest (guest)
Trên client ta vào CMD và gõ lệnh telnet 10.145.30.234 . Thông báo
yêu cầu nhập username và password sẽ hiện lên. Ta nhâp vào admin và
password tương ứng như đã cấu hình:
Hình 12: Truy cập vào router với tài khoản level 15
Ta thấy như hình, với level 15 khi login vào router đã ở chế độ privilege.
Tiếp theo ta thử login vào với tài khoản Guest:
Phần 2: Kết hợp Privilege Levels và Command
Authorization
Như đã đề cập ở trên. Ưu điểm của TACACS+ so với RADIUS đó là chức
năng Command Authorization, xác định những lệnh mà user có thể
hoặc không thể sử dụng khi truy cập vào.
Vậy lúc này thì những lệnh mà một user khi login vào thiết bị có thể
thực hiện chính là những lệnh nằm trong Privilege Levels của họ trừ đi
những lệnh mà chúng ta cấu hình trong Command Authorization.
Mô tả yêu cầu
Dựa trên hai group sẵn có ở trên là Administrator ta cấu hình thêm như
sau:
Administrator với Level 15 nhưng không thể xoá startup-config
Guest lúc này ta set lên level 15 luôn nhưng chỉ có phép sử dụng
lênh Show
Các bước thực thực hiện
Như đã nói ở trên, trước hết ta set quyền của nhóm Guest ở mức 15.
Việc set lên Level 15 bây giờ chỉ có ý nghĩa đó là maximum Level. Tất
cả đều phụ thuộc vào Command Authorization mà bạn sẽ set sau
này.
Bước 1: Tạo những mẫu Command Authorization – một nhóm
những lệnh có thể hoặc ko thể thực thi dành cho user.
Trước tiên ta vào menu Shared Profile Components.
Click vào Shell Command Authorization Sets
Hình 15: Chọn chức năng cấu hình Command Authorization
Bấm vào nút Add để thêm vào một mẫu mới.
Nội dung cấu hình gồm các phần với ý nghĩa như sau: