Mô hình Sultan Ahmet Camii, Turkey, P 1
Bạn đang xem bản rút gọn của tài liệu. Xem và tải ngay bản đầy đủ của tài liệu tại đây (1.31 MB, 14 trang )
Sultan Ahmet Camii,Turkey : Assembley Instructions
/>
North west face
South east face
North east face
South west face
View of completed model
Parts list (Pattern) : Thirty A4 sheets (No.1 to No.30)
Formally known as Sultan Ahmed Camii, this mosque was built by Sultan Ahmed I, over seven years between 1609 and 1616,
and is known as one of the world's most beautiful Islamic mosques. Called "camii" in Turkish, the interior walls of the mosque
are decorated with around 21,000 beautiful blue and white Iznik ceramic tiles, giving the mosque its more popular name of
"Blue Mosque". Some 260 stained glass windows help create a beautifully mystical atmosphere as light streams through them.
The mosque is still in use as a place of worship. The main dome is approximately 43 meters high, with a diameter of
approximately 23 meters, and is supported by four marble columns, each measuring roughly 5 meters in diameter. The only
mosque in the world to feature six minarets, the Blue Mosque is one of Turkey's World Heritage sites.
No. of Parts : 262
Assembly Instructions : Fourteen A4 sheets (No.1 to No.14)
* Build the model by carefully reading the Assembly Instructions , in the parts sheet page order..
Hint: Trace
T
along the folds with a ruler
and a used pen (no ink) to get a sharper, easier fold.
* This model was designed for Papercraft and may differ from the original in some respects..
Assembly Instructions
Mountain fold (dotted line)
Make a mountain fold.
Valley fold (dashed and dotted line)
Make a valley fold.
Scissors line (solid line)
Cut along the line.
Cut in line (solid line)
Cut along the line.
Glue
The glue spot (colored dot)
shows where to apply the glue.
Glue spot(Red dot)
Glue parts with the same number together.
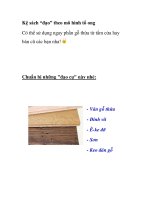
Tools and materials
Assembly tip
Before gluing, crease the paper along mountain
fold and valley fold lines and make sure
rounded sections are nice and stiff.
Caution
Glue, scissors and other tools may be dangerous
to young children so be sure to keep them out of
the reach of young children.
Glue spot(Green dot)
Glue within the same part.
Glue spot(Blue dot)
Glue to the rear of the other part.
-1-
Scissors, set square, glue (We recommend stick glue),
pencil, used ballpoint pen, toothpicks, tweezers,
(useful for handling small parts)
Sultan Ahmet Camii,Turkey : Assembley Instructions
Before starting.
1 First, stick only the green colored parts
Every page of the Assembly Parts section has a number (Sheet 1 to 30)
at the bottom of the page, in the center. Follow the assembly
in the order of the pages. (*Assembly Parts are from Sheet 2 to 30)
There are a total of 262 parts. Each sheet shows the part numbers.
Also, on the glue spot of each part, the glue spot number of the corresponding part is printed.
The numbers 1 2 3 ,etc., on each parts indicate the order in which they are to be glued.
Where the same part has multiple connecting points and glue spots where it is to be glued
to other parts, colored spots
and numbers are given in order to indicate the positions
precisely. Follow the illustrations in the Assembly Instructions carefully.
together in adjacent pairs.
2 Once all the adjacent pairs have been joined up, stick the ends together.
2L
1
1
2
2M
2
Sheet No.
key points to creating a beautiful dome shape
4
2A
The light blue sections
are not glued at first.
Glue the light green sections
only.
2 O 2Q
2S 2U
8
*Glue four sides,
back and front.
3 Check the shape of the dome as you stick on
all of the sides.
3
4 When joining part 2M to part 2L, match up
the light blue
sections also and glue
them at the same time.
7
1
3
2K
2B
9
2
5
*Glue the four points
marked
at the same time.
2C
2D
2E
2F
7
5 Connect the ends of part 2L at the back and
then glue on part 2K at the locations indicated.
10
2G 2H
4
2I
2J
8
5
*Use an object with a rounded tip to press
down from the inside on the gluing area.
11
6
2N 2R
2P 2T
12
13
*Stick onto the center part,
marked with the red circle
.
-2-
6
Sultan Ahmet Camii,Turkey : Assembley Instructions
2
3 4
Sheet No.
Sheet No.
3
Sheet No.
3A 3B
* Parts sheet No.3
7
6
4
Sheet No.
4A 4B
* Parts sheet No.4
8
2
Sheet No.
3
Sheet No.
3C
2C
2D
2E
2F
10
9
2G 2H
* Parts sheet No.3
2I
3
5
4
2J
* Parts sheet No.2
1
11
2
2 O 2Q
2S 2U
-3-
Sultan Ahmet Camii,Turkey : Assembley Instructions
4 5 6 7 8
4 5 6 7
Sheet No.
Sheet No.
6
4
Sheet No.
4
Sheet No.
Sheet No.
* Parts sheet No.6
* Parts sheet No.4
4F
4I
4D
4G
4E
4H
2
4G
4D
4H
2
4E
4I
3
6
12
4F
11
1
4C
6A
8
7
5
* Parts sheet No.4
10
4
9
1
5
Sheet No.
* Parts sheet No.5
3
6
5B
Sheet No.
1
5C
5D
* Parts sheet No.6
5F
5E
2
5B
13
4
7A
5
Sheet No.
10
7
* Parts sheet No.5
6B
15
5A
17
6
3
5E
8
9
11
5
12
5C
5D
5F
7
Sheet No.
6F
6C
16
6D
6E
* Parts sheet No.7
18
14
6
Sheet No.
* Parts sheet No.6
6G
10
6I
6G
6H
1
4
6H
8
9
4
6
2
6J
7
3
6I
5
7
11
8
Sheet No.
Sheet No.
* Parts sheet No.7
7C
7I
6L
6K
* Parts sheet No.8
7B
7H
8B
7D
7J
7E
7K
7F
7L
7G
7M
12
8C
8G
8F
8E
13
8D
-4-
Sultan Ahmet Camii,Turkey : Assembley Instructions
9 10
10
Sheet No.
9
Sheet No.
Sheet No.
10
Sheet No.
1
* Parts sheet No.9 , 10
10 H
9
9A
9H
10 A
8
1
10
The light blue sections
are not glued at first.
Glue the light green sections
only.
9G
9N
10 G
9D
9K
10 D
9C
9J
10 C
2
10 I
The light blue sections
are not glued at first.
Glue the light green sections
only.
2
10 J
11
4
10 N
3
9F
9M
10 F
10 L
7
9E
9L
10 E
3
10 O
15
10 M
14
13
12
5
8
6
4
9
10 K
16
9B
9I
10 B
6
5
10
7
-5-
Sultan Ahmet Camii,Turkey : Assembley Instructions
8 11
Sheet No.
4
11
Sheet No.
1
* Parts sheet No.11
3
11 C 11 F
11 A 11 D
11 G 11 J
11 L
6
11 B 11 E
11 H 11 K
3
2
1
2
11 I
5
4
4
4
1
7
1
8
2
3
3
2
10
11
9
12
1
8A
8
Sheet No.
* Parts sheet No.8
2
-6-
Sultan Ahmet Camii,Turkey : Assembley Instructions
12 13 14 15 16
Sheet No.
15 B
15
Sheet No.
15 A
4
* Parts sheet No.15
12
15 C
Sheet No.
6
* Parts sheet No.12
12 A
13
Sheet No.
3
* Parts sheet No.13
13 A
14
Sheet No.
* Parts sheet No.14
2
14 A
1
9
16 B
7
5
16 A
8
16
Sheet No.
* Parts sheet No.16
155mm
60mm
30A
*After connecting all the parts, mark the location of part No. 30A with a pencil on the rear center. It helps to use a straight.
-7-
Sultan Ahmet Camii,Turkey : Assembley Instructions
17 18
Sheet No.
17 L
18 L
17 M
18 M
17 N
18 N
15
6
7
17 C
18 C
11
10
12
2
*Glue four sides, back and front.
17 D
18 D
1
17 E
18 E
17 J
18 J
17 G
18 G
9
17 I
18 I
17 F
18 F
8
14
13
5
3
*Glue the four points marked
at the same time.
17 K
18 K
4
*Use an object with a rounded tip to press down
from the inside on the gluing area.
17 A
18 A
17 H
18 H
-8-
17 B
18 B
Sultan Ahmet Camii,Turkey : Assembley Instructions
19 20 21
Sheet No.
20
19
21
Sheet No.
Sheet No.
* Parts sheet No.19
19 C
19 D
1
19 A
19 F
19 H
19 I
20
20
21
21
2
3
19 B
19 G
19 E
19 J
Sheet No.
* Parts sheet No.20
4
20 B
21 B
5
A
H
A
H
11
* Parts sheet No.21
20 D 20 J
20 E 20 K
20 F 20 L
21 D 21 J
21 E 21 K
21 F 21 L
20 I
21 I
12
13
20 C 20 G
21 C 21 G
14
10
20
15
*Slide up from the bottom. Apply glue and
then pinch together at the location shown,
using tweezers or similar.
20
16
*Slide up from the bottom. Apply glue and
then pinch together at the location
shown,using tweezers or similar.
6
9
19
8
7
*Slide down from the top.
Apply glue and then pinch
together at the prescribed
location.
*Slide down from the top.
Apply glue and then pinch
together at the prescribed
location.
18
17
*Line up the connection locations
of the parts to give you a nicer finish.
-9-
*Line up the connection locations
of the parts to give you a nicer finish.
Sultan Ahmet Camii,Turkey : Assembley Instructions
22 23 24 28
Sheet No.
22 B
22
22
Sheet No.
Sheet No.
* Parts sheet No.22
* Parts sheet No.22
6
22 A
22 C
23
Sheet No.
* Refer to Assembly Instructions explanation No. 2.
* Parts sheet No.23
7
22 D
23 E
22 E
10
8
9
24
Sheet No.
* Parts sheet No.24
4
1
13
24 A
* Stick the triangular shapes together
on their rear sides.
11
23 A
14
2
5
23
Sheet No.
12
* Parts sheet No.23
3
23 B
15
28 A
23 C
28
Sheet No.
* Refer to Assembly Instructions explanation No. 2.
* Parts sheet No.28
17
23 D
16
- 10 -
Sultan Ahmet Camii,Turkey : Assembley Instructions
24 25
Sheet No.
25
Sheet No.
* Parts sheet No.25
25 C
3
*Glue four sides, back and front.
4
1
5
*Glue the four points marked
at the same time.
25 A
6
2
25
sheet No.
* Parts sheet No.25
25 B
25 D
9
8
7
24
24 C 24 E 24 G 24 I
24 M 24 O 24 Q 24 S
Sheet No.
* Parts sheet No.24
24
24 K
24 U
24 B
24 L
Sheet No.
* Parts sheet No.24
25
24 D 24 F
24 N 24 P
24 H 24 J
24 R 24 T
15
25
Sheet No.
Sheet No.
25 F
* Parts sheet No.25
25 H
25 J
25 L
25 N
10
25 E
* Parts sheet No.25
25 G 25 I
25 K
25 M
16
13
*Glue four sides, back and front.
11
14
12
*Glue the four points marked
at the same time.
*Use an object with a rounded tip to
press down from the inside on the gluing area.
- 11 -
*Stick onto the center part,
marked with the red circle
.
Sultan Ahmet Camii,Turkey : Assembley Instructions
26 27
Sheet No.
27
Sheet No.
* Parts sheet No.27
27 A
26
Sheet No.
* Parts sheet No.26
27
Sheet No.
* Parts sheet No.27
4
26 C 26 E 26 G 26 I
26 M 26 O
26 K
27 C 27 E 27 G 27 I
27 M 27 O
27 K
* Glue four sides,
back and front.
3
6
5
* Glue the four points marked
at the same time.
26
Sheet No.
* Parts sheet No.26
26 A
7
2
*Use an object with a rounded tip to
press down from the inside on the gluing area.
26
Sheet No.
* Parts sheet No.26
27
Sheet No.
* Parts sheet No.27
26 B
26 L
26 D 26 F
26 N
26 H 26 J
27 B
27 L
27 D 27 F
27 N
27 H 27 J
* Refer to Assembly Instructions Page 13 for details on the connection of 26A and 27A.
9
10
1
* Line up the shapes and stick them
together on their rear sides.
8
* Stick onto the center part,
marked with the red circle
- 12 -
.
Sultan Ahmet Camii,Turkey : Assembley Instructions
28 29
Sheet No.
8
28 A
28
Sheet No.
28 B
* Parts sheet No.28
29 B
28 B
1
7
6
29 A
29
28 A
3
4
2
Sheet No.
29 A
* Parts sheet No.29
29
Sheet No.
5
* Parts sheet No.29
9
12
11
14
10
13
- 13 -
Sultan Ahmet Camii,Turkey : Assembley Instructions
30
Sheet No.
2
5
1
30A
11
11
4
3
17
9
12
13
14
6
8
7
*Stick on part 30A, matching
it up with the pencil line
that you drew in Step 7 of
the assembly instructions.
15
16
*Once all the parts of the building have been joined up, assemble
the base platform. Fold flaps 13 and 14 on the right and left inward
and glue them. The upper and lower flaps 16 and 17 should be
joined up with the four corner flaps 15 , then folded inwards and glued.
10
- 14 -