kids making jewelry
Bạn đang xem bản rút gọn của tài liệu. Xem và tải ngay bản đầy đủ của tài liệu tại đây (7.33 MB, 104 trang )
Making
Jewelry
Denise Etchison
Australia • Brazil • Japan • Korea • Mexico • Singapore • Spain • United Kingdom • United States
Course Technology PTR
A part of Cengage Learning
Printed in the United States of America
1 2 3 4 5 6 7 11 10 09
© 2009 Course T
echnology, a part of Cengage Learning.
ALL RIGHTS RESERVED. No part of this work covered by the copyright
herein may be reproduced, transmitted, stored, or used in any form or by
any means graphic, electronic, or mechanical, including but not limited to
photocopying, recording, scanning, digitizing, taping, Web distribution,
information networks, or information storage and retrieval systems, except
as permitted under Section 107 or 108 of the 1976 United States Copyright
Act, without the prior written permission of the publisher.
All trademarks are the proper
ty of their respective owners.
Library of Congress Control Number: 2008902391
ISBN-13: 978-1-59863-526-3
ISBN-10: 1-59863-526-3
Course Technology
25 Thomson Place
Boston, MA 02210
USA
Cengage Learning is a leading provider of customized learning solutions
with office locations around the globe, including Singapore, the United
Kingdom, Australia, Mexico, Brazil, and Japan. Locate your local office at:
international.cengage.com/region
Cengage Learning products are represented in Canada by
Nelson Education, Ltd.
For your lifelong learning solutions, visit courseptr.com
Visit our corporate website at cengage.com
Kids! Picture Yourself Making
Jewelry
Denise Etchison
Publisher and General Manager,
Course Technology PTR:
Stacy L. Hiquet
Associate Director of Marketing:
Sarah Panella
Manager of Editorial Services:
Heather Talbot
Marketing Manager: Jordan Casey
Acquisitions Editor: Megan Belanger
Project Editor: Sandy Doell
Kid Reviewer: Shelby Hiquet
Interior Photography: Tami Blevins
PTR Editorial Services Coordinator:
Erin Johnson
Interior Layout: Jill Flores
Cover Designer: Mike Tanamachi
Indexer: Katherine Stimson
Proofreader: Heather Urschel
For product information and technolog
y assistance, contact us at
Cengage Learning Customer & Sales Support, 1-800-354-9706
For permission to use material from this text or product,
submit all requests online at cengage.com/permissions
Further permissions questions can be emailed to
eISBN-10: 1-59863-7
02-9
For my daughter Calee Etchison.
Thank you for being you.
ACKNOWLEDGMENTS
A special thanks to my family and friends for their encouragement, support, and love.
Special thanks to my daughter Calee Etchison for your patience and always being there for me.
Sandy Doell, thanks for all your hard work, patience, sense of humor, and working your magic.
Thank you to the following mentors, friends, and inspirations:
Tami Blevins Photography
Shelby Hiquet
Anna Villanyi
Laura Villanyi
Beth Wentz
Melanie Reckas
Indianapolis Art Center
Michele Etchison
Desi Busby
Dustin Etchison
Lucas Etchison
Rex, Dianna, Dan, and Brandon
Apollo, Aspen, Eller, Big Daddy, Patchy, Scotch, Miss Walter, & Cosmo
In memory of Toby. Good Boy!
Thank you to everyone who contributed to the creation of this book: Stacy Hiquet, publisher; Megan
Belanger, acquisitions editor; Heather Talbot, manager of editorial services; Jill Flores, layout and design;
Heather Urschel, proofreader; Katherine Stimson, indexer; and everyone at Cengage Learning for their
cooperation and encouragement.
Denise Etchison grew up on a farm in central
Indiana, where she always felt an urge to make
art. She spent many hours as a child walking the
corn rows searching for what some might call
ordinary rocks, but she called her “treasures.”
With a little care and polish, she knew their
beauty could be brought out. Early attempts at
artwork were created from old fence wire and
barn roofing found on the farm.
Until 1996, Denise spent most of her professional
life working in retail and merchandising while
raising her daughter Calee. Then, by chance, she
drove past the Indianapolis Art Center and saw a
sign that said “Register Now for Classes.” Over the
next few years, she embarked on an artistic explo-
ration that took her from ceramics and steel
ABOUT THE AUTHOR
sculpture and finally to her true passion—jewelry
design. She was fortunate enough to find encour-
aging teachers to mentor her in wire wrapping,
glass fusing, metalsmithing, and stone inlay, all of
these forming the foundation of her training in
jewelry fabrication. Lapidary work (the cutting
and shaping of stones) and the creation of silver
settings (bezels) to place stones in has become
her favorite form of design. It allows her to return
to the earlier joy she found in collecting rocks
and fossils, letting their naturally occurring pat-
terns and geometry inspire her creations.
In 2000, Denise began to give back to the com-
munity that encouraged her skills by becoming
a jewelry instructor at the Indianapolis Art
Center. She built her own home studio in 2003,
where she teaches private lessons and work-
shops. She began to sell her artwork through
retail venues and at art fairs. Denise currently
conducts workshops and demonstrations in
public schools, tailoring her art instruction for
kindergarten through high school classes, and
mentoring high school interns who serve
apprenticeships in her studio. Through teaching
and participation in art fairs, Denise has been
able to add the element of human interaction so
important to inspiring a creative life. Denise
loves seeing her students’ eyes light up when
they master a new skill or speaking to someone
who has found inspiration and joy in wearing
her jewelry designs.
Denise is the author of Picture Yourself Making
Jewelry and Beading, published in 2008. She
has also had articles published in magazines,
including Fishers/Geist Magazine.
Project 1
Forest Fairy Halo
Project 3
Love and Friendship Beads
Project 2
Braided Friendship Bracelet
Project 4
B.F.F. Tag You’re It! Necklace
TABLE OF CONTENTS
Project 5
Label Holder Necklace
Project 7
Memory Wire Bracelet
Project 8
Ribbon and Silk Flower
Bracelet
Project 6
Leather Cord and Donut Bead
Necklace
CONTENTS
vii
CONTENTS
viii
Project 9
Leather Bracelet with Brads
Project 11
Wood Decoupage Necklace
Project 12
Colorful Beads and Hemp
Cord Necklace
Project 10
Beaded Inspiration Bracelet
CONTENTS
ix
Project 13
Message in a Bottle Necklace
Project 15
Bead Drop Earrings
Project 16
Bead Drop Necklace
Project 14
Wire Spiral Ring
MESSAGE FROM THE AUTHOR
The jewelry projects in this book are meant to
inspire the beginning jewelry artist. Here you
will learn the basics of jewelry design and cre-
ation; after you work on some of the projects in
this book, you’ll be able to create your own
designs and express your own ideas through art.
You will learn to make your own jewelry and
wear it as a personal expression of who you are.
Remember these things as you work:
Experimentation is good.
Be happy when you make a mistake! Mistakes
are part of the learning process. Many times
“mistakes” will become ideas for other designs.
You will learn from all of your mistakes.
The techniques described in Kids! Picture
Yourself Making Jewelry will appeal to both
beginning and experienced artists. There’s some-
thing here for everyone!
My goal is that you will have fun and enjoy mak-
ing the projects in the book, but I also want to
inspire originality in each individual’s work. Art
means the freedom to express yourself in your
own way, not just copying what I tell you to do
in this book, so use the book as a starting point
for your own designs.
Start out with limited tools. Seek inexpensive
alternatives, improvise with what you have on
hand, or use what is easily obtained. Think
“outside the box,” which is just another way of
saying “be creative,” and find new uses for
ordinary items.
The projects in this book are arranged, more or
less, in order of difficulty. The simple detailed
instructions make it easy for you to jump in at any
point and complete a project. Or you can start at
the beginning and work your way through from
simple to more complicated. Project 1, the Forest
Fairy Halo, requires only tools you probably
already have in your kitchen or workshop. Project
2, Braided Friendship Bracelet, also requires little
in the way of tools. Later projects, such as Project
14, the Wire Spiral Ring, require a little more
work, more tools, and attention to safety cautions.
All the pieces in this book, though, are things you
can make today and wear tonight.
All the projects have detailed step by step
instructions; you can’t go wrong as you work
your way through the book. If you are just start-
ing to make jewelry, you will find many useful
tips and advice about tools throughout the book.
My hope is to spark your imagination and show
you that your creative options are endless.
No matter how long you have been making and
designing jewelry, there are always different and
new techniques to learn. It is a constant learn-
ing process with no end in sight!
It is gratifying to make something yourself and
be able to wear it. When you give something
you made yourself as a gift, it’s personal and
special; a part of you went into making it.
There is no wrong. The more you experiment
with the projects you’ll learn in this book, the
more options you will have with your designs.
MESSAGE FROM THE AUTHOR
xi
The projects in this book should be considered
as basic instruction, a starting place for your
own ideas. Use your imagination and make each
design your own by changing the colors or
materials.
Denise says:
“Teaching workshops and having a daughter has
taught me that kids like to be allowed to be
messy, they like things to be easy to understand,
and they like to add their own style to the
design, I also have learned that kids really like to
use a hammer!”
A Word About Tools
You might want to start your own toolbox and
put in a few useful items that you will need for
other projects in your jewelry making career. Let
your friends and family know that you are open
to donations of their old tools. Have a birthday
coming up? Let everyone know that you are
starting a toolbox; they may ask you to provide a
wish list. And this is a good one no matter how
old you are—let “Santa” know what is on your
wish list. Tools do not have to be expensive. Your
toolbox can grow over time; you can get more
tools as you need them for new projects.
You don’t need to buy an actual toolbox. A shoe
box works great to hold the tools you’ll need for
your jewelry projects. Reduce, reuse, recycle!
Make your toolbox a work of art itself. Decorate
the shoe box by painting it. Use decoupage glue
to add copies of your favorite photos over the
painted surface. Keep it simple or go all out by
adding stickers, sequins, rhinestones, feathers;
or just about anything that makes you happy!
Get your artistic groove on! Paint the handles of
your tools bright, funky colors! This will make
them easy to keep track of and will make you
smile when you use them!
Ask a parent first of course, but following are
some places where you can find tools:
Raid the garage workbench. You might offer to
help clean and organize the workbench and tool-
boxes in exchange for a few hand-me-down tools!
Go through old toolboxes and junk drawers.
Visit garage sales and flea markets.
Don’t forget craft stores, local hardware stores,
and farm supply stores.
The list of tools you’ll need for the projects in
this book begins on the next page, but here are
some additional items you might want to add to
your toolbox when you run across them:
Bandages—In case you suffer a little for your art.
Q-Tips—These are good for wiping away excess
glue.
Paper towels—You’ll need these for clean up.
Tweezers—These come in handy for picking up
tiny objects.
Toothpicks—Keep just a couple on hand; they
can be used to put glue in the tiniest of places.
Plastic sandwich or snack baggies—These help
you keep just about everything, no matter how
small, organized.
Old magazines—You need these for decoupage
projects.
TOOLS USED IN THIS BOOK
xii
Tools Used in This Book
Pliers
Many specialty pliers are available through jew-
elry supply companies. Before you invest in cost-
ly pliers, start with the basics and build from
there. Two pair of chain nose pliers, two pair of
round nose pliers, and a good pair of cutters. I
always keep an old pair of pliers close by to use
for certain tasks. I keep a good pair close to use
for other tasks.
Round nose pliers have round smooth tapered
jaws. Use them to make loops and curved bends
in wire. Find them at your local arts and craft
store or jewelry supply company.
Chain nose pliers have flat smooth tapered
jaws. Use these to grip small components. Use
them to bend and shape wire and hold small
objects. It’s good to have at least two pairs on
hand. Find these at local arts and craft store or
jewelry supply company.
Wire cutters: This is a tool with blades that will
cut thick materials. These can easily be found at
a hardware store or discount store. You may pre-
fer a pair of smaller wire cutters purchased from
an arts and crafts store. They can be found in
the jewelry department. These are used to cut
the wire for the ring in Project 14.
Markers, pens, and pencils: Keep lots of sizes
handy. These are good, not only for marking
measurements, but for many other uses. Use
them to wrap wire around to make the curls on
the Forest Fairy Halo in Project 1. They are also
used in Project 14 to make the shank of the ring.
Tin snips are larger than wire cutters with larger
cutting blades. You may find wire cutters easier
to use because of their smaller size. Check with
your parents; they may have an old pair that you
can add to your toolbox.
You will find many uses for a 1/16" hole punch!
You can purchase this item at many arts and
crafts stores. Also check scrapbooking stores.
A ruler is a must have! Raid the junk drawer,
and go through old school supplies before you
resort to buying a new one.
TOOLS USED IN THIS BOOK
xiii
Keep a roll of gift wrapping or masking tape in
your toolbox. Use it to hold the ends of the
braided friendship bracelet in place, use on the
ends of cord to keep beads from sliding off. Be
aware of what you are sticking any tape to. You
do not want it to take the finish off a piece of
furniture. When in doubt, check with an adult.
A beading needle is a long flexible needle, usu-
ally made from wire. It has a large hole (eye) to
place thread or cord through. The beading nee-
dle is used in Project 10. It is not sharp like a
sewing needle but you do need to be careful
with it because it is pointed.
Craft glue is used in many ways; several varieties
and brands are available. Check the label to
make sure the glue is recommended for the type
of project that you are using it for. You can use
glue to keep items in place, use on the end of
the ribbon in Projects 8 and 13 to keep the ends
from fraying.
TOOLS USED IN THIS BOOK
xiv
Clothes pins, the kind that open and close with
a spring hinge, help keep glued items in place
until the glue is dry. You can find these in large
discount stores, in the section that has laundry
supplies.
Scissors come in handy for many tasks during
the jewelry making process. Be sure you have a
sturdy pair, good for cutting through thick paper
and yarn. You can find specialty scissors in a jew-
elry making catalog or store, but you can also
just use the ones in a home sewing kit or kitchen
drawer.
Paint brushes in a variety of sizes are great for
applying decoupage or glue in places where
you need to be careful about how much you
apply, and of course, paint brushes are good
for painting.
TOOLS USED IN THIS BOOK
xv
Keep scrap paper in a folder or large plastic bag.
You can use large pieces, such as old newspa-
pers, to cover your work space. Always keep all
of the scraps from your other projects because
you will probably need a small piece of a certain
color in the future, and it’s good to have small
scraps handy.
Hammers come in many sizes. If you are getting
a hammer to add to your toolbox, visit the hard-
ware store and purchase one that is smaller than
a normal one. You can also just use a regular old
hammer like the one that’s used to hammer
nails. If you borrow one from a parent or from
someone else’s toolbox or the garage, make sure
that you return it where it belongs! When you
hammer nails, use a pair of pliers to hold the
nail in place while starting to hammer it. Watch
out for fingers!
Nails come in many lengths and thicknesses. It’s
good to keep several sizes on hand for different
projects. Find these in the garage, a “clutter”
drawer in the kitchen, or in a parent’s toolbox.
Scrap wood is used in Project 9. You do not need
a large piece of wood; take a look around the
garage or storage space and see if you find a
leftover piece from a woodworking project.
Many hardware stores sell bundles of scrap
wood pieces at very low prices.
TOOLS USED IN THIS BOOK
xvi
Decoupage glue is used as a protective coating
for some surfaces. It can also be used as glue to
hold things together. Use in multiple layers to
get a thick protective layer. This glue goes on
white and dries clear. It comes in either a glossy
(shiny) or matte (not shiny) finish.
Safety goggles are not very stylish, but they are
certainly necessary! Make it a habit to wear
safety glasses to protect your eyes from flying
bits of metal when you are cutting and from
long wire flipping around and hitting you in
the eye when you are bending it. Add your own
artistic touch to these. Craft glue and rhine-
stones will give your goggles a touch of whimsy
and individuality!
TOOLS USED IN THIS BOOK
xvii
T
his is a great project to use
for fundraising. Older kids
can make these halos
ahead of time and they can be
sold pre-made. They also make
a great activity to entertain
younger kids or as a group proj-
ect for a sleepover. The project
shown here can be made with
various colored chenille stems or
different colors and shapes of
sequins. Let your imagination
run free with color schemes,
shapes, and holiday themes.
PROJECT
1
Forest Fairy Halo
MATERIALS NEEDED
6 brown chenille stems
48 assorted leaf sequins
4 plastic flower shapes
TOOLS NEEDED
Wire cutters or old scissors
1/16" hole punch
Marker
KIDS! PICTURE YOURSELF Making Jewelry
4
Connect two chenille stems by twisting the ends together to form a circle. You can adjust the size
of the halo at this time. Set the halo aside.
With the wire cutters or old scissors, cut two chenille stems into four equal pieces; you will have
eight pieces total. Set these aside.
1
2
CHAPTER 1 FOREST FAIRY HALO
5
Using the 1/16" hole punch, punch holes into the leaf sequins. The project pictured here uses 24
light green sequins and 24 dark green sequins for a total of 48 leaf sequins.
Use the eight pieces of chenille stems that you cut and the 48 leaf sequins that have holes punched
into them to form branches to bend around the halo circle. First, slide two leaf sequins, one of each
green shade, onto the chenille stem. Slide them down about an inch. Slide another leaf sequin onto
the end of the chenille stem and bend the end of the stem over to keep the leaf sequin from com-
ing off the stem. Slide the two leaf sequins that are on the chenille stem back up to where the end
leaf sequin is attached. Repeat this step on the other end of the chenille stem. Alternate the light
and dark green colors on the end leaf sequins. Do this to all eight of the cut chenille stems.
3
4
KIDS! PICTURE YOURSELF Making Jewelry
6
Put the halo that you made on a flat surface
and lay the chenille stems with the leaf
sequins on them around the halo. This will
help you figure out where to put the stems.
Curl the chenille stems around a marker to form curly
vines to add to the halo. Do this to all four chenille stems.
Fold the chenille stems in the middle and wrap
them around the halo twice to secure them in
place. Once you have attached all eight stems
with leaves to the halo, set this aside.
Using wire cutters or old
scissors, cut two chenille
stems in half. You will need
four pieces approximately
6 inches long.
5
6
7
8
CHAPTER 1 FOREST FAIRY HALO
7
Slide one plastic flower onto one end of the
curled chenille stem and bend the end to
secure the flower in place. Leave the other
end curly. Repeat this step for all of the curled
chenille stems.
Decide where you want the flowers on the halo and attach them the same way that you
attached the chenille stems with the leaf sequins, bending the curled chenille stems around
the halo to secure them in place.
9
10
Sequins come in a wide variety
of colors and shapes, so have
fun, mix them up, and create
your own designs.
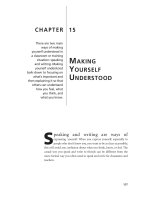
T
hese are great to make in
many colors and sizes,
and can also be a great
fundraising idea. There are
instructions for many different
designs available online and in
art and craft stores. This is a
very easy beginning friendship
bracelet.
PROJECT
2