DEPLOY SOFTWAVE SU DUNG FILE
Bạn đang xem bản rút gọn của tài liệu. Xem và tải ngay bản đầy đủ của tài liệu tại đây (1.76 MB, 25 trang )
1
DEPLOY SOFTWARE
(CÀI ĐẶT PHẦN MỀM TỪ XA)
1. Giới thiệu Deploy software:
Deploy software là công cụ hỗ trợ cài đặt phần mềm từ xa cho hệ thống mạng máy
tính có Domain.
Điều kiện sử dụng: File cài đặt phải có dạng *.MST, *.MSI hoặc *.ZAP, nếu phần
mở rộng là *.EXE thì dùng phần mềm Winstle.msi để chuyển đổi.
2. Yêu cầu hệ thống:
Hệ thống Domain; thông số IP của các máy như sau:
SERVER CLIENT
IP address 192.168.1.103 192.168.1.XXX
Subnet mask 255.255.255.0 255.255.255.0
Default gateway 192.168.1.1 192.168.1.1
Preferred DNS 192.168.1.103 192.168.1.103
Source cần cài đặt được share full.
Office Resource Kit: đây là chương trình hỗ trợ tạo file *.MST. Download:
6a296a/ork.exe
3. Deploy Softwave với file *.MST
Bước 1: Cài Office resource kit
(thực hiện tại SERVER)
Start Run Nhập C:\ork.exe OK
2
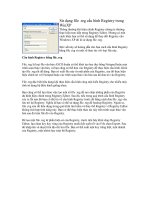
Màn hình End-User License Agreement Chọn I accept … Agreement Next
Màn hình Type of Installation Chọn Complete Install Next
3
Màn hình Summary Install
Quá trình cài đặt hoàn tất OK
Bước 2: Tạo file *.MST; Tạo GPO kết hợp file *.MST
o a/
Tạo file *.MST
4
Start Programs Microsoft Office Microsoft Office Tools Microsoft
Office 2003 Resource Kit Custom Installation Wizard
Màn hình Custom Installation Wizard Next
5
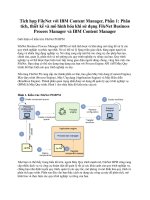
Màn hình Open the MSI File Nhập đường dẫn tới file cài đặt
\\192.168.1.103\office 2003\PRO11.MSI Next
Màn hình Open the MST file Chọn Create a new MST file Next
6
Màn hình Select the MST File to Save Nhập đường để lưu file MST
\\192.168.1.103\ofice 2003\Nhap_CDKey.MST Next
Màn hình Specify Default Path and Organization Nhập Organization name
Next
7
Màn hình Remove Previous Versions Next
Màn hình Set Feature Installation States Next
8
Màn hình Configure Local Installation Source Nhập Product Key Next
Màn hình Customize Default Application Settings Next
9
Màn hình Change Office User Settings Next
Màn hình Add/Remove Files Next
10
Màn hình Add/Remove Registry Entries Next
Màn hình Add, Modify, or Remove Shortcuts Next
11
Màn hình Identify Additional Servers Next
Màn hình Specify Office Security Settings Next
12
Màn hình Add Installations and Run Programs Next
Màn hình Outlook: Customize Default Profile Next
13
Màn hình Outlook: Customize Default Settings Next
Màn hình Outlook: Specify Send/Receive Group Settings Next
14
Màn hình Modify Setup Properties Next
Màn hình Save Changes Finish
15
Màn hình Custom Installation Wizard Exit
Quan sát kết quả
16
o
b/ Tạo GPO kết hợp file *.MST
Start Run Nhập DSA.MSC OK ( Start Programs Administrative
Tools Active Directory Users and Computers).
Màn hình Active Directory Users and Computers Tạo OU KeToan Tạo 2 user
kt1 và kt2 trong OU KeToan
17
Màn hình Active Directory Users and Computers Click phải KeToan
Properties
Màn hình KeToan Properties Add Nhập Trien khai Office cho user Edit
18
Màn hình Group Policy Object Editor Click phải Software installation New
Package
Màn hình Open \\192.168.1.103\office 2003\PRO11.MSI Open
19
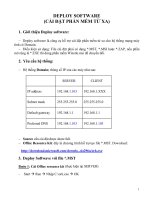
Màn hình Deploy Software Chọn Advanced OK
Màn hình Microsoft Office Professional Edition 2003 Properties Tab
Deployment Check vào các ô Assigned, Uninstall this … of management, Install
this application at logon
20
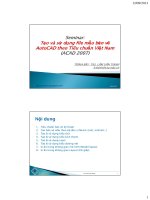
Tab Modifications Add
Chọn file MST \\192.168.1.103\office 2003\Nhap_CDKey.MST Open
21
Quan sát kết quả OK
Màn hình Group Policy Object Editor Close
22
Màn hình KeToan Properties Close
Start Run Nhập gpupdate /force OK
Bước 3:
Kiểm tra (thực hiện tại CLIENT)
Restart máy CLIENT Logon kt1
23
Start Programs Microsoft Office Microsoft Office Word 2003
a
Quan sát kết quả
4.
Một số sai hỏng và cách khắc phục:
DNS của máy Server phải trỏ đến địa chỉ của chính nó; DNS máy Client phải trỏ
đến máy Server cụ thể:
SERVER CLIENT
IP address 192.168.1.103 192.168.1.XXX
Subnet mask 255.255.255.0 255.255.255.0
Default gateway 192.168.1.1 192.168.1.1
Preferred DNS 192.168.1.103 192.168.1.103
24
Màn hình Open the MSI File Nhập đường dẫn tới file cài đặt (vd:
\\192.168.1.103\office 2003\PRO11.MSI) Next
Màn hình Select the MST File to Save Nhập đường để lưu file MST
(\\192.168.1.103\ofice 2003\Nhap_CDKey.MST) Next
25