GWT in Practice phần 4 pot
Bạn đang xem bản rút gọn của tài liệu. Xem và tải ngay bản đầy đủ của tài liệu tại đây (403.25 KB, 37 trang )
94 CHAPTER 4 Core Application Structure
private PasswordTextBox password = new PasswordTextBox();
private PasswordTextBox passwordConfirm = new PasswordTextBox();
private TextBox firstName = new TextBox();
private TextBox lastName = new TextBox();
private TextArea notes = new TextArea();
private AddressEdit billingAddress;
private AddressEdit shippingAddress;
public UserEdit(final UserCreateListener controller, final User user) {
super();
this.user = user;
stack.setHeight("350px");
VerticalPanel basePanel = new VerticalPanel();
Button save = new Button("Save");
basePanel.add(save);
basePanel.add(stack);
FlexTable ft = new FlexTable();
ft.setWidget(0,0, new Label("Username"));
ft.setWidget(0,1, username);
ft.setWidget(1,0, new Label("Password"));
ft.setWidget(1,1, password);
ft.setWidget(2,0, new Label("Confirm"));
ft.setWidget(2,1, passwordConfirm );
ft.setWidget(3,0, new Label("First Name"));
ft.setWidget(3,1, firstName);
ft.setWidget(4,0, new Label("Last Name"));
ft.setWidget(4,1, lastName);
stack.add(ft, "User Information" );
billingAddress = new AddressEdit(
user.getBillingAddress());
stack.add(billingAddress, "Billing Address");
shippingAddress = new AddressEdit(
user.getShippingAddress());
stack.add(shippingAddress, "Shipping Address");
notes.setWidth("100%");
notes.setHeight("250px");
stack.add(notes, "Notes");
this.initWidget(basePanel);
}
}
In this example, we are using our
UserEdit
class as a component in a larger edit view
of the
User
model object. While the object graph contains other structured objects (the
Address
classes), the
UserEdit
class brings these together with the editors for the other
portions of our model that we created individually. It also provides direct edit widgets
for simple values directly on the
User
class. At first blush, this looks very similar to the
process we used in constructing the
AddressEdit
class, but it is actually a bit different.
DISCUSSION
Listing 4.3 creates our model layer object
b
and a bunch of widgets relating to the
fields on the model. The outer container is simply a
VerticalPanel
, and then we use
a
StackPanel
to separate out different aspects of the
User
object. A
StackPanel
is a
Create FlexTable
to lay out basic
elements
Create
AddressEdit
classes for
addresses
95Building view components
special kind of container that provides an expanding and collapsing stack of widgets
with a label that toggles between them (much like the sidebar in Microsoft Outlook).
The use of the
StackPanel
is in keeping with one of the new principles you should
note if you are coming from traditional web development: Build interface compo-
nents, not navigation. In a traditional web application, each element of the stack
might be a separate page, and it would be necessary to use a
Session
construct on the
server to store the intermediate states of the
User
object. Here we can simply build the
entire
User
object’s construction process into one component that lets the user move
through them. This means less resource use on the server, because we are spared a
request-response cycle when we move between the different sections; we no longer
have to maintain state information for each user accessing the application.
Once we have constructed the
UserEdit
object, it has no exposed methods other
than
getElement()
, and it is public rather than package-scoped like
AddressEdit
.
These aren’t completed classes, however. We still need to enable them to interact with
the model layer. This means handling user input via events and making changes to the
model to update the data.
4.2.3 Binding to the model with events
We discussed in section 4.1 why we need events on the model layer, and how to pro-
vide that functionality. Now, in the view layer, we need to build the binding logic into
our widgets.
GWT includes a number of basic event types.
In fact, many of the
GWT widgets provide much of the event notification you will
ever need. In our
UserEdit
example thus far, we made use of
Button
, which extends
FocusWidget
, which in turn implements
SourcesClickEvents
and
SourcesFocus-
Events
to raise events for our
ClickListener
implementation. Likewise, we used
TextBox
, which itself implements
SourcesKeyboardEvents
,
SourcesChangeEvents
,
and
SourcesClickEvents
. In the GWT API, event types are specified by these
Sources
interfaces, which tell developers what events a widget supports. We can use these,
along with the
PropertyChangeEvent
s from our model layer to provide a two-way
binding with the view.
PROBLEM
We need to bind the data from a widget or a view component to a property on a
model object.
SOLUTION
We will revisit the
UserEdit
composite class to demonstrate data binding. Listing 4.4
shows the changes we will make to the constructor, and the new methods we will add
to support this concept.
public class UserEdit extends Composite{
// Previously shown attributes omitted
private PropertyChangeListener[] listeners =
new PropertyChangeListener[5];
Listing 4.4 UserEdit.java, modified to include PropertyChangeSupport
Create Array to hold
PropertyChangeListeners
96 CHAPTER 4 Core Application Structure
public UserEdit(final UserCreateListener controller, final User user) {
super();
// Previously shown widget building omitted.
listeners[0] = new PropertyChangeListenerProxy(
"street1",
new PropertyChangeListener() {
public void propertyChange(
PropertyChangeEvent propertyChangeEvent) {
street1.setText(
(String) propertyChangeEvent.getNewValue());
}
});
address.addPropertyChangeListener(listeners[0]);
street1.addChangeListener(
new ChangeListener() {
public void onChange(Widget sender) {
address.setStreet1(street1.getText());
}
});
// Repeating pattern for each of the elements
save.addClickListener( new ClickListener() {
public void onClick(Widget sender) {
if(!password.getText().equals(
passwordConfirm.getText())) {
Window.alert("Passwords do not match!");
return;
}
controller.createUser(user);
}
});
this.initWidget(basePanel);
}
public void cleanup(){
for (int i=0; i < listeners.length; i++) {
user.removePropertyChangeListener(listeners[i]);
}
billingAddress.cleanup();
shippingAddress.cleanup();
}
Now we have the basics of data binding and housekeeping in the
UserEdit
class.
DISCUSSION
Providing two-way data binding, unfortunately, requires a good deal of repetitive code
c
. In Swing it is possible to simplify a lot of this boilerplate code with reflection-based
utility classes, but since the Reflection
API isn’t available in GWT code, we must repeat
this code for each of our properties. First, we create a
PropertyChangeListener
b
that watches the model and will update the view if the model changes. We wrap it in a
PropertyChangeListenerProxy
that will filter the events to just those we want to
watch. While not critical here, it is a very good practice to provide this binding in your
Create
PropertyChangeListener
for model
b
Add PropertyChangeListener
to model object
c
Repeat
for each
property
Create change
listener for view
d
Update
model
Check
passwordConfirm
before updating
e
Call controller
f
Clean up model
listener
g
Clean up child
view elements
h
97Building view components
widgets. This ensures that if another part of the application updates the model, the
view will reflect it immediately and you will not have a confused state between differ-
ent components that are looking at the same objects.
NOTE While the
PropertyChangeSupport
class will let you add
Property-
ChangeListener
s specifying a property name, it will wrap these in the
PropertyChangeListenerProxy
class internally. When it does this, you
lose the ability to call
removePropertyChangeListener()
without specify-
ing a property name. Since we just want to loop over all of these listeners
in our
cleanup()
method, we wrap them as we construct them so the
cleanup will run as expected.
Next, we create a
ChangeListener
and attach it to the widget responsible for the prop-
erty
d
. With each change to the widget, the model will be updated. In this case, we
are using
TextBox
es, so we call the
getText()
method to determine their value. If you
have done Ajax/
DHTML programming before, you know that the common pattern for
the
<input
type="text">
element is that the
onChange
closure only fires when the
value has changed and the element loses focus. Sometimes this is important to keep in
mind, but since we know that the element will lose focus as the user clicks the Save
button, we don’t have to worry about it here. If you need that kind of detail about
changes, you could use a
KeyboardListener
on the
TextBox
es, which will fire on each
keystroke while the box is focused.
For some widgets, you might have to provide a bit of logical conversion code to
populate the model. The following is a small section from the
AddressEdit
class,
where we update the state property on the
Address
object:
listeners[4] = new PropertyChangeListener() {
public void propertyChange(
PropertyChangeEvent propertyChangeEvent) {
for(int i=0; i < state.getItemCount(); i++) {
if(state.getItemText(i).equals(
propertyChangeEvent.getNewValue())) {
state.setSelectedIndex(i);
break;
}
}
}
};
address.addPropertyChangeListener("state", listeners[4]);
state.addChangeListener(new ChangeListener() {
public void onChange(Widget sender) {
String value = state.getItemText(state.getSelectedIndex());
if(!" ".equals(value)) {
address.setState(value);
}
}
});
98 CHAPTER 4 Core Application Structure
This looks much like the repeating patterns with the
TextBox
es, but in both listeners
we must determine the value in relation to the
SelectedIndex
property of the state
ListBox
.
When the user clicks the Save button, we need to make the call back to the control-
ler layer to store the user data
f
. You will notice that we are doing one small bit of
data validation here: we are checking that the
password
and
passwordConfirm
values
are the same
e
. The
passwordConfirm
isn’t actually part of our model; it is simply a
UI nicety. Where you do data validation can be an interesting discussion on its own. In
some situations, you might know the valid values and simply put the checks in the set-
ters of the model and catch exceptions in the
ChangeListener
s of the view. This can
provide a lot of instant feedback to users while they are filling out forms. For larger
things like either-or relationships, or things that require server checks, providing vali-
dation in the controller is the best option. Of course, since
GWT is Java-based, you can
use the same validation logic on the server and the client, saving on the effort you
might have expended in more traditional Ajax development.
The final important thing to notice here is the
cleanup()
g
method. This simply
cycles through the
PropertyChangeListener
s we added to the model class and
removes them. This is important because once the application is done with the
UserEdit
widget, it needs a means to clean up the widget. If we didn’t remove these
listeners from the longer-lived
User
object, the
UserEdit
reference could never be
garbage-collected, and would continue to participate in the event execution, need-
lessly taking up processor cycles. Of course, since the
AddressEdit
widget is doing this
as well, we also need to clean up those listeners
h
.
Why do we clean up the
PropertyChangeListener
s and not the
ChangeListener
s
and
ClickListener
s we used on the child widgets? Those change listeners will fall out
of scope and be garbage-collected at the same time as our
UserEdit
class. Since they
are private members, and the
UserEdit
Composite
masks any other operations into
itself, classes outside of the scope of
UserEdit
can’t maintain references to them.
Now that we have the model and the view, and we have established the relationship
between them, we need to set up the controller and send the user registration infor-
mation back to the server.
4.3 The controller and service
You may have noticed that we passed a
UserCreateListener
instance into the
UserEdit
constructor. It is important in the design of your application that your cus-
tom widgets externalize any business logic. If you want to promote reuse of your view
code, it shouldn’t needlessly be tied to a particular set of business logic. In this exam-
ple, though, our controller logic is pretty simple.
In this section, we will build the controller and the service servlet that will store
our user in the database, pointing out places where you can extend the design with
other functionality.
99The controller and service
4.3.1 Creating a simple controller
The overall job of the controller is to provide access to business logic and provide a
control system for the state of the view. Think, for a moment, about the controller
level of an
Action
in a Struts application. Suppose it is triggered based on a user
event, a form submission. It then validates the data and passes it into some kind of
business logic (though many Struts applications, unfortunately, put the business logic
right in the
Action
bean) and directs the view to update to a new state—redirecting to
some other page. You should think of the controller in a
GWT application as filling
this role, but in a very different manner.
We will now take a look at a simple controller in the form of a
UserCreateListener
.
PROBLEM
We need to create a controller to manage the action events and state for our view
class. This will trigger the use-case actions of our application.
SOLUTION
We will start by creating a simple implementation of the
UserCreateListener
inter-
face, as presented in listing 4.5.
package com.manning.gwtip.user.client;
import com.google.gwt.core.client.GWT;
import com.google.gwt.user.client.Window;
import com.google.gwt.user.client.rpc.AsyncCallback;
import com.google.gwt.user.client.rpc.ServiceDefTarget;
public class UserCreateListenerImpl implements UserCreateListener {
private UserServiceAsync service =
(UserServiceAsync) GWT.create(UserService.class);
public UserCreateListenerImpl() {
super();
ServiceDefTarget endpoint = (ServiceDefTarget) service;
endpoint.setServiceEntryPoint
(GWT.getModuleBaseURL()+"UserService");
}
public void createUser(User user){
if ("root"
.equals(
user.getUsername())) {
Window.alert("You can't be root!");
return;
}
service.createUser(user, new AsyncCallback() {
public void onSuccess(Object result) {
Window.alert("User created.");
// here we would change the view to a new state.
}
public void onFailure(Throwable caught) {
Window.alert(caught.getMessage());
Listing 4.5 UserCreateListenerImpl—the controller for the UserEdit widget
Create a
service
b
Bind the server
address
c
Validate
the data
Alert
user
100 CHAPTER 4 Core Application Structure
}
});
}
}
Now we have a controller class for our
UserEdit
widget. This controller will make calls
back to the remote service, completing the front end of the application.
DISCUSSION
This is a simple and somewhat trivial example, but it does demonstrate the logical
flow you should see in your application. First, we get the service
b
and bind it
c
,
as you saw in chapter 3. Next, we implement the required method,
createUser()
.
The method starts with a simple bit of data validation, and this could certainly be
more advanced.
A good case would be to create a
UserValidator
object that could perform any
basic validation we need. This simple example just shows where this would happen.
Once the validation is done, we make the call to the remote service and handle the
results. If this were part of a larger application, the
onSuccess()
method might call
back out to another class to remove the
UserEdit
panel from the screen and present
the user with another panel, like the forward on a Struts action controller.
Another validation case would be to present the user with an error notification if
something “borked” on the call to the server. This might indicate an error, or data
that failed validation on the server. For example, duplicate usernames can’t easily be
checked on the client. We have to check this at the point where we insert the user into
the database.
All of which brings us to accessing the database in the service. For this, we will use
the Java Persistence
API.
4.3.2 JPA-enabling the model
One of the most common questions in GWT development is, “How do I get to the
database?” You saw the basics of the Tomcat Lite configuration in chapter 3, but most
people want to use something fancier than raw
JDBC with their database. While JDBC
works well, it is more cumbersome to work with than object-oriented persistence APIs.
Today, that usually means some
JPA provider like Hibernate, Kodo, OpenJPA, or
TopLink Essentials.
There are two general patterns for using
JPA in a GWT environment. The first is to
JPA-enable a model shared between the client and the server. The second is to create a
set of
DTOs that are suitable for use on the client, and convert them in the service to
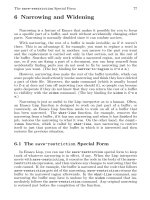
something suitable for use on the server. Figure 4.5 shows the difference between
these approaches in systems.
There are trade-offs to be made with either of these patterns. If you
JPA-enable a
shared model, your model classes are then limited to what the
GWT JRE emulation
classes can support, and to the general restrictions for being
GWT-translatable (no
argument constructor, no Java 5 language constructs currently, and so on). Using the
DTO approach and converting between many transfer objects adds complexity and
101The controller and service
potentially a lot of lines of code to your application, but it also provides you with finer-
grained control over the actual model your
GWT client uses.
Due to the restrictions in the direct
JPA entity approach, and due to other
advantages that a
DTO layer can provide, it is common to use the DTO approach to
communicate between
GWT and a server-side model. We will take a look at this pat-
tern, using transfer objects and all of the aspects it entails, in detail in chapter 9,
where we will consider a larger Spring-managed application. In this chapter, we will
look at
JPA-enabling our GWT beans, which is the easiest method for simple stand-
alone applications.
PROBLEM
We want to enable our model beans for use with JPA providers to persist them to
a database.
SOLUTION
If you have been using JPA in the past, and you recall that GWT client components are
bound to a Java 1.4 syntactical structure, you are likely thinking to yourself, “you can’t
add annotations to those beans!” Good eye—you would be thinking correctly. However,
there is another way to describe
JPA beans that doesn’t normally get much attention but
is designed for just such a scenario: using an orm.xml metadata mapping file. You, of
course, also need a persistence.xml file to declare the persistence unit. Listing 4.6 shows
the persistence unit definition.
<?xml version="1.0" encoding="UTF-8"?>
<persistence xmlns=" /> xmlns:xsi=" />Listing 4.6 Persistence.xml for the user
BaseObject
DataTransferObject
Server Side
Client Side
Database
BaseObject
Map To
Objects
DataTransferObject
Serialize/
Deserialize
Serialize/
Deserialize
BaseObject
Figure 4.5 Flow from the server to the client with and without DataTransferObjects. Note that an
additional mapping step is needed if DTOs are used.
102 CHAPTER 4 Core Application Structure
xsi:schemaLocation=" /> /> version="1.0">
<persistence-unit name="user-service"
transaction-type="RESOURCE_LOCAL">
<provider>
org.hibernate.ejb.HibernatePersistence
</provider>
<class>com.manning.gwtip.user.client.User</class>
<class>com.manning.gwtip.user.client.Address</class>
<properties>
<property name="hibernate.dialect"
value="org.hibernate.dialect.MySQLDialect"/>
<property name="hibernate.connection.driver_class"
value="com.mysql.jdbc.Driver"/>
<property name="hibernate.connection.username"
value="userdb"/>
<property name="hibernate.connection.password"
value="userdb"/>
<property name="hibernate.connection.url"
value="jdbc:mysql://localhost/userdb"/>
<property name="hibernate.hbm2ddl.auto"
value="create-drop"/>
</properties>
</persistence-unit>
</persistence>
If you have used JPA before, this will look pretty standard. We aren’t using a
Data-
Source
here, just making direct connections to the database. We are also using Hiber-
nate. Even though we have experience using both Hibernate and TopLink Essentials
as
JPA providers, we chose Hibernate for this example because although Hibernate
requires more dependencies, it is actually easier to demonstrate in the
GWT shell.
TopLink works in the shell also, but it requires additional steps beyond dependencies,
such as an endorsed mechanism override of the embedded Tomcat version of Xerces,
and the inclusion of the TopLink agent (we will use TopLink in several other exam-
ples later in the book).
Next, we need an orm.xml file to specify the metadata we would normally specify
in annotations. Listing 4.7 shows the mapping file for our user objects.
<?xml version="1.0" encoding="UTF-8"?>
<entity-mappings xmlns="
xmlns:xsi=" /> xsi:schemaLocation=" /> /> version="1.0">
<package>com.manning.gwtip.user.client</package>
<entity class="User"
metadata-complete="true" access="PROPERTY">
<table name="USER"/>
Listing 4.7 The orm.xml file
Specify using
Hibernate
Specify using
MySQL
Drop and create the
DB each time
Save steps with
metadata-complete
b
103The controller and service
<named-query name="User.findUserByUsernameAndPassword">
<query>select u from User u
where u.username = :username
and u.password = :password</query>
</named-query>
<attributes>
<id name="username" />
<one-to-one name="shippingAddress" >
<cascade>
<cascade-all />
</cascade>
</one-to-one>
<one-to-one name="billingAddress" >
<cascade>
<cascade-all />
</cascade>
</one-to-one>
</attributes>
</entity>
<entity class="Address" metadata-complete="true" access="PROPERTY">
<table name="ADDRESS"/>
<attributes>
<id name="id">
<generated-value strategy="IDENTITY"/>
</id>
</attributes>
</entity>
</entity-mappings>
This looks a lot like the annotations you might provide in the Java files themselves.
Indeed, the orm.xml file maps pretty much one to one with the annotations. The
important thing to pay attention to is the
metadata-complete
attribute on the
<entity>
element
b
. This tells the entity manager to use its default behavior for any
properties on the object that aren’t explicitly laid out in the file.
DISCUSSION
For the
id
property on the
Address
object, we are using an
IDENTITY
strategy that will
use My
SQL’s autoincrementing field type. This is another area where Hibernate and
TopLink differ in use. TopLink doesn’t support the
IDENTITY
scheme with its MySQL4
dialect. You must use a virtual sequence. In this case, the address
<entity>
element
would look like this:
<entity class="Address" metadata-complete="true" access="PROPERTY">
<table name="ADDRESS"/>
<sequence-generator
name="addressId" sequence-name="ADDRESS_ID_SEQUENCE" />
<attributes>
<id name="id">
<generated-value strategy="SEQUENCE" generator="addressId"/>
</id>
</attributes>
</entity>
Cascade to
Address objects
Autoincrement
ID field
104 CHAPTER 4 Core Application Structure
MySQL doesn’t support sequences as a database structure, but TopLink will create a
table to maintain the sequence value. Hibernate balks at this configuration, because it
knows that My
SQL doesn’t support sequences. In short, don’t expect these configura-
tion files to be write-once-run-anywhere. Everything from the
JPA provider used, right
down to the database used, is coupled in your application. Hopefully as the
EJB 3/JPA
implementations mature, these issues will go away.
The orm.xml file is not well documented. We have found the best documentation to
be simply looking at the schema file itself ( />orm_1_0.xsd) and using a validating
XML editor. Another option is to use the Open-
JPA reverse-engineering tool ( which has the
ability to create an orm.xml file for you from an existing database schema.
Now we have our
JPA mappings, enabling us to store the objects from the model we
created in the first step to the database. The last step is to create the service component
that will bridge the gap between the client-side controller we created in section 4.3.1 and
the database.
4.3.3 Creating a JPA-enabled service
We mentioned in chapter 3 that it is generally a best practice to create a separate local
service and have your
RemoteServiceServlet
proxy calls into it. While we will be look-
ing at that pattern in detail in chapter 9, we will simply create our service code in the
servlet here. Since we are
JPA-enabling our model, the fact that our service is depen-
dent on the
GWT libraries doesn’t have any negative ramifications.
PROBLEM
We need to create a JPA-enabled service servlet for our application to take model
objects sent from the controller layer of the client and store them in a database.
SOLUTION
Listing 4.8 shows the
RemoteServiceServlet
that will take the model objects and per-
sist them to the database.
public class UserServiceServlet extends RemoteServiceServlet
implements UserService {
private EntityManagerFactory factory;
public UserServiceServlet() {
super();
try{
factory =
Persistence.createEntityManagerFactory(
"user-service");
} catch(Exception e){
e.printStackTrace();
}
}
Listing 4.8 UserServiceServlet with JPA calls
Cannot use
@PersistenceUnit
annotation
b
Create the
EntityManagerFactory
c
105The controller and service
public void createUser(User user) throws UserServiceException {
if("root".equals(user.getUsername())) {
throw new UserServiceException(
"You can't be root!");
}
try{
EntityManager mgr = factory.createEntityManager();
mgr.getTransaction().begin();
mgr.persist(user);
mgr.getTransaction().commit();
} catch(RollbackException e) {
throw new UserServiceException(
"That username is taken. Try another!");
} catch(PersistenceException p) {
throw new UserServiceException(
"An unexpected error occurred: "+p.toString());
}
}
}
This likely looks familiar to anyone who has done JPA work, but there are some impor-
tant things to cover concerning how we are interacting with
JPA here.
DISCUSSION
This is a pretty simple class, but there are some important things to note about it.
First, we aren’t using the
@PersistenceUnit
annotation to get our
EntityManager-
Factory
b
. This would be the “regular” way to get
EntityManagerFactory
in Java EE
5. The Tomcat in GWTShell—or Tomcat in general, for that matter—doesn’t support
Java
EE 5 dependency injection. You can use Spring for this in regular Tomcat, but
since all the servlets in the
GWT shell are created by the shell proxy service, we can’t
easily do this in hosted mode. So, we simply create the factory on our own in the con-
structor
c
.
The next thing of note is that we revalidate the user data
d
. Remember, you
should always check the data on both sides. Checking it on the client side improves
the user experience; checking it on the server improves application robustness.
Finally, we check for the
RollBackException
, which is thrown if the username is
already in the database. This is a broken part of Hibernate. If we were using TopLink,
we would catch the “correct” exception,
javax.persistence.EntityExistsExcep-
tion
. These types of differences are another example of the current challenges of
using the present generation of
JPA providers.
Now we have all the necessary components of a basic web application. We have a
model layer that notifies listeners of changes, a view layer that binds to the model and
provides updates, and a controller layer that captures our use cases and passes
requests to the service. Last, we have a service that takes our model layer and persists it
to a database. While these are the same components that a Struts or
JSF developer
might be used to building, they manifest differently in code and bring with them a
new set of design issues for the web developer to consider.
Remember, never
trust the client
d
Catch persistence
exceptions
106 CHAPTER 4 Core Application Structure
4.4 Summary
In this chapter, we introduced the standard patterns that make up a GWT application.
While the typical
MVC approach certainly still applies, the way we go about using it is
very different from the server-side
MVC you might have used in traditional web frame-
works in the past. First, the model object on the client is much more intelligent than a
simple value object. Data binding is done on an eventing basis, and calls to the server
are more service-oriented, representing a use case for your application, not necessar-
ily a “screen.”
Some of these things you already know how to do, yet the ways you expect to do
them might not work at first in the
GWT shell environment. Here, we explored one way
to integrate
JPA with a GWT application. In chapter 9, we will look at another pattern
that integrates Spring,
JPA, and DTOs. Chapter 9’s approach can be used to make your
application integrate more cleanly with existing
JEE systems. The direct JPA- and GWT-
enabled model pattern we used here is better for simple, standalone applications.
Until now we have focused on building
GWT applications using the standard RPC
approach for communicating with servers. In addition to the RPC and servlet method,
you can also communicate with other server backends, including those that are not
servlet based. In the next chapter, we will cover additional means of talking to servers,
including basic
HTTP and more advanced XML, SOAP, REST, Flash, and Comet. Along
the way, we will also deal with the key related concepts of client/server object serializa-
tion with Java and JavaScript, and of security.
107
Other Techniques
for Talking to Servers
When I am working on a problem, I never think about beauty. I think only of how
to solve the problem. But when I have finished, if the solution is not beautiful, I
know it is wrong.
—Buckminster Fuller
While
GWT’s RPC mechanism, which we introduced in chapter 3, is great for green-
field development and can be used to proxy to other service implementations,
sometimes it’s more valuable to have your application talk directly to an external
service. For instance, if you have existing
SOAP-based services that are not colo-
cated with your web application, a two-stage proxy from the web application server
can hinder performance and drive up bandwidth costs. Other times you might
This chapter covers
■
Security issues for communications
■
Using GWT’s HTTP classes
■
Using Flash as a communication proxy
■
Using Java applets as communication proxies
■
The Comet technique for event-based
communications
108 CHAPTER 5 Other Techniques for Talking to Servers
want to talk to public web services from Amazon, Google, Yahoo, or others. In this
chapter we’ll address issues surrounding talking to servers. We’ll start with the security
concerns and then look at several technologies—
GWT and non-GWT—that enable
data transmission and server communication.
Regarding data transmission, we’ll take a deeper look at
GWT’s Java-to-JavaScript
mapping, highlighting issues developers should be aware of, and taking a look at the
JavaDoc-style of annotation
GWT uses (
typeArgs
), which supports serialization. Then
we’ll look at two means of working with foreign data:
GWT’s bundled support for the
JSON data-serialization format, and the direct GWT XML Parser API.
Once we have a handle on how to deal with data, we’ll look at several techniques
for sending and receiving data. The first will be
XML over HTTP using GWT’s
HTTP-
Request
class—a technique similar to Representational State Transfer (REST). Follow-
ing that, we’ll take a look at using Flash and Java applets to extend the capabilities of a
stock web browser and, therefore,
GWT. Finally, we’ll look at Comet, a technique for
sending streaming data to clients outside of the traditional client-request server-
response cycle.
5.1 Web development methods and security
For traditional Java server developers, GWT may be a first step into the world of Ajax
development. If this is true for you, this section will be an essential primer. If it’s not,
feel free to jump ahead to the next section where we’ll dive deep into Java-to-
JavaScript mapping. Go ahead. We won’t be offended.
If you’re still here, what we’ll discuss in this chapter will affect your life as a
GWT
developer, but it isn’t exclusive to GWT. JavaScript has been a blessing and a curse for
Ajax developers since way back when they were called
DHTML developers. When
Netscape introduced JavaScript, it pushed the boundaries of what could be done with a
browser, and it introduced a whole new series of concerns about security on the Internet
and scripting access across websites. These concerns still exist and carry over into Ajax
applications with the use of the
XMLHttpRequest
object, as well as synchronicity issues in
applications. We’ll take a look at each of these, starting with security.
Following our theme of using a variety of development tools to showcase the vari-
ous
GWT options, we’ll use NetBeans for our example projects in this chapter. Net-
Beans is a capable and popular
IDE, and it includes an available GWT project template
to boot. We’ll set up NetBeans at the end of this section.
5.1.1 Dealing with browser security
Many of the security issues dealt with in JavaScript environments fall into the category
of
XSS vulnerabilities in browsers. Before browsers implemented strict security mea-
sures, any web page could open an
<iframe>
to another web page and then reach into
the structure of that site to inspect or potentially manipulate “secure” data (if both
sites were opened in the same browser). This was quickly recognized as a problem,
109Web development methods and security
and today there are security measures in place to restrict such access. Though related
issues still crop up from time to time in the major browsers, these are mostly relics.
Today there are clear rules among the browsers about execution permissions between
scripts and servers.
The best rule of thumb to remember is what the Mozilla Foundation calls the same-
origin policy. Jesse Ruderman describes it as follows ( />security/components/same-origin.html):
The same origin policy prevents documents or scripts loaded from one origin from getting or
setting properties of a document from a different origin. The policy dates from Netscape
Navigator 2.0.
Mozilla considers two pages to have the same origin if the protocol, port (if given), and host
are the same for both pages.
This basically means that a script from somedomain.com can’t access scripts or pages
from someotherdomain.com. The exception to this rule is the page that invokes the
script. For example, when you include the Google Maps
API in your HTML page using
the following code, your originating host page has access to the script, and the script
has access to your host page, as though they were on the same server:
<script src=" /> type="text/javascript"></script>
While this Google-provided script has access to the DOM from your page, and your
page has access to the script, the script cannot access other domains or reach up and
access your script information. Code within the script can communicate only within
the maps.google.com domain, not up and out to your.domain.com. Table 5.1 illus-
trates several scenarios where the same-origin policy is applied to a hypothetical
HTML
page, with the result and reasoning.
The same-origin policy applies to most elements on the page by default, including
most browser plugins such as Flash and Java. However, these plugins do often provide
methods to get around this limitation, and we’ll address this later in the chapter. The
same-origin policy also extends to the
XMLHttpRequest
object.
Table 5.1 Same-origin policy enforcement from htttp://your.company.com/page.html
URL Result Reason
Succeeds
Succeeds
Fails Different protocols
:8080/servlet Fails Different ports
Fails Different hosts
110 CHAPTER 5 Other Techniques for Talking to Servers
5.1.2 Understanding XMLHttpRequest
At the core of the Ajax technology is the
XMLHttpRequest
object, sometimes simply
referred to as
XHR. All communication from the JavaScript environment to other serv-
ers takes place through this object, and, as mentioned previously, it carries restrictions.
A script can (ideally) only communicate with the server from which the script was
served. If it’s an inline script in an
HTML page, it can only communicate with the orig-
inating host of the page. If the script was specified with the
src
attribute on an HTML
page, it may then interact only with the host from which the included script was served.
For instance, when you use the Google Maps JavaScript
API, you include the script
files from the Google web server. If you copy the script files to your own web server, you’ll
find they no longer work reliably. The security policy will not allow the script to commu-
nicate with the Google server for things like image tilesets and location service calls.
The
XMLHttpRequest
object also carries these same implied limitations. It can, as a
rule, only use
GET
and
POST
methods for HTTP requests. While the W3C specification
doesn’t limit this, it is not supported in all browsers. Browser vendors are expanding
this to include the
PUT
and
DELETE
methods, but they are not supported universally.
This means the
GWT
HTTPRequest
object, which we’ll look at a bit later, cannot offer
complete
HTTP functionality including
PUT
and
DELETE
and still maintain the cross-
browser compatibility that
GWT promises.
Each request made by the
XMLHttpRequest
object is also executed asynchronously
from the JavaScript runtime, a property that carries its own set of considerations.
5.1.3 Coding asynchronously
As you saw in chapter 3, calls to servers are always handled asynchronously. This car-
ries both curses and blessings for developers.
The curses generally stem from developers being used to the very procedural request-
response cycle of traditional web programming. Making a call to the server is not like
calling a method on an
EJB or other Remote Method Invocation (RMI) exposed object,
where the method returns a value and the code continues to execute procedurally. All
calls are handled by callbacks. In JavaScript, this is done by attaching closures to the
XHR
object at runtime. In the Java world of GWT, these callbacks are handled by classes that
implement the appropriate interface for receiving the event. While the
GWT nomencla-
ture can be a bit mismatched (
AsyncCallback
for RPC services, or
ResponseTextHandler
for the
HTTPRequest
object), all the related constructs follow a traditional Observer
design pattern. You implement the observer to the
API’s observable.
The blessings of this asynchronicity are twofold. First, and most significant, when
code is written this way, issues of runtime concurrency melt away. Second, when your
thoughts shift away from the direct request-response terms of a standard web applica-
tion, asynchronous calls help enforce better practices in overall application structure.
JavaScript in the browser environment executes in a single thread. In the case of
Firefox, this is the same thread that the user interface renderer runs in, because
JavaScript may want to immediately render changes to the interface. While this can
111Web development methods and security
result in negative user experiences if a client-side script does a lot of processing or
runs wildly out of control, it’s advantageous when dealing with server calls. Executing
in a single thread means that no two returns from asynchronous calls ever execute at
the same time, so the programmer doesn’t have to deal with any issues of concurrent
access to objects or methods in the code.
While perhaps inspiring rebellious thoughts, this aspect of Ajax (and
GWT devel-
opment) reflects an Orwellian attitude: “Right thinking will be rewarded, wrong
thinking punished.” In the ideal
MVC application, calls to external services should be
reflected in changes to the model layer, which in turn notifies the view layer to alter
the display the user sees. While this pattern is somewhat flexible, thinking of your
GWT application in these terms is a good habit. The fact that the browser gives you few
other options is actually helpful in forcing you to come to terms with the pattern.
Developing good habits early is better than trying to break bad habits later.
Now that you have some understanding of the coding and security issues revolving
around calling server-side code, we need to set up our NetBeans
IDE.
5.1.4 Developing GWT applications in NetBeans
In the examples in this chapter, we’ll be using the NetBeans IDE, NetBeans Enterprise
Pack, and
GWT4NB plugin (). The core IDE and the Enter-
prise Pack can be downloaded from NetBeans.org.
Once you have installed NetBeans and the Enterprise Pack using the installers
provided, you need to install the
GWT4NB plugin by selecting Tools > Plugins and
selecting the Available Plugins tab. Figure 5.1 shows this selection. Select
GWT4NB
Figure 5.1 Selecting the GWT4NB module from the NetBeans Update Center
112 CHAPTER 5 Other Techniques for Talking to Servers
and click Install. It will take you through several more steps, which you can just click
Next through.
The first time you create a
GWT application project using NetBeans, you’ll be
prompted for the installation folder for
GWT (the equivalent of GWT_HOME for the
IDE). Once configured, NetBeans provides basic scaffolding for your GWT application
and includes the appropriate .jar files in the library path. The code examples pro-
vided for this chapter (available at the Manning website) also each include a NetBeans
project so that you can simply load and run things from there if you choose.
And speaking of code, let’s get to it, starting with basic
HTTP operations using the
GWT APIs.
5.2 Enabling REST and POX communications
Though GWT provides its own Java-based RPC service, as we saw in chapter 3, you may
want to directly access
XML resources within your applications instead. Such resources
usually come in two forms:
■
POX (plain old XML over HTTP)
■
REST (Representational State Transfer)
POX usually just involves an application interface exposed as XML with data transferred
over
HTTP. REST ( is a
little more descriptive. It deals with
XML (or other format) representations of objects
handled by actions represented by the four standard
HTTP request methods:
PUT
,
GET
,
POST
, and
DELETE
. These map to the CRUD (Create Read Update Delete) operations
most people use to describe basic data-centric applications. For instance, suppose you
were dealing with blog entries. To create a new entry, you would
PUT
an
<entry>
ele-
ment to the
URI that is the root of the entries. This
PUT
would result in an ID being
assigned and a
URI allocated, typically the same as the ID, and a subsequent
POST
of an
<entry>
element to that URI would update the existing entry. There is a REST-style
protocol for blogs called the Atom Publishing Protocol, that follows this exact pattern.
For either style of service, there are two simple functional requirements on the cli-
ent side: making a request to the web service, and dealing with the
XML data content.
GWT provides two basic methods for making the request: basic HTTP and advanced
HTTP. We’ll examine both of these request methods and the XML content itself.
5.2.1 Making basic HTTP requests with GWT
The whole point of Ajax is enabling clients to send requests to servers. Of the two
GWT-provided methods to facilitate this, the first is the
HTTPRequest
object. This is
part of the
com.google.gwt.user.User
module that almost every application inherits.
This module provides the basic functionality you need to make a request to the server.
PROBLEM
We need our application to send data to, and retrieve data from, the server.
113Enabling REST and POX communications
SOLUTION
We will use the aptly named GWT
HTTPRequest
object to make basic HTTP requests.
Using
HTTPRequest
is very easy. It has four simple static methods to make
GET
and
POST
requests. For example, let’s start with a simple XML
Person
representation file,
as follows:
<?xml version="1.0" encoding="UTF-8"?>
<person>
<firstName>Jane</firstName>
<lastName>Doe</lastName>
</person>
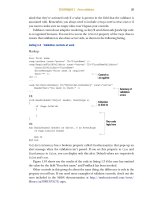
We want to retrieve that file within GWT and, for now, simply echo the XML content to
an alert box, as shown in figure 5.2.
Performing this file retrieval with
GWT is very straightforward, as shown in listing 5.1.
HTTPRequest.asyncGet(GWT.getModuleBaseURL()+
"/person.xml",
new ResponseTextHandler(){
public void onCompletion(String responseText) {
Window.alert(responseText);
}
});
Here we use the
HTTPRequest
object, simply passing in a URL and a
ResponseText-
Handler
, to which the
String
containing the value returned by the server will be
passed
b
. The other possible variations on this style of request include an additional
asyncGet()
version that takes a username and password for authentication, and two
analogous
asyncPost()
methods that also each take a
String
value for
POST
data.
DISCUSSION
The advantage of the
HTTPRequest
object is that it’s easy, and in many contexts it sim-
ply gets the job done. For most applications that utilize
POX, this is all you need.
However, there are situations where such simplicity can be limiting. For instance,
this approach obviously only supports half of the
HTTP request methods; the other
half are needed to support
REST. Google provides the
com.google.gwt.http.HTTP
module, with its basic
RequestBuilder
class, to support REST.
Listing 5.1 Retrieving the person.xml file
Figure 5.2
Echoing XML content
in a JavaScript alert
Create HTTPRequest
using asyncGet
b
114 CHAPTER 5 Other Techniques for Talking to Servers
5.2.2 Making advanced HTTP requests with GWT
If you are interacting with REST-based services, you need more methods and more options
than
HTTPRequest
offers. The
com.google.gwt.http.HTTP
module provides these.
But before we look at this module, the bad news: doing pure
REST isn’t really pos-
sible. While
XHR in many browsers supports
PUT
and
DELETE
requests, Safari notably
does not. There are two ways to address this: use an
HTTP tunnel and extract the
actual method from an
HTTP header, or ignore KHTML/WebKit-derived browsers.
We’ll take a quick look at each of these approaches.
PROBLEM
Our application needs advanced HTTP support not provided by
HTTPRequest
.
SOLUTION
When your needs exceed
HTTPRequest
’s capabilities, you can use the
RequestBuilder
object to perform actions with more HTTP methods and manipulate HTTP headers.
By inheriting the
com.google.gwt.http.HTTP
module in the gwt.xml file, we gain
access to a much more full-featured
HTTP client API. The basic class in this API is the
RequestBuilder
, which lets you manipulate headers, cope with status codes, and (if
you desire) override the built-in
HTTP methods to support
PUT
and
DELETE
.
With a few more lines of code than we used in listing 5.1, we can retrieve the same
XML
Person
file using
RequestBuilder
. This is shown in listing 5.2.
RequestBuilder builder =
new RequestBuilder(RequestBuilder.GET,
GWT.getModuleBaseURL()+"/person.xml");
try {
builder.addHeader("X-MyHeader", "somevalue");
Request request = builder.sendRequest(null,
new RequestCallback() {
public void onError(Request request, Throwable exception) {
Window.alert("There was an error! "+
exception.getMessage());
}
public void onResponseReceived(Request request,
Response response) {
Window.alert(response.getText());
}
});
} catch (RequestException e) {
Window.alert("Unable to build the request.");
}
DISCUSSION
Here we have a more complex callback,
RequestCallback
, with an error handler and
a more advanced response handler
d
. With the response handler, you have access to
the headers returned from the server, and by using the
RequestBuilder
you can also
manipulate the headers sent to the server
c
. If you were implementing a REST
Listing 5.2 Retrieving the person.xml file with RequestBuilder
Create RequestBuilder
b
Manipulate request
header state
c
Use RequestCallback
d
115Enabling REST and POX communications
application with a tunnel to remap the action based on an HTTP header, you could set
X-HTTP-Method-Override
to
PUT
or
DELETE
and deal with the changes in the server
implementation. Or, you could proxy the request with the appropriate method to that
actual
REST application.
You’ll also notice that the method type comes from public, static, final values on
the
RequestBuilder
object
b
. This would seem to limit you to the same
GET
and
POST
types available with
HTTPRequest
. Nevertheless, if you’re willing to sacrifice browser
compatibility, especially with older versions of Safari, you can get around this limita-
tion by extending
RequestBuilder
. For example, if you wanted to build a
DELETE
request, you could implement something like what is shown in listing 5.3.
public class DeleteRequestBuilder extends RequestBuilder {
public DeleteRequestBuilder(String url) {
super("DELETE", url);
}
}
Once you pass in the simple string value of the method you want to use, the
Request-
Builder
can be used as it would be for
GET
or
POST
requests.
Of course, now that we have the functionality, we also need to deal with the
XML
data. GWT provides for this as well.
5.2.3 Working with XML
Now that we’ve looked at how to send and receive XML data via HTTP, we need a way
to deal with the
XML itself. GWT includes this functionality in the
com.google.gwt.
xml.XML
module. Once we have added the appropriate
<inherits>
element to the
gwt.xml file, it becomes available to our code.
PROBLEM
We need to create and parse XML documents within our GWT application.
SOLUTION
GWT provides an XML module that includes an
XMLParser
and a
Document
, which we
can use to parse and manipulate
XML data. This XML parser is based on the XML
models provided by the web browsers. The
XMLParser
object is used to both parse text
and create
Document
instances.
As a simple example, let’s parse the
XML information from the person.xml file
used in the previous examples. This is shown in listing 5.4.
HTTPRequest.asyncGet(GWT.getModuleBaseURL()+"/person.xml",
new ResponseTextHandler() {
public void onCompletion(String responseText) {
Document doc =
XMLParser.parse(responseText);
Listing 5.3 DELETE method RequestBuilder
Listing 5.4 Parsing XML
Pass DELETE method to
parent constructor
Parse response text
to a document
b
116 CHAPTER 5 Other Techniques for Talking to Servers
Element root = (Element) doc.getFirstChild();
String firstName = root
.getElementsByTagName("firstName")
.item(0)
.getFirstChild()
.getNodeValue();
String lastName = root
.getElementsByTagName("lastName")
.item(0)
.getFirstChild()
.getNodeValue();
Window.alert("Hello "+ firstName + " "+ lastName);
}
});
If you have ever done any DOM-based XML programming, this example probably
looks remarkably familiar. The parser is invoked by simply passing a string to the static
parse()
method, and a
Document
is returned.
DISCUSSION
It’s important to remember that the
Document
object returned by the
XMLParser.
parse()
method is of type
com.google.gwt.xml.client.Document
and not of type
org.w3c.dom.Document
b
. These are not interchangeable. It’s also important to
remember that the
XMLParser
and all of the GWT DOM-style classes are implemented
using calls to the browser’s native
XML functionality, and are not usable on the server
side or outside of
GWT at all.
These limitations aside, parsing
XML is pretty easy. The
getElementsByTag-
Name()
method can be used to get a collection of elements, and then a specific item
can be obtained by index location
c
. Then the children
d
and node values can be
obtained
e
.
But what about serializing
XML? It, quite literally, couldn’t be easier. Simply call
toString()
on a
Document
or any
Element
object, and GWT serializes it to XML for you.
Now that we have covered the basics of
XML, we’re going to look at some finer
points of Java and JavaScript interaction, both with the
RPC mechanism and with JSON.
5.3 Understanding Java-to-JavaScript interaction
You have already seen the basics of how GWT handles Java-to-JavaScript mapping in
previous examples. Now we’ll explore this mapping further to better understand the
nature of JavaScript serialization for server communications. We’ll also discuss in
more detail how Java and JavaScript objects are dealt with in your compiled code.
To begin with, serializing Java Collections with
GWT requires giving the GWTCom-
piler a bit more information, because it does not yet support generics or Java 5 style
annotations as of this writing.
5.3.1 Using GWT JavaDoc annotations to serialize collections
The GWT compiler is very aggressive about minimizing the code in the final JavaScript
files. It examines the call tree and prunes unused methods from classes. It also
Get first firstName
element
c
Get TEXT node within firstName
d
Get String value
of TEXT node
e
117Understanding Java-to-JavaScript interaction
traverses the graph of objects that are used for RPC calls—those that implement the
IsSerializable
or
Serializable
interfaces—and only serializes and deserializes for
classes that are actually used in the application.
As you already know,
GWT uses Java 1.4 language syntax in the Java source of your
application. This precludes the use of generics to type the collection structures from
the
java.util
package. But these structures need to be serializable to pass them back
and forth from the client to
RPC services, so how does the compiler know what it
needs to provide handlers for?
PROBLEM
Serialization of collections does not provide typing via generics, and serializers don’t
get created for contained classes with Java 1.4 language structures.
SOLUTION
Using the
gwt.typeArgs
JavaDoc style annotation, you can declare property types,
return types, and method parameters when dealing with collections. Doing so alerts
the
GWT compiler of your intentions and allows collections to be serialized.
The
gwt.typeArgs
annotation allows the GWT compiler and serialization mecha-
nism to recognize and optimize types with collections. This is actually a JavaDoc style
annotation that is inspected by the Java-to-JavaScript compiler when the application
is built to determine what the top-level point of serialization for a particular prop-
erty, argument, or return type should be. Let’s look at a simple example that uses
each of these.
First, for a property, we’ll look at three classes in listing 5.5. A
Fleet
, which con-
tains vessels, and two
Vessel
types: a
StarShip
and a
TugBoat
.
public class Fleet implements IsSerializable{
/**
* @gwt.typeArgs <com.manning.gwtip.servercom.Vessel>
*/
public ArrayList vessels;
public Fleet() {
super();
}
//
public class Vessel implements IsSerializable {
public String name;
public String registry;
public String captain;
public Vessel() {
super();
}
}
//
Listing 5.5 GWT JavaDoc typeArgs annotations with properties
Specify typed
collection
elements
b
Specify
IsSerializable
type
c
118 CHAPTER 5 Other Techniques for Talking to Servers
public class TugBoat extends Vessel {
public int towCapacity;
public TugBoat() {
super();
}
}
//
public class StarShip extends Vessel{
public int photonTorpedoCount;
public StarShip() {
super();
}
}
In the
Fleet
class, we’re specifying the type of the collection of
Vessel
objects by
using the
typeArgs
JavaDoc annotation
b
. The types specified in this manner must
themselves be of type
IsSerializable
or
Serializable
c
. Inheritance is also sup-
ported when using
GWT’s serialization methods
d
.
It’s important to remember that for both service calls and
typeArgs
references you
want to be as specific as possible. The
GWT compiler can’t know which of these
you might be passing between the server and the client. Even if you never cast a
Vessel
to a
StarShip
in the client, that data needs to be there if it goes back to the
server. This means the compiler cannot omit the unused data from
StarShip
.
The
typeArgs
annotation can also be used to specify arguments and return types
for service methods. Listing 5.6 shows a hypothetical service interface that demon-
strates this.
public interface FleetRemoteService extends RemoteService {
/**
* @gwt.typeArgs fleets
* <com.manning.gwtip.servercom.client.Fleet>
*/
public void setFleetsForOwner(String owner, Set fleets);
/**
* @gwt.typeArgs
* <java.lang.String,[ ]servercom.client.Fleet>
*/
public HashMap getAllFleets();
}
In this manner, the GWT
typeArgs
JavaDoc style annotation can alert the GWT com-
piler what types are used in a collection, either as input parameters or return values.
DISCUSSION
As listing 5.6 demonstrates, immediately following a
typeArgs
annotation on a
method declaration, you can specify a particular argument being described, such as
the
Set
named
fleets
b
. You can also use
typeArgs
to specify a return type for a
Listing 5.6 RemoteService using typeArgs
Include GWT
serialization handlers
d
Provide
typeArgs for
an argument
b
Provide typeArgs
for a return type;
package
abbreviated
c