Macromedia fireworks MX bible phần 2 pptx
Bạn đang xem bản rút gọn của tài liệu. Xem và tải ngay bản đầy đủ của tài liệu tại đây (1.49 MB, 102 trang )
63
Chapter 2 ✦ Understanding the Interface
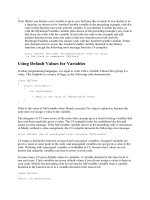
Figure 2-28: Adding links to your Web objects is
easy with the URL panel.
You can access most of Fireworks’ URL management utilities through the URL panel
Options menu, detailed in Table 2-13.
Table 2-13
URL Panel Options Menu Commands
Option Description
Add Used URLs to Library Adds the list of current URLs to the URL Library
Clear Unused URLs Removes all URLs from the current listing
Add URL Adds a new URL to the URL Library
Edit URL Opens the Edit URL dialog box
Delete URL Removes the selected URL from the URL Library
New URL Library Creates a new URL Library
Import URLs Loads a new set of URLs from a previously stored URL Library,
a bookmark file, or an HTML page
Export URLs Stores the current URL Library
Styles panel
If you’ve ever spent hours getting just the right combination of stroke, fill, and
effects for an object — and then find you need to apply the same combination to all
the navigation buttons throughout a Web site — you’ll greatly appreciate the
Fireworks Styles feature.
In Fireworks, a style is a collection of attributes that you can apply to any object.
The Styles panel is preset with a number of such designs, which appear as graphi-
cal buttons and text, with many more available on the Fireworks CD-ROM. To apply
043662-1 ch02.F 8/2/02 2:24 PM Page 63
64
Part I ✦ Come See the Fireworks
a style, select the object and then select the style; you can even select multiple
objects (such as a row of navigation buttons) and apply the same style to them all
with one click. Styles are a terrific time-saver and a great way to maintain a consis-
tent look and feel.
The Styles panel, shown in Figure 2-29, is composed of a series of icons, each repre-
senting a different style. A style can have the following attributes: fill type, fill color,
stroke type, stroke color, effect, text font, text size, and text color. In addition to the
preset styles, you can also save your own combinations. Just highlight the object
with the desired attributes and select the New Style button on the Styles panel. You
can also accomplish this by choosing New Style from the Options menu. A full list
of the Styles panel Options menu commands appears in Table 2-14.
Figure 2-29: Automate applying a consistent look
and feel to your objects by using the Styles panel.
Table 2-14
Styles Panel Options Menu Commands
Option Description
New Style Creates a new style based on the current object
Edit Style Opens the Edit Style dialog box
Delete Styles Removes a selected style or styles
Import Styles Loads a new set of styles after the currently selected style
Export Styles Stores the currently selected style or styles
Reset Styles Reloads the default configuration of styles
Large Icons Displays the available styles with icons twice as large as
normal
Find out more about creating and applying styles in Chapter 16.
Cross-
Reference
043662-1 ch02.F 8/2/02 2:24 PM Page 64
65
Chapter 2 ✦ Understanding the Interface
Library panel
The Library panel contains Fireworks Libraries: collections of symbols that you can
save and reopen as needed. Symbols are edited right in the Library. Dragging a sym-
bol from the Library panel and dropping it into a document creates an instance of
that symbol. Instances are copies of symbols that remain linked to the symbol and
inherit changes to the symbol. Instances are similar to a Windows file shortcut or
Mac alias — right down to the arrow badge — and can be animated, tweened, and
edited as a group. You can save symbols in Symbol Libraries and use them again
and again in multiple documents.
The commands detailed in Table 2-15 are located in the Library panel Options
menu. Figure 2-30 shows the Library panel.
Figure 2-30: The Library panel enables you to
store Libraries of symbols.
Table 2-15
Library Panel Options Menu Commands
Option Description
New Symbol Creates a new symbol
Duplicate Duplicates the current symbol
Delete Removes the current symbol from the Library and all its
instances from the document
Edit Symbol Opens the selected symbol in its own window for editing
Properties Displays the Symbol Properties dialog box for the current
symbol
Select Unused Items Selects unused symbols in the Library
Continued
043662-1 ch02.F 8/2/02 2:24 PM Page 65
66
Part I ✦ Come See the Fireworks
Table 2-15 (continued)
Option Description
Update Updates symbols that were imported from external Libraries
Play Consecutively displays all frames of a button
Import Symbols Imports symbols from a saved Library
Export Symbols Exports symbols to a saved Library
Find and Replace panel
Let’s suppose you’ve just finished the graphics for a major Web site, chock-full of
corporate logos, and you receive the call. You know, the one from the client who
informs you that the company has just been acquired and instead of NewCo, Inc.,
it’s now New2Co, Inc. Could you please redo all the graphics — by tomorrow?
Because Fireworks objects are always editable, the Find and Replace panel, shown
in Figure 2-31, makes updating a series of Web graphics a snap. You can change all
the graphics in a selection, a file, a frame, or a series of files. Moreover, Find and
Replace can handle more than just text; you can also alter fonts, colors, and URLs,
or even snap all the colors to their nearest Web safe neighbor.
Figure 2-31: Need to make global changes in
text, font, color, or URLs? Pull up the Find and
Replace panel and get the job done fast.
The Find and Replace feature works with the Project Log panel, which tracks
changes made to your documents. You can enable Project Log tracking through the
Options menu commands listed in Table 2-16, as well as specify replacement
options for multiple file operations.
043662-1 ch02.F 8/2/02 2:24 PM Page 66
67
Chapter 2 ✦ Understanding the Interface
Table 2-16
Find and Replace Panel Options Menu Commands
Option Description
Add Files to Project Log Tracks changes made in a Find and Replace operation in the
Project Log
Replace Options Displays options for multiple-file Find and Replace operations
You can really ramp up your production level of Web graphics if you master the
Find and Replace feature. To learn more about it, see Chapter 18.
Project Log panel
With the power inherent in Fireworks automation tools, such as Find and Replace
and Batch Processing, you need a way to keep track of the many changes you may
make. The Project Log panel, shown in Figure 2-32, details each change that has
taken place and enables you to not only receive confirmation of the change, but
also to easily open any file that was affected.
Figure 2-32: Use the Project Log to manage your
Find and Replace and Batch Process operations.
In addition to listing documents altered during an automated process, you can use
the Project Log to keep a number of files close at hand, ready to be opened at will.
Through the Add Files to Log command, in the Options menu detailed in Table 2-17,
files can be made accessible, but not immediately opened. The Options menu also
enables you to quickly make changes to files in the Project Log and to re-export
them using their previous settings.
To find out more about what’s possible with the Project Log, turn to Chapter 18.
Cross-
Reference
Cross-
Reference
043662-1 ch02.F 8/2/02 2:24 PM Page 67
68
Part I ✦ Come See the Fireworks
Table 2-17
Project Log Options Menu Commands
Option Description
Export Again Exports selected files in the Project Log using their previous
settings
Add Files to Log Includes additional graphic files in the Project Log without
initially opening them
Clear Selection Removes the selected files from the Project Log
Clear All Removes all files from the Project Log
Answers panel
The Answers panel, shown in Figure 2-33, is a Flash panel that dynamically interacts
with Macromedia’s Web site, allowing you to access a wide variety of information.
The Answers panel initially contains links to the What’s New file, the Readme file,
and the Fireworks Tutorials. Along with these links you find a button labeled
Update. Clicking the Update button checks the Macromedia Web site and refreshes
the panel with an option list containing access to tech notes, a Web search for tech
support issues, and a list of the newest extensions uploaded to the Fireworks
exchange. To Update the information in the panel again, select Settings from the
option list and then click Update Panel. The Answers panel Options menu has no
special settings.
Figure 2-33: The Answers panel is your window to
the Macromedia Web site. You can search for help,
view top TechNotes, and even see recently
uploaded extensions.
The Answers panel is a new addition to Fireworks MX.
New
Feature
043662-1 ch02.F 8/2/02 2:24 PM Page 68
69
Chapter 2 ✦ Understanding the Interface
Using the Menus
You can also find many of the commands and options available in the various
Fireworks panels in the menus. You’ll also find, however, that many features are
unavailable anywhere else. This section provides a reference to every menu item in
Fireworks, along with its corresponding default keyboard shortcut, if available.
Windows users won’t see all of Fireworks’ menus unless a document window is
open.
Application menu (Mac OS X only)
The Application menu, also known as the Fireworks menu in this case, is an OS X
only menu that contains commands for setting up an application and controlling
how it interacts with the operating system. It is formally referred to the Application
menu because it becomes the name of the application that is forefront in the OS.
While in Fireworks, it’s the Fireworks menu, while in Dreamweaver it’s the
Dreamweaver menu, and so forth. Table 2-18 lists the commands in the Fireworks
menu.
Table 2-18
Fireworks Menu Commands (Mac OS X only)
Command Description Keystroke
About Fireworks Displays the About Fireworks dialog box with n/a
information about the application and its authors
Keyboard Shortcuts Displays the Keyboard Shortcuts dialog box, which n/a
enables you to modify keyboard shortcuts
Preferences Displays the Preferences dialog box where you Command+U
set user preferences
Services Displays a submenu of available system services n/a
Hide Fireworks Hides the Fireworks application and all of Command+H
its windows
Hide Others Hides all running applications except for Fireworks n/a
Show All Shows all running applications n/a
Quit Fireworks Quits the Fireworks application Command+Q
In the tables throughout this chapter, commands or tools listed in bold text are
new or have changed menu, or panel, locations in Fireworks MX.
Note
043662-1 ch02.F 8/2/02 2:24 PM Page 69
70
Part I ✦ Come See the Fireworks
File menu
Placing basic computer operations — creating, saving, and printing files — in the
File menu is standard practice. Fireworks follows this practice and also includes
commands for importing and exporting. All File menu commands are listed in
Table 2-19.
Table 2-19
File Menu Commands
Command Description Windows Macintosh
New Displays the New Document Ctrl+N Command+N
dialog box before creating a
new document
Open Displays the Open dialog box Ctrl+O Command+O
before opening existing
documents
Open Recent ➪ Displays a submenu of your n/a n/a
Your Recently recently opened documents
Opened Documents
Reconstitute Table Creates a Fireworks document n/a n/a
with slice objects from an
HTML table
Scan ➪ Twain Acquire Displays the interface dialog box n/a n/a
for a twain source, such as a
scanner, if one is available and has
been selected, before acquiring
an image
Scan ➪ Twain Select Displays the Select Source dialog n/a n/a
box before allowing you to select
a twain source to acquire an
image from
Scan ➪ Your Lists currently installed — n/a
Photoshop Acquire Photoshop Acquire plug-ins—
Plug-Ins typically, each plug-in enables you
(Macintosh only) to acquire an image from a
corresponding device
Close Closes the current document Ctrl+W Command+W
Save Saves a document, or displays Ctrl+S Command+S
the Save As dialog box for an
unnamed document
Save As Displays the Save As dialog box Ctrl+Shift+S Command+
before saving a document Shift+S
043662-1 ch02.F 8/2/02 2:24 PM Page 70
71
Chapter 2 ✦ Understanding the Interface
Command Description Windows Macintosh
Save a Copy Displays the Save Copy As n/a n/a
dialog box before saving a
copy of a document
Revert Replaces the current document n/a n/a
with the previously saved version
of the same document
Import Displays the Import dialog box Ctrl+R Command+R
before importing a file into any
open document
Export Displays the Export dialog box Ctrl+Shift+R Command+
before exporting a document in Shift+R
the format specified in the
Optimize panel
Export Preview Displays the Export Preview Ctrl+Shift+X Command+
dialog box before exporting a Shift+X
document
Update HTML Places or updates Fireworks n/a n/a
HTML code in another HTML
file on the same computer
Export Wizard Displays the Export Wizard n/a n/a
before exporting a document
Batch Process Displays the Batch Process n/a n/a
dialog box before processing
multiple image files
Preview in Browser ➪ Previews a document in your F12 F12
Preview in Primary primary browser
Browser
Preview in Browser ➪ Previews a document in Shift+F12 Shift+F12
Preview in Secondary your secondary browser
Browser
Preview in Browser ➪ Displays the Locate Browser n/a n/a
Set Primary Browser dialog box before selecting a
browser as your primary browser
Preview in Browser ➪ Displays the Locate Browser n/a n/a
Set Secondary Browser dialog box before selecting a
browser as your secondary browser
Page Setup Displays the Page Setup dialog n/a n/a
box (for printing)
Print Displays the Print dialog box Ctrl+P Command+P
before printing a document
Continued
043662-1 ch02.F 8/2/02 2:24 PM Page 71
72
Part I ✦ Come See the Fireworks
Table 2-19 (continued)
Command Description Windows Macintosh
HTML Setup Displays the HTML Setup n/a n/a
dialog box
Exit (Windows only) Quits Fireworks Ctrl+Q —
Edit menu
The Edit menu holds the standard editing commands, such as Undo, Cut, Copy, and
Paste, as well as numerous commands specific to Fireworks graphics, such as Paste
Inside and Crop Document. The Edit menu is detailed in Table 2-20.
Table 2-20
Edit Menu Commands
Command Description Windows Macintosh
Undo Reverses the last action; the Ctrl+Z Command+Z
number of Undo steps is set
in Preferences
Redo Redoes the last edit that was Ctrl+Y Command+Y
undone by Undo
Insert ➪ New Button Displays the Button Editor n/a n/a
before creating a new button
Insert ➪ New Symbol Displays the Symbol Properties Ctrl+F8 Command+F8
dialog box before creating a
new symbol
Insert ➪ Hotspot Inserts a hotspot object Ctrl+Shift+U Command+
Shift+U
Insert ➪ Slice Inserts a slice object Alt+Shift+U Option+
Shift+U
Insert ➪ Empty Bitmap Inserts an empty bitmap object n/a n/a
Insert ➪ Bitmap Creates a new bitmap of the n/a n/a
Via Copy selected pixels, leaving the
original pixels in place
Insert ➪ Bitmap Via Cut Creates a new bitmap of the n/a n/a
selected pixels, removing the
original pixels from the document
Insert ➪ Layer Creates a new layer n/a n/a
043662-1 ch02.F 8/2/02 2:24 PM Page 72
73
Chapter 2 ✦ Understanding the Interface
Command Description Windows Macintosh
Insert ➪ Frame Creates a new frame n/a n/a
Libraries ➪ Animations Imports sample animations n/a n/a
included with Fireworks
Libraries ➪ Bullets imports sample bullets n/a n/a
included with Fireworks
Libraries ➪ Buttons Imports sample buttons n/a n/a
included with Fireworks
Libraries ➪ Themes Imports sample themes n/a n/a
included with Fireworks
Libraries ➪ Other Displays the Open dialog n/a n/a
box before importing a Library
Find and Replace Displays the Find and Ctrl+F Command+F
Replace dialog box
Cut Moves the current selection Ctrl+X Command+X
to the system clipboard
Copy Copies the current selection Ctrl+C Command+C
to the system clipboard
Copy as Vectors Copies a Fireworks vector n/a n/a
object from the current selection
to the system clipboard as vector
information
Copy HTML Code Displays the Copy HTML Code Ctrl+Alt+C Command+
Wizard, which guides you Option+C
through the process of exporting
images and copying HTML code
to the system clipboard for pasting
into an HTML editor, such as
Macromedia Dreamweaver
Paste Copies the contents of the system Ctrl+V Command+V
clipboard to the current cursor
position
Clear Removes the current selection Backspace Delete
from the document
Paste as Mask Copies the content of the n/a n/a
clipboard as a mask
Continued
043662-1 ch02.F 8/2/02 2:24 PM Page 73
74
Part I ✦ Come See the Fireworks
Table 2-20 (continued)
Command Description Windows Macintosh
Paste Inside Copies the contents of the Ctrl+Shift+V Command+
system clipboard into a Shift+V
selected, closed path
Paste Attributes Copies the Fireworks-specific Ctrl+Alt+ Command+
attributes of the contents of Shift+V Option+
the system clipboard to a Shift+V
selected object
Duplicate Creates a copy of the selected Ctrl+Alt+D Command+
object, offset slightly from Option+D
the original
Clone Creates a copy of the selected Ctrl+Shift+D Command+
object, directly on top of the Shift+D
original
Crop Selected Bitmap Displays crop handles around n/a n/a
the selected bitmap object
Crop Document Selects the Crop tool n/a n/a
Preferences Displays the Preferences Ctrl+U Command+U
dialog box
Keyboard Shortcuts Displays the Keyboard Shortcuts n/a n/a
dialog box before modifying
keyboard shortcuts
The last two menu items in Table 2-20 are only found on Windows and Mac OS 9.
On Mac OS X, these items are in the Application menu, which is covered in Table
2-18.
View menu
The View menu commands, listed in Table 2-21, control a Web artist’s views during
the creation phase. In addition to numerous magnification commands, the View
menu also contains helpful layout aids, such as Rulers, Grids, and Guides. You’ll
also find several features to help you see just the graphic when you need to have a
clear, uncluttered perspective.
Note
043662-1 ch02.F 8/2/02 2:24 PM Page 74
75
Chapter 2 ✦ Understanding the Interface
Table 2-21
View Menu Commands
Command Description Windows Macintosh
Zoom In Increases the magnification Ctrl+ Command+
level of a document by one Equals (=) Equals (=)
setting
Zoom Out Decreases the magnification Ctrl+ Command+
level of a document by one Minus (–) Minus (–)
setting
Magnification ➪ 6% Sets the magnification level n/a n/a
of a document to 6 percent
Magnification ➪ 12% Sets the magnification level n/a n/a
of a document to 12 percent
Magnification ➪ 25% Sets the magnification level n/a n/a
of a document to 25 percent
Magnification ➪ 50% Sets the magnification level Ctrl+5 Command+5
of a document to 50 percent
Magnification ➪ 66% Sets the magnification level n/a n/a
of a document to 66 percent
Magnification ➪ 100% Sets the magnification level Ctrl+1 Command+1
of a document to 100 percent
Magnification ➪ 150% Sets the magnification level n/a n/a
of a document to 150 percent
Magnification ➪ 200% Sets the magnification level Ctrl+2 Command+2
of a document to 200 percent
Magnification ➪ 300% Sets the magnification level Ctrl+3 Command+3
of a document to 200 percent
Magnification ➪ 400% Sets the magnification level Ctrl+4 Command+4
of a document to 400 percent
Magnification ➪ 800% Sets the magnification level Ctrl+8 Command+8
of a document to 800 percent
Magnification ➪ 1600% Sets the magnification level Ctrl+6 Command+6
of a document to 1,600 percent
Magnification ➪ 3200% Sets the magnification level n/a n/a
of a document to 3,200 percent
Magnification ➪ 6400% Sets the magnification level n/a n/a
of a document to 6,400 percent
Continued
043662-1 ch02.F 8/2/02 2:24 PM Page 75
76
Part I ✦ Come See the Fireworks
Table 2-21 (continued)
Command Description Windows Macintosh
Fit Selection Sets the magnification level Ctrl+Alt+ Command+
of a document so that all Zero (0) Option+
selected objects are visible Zero (0)
Fit All Sets the magnification level Ctrl+Zero (0) Command+
of a document so that all Zero (0)
objects are visible
Full Display Toggles Full Display Ctrl+K Command+K
Macintosh Gamma Toggles the document display n/a —
(Windows only) to simulate a typical Macintosh
Gamma setting
Windows Gamma Toggles the document display — n/a
(Macintosh only) to simulate a typical Windows
Gamma setting
Hide Selection Hides selected objects Ctrl+L Command+L
Show All Shows all hidden objects Ctrl+Shift+L Command+
Shift+L
Rulers Toggles display of rulers Ctrl+Alt+R Command+
Option+R
Grid ➪ Show Grid Toggles display of the grid Ctrl+Alt+G Command+
Option+G
Grid ➪ Snap To Grid Toggles whether objects Ctrl+Alt+ Command+
snap to the grid or not Shift+G Option+
Shift+G
Grid ➪ Edit Grid Displays the Edit Grid dialog box n/a n/a
Guides ➪ Show Guides Toggles display of guides Ctrl+Semi- Command+
colon (;) Semicolon (;)
Guides ➪ Lock Guides Toggles whether or not guides Ctrl+Alt+ Command+
can be edited and moved Semicolon (;) Option+
Semicolon (;)
Guides ➪ Snap to Guides Toggles whether objects snap Ctrl+Shift+ Command+
to Guides or not Semicolon (;) Shift+
Semicolon (;)
Guides ➪ Edit Guides Displays the Edit Guides dialog box n/a n/a
Slice Guides Toggles display of Slice Guides Ctrl+Alt+ Command+
Shift+ Option+Shift+
Semicolon (;) Semicolon (;)
043662-1 ch02.F 8/2/02 2:24 PM Page 76
77
Chapter 2 ✦ Understanding the Interface
Command Description Windows Macintosh
Slice Overlay Toggles display of the Slice Overlay n/a n/a
Hide Edges Toggles display of selection borders F9 F9
Hide Panels Toggles display of all open panels F4 F4
Status Bar (Windows only) Toggles display of the status bar n/a —
Select menu
The Select menu, detailed in Table 2-22, contains commands for selecting objects as
well as manipulating any selections you’ve already made.
Table 2-22
Select Menu Commands
Command Description Windows Macintosh
Select All Selects all objects in a document Ctrl+A Command+A
in vector mode, or all pixels in a
bitmap object in bitmap mode
Deselect Deselects all objects or pixels Ctrl+D Command+D
Superselect Selects the entire group to which n/a n/a
the current (sub)selection belongs
Subselect Selects an individual object within n/a n/a
a group
Select Similar Selects pixels that are similarly n/a n/a
colored to the selection while in
bitmap mode
Select Inverse Selects all deselected pixels and Ctrl+Shift+I Command+
deselects all selected pixels in Shift+I
bitmap mode
Feather Displays the Feather Selection n/a n/a
dialog box before feathering the
edges of a pixel selection in
bitmap mode
Expand Marquee Displays the Expand Selection n/a n/a
dialog box before expanding the
current selection in bitmap mode
Continued
043662-1 ch02.F 8/2/02 2:24 PM Page 77
78
Part I ✦ Come See the Fireworks
Table 2-22 (continued)
Command Description Windows Macintosh
Contract Marquee Displays the Contract Selection n/a n/a
dialog box before contracting the
current selection in bitmap mode
Border Marquee Displays the Select Border dialog n/a n/a
box before selecting a border
around the current selection in
bitmap mode
Smooth Marquee Displays the Smooth Selection n/a n/a
dialog box before smoothing the
edges of the current selection in
bitmap mode
Save Bitmap Selection Stores the current marquee n/a n/a
selection for later recall
Restore Bitmap Recalls a stored marquee selection n/a n/a
Selection
Modify menu
After you’ve created your basic objects, you’ll undoubtedly spend as much, if not
more time, tweaking and modifying them in order to get them just right. The Modify
menu commands, detailed in Table 2-23, are quite numerous and specific.
Table 2-23
Modify Menu Commands
Command Description Windows Macintosh
Canvas ➪ Image Size Displays the Image Size dialog n/a n/a
box before changing the size of
a bitmap
Canvas ➪ Canvas Size Displays the Change Canvas Size n/a n/a
dialog box before changing the
size of the canvas
Canvas ➪ Canvas Color Displays the Canvas Color dialog n/a n/a
box before changing the color of
the canvas
Canvas ➪ Trim Canvas Shrinks the canvas to fit snugly Ctrl+Alt+T Command+
around all objects Option+T
043662-1 ch02.F 8/2/02 2:24 PM Page 78
79
Chapter 2 ✦ Understanding the Interface
Command Description Windows Macintosh
Canvas ➪ Fit Canvas Shrinks or expands the canvas Ctrl+Alt+F Command+
to fit snugly around all objects Option+F
Canvas ➪ Rotate 180° Rotates the canvas 180 degrees n/a n/a
Canvas ➪ Rotates the canvas 90 degrees n/a n/a
Rotate 90° CW clockwise
Canvas ➪ Rotates the canvas 90 degrees n/a n/a
Rotate 90° CCW counterclockwise
Animation ➪ Displays the Animate dialog box Alt+Shift+F8 Option+
Animate Selection before creating an animation Shift+F8
symbol
Animation ➪ Settings Displays the Animate dialog box n/a n/a
for the selected animation symbol
Animation ➪ Changes an animation symbol into n/a n/a
Remove Animation a graphic symbol, removing the
animation
Symbol ➪ Displays the Symbol Properties F8 F8
Convert to Symbol dialog box before converting an
object to a symbol
Symbol ➪ Edit Symbol Displays the selected symbol in n/a n/a
its own canvas for editing
Symbol ➪ Displays the Tween Instances Ctrl+Alt+ Command+
Tween Instances dialog box before creating Shift+T Option+
intermediate steps between Shift+T
two selected symbol instances
Symbol ➪ Break Apart Breaks the link between the n/a n/a
selected symbol and its instances
Pop-up Menu ➪ Displays the Add Pop-up Menu n/a n/a
Add Pop-up Menu dialog box
Pop-up Menu ➪ Displays the Edit Pop-up Menu n/a n/a
Edit Pop-up Menu dialog box
Pop-up Menu ➪ Deletes an existing pop-up menu n/a n/a
Delete Pop-up Menu
Mask ➪ Reveal All Shows an object and its mask n/a n/a
when editing a mask
Mask ➪ Hide All Shows only the mask when n/a n/a
editing a mask
Continued
043662-1 ch02.F 8/2/02 2:24 PM Page 79
80
Part I ✦ Come See the Fireworks
Table 2-23 (continued)
Command Description Windows Macintosh
Mask ➪ Paste as Mask Copies the contents of the n/a n/a
clipboard as a mask
Mask ➪ Group as Mask Groups one or more selected n/a n/a
objects with the top object used
as an alpha mask
Mask ➪ Reveal Selection Shows the area defined by a n/a n/a
pixel selection
Mask ➪ Hide Selection Hides the area defined by a n/a n/a
pixel selection
Mask ➪ Disable Mask Disables the selected object’s mask n/a n/a
Mask ➪ Delete Mask Deletes the selected object’s mask n/a n/a
Selective JPEG ➪ Save Saves a selection as a selective n/a n/a
Selection as JPEG Mask JPEG mask
Selective JPEG ➪ Restore Creates a selection that matches n/a n/a
JPEG Mask as Selection a selective JPEG mask
Selective JPEG ➪ Settings Displays the Selective JPEG n/a n/a
Settings dialog box
Selective JPEG ➪ Removes a selective JPEG mask n/a n/a
Remove JPEG Mask
Flatten Selection Converts one or more selected Ctrl+Alt+ Command+
objects into a single bitmap object Shift+Z Option+
Shift+Z
Merge Down Merges vectors or bitmaps onto Ctrl+E Command+E
a bitmap below
Flatten Layers Flattens visible layers into one n/a n/a
layer, discarding hidden layers
Transform ➪ Toggles the display of an object’s n/a n/a
Free Transform transformation handles
Transform ➪ Scale Sets transformation handles n/a n/a
to resize and rotate objects
Transform ➪ Skew Sets transformation handles n/a n/a
to slant, change perspective,
and rotate objects
Transform ➪ Distort Sets transformation handles n/a n/a
to distort and rotate objects
Transform ➪ Displays the Numeric Transform Ctrl+Shift+T Command+
Numeric Transform dialog box Shift+T
043662-1 ch02.F 8/2/02 2:24 PM Page 80
81
Chapter 2 ✦ Understanding the Interface
Command Description Windows Macintosh
Transform ➪ Rotate 180° Rotates an object 180 degrees n/a n/a
Transform ➪ Rotates an object 90 degrees Ctrl+9 Command+9
Rotate 90° CW clockwise
Transform ➪ Rotates an object 90 degrees Ctrl+7 Command+7
Rotate 90° CCW counterclockwise
Transform ➪ Flips an object horizontally n/a n/a
Flip Horizontal
Transform ➪ Flip Vertical Flips an object vertically n/a n/a
Transform ➪ Removes all transformations n/a n/a
Remove Transformations from an object
Arrange ➪ Bring to Front Moves an object to the front Ctrl+Shift+ Command+
of a layer Up Arrow Shift+Up Arrow
Arrange ➪ Bring Forward Moves an object in front of the Ctrl+ Command+
object just in front of it Up Arrow Up Arrow
Arrange ➪ Send Backward Moves an object in back of the Ctrl+ Command+
object just behind it Down Arrow Down Arrow
Arrange ➪ Send to Back Moves an object to the back Ctrl+Shift+ Command+
of a layer Down Arrow Shift+
Down Arrow
Align ➪ Left Aligns selected objects to Ctrl+Alt+1 Command+
the left edge of the selection Option+1
Align ➪ Center Vertical Aligns selected objects to the Ctrl+Alt+2 Command+
vertical center of the selection Option+2
Align ➪ Right Aligns selected objects to the Ctrl+Alt+3 Command+
right edge of the selection Option+3
Align ➪ Top Aligns selected objects to the Ctrl+Alt+4 Command+
top edge of the selection Option+4
Align ➪ Center Horizontal Aligns selected objects to the Ctrl+Alt+5 Command+
horizontal center of the selection Option+5
Align ➪ Bottom Aligns selected objects to the Ctrl+Alt+6 Command+
bottom of the selection Option+6
Align ➪ Distribute Widths Distribute selected objects Ctrl+Alt+7 Command+
horizontally throughout Option+7
the selection
Align ➪ Distribute Heights Distribute selected objects Ctrl+Alt+9 Command+
vertically throughout the Option+9
selection
Continued
043662-1 ch02.F 8/2/02 2:24 PM Page 81
82
Part I ✦ Come See the Fireworks
Table 2-23 (continued)
Command Description Windows Macintosh
Combine Paths ➪ Join Joins two or more selected Ctrl+J Command+J
paths or endpoints
Combine Paths ➪ Split Splits an object into Ctrl+Shift+J Command+
component paths Shift+J
Combine Paths ➪ Union Combines two or more selected n/a n/a
closed paths into a single object
Combine Paths ➪ Combines overlapping parts of n/a n/a
Intersect two or more selected closed paths
Combine Paths ➪ Punch Combines two or more selected n/a n/a
closed paths by punching holes in
the back object with the front
object(s)
Combine Paths ➪ Crop Crops the back object of a n/a n/a
selection with the front object
of a selection of two or more
closed paths
Alter Path ➪ Simplify Displays the Simplify dialog box n/a n/a
before removing points from a
path while keeping its overall shape
Alter Path ➪ Displays the Expand dialog box n/a n/a
Expand Stroke
Alter Path ➪ Inset Path Displays the Inset dialog box n/a n/a
before expanding or contracting
one or more closed paths
Alter Path ➪ Hard Fill Removes antialiasing or feathering n/a n/a
from the edges of a selection
Alter Path ➪ Anti-Alias Fill Antialiases the edges of a selection n/a n/a
Alter Path ➪ Feather Fill Feathers the edges of a selection n/a n/a
Group Groups one or more selected Ctrl+G Command+G
objects
Ungroup Ungroups a Group or Mask Group Ctrl+Shift+G Command+
Shift+G
043662-1 ch02.F 8/2/02 2:24 PM Page 82
83
Chapter 2 ✦ Understanding the Interface
Text menu
Text in a traditional graphics program plays a relatively small, but key role. In a Web
graphics program such as Fireworks, text becomes more important because graph-
ics are the only way to incorporate heavily styled text into Web pages. The Text
menu commands, detailed in Table 2-24, offer many shortcuts that enable you to
manipulate text objects without opening the Text Editor.
Table 2-24
Text Menu Commands
Command Description Windows Macintosh
Font ➪ Your Font List Changes the selected text object’s n/a n/a
typeface or the default typeface
if no text object is selected
Size ➪ Other Displays the Text Size dialog box n/a n/a
Size ➪ Smaller Decreases the font size by Ctrl+Shift+ Command+
one point comma (,) Shift+
comma (,)
Size ➪ Larger Increases the font size by Ctrl+Shift+ Command+
one point period (.) Shift+period (.)
Size ➪ 8 to 120 Changes the selected text object’s n/a n/a
type size or the default type size
if no text object is selected
Style ➪ Plain Removes bold, italic, and n/a n/a
underline formatting from the
selected text
Style ➪ Bold Makes the selected text bold Ctrl+B Command+B
Style ➪ Italic Italicizes the selected text Ctrl+I Command+I
Style ➪ Underline Underlines the selected text n/a n/a
Align ➪ Left Left-aligns the selected text Ctrl+Alt+ Command+
Shift+L Option+
Shift+L
Align ➪ Centers the selected text Ctrl+Alt+ Command+
Centered Horizontally Shift+C Option+
Shift+C
Align ➪ Right Right-aligns the selected text Ctrl+Alt+ Command+
Shift+R Option+
Shift+R
Continued
043662-1 ch02.F 8/2/02 2:24 PM Page 83
84
Part I ✦ Come See the Fireworks
Table 2-24 (continued)
Command Description Windows Macintosh
Align ➪ Justified Justifies the selected text Ctrl+Alt+ Command+
Shift+J Option+
Shift+J
Align ➪ Stretched Force-justifies the selected text Ctrl+Alt+ Command+
Shift+S Option+
Shift+S
Align ➪ Top Aligns vertically flowing text to n/a n/a
the top of the text block
Align ➪ Centered Vertically Aligns vertically flowing text to the n/a n/a
vertical center of the text block
Align ➪ Bottom Aligns vertically flowing text to n/a n/a
the bottom of the text block
Align ➪ Justified Vertically Justifies vertically flowing text n/a n/a
to the top and bottom of the
text block
Align ➪ Force-justifies vertically flowing n/a n/a
Stretched Vertically text to the top and bottom of the
text block
Editor Displays the Text Editor dialog box n/a n/a
Attach to Path Attaches the selected text block Ctrl+ Command+
to a selected path Shift+Y Shift+Y
Detach from Path Detaches the selected text block n/a n/a
from a path if it’s attached to one
Orientation ➪ Orients attached text so that the n/a n/a
Rotate Around Path bottom of each letter is closest to
the path
Orientation ➪ Vertical Orients attached text so that the n/a n/a
side of each letter is closest to
the path
Orientation ➪ Skews attached text vertically n/a n/a
Skew Vertical
Orientation ➪ Skews attached text horizontally n/a n/a
Skew Horizontal
Reverse Direction Reverses the direction of text n/a n/a
attached to a path
Convert to Paths Converts text objects into Ctrl+ Command+
vector objects Shift+P Shift+P
043662-1 ch02.F 8/2/02 2:24 PM Page 84
85
Chapter 2 ✦ Understanding the Interface
Command Description Windows Macintosh
Check Spelling Begins spell checking the Shift+F7 Shift+F7
current document
Spelling Setup Opens a dialog box to set n/a n/a
spell checking preferences
Commands menu
Commands enable the Fireworks user to extend the basic feature set; they are rela-
tively easy to create because they’re written in JavaScript. Table 2-25 details the
commands that are included with Fireworks.
Table 2-25
Commands Menu Commands
Command Description Windows Macintosh
Manage Saved Opens the Manage Saved n/a n/a
Commands Commands dialog box
Manage Extensions Loads the Extension Manager n/a n/a
to install, remove, or temporarily
disable extensions
Run Script Enables you to choose a scriptlet n/a n/a
for Fireworks to run
Creative ➪ Adds arrowheads to an open path n/a n/a
Add Arrowheads
Creative ➪ Creates a faux-wood picture frame n/a n/a
Add Picture Frame around the current document
Creative ➪ Converts the selection to grayscale n/a n/a
Convert to Grayscale
Creative ➪ Converts the selection n/a n/a
Convert to Sepia Tone to a sepia tint
Creative ➪ Fade Image Applies one of eight preset alpha n/a n/a
masks to your bitmap
Creative ➪ Adds depth and rotation to objects n/a n/a
Twist and Fade
Data-Driven Use an external XML file to insert n/a n/a
Graphics Wizard variables into batched file
processing
Continued
043662-1 ch02.F 8/2/02 2:24 PM Page 85
86
Part I ✦ Come See the Fireworks
Table 2-25 (continued)
Command Description Windows Macintosh
Document ➪ Distributes the selected objects in n/a n/a
Distribute to Layers your document so that each one
is on its own layer
Document ➪ Hides all layers except n/a n/a
Hide Other Layers the current layer
Document ➪ Locks all layers except n/a n/a
Lock Other Layers the current layer
Document ➪ Reverses the order of the n/a n/a
Reverse Frames frames in a document
Panel Layout Sets ➪ Arranges the floating panels n/a n/a
1024×768/1152×768/ to the right of the screen, sized
1280×1024/800×600/ for optimal viewing at various
Your Panel Layout Sets display resolutions, and lists
panel layout sets created with the
Commands ➪ Panel Layout Sets ➪
Save Panel Layout command
Panel Layout Sets ➪ Displays a dialog box where you n/a n/a
Save Panel Layout can name the current panel layout
and save it so that it appears under
Commands ➪ Panel Layout Sets
Reset Warning Dialogs Resets all Warning dialog boxes n/a n/a
that have a “Don’t show this again”
back to their default of appearing
Resize Selected Objects Resizes selected objects graphically n/a n/a
Web ➪ Create Creates a shared palette n/a n/a
Shared Palette from multiple files
Web ➪ Select Selects all hotspots or slices that n/a n/a
Blank ALT Tags do not have alt text specified
Web ➪ Set ALT Tags Displays a dialog box where you n/a n/a
can specify alt text for a document’s
hotspots and slices
Filters
A filter is a plug-in that extends the capabilities of a program. With Fireworks, filters
are primarily image filters and are, in most cases, the same plug-ins that are
designed for use in Photoshop. As you can see in Table 2-26, Fireworks comes with
043662-1 ch02.F 8/2/02 2:24 PM Page 86
87
Chapter 2 ✦ Understanding the Interface
four groups of its own filters, three Eye Candy 4000 filters, referred to as Eye Candy
4000 LE, plus Alien Skin Splat LE. Because Fireworks can read most Photoshop fil-
ters and plug-ins, you can greatly extend the available filters by assigning an addi-
tional Photoshop plug-ins folder in Fireworks Preferences.
Because all Fireworks filters are pixel-based image filters, any filter applied to a
vector object first converts it into a bitmap object. Many filters are also available in
the Effect section of the Property inspector as Live Effects, which work on both
bitmap and vector objects without reducing editability.
Table 2-26
Filters Menu Commands
Command Description Windows Macintosh
Repeat Filter Repeats the most Ctrl+Alt+ Command+
recently used Xtra Shift+X Option+
Shift+X
Adjust Color ➪ Autocorrects the selection’s levels n/a n/a
Auto Levels
Adjust Color ➪ Displays the Brightness/Contrast n/a n/a
Brightness/Contrast dialog box before adjusting the
selection’s brightness and/or
contrast levels
Adjust Color ➪ Curves Displays the Curves dialog box n/a n/a
before adjusting the selection’s
color curves
Adjust Color ➪ Displays the Hue/Saturation dialog n/a n/a
Hue/Saturation box before adjusting the selection’s
hue and saturation levels
Adjust Color ➪ Invert Changes each color in the selection Ctrl+Alt+ Command+
to its mathematical inverse Shift+I Option+Shift+I
Adjust Color ➪ Levels Displays the Levels dialog box n/a n/a
before adjusting the
selection’s levels
Blur ➪ Blur Blurs the selection n/a n/a
Blur ➪ Blur More Blurs the selection across a larger n/a n/a
radius than Blur
Blur ➪ Gaussian Blur Displays the Gaussian Blur dialog n/a n/a
box before blurring the selection
Continued
Caution
043662-1 ch02.F 8/2/02 2:24 PM Page 87