beginning iphone 3 development exploring the iphone sdk phần 6 pdf
Bạn đang xem bản rút gọn của tài liệu. Xem và tải ngay bản đầy đủ của tài liệu tại đây (2.19 MB, 58 trang )
CHAPTER 9: Navigation Controllers and Table Views264
}
- (void)viewDidUnload {
self.list = nil;
[childController release];
childController = nil;
}
- (void)dealloc {
[list release];
[childController release];
[super dealloc];
}
#pragma mark -
#pragma mark Table Data Source Methods
- (NSInteger)tableView:(UITableView *)tableView
numberOfRowsInSection:(NSInteger)section {
return [list count];
}
- (UITableViewCell *)tableView:(UITableView *)tableView
cellForRowAtIndexPath:(NSIndexPath *)indexPath {
static NSString * DisclosureButtonCellIdentifier =
@"DisclosureButtonCellIdentifier";
UITableViewCell *cell = [tableView dequeueReusableCellWithIdentifier:
DisclosureButtonCellIdentifier];
if (cell == nil) {
cell = [[[UITableViewCell alloc]
initWithStyle:UITableViewCellStyleDefault
reuseIdentifier: DisclosureButtonCellIdentifier] autorelease];
}
NSUInteger row = [indexPath row];
NSString *rowString = [list objectAtIndex:row];
cell.textLabel.text = rowString;
cell.accessoryType = UITableViewCellAccessoryDetailDisclosureButton;
[rowString release];
return cell;
}
#pragma mark -
#pragma mark Table Delegate Methods
- (void)tableView:(UITableView *)tableView
didSelectRowAtIndexPath:(NSIndexPath *)indexPath {
UIAlertView *alert = [[UIAlertView alloc] initWithTitle:
@"Hey, do you see the disclosure button?"
message:@"If you're trying to drill down, touch that instead"
delegate:nil
cancelButtonTitle:@"Won't happen again"
24594ch09.indd 264 6/23/09 11:45:28 AM
Download at Boykma.Com
CHAPTER 9: Navigation Controllers and Table Views
265
otherButtonTitles:nil];
[alert show];
[alert release];
}
- (void)tableView:(UITableView *)tableView
accessoryButtonTappedForRowWithIndexPath:(NSIndexPath *)indexPath {
if (childController == nil)
childController = [[DisclosureDetailController alloc]
initWithNibName:@"DisclosureDetail" bundle:nil];
childController.title = @"Disclosure Button Pressed";
NSUInteger row = [indexPath row];
NSString *selectedMovie = [list objectAtIndex:row];
NSString *detailMessage = [[NSString alloc]
initWithFormat:@"You pressed the disclosure button for %@.",
selectedMovie];
childController.message = detailMessage;
childController.title = selectedMovie;
[detailMessage release];
[self.navigationController pushViewController:childController
animated:YES];
}
@end
By now, you should be fairly comfortable with everything up to and including the three
datasource methods we just added. Let’s look at our two new delegate methods.
The first method, tableView:didSelectRowAtIndexPath:, which gets called when the row
is selected, puts up a polite little alert telling the user to tap the disclosure button instead of
selecting the row. If the user actually taps the detail disclosure button, the last of our new
delegate methods, tableView:accessoryButtonTappedForRowWithIndexPath:, is called.
Let’s look at this one a little more closely.
The first thing we do here is check the childController instance variable to see if it’s nil.
If it is, we have not yet allocated and initialized a new instance of DetailDisclosure
Controller
, so we do that next.
if (childController == nil)
childController = [[DisclosureDetailController alloc]
initWithNibName:@"DisclosureDetail" bundle:nil];
This gives us a new controller that we can push onto the navigation stack, just as we did
earlier in FirstLevelViewController. Before we push it onto the stack, though, we need
to give it some text to display.
childController.title = @"Disclosure Button Pressed";
24594ch09.indd 265 6/23/09 11:45:28 AM
Download at Boykma.Com
CHAPTER 9: Navigation Controllers and Table Views266
In this case, we set message to reflect the row whose disclosure button was tapped. We also
set the new view’s title based on the selected row.
NSUInteger row = [indexPath row];
NSString *selectedMovie = [list objectAtIndex:row];
NSString *detailMessage = [[NSString alloc]
initWithFormat:@"You pressed the disclosure button for %@.",
selectedMovie];
childController.message = detailMessage;
childController.title = selectedMovie;
[detailMessage release];
Then, finally, we push the detail view controller onto the navigation stack.
[self.navigationController pushViewController:childController
animated:YES];
And, with that, our first second-level controller is done, as is our detail controller. The
only remaining task is to create an instance of our second level controller and add it to
FirstLevelViewController’s controllers.
Single-click FirstLevelViewController.m, and insert the following code into the viewDidLoad
method:
- (void)viewDidLoad {
self.title = @"First Level";
NSMutableArray *array = [[NSMutableArray alloc] init];
// Disclosure Button
DisclosureButtonController *disclosureButtonController =
[[DisclosureButtonController alloc]
initWithStyle:UITableViewStylePlain];
disclosureButtonController.title = @"Disclosure Buttons";
disclosureButtonController.rowImage = [UIImage
imageNamed:@"disclosureButtonControllerIcon.png"];
[array addObject:disclosureButtonController];
[disclosureButtonController release];
self.controllers = array;
[array release];
[super viewDidLoad];
}
All that we’re doing is creating a new instance of DisclosureButtonController. We specify
UITableViewStylePlain to indicate that we want an indexed table, not a grouped table.
Next, we set the title and the image to one of the .png files we had you add to your project,
24594ch09.indd 266 6/23/09 11:45:28 AM
Download at Boykma.Com
CHAPTER 9: Navigation Controllers and Table Views
267
add the controller to the array, and release the controller. Up at the top of the file, you’ll need
to add one line of code to import the header class for our new file. Insert this line right above
the @implementation declaration:
#import "DisclosureButtonController.h"
Save everything, and try building. If everything went as planned, your project should com-
pile and then launch in the simulator. When it comes up, there should be just a single row
(see Figure 9-12).
If you touch the one row, it will take you down to the table view we just implemented (see
Figure 9-13).
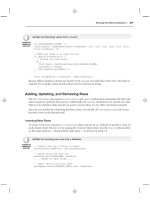
Notice that the title that we set for our controller is now displayed in the navigation bar, and
the title of the view controller we were previously at (First Level) is contained in a navigation
button. Tapping that button will take the user back up to the first level. Select any row in this
table, and you will get a gentle reminder that the detail disclosure button is there for drilling
down (see Figure 9-14).
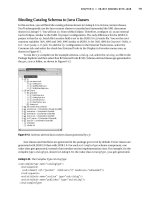
Figure 9-12. Our application
after adding the first of six
second-level controllers
Figure 9-13. The Disclosure
Buttons view
Figure 9-14. Selecting the row
does not drill down when there
is a detail disclosure button
visible.
24594ch09.indd 267 6/23/09 11:45:28 AM
Download at Boykma.Com
CHAPTER 9: Navigation Controllers and Table Views268
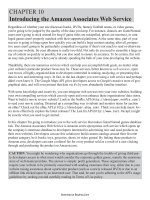
If you touch the detail disclosure button itself, you drill
down into another view. The new view (see Figure 9-15)
shows information that we passed into it. Even though this
is a simple example, the same basic technique is used any-
time you show a detail view.
Notice that when we drill down to the detail view, the title
again changes, as does the back button, which now takes us
to the previous view instead of the root view. That finishes
up the first view controller. Do you see now how the design
Apple used here with the navigation controller makes it
possible to build your application in small chunks? That’s
pretty cool, isn’t it?
Our Second Subcontroller:
The Checklist
The next second-level view we’re going to implement is
another table view, but this time, we’re going to use the
accessory icon to let the user select one and only one item from the list. We’ll use the acces-
sory icon to place a checkmark next to the currently selected row, and we’ll change the
selection when the user touches another row.
Since this view is a table view and it has no detail view, we don’t need a new nib, but we do
need to create another subclass of SecondLevelViewController. Select the Classes folder
in the Groups & Files pane in Xcode, and then press ⌘N or select New File. . . from the File
menu. Select Cocoa Touch Class, and then select Objective-C class and NSObject for Subclass
of. Click the Next button, and when prompted for a name, type CheckListController.m, and
make sure that the header file is created as well.
To present a checklist, we’re going to need a way to keep track of which row is currently
selected. We’ll declare an NSIndexPath property to track the last row selected. Single-click
CheckListController.h, and add the following code:
#import <Foundation/Foundation.h>
#import <UIKit/UIKit.h>
#import "SecondLevelViewController.h"
@interface CheckListController : NSObject {
@interface CheckListController : SecondLevelViewController {
NSArray *list;
NSIndexPath *lastIndexPath;
}
Figure 9-15. The detail view
24594ch09.indd 268 6/23/09 11:45:28 AM
Download at Boykma.Com
CHAPTER 9: Navigation Controllers and Table Views
269
@property (nonatomic, retain) NSArray *list;
@property (nonatomic, retain) NSIndexPath * lastIndexPath;
@end
Then switch over CheckListController.m and add the following code:
#import "CheckListController.h"
@implementation CheckListController
@synthesize list;
@synthesize lastIndexPath;
- (void)viewDidLoad {
NSArray *array = [[NSArray alloc] initWithObjects:@"Who Hash",
@"Bubba Gump Shrimp Étouffée", @"Who Pudding", @"Scooby Snacks",
@"Everlasting Gobstopper", @"Green Eggs and Ham", @"Soylent Green",
@"Hard Tack", @"Lembas Bread", @"Roast Beast", @"Blancmange", nil];
self.list = array;
[array release];
[super viewDidLoad];
}
- (void)viewDidUnload {
self.list = nil;
self.lastIndexPath = nil;
[super viewDidUnload];
}
- (void)dealloc {
[list release];
[lastIndexPath release];
[super dealloc];
}
#pragma mark -
#pragma mark Table Data Source Methods
- (NSInteger)tableView:(UITableView *)tableView
numberOfRowsInSection:(NSInteger)section {
return [list count];
}
- (UITableViewCell *)tableView:(UITableView *)tableView
cellForRowAtIndexPath:(NSIndexPath *)indexPath {
static NSString *CheckMarkCellIdentifier = @"CheckMarkCellIdentifier";
UITableViewCell *cell = [tableView dequeueReusableCellWithIdentifier:
CheckMarkCellIdentifier];
if (cell == nil) {
cell = [[[UITableViewCell alloc]
initWithStyle:UITableViewCellStyleDefault
24594ch09.indd 269 6/23/09 11:45:28 AM
Download at Boykma.Com
CHAPTER 9: Navigation Controllers and Table Views270
reuseIdentifier:CheckMarkCellIdentifier] autorelease];
}
NSUInteger row = [indexPath row];
NSUInteger oldRow = [lastIndexPath row];
cell.textLabel.text = [list objectAtIndex:row];
cell.accessoryType = (row == oldRow && lastIndexPath != nil) ?
UITableViewCellAccessoryCheckmark : UITableViewCellAccessoryNone;
return cell;
}
#pragma mark -
#pragma mark Table Delegate Methods
- (void)tableView:(UITableView *)tableView
didSelectRowAtIndexPath:(NSIndexPath *)indexPath {
int newRow = [indexPath row];
int oldRow = (lastIndexPath != nil) ? [lastIndexPath row] : -1;
if (newRow != oldRow) {
UITableViewCell *newCell = [tableView cellForRowAtIndexPath:
indexPath];
newCell.accessoryType = UITableViewCellAccessoryCheckmark;
UITableViewCell *oldCell = [tableView cellForRowAtIndexPath:
lastIndexPath];
oldCell.accessoryType = UITableViewCellAccessoryNone;
lastIndexPath = indexPath;
}
[tableView deselectRowAtIndexPath:indexPath animated:YES];
}
@end
Look first at the tableView:cellForRowAtIndexPath: method, because there are a few
new things in there worth noticing. The first several lines should be familiar to you:
static NSString *CheckMarkCellIdentifier = @"CheckMarkCellIdentifier";
UITableViewCell *cell = [tableView dequeueReusableCellWithIdentifier:
CheckMarkCellIdentifier];
if (cell == nil) {
cell = [[[UITableViewCell alloc]
initWithStyle:UITableViewCellStyleDefault
reuseIdentifier:CheckMarkCellIdentifier] autorelease];
}
24594ch09.indd 270 6/23/09 11:45:28 AM
Download at Boykma.Com
CHAPTER 9: Navigation Controllers and Table Views
271
Here’s where things get interesting, though. First, we extract the row from this cell and from
the current selection:
NSUInteger row = [indexPath row];
NSUInteger oldRow = [lastIndexPath row];
We grab the value for this row from our array and assign it to the cell’s title:
cell.textLabel.text = [list objectAtIndex:row];
Then, we set the accessory to show either a checkmark or nothing, depending on whether
the two rows are the same. In other words, if the row the table is requesting a cell for is the
currently selected row, we set the accessory icon to be a checkmark; otherwise, we set it to
be nothing. Notice that we also check lastIndexPath to make sure it’s not nil. We do this
because a nil lastIndexPath indicates no selection. However, calling the row method on a
nil object will return a 0, which is a valid row, but we don’t want to put a checkmark on row
0 when, in reality, there is no selection.
cell.accessoryType = (row == oldRow && lastIndexPath != nil) ?
UITableViewCellAccessoryCheckmark : UITableViewCellAccessoryNone;
After that, we just release the string we declared and return the cell.
[rowTitle release];
return cell;
Now skip down to the last method. You’ve seen the tableView:didSelectRowAtIndexPath:
method before, but we’re doing something new here. We grab not only the row that was just
selected but also the row that was previously selected.
int newRow = [indexPath row];
int oldRow = [lastIndexPath row];
We do this so if the new row and the old row are the same, we don’t bother making any
changes:
if (newRow != oldRow) {
Next, we grab the cell that was just selected and assign a checkmark as its accessory icon:
UITableViewCell *newCell = [tableView
cellForRowAtIndexPath:indexPath];
newCell.accessoryType = UITableViewCellAccessoryCheckmark;
24594ch09.indd 271 6/23/09 11:45:29 AM
Download at Boykma.Com
CHAPTER 9: Navigation Controllers and Table Views272
We then grab the previously selected cell, and we set its accessory icon to none:
UITableViewCell *oldCell = [tableView cellForRowAtIndexPath:
lastIndexPath];
oldCell.accessoryType = UITableViewCellAccessoryNone;
After that, we store the index path that was just selected in lastIndexPath, so we’ll have it
next time a row is selected:
lastIndexPath = indexPath;
}
When we’re all done, we tell the table view to deselect the row that was just selected,
because we don’t want the row to stay highlighted. We’ve already marked the row with a
checkmark; leaving it blue would just be a distraction.
[tableView deselectRowAtIndexPath:indexPath animated:YES];
}
Next, we just need to add an instance of this controller to FirstLevelViewController’s
controllers array. We do that by adding the following code to the viewDidLoad method in
FirstLevelViewController.m:
- (void)viewDidLoad {
self.title = @"First Level";
NSMutableArray *array = [[NSMutableArray alloc] init];
// Disclosure Button
DisclosureButtonController *disclosureButtonController =
[[DisclosureButtonController alloc]
initWithStyle:UITableViewStylePlain];
disclosureButtonController.title = @"Disclosure Buttons";
disclosureButtonController.rowImage = [UIImage imageNamed:
@"disclosureButtonControllerIcon.png"];
[array addObject:disclosureButtonController];
[disclosureButtonController release];
// Check List
CheckListController *checkListController = [[CheckListController alloc]
initWithStyle:UITableViewStylePlain];
checkListController.title = @"Check One";
checkListController.rowImage = [UIImage imageNamed:
@"checkmarkControllerIcon.png"];
[array addObject:checkListController];
[checkListController release];
24594ch09.indd 272 6/23/09 11:45:29 AM
Download at Boykma.Com
CHAPTER 9: Navigation Controllers and Table Views
273
self.controllers = array;
[array release];
[super viewDidLoad];
}
Finally, you’ll need to import the new header file, so add this line just after all the other
#import statements, toward the top of the file:
#import "CheckListController.h"
Well, what are you waiting for? Save everything, compile, and run. If everything went
smoothly, the application launched again in the simulator, and there was much rejoicing.
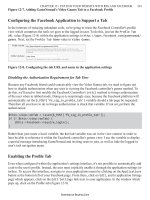
This time there will be two rows (see Figure 9-16).
If you touch the Check One row, it will take you down to the view controller we just
implemented (see Figure 9-17). When it first comes up, no rows will be selected and no
checkmarks will be visible. If you tap a row, a checkmark will appear. If you then tap a
different row, the checkmark will switch to the new row. Huzzah!
Figure 9-16. Two second-level
controllers, two rows. What a
coincidence!
Figure 9-17. The checklist view.
Note that only a single item can
be checked at a time. Soylent
Green, anyone?
24594ch09.indd 273 6/23/09 11:45:29 AM
Download at Boykma.Com
CHAPTER 9: Navigation Controllers and Table Views274
Our Third Subcontroller: Controls on
Table Rows
In the previous chapter, we showed you how to add subviews to a table view cell to custom-
ize its appearance, but we didn’t put any active controls into the content view, only labels.
It’s time to try adding controls to a table view cell. In our example, we’ll add a button to each
row, but the same technique will work with most controls. We’ll add the control to the acces-
sory pane this time, which means that when tapping the accessory pane, the user will tap
the button, similar to the way they would tap a disclosure button.
To add another row to our root view’s table, we need another controller. You know the
drill: select the Classes folder in the Groups & Files pane in Xcode, and then press ⌘N or
select New File. . . from the File menu. Select Cocoa Touch Class, select Objective-C class,
and select Objective-C class and NSObject for Subclass of. When prompted for a name, type
RowControlsController.m, and make sure the checkbox for creating the header file is checked.
Just as with the last section, this controller can be completely implemented with a single
table view; no nib file is necessary.
Single-click RowControlsController.h, and add the following code:
#import <Foundation/Foundation.h>
#import <UIKit/UIKit.h>
#import "SecondLevelViewController.h"
@interface RowControlsController : NSObject {
@interface RowControlsController : SecondLevelViewController {
NSArray *list;
}
@property (nonatomic, retain) NSArray *list;
- (IBAction)buttonTapped:(id)sender;
@end
Not much there, huh? We change the parent class, create an array to hold our table data,
then we define a property for that array, and declare an action method that will get called
when the row buttons are pressed.
NOTE
Strictly speaking, we don’t need to make this method an action method, since we won’t be triggering it
from controls in a nib file. Since it is an action method and will be called by a control, however, it’s still a
good idea to use the IBAction keyword.
24594ch09.indd 274 6/23/09 11:45:29 AM
Download at Boykma.Com
CHAPTER 9: Navigation Controllers and Table Views
275
Switch over to RowControlsController.m, and make the following changes:
#import "RowControlsController.h"
@implementation RowControlsController
@synthesize list;
- (IBAction)buttonTapped:(id)sender
{
UIButton *senderButton = (UIButton *)sender;
UITableViewCell *buttonCell =
(UITableViewCell *)[senderButton superview];
NSUInteger buttonRow = [[self.tableView
indexPathForCell:buttonCell] row];
NSString *buttonTitle = [list objectAtIndex:buttonRow];
UIAlertView *alert = [[UIAlertView alloc]
initWithTitle:@"You tapped the button"
message:[NSString stringWithFormat:
@"You tapped the button for %@", buttonTitle]
delegate:nil
cancelButtonTitle:@"OK"
otherButtonTitles:nil];
[alert show];
[alert release];
}
- (void)viewDidLoad {
NSArray *array = [[NSArray alloc] initWithObjects:@"R2-D2",
@"C3PO", @"Tik-Tok", @"Robby", @"Rosie", @"Uniblab",
@"Bender", @"Marvin", @"Lt. Commander Data",
@"Evil Brother Lore", @"Optimus Prime", @"Tobor", @"HAL",
@"Orgasmatron", nil];
self.list = array;
[array release];
[super viewDidLoad];
}
- (void)viewDidUnload {
self.list = nil;
[super viewDidUnload];
}
- (void)dealloc {
[list release];
[super dealloc];
}
#pragma mark -
#pragma mark Table Data Source Methods
- (NSInteger)tableView:(UITableView *)tableView
numberOfRowsInSection:(NSInteger)section {
return [list count];
}
24594ch09.indd 275 6/23/09 11:45:29 AM
Download at Boykma.Com
CHAPTER 9: Navigation Controllers and Table Views276
- (UITableViewCell *)tableView:(UITableView *)tableView
cellForRowAtIndexPath:(NSIndexPath *)indexPath {
static NSString *ControlRowIdentifier = @"ControlRowIdentifier";
UITableViewCell *cell = [tableView
dequeueReusableCellWithIdentifier:ControlRowIdentifier];
if (cell == nil) {
cell = [[[UITableViewCell alloc]
initWithStyle:UITableViewCellStyleDefault
reuseIdentifier:ControlRowIdentifier] autorelease];
UIImage *buttonUpImage = [UIImage imageNamed:@"button_up.png"];
UIImage *buttonDownImage = [UIImage imageNamed:@"button_down.png"];
UIButton *button = [UIButton buttonWithType:UIButtonTypeCustom];
button.frame = CGRectMake(0.0, 0.0, buttonUpImage.size.width,
buttonUpImage.size.height);
[button setBackgroundImage:buttonUpImage
forState:UIControlStateNormal];
[button setBackgroundImage:buttonDownImage
forState:UIControlStateHighlighted];
[button setTitle:@"Tap" forState:UIControlStateNormal];
[button addTarget:self action:@selector(buttonTapped:)
forControlEvents:UIControlEventTouchUpInside];
cell.accessoryView = button;
}
NSUInteger row = [indexPath row];
NSString *rowTitle = [list objectAtIndex:row];
cell.textLabel.text = rowTitle;
return cell;
}
#pragma mark -
#pragma mark Table Delegate Methods
- (void)tableView:(UITableView *)tableView
didSelectRowAtIndexPath:(NSIndexPath *)indexPath {
NSUInteger row = [indexPath row];
NSString *rowTitle = [list objectAtIndex:row];
UIAlertView *alert = [[UIAlertView alloc]
initWithTitle:@"You tapped the row."
message:[NSString
stringWithFormat:@"You tapped %@.", rowTitle]
delegate:nil
cancelButtonTitle:@"OK"
otherButtonTitles:nil];
[alert show];
[alert release];
24594ch09.indd 276 6/23/09 11:45:29 AM
Download at Boykma.Com
CHAPTER 9: Navigation Controllers and Table Views
277
[tableView deselectRowAtIndexPath:indexPath animated:YES];
}
@end
Let’s look first at our new action method. The first thing we do is declare a new UIButton
instance and set it to sender. This is just so we don’t have to cast sender multiple times
throughout our method:
UIButton *senderButton = (UIButton *)sender;
Next, we get the button’s superview, which is the table view cell for the row it’s in, and we
use that to determine the row that was pressed and to retrieve the title for that row:
UITableViewCell *buttonCell =
(UITableViewCell *)[senderButton superview];
NSUInteger buttonRow = [[self.tableView
indexPathForCell:buttonCell] row];
NSString *buttonTitle = [list objectAtIndex:buttonRow];
Then we show an alert, telling the user that they pressed the button:
UIAlertView *alert = [[UIAlertView alloc]
initWithTitle:@"You tapped the button"
message:[NSString stringWithFormat:
@"You tapped the button for %@", buttonTitle]
delegate:nil
cancelButtonTitle:@"OK"
otherButtonTitles:nil];
[alert show];
[alert release];
Everything from there to tableView:cellForRowAtIndexPath: should be familiar to you,
so skip down to that method, which is where we set up the table view cell with the button.
The method starts as usual. We declare an identifier and then use it to request a reusable
cell:
static NSString *ControlRowIdentifier = @"ControlRowIdentifier";
UITableViewCell *cell = [tableView
dequeueReusableCellWithIdentifier:ControlRowIdentifier];
If there are no reusable cells, we create one:
if (cell == nil) {
cell = [[[UITableViewCell alloc]
initWithStyle:UITableViewCellStyleDefault
reuseIdentifier:ControlRowIdentifier] autorelease];
24594ch09.indd 277 6/23/09 11:45:29 AM
Download at Boykma.Com
CHAPTER 9: Navigation Controllers and Table Views278
To create the button, we’re going to load in two of the images that were in the images folder
you imported earlier. One will represent the button in the normal state, the other will repre-
sent the button in its highlighted state or, in other words, when the button is being tapped:
UIImage *buttonUpImage = [UIImage imageNamed:@"button_up.png"];
UIImage *buttonDownImage = [UIImage imageNamed:@"button_down.png"];
Next, we create a button. Because the buttonType property of UIButton is declared read-
only, we have to create the button using the factory method buttonWithType:. We can’t
create it using alloc and init, because we wouldn’t be able to change the button’s type to
UIButtonTypeCustom, which we need to do in order to use the custom button images:
UIButton *button = [UIButton buttonWithType:UIButtonTypeCustom];
Next, we set the button’s size to match the images, assign the images for the two states, and
give the button a title:
button.frame = CGRectMake(0.0, 0.0, buttonUpImage.size.width,
buttonUpImage.size.height);
[button setBackgroundImage:buttonUpImage
forState:UIControlStateNormal];
[button setBackgroundImage:buttonDownImage
forState:UIControlStateHighlighted];
[button setTitle:@"Tap" forState:UIControlStateNormal];
Finally, we tell the button to call our action method on the Touch Up Inside event and assign
it to the cell’s accessory view:
[button addTarget:self action:@selector(buttonTapped:)
forControlEvents:UIControlEventTouchUpInside];
cell.accessoryView = button;
Everything else in the method is just like we’ve done it in the past.
The last method we implemented is tableView:didSelectRowAtIndexPath:, which, as
you know by now, is the delegate method that gets called after the user selects a row. All we
do here is find out which row was selected and grab the appropriate title from our array:
NSUInteger row = [indexPath row];
NSString *rowTitle = [list objectAtIndex:row];
Then we create an another alert to inform the user that they tapped the row, but not the
button:
UIAlertView *alert = [[UIAlertView alloc]
initWithTitle:@"You tapped the row."
message:[NSString
stringWithFormat:@"You tapped %@.", rowTitle]
24594ch09.indd 278 6/23/09 11:45:29 AM
Download at Boykma.Com
CHAPTER 9: Navigation Controllers and Table Views
279
delegate:nil
cancelButtonTitle:@"OK"
otherButtonTitles:nil];
[alert show];
[alert release];
[tableView deselectRowAtIndexPath:indexPath animated:YES];
Now, all we have to do is add this controller to the array in FirstLevelViewController.
Single-click FirstLevelViewController.m, and add the following code to viewDidLoad:
- (void)viewDidLoad {
self.title = @"Root Level";
NSMutableArray *array = [[NSMutableArray alloc] init];
// Disclosure Button
DisclosureButtonController *disclosureButtonController =
[[DisclosureButtonController alloc]
initWithStyle:UITableViewStylePlain];
disclosureButtonController.title = @"Disclosure Buttons";
disclosureButtonController.rowImage = [UIImage
imageNamed:@"disclosureButtonControllerIcon.png"];
[array addObject:disclosureButtonController];
[disclosureButtonController release];
// Check List
CheckListController *checkListController = [[CheckListController alloc]
initWithStyle:UITableViewStylePlain];
checkListController.title = @"Check One";
checkListController.rowImage = [UIImage
imageNamed:@"checkmarkControllerIcon.png"];
[array addObject:checkListController];
[checkListController release];
// Table Row Controls
RowControlsController *rowControlsController =
[[RowControlsController alloc]
initWithStyle:UITableViewStylePlain];
rowControlsController.title = @"Row Controls";
rowControlsController.rowImage = [UIImage imageNamed:
@"rowControlsIcon.png"];
[array addObject:rowControlsController];
[rowControlsController release];
self.controllers = array;
[array release];
[super viewDidLoad];
}
24594ch09.indd 279 6/23/09 11:45:29 AM
Download at Boykma.Com
CHAPTER 9: Navigation Controllers and Table Views280
In order for this code to compile, we have to also import the header file for the RowControls
Controller
class, so add the following line of code just before the @implementation line in
the same file:
#import "RowControlsController.h"
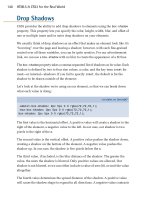
Save everything, and compile it. This time, assuming everything went OK, you’ll get yet
another row when your application launches (see Figure 9-18).
If you tap this new row, it will take you down to a new list where every row has a button
control on the right side of the row. Tapping either the button or the row will show an alert
telling you which one you tapped (Figure 9-19).
Tapping a row anywhere but on its switch will display an alert telling you whether the switch
for that row is turned on or off. At this point, you should be getting pretty comfortable with
how this all works, so let’s try a slightly more difficult case, shall we? Let’s look at how to
allow the user to reorder the rows in a table.
Figure 9-18. The row controls
controller added to the root
level controller
Figure 9-19. The table with
buttons in the accessory view
24594ch09.indd 280 6/23/09 11:45:29 AM
Download at Boykma.Com
CHAPTER 9: Navigation Controllers and Table Views
281
Our Fourth Subcontroller: Moveable Rows
How you doing? Hanging in there? This chapter is very long, and you’ve already accom-
plished a lot. Why not take a break, and grab a Fresca and a Pastel de Belém? We’ll do the
same. When you’re refreshed and ready to move on, we’ll build another second-level view
controller and add it to our application.
Editing Mode
Moving and deleting rows, as well as inserting rows at a specific spot in the table are all tasks
that can be implemented fairly easily. All three are done by turning on something called
editing mode, which is done using the setEditing:animated: method on the table view.
This method takes two Booleans. The first indicates whether you are turning on or off edit-
ing mode, and the second indicates whether the table should animate the transition. If you
set editing to the mode it’s already in (in other words, turning it on when it’s already on or off
when it’s already off), the transition will not be animated regardless of what you specify in
the second parameter.
In the follow-on controller, we’ll again use editing mode, this time to allow the user to delete
rows from the table. Allowing row reordering is the easiest of the editing mode tasks, so we’ll
tackle it first.
Once editing mode is turned on, a number of new delegate methods come into play. The
table view uses them to ask if a certain row can be moved or edited and again to notify you
if the user actually does move or edit a specific row. It sounds more complex than it is. Let’s
see it in action.
Creating a New Second-Level Controller
Because we don’t have to display a detail view, the Move Me view controller can be imple-
mented without a nib and with just a single controller class. So, select the Classes folder
in the Groups & Files pane in Xcode, and then press ⌘N or select New File… from the File
menu. Select Cocoa Touch Class, select Objective-C class and NSObject for Subclass of. When
prompted for a name, type MoveMeController.m, and create the header file as well.
In our header file, we need two things. First, we need a mutable array to hold our data and
keep track of the order of the rows. It has to be mutable because we need to be able to
move items around as we get notified of moves. We also need an action method to toggle
edit mode on and off. The action method will be called by a navigation bar button that we
will create. Single-click MoveMeController.h, and make the following changes:
24594ch09.indd 281 6/23/09 11:45:29 AM
Download at Boykma.Com
CHAPTER 9: Navigation Controllers and Table Views282
#import <Foundation/Foundation.h>
#import <UIKit/UIKit.h>
#import "SecondLevelViewController.h"
@interface MoveMeController : NSObject {
@interface MoveMeController : SecondLevelViewController {
NSMutableArray *list;
}
@property (nonatomic, retain) NSMutableArray *list;
-(IBAction)toggleMove;
@end
Now, switch over to MoveMeController.m and add the following code:
#import "MoveMeController.h"
@implementation MoveMeController
@synthesize list;
-(IBAction)toggleMove{
[self.tableView setEditing:!self.tableView.editing animated:YES];
if (self.tableView.editing)
[self.navigationItem.rightBarButtonItem setTitle:@"Done"];
else
[self.navigationItem.rightBarButtonItem setTitle:@"Move"];
}
- (void)dealloc {
[list release];
[super dealloc];
}
- (void)viewDidLoad {
if (list == nil)
{
NSMutableArray *array = [[NSMutableArray alloc] initWithObjects:
@"Eeny", @"Meeny", @"Miney", @"Moe", @"Catch", @"A",
@"Tiger", @"By", @"The", @"Toe", nil];
self.list = array;
[array release];
}
UIBarButtonItem *moveButton = [[UIBarButtonItem alloc]
initWithTitle:@"Move"
style:UIBarButtonItemStyleBordered
target:self
action:@selector(toggleMove)];
self.navigationItem.rightBarButtonItem = moveButton;
[moveButton release];
[super viewDidLoad];
24594ch09.indd 282 6/23/09 11:45:29 AM
Download at Boykma.Com
CHAPTER 9: Navigation Controllers and Table Views
283
}
#pragma mark -
#pragma mark Table Data Source Methods
- (NSInteger)tableView:(UITableView *)tableView
numberOfRowsInSection:(NSInteger)section {
return [list count];
}
- (UITableViewCell *)tableView:(UITableView *)tableView
cellForRowAtIndexPath:(NSIndexPath *)indexPath {
static NSString *MoveMeCellIdentifier = @"MoveMeCellIdentifier";
UITableViewCell *cell = [tableView
dequeueReusableCellWithIdentifier:MoveMeCellIdentifier];
if (cell == nil) {
cell = [[[UITableViewCell alloc]
initWithStyle:UITableViewCellStyleDefault
reuseIdentifier:MoveMeCellIdentifier] autorelease];
cell.showsReorderControl = YES;
}
NSUInteger row = [indexPath row];
cell.textLabel.text = [list objectAtIndex:row];
return cell;
}
- (UITableViewCellEditingStyle)tableView:(UITableView *)tableView
editingStyleForRowAtIndexPath:(NSIndexPath *)indexPath {
return UITableViewCellEditingStyleNone;
}
- (BOOL)tableView:(UITableView *)tableView
canMoveRowAtIndexPath:(NSIndexPath *)indexPath {
return YES;
}
- (void)tableView:(UITableView *)tableView
moveRowAtIndexPath:(NSIndexPath *)fromIndexPath
toIndexPath:(NSIndexPath *)toIndexPath {
NSUInteger fromRow = [fromIndexPath row];
NSUInteger toRow = [toIndexPath row];
id object = [[list objectAtIndex:fromRow] retain];
[list removeObjectAtIndex:fromRow];
[list insertObject:object atIndex:toRow];
[object release];
}
@end
24594ch09.indd 283 6/23/09 11:45:29 AM
Download at Boykma.Com
CHAPTER 9: Navigation Controllers and Table Views284
Let’s take this one step at a time. The first code we added was the implementation of our
action method:
-(IBAction)toggleMove{
[self.tableView setEditing:!self.tableView.editing animated:YES];
if (self.tableView.editing)
[self.navigationItem.rightBarButtonItem setTitle:@"Done"];
else
[self.navigationItem.rightBarButtonItem setTitle:@"Move"];
}
All that we’re doing here is toggling edit mode and then setting the button’s title to an
appropriate value. Easy enough, right?
Then we have a standard dealloc method, but no viewDidUnload method. That’s inten-
tional. We have no outlets, and if we were to flush our list array, we would lose any
reordering that the user had done when the view gets flushed, which we don’t want.
Therefore, since we have nothing to do in the viewDidUnload method, we don’t bother to
override it.
The next method we touched is viewDidLoad. The first part of that method doesn’t do any-
thing you haven’t seen before. It checks to see if list is nil, and if it is (meaning this is the
first time this method has been called), it creates a mutable array, filled with values, so our
table has some data to show. After that, though, there is something new.
UIBarButtonItem *moveButton = [[UIBarButtonItem alloc]
initWithTitle:@"Move"
style:UIBarButtonItemStyleBordered
target:self
action:@selector(toggleMove)];
self.navigationItem.rightBarButtonItem = moveButton;
[moveButton release];
Here, we’re creating a button bar item, which is a button that will sit on the navigation bar.
We give it a title of Move and specify a constant, UIBarButtonItemStyleBordered, to indi-
cate that we want a standard bordered bar button. The last two arguments, target and
action, tell the button what to do when it is tapped. By passing self as the target and giv-
ing it a selector to the toggleMove method as the action, we are telling the button to call
our toggleMove method whenever the button is tapped. As a result, anytime the user taps
this button, editing mode will be toggled. After we create the button, we add it to the right
side of the navigation bar, and then release it.
Now, skip down to the tableView:cellForRowAtIndexPath: method we just added. Did
you notice this new line of code?
24594ch09.indd 284 6/23/09 11:45:30 AM
Download at Boykma.Com
CHAPTER 9: Navigation Controllers and Table Views
285
cell.showsReorderControl = YES;
Standard accessory icons can be specified by setting the accessoryType property of the
cell. But, the reorder control is not a standard accessory icon: it’s a special case that’s shown
only when the table is in edit mode. To enable the reorder control, we have to set a property
on the cell itself. Note, though, that setting this property to YES doesn’t actually display the
reorder control until the table gets put into edit mode. Everything else in this method is stuff
we’ve done before.
The next new method is short but important. In our table view, we want to be able to reor-
der the rows, but we don’t want the user to be able to delete or insert rows. As a result, we
implement the method tableView:editingStyleForRowAtIndexPath:. This method
allows the table view to ask if a specific row can be deleted or if a new row can be inserted at
a specific spot. By returning UITableViewCellEditingStyleNone for each row, we are indi-
cating that we don’t support inserts or deletes for any row.
Next comes the method tableView:canMoveRowAtIndexPath:. This method gets called
for each row, and it gives you the chance to disallow the movement of specific rows. If you
return NO from this method for any row, the reorder control will not be shown for that row,
and the user will be unable to move it from its current position. We want to allow full reor-
dering, so we just return YES for every row.
The last method, tableView:moveRowAtIndexPath:fromIndexPath:, is the method that
will actually get called when the user moves a row. The two parameters besides tableView
are both NSIndexPath instances that identify the row that was moved and the row’s new
position. The table view has already moved the rows in the table so the user is seeing the
right thing, but we need to update our data model to keep the two in sync and avoid caus-
ing display problems.
First, we retrieve the row that needs to be moved. Then, we retrieve the row’s new position.
NSUInteger fromRow = [fromIndexPath row];
NSUInteger toRow = [toIndexPath row];
We now need to remove the specified object from the array and reinsert it at its new loca-
tion. But before we do that, we retrieve a pointer to the about-to-be-moved object and
retain it so that the object doesn’t get released when we remove it from the array. If the array
is the only object that has retained the object we’re removing (and in our case, it is), remov-
ing the selected object from the array will cause its retain count to drop to 0, meaning it will
probably disappear on us. By retaining it first, we prevent that from happening.
id object = [[list objectAtIndex:fromRow] retain];
[list removeObjectAtIndex:fromRow];
24594ch09.indd 285 6/23/09 11:45:30 AM
Download at Boykma.Com
CHAPTER 9: Navigation Controllers and Table Views286
After we’ve removed it, we need to reinsert it into the specified new location:
[list insertObject:object atIndex:toRow];
And, finally, because we’ve retained it, we need to release it to avoid leaking memory:
[object release];
Well, there you have it. We’ve implemented a table that allows reordering of rows. Now, we
just need to add an instance of this new class to FirstLevelViewController’s array of con-
trollers. You’re probably comfortable doing this by now, but we’ll walk you through it just to
keep you company.
In FirstLevelViewController.m, import the new view’s header file by adding the following line
of code just before the @implementation declaration:
#import "MoveMeController.h"
Now, add the following code to the viewDidLoad method in the same file:
- (void)viewDidLoad {
self.title = @"First Level";
NSMutableArray *array = [[NSMutableArray alloc] init];
// Disclosure Button
DisclosureButtonController *disclosureButtonController =
[[DisclosureButtonController alloc]
initWithStyle:UITableViewStylePlain];
disclosureButtonController.title = @"Disclosure Buttons";
disclosureButtonController.rowImage = [UIImage
imageNamed:@"disclosureButtonControllerIcon.png"];
[array addObject:disclosureButtonController];
[disclosureButtonController release];
// Check List
CheckListController *checkListController = [[CheckListController alloc]
initWithStyle:UITableViewStylePlain];
checkListController.title = @"Check One";
checkListController.rowImage = [UIImage
imageNamed:@"checkmarkControllerIcon.png"];
[array addObject:checkListController];
[checkListController release];
// Table Row Controls
RowControlsController *rowControlsController =
[[RowControlsController alloc]
initWithStyle:UITableViewStylePlain];
24594ch09.indd 286 6/23/09 11:45:30 AM
Download at Boykma.Com
CHAPTER 9: Navigation Controllers and Table Views
287
rowControlsController.title = @"Row Controls";
rowControlsController.rowImage = [UIImage imageNamed:
@"rowControlsIcon.png"];
[array addObject:rowControlsController];
[rowControlsController release];
// Move Me
MoveMeController *moveMeController = [[MoveMeController alloc]
initWithStyle:UITableViewStylePlain];
moveMeController.title = @"Move Me";
moveMeController.rowImage = [UIImage imageNamed:@"moveMeIcon.png"];
[array addObject:moveMeController];
[moveMeController release];
self.controllers = array;
[array release];
[super viewDidLoad];
}
OK, let’s go ahead and compile this bad boy and see what
shakes out. If everything went smoothly, our application
will launch in the simulator with (count ’em) four rows in the
root-level table. If you click the new one, called Move Me, it’ll
take you down to a list of rows. If you want to try moving
the rows, click the Move button, and the reorder controls
should appear (see Figure 9-20).
If you tap in the reorder control and then drag, the row
should move as you drag, as in Figure 9-6. Move the row as
you like. The row should settle into its new position nicely.
You can even navigate back up to the top level and come
back down, and your rows will be right where you left them.
If you quit and come back in, they will get restored, but
don’t worry; in a few chapters, we’ll teach you how to save
and restore data.
NOTE
If you find you have a bit of trouble making contact with the move control, don’t panic. If you are very
careful to actually click the pixels of the move control, you should be able to experience moving goodness.
The difficulty here is that you are interfacing with the simulator using a single-pixel hot-spot cursor. If
you downloaded the application onto your iPhone or iPod touch (which you can’t do until you are accepted
into one of Apple’s for-pay iPhone Developer Programs), you’d be using your big, fat fingers, which, pre-
sumably, are several pixels wide and will have no trouble making contact with the move control.
Figure 9-20. The Move Me view
controller when you first drill
down
24594ch09.indd 287 6/23/09 11:45:30 AM
Download at Boykma.Com
CHAPTER 9: Navigation Controllers and Table Views288
In case you hadn’t noticed, this chapter is a bit of a marathon. If you’re feeling a little over-
whelmed, this is probably a good time to take a break. There’s a lot of stuff in this chapter
to absorb, but it’s important. The vast majority of iPhone applications will use table views
in some respect. When you’re ready to move on, we’ll look at another use of edit mode. This
time, we’ll let the user delete our precious rows. Gasp!
Our Fifth Subcontroller: Deletable Rows
Letting users delete rows isn’t really significantly harder than letting them move rows. Let’s
take a look at that process. Instead of creating an array from a hard-coded list of objects,
we’re going to load a property list file this time, just to save some typing. You can grab the
file called computers.plist out of the 09 Nav folder in the projects archive that accompanies
this book and add it to the Resources folder of your Xcode project.
Select the Classes folder in the Groups & Files pane in Xcode, and then press ⌘N or select
New File… from the File menu. Select Cocoa Touch Class, select Objective-C class and
NSObject for Subclass of. When prompted for a name, this time type DeleteMeController.m.
Once you’ve got your new files, let’s start by editing DeleteMeController.h. The changes we’re
going to make there should look familiar, as they’re nearly identical to the ones we made in
the last view controller we built. Go ahead and make these changes now:
#import <Foundation/Foundation.h>
#import <UIKit/UIKit.h>
#import "SecondLevelViewController.h"
@interface DeleteMeController : NSObject {
@interface DeleteMeController : SecondLevelViewController {
NSMutableArray *list;
}
@property (nonatomic, retain) NSMutableArray *list;
-(IBAction)toggleEdit:(id)sender;
@end
No surprises here, right? We’re changing the superclass from NSObject to Second
LevelViewController
. After that, we declare a mutable array to hold our data and an
action method to toggle edit mode. In the last controller we built, we used edit mode to
let the users reorder rows. In this version, edit mode will be used to let them delete rows.
You can actually combine both in the same table if you like. We separated them so the con-
cepts would be a bit easier to follow, but the delete and reorder operations do play nicely
together. A row that can be reordered will display the reorder icon anytime that the table is
in edit mode. When you tap the red circular icon on the left side of the row (see Figure 9-7),
the Delete button will pop up, obscuring the reorder icon but only temporarily.
24594ch09.indd 288 6/23/09 11:45:30 AM
Download at Boykma.Com