Microsoft Press mcts training kit 70 - 648 server virtualization phần 9 docx
Bạn đang xem bản rút gọn của tài liệu. Xem và tải ngay bản đầy đủ của tài liệu tại đây (1.55 MB, 65 trang )
498 CHAPTER 8 Securing Hosts and Virtual Machines
3. Click New User Role in the Actions pane. This launches the Create User Role Wizard.
Type Library Administrators, type a short description, and select Delegated
Administrator from the drop-down list under User Role Profile. Click Next.
4. Click Add, type Library, and click Check Names and then OK. Click Next.
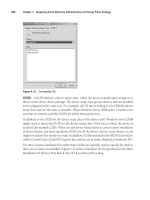
5. On the Select Scope page, select All Libraries and click Next (see Figure 8-28). As you
can see, this page lets you determine the scope of delegation. By selecting All Libraries,
you grant access to Library Stores only. Click Create to generate the new role.
FIGURE 8-28 Selecting the scope of delegation
Your new role has been created and is now available in SCVMM. Now make sure the
Library Administrators can log on to the remote server.
1. Return to Server Manager, which should be open in the Task Bar.
2. Click Server Manager (SCVMM01) to view the Server Manager Home Page.
3. Click Configure Remote Desktop and then click Select Users.
4. Click Add, type Library, click Check Names, and then click OK three times.
Your computer is ready for delegation.
Lesson 2: Securing the Virtual Environment CHAPTER 8 499
exerc ise 3 View the Results of a Role Delegation
In this exercise you will log on as a delegated administrator and view the access this grants
you. Perform this exercise on SCVMM01 and log on with the Terry Adams account.
1. Log on to SCVMM01 with the Terry Adams account. Launch the SCVMM Administrator
Console. You can double-click the shortcut on the desktop or click Start, click All
Programs, click Microsoft System Center, click Virtual Machine Manager 2008, and
then click the Virtual Machine Manager Administrator Console shortcut. This opens the
Connect To Server window.
2. Localhost:8100 is already listed and Make This Server My Default is selected.
Click Connect.
3. The console opens in the Overview and is focused on the Hosts view. Note that you do
not see any hosts, but you have full access to the Libraries (see Figure 8-29).
FIGURE 8-29 Viewing a delegated console
4. Change to Virtual Machines view. Notice that you do not have access to this view,
either. However, when you change to Library View, you’ll notice that you have full
access to all Library resources. You can manage resources, deploy VMs, and perform
any task that is tied to an SCVMM Library.
500 CHAPTER 8 Securing Hosts and Virtual Machines
5. Change to Administration view. Notice that you have access to some items in
Administration view—even the ability to create new user roles. However, if you create
a new delegated administration user role, you will find that the only thing you can
delegate is Libraries (see Figure 8-30). Explore the console thoroughly to view what can
be done as a Library—only administrator.
FIGURE 8-30 Delegated administrators only have control over their own delegation scope.
Log off when your tour is complete.
Lesson 2: Securing the Virtual Environment CHAPTER 8 501
Quick Check
1. When can you use Authorization Manager (AzMan)?
2. What are the three main roles that can be defined within SCVMM?
3. What is the required infrastructure to put OVMST in place?
Quick Check Answers
1. AzMan is only available on full installations of Windows Server 2008 and is
launched by typing AzMan.msc at the prompt in the Start menu.
2. The three main roles in SCVMM are:
n
Full resource pool administrator The default administrator role in SCVMM.
n
Delegated administrator Supports the delegation of host groups and/or libraries.
n
Virtual machine user A role defined by the Self-Service Portal.
3. The requirements for the OVMST are:
n
The tool itself, which must be downloaded
n
SCVMM 2007 or 2008
n
Windows Server Update Services version 3.0 or 3.0 SP1 or System Center
Configuration Manager
n
Optionally, a dedicated servicing host
502 CHAPTER 8 Securing Hosts and Virtual Machines
Case Scenario: Planning a Resource Pool
Security Strategy
In the following case scenarios, you will apply what you’ve learned about securing hosts and
virtual machines. You can find answers to these questions in the “Answers” section on the
companion CD which accompanies this book.
You are the resource pool administrator for Lucerne Publishing. The Lucerne resource pool
contains 12 main VMs in production running on 3 hosts. All hosts are managed with SCVMM
and all hosts are running Hyper-V only. One new host has been brought in to support
better levels of high availability in your machines. Lucerne also runs test and development
environments on machines in other host groups.
Recently, one of your IT managers assisted a presentation on virtualization. The speaker
talked a lot about security and the potential threats organizations face when working with
virtual machines in production. Now the manager is all fired up and wants some answers to
some tough questions. He has downloaded the Hyper-V Security Guide and is asking what
kind of security has been implemented in your resource pool. He insists that it is necessary
to document the security practices you put in place in the resource pool. Specifically, the
manager wants answers to the following questions:
1. How is the resource pool configured and which components are running in it?
2. How do the resource pool components interact with each other?
3. How are the virtual machines running on the resource pool secured?
Suggested Practices
To help you successfully master the exam objectives presented in this chapter, complete the
following tasks.
Hyper-V Security
n
Practice 1 Take the time to work with the various virtual network adapters available
in Hyper-V. Connect different virtual machines to each adapter type in an effort to
isolate their network traffic. This will be useful practice for the exam.
n
Practice 2 Take the time to create new folders for the storage of virtual machine files.
Take a close look at the access control lists that must be enabled to support moving
these storage locations from their defaults. One good way to do this is to examine the
security properties of the default locations.
Chapter Summary CHAPTER 8 503
Hyper-V Role Delegation
n
Practice 1 Play with the various roles you can generate for Hyper-V role delegation
with Authorization Manager. Rely on the InitialStore.xml file to begin this practice and
save your changes. Copy the updated stores to other servers to load them and then
log on with different accounts to test the access you have granted.
n
Practice 2 Play with the various roles you can generate for SCVMM role delegation
with the Administrator Console. Then log on with different accounts to test the access
you have granted.
Chapter Summary
n
Virtual environments need a different security approach. When you are running host
servers and virtual machines that rely on the same operating system, you need to
segregate the security context of the resource pool from the virtual environment.
n
It is important to maintain the integrity of the installed files, installed services, and
firewall rules of the Windows Server 2008 installation when adding the Hyper-V role
for the security implementation.
n
The Security Configuration Wizard in Windows Server 2008 generates security profiles
based on the role of a server within the network and allows you to configure service
configurations through predefined, role-based configurations; network security; and
registry settings; as well as implement an audit policy.
n
Windows Vista added a new capability for the Windows operating system—being
able to configure removable device controls through the use of Group Policy. This is
done through the control of device installations. To increase the security context in
the resource pool, this GPO should be applied on both servers and PCs so that no
unauthorized user can connect a USB drive.
n
BitLocker Full Drive Encryption allows you to encrypt the contents of the operating
system volume and is often used for mobile systems, but can be also used to protect
server drives.
n
To be able to audit an object you need to enable the auditing policy within a Group
Policy object, and you must turn on auditing for the object itself.
n
In a distributed management resource pool, you rely on Authorization Manager to
manage Hyper-V hosts. In a centrally managed resource pool, you rely on a host
server and virtual machine management tool—for example SCVMM—to assign
least-privilege access rights.
504 CHAPTER 8 Securing Hosts and Virtual Machines
n
The Hyper-V authorization stores are made up of four components: store scope, store
tasks, store roles, and assigned users or groups. AzMan can operate in Administrator
mode to modify an existing policy and in Developer mode to create new policies and
to modify the structure of an existing policy.
n
Virtual Service Offering’s scope of protection depends on the size of the organization.
You should rely on the various virtual networks supported by Hyper-V to segregate
traffic between virtual machines of different sensitivity.
n
Time synchronization in virtual machines is very important when working in Active
Directory forests and domains, and is also essential if you want Kerberos authentication
to work properly.
n
The Offline Virtual Machine Servicing Tool (OVMST) is designed to automatically
update all virtual machines whether they are on or off.
CHAPTER 9 505
C H A P T E R 9
Protecting Hyper-V
Resource Pools
D
ata protection is one of the most important aspects of any resource pool because
of the very nature of the pool itself: It is composed of host servers running virtual
workloads. Running your production workloads in virtual machines transforms the way you
work with production machines, but it also has both positive and negative impacts on your
protection strategies.
First of all, you need to design a protections strategy for your host servers. As you
know, if a host server fails and it is not protected, all of the virtual workloads on that
server will also fail. However, if you run the host server on a failover cluster, the workloads
on the host server will automatically be transferred to another host. If you don’t run the
host server on a failover cluster—for example, if you are running a Standard edition of
Windows Server 2008 with Hyper-V or if you are running Windows Hyper-V Server—all
of the workloads fail. What is worse is that you cannot transfer the virtual machines from
a failed Hyper-V to another host server because even if you can access the VMs—for
example, if they are stored on a shared folder running on a separate server or in a storage
area network—you cannot open an existing VM within Hyper-V. Hyper-V only supports
the exporting and importing of a VM, but if the host server has failed, you cannot export
the VM from the original host.
This means that you must have protection mechanisms for both the virtual machines you
run and the hosts themselves. If for some reason you run standalone hosts, you must have
a solid backup and recovery strategy for the host.
More Info HYPER-V FAILOVER CLUSTERS
More information on creating and deploying both single-site and multi-site Hyper-V
failover clusters can be found in Chapter 3, “Completing Resource Pool Configurations.”
C o n t e n t s
CHAPTER 9 505
Protecting Hyper-V Resource Pools 505
Before You Begin . . . . . . . . . . . . . . . . . . . . . . . . . . . . . . . . . . . . . . . . . . . . . . . .507
Lesson 1: Protecting Your Resource Pools . . . . . . . . . . . . . . . . . . . . . . . . . .508
Understanding Hyper-V Host Protection Strategies 508
Understanding Virtual Machine Protection Strategies 510
Working with Windows Server Backup 516
Working with System Center Data Protection Manager 529
Case Scenario: Dealing with a Host Server Failure . . . . . . . . . . . . . . . . . . .547
Suggested Practices . . . . . . . . . . . . . . . . . . . . . . . . . . . . . . . . . . . . . . . . . . . . .547
Windows Server Backup 548
System Center Data Protection Manager 548
Chapter Summary . . . . . . . . . . . . . . . . . . . . . . . . . . . . . . . . . . . . . . . . . . . . . . .548
506 CHAPTER 9 Protecting Hyper-V Resource Pools
These protection mechanisms range from simple backups to disks to complex systems that
automatically store all information offsite. The mechanisms you choose for your environment
will depend on the size of your organization, the recovery policies your organization has in
place, and the complexity of your resource pool. Keep the following considerations in mind as
you plan for your own recovery strategy:
n
If you are running standalone host servers, you must protect each and every host
server through regular backups. These backups must be tested regularly to ensure that
they are consistent and provide a valid restoration method.
n
If you are running clustered host servers, you should try to have as many redundant
nodes as possible to avoid single points of failure. If VMs are hosted on a resource
group that includes more than two nodes, the likelihood of having all nodes fail at
once is considerably reduced and your virtual machines are well protected. They
should still be backed up, however. To protect the hosts even more, you should have a
means of quickly re-creating a host and introducing it into the cluster to replace failed
nodes.
n
If you are using a single-site cluster, make sure your shared storage container is not a
single point of failure. If you are using a storage area network, rely on the SAN’s own
capabilities to create duplicates of the data your cluster manages—that data being, in
fact, the VMs you run.
n
If you are running multi-site host clusters, you are already replicating the virtual
machine data offsite and are protected. Once again, you still need a means to back up
the virtual machines themselves as well as a simple means to introduce new hosts into
the cluster if required.
n
If you are running a resource pool management tool such as System Center Virtual
Machine Manager, you need to make sure you protect this system as well as the
database it relies on.
n
If your resource pool is using a utility directory—as it should—you must protect the
domain controllers it relies on. If they are VMs, you can use normal VM protection
strategies as defined in this chapter.
n
If you are using Library Servers, you need to protect these systems so that they can be
quickly recovered if a mishap occurs.
As you can see, your protection plan must cover more than just the host servers or the
virtual machines they run. It must protect the entire resource pool, it must be tested, and it
must be documented so that you know what to do in the event of a disaster.
More Info HYPER-V PROTECTION STRATEGIES
For more information on Hyper-V protection strategies, look up “Backup and
Disaster Recovery for Server Virtualization” at />magazine/2008.10.disasterr.aspx.
Before You Begin CHAPTER 9 507
Specifically in terms of backup, your disaster recovery strategy must consider how you
intend to protect your systems. You have three choices:
n
Back up entire host systems. This will back up both the host systems and the virtual
machines running on them.
n
Back up the files that make up the virtual machines as files only. This captures a VM
as it is during its operation.
n
Back up files and folders within each of the VMs.
Each method will have an impact on your recovery operations. In addition, you are faced
with a potential issue that you do not face in physical environments: Because your resource
pools are clustered together and because Hyper-V supports Quick Migration, the VMs that
are on one host on Monday may very well not be the same VMs that are on the same host on
Tuesday. This means that VMs are moving targets. Your protection strategy must take virtual
machine mobility into account.
Exam objective in this chapter:
n
Manage snapshots and backups.
Before You Begin
To complete this chapter, you must have:
n
Experience with Windows Server 2003 and or Windows Server 2008 disaster recovery
implementations.
n
Access to a setup as described in the Introduction. In this case, you will be using the
third USB disk, which was listed as a requirement.
508 CHAPTER 9 Protecting Hyper-V Resource Pools
Lesson 1: Protecting Your Resource Pools
Backing up a single server is a simple operation. However, backing up a host server that
includes a multitude of virtual machines is a completely different operation. Will you back up
just the host and then just the files that make up the VMs, or will you perform internal VM
backups? Determining which strategy to use is the focus of this chapter.
After this lesson, you will understand:
n
How to plan a backup solution.
n
How to perform backups for the hosts.
n
How to manage backups for the hosts.
n
How to recover host servers.
n
How to perform live backups using VSS and DPM.
n
How to perform a backup within a VM.
n
When to use backups vs. snapshots.
n
How to restore VMs.
Estimated lesson time: 60 minutes
Understanding Hyper-V Host Protection Strategies
Backing up host servers means backing up three different types of objects:
n
Operating System The partition that makes up the system drive and runs the host
server parent partition.
n
Data Partitions The data drive(s) that contains the virtual service offerings.
n
Virtual Machine Contents The contents of the virtual service offerings must also be
backed up. This is discussed in more detail in the next lesson.
Host servers are the simplest kind of server because they only run one major role:
virtualization. If you set up your infrastructure right, backing these machines up is relatively
easy. The ideal infrastructure for host servers is that of a server connected to some form of
shared storage. Ideally, each and every data drive on the server will be hosted within the shared
storage infrastructure. This provides several levels of defense against data or system loss:
n
Each partition can either rely on the Volume Shadow Copy Service (VSS) or the internal
snapshot tool provided with the storage unit to provide a first level of defense.
n
The second level of defense is provided by the volume shadow copies of the virtual
machines located on the data drive. These copies are generated on a regular basis
if the storage drive is also a shared folder.
Lesson 1: Protecting Your Resource Pools CHAPTER 9 509
n
A third level of defense is provided through failover clustering.
n
The last level of defense is provided through backups of the disks that make up each
host system.
Most of these methods focus on the protection of virtual machines. In the case of virtual
machines, you’ll be using new disaster recovery techniques. However, because Hyper-V host
servers use a parent partition that runs the Windows Server 2008 operating system, you can
rely on standard Windows Server recovery techniques to get a non-working host server back
into running shape. These include:
n
Driver rollback If your system becomes unstable because of a faulty driver, you
can roll the driver back to restore the previous version, as long as you can still log on
to your system. This is done by viewing the device properties in the Device Manager,
which is reached by launching Server Manager and then using the Diagnostics node to
access Device Manager. Then right-click the faulty device, choose Properties, click the
Driver tab, and select Roll Back Driver (see Figure 9-1).
FIGURE 9-1 Rolling back a driver
n
Disabling devices You can also use Device Manager to disable faulty devices. Do this
by moving to Device Manager, locating the device, right-clicking it, and selecting Disable
from the shortcut menu.
n
Last Known Good Configuration Just like previous versions of Windows, Windows
Server 2008 includes a Last Known Good Configuration startup choice. This reverts to
the last configuration saved in the registry before you applied changes. You can access
this option by pressing the F8 key during system startup. This also gives you access to
a number of different startup modes: Safe Mode, Safe Mode With Networking, and
so on. You can also use these various operational modes to try to repair non-working
Windows Server 2008 installations.
510 CHAPTER 9 Protecting Hyper-V Resource Pools
n
Windows Recovery Environment (WinRE) WinRE provides you with a special console
that allows you to perform recovery operations, such as disabling services, copying device
drivers or other files to the system, and otherwise repairing an installation. The console
is available on the Windows Server 2008 installation media, but it can also be installed
locally on host systems. You might consider installing this console on your host servers if
you do not have ready access to an installation media DVD in the event of a mishap. This
console includes a host of features that can repair a non-working system.
More Info WinRE
For more information on WinRE, go to />cc766048.aspx.
n
Windows PE You can also use the Windows Preinstallation Environment ( WindowsPE)
to create a bootable device that will boot into a character-based Windows environment
similar to Server Core. This is also an excellent recovery tool because Windows PE gives
you access to both network drives and local NTFS drives during your repair process.
Note that you can also use Windows PE to build a bootable device that includes WinRE.
More Info WINDOWS PE
For more information on Windows PE, go to />cc749538.aspx.
n
Windows Server Backup (WSB) Using the default backup tool included within
Windows Server 2008, you can back up and restore data to removable media or to
spare disk drives. You can also back up entire systems to virtual hard drive images for
complete system protection.
n
Third-party backup and restore tools If you find that Windows Server Backup is not
enough, you can choose from a number of different third-party tools. When selecting a
third-party product, you must consider three key elements: integration with the Volume
Shadow Copy Service APIs to take advantage of this feature, complete system recovery
from bootable media, and integration with Windows Server 2008 roles such as Active
Directory Domain Services.
As you can see, you should only resort to a backup to recover a server when nothing
else works.
Understanding Virtual Machine Protection Strategies
When it comes to protecting virtual machines, your options are much more open than when
you work with host servers. After all, most virtual machines are nothing but a set of files in
a folder. Back up the files and you have a protected virtual machine. However, sometimes it
isn’t that easy. When a VM runs, it includes a lot of data in memory. If the machine is not in a
saved state or is not shut down prior to the backup, you may lose data. In addition, when you
back up only the files that make up VMs, the applications within the VMs will not be aware
Lesson 1: Protecting Your Resource Pools CHAPTER 9 511
that a backup has been performed. For example, when you back up database applications
such as Exchange and Microsoft SQL Server, they do not truncate transaction logs because
they do not know that a backup has been performed.
Because of their production nature, backing up virtual service offerings means backing
up several types of information, including user data, corporate data, databases, documents,
system state information for your servers, and Active Directory Domain Services data. You can
use either the built-in backup tool or a third-party backup tool to perform these backups. But
if you have multiple versions of operating systems in your VMs and you rely on the built-in
tool, you need to rely on multiple, different tools. This is one more reason why you should
be running enlightened guest operating systems. When you do, the backup tool you use at
the Hyper-V host level will be able to rely on VSS to take a VSS snapshot of the VM while it is
running and then create a data-consistent backup from this snapshot—as long as the Backup
(Volume Snapshot) Integration Service is turned on for the child partition (see Figure 9-2).
FIGURE 9-2 The Backup Integration service
If the machine is not enlightened, VSS cannot capture a snapshot of the VM’s files, and
the backup tool therefore saves the state of the VM and then takes a backup and restarts
the VM when the backup is complete. Legacy VMs must be put into a saved state to create
512 CHAPTER 9 Protecting Hyper-V Resource Pools
data-consistent backups of the virtual hard disk contents. They are restored when the backup
is complete. Obviously, this means that backups of legacy VMs must be done off-hours so
that end users are not affected.
IMportant VSS vs. HYPER-V SNAPSHOTS
Do not confuse Volume Shadow Copy Service snapshots with Hyper-V snapshots. When
you take a Hyper-V snapshot, it automatically converts the VHD into a differencing disk
and creates a parent-child relationship between the disks. Although this is a good way
to retain a specific image of a VM, it is not a good way to perform VM backups. VSS
snapshots, on the other hand, provide a disk image of the state of a VM and rely on this
disk image to perform a backup. VSS snapshots are application-specific and maintain the
consistency of a VM data during the backup operation.
You have some other ways to protect VMs, however. For example, you may already have
been using Windows NTBackup to protect your physical machines before their conversion
to Hyper-V VMs. These backups will not be compatible to Windows Server Backup if you
upgrade the machines to Windows Server 2008. You can, however, download a version of
NTBackup that works with Windows Server 2008. This ensures that your existing backups
are still valid.
More Info NT BACKUP
Download a Windows Server 2008-compatible version of NTBackup from Microsoft at
/>Performing Internal VM Backups
You can also generate backups from within the VM itself. After all, VMs are nothing but a set
of files, and to work with a backup, you only need to protect these files. However, you cannot
protect the files if VM contents are in memory and not stored in the disk files. In this case, the
best way to generate a backup is to use the following procedure:
1. Add a new dynamically expanding VHD to the VM. You use a dynamically expanding
VHD to keep the file size as small as possible.
2. Format the new VHD in the VM.
3. Create a backup schedule inside the VM and use the new VHD as the backup target.
Make sure your schedule is set to replace all backup contents on the target drive. This
way each copy of the drive will contain only one backup set.
4. When the backup is complete, replicate the VHD containing the backup files
to a new location in your network. If the location is offsite, you do not need to
move the backups offsite manually. Use the RoboCopy.exe utility contained within
the parent partition of Hyper-V hosts to perform this copy on a scheduled task.
This creates a consistent backup of the VHD because the VHD is at rest as soon as
Lesson 1: Protecting Your Resource Pools CHAPTER 9 513
the backup is complete. Therefore, all contents are valid. The replication target can
be a number of different locations:
n
A local disk on the Hyper-V host server
n
A disk in a SAN
n
A local file share on your network
n
A remote file share on your network
n
A Windows SharePoint Services or Office SharePoint Server store
5. Use a schedule and target different folders for each day to maintain daily backups.
For example, you could use the following schedule:
n
Save the VHD once per day for an entire month. Retain for one month and then
rotate the saved VHD copies.
n
Save one of the daily VHDs as a weekly backup for each week. Retain for six months
and then rotate them.
n
Save one of the weekly VHDs as the monthly backup for each month. Retain for one
year and then rotate them.
n
Save one of the monthly VHDs as the yearly backup for each year. Retain them for
at least seven years or however long your compliance rules require it.
6. If restores are required, you can mount the backup VHDs using the VHDMount.exe
utility, which can mount offline VHDs and let you view their contents. You can then use
the original backup tool to restore contents from the backup within the VHD.
More Info VHD MOUNT UTILITY
VHDMount.exe is part of the Microsoft Virtual Server 2005 R2 download and must be
extracted from its content. Download Microsoft Virtual Server from rosoft
.com/windowsserversystem/virtualserver. To install it, run the Virtual Server installation file
and clear all of the components except for the VHD Mount tool.
Note that if the guest operating system is Windows Server 2008 and you use WSB to
perform the backup, you do not need to use the VHD Mount utility. This also applies if you
just want to restore contents from inside the VM using the original backup tool. Simply
replace the VHD file that is attached to the VM with the appropriate copy of the replicated
VHD and view the contents using the backup tool.
Using the Volume Shadow Copy Service on File Shares
Another way to protect VMs is through VSS itself. Each disk drive in Windows Server 2008 can
protect the contents of shared folders through the use of VSS snapshots that are created on
a schedule. Windows Server 2008 supports up to 512 snapshots before it needs to overwrite
them. Another way to protect VMs is to rely on this shared folder snapshot process.
514 CHAPTER 9 Protecting Hyper-V Resource Pools
In Windows Server, each drive that is attached to a server is shared by default as
Drive$. This share is a hidden share—because of the attached $ sign—but it is always
generated automatically. This means that you do not need to create a share for the disks
or folders that contain VM files because the share already exists. Then you can proceed
as follows:
1. Ideally, you will be able to prepare the host server by adding an additional volume.
This volume will be used to store all of its VSS snapshots. Because each snapshot is
300 MB in size and you want to store 512 of them, your volume should be about
180 GB in size. Double that if you need to protect two different data volumes.
2. Enable VSS for the data volume or the volume containing the VM files. VSC is a
property of a disk volume in Windows Server. To enable it, open Windows Explorer,
locate the data drive, right-click it, and select Configure Shadow Copies. Accept the
User Account Control prompt if it appears.
3. Specify VSS settings. In the Shadow Copies dialog box, click the Settings button. In the
Settings dialog box, use the drop-down list to select the new drive you added to store
the snapshots (see Figure 9-3). Set the limit for the copy as appropriate. (The default
should be fine.)
FIGURE 9-3 Configuring VSS settings for a drive
4. Change the schedule if required. Begin with the default schedule at first; you can
always change it later. By default, snapshots are created at 7:00
a.m. and 12:00 p.m.
every weekday. Click OK when done.
5. Make sure you select the data volume you want to protect and click Enable to turn
on the VSS service for this volume. A warning will appear (see Figure 9-4). You can
safely discard this warning because you just set the configuration for your snapshots.
Click Yes.
Lesson 1: Protecting Your Resource Pools CHAPTER 9 515
FIGURE 9-4 The VSS Enable Shadow Copies Warning
VSS will now automatically generate two snapshots per day for this volume. Repeat the
operation for any other volume you want to protect.
In the event of a mishap, you can now rely on the Previous Versions client to restore lost
files and folders or the files that make up a VM (see Figure 9-5). You can therefore rely on this
tool to recover lost VMs on a Hyper-V host. The Previous Versions client is built in to Windows
Vista and Windows Server 2008. It must be installed on older versions of Windows. It can be
found in the %SystemRoot%\System32\Clients folder on Windows Server 2003 installations.
The installation file is named TWCLI32.msi.
FIGURE 9-5 Restoring a previous version
516 CHAPTER 9 Protecting Hyper-V Resource Pools
Previous Versions is a feature of the properties of a file in Windows. Simply right-click the
object (file or folder) and select Restore Previous Versions to recover the content you lost. This
is a powerful feature of this operating system and one that Hyper-V simply inherits because it
runs on top of the operating system.
You can open, copy, or restore the contents of a snapshot. This lets you restore any
component of a virtual machine. In a way, this provides the same feature as the Hyper-V
snapshot utility, but it provides you with 512 snapshots instead of 50 and it does not turn the
VHD into a differencing disk.
IMportant RESTORING VMs FROM PREVIOUS VERSIONS
Be very careful when you use Previous Versions to restore virtual machine files. Ideally, you
will use this for data disks only. You can use it to restore an entire virtual machine, but do
this with care. Production VMs and VMs running complex, time-based processes such as
domain controllers are not good candidates for Previous Versions restores. Machines that
contain all services in one VM, such as Windows Small Business Server, can be restored with
this method because everything is contained in one computer. This method is very useful
for test and development environments, but should be used with care on production VMs.
More Info WORKING WITH SHADOW COPIES
You can manage shadow copies or VSS snapshots from the command line. To do so, you
must use the DiskShadow.exe command. Find out more about this command at
/>Working with Windows Server Backup
Windows Server Backup (WSB) is a feature included in Windows Server 2008. It provides
a basic backup and recovery solution for computers running the Windows Server 2008
operating system. WSB replaces the previous version of Windows Backup (NTBackup.exe),
which was found in all versions of Windows Server prior to 2008.
WSB is composed of a series of different components:
n
A Microsoft Management Console (MMC) snap-in that is available as a standalone
console (WBAdmin.msc), as a portion of Server Manager under the Storage node, or
as a snap-in that you can add to a custom console. This console is only available on full
installations.
n
A command-line tool (WBAdmin.exe) that can be used on both the full and the Server
Core installations.
More Info WBAdmin.exe REFERENCE
For more information on WBAdmin.exe, go to
library/cc754015.aspx.
Lesson 1: Protecting Your Resource Pools CHAPTER 9 517
n
A series of Windows PowerShell cmdlets that are added by including the Windows
PowerShell snap-in named Windows.ServerBackup. These cmdlets can run on the full
installation or perform remote operations on Server Core installations. Remember,
however, that you must enable the proper ports on Windows Firewall to support
remote operations on Server Core installations.
With each method, you must be a member of the local administrators group or a member
of the Backup Operators group to use any of these tools. Like all Windows Server 2008
features, WSB is not installed by default. It must be added as a feature. When you do so, you
will be prompted to add two sub-features:
n
Windows Server Backup, which adds the console and the WBAdmin.exe
command-line tool.
n
Command-Line Tools, which add the Windows PowerShell cmdlets that support
Windows Server Backup. This option also requires Windows PowerShell and the
Microsoft .NET Framework.
WSB is designed to perform a variety of tasks. Those who have not seen WSB and are used
to NT Backup will find that the WSB console is completely different, as is the WSB feature set.
For example, you can use WSB to back up the following:
n
A full server, including all of the volumes tied to the server. This supports the recovery
of an entire server.
n
Critical volumes or volumes that contain operating system files. This supports the
recovery of the operating system itself or only the system state if required.
n
Selected data volumes on the server. This supports the recovery of files, applications,
or data from a given volume. For WSB, Hyper-V virtual machines are applications
because Hyper-V uses a Volume Shadow Copy Service writer to perform the backup.
Note, however, that WSB does not support the backup of individual files or folders; it only
backs up entire volumes—and only volumes that are formatted with NTFS. All other volumes
are ignored.
It is also important to understand the backup targets you can use with WSB. Table 9-1
outlines the various targets you can use with WSB.
TABLE 9-1 Potential WSB Backup Targets
TARGET COMMENT
Shared folder You can back up to a shared folder, but each folder can only contain a
single backup image. If you back up to the same folder each time, the
previous backup will be overwritten. If the backup fails, you can be
left without a backup. To avoid this issue, create a series of subfolders
in the shared folder location and configure each backup to target a
different subfolder. Subfolder names can reflect backup contents—
for example, Monday, Tuesday, Wednesday, and so on. Note that you
cannot schedule backups to shared folders.
518 CHAPTER 9 Protecting Hyper-V Resource Pools
TARGET COMMENT
Optical media or
removable media
You can back up to removable media, but if you do, you will only be
able to recover entire volumes. Note that the backup will not work if
the target media has less than 1 GB of free space.
Note: You cannot schedule backups to optical or removable media.
Internal hard disk You can back up to an internal hard disk. When you do so, you will be
able to recover files, folders, applications, and volumes. If the backup
includes critical volumes, you will also be able to recover the operating
system or the system state. However, the volume must use separate
spindles if you want to be able to back up the operating system.
In addition, the backup volume will be reformatted by WSB, will be
entirely dedicated to backup, and will not be visible in Windows
Explorer. Note that you can schedule backups to internal disks.
External hard disk You can back up to an external hard disk. When you do so, you will
be able to recover files, folders, applications, and volumes. If the
backup includes critical volumes, you will also be able to recover the
operating system or the system state. Using an external hard disk will
let you more easily move the backup offsite. Once again, the backup
volume will be reformatted by WSB, will be entirely dedicated to
backup, and will not be visible in Windows Explorer. Note that you
can schedule backups to external disks.
Keep in mind that if the volume you are backing up is using BitLocker Full Drive Encryption,
the backup will not be encrypted unless you also encrypt the target disk. In addition, WSB will
not be able to back up volumes that are larger than 2,043 GB. However, after a volume is used
as a backup target, you no longer need to worry about it running out of space because WSB
automatically manages space on the volume from that point on.
exaM tIp WSB BACKUP TARGETS
Remember that WSB no longer supports tape drives as a backup media. Don’t get caught
by this during the exam.
IMportant EXTERNAL DISK TARGETS
If you used device control Group Policy Objects in your security strategy for the resource
pool, you will not be able to use USB-based external hard disks as backup targets. If you
want to use WSB for backup, you must enable the particular disk type in the device control
GPO. Keep in mind that third-party backup tools do not have the same limitations as WSB.
More Info WINDOWS SERVER BACKUP
For more information on Windows Server Backup, go to />en-us/library/cc770266.aspx.
Lesson 1: Protecting Your Resource Pools CHAPTER 9 519
Understanding WSB PowerShell Cmdlets
Windows Server Backup includes two command-line tools for performing backups. The first
is strictly a command-line tool: WBAdmin.exe. The second is a set of Windows PowerShell
cmdlets that lets you control and script backup operations. Table 9-2 lists the different
Windows PowerShell cmdlets available for WSB operations. You can view additional information
about these cmdlets if you run the following two cmdlets in your Windows PowerShell
command window:
Add-PSSnapin Windows.ServerBackup
Get-Command -PSSnapin Windows.ServerBackup | Get-Help –Full
The first cmdlet loads the Windows Server Backup PowerShell snap-in and the second
cmdlet obtains help from the contents of the snap-in.
TABLE 9-2 WSB PowerShell Cmdlets
CMDLET DESCRIPTION
Add-WBBackupTarget Adds a backup target to the backup policy
Add-WBVolume Adds a volume to the backup policy
Get-WBBackupTarget Gets backup targets from a policy
Get-WBDisk Gets all disks
Get-WBPolicy Gets current backup policy
Get-WBSchedule Gets backup schedule in policy
Get-WBSummary Gets backup history and summary
Get-WBVolume Gets all volumes
New-WBBackupTarget Creates a new backup target
New-WBPolicy Creates a new empty policy
Remove-WBBackupTarget Removes a backup target from the policy
Remove-WBPolicy Deletes the backup policy
Remove-WBVolume Removes a volume from the policy
Set-WBPolicy Saves the WBPolicy object to create a scheduled backup
Set-WBSchedule Sets the schedule to the backup policy
You can use these cmdlets with the instructions in Chapter 7, “Automating VM
Management with Windows PowerShell,” to create your own scripts for generating backups.
Protecting Hyper-V and VMs with Windows Server Backup
To back up host servers running Hyper-V parent partitions, you must begin by installing the
Windows Server Backup tool. Perform the installation from Server Manager.
520 CHAPTER 9 Protecting Hyper-V Resource Pools
1. Open Server Manager, right-click Features in the Tree pane, and then click Add Features.
2. Scroll down and then expand Windows Server Backup Features. Select Windows Server
Backup And Command-line Tools. Choose the Command-line Tools only if you intend
to use Windows PowerShell to script backups. If you do, a dialog box will appear,
asking you to install Windows PowerShell as a requirement if it is not already installed
on the computer. This also happens for the .NET Framework if it is not already installed.
Click Add Required Features and then click Next.
note INSTALLING WINDOWS SERVER BACKUP
If you only select Windows Server Backup Features without expanding it, the
installation only includes the WSB snap-in and the WBAdmin command-line tool—the
Windows PowerShell cmdlets will not be installed.
3. Click Install to start the installation and click Close when complete.
Now that the installation is complete, you must add the Hyper-V Volume Shadow Copy
Service snapshot writer to the registry. WSB can work with any number of VSS writers, but it
cannot install them. Therefore, the Hyper-V VSS writer is not installed when you add WSB to a
machine running Hyper-V.
1. Begin by indentifying the globally unique identifier (GUID) for the Hyper-V VSS writer.
Open an elevated command prompt. Right-click the Command Prompt shortcut on
the Start menu and then click Run As Administrator. Accept all UAC prompts.
2. Type the following command to locate the GUID:
vssadmin list writers >writerslist.txt
3. This lists the available writers and stores the data into the writerslist.txt file. Open it in
Notepad. Use the following command:
notepad writerslist.txt
4. Locate the GUID for the Hyper-V VSS writer in the writerslist.txt file (see Figure 9-6). Select
the text, right-click it, and choose Copy. The copied data will be used in the next step.
FIGURE 9-6 Locating the Hyper-V VSS writer GUID
Lesson 1: Protecting Your Resource Pools CHAPTER 9 521
5. Start the Registry Editor to add the Hyper-V writer to WSB:
regedit
IMportant EDITING THE REGISTRY
Be very careful as you proceed through the next steps. Wrongly configuring the
Windows Registry can result in a non-working server.
6. Navigate to HKey_Local_Machine\Software\Microsoft\Windows NT\CurrentVersion. If a
sub-key named WindowsServerBackup exists, click it. If not, right-click CurrentVersion,
select New, and then select Key. Type WindowsServerBackup and press Enter. This
creates the Windows Server Backup branch.
7. Create a sub-key under WindowsServerBackup called Application Support. Right-click
WindowsServerBackup, select New, and then select Key. Type Application Support
and press Enter. This creates the sub-key.
8. Create a third sub-key with the Hyper-V GUID. Right-click Application Support, select
New, and then select Key. Paste the GUID, including the brackets ({}).
9. Add a new string value to the Hyper-V GUID key. Right-click the key, choose New, and
then choose String Value. Name the value Application Identifier and press Enter.
Right-click the Application Identifier value and choose Modify. Type Hyper-V VSS
Writer and click OK. The result should be a new entry for WSB (see Figure 9-7). WSB
will read this key next time you perform a backup and will be able to use the Hyper-V
VSS writer during the backup.
FIGURE 9-7 Adding the Hyper-V VSS Writer value to the registry
10. Now export this value so that you can update other servers to use the Hyper-V VSS
writer. Right-click WindowsServerBackup in the Tree pane and choose Export. Name
the file Hyper-VWriter.reg and click Save. This exports the branch you just created
(see Figure 9-8). You can import it into any other computer simply by typing the
following command in an elevated command prompt. It will prompt a warning. Click
Yes to proceed and then click OK after the update has been added.
start hyper-vwriter.reg
522 CHAPTER 9 Protecting Hyper-V Resource Pools
FIGURE 9-8 The contents of the Hyper-VWriter.reg file
Your server is now ready to run WSB backups. Make sure you import the registry file
on all other servers to enable support for the Hyper-V VSS writer. As with all imported
registry information, you will get a security warning when importing the .reg file. Click Yes
to complete the import (see Figure 9-9).
FIGURE 9-9 Adding the contents of the Hyper-VWriter.reg file to another computer
Update alert POTENTIAL ISSUES WITH HYPER-V BACKUPS
You can run into potential issues when you use WSB to back up Hyper-V computers.
For example, one known issue is that when you try to back up a machine whose
configuration is missing—for example, it was located on a network share that is no longer
available—WSB will fail to back up any VM on the server. Microsoft has issued an update to
correct this. Find it at A second update will help
resolve issues regarding the number of volumes on a host and potential unstable states
when performing backups. Get it from A third
update will deal with potential stop errors when performing Hyper-V VM backups. Find
it at The first update may already be on your
servers; it is unlikely that the last two are. You can verify the updates through the server’s
update history. If you do not have them already, obtain them and install them on each host.
Now that your servers are ready, you can back them up using WSB. Make sure you have an
additional external disk connected to your host server. Do not worry about cleaning the disk
because WSB will reformat it and empty all contents. Proceed as follows:
1. Launch Windows Server Backup. In Server Manager, click the Storage node in the Tree
pane and choose Windows Server Backup.
note REMOTE BACKUPS
Windows Server Backup is included in the Remote Server Administration Tools (RSAT) and
can be used on any Windows Server 2008 full installation or on a Windows Vista computer.