Microsoft Press windows server 2008 Policies and PKI and certificate security phần 3 ppt
Bạn đang xem bản rút gọn của tài liệu. Xem và tải ngay bản đầy đủ của tài liệu tại đây (1.19 MB, 77 trang )
126 Part II: Establishing a PKI
The following assumptions apply to the Fabrikam, Inc. policy CA:
■ It implements a single CPS, with the CPS published at www.fabrikam.com/CPS/
CPStatement.asp.
■ OID 1.3.6.1.4.1.311.509.3.1 is assigned to the CPS.
■ The key length for the private key and public key is 2,048 bits.
■ The validity period of the policy CA certificate is 10 years.
■ Base CRLs are published every 26 weeks with a 2-week overlap.
■ Delta CRLs are disabled.
■ Discrete signatures must be enabled in the policy CA certificate to allow the use of CNG
algorithms for hash and certificate signing.
■ The policy CA will use the SHA256 hash algorithm.
Based on these assumptions, the following CAPolicy.inf file can be installed in the %Windir%
of the Fabrikam, Inc. policy CA computer:
[Version]
Signature="$Windows NT$"
[PolicyStatementExtension]
Policies=FabrikamCPS
[FabrikamCPS]
OID=1.3.6.1.4.1.311.509.3.1
NOTICE=Fabrikam Industries Certification Practice Statement
URL=
[certsrv_server]
RenewalKeyLength=2048
RenewalValidityPeriodUnits=10
RenewalValidityPeriod=years
CRLPeriod=weeks
CRLPeriodUnits=26
CRLOverlapPeriod=weeks
CRLOverlapUnits=2
CRLDeltaPeriodUnits=0
CRLDeltaPeriod=days
DiscreteSignatureAlgorithm=1
Installing Certificate Services
After the CAPolicy.inf file is in place, you can install Certificate Services. Because the policy
CA’s certificate request is submitted to the root CA, the issuance of the subordinate CA
certificate takes place at the root CA.
Chapter 6: Implementing a CA Hierarchy 127
The following assumptions are made about the root CA computer:
■ It uses the naming scheme shown previously in Figure 6-1.
■ It has two mirrored partitions—drive C for the operating system and drive D for the CA
database and log files.
Note
IIS is not required for the installation of an offline policy CA. The only certificate
requests submitted to the policy CA are for subordinate CA certificates, and these can be
submitted by using the Certification Authority console.
To start the process of installing Certificate Services, perform the following tasks at the
policy CA:
1. Log on as a member of the local Administrators group.
2. Ensure that the date and time matches the date and time on the root CA computer.
3. Click Start, point to Administrative Tools, and then click Server Manager.
4. In the Roles Summary section, click Add Roles.
5. If the Before You Begin page appears, select the Skip This Page By Default check box,
and then click Next.
6. On the Select Server Roles page, select the Active Directory Certificate Services check
box, and when the role is populated, click Next.
7. On the Introduction To Active Directory Certificate Services page, click Next.
8. On the Select Role Services page, select the Certification Authority check box, and then
click Next.
9. On the Specify Setup Type page, click Standalone, and then click Next.
10. On the Specify CA Type page, click Subordinate CA, and then click Next.
11. On the Set Up Private Key page, click Create A New Private Key, and then click Next.
12. On the Configure Cryptography For CA page, set the following options, and then
click Next.
❑ Select a cryptographic service provider (CSP): RSA#Microsoft Software Key
Storage Provider
❑ Key character length: 2048
❑ Select the hash algorithm for signing certificates issued by this CA: sha256
13. On the Configure CA Name page, provide the following information, and then click Next.
❑ Common name for this CA: Fabrikam Corporate Policy CA
❑ Distinguished name suffix: O=Fabrikam Inc.,C=US
128 Part II: Establishing a PKI
14. On the Request Certificate From A Parent CA page, click Save A Certificate Request to
file, and manually send it later to a parent CA, accept the default file name, and then
click Next.
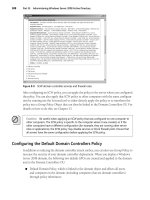
15. On the Configure Certificate Database page, provide the following settings, and then
click Next:
❑ Certificate database: D:\CertDB
❑ Certificate database log: D:\CertLog
16. After verifying the information on the Confirm Installation Selections page, click Install.
17. On the Installation Results page, note that the installation is incomplete, and then
click Close.
18. Open C:\.
19. Copy the FABINCCA02_Fabrikam Corporate Policy CA.req file to the USB drive.
20. Remove the USB drive containing the certificate request file from the policy CA computer.
The USB drive must now be transported to the root CA computer to submit the certificate
request and to copy the issued certificate back to the policy CA. While logged on at the root
CA computer as a member of the local Administrators group, use the following process:
1. Insert the USB Drive containing the certificate request file into a USB port on the root CA
computer.
2. From the Start menu, click Administrative Tools, and then click Certification Authority.
3. In the console tree, right-click Fabrikam Corporate Root CA, point to All Tasks, and then
click Submit New Request.
4. In the Open Request File dialog box, in the File Name box, type
A:\FABINCCA02_Fabrikam Corporate Policy CA.req, and then click Open.
5. In the console tree, expand Fabrikam Corporate Root CA, and then click Pending Requests.
6. In the details pane, right-click the certificate request, point to All Tasks, and then click
Export Binary Data.
7. In the Export Binary Data dialog box, in the Columns That Contain Binary Data drop-
down list, select Binary Request, and then click OK.
8. Review the request detail for accuracy:
❑ Verify that the subject name is Fabrikam Corporate Policy CA.
Subject:
CN=Fabrikam Corporate Policy CA
O=Fabrikam Inc.
C=US
❑ Ensure that the public key length is 2048 bits.
Public Key Length: 2048 bits
Chapter 6: Implementing a CA Hierarchy 129
❑ Ensure that the basic constraints indicate Subject Type=CA.
Basic Constraints
Subject type=CA
❑ Verify that the Certificate Policy statement is correctly configured with the
Policy Identifier OID set to 1.3.6.1.4.1.1204.509.3.1, the Notice Text set to
“Fabrikam Industries Certification Practice Statement,” and the CPS qualifier
set to />Certificate Policies
[1] Certificate Policy:
Policy Identifier=1.3.6.1.4.1.1204.509.3.1
[1,1]Policy Qualifier Info:
Policy Qualifier Id=User Notice
Qualifier:
Notice Text=Fabrikam Industries Certification Practice Statement
[1,2]Policy Qualifier Info:
Policy Qualifier Id=CPS
Qualifier:
/>❑ Verify that the Signature Algorithm is SHA256RSA.
Algorithm ObjectId: 1.2.840.113549.1.1.11 sha256RSA
❑ Verify that the signature matches the public key.
Signature matches Public Key
9. Close the Binary Request window.
10. In the details pane, right-click the pending SubCA certificate, point to All Tasks, and
then click Issue.
11. In the console tree, click Issued Certificates.
12. In the details pane, double-click the issued certificate.
13. In the Certificate dialog box, click the Details tab.
14. On the Details tab, click Copy To File.
15. In the Certificate Export Wizard, click Next.
16. On the Export File Format page, click Cryptographic Message Syntax Standard—
PKCS #7 Certificates (.P7B), select the Include All Certificates In The Certification Path
If Possible check box, and then click Next.
17. On the File To Export page, in the File Name box, type F:\policyca.p7b, and then click
Next.
18. On the Completing The Certificate Export Wizard page, click Finish.
19. In the Certificate Export Wizard message box, click OK.
130 Part II: Establishing a PKI
20. In the Certificate dialog box, click OK.
21. Close the Certification Authority console.
22. Remove the USB drive containing the certificate request file.
Once the certificate is exported to the floppy disk, you must complete installation of the
policy CA by installing the subordinate CA certificate at the policy CA. Use the following
procedure:
1. Insert the USB Drive containing the PKCS#7 file into a USB port on the Policy CA computer.
2. From the Start menu, click Administrative Tools, and then click Certification Authority.
3. In the console tree, right-click Fabrikam Corporate Policy CA, point to All Tasks, and
then click Install CA Certificate.
4. In the Select File To Complete CA Installation dialog box, in the File Name box, type
F:\policyca.p7b, and then click Open.
5. In the console tree, right-click Fabrikam Corporate Policy CA, point to All Tasks, and
then click Start Service.
Note
At this point, Certificate Services starts and allows you to view and configure the
policy CA. If the service does not start, the most common error is the revocation function
being unable to check revocation status. This is typically because of forgetting to install
the root CA certificate and CRL on the policy CA.
Post-Installation Configuration
Once the policy CA installation is complete, you must ensure that the policy CA’s registry
settings are configured correctly. The following assumptions are made regarding the
Fabrikam network:
■ All client and server computers are running Windows XP or later and are members of
the Fabrikam.com domain.
■ There is a Web server named www.fabrikam.com. A virtual directory named Certdata
contains CRL and AIA information for all CAs in the CA hierarchy. This Web server is
accessible internally and externally.
■ The subordinate CA below the policy CA has a validity period of five years.
■ All auditing options must be enabled on the policy CA.
■ The policy CA certificate and CRL are copied to a floppy disk to allow publication to
AD DS and to the www.fabrikam.com Web server.
Chapter 6: Implementing a CA Hierarchy 131
■ Sleep.exe from the Windows Server 2003 Resource Kit is installed on the policy CA
computer.
■ Discrete Signatures must be supported and available for certificate requests submitted
to the CA.
To configure the policy CA to implement these design decisions and the assumptions stated
previously, the following post-installation script can be used:
::Declare Configuration NC
certutil -setreg CA\DSConfigDN CN=Configuration,DC=fabrikam,DC=com
::Define CRL Publication Intervals
certutil -setreg CA\CRLPeriodUnits 26
certutil -setreg CA\CRLPeriod "Weeks"
certutil –setreg CA\CRLOverlapUnits 2
certutil –setreg CA\CRLOverlapPeriod "Weeks"
certutil -setreg CA\CRLDeltaPeriodUnits 0
certutil -setreg CA\CRLDeltaPeriod "Days"
::Apply the required CDP Extension URLs
certutil -setreg CA\CRLPublicationURLs
"1:%windir%\system32\CertSrv\CertEnroll\%%3%%8%%9.crl\n10:ldap:///
CN=%%7%%8,CN=%%2,CN=CDP,CN=Public Key Services,CN=Services,%%6%%10\n
2: %%3%%8%%9.crl"
::Apply the required AIA Extension URLs
certutil -setreg CA\CACertPublicationURLs
"1:%windir%\system32\CertSrv\CertEnroll\%%1_%%3%%4.crt\n2:ldap:///CN=%%7,CN=AIA,CN=Public
Key Services,CN=Services,%%6%%11\n
2:
::Enable all auditing events for the Fabrikam Corporate Policy CA
certutil -setreg CA\AuditFilter 127
::Set Validity Period for Issued Certificates
certutil -setreg CA\ValidityPeriodUnits 5
certutil -setreg CA\ValidityPeriod "Years"
:: Enable discrete signatures in subordinate CA certificates
Certutil –setreg CA\csp\DiscreteSignatureAlgorithm 1
::Restart Certificate Services
net stop certsvc & net start certsvc
sleep 5
certutil –crl
::Copy the policy CA certificates and CRLs to the USB Drive
Echo Insert the USB Drive in the USB slot
sleep 5
copy /y %windir%\system32\certsrv\certenroll\*.cr? f:\
132 Part II: Establishing a PKI
Implementing an Online Issuing CA
The process for installing subordinate online CAs is slightly different than the process for
installing subordinate offline CAs.
Pre-Installation Configuration
Before installing Certificate Services on the issuing CA, you must ensure that the issuing CA
trusts the root CA and is able to download the policy CA certificate and CRL for certificate
revocation checking.
This is accomplished by manually installing or publishing the root CA and policy CA
certificates stored on a floppy disk to the following locations:
■ The local computer’s Trusted Root Store and intermediate CA store This location is
required if you are unable to publish the certificate into AD DS or to the HTTP URL
referenced in the AIA and CDP extensions of certificates issued by the root or policy CA.
This location is also required if the issuing CA is a standalone CA.
■ AD DS The root and policy CA certificate and CRLs can be published into AD DS.
Publication into AD DS enables the automated download of the certificates to all
Windows 2000, Windows XP, Windows Server 2003, Windows Vista, and Windows
Server 2008 computers that are members of the forest.
■ HTTP URLs referenced in the AIA and CDP extensions The root and policy CA certifi-
cates and CRLs must be manually published to these locations to enable download of
the CA certificates and CRLs to all clients using these URLs for chain building and
revocation checking.
Installing Certificates Locally at the Issuing CA If you have not published the root and
policy CA certificates into AD DS or to the HTTP URLs included in the certificates issued by
the root and policy CAs, you can manually install the certificates into the issuing CA’s local
machine store. This process is similar to the one used to install the root CA certificate and
CRL at the policy CA. The difference is that both root and intermediate CA certificates are
installed at an issuing CA.
Tip
I still publish the root and policy CA certificates locally because of impatience. When you
publish them to AD DS, you have to wait for replication and application of Group Policy before
the issuing CA has knowledge of the certificates. Installing the certificate and CRL locally offers
immediate recognition of the CA hierarchy.
The following script publishes the root CA certificate and CRL into the local machine store:
@echo off
a:
cd \
for %%c in ("FABINCCA01*.crt") do certutil -addstore -f Root "%%c"
Chapter 6: Implementing a CA Hierarchy 133
for %%c in ("Fabrikam Corporate Root*.crl") do certutil -addstore -f Root "%%c"
for %%c in ("FABINCCA02*.crt") do certutil -addstore -f CA "%%c"
for %%c in ("Fabrikam Corporate Policy*.crl") do certutil -addstore -f CA "%%c"
This batch file supports later revisions to the root or policy CA certificates and publishes all
versions of the root and policy CA certificates and CRLs.
Tip
When using this script in your environment, modify each line’s search pattern to a
pattern that uniquely describes the CA computer name for *.crt files and the CA logical name
for *.crl files.
Publishing Certificates and CRLs into AD DS The preferred method of publishing root
and policy CA certificates and CRLs in a forest environment is to publish them into AD DS.
When published into AD DS, the CA certificates and CRLs are published in the configuration
naming context and are automatically downloaded to all forest members running Windows
2000, Windows XP, Windows Server 2003, Windows Vista, or Windows Server 2008 through
autoenrollment.
To publish the root and policy CA certificates and CRLs, use the following script, which must
be run by a member of the Enterprise Admins group:
@echo off
a:
cd \
for %%c in ("FABINCCA01*.crt") do certutil -dspublish -f "%%c" RootCA
for %%c in ("FABINCCA02*.crt") do certutil -dspublish -f "%%c" SubCA
for %%c in ("Fabrikam Corporate Root*.crl") do certutil -dspublish -f "%%c"
for %%c in ("Fabrikam Corporate Policy*.crl") do certutil -dspublish -f "%%c"
gpupdate /force
The next time Group Policy is applied to a computer that is a member of the forest, certificates
will be automatically added to the trusted root or intermediate CA store of the local machine
through the autoenrollment mechanism.
Tip
When using this script in your environment, modify each line’s search pattern to a
pattern that uniquely describes the CA computer name for *.crt files and the CA logical name
for *.crl files.
Copying Certificates and CRLs to HTTP Publication Points If you implement HTTP
URLs in your offline CA CDP and AIA extensions, you must manually copy the files to the
referenced location. The transfer mechanism entirely depends on the Web servers that host
the CA certificates and CRLs. Some of the more commonly chosen mechanisms include: File
Transfer Protocol (FTP), Robocopy (now part of the Windows Server 2008 operating system),
Secure FTP, Remote Copy Protocol (RCP), and Trivial File Transfer Protocol (TFTP).
134 Part II: Establishing a PKI
The actual commands that you use depend entirely on the method you choose to copy the
files to the Web server or Web server cluster.
The following example shows how to use Robocopy to copy the root and Policy CA files to a
Web server with the NetBIOS name FABWEB01 to a share named CertEnroll$. The batch file
assumes that the necessary files are on the root of the USB Drive (F:).
@echo off
F:
net use \\FABWEB01.fabrikam.com
robocopy F: \\ FABWEB01.fabrikam.com\certenroll$ *.crt *.crl /R:5 /W:5 /V /
LOG:UpdateCrlLog.txt
net use \\FABWEB01.fabrikam.com /d
Creating a CAPolicy.inf File
Once the root and policy CA certificates and CRLs are downloaded to the local machine’s
trusted root store, you must prepare a CAPolicy.inf file for the issuing CA. The CAPolicy.inf file
for an issuing CA must define certificate-renewal and CRL publication settings.
The following assumptions apply to the Fabrikam issuing CA:
■ The key length for the private key and public key is 2,048 bits.
■ The policy CA certificate’s validity period is five years.
■ Base CRLs are published every three days with an overlap of four hours.
■ Delta CRLs are published every 12 hours.
■ Discrete signatures must be enabled in the issuing CA certificate to allow the use of
CNG algorithms for hash and certificate signing.
■ The issuing CA will use the SHA256 hash algorithm.
■ The CA will not have any certificate template available for enrollment initially.
Based on these assumptions, the following CAPolicy.inf file can be installed in the %Windir%
of the Fabrikam, Inc. issuing CA computer:
[Version]
Signature="$Windows NT$"
[certsrv_server]
renewalkeylength=2048
RenewalValidityPeriodUnits=5
RenewalValidityPeriod=years
CRLPeriod=3
CRLPeriodUnits=days
CRLOverlapPeriod=4
CRLOverlapUnits=hours
CRLDeltaPeriod=12
CRLDeltaPeriodUnits=hours
Chapter 6: Implementing a CA Hierarchy 135
DiscreteSignatureAlgorithm=1
LoadDefaultTemplates=0
What if I Am Deploying Only a Two-Tier Hierarchy?
If you are deploying a two-tier CA hierarchy, the major configuration change is the
contents of the CAPolicy.inf file. In a two-tier CA hierarchy, the second tier is deployed
as a combination policy and issuing CA. The CAPolicy.inf file must be changed to reflect
this, as shown below. This example assumes that the same requirements exist for CPS
publication.
[Version]
Signature="$Windows NT$"
[PolicyStatementExtension]
Policies=FabrikamCPS
[FabrikamCPS]
OID=1.3.6.1.4.1.311.509.3.1
NOTICE=Fabrikam Industries Certification Practice Statement
URL=
renewalkeylength=2048
RenewalValidityPeriodUnits=5
RenewalValidityPeriod=years
CRLPeriod=3
CRLPeriodUnits=days
CRLOverlapPeriod=4
CRLOverlapUnits=hours
CRLDeltaPeriod=12
CRLDeltaPeriodUnits=hours
DiscreteSignatureAlgorithm=1
LoadDefaultTemplates=0
This CAPolicy.inf file ensures that the CPS information is included in the issuing CA’s
certificate, but the file implements the CRL and CA certificate settings for an issuing CA.
Installing Certificate Services
Once the CAPolicy.inf file is in place, you can install Certificate Services. Because the issuing
CA’s certificate request is submitted to the policy CA, the issuance of the subordinate CA
certificate occurs at the policy CA.
The following assumptions are made about the issuing CA computer:
■ It uses the naming scheme shown previously in Figure 6-1.
■ It has two mirrored partitions and a RAID 5 array—drive C: for the operating system,
drive D: for the CA log files, and drive E:, a RAID 5 array, for the CA database.
136 Part II: Establishing a PKI
To begin installing Certificate Services, ensure that you are logged on as a member of the
Enterprise Admins group. In addition, ensure that the Enterprise Admins group is a member
of the local Administrators group at the enterprise CA. Use the following procedure to install
the enterprise CA:
Tip
If installing a two-tier CA hierarchy, replace all instances of the policy CA with the root
CA in the upcoming steps.
1. Ensure that the enterprise CA is a member of a domain in the forest.
2. Ensure that the date and time are correctly set.
3. Click Start, point to Administrative Tools, and then click Server Manager.
4. In the Roles Summary section, click Add Roles.
5. If the Before You Begin page appears, select the Skip This Page By Default check box, and
then click Next.
6. On the Select Server Roles page, select the Active Directory Certificate Services check
box, and when the role is populated, click Next.
7. On the Introduction To Active Directory Certificate Services page, click Next.
8. On the Select Role Services page, select the Certification Authority check box, and then
select the Certification Authority Web Enrollment check box.
9. In the Add Roles Wizard dialog box, note that you must add the Web Server (IIS) role,
and then click Add Required Role Services.
10. On the Select Role Services page, click Next.
11. On the Specify Setup Type page, click Enterprise, and then click Next.
12. On the Specify CA Type page, click Subordinate CA, and then click Next.
13. On the Set Up Private Key page, click Create A New Private Key, and then click Next.
14. On the Configure Cryptography For CA page, set the following options, and then
click Next.
❑ Select a cryptographic service provider (CSP): RSA#Microsoft Software Key
Storage Provider
❑ Key character length: 2048
❑ Select the hash algorithm for signing certificates issued by this CA: sha256
15. On the Configure CA Name page, provide the following information, and then click Next.
❑ Common name for this CA: Fabrikam Corporate Issuing CA
❑ Distinguished name suffix: O=Fabrikam Inc.,C=US
Chapter 6: Implementing a CA Hierarchy 137
16. On the Request Certificate From A Parent CA page, click Save a Certificate Request To
File And Manually Send It Later To A Parent CA, accept the default file name, and then
click Next.
17. On the Configure Certificate Database page, provide the following settings, and then
click Next:
❑ Certificate database: E:\CertDB
❑ Certificate database log: D:\CertLog
18. On the Web Server (IIS) page, click Next.
19. On the Select Role Services page, accept the recommend role services, and then
click Next.
20. After verifying the information on the Confirm Installation Selections page, click
Install.
21. On the Installation Results page, note that the installation of Active Directory Certificate
Services is incomplete whereas the installation of Web Server (IIS) is complete, and then
click Close.
22. Open C:\.
23. Copy the FABINCCA03.fabrikam.com_Fabrikam Corporate Issuing CA.req file to the
USB drive.
24. Remove the USB drive containing the certificate request file from the issuing CA computer.
The USB drive must now be transported to the policy CA computer to submit the certificate
request and to copy the issued certificate back to the issuing CA. Use the following process
at the policy CA logged on as a member of the local Administrators group:
1. Insert the USB Drive containing the certificate request file into a USB port on the root
CA computer.
2. From the Start menu, click Administrative Tools, and then click Certification Authority.
3. In the console tree, right-click Fabrikam Corporate Policy CA, point to All Tasks, and
then click Submit New Request.
4. In the Open Request File dialog box, in the File Name box, type F:\FABINCCA03.
fabrikam.com_Fabrikam Corporate Policy CA.req, and then click Open.
5. In the console tree, expand Fabrikam Corporate Policy CA, and then click Pending
Requests.
6. In the details pane, right-click the certificate request, point to All Tasks, and then click
Export Binary Data.
7. In the Export Binary Data dialog box, in the Columns That Contain Binary Data
drop-down list, select Binary Request, and then click OK.
138 Part II: Establishing a PKI
8. Review the request detail for accuracy:
❑ Verify that the subject name is Fabrikam Corporate Issuing CA.
Subject:
CN=Fabrikam Corporate Issuing CA
O=Fabrikam Inc.
C=US
❑ Ensure that public key length is 2048 bits.
Public Key Length: 2048 bits
❑ Ensure that the basic constraints indicate Subject Type=CA.
Basic Constraints
Subject type=CA
❑ Verify that the Signature Algorithm is SHA256RSA.
Algorithm ObjectId: 1.2.840.113549.1.1.11 sha256RSA
❑ Verify that the signature matches the public key.
Signature matches Public Key
9. Close the Binary Request window.
10. In the details pane, right-click the pending SubCA certificate, point to All Tasks, and
then click Issue.
11. In the console tree, click Issued Certificates.
12. In the details pane, double-click the issued certificate.
13. In the Certificate dialog box, click the Details tab.
14. On the Details tab, click Copy To File.
15. In the Certificate Export Wizard, click Next.
16. On the Export File Format page, click Cryptographic Message Syntax Standard—
PKCS #7 Certificates (.P7B), select the Include All Certificates In The Certification Path
If Possible check box, and then click Next.
17. On the File To Export page, in the File Name box, type F:\issuingca.p7b, and then
click Next.
18. On the Completing The Certificate Export Wizard page, click Finish.
19. In the Certificate Export Wizard message box, click OK.
20. In the Certificate dialog box, click OK.
21. Close the Certification Authority console.
22. Remove the USB drive containing the certificate request file.
Chapter 6: Implementing a CA Hierarchy 139
Once the certificate is exported to the floppy disk, you must complete installation of the
policy CA by installing the subordinate CA certificate at the issuing CA. Use the following
procedure:
1. Insert the USB Drive containing the PKCS#7 file into a USB port on the issuing
CA computer.
2. From the Start menu, click Administrative Tools, and then click Certification Authority.
3. In the console tree, right-click Fabrikam Corporate Issuing CA, point to All Tasks, and
then click Install CA Certificate.
4. In the Select File To Complete CA Installation dialog box, in the File Name box, type
F:\issuingca.p7b, and then click Open.
5. In the console tree, right-click Fabrikam Corporate Issuing CA, point to All Tasks, and
then click Start Service.
Note
At this point, Certificate Services starts and allows you to view and configure the
issuing CA.
Post-Installation Configuration
Once the issuing CA is installed, you must ensure that the issuing CA’s registry settings are
configured correctly. The following assumptions are made regarding the Fabrikam network:
■ All client and server computers are running Windows 2000, Windows XP, or Windows
Server 2003 and are members of the Fabrikam.com domain.
■ The issuing CA’s certificate and CRL are published in AD DS, on the issuing CA’s Web
service, and at an externally accessible Web server.
■ There is a Web server named www.fabrikam.com. A virtual directory named Certdata
contains CRL and AIA information for all CAs in the CA hierarchy. This Web server is
accessible internally and externally.
■ The issuing CA issues certificates—with a maximum two-year validity period—to users,
computers, services, and network devices.
■ The issuing CA certificate and CRL are copied to a floppy disk to allow publication to
the www.fabrikam.com Web server.
■ All auditing options must be enabled on the issuing CA computer.
■ Discrete Signatures must be supported and available for certificate requests submitted
to the CA.
■ Sleep.exe from the Windows Server 2003 Resource Kit is installed on the issuing CA
computer.
140 Part II: Establishing a PKI
■ CRL and CA certificate retrieval should take place in the following order:
a. AD DS
b. Externally accessible Web server
c. The issuing CA’s Web service
Note
The order to use for CA certificate and CRL retrieval is discussed greater detail in
Chapter 11, “Certificate Validation.”
Use the following post-installation script to configure the issuing CA to implement these
design decisions and the assumptions stated previously:
::Declare Configuration NC
certutil -setreg CA\DSConfigDN CN=Configuration,DC=fabrikam,DC=com
::Define CRL Publication Intervals
certutil -setreg CA\CRLPeriodUnits 3
certutil -setreg CA\CRLPeriod "Days"
certutil -setreg CA\CRLOverlapUnits 4
certutil -setreg CA\CRLOverlapPeriod "Hours"
certutil -setreg CA\CRLDeltaPeriodUnits 12
certutil -setreg CA\CRLDeltaPeriod "Hours"
::Apply the required CDP Extension URLs
certutil -setreg CA\CRLPublicationURLs
"65:%windir%\system32\CertSrv\CertEnroll\%%3%%8%%9.crl\n79:ldap:///
CN=%%7%%8,CN=%%2,CN=CDP,CN=Public Key
Services,CN=Services,%%6%%10\n6: />http://%%1/CertEnroll/%%3%%8%%9.crl "
::Apply the required AIA Extension URLs
certutil -setreg CA\CACertPublicationURLs
"1:%windir%\system32\CertSrv\CertEnroll\%%1_%%3%%4.crt\n3:ldap:///
CN=%%7,CN=AIA,CN=Public Key
Services,CN=Services,%%6%%11\n2: />http://%%1/CertEnroll/%%1_%%3%%4.crt "
::Enable all auditing events for the Fabrikam Corporate Issuing CA
certutil -setreg CA\AuditFilter 127
:: Enable discrete signatures in issued certificates
Certutil –setreg CA\csp\DiscreteSignatureAlgorithm 1
::Set Maximum Validity Period for Issued Certificates
certutil -setreg CA\ValidityPeriodUnits 2
certutil -setreg CA\ValidityPeriod "Years"
::Restart Certificate Services
net stop certsvc & net start certsvc
sleep 5
Chapter 6: Implementing a CA Hierarchy 141
certutil –crl
::Copy the issuing CA certificates and CRLs to the USB Drive assigned as F: drive
Echo Insert the USB token as F: drive
sleep 5
copy /y %windir%\system32\certsrv\certenroll\*.cr? f:\
Implementing an Enterprise Root CA
Some organizations do not require the security enhancements of a multi-tier CA hierarchy.
They simply need a CA to issue certificates for the computers, users, services, and network
devices on their network. There is no need for redundancy or to provide a high-assurance
trust model.
In these circumstances, a CA hierarchy consisting of a single CA can be deployed. An example
of this is the CA hierarchy for Margie’s Travel shown previously in Figure 6-2.
Note
It is always recommended to use Windows Server 2008 Enterprise Edition when
installing an enterprise CA. Windows Server 2008 Enterprise Edition enables advanced features
not available in Windows Server 2008 Standard Edition, such as the issuing of version 2
certificate templates, private key archival, and role separation enforcement.
Creating a CAPolicy.inf File
Even though you are deploying a single CA for the network, it is still recommended that you
create a CAPolicy.inf file. The reason for this is to ensure that the configuration settings, which
are defined only in the CAPolicy.inf file, are applied to the enterprise root CA.
Note
This example of implementing an enterprise root CA assumes that Margie’s Travel has
an existing AD DS deployment with a single domain named margiestravel.com. It does not
matter if the domain is a Windows 2000, Windows Server 2003, or Windows Server 2008
domain, as long as the AD DS modifications discussed in Chapter 4 are applied.
The CAPolicy.inf file for Margie’s Travel makes the following assumptions:
■ The root CA uses a key length of 2,048 bits.
■ The validity period of the root CA certificate is 10 years.
■ Base CRLs are published every two days.
■ Delta CRLs are published every 12 hours.
■ The root CA does not contain a CDP or AIA extension to prevent revocation checking of
the root CA certificate.
142 Part II: Establishing a PKI
■ A CPS is not necessary.
■ Default certificate templates should not be published at the CA.
Based on these assumptions, the following CAPolicy.inf file can be installed in the %Windir%
of the MargieCA01 computer.
[Version]
Signature="$Windows NT$"
[certsrv_server]
renewalkeylength=2048
RenewalValidityPeriodUnits=10
RenewalValidityPeriod=years
CRLPeriod=days
CRLPeriodUnits=2
CRLDeltaPeriodUnits=12
CRLDeltaPeriod=hours
LoadDefaultTemplates=0
Note Because we are installing a Windows Server 2008 enterprise root CA, there is no need
to include [AuthorityInformationAccess] and [CRLDistributionPoint] sections with Empty=True
lines. These are required only if installing a Windows Server 2003 enterprise root CA.
Installing Active Directory Certificate Services
To install Windows Server 2008 Certificate Services as an enterprise CA, a user who is a
member of both the Enterprise Admins group of the forest and the local Administrators group
of the MargieCA01 computer must perform the install.
This installation procedure assumes that the naming conventions shown previously in
Figure 6-2 and the assumptions made for the creation of the CAPolicy.inf file are still in effect.
In addition, it is assumed that the enterprise CA will be installed on a computer with a single
disk drive.
The following procedure performs the installation of the CA:
1. Log on as a member of the Enterprise Admins and local Administrators group.
2. Click Start, point to Administrative Tools, and then click Server Manager.
3. In the Roles Summary section, click Add Roles.
4. If the Before You Begin page appears, select the Skip This Page By Default check box, and
then click Next.
Chapter 6: Implementing a CA Hierarchy 143
5. On the Select Server Roles page, select the Active Directory Certificate Services check
box, and when the role is populated, click Next.
6. On the Introduction to Active Directory Certificate Services page, read the items to Note,
and then click Next.
7. On the Select Role Services page, select the Certification Authority and the Certification
Authority Web Enrollment check boxes.
8. In the Add Role Services Required For Certification Authority Web Enrollment dialog
box, click Add Required Role Services.
9. On the Select Role Services page, click Next.
10. On the Specify Setup Type page, click Enterprise, and then click Next.
11. On the Specify CA Type page, click Root CA, and then click Next.
12. On the Set Up Private Key page, click Create A New Private Key, and then click Next.
13. On the Configure Cryptography For CA pages, leave the default values (these meet our
design requirements), and then click Next.
Note
You can define a cryptographic service provider other than the default
(RSA#Microsoft Software Key Storage Provider), key length greater or less than the
default value of 2048, and a hashing algorithm supported by the selected CSP.
14. On the Configure CA Name page, provide the following information, and then
click Next.
❑ Common Name for this CA: Margie’s Travel Root CA
❑ Distinguished name suffix: O=Margie’s Travel,C=US
15. On the Set Validity Period page, change the validity duration to 10 years, and then
click Next.
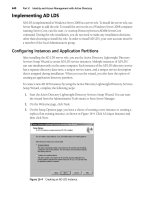
16. On the Configure Certificate Database page, accept the default storage locations for the
certificate database and the certificate database log, and then click Next.
17. On the Web Server (IIS) page, click Next.
18. On the Select Role Services page, accept the recommended role services, and click Next.
19. On the Confirm Installation Selections page, verify the presented information, and then
click Install.
20. On the Installation Results page, ensure that status for both Active Directory Certificate
Services and for Web Server (IIS) is Installation Succeeded, and then click Close.
144 Part II: Establishing a PKI
Post-Installation Configuration
Once the installation of Certificate Services is complete, you should run a post-installation
script to ensure that the correct settings are defined for the enterprise root CA.
To meet the objectives defined earlier for Margie’s Travel and to apply the default CRL and AIA
publication points, the following script can be used:
::Declare Configuration NC
certutil -setreg CA\DSConfigDN CN=Configuration,DC=margiestravel,DC=com
::Define CRL Publication Intervals
certutil -setreg CA\CRLPeriodUnits 2
certutil -setreg CA\CRLPeriod "Days"
certutil -setreg CA\CRLDeltaPeriodUnits 12
certutil -setreg CA\CRLDeltaPeriod "Hours"
::Apply the default CDP Extension URLs
certutil -setreg CA\CRLPublicationURLs
"65:%windir%\system32\CertSrv\CertEnroll\%%3%%8%%9.crl\n79:ldap:///
CN=%%7%%8,CN=%%2,CN=CDP,CN=Public Key Services,CN=Services,%%6%%10\n6:http://%%1/
CertEnroll/%%3%%8%%9.crl"
::Apply the default AIA Extension URLs
certutil -setreg CA\CACertPublicationURLs
"1:%windir%\system32\CertSrv\CertEnroll\%%1_%%3%%4.crt\n3:ldap:///CN=%%7,CN=AIA,CN=Public
Key Services,CN=Services,%%6%%11\n2:http://%%1/CertEnroll/
%%1_%%3%%4.crt"
::Enable all auditing events for the enterprise root CA
certutil -setreg CA\AuditFilter 127
::Set Validity Period for Issued Certificates
certutil -setreg CA\ValidityPeriodUnits 2
certutil -setreg CA\ValidityPeriod "Years"
::Restart Certificate Services
net stop certsvc & net start certsvc
sleep 5
certutil –crl
Enabling Auditing
In all of the deployment examples, the post-installation script enables all auditing events for
Certificate Services. These auditing events depend on enabling success and failure auditing
for Object Access. The configuration of this option depends mainly on whether the CA is an
offline CA or an online CA:
■ For an offline CA, the audit settings are defined in the Local Security Policy.
■ For an online CA, the audit settings are typically enforced using a Group Policy Object
(GPO) linked to the OU where the issuing CA accounts exist in AD DS.
Chapter 6: Implementing a CA Hierarchy 145
Note There is nothing wrong with enforcing the audit settings on an issuing CA in the local
security policy. The risk is that a conflicting GPO would take precedence and potentially not
enable the required audit settings.
1. If you wish to define CA audit settings by using Group Policy, perform the following
steps:
a. From Administrative Tools, open Active Directory Users And Computers.
b. In the console tree, expand the OU structure, right-click the OU where the CA’s
computer account exists, and then click Properties.
c. In the OU Properties dialog box, on the Group Policy tab, click New.
d. Name the new Group Policy CA Audit Settings, and then click Edit.
e. In the console tree, navigate to the following container: Computer
Settings\Windows Settings\Security Settings\Local Policies\Audit Policy.
2. If you wish to define CA audit settings in the Local Security Policy console, perform the
following steps:
a. From Administrative Tools, open Active Directory Users And Computers.
b. In the console tree, navigate to the following container: Security Settings\Local
Policies\Audit Policy.
3. Enable the following auditing settings:
❑ Account Logon: Success, Failure
❑ Account Management: Success, Failure
❑ Directory Service Access: Failure
❑ Logon Events: Success, Failure
❑ Object Access: Success, Failure
❑ Policy Change: Success, Failure
❑ Privilege Use: Failure
❑ Process Tracking: No auditing
❑ System Events: Success, Failure
4. If defining a Group Policy Object, perform the following steps:
a. Close the Group Policy Editor or the Local Security Policy console.
b. In the OU Properties dialog box, click OK.
c. Close Active Directory Users And Computers.
5. If defining a Local Security Policy, close the Local Security Policy console.
146 Part II: Establishing a PKI
If you wish to enable KSP audit log events in the Windows Security log, a member of the local
Administrators group must run the following command at each CA:
auditpol /set /subcategory:"other system events" /success:enable /failure:enable
It is recommended to then restart Certificate Services to ensure that the CNG audit settings
are enforced.
Verifying Installation
Once you install the CA hierarchy—whether it is a single-tier or multi-tier hierarchy—you must
ensure that the AIA and CDP URLs are configured correctly before you start issuing certificates.
If the URLs are configured incorrectly, the certificate chaining engine might encounter errors
when it attempts to download CA certificates and CRLs from the referenced URLs. In addition,
you cannot go back and edit issued certificates. As discussed in Chapter 2, “Primer to PKI,”
a certificate is a signed object and cannot be modified without invalidating the signature
included in the thumbprint extension of the certificate.
The PKI Health Tool (PKIView.msc)—now included as part of the Certificate Services role
installation—evaluates every URL included in the AIA and CDP extensions of the certificates
in the CA hierarchy. The tool attempts to connect to each referenced URL and reports
whether the certificate or CRL is reachable as well as whether the current version is reaching
expiration.
You must run the PKI Health tool on a Windows Server 2008 computer that is a member of
the forest. To use the tool, use the following procedure:
1. From the Start menu, click Run, type pkiview.msc, and then click OK.
2. In the console tree, click each CA in the hierarchy. In the details pane, review the status
of each CRL and AIA location.
If a publication point is configured correctly, the status column will report a value of OK. If
the publication point is configured incorrectly or if the CA certificate or CRL is not copied
correctly to the publication point, the status column reports a status of Unable to Download.
Finally, if the CA certificate or CRL is near expiration, the status column will report a value of
Expiring.
Note
More details on using the PKI Health Tool are discussed in Chapter 8, “Verifying and
Monitoring Your Microsoft PKI.”
Chapter 6: Implementing a CA Hierarchy 147
Case Study: Deploying a PKI
You are the network administrator for Fabrikam, Inc. Based on the design requirements, you
have decided to deploy the CA hierarchy shown previously in Figure 6-1.
To assist you in configuring the CAPolicy.inf files, pre-installation batch files, and post-installation
batch files, the following design requirements are provided:
■ Root CA
❑ The root CA must use a key length of 2,048 bits for its public and private key pair.
❑ The root CA certificate must have a 20-year lifetime.
❑ The root CA will publish its base CRL twice a year.
❑ The root CA will not implement a delta CRL.
❑ The root CA certificate will not include an AIA or CDP extension.
❑ The root CA will issue subordinate CA certificates with a 10-year lifetime.
❑ The root CA certificate and CRL are published in AD DS to allow automatic
distribution to all Windows 2000 and later client computers.
❑ The root CA must issue subordinate CA certificates that have an AIA extension
with the first URL referencing the AD DS publication point and the second URL as
(where RootCACertificate is
the default name of the Root CA’s certificate file).
❑ The root CA must issue subordinate CA certificates that have a CDP extension
with the first URL referencing the AD DS publication point and the second URL as
(where RootCACRL is the default
name of the Root CA’s CRL file).
■ Policy CA
❑ The certification practice statement (CPS) for the Fabrikam PKI is published at the
URL www.fabrikam.com/CPS/Fabrikampolicy.asp.
❑ The OID assigned to the Fabrikam CPS is 1.3.6.1.4.1.311.509.4.1.
■ Issuing CA
❑ The issuing CA will host the Certificate Services Web Enrollment pages.
❑ The issuing CA will publish a base CRL daily and a delta CRL every eight hours.
Case Study Questions
The questions for this case study are divided into sections related to configuration of the
Fabrikam Corporate Root CA, the Fabrikam Corporate Policy CA, and the Fabrikam
Corporate Issuing CA.
148 Part II: Establishing a PKI
Fabrikam Corporate Root CA
Answer the following questions relating to configuration of the Fabrikam Corporate Root CA
based on the information provided in the design requirements:
1. How do you define the key length of 2,048 bits for the root CA during installation of the
root CA?
2. How do you ensure that the key length will remain 2,048 bits when the root CA’s
certificate is renewed?
3. What entries are required in the CAPolicy.inf file to specify the required base CRL and
delta CRL publication intervals?
4. How would you suppress the inclusion of an AIA and CDP extension in the root CA
certificate on Windows Server 2008 Standard Edition?
5. After configuring the CAPolicy.inf file, you note that none of the settings are applied to
the root CA when you install Certificate Services. You check and find that the file is
located in the C:\temp folder. Why did the installation not apply the settings in the
CAPolicy.inf file?
6. How do you configure the root CA to issue subordinate CA certificates with a lifetime of
10 years?
7. How do you define the location in Configuration naming context for publishing the root
CA certificate and CRL to AD DS? (Assume that the forest root domain is the same as
shown previously in Figure 6-1.)
8. What command is required to define the AIA publication URLs for the certificates
issued by the root CA?
9. What command is required to define the CDP publication URLs for the certificates
issued by the root CA?
Fabrikam Corporate Policy CA
Answer the following questions relating to configuration of the Fabrikam Corporate Policy CA
based on the information provided in the design requirements:
1. On the first attempt to install the policy CA, you receive the error that the CA is unable
to determine the revocation status for the policy CA certificate. What must you do to
ensure that the policy CA recognizes the root CA certificate as a trusted root certificate
and can determine the revocation status for the policy CA certificate?
2. What command do you use to add the root CA certificate as a trusted root CA certificate
on the Fabrikam Corporate Policy CA, assuming that the name of the root CA certificate
is FABINCCA01_Fabrikam Corporate Root CA.crt?
Chapter 6: Implementing a CA Hierarchy 149
3. What command do you use to allow the policy CA to access the root CA CRL, assuming
that the name of the root CA certificate is Fabrikam Corporate Root CA.crl?
4. How do you configure the CAPolicy.inf file on the policy CA to include the CPS and
related OID?
Fabrikam Corporate Issuing CA
Answer the following questions relating to configuration of the Fabrikam Corporate Policy CA
based on the information provided in the design requirements:
1. What commands do you use to ensure that the root CA and policy CA certificates are
automatically added to the local machine store of all Windows 2000, Windows XP, and
Windows Server 2003 domain members?
2. What commands do you use to ensure that the root CA and policy CA CRLs are
automatically added to the local machine store of all Windows 2000, Windows XP, and
Windows Server 2003 domain members?
3. On the first attempt to install the issuing CA, you receive the error that the CA is unable
to determine the revocation status for the policy CA certificate. Assuming that you have
successfully published the root and policy CA information to AD DS, what must you do
to ensure that the issuing CA can determine the revocation status for the issuing CA
certificate?
4. What are the minimum components of the World Wide Web Service required to install
the Certificate Services Web Enrollment pages?
5. What commands are required at the issuing CA to publish the base CRL daily and the
delta CRL every eight hours?
Additional Information
■ Microsoft Official Curriculum, Course 2821: “Designing and Managing a Windows
Public Key Infrastructure” ( />2821Afinal.mspx)
■ “Best Practices for Implementing a Microsoft Windows Server 2003 Public Key
Infrastructure” ( />481d-8a96-03e0be7374ed1033.mspx?mfr=true)
■ “Certificate Revocation and Status Checking” ( />library/bb457027.aspx)
■ “Active Directory Certificate Server Enhancements in Windows Server Code Name
‘Longhorn’” ( />4ff9-8fb8-0539ba21ab95&displaylang=en)
150 Part II: Establishing a PKI
■ 231182: “Certificate Authority Servers Cannot Be Renamed or Removed from Network”
■ 555151: “How to Remove Manually Enterprise Windows Certificate Authority from
Windows 2000/2003 Domain”
■ 896733: “TechNet Support WebCast: Best Practices for Public Key Infrastructure: Steps
to Build an Offline Root Certification Authority (Part 1 of 2)”
■ 896737: “TechNet Support WebCast: Best Practices for Public Key Infrastructure:
Setting Up an Offline Subordinate and an Online Enterprise Subordinate (Part 2 of 2)”
■ 927169: “Custom Extensions in the CAPolicy.inf File Do Not Take Effect After You
Renew the Root CA Certificate by Using a New Key”
Note
The five articles above can be accessed through the Microsoft Knowledge Base.
Go to , and enter the article number in the Search The
Knowledge Base text box.