MacBook For Dummies phần 2 doc
Bạn đang xem bản rút gọn của tài liệu. Xem và tải ngay bản đầy đủ của tài liệu tại đây (1.04 MB, 39 trang )
If you want to keep an external keyboard handy, consider a laptop shelf —
these Plexiglas or metal stands elevate your laptop several inches above
the desk, putting the screen at a better ergonomic position and allowing
you to park your keyboard and external mouse underneath.
Unpacking and Connecting Your Laptop
You’re going to love this section — it’s short and sweet because the configu-
ration of a laptop on your desktop is a piece of cake. (Sorry about the cliché
overload, but this really is easy.)
Unpacking for the road warrior
Follow these guidelines when unpacking your system:
ߜ Check for damage. I’ve never had a box arrive from Apple with shipping
damage, but I’ve heard horror stories from others (who claim that King
Kong must have been working for That Shipping Company).
Check all sides of your box before you open it. If you find significant
damage, take a photograph (just in case).
ߜ Search for all the parts. When you’re removing those chunks o’
Styrofoam, make certain that you’ve checked all sides of each foam
block for parts snuggled therein or taped for shipment.
ߜ Keep all packing materials. Do not head for the trash can with the box
and packing materials. Keep your box and all packing materials for at
least a year, until the standard Apple warranty runs out. If you have to
ship the laptop to an Apple service center, the box and the original pack-
ing is the only way for your machine to fly.
And now, a dramatic Mark’s Maxim about cardboard containers:
Smart computer owners keep their boxes far longer than a year. If you
sell your laptop or move across the country, for example, you’ll want
that box. Trust me on this one.
ߜ Store the invoice for safekeeping. Your invoice is a valuable piece of
paper, indeed.
Save your original invoice in a plastic bag, along with your computer’s
manuals and original software, and other assorted hoo-hah. Keep the
bag on your shelf or stored safely in your desk, and enjoy a little peace
of mind.
19
Chapter 1: Hey, It Really Does Have Everything I Need
05_04859X ch01.qxp 7/20/06 10:40 PM Page 19
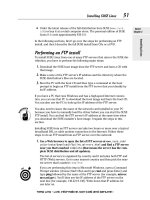
ߜ Read the Mac’s manual. “Hey, wait a minute, Mark — why do I have to
read the manual from Apple along with this tome?” Good question, and
here’s the answer: The documentation from Apple might contain new and
updated instructions that override what I tell you here. (For example,
“Never cut the red wire. Cut the blue wire instead.” Or something to that
effect.) Besides, Apple manuals are rarely thicker than a restaurant menu.
Connecting cables 101
Your laptop makes all its connections simple, but your computer depends on
you to get the outside wires and thingamabobs where they go.
The absolutely essential connection
After your new Mac is resting comfortably in its assigned spot (I assume
that’s a desktop), you need to make just one required connection: the power
cable! Plug the cable into the corresponding socket on the Mac first, and then
plug ’er into that handy AC outlet.
Adding the Internet to the mix
If you have Internet access or a local computer network, you need to make at
least one of the following connections in this section.
If you don’t have any Internet service, start with local dialup Internet access.
(Owners of MacBook and MacBook Pro laptops will need an external USB
modem, because these models no longer have an internal modem.) You can
check high-speed options later — typically, your local cable and telephone
companies can provide you with more information on your long-term choices
for Internet service.
If you get on the Internet by dialing a standard phone number and your laptop
has an internal or external USB modem, just make two more connections:
1. Plug one of the telephone cable’s connectors into your external
modem port.
2. Plug the other telephone cable connector into your telephone line’s
wall jack.
After you get your account information from your ISP, Chapter 17 has the
details on configuring your modem and Internet settings for dialup access.
If you have high-speed Internet service, or if you’re in an office or school with
a local computer network, you can probably connect through your laptop’s
built-in Ethernet port. You make two connections:
20
Part I: Tie Myself Down with a Desktop? Preposterous!
05_04859X ch01.qxp 7/20/06 10:40 PM Page 20
1. Plug one end of the Ethernet cable into the Ethernet port on the Mac.
2. Plug the other end of the Ethernet cable into the Ethernet port from
your network.
Your network port is probably one of the following: an Ethernet wall
jack, an Ethernet hub or switch, or a cable or DSL Internet router (or
sharing device).
Will you be joining a wireless network? If so, you’ll find the information you
need on installing an AirPort Extreme wireless card in an older Mac laptop in
Chapter 20, and all the details you need to configure Tiger for wireless net-
working in Chapter 17.
Great, a Lecture about Handling
My Laptop
Proper handling of your laptop is important, so we’ll take a moment to cover
the Rules of Proper Laptop Deportment. Okay, perhaps I’m lecturing a bit, but
a little common sense goes a long way when handling any computer equip-
ment, and your laptop is no different. (Scolding mode off.)
Keep these rules in mind while opening and carrying your laptop:
ߜ The cover is your friend. Open your laptop’s cover slowly, without jerk-
ing or bending it.
ߜ Close it before you move it. By closing your laptop, you put your Mac
OS X operating system into sleep mode, and the hard drive automati-
cally spins down (making it safer to move). The laptop is still on, and
will spring back to life once you open the cover.
ߜ Be nice to your keyboard. Don’t press too hard on those keys! Use the
same amount of pressure that you use with a desktop computer keyboard.
ߜ Keep food and drinks far away. Care to turn your laptop into a very
expensive doorstop? Then go ahead and park your soda next to it. (Oh,
and crumbs are perfect if you’re interested in buying replacement key-
boards.)
ߜ Keep your laptop as level as possible. Using your laptop while it’s tilted
too far in any direction can eventually cause problems with your hard
drive. I kid you not.
21
Chapter 1: Hey, It Really Does Have Everything I Need
05_04859X ch01.qxp 7/20/06 10:40 PM Page 21
An Overview of Mac Software Goodness
This section answers the most common of all novice computer questions:
“What the heck will I do with this thing?” You’ll find additional details and
exciting factoids about the software that you get for free, software you’ll
want to buy, and stuff you can do on the Internet.
What comes with my laptop?
Currently, Apple laptops ship with the following major software applications
installed and ready to use:
ߜ The iLife 2006 suite: You know you want these applications! They turn
your Mac into a digital hub for practically every kind of high-tech device
on the planet, including DV camcorders, digital cameras, portable music
players, PDAs, and even cell phones.
Chapters 11–15 focus on the major applications that make up iLife:
iMovie HD, iDVD, iTunes, iPhoto, and GarageBand.
ߜ Office 2004 and iWork trial versions: You can try both of those produc-
tivity suites, but expect to buy the full shooting match if you want to
continue using either one.
ߜ QuickBooks for Mac: Track your expenses, build a budget (and watch it
evaporate), and plan for your financial future. Your checkbook suddenly
becomes manageable and tax time becomes easier when you organize
your financial world with QuickBooks.
ߜ Photo Booth and Front Row: You’ll discover more about these applica-
tions in Chapter 10 — for now, suffice it to say that Photo Booth works
with your laptop’s iSight camera, while Front Row is the remote-control
software you’ll use with your Apple remote.
The installed software on your Mac might change as new programs become
available.
Connecting to the Internet from your lap
What is a modern computer without the Internet? Apple gives you great tools
to take full advantage of every road sign and off-ramp on the Information
Superhighway right out of the box:
ߜ Web surfing: I use Tiger’s Apple Safari Web browser every single day. It’s
faster and better designed than Internet Explorer, with unique features
such as tabbed browsing and built-in RSS feeds.
22
Part I: Tie Myself Down with a Desktop? Preposterous!
05_04859X ch01.qxp 7/20/06 10:40 PM Page 22
If tabbed browsing and RSS feeds sound like ancient Aztec to you, don’t
worry. Chapter 8 is devoted entirely to Safari.
ߜ Web searches: Sherlock can search the entire Internet for stocks, movie
listings, airline schedules, dictionaries, and foreign language transla-
tions. I explain this Internet sleuth in Chapter 7.
ߜ Chat: iChat lets you use your Mac to chat with others around the world
for free using the Internet — by keyboard, voice, or full-color video. This
is awesome stuff straight out of Dick Tracy and Buck Rogers. If you’ve
never seen a video chat, you’ll be surprised by just how good your
friends and family look!
Always wear a shirt when videoconferencing.
ߜ E
mail: Soldier, Apple’s got you covered. The Mail application is a full-
featured e-mail system, complete with defenses against the torrent of
junk mail awaiting you. (Imagine a hungry digital saber-toothed tiger
with an appetite for spam.) Send pictures and attached files to everyone
on the planet, and look doggone good doing it.
Applications that rock
Dozens of small applications are built into Mac OS X. I mention them in later
chapters, but here are four good examples to whet your appetite:
ߜ iCal: Keep track of your schedule and upcoming events, and even share
your calendar online with others in your company or your circle of
friends. See how to keep your life in order in Figure 1-2.
ߜ DVD Player: Put all that widescreen beauty to work and watch your
favorite DVD movies with DVD Player! You have all the features of
today’s most expensive standalone DVD players, too, including a spiffy
onscreen control that looks like a remote.
ߜ Address Book: Throw away that well-thumbed collection of fading
addresses. Tiger’s Address Book can store, search, and recall just about
any piece of information on your friends, family, and acquaintances.
ߜ Chess: Ah, but this isn’t the chessboard your Dad used! Play the game of
kings against a tough (and configurable) opponent — your MacBook —
on a beautiful 3-D board. Heck, your Mac even narrates the game by
speaking the moves!
You can use the data you store in your Address Book in other Apple applica-
tions included with Tiger, such as Apple Mail and iChat.
23
Chapter 1: Hey, It Really Does Have Everything I Need
05_04859X ch01.qxp 7/20/06 10:40 PM Page 23
Boot Camp For Dummies
Although Mac OS X Leopard — the next version of Mac OS X — is still being
polished, one particularly exciting feature of this upcoming release is avail-
able now. You can use Apple’s Boot Camp utility and your licensed copy of
Windows XP to install and boot Windows on your Intel-based MacBook or
MacBook Pro laptop!
Boot Camp creates a Windows-friendly partition (or section) on your hard
drive, where all your Windows files are stored. Other than the slightly strange
key assignments you’ll have to remember, early adopters of Boot Camp
report that it’s surprisingly reliable and easy to use. However, I strongly urge
that you back up your laptop on a regular basis; inviting Windows to your
Mac laptop also invites potential viruses as well.
For more information on Boot Camp and how you can download and install it,
visit Apple’s Mac OS X page at www.apple.com/macosx/.
Figure 1-2:
Hey, isn’t
that iCal
running on
your Mac?
You are
iTogether!
24
Part I: Tie Myself Down with a Desktop? Preposterous!
05_04859X ch01.qxp 7/20/06 10:40 PM Page 24
Other Stuff That Nearly Everyone Wants
No man is an island, and no computer is either. I always recommend the same
set of stuff for new PC and Mac owners. These extras help keep your new
computer clean and healthy (and some make sure you’re happy as well):
ߜ Surge suppressor: Even an all-in-one computer like your laptop can fall
prey to a power surge. I recommend one of these:
• A basic surge suppressor with a fuse can help protect your Mac
from an overload.
• A UPS (uninterruptible power supply) costs a little more, but it
does a better job of filtering your AC line voltage to prevent
brownouts or line interference from reaching your computer.
Of course, your laptop’s battery immediately kicks in if you experi-
ence a blackout, so a UPS is less important for your computer.
However, any computer tech will tell you that filtered AC current is
far better for your laptop, and your UPS will also provide power for
external devices that don’t have a battery.
ߜ Screen wipes: Invest in a box of premoistened screen wipes. Your Mac’s
screen can pick up dirt, fingerprints, and other unmentionables faster
than you think.
Make sure your wipes are especially meant for LCD or laptop computer
screens.
ߜ Blank CDs and DVDs: Depending on the type of optical drive installed in
your laptop — and the type of media you’re recording, such as com-
puter data CDs, DVD movies, or audio CDs — you’ll want blank discs for
• CD-R (record once)
• CD-RW (record multiple times)
• DVD-R (record once)
ߜ Cables: Depending on the external devices and wired network connec-
tivity you’ll be using, these are
• A standard Ethernet cable (for wired networks or high-speed
Internet)
• FireWire or USB cables for devices you already have
Most hardware manufacturers are nice enough to include a cable
with their products, but there are exceptions, especially USB print-
ers. Shame on those cheapskates!
25
Chapter 1: Hey, It Really Does Have Everything I Need
05_04859X ch01.qxp 7/20/06 10:40 PM Page 25
ߜ A restraining cable: For those who are a little more security-conscious
or tend to use their laptops in public places, a standard Kensington
laptop lock slot is provided on your computer’s case. The principle is
the same as a bicycle cable lock: if your laptop is secured by a cable to a
sturdy fixture, it’s going to be nearly impossible for it to walk off with
someone else.
ߜ A wrist rest: You might have many reasons to buy a new Mac laptop, but
I know that a bad case of carpal tunnel syndrome is not one of them. Take
care of your wrists by carrying a keyboard wrist rest in your laptop bag.
26
Part I: Tie Myself Down with a Desktop? Preposterous!
05_04859X ch01.qxp 7/20/06 10:40 PM Page 26
Chapter 2
Turning On Your Portable
Powerhouse
In This Chapter
ᮣ Turning on your laptop
ᮣ Checking your Mac for proper operation
ᮣ Monitoring your battery and heat level
ᮣ Setting up Mac OS X Tiger
ᮣ Registering your MacBook or MacBook Pro
ᮣ Using Migration Assistant
ᮣ Copying information from a Windows PC
I
n Chapter 1, you got as far as unpacking your Mac laptop and connecting a
number of cables to it, but unless you bought this computer solely as a
work of modern art, it’s time to turn on your Mac and begin living The Good
Life. (Plus, you still get to admire that Apple design whilst using iTunes.)
After you get your new beauty powered on, I will help you with an initial
checkup of your laptop’s health.
I also familiarize you with the initial chores that you need to complete —
such as using the Mac OS X Setup and moving the data and settings from
your existing computer to your MacBook or MacBook Pro — before you
settle in with your favorite applications.
In this chapter, I assume that Mac OS X Tiger was preinstalled on your Mac
or that you just completed an upgrade to Tiger from an earlier version of
Mac OS X.
06_04859X ch02.qxp 7/20/06 10:40 PM Page 27
Tales of the On Button
Your Mac’s power switch is located on the right side of the keyboard. Press it
now to turn on your Mac, and you will hear the pleasant startup tone that’s
been a hallmark of Apple computers for many years. The power button will
also light up. Don’t be alarmed if you don’t immediately see anything onscreen
because it takes a few seconds for the initial Apple logo to appear.
In my experience, sometimes a simple quick press of the power button on
some Mac laptop models just doesn’t do it. Rather, you actually have to
hold the button down for a count of two or so before the computer turns on.
However, if your Mac laptop ever locks up tight (and you can’t quit an appli-
cation, as I demonstrate in Chapter 4), the power button gives you another
option: hold it down for a count of five and your Mac shuts off.
As the Apple logo appears, you see a twirling, circular high-tech progress
indicator that looks like something from a James Bond movie. That’s the sign
that your Mac is loading Tiger and checking your internal drive for problems.
Sometimes the twirling circle can take a bit longer to disappear. As long as it’s
twirling, though, something good is happening.
Next, Tiger displays the soon-to-be-quite-familiar Aqua Blue (yup, that’s its
name) background while it loads certain file sharing, networking, and print-
ing components (and such). This time, you get a more conservative progress
bar, but the result is the same. Just wait patiently a bit longer.
At last, your wait is rewarded, and you see the Tiger Setup Assistant.
Mark’s Favorite Signs of a
Healthy Laptop
Before you jump into the fun stuff, don’t forget an important step — a quick
prelim check of the signs that your new mobile Mac survived shipment intact
and happy.
If you can answer “yes” to each of these questions, your Mac likely made the
trip without serious damage:
1. Does the case show signs of damage?
It’s pretty easy to spot damage to your Mac’s svelte design. Look for
scratches and puncture damage.
2. Does the LCD screen work, and is it undamaged?
28
Part I: Tie Myself Down with a Desktop? Preposterous!
06_04859X ch02.qxp 7/20/06 10:40 PM Page 28
Does the cover open smoothly? Are any individual dots (or pixels) on
your LCD monitor obviously malfunctioning? Bad pixels appear black or
in a different color than everything surrounding them. (Techs call these
irritating anarchists dead pixels. A 13" MacBook screen has literally hun-
dreds of thousands of pixels, and unfortunately, many new LCD screens
include one or two dead ones.
3. Do the keyboard and trackpad work?
Check your Mac’s built-in trackpad by moving your finger across its sur-
face; the cursor should move on your screen. To check the keyboard,
press the Caps Lock key on the left and observe whether the Caps Lock
light turns on and off.
If you do notice a problem with your laptop (and you can still use your Safari
browser and reach the Web), you can make the connection to an Apple sup-
port technician at www.apple.com. If your MacBook Pro remains dead —
like an expensive paperweight — and you can’t get to the Internet, you can
check your phone book for a local Apple service center. Chapter 19 also
offers troubleshooting information.
You’re Not Going to Lecture Me
About Batteries, Are You?
No, this is not going to be a lecture. In fact, the only lecture I’ll put you
through in this book concerns backing up. (Which you should do.) Instead,
consider these tips as your rules of the road for monitoring and charging
your battery:
ߜ Keep your laptop plugged into an AC socket when possible. I take
every opportunity to top off my laptop’s battery, and so should you.
ߜ Your battery recharges faster when your laptop is off or in sleep
mode. Have only half an hour to charge your battery before you’re away
from an AC socket? In that case, don’t use your MacBook whilst it’s
plugged in and charging. For the most juice you can scavenge, turn off
your laptop or leave it in sleep mode.
ߜ Monitor your battery level from the Finder menu. I love Tiger’s battery
monitoring system! Your laptop’s battery life is displayed in the Finder
menu as a percentage of power remaining (with a fully charged battery
registering at 100%). Keep in mind that the percentage shown is esti-
mated using your current System Preference settings and power usage,
so if you change your Energy Saver settings or remove a USB device that
draws power from your laptop, you’ll see that change reflected in the
battery meter.
29
Chapter 2: Turning On Your Portable Powerhouse
06_04859X ch02.qxp 7/20/06 10:40 PM Page 29
ߜ Turn off unnecessary hardware to conserve battery power. If you
want to conserve battery power as much as possible, disconnect any
USB or FireWire devices, and turn off your AirPort and Bluetooth wire-
less hardware if you’re not connected to a network. You can save power
also by reducing the brightness of your display from your laptop’s key-
board, by using sleep mode, and by removing CDs and DVDs from your
drive.
ߜ Calibrate your battery. You can “train” your battery to provide the max-
imum charge by calibrating it; Apple recommends that you recalibrate
your battery once a month. First, charge your battery until the Finder
menu battery meter indicates that the unit is fully charged at 100%, and
then keep your laptop connected to an AC socket for another two hours
to ensure a maximum charge. Now disconnect the power cord and use
your laptop on battery power until it’s fully discharged and it automati-
cally switches to sleep mode (make sure that you’ve closed all your
applications when you see the low battery warning dialog box, so you
don’t lose anything). Allow your laptop to sleep (or turn it off) for a full
five hours. Finally, reconnect the AC cord and fully charge your battery.
You’re finished!
Setting Up and Registering Your Laptop
After your Mac is running and you’ve given it the once-over for obvious ship-
ping damage, your next chore is to set up your laptop. Unlike other tasks in
this book, I won’t cover the setup process step-by-step. Apple contextually
30
Part I: Tie Myself Down with a Desktop? Preposterous!
Hot patootie, is my laptop steam-powered?
It’s a well-known fact that laptops generate heat.
Today’s super-fast multicore processors can
work up a head of steam — pun intended —
while you’re using them, and even though your
laptop has a fan, some of that heat is simply radi-
ated from the bottom of the computer.
What you may not realize, however, is just how
much
heat your MacBook or MacBook Pro can
produce! You’re not going to be scalded if you
shift your MacBook from a desk to your lap
(Apple dislikes lawsuits as much as the next
company), but if you’ve been using that laptop
for hours, it will be uncomfortably hot!
To avoid that burning sensation, buy a laptop
stand or cooling pad for your desk. These nifty
metal or Plexiglas pedestals raise your laptop
up off of your desk, allowing air to flow under
the bottom of the computer for better cooling.
Also, a laptop stand elevates the screen to a
more ergonomic position. (The keyboard may
suddenly be harder to use, naturally, but that’s
yet another reason why I recommend an exter-
nal keyboard when you’re using your Mac
laptop at a semipermanent desk location; it
saves wear and tear on your laptop keyboard,
and you get a full-size keyboard.)
06_04859X ch02.qxp 7/20/06 10:40 PM Page 30
tweaks the questions that you see during setup on a regular basis, and the
questions are very easy to answer. Everything is explained onscreen, com-
plete with onscreen Help if you need it.
However, I do want you to know what to expect as well as what information
you need to have at hand. I also want you to know about support opportuni-
ties like Apple’s .Mac Internet services. Hence this section: Consider it a
study guide for whatever your MacBook’s setup procedure has to throw
at you.
Setting up Mac OS X Tiger
After you start your computer for the first time — or if you just upgraded
from Mac OS 9 or an earlier version of Mac OS X — your laptop will likely
launch Tiger Setup automatically. (Note that some custom install options,
such as the Archive and Install option, may not launch the setup procedure.)
The setup process takes care of a number of different tasks:
ߜ Setup provides Tiger with your personal information. As I mention in
Chapter 1, your Mac ships with a bathtub full of applications, and many
of those use your personal data (such as your address and telephone
number) to automatically fill out your documents.
If that stored personal information starts you worrying about identity
theft, I congratulate you. If you’re using your common sense, it should.
However, in this case, Apple doesn’t disseminate this information any-
where else, and the applications that use your personal data won’t send
it anywhere, either. And Safari, the Apple Web browser, fills out forms on
a Web page automatically only if you give your permission.
ߜ Setup configures your language and keyboard choices. Mac OS X is a
truly international operating system, so you are offered a chance to con-
figure your laptop to use a specific language and keyboard layout.
ߜ Setup configures your e-mail accounts in Apple Mail. If you already
have an e-mail account set up with your ISP, keep the e-mail account
information that the ISP provided handy to answer these questions. The
info should include the incoming POP3 and outgoing SMTP mail servers
you’ll be using, your e-mail address, and your login name and password.
ߜ Setup allows you to open a trial subscription with Apple’s .Mac ser-
vice. Apple’s .Mac subscription service provides you with online file
storage, iSync capability across multiple computers, backups to your
online storage, Apple e-mail accounts (through both Web mail and the
Apple Mail application), photocasting, podcasting, and your own acre of
iWeb site on the Internet. I go into all these in detail in Chapter 9, but for
now, just sign up (or sign in, if you already have an existing account) and
take the opportunity to feel smug about owning an Apple computer.
31
Chapter 2: Turning On Your Portable Powerhouse
06_04859X ch02.qxp 7/20/06 10:40 PM Page 31
ߜ Setup sends your registration information to Apple. As a proud owner
of a Mac laptop, take advantage of the year of hardware warranty sup-
port and the free 90 days of telephone support — but you have to regis-
ter to use ’em. Rest assured that all this info is confidential.
ߜ Setup launches Migration Assistant. This assistant guides you through
the process of migrating (an engineer’s term for moving) your existing
user data from your old Mac or PC to your new laptop. Naturally, if your
MacBook is your first computer, you can skip this step with a song in
your heart! (Read more on Migration Assistant in the section, “Importing
Stuff from Another Mac.”)
Registering your Mac
I’ll be honest here: I know that many of us, myself included, don’t register
every piece of computer hardware we buy. For example, I didn’t register my
wireless Bluetooth adapter that I bought for my older iBook because the total
expenditure was only around $40, the gizmo has no moving parts, and I’m
never likely to need technical support to use it or get it fixed.
However, your MacBook is a different kettle of fish altogether, and I strongly
recommend that you register your purchase with Apple during the setup
process. You spent a fair amount on your computer, and it’s an investment
with a significant number of moving parts.
Even the hardiest of techno-wizards would agree with this important Mark’s
Maxim:
If you don’t register your new laptop, you can’t receive support.
And rest assured that Apple is not one of those companies that constantly
pesters you with e-mail advertisements and near-spam. I’ve registered every
Apple computer I’ve owned, and I’ve never felt pestered. (And I have an
extremely low tolerance for spam.)
Importing Stuff from Another Mac
If you’re upgrading from an older Mac running Mac OS X to your new laptop, I
have great news for you: Apple includes Migration Assistant, a utility applica-
tion that can help you copy (whoops, I mean, migrate) all sorts of data from
your old Mac to your new machine. The list of stuff that gets copied over
includes the following:
32
Part I: Tie Myself Down with a Desktop? Preposterous!
06_04859X ch02.qxp 7/20/06 10:40 PM Page 32
ߜ User accounts: If you set up multiple user accounts (so that more than
one person can share the computer), the utility ports them all to your
new Mac.
ߜ Network settings: Boy, howdy, this is a real treat for those with manual
network settings provided by an ISP or a network administrator!
Migration Assistant can re-create the entire network environment of
your old Mac on your new laptop.
ߜ System Preference settings: If you’re a fan of tweaking and customizing
Mac OS X to fit you like a glove, rejoice. Migration Assistant actually
copies over all the changes that you’ve made in System Preferences on
your old Mac! (Insert sound of angelic chorus: Hallelujah!)
ߜ Documents: The files in your Documents folders are copied to your
new Mac.
ߜ Applications: Migration Assistant tries its best to copy over the third-
party applications that you’ve installed in your Applications folder on the
older Mac. I say tries its best because you might have to reinstall some
applications, anyway. Some developers create applications that spread
out all sorts of files across your hard drive, and Assistant just can’t keep
track of those nomadic files. And some other applications make the trek
just fine, but you might have to reenter their serial numbers.
Setup launches Migration Assistant automatically if you indicate that you need
to transfer stuff during the setup process, but you can always launch Migration
Assistant manually at any time. You’ll find it in the Utilities folder inside your
Applications folder; just double-click the Migration Assistant icon.
To use Migration Assistant to copy your system from your older Mac, you
need a FireWire cable to connect the computers. If you don’t already have
one, you can pick one up at your local Maze o’ Wires electronics store or at
your computer store. (This cable will probably come in handy in the future
as well, so it’s not a one-use wonder.)
Follow these steps to use Migration Assistant:
1. Click Continue on the opening screen.
Assistant prompts you for the account name and password that you cre-
ated during the setup procedure, as shown in Figure 2-1. Your account is
an admin account, meaning that you have a higher security level that
allows you to change things in Tiger. (See Chapter 16 for much more
detail on user accounts.)
2. Type your password and then click OK.
Characters in your password are displayed as bullet characters for
security.
33
Chapter 2: Turning On Your Portable Powerhouse
06_04859X ch02.qxp 7/20/06 10:40 PM Page 33
3. Click From Another Mac and then click Continue.
4. Connect a FireWire cable between the two computers and then click
Continue.
5. Restart your older Mac while holding down the T key. Continue hold-
ing down the T key until you see the FireWire symbol appear on your
older machine.
This restarts your older computer in FireWire Target Disk mode, in which
your older Mac essentially becomes a huge external FireWire hard drive.
(Neat trick.)
6. Click Continue.
7. Select the check boxes next to the user accounts that you want to
transfer from your older machine (see Figure 2-2) and then click
Continue.
The Assistant displays how much space is required to hold the selected
accounts on your new laptop’s hard drive.
8. Select the check boxes next to the applications and files that you want
to copy (see Figure 2-3) and then click Continue.
Figure 2-1:
Enter your
admin
password
to use
Migration
Assistant.
34
Part I: Tie Myself Down with a Desktop? Preposterous!
06_04859X ch02.qxp 7/20/06 10:40 PM Page 34
9. Select the check boxes next to the settings that you want to transfer
(see Figure 2-4).
Normally, you want to migrate all three groups of settings.
10. Click the Migrate button.
11. After everything is copied, press and hold the power button on your
older Mac to shut it off. Then disconnect the FireWire cable.
Figure 2-3:
Would you
like
applications
and files
with that
migration?
Figure 2-2:
Select the
user
accounts
you want to
migrate.
35
Chapter 2: Turning On Your Portable Powerhouse
06_04859X ch02.qxp 7/20/06 10:40 PM Page 35
Importing Stuff from Windows
(If You Must)
If you’re a Windows-to-Mac switcher, you made a wise choice, especially if
you’re interested in the creative applications in the iLife suite! Although you
could choose to start your Apple computing life anew, you probably want to
migrate some of your existing documents and files from that tired PC to your
bright, shiny, new MacBook Pro.
Unfortunately, Mac OS X has no Windows Migration Assistant. However, if
you’re moving from a Windows PC to a Mac, you can copy your files manually
from a CD or DVD, a USB Flash drive, or over a network. (Note, however, that
today’s Mac laptops don’t come with a floppy drive. And trust me, you would-
n’t want to use one to move anything that matters, anyway.)
The Mac OS X Help system contains an entire subsection on specific tricks
you can use when switching from Windows to Mac, including how to connect
to a Windows network and how to connect the two computers together
directly.
Even with Boot Camp — Apple’s dual-boot feature that allows you to run
both Tiger and Windows XP on your MacBook or MacBook Pro — manually
moving existing Windows applications such as Paint Shop Pro to your
Figure 2-4:
Copy Mac
OS X
settings
with
Migration
Assistant.
36
Part I: Tie Myself Down with a Desktop? Preposterous!
06_04859X ch02.qxp 7/20/06 10:40 PM Page 36
laptop’s hard drive usually won’t work. That’s because most Windows soft-
ware installs all sorts of necessary files in several folders across your hard
drive. Instead, you’ll have to install Windows XP on your Mac laptop (using
Boot Camp) and then reinstall your Windows applications.
In general, however, you can move the document files you’ve created — such
as Office documents, movies, photos, and music — without a problem. Table
2-1 illustrates what can be moved between Windows XP and Mac OS X as well
as the application you use in Tiger to open those files and documents.
Table 2-1 Moving Media and Documents Betwixt Computers
File Type Windows XP Mac OS X Mac App
Location Location
Music files My Music folder Music folder iTunes
Video and movie files My Videos folder Movies folder QuickTime/DVD
Player
Digital photos My Pictures folder Pictures folder iPhoto
Mac Office documents My Documents Documents Office/iWorks
folder folder
If you don’t mind investing around $50, use the Move2Mac software utility,
which does most of the work of Migration Assistant for those switching from
a Windows PC. From Detto Technologies (www.detto.com/move2mac),
Move2Mac comes complete with a special USB-to-USB cable that connects
your two computers for high-speed copying. You can choose what you want
to transfer to your new Mac (use Table 2-1 as a guide), and the copying is
performed automatically for you. Plus, Move2Mac transfers goodies such
as your home page and bookmarks from Internet Explorer, desktop back-
grounds, and even your Address Book contacts and account settings from
Outlook Express. Move2Mac makes switching much easier, and I can highly
recommend it.
37
Chapter 2: Turning On Your Portable Powerhouse
06_04859X ch02.qxp 7/20/06 10:40 PM Page 37
38
Part I: Tie Myself Down with a Desktop? Preposterous!
06_04859X ch02.qxp 7/20/06 10:40 PM Page 38
Chapter 3
The Laptop Owner’s Introduction
to Mac OS X
In This Chapter
ᮣ Introducing Mac OS X Tiger
ᮣ Appreciating the UNIX core underneath Tiger
ᮣ Recognizing similarities between Windows XP and Tiger
ᮣ Getting help while learning about Tiger
I
n the other books that I’ve written about Mac OS X Tiger, I use all sorts of
understated phrases to describe my operating system of choice, such as
elegantly reliable, purely powerful, and supremely user-friendly.
But why is Tiger such a standout? To be specific, why do creative profession-
als and computer techno-wizards across the globe hunger for the very same
Mac OS X that runs your Mac laptop? Why is Tiger so far ahead of Windows
XP in features and performance? Good questions, all!
In this chapter, I answer those queries and satisfy your curiosity about your
new big cat. I introduce the main elements of the Tiger desktop, and I show
you the fearless UNIX heart that beats underneath Tiger’s sleek exterior. I
also point out the most important similarities between Tiger and Windows
XP, and I outline the resources available if you need help with Mac OS X.
Oh, and I promise to use honest-to-goodness English in my explanations, with
a minimum of engineer-speak and indecipherable acronyms. (Hey, you’ve got
to boast about Tiger in turn to your family and friends. Aunt Harriet might
not be as technologically savvy as we are.)
07_04859X ch03.qxp 7/20/06 10:39 PM Page 39
Your Own Personal Operating System
Tiger is a special type of software called an operating system. You know, OS,
as in Mac OS. That means Tiger essentially runs your MacBook Pro and also
allows you to run all your other applications, such as Keynote or Photoshop
CS2. Tiger is the most important computer application — or software — that
you run.
Think of a pyramid, with Tiger as the foundation and other applications run-
ning on top.
You’re using the operating system when you aren’t running a specific applica-
tion, such as when you perform these actions:
ߜ Copying files from a CD to your hard drive
ߜ Choosing a different screensaver
Sometimes, Tiger even peeks through an application while it’s running. For
example, actions like these are also controlled by Tiger:
ߜ The Open, Save and Save As dialog boxes you see when working with
files in Photoshop CS2
ߜ The Print dialog that appears when you print a document in Microsoft
Word 2004
In this section, I escort you around the most important hotspots in Tiger, and
you meet the most interesting onscreen thingamabobs that you use to con-
trol your laptop. (I told you I wasn’t going to talk like an engineer!)
The Tiger desktop
The Tiger desktop isn’t made of wood, and you can’t stick your gum under-
neath. However, it does indeed work much like the surface of a traditional
desk. You can store things there, organize things into folders, and take care of
important tasks such as running other applications. Heck, you even have a
clock and a trash can.
Gaze upon Figure 3-1 and follow along as you venture to your desktop and
beyond.
40
Part I: Tie Myself Down with a Desktop? Preposterous!
07_04859X ch03.qxp 7/20/06 10:39 PM Page 40
Meet me at the dock
The dock is the closest thing to the dashboard of a car that you’re likely to
find on a Macintosh. It’s a pretty versatile combination — it’s one part orga-
nizer, one part application launcher, and one part system monitor. From here,
you can launch applications, see what’s currently running, and display or
hide the windows shown by your applications.
Each icon in the dock represents one of the following:
ߜ An application that you can run (or is currently running)
ߜ An application window that’s minimized (shrunk)
ߜ A Web page
ߜ A document or folder on your system
Finder menu
DockIcons
Finder window
Figure 3-1:
Everything
Tiger starts
here — the
Mac OS X
Desktop.
41
Chapter 3: The Laptop Owner’s Introduction to Mac OS X
07_04859X ch03.qxp 7/20/06 10:39 PM Page 41
ߜ A network server or shared folder
ߜ Your trash
I cover the dock in more detail in Chapter 5.
The dock is highly configurable. You can
ߜ Move it to different sides of the screen
ߜ Make it disappear and call it back
ߜ Resize it
Dig those crazy icons
By default, Tiger always displays at least one icon on your desktop: your
Mac’s internal hard drive. To open a hard drive and view or use the contents,
you double-click the icon. Other icons that might appear on your desktop can
represent
ߜ CDs and DVDs
ߜ An iPod
ߜ External hard drives or USB Flash drives
ߜ Applications, folders, and documents
ߜ Files you’ve downloaded from the Internet
ߜ Network servers you’ve accessed
Chapter 4 provides the good stuff on icons and their uses in Tiger.
This menu has no food
The Finder menu isn’t found in a restaurant. Instead, you find it at the top of
the desktop, where you can use it to control your applications. Virtually
every application that you run on your Mac has a menu. (Chapter 4 dives
deep into the depths of the Finder.)
To use a menu command, follow these steps:
1. Click the menu group (such as File or Edit).
2. Choose the desired command from the list that appears.
Only two menu groups are in every Mac OS X application: the Apple menu
(which is identified with that jaunty Apple Corporation icon, Ú) and the
application menu (which always bears the name of the active application).
For instance, the DVD Player menu group appears when you run Tiger’s DVD
Player, and the Word menu group appears when you launch Microsoft Word
2004. I cover these two common groups in more detail in Chapters 4 and 5.
42
Part I: Tie Myself Down with a Desktop? Preposterous!
07_04859X ch03.qxp 7/20/06 10:39 PM Page 42
There’s always room for one more window
You’re probably already familiar with the ubiquitous window itself. Both Tiger
and the applications that you run use windows to display things such as
ߜ The documents that you create
ߜ The contents of your hard drive
The window in Figure 3-1 is a Finder window, where Tiger gives you access to
the applications, documents, and folders on your system.
Windows are surprisingly configurable. I cover them at length in Chapter 4.
Why get so excited by Tiger?
How Tiger’s core is designed makes more of a difference than all the visual
bells and whistles, which tend to be similar between Windows XP and Mac
OS X Tiger (and Linux as well, for that matter). Time for a Mark’s Maxim:
Sure, Tiger’s elegant exterior is a joy to use, but Mac OS X is a better operating
system than Windows because of the unique UNIX muscle that lies underneath!
So what should you and I look for in Mac OS X? Keep in mind that today’s
computer techno-wizard demands three requirements for a truly high-pow-
ered software wonderland, and that Tiger easily meets all three:
43
Chapter 3: The Laptop Owner’s Introduction to Mac OS X
Isn’t Windows XP the latest thing?
You’ve seen highly customized “pocket rocket”
compact cars with the flashy paint jobs, huge
noisy mufflers, and aerodynamic fiberglass
stuff. You might think that these cars are real
road racers, but what’s underneath is different.
The 4-cylinder engine that you
don’t
see is
stock. These cars don’t perform any better than
a mundane model straight from the factory.
The same holds true for Microsoft Windows XP,
which was another attempt by the folks at
Redmond to put a modern face on an antique
operating system. Forget the flashy colors and
the visual effects: Windows XP is simply more
of the same (and it’s now several years old to
boot). Sure, it’s more reliable and faster than
Windows 98 and Windows ME, but you can
forget real performance or innovation.
Unfortunately, if you’re running PC hardware,
the only other practical choice for a computing
novice is Linux, which is still regarded as too
complex by major manufacturers such as Dell
and Hewlett-Packard. Therefore, with a PC,
you’re usually stuck with Windows XP, or you’ve
picked up an expensive paperweight.
07_04859X ch03.qxp 7/20/06 10:39 PM Page 43
