Crystal Reports For Visual Studio 2005 phần 6 pptx
Bạn đang xem bản rút gọn của tài liệu. Xem và tải ngay bản đầy đủ của tài liệu tại đây (324.06 KB, 57 trang )
Walkthroughs
Copyright © 2004 Business Objects
Page 296
Reduced-Code Windows Project Setup with
Crystal Reports Using Smart Tasks
In this tutorial, you learn how to follow a reduced-code development model to set up a
Windows project, using Smart Tasks.
Introduction
In this tutorial, you learn how to create a Windows project in Crystal Reports for Visual
Studio 2005. You then add a CrystalReportViewer control to the Windows Form. From the
Smart Task panel, you open the embedded Crystal Reports Designer and create a new
report. The Smart Tasks feature generates code that binds the report to the
CrystalReportViewer control.
Throughout this tutorial, you can preview the report three ways:
In the embedded Crystal Reports Designer, with the new Preview button in Crystal
Reports for Visual Studio 2005.
In the Windows Form, with dummy data.
Note This preview of the Windows Form is a new feature called the Design Time
Preview. For more information, see Appendix: Design Time Preview.
At runtime, when you build and compile the application.
At the end of this tutorial, you switch to code view, to see how the reduced-code
development model functions in Crystal Reports for Visual Studio 2005.
Creating a Windows Project with a
CrystalReportViewer Control
Before you create a Windows Project, verify that Crystal Reports for Visual Studio 2005
has been installed on your system.
To set up a reduced-code Windows project in Crystal Reports for Visual Studio
2005
1. Launch Visual Studio 2005.
2. From the File menu, select New, and then click Project.
3. In the New Project dialog box, select a language folder for C# or Visual Basic from
the Project Types list.
4. From the Templates list, click Windows Application.
5. In the Name field, replace the default project name with the name of your project.
6. Click OK.
Your project opens in Solution Explorer and contains a Form1 class.
7. Open the Form1 class.
8. From the Toolbox, open the Crystal Reports node to locate the
CrystalReportViewer control.
9. Drag the CrystalReportViewer control onto the Windows Form.
10. From the Properties window, set the Name property:
For Visual Basic projects, set the value to "myCrystalReportViewer."
Walkthroughs
Copyright © 2004 Business Objects
Page 297
For C# projects, set the value to "crystalReportViewer."
11. From the File menu, click Save All.
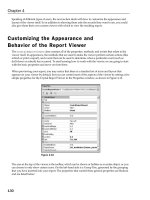
Configuring the Report in Smart Tasks
Visual Studio 2005 has a new GUI feature for .NET controls, called Smart Tasks. For the
CrystalReportViewer control in Windows projects, the Smart Task panel is named
"CrystalReportViewer Tasks."
The "CrystalReportViewer Tasks" Smart Task panel enables you to configure several
features of the CrystalReportViewer control, without having to write code.
Any selections that you make in Smart Tasks are generated as code in a Form1 partial
class. This hidden partial class is a new feature of Visual Studio 2005 that contains
initialization and design code. In this section, you configure a new report with the
CrystalReportViewer Tasks Smart Task panel and the embedded Crystal Reports
Designer. Later in these reduced-code tutorials, you examine other features of Smart
Tasks.
Configuring the Report using Smart Tasks
1. On the upper-right corner of the CrystalReportViewer control, click on the small
triangular button.
The Smart Task panel named "CrystalReportViewer Tasks" opens.
2. Click the Create a New Report link.
3. In the Create a New Crystal Report dialog box, enter the name
"XtremeCustomers.rpt," and then click OK.
The Crystal Reports Gallery dialog box opens.
4. In the Create New Crystal Report Document panel of the Crystal Reports
Gallery dialog box, select Using a Report Wizard.
5. In the Choose an Expert panel, select Standard, and then click OK.
6. In the Available Data Sources panel of the Standard Report Creation Wizard
window, do the following:
a) Expand the Create New Connection folder.
b) Expand the ODBC (RDO) folder.
7. In the ODBC (RDO) window, select the correct ODBC DSN entry for your version of
Crystal Reports, as explained in Appendix: ODBC DSN Entry for Xtreme Sample
Database, and then click Finish.
The ODBC (RDO) folder expands and shows the Xtreme Sample Database.
8. Expand the Tables node, and then select the Customer table.
9. Double-click the Customer table to move the table into the Selected Tables panel,
and then click Next.
10. CTRL-click Customer Name, Contact Title, Address1, and City.
11. Click the > symbol to move these fields into the Fields to Display panel, and then
click Next.
12. In the Available Fields panel, under Report Fields, select Customer.City, click the
> symbol to move the field into the Group By panel, and then click Finish.
Walkthroughs
Copyright © 2004 Business Objects
Page 298
The XtremeCustomers report is created and loaded into the main window of Visual
Studio.
13. At the bottom of the window, click Main Report Preview.
The report is displayed in preview mode and shows data from the Xtreme database.
Note The Preview button is a new feature of the embedded Crystal Reports
Designer that ships with Crystal Reports for Visual Studio 2005.
14. At the bottom of the window, click Main Report to exit Preview mode.
15. Return to the Form1 class.
The report is displayed in Design Time Preview mode, showing the report's graphic
layout on the Web Form. Below Form1, the XtremeCustomers report is displayed in the
component tray.
16. From the File menu, click Save All.
Your report is created and becomes the designated report for the CrystalReportViewer
control. At this point, you may want to rename your report variable.
To rename the report variable
1. Click XtremeCustomers1 in the component tray to select it.
2. From the Properties window, set the Name field to "xtremeCustomersReport."
You are now ready to build and run your project.
To test the reduced-code Windows project
1. From the Build menu, select Build Solution.
2. If you have any build errors, go ahead and fix them now.
3. From the Debug menu, click Start.
4. The XtremeCustomers report is displayed in a new Windows application.
5. Return to Visual Studio and click Stop to exit from debug mode.
Exploring the Code Generated by Smart Tasks
In this section, you explore the code that is generated by Smart Tasks, which enabled you
to set up a Windows Project with Crystal Reports without having to write code.
To explore the code generated by Smart Tasks
1. Open the Form1 class.
2. From the View menu, click Code.
The Form1 class opens in code view and displays an empty class.
Note In C#, the empty class displays the class constructor.
public Form1()
{
InitializeComponent();
}
Notice that the following code is missing:
The declaration of the CrystalReportViewer control instance
The instance of the XtremeCustomers report.
Walkthroughs
Copyright © 2004 Business Objects
Page 299
The code that binds the report to the CrystalReportViewer control.
The absent code has been hidden in a partial class. Partial classes are a new feature in the
.NET Framework 2.0 and Visual Studio 2005. Partial classes allow one class to accept an
addendum from another class file, by giving the other class file the same class name and
prefixed with the word "partial." The partial class usually contains auto-generated
designer code.
To view the auto-generated code that does not appear in the Form1 class, you will explore
the CrystalReportViewer and report instances in the hidden Form1 partial class.
To view the hidden Form1 partial class
1. From Solution Explorer, click the toolbar icon Show All Files.
2. Expand Form1.cs or Form1.vb.
The Form1.Designer.cs or .vb is displayed.
3. Right-click Form1.Designer.cs or .vb and select View Code.
The Form1 partial class opens and displays the auto-generated code for this class. This
includes the declaration of the CrystalReportViewer control instance, the
XtremeCustomers report instance, and the code that binds the report to the
CrystalReportViewer control instance.
Note If you prefer to write the code and place it into the code-behind class, see
Appendix: Project Setup.
Conclusion
In this tutorial, you followed a reduced-code development model to create a Crystal
Reports Windows Project.
You added a CrystalReportViewer control, and then used Smart Tasks to create a new
report and bind it to the CrystalReportViewer control, without having to write code. You
then explored the code that was auto-generated in the hidden partial class, based on your
selections in Smart Tasks.
Sample Code Information
Each tutorial comes with Visual Basic and C# sample code that show the completed
version of the project. Follow the instructions in this tutorial to create a new project or
open the sample code project to work from a completed version.
The sample code is stored in folders that are categorized by language and project type.
The folder names for each sample code version are as follows:
C# Windows project: CS_Win_ReducedCode_ProjectSetup
Visual Basic Windows project: VB_Win_ReducedCode_ProjectSetup
To locate the folders that contain these samples, see Appendix: Tutorials' Sample Code
Directory.
Walkthroughs
Copyright © 2004 Business Objects
Page 300
Crystal Reports
For Visual Studio 2005
Reduced-Code Tutorial:
Secure Database Logon in a Web Site
Walkthroughs
Copyright © 2004 Business Objects
Page 301
Reduced-Code Secure Database Logon in a
Web Site
Introduction
In this reduced-code Web Site tutorial, you learn how to display a report that contains
information from a secure SQL Server database. To provide a secure database logon, you
assign the report's DataSources property to the SQLDataSource control, which is part of
the new DataSource control framework in Visual Studio 2005.
Note A coding development model of this tutorial is also available. See Logging onto
a Secure SQL Server Database Using SQL Authentication or Logging onto a Secure SQL
Server Database Using Integrated Security.
In this tutorial, to display a report that contains information from a secure SQL Server
database, you use the new tag-based application development model to connect the key
components:
Connect a CrystalReportViewer control to a CrystalReportSource control.
Connect the CrystalReportSource control to a report.
Connect the report's DataSources property to an SqlDataSource control.
Note DataSources is viewed as a report property in the Properties window, or as
a tag in HTML view (Source view).
All of this work is done without having to write code.
To begin, you add a CrystalReportViewer control to the Web Form. From Smart Tasks, you
create a CrystalReportSource control, and then build a Crystal report with the embedded
Crystal Reports Designer. This report logs on to a secure SQL server database. The report
is referenced within the CrystalReportSource control.
Then you learn how to configure the logon to the secure SQL server database, to return
the required tables that are used by the Crystal report. To start, you select the "Enable
Database Logon prompt" option in Smart Tasks. When that option is selected, the
exception that is thrown during a database logon failure is replaced with a prompt that
requests the user to log on manually.
To configure a consistent log on to the required database, you add a SqlDataSource
control, and then configure it to address the secure SQL server database and return the
required tables.
Finally, you assign the DataSource property of the report to the SqlDataSource control
that you have created.
Creating a Web Site with a
CrystalReportViewer Control
Before you create a Web Site, verify that Crystal Reports for Visual Studio 2005 has been
installed on your system.
Some database setup is required as a prerequisite to this tutorial.
Prerequisite Database Setup
1. SQL Server configuration:
Walkthroughs
Copyright © 2004 Business Objects
Page 302
If you have SQL Server (or the OEM version, MSDE) installed, it must be configured
to require SQL Server Authentication.
If you do not have SQL Server (or the OEM version, MSDE) installed, you must
install MSDE with SQL Server Authentication set to "True."
2. The Northwind database provided with SQL Server must be installed and verified that
it requires SQL Server Authentication.
3. A limited access account must be created for use within the Web site.
To install MSDE with SQL Server Authentication, or the Northwind database, go to the
following sections from Appendix: System Setup in this documentation:
Appendix: MSDE Installation with Windows or SQL Server Authentication
Appendix: Northwind Database Installation
Appendix: Security: Creating a Limited Access Database Account
Once you have configured SQL Server and the Northwind database according to the
sections above, you are ready to create a Web Site that displays a Crystal report drawing
its information securely from a Northwind database.
You begin by setting up a reduced-code Web Site.
To set up a reduced-code Web Site in Crystal Reports for Visual Studio 2005
1. Launch Visual Studio 2005.
2. From the File menu, select New, and then click Web Site.
3. In the New Web Site dialog box, click ASP.NET Web Site.
4. In the Location dropdown, select File System.
5. In the Language dropdown, select the coding language that you wish to use.
6. In the Location text field enter the directory path "C:\WebSites\", followed by the
name of your project.
C:\WebSites\MyProjectName
7. Click OK.
Your project opens in the Solution Explorer and contains a Default.aspx page.
8. Open the Default.aspx page (the Web Form).
9. From the View menu, click Designer.
Note You can also switch to design view by clicking the Design button at the
bottom of the form view.
10. From the Toolbox, open the Crystal Reports node to locate the
CrystalReportViewer control.
11. Drag the CrystalReportViewer control onto the Web Form.
The Smart Task panel named "CrystalReportViewer Tasks" opens.
Configuring the CrystalReportSource in Smart
Tasks
Visual Studio 2005 has a new GUI feature for .NET controls, called Smart Tasks. For the
CrystalReportViewer control in Web Sites, the Smart Task panel is named
"CrystalReportViewer Tasks."
Walkthroughs
Copyright © 2004 Business Objects
Page 303
The "CrystalReportViewer Tasks" Smart Task panel enables you to configure several
features of the CrystalReportViewer control, without having to write code.
Any selections that you make in Smart Tasks are generated as tag-based settings within
the ASPX page.
In this section, you configure the CrystalReportSource control that is available from the
"CrystalReportViewer Tasks" Smart Task. Later in these reduced-code tutorials, you
examine other features of Smart Tasks.
To begin, you learn how to close and re-open Smart Tasks.
Configuring the CrystalReportSource using Smart Tasks
1. If the Smart Task panel is currently open, click on the Web Form to close Smart Tasks.
2. On the upper-right corner of the CrystalReportViewer control, click on the small
triangular button.
The Smart Task panel named "CrystalReportViewer Tasks" re-opens. In the Choose
Report Source list, <None> is displayed.
3. Click the Choose Report Source list and select <New report source…>.
The Create ReportSource dialog box opens.
4. In the Specify a name for the control textbox, leave the default entry as
CrystalReportSource1.
5. Click the Specify a report for the ReportSource control drop- down list and select
<New Report>.
Your alternative selection is <Browse…>. That option allows you to select an existing
Crystal report from the file directory. However, later you will create a new report that
is required for this tutorial.
6. In the Create a New Crystal Report dialog box, enter the name
"NorthwindCustomers.rpt".
7. Click OK, and then click OK again to close the Create ReportSource dialog box.
Creating and Connecting the Report to a
Secure Database
You now begin the process of creating and connecting the report.
To create and connect the report to a secure database
1. If the Registration Wizard dialog box appears, you need to register your copy of
Crystal Reports. You have two choices:
Click Next to register now.
Click Register Later to register later.
After registering or choosing to register later, proceed to the next step.
2. In the Create New Crystal Report Document panel of the Crystal Reports
Gallery dialog box, select Using a Report Wizard.
3. In the Choose an Expert panel, select Standard, and then click OK.
4. In the Available Data Sources panel, expand the Create New Connection folder.
Walkthroughs
Copyright © 2004 Business Objects
Page 304
Note In Visual Studio .NET 2002 or 2003 where Crystal Reports has not been
upgraded to Crystal Reports Developer, the Create New Connection folder does not
exist; the contents are shown at the top level.
5. From the subfolder that opens, expand the OLE DB (ADO) folder.
6. In the OLE DB (ADO) dialog box, select Microsoft OLE DB Provider for SQL
Server, and then click Next.
7. You can now use either SQL Authentication, or Windows Authentication with
Integrated Security:
If you are using SQL Authentication, enter the values for your database server,
user id, and password into the Server, User ID, and Password fields and then
from the Database list, select "Northwind."
Note For security reasons, it is important that you use a database account
with limited access permissions. For more information, see Appendix: Security:
Creating a Limited Access Database Account.
If you are using Windows Authentication with Integrated Security, enter the value
for your database server and check the Integrated Security checkbox, and then
from the Database list, select "Northwind."
8. Click Finish.
The OLE DB folder expands to show your database server and, within it, the Northwind
database.
9. Expand the nodes Northwind, dbo, and Tables, and then select the Customers
table.
10. Click the > symbol to move the table into the Selected Tables panel, and then click
Next.
11. Hold down CTRL and click CompanyName, ContactName and City.
12. Click the > symbol to move these fields into the Fields to Display panel, and then
click Next.
13. In the Available Fields panel, under Report Fields, select Customer.City, click the
> symbol to move the field into the Group By panel, and then click Finish.
The NorthwindCustomers report is created and loaded into the main window of Visual
Studio.
14. At the bottom of the window, click Main Report Preview.
The report is displayed in preview mode and shows data from the secure Northwind
database.
Note The Preview button is a new feature of the embedded Crystal Reports
Designer that ships with Crystal Reports for Visual Studio 2005.
15. At the bottom of the window, click Main Report to exit Preview mode.
16. Open the Web Form.
17. From the View menu, click Designer.
The report is displayed in Design Time Preview mode and shows the report's graphic
layout on the Web Form.
18. From the File menu, click Save All.
Walkthroughs
Copyright © 2004 Business Objects
Page 305
Your report is created and is now the designated report for the CrystalReportSource
control. You are now ready to build and run your project.
To test the reduced-code Web Site
1. From the Build menu, select Build Solution.
2. If you have any build errors, go ahead and fix them now.
3. From the Debug menu, click Start.
Note If you are developing a Web Site in Visual Studio 2005, and this is the first
time you have started debugging, a dialog box appears and states that the
Web.config file must be modified. Click the OK button to enable debugging.
4. A database logon prompt page appears, asking you to enter the database password.
This is the expected result, for two reasons:
You have not yet configured the data source.
In Smart Tasks for the CrystalReportViewer control, the "Enable database logon
prompting" checkbox is selected by default.
5. Enter the password and click Logon.
6. The NorthwindCustomers report is displayed in the Web browser.
7. Return to Visual Studio and click Stop to exit from debug mode.
Configuring Database Logon Prompting in the
Smart Task
In this procedure, you examine the effect of turning off "Enable Database Logon
Prompting" in the Smart Task.
To configure Database Logon Prompting in the Smart Task
1. Open the Default.aspx page (the Web Form).
2. From the View menu, click Designer.
3. On the upper-right corner of the CrystalReportViewer control, click on the small
triangular button.
The Smart Task panel "CrystalReportViewer Tasks" opens.
4. Clear the Enable Database Logon Prompting checkbox.
5. Click on the Web Form to close the Smart Task.
6. From the Build menu, select Build Solution.
7. If you have any build errors, go ahead and fix them now.
8. From the Debug menu, click Start.
Because database logon prompting is no longer enabled, a Logon Failed exception is
thrown in the Web application window.
9. Return to Visual Studio and click Stop to exit from debug mode.
10. Return to the Smart Task panel for the CrystalReportViewer control.
11. Select the Enable Database Logon Prompting checkbox.
12. Close Smart Tasks.
13. From the File menu, click Save All.
Walkthroughs
Copyright © 2004 Business Objects
Page 306
Adding a SqlDataSource control
In ASP.NET 2.0, data sources are now configured and accessed through the new
DataSource control framework. By default, a Crystal report bypasses the need for a
separate data source because data access is encapsulated within the report.
However, if the data is from a secure SQL server, then the report requires a data source
to manage the logon process.
To add a SqlDataSource control
1. Open the Default.aspx page (the Web Form).
2. From the View menu, click Designer.
Note You can also switch to design view by clicking the Design button at the
bottom of the form view.
3. Click your mouse to the right of the CrystalReportSource control, then press ENTER.
A flashing cursor appears below the CrystalReportSource control.
4. In the Toolbox, click the Data sub node to expand the Data controls.
5. From the Data sub node, drag a SqlDataSource control onto the Web Form below the
CrystalReportSource control.
6. In the Smart Task panel (named Common SqlDataSource Tasks), click
Configure Data Source…
7. In the Configure Data Source window, click New Connection…
8. In the Add Connection dialog box, in the Server name field, enter the name of your
database server.
9. In the Log on to the server panel, choose either the Use SQL Server
Authentication or the Use Windows Authentication radio button.
10. If you chose SQL Server Authentication, do the following:
Enter values into the User name and Password fields.
Note Remember to use the limited access database account.
Select the Save my password checkbox.
11. If you chose Windows Authentication, go to the next step.
12. In the Connect to a database panel, select the Select or enter a database name
radio button.
13. From the list, select Northwind, and then click Test Connection.
14. The Northwind connection is verified. If the connection fails, check your password.
15. Once the test connection succeeds, click OK to close the Connection Properties
window.
16. In the Configure Data Source window, the Connection String field shows the
complete connection information.
If you chose Windows Authentication, the Integrated Security property is set to
true.
Data Source=ABCDE;Initial Catalog=Northwind;Integrated Security=True
If you chose SQL Authentication, the UserID and password values are assigned.
Walkthroughs
Copyright © 2004 Business Objects
Page 307
Note For security reasons, it is important that you use a database account
with limited access permissions. For more information, see Appendix: Security:
Creating a Limited Access Database Account.
In the code that you write, replace the sample server name, database name
and password (shown below) with your own connection information.
Server=ABCDE;User
ID=limitedPermissionAccount;Password=1234;Database=Northwind;Persist
Security Info=True
17. Click Next, and in the following window click Next again to save the connection with
a default name of "NorthwindConnectionString."
18. Click the Specify columns from a table or view option.
19. In the Name list, select "Customers."
20. In the Columns pane, select the Company Name, Contact Name and City
checkboxes, and then click Next.
Note The columns selected here must match the columns that are selected in
your original report. If you later change the columns that are selected in your
report, with the embedded Crystal Reports Designer, you must change the
columns here in your SQL statement. For scalability purposes, it is strongly
recommended that you do not use the asterisk selection, but instead choose the
specific columns that are used by your report.
21. In the Test Query window, click Test Query.
22. If the query is successful, then click Finish.
23. The SqlDataSource control is displayed at the bottom of the window, below the
CrystalReportViewer control and the CrystalReportSource control.
Connecting CrystalReportSource to the
SqlDataSource Control
On your Web Form, you now have three controls that are related to each other:
The CrystalReportViewer control, which links to the CrystalReportSource control to
access the report to display it.
The CrystalReportSource control, which encapsulates the report.
The SqlDataSource control, which encapsulates data access information.
Remember that the CrystalReportSource control was linked to the CrystalReportViewer
control when adding the CrystalReportViewer control to the Web Form. However, nothing
has occurred to link the CrystalReportSource to the SqlDataSource. Therefore, even
though the data configuration information exists, at runtime the report would not be able
to find this information and would ask for logon.
In this section, you connect the CrystalReportSource to the SqlDataSource control. For
this task, you use the DataSource Collection Editor dialog box.
To connect the CrystalReportSource to the SqlDataSource control
1. Open the Default.aspx page (the Web Form).
2. From the View menu, click Designer.
Walkthroughs
Copyright © 2004 Business Objects
Page 308
3. Select the CrystalReportSource control.
4. From Properties, expand Report.
Note If the Properties Explorer is not visible, from the View menu, click
Properties Window.
5. Within the Report property, click the ellipsis ( ) on the far right of DataSources
(Collection).
6. In the Data Source Collection Editor dialog box, do the following:
a) Click Add.
b) In the Report panel, select Main report.
c) In the Choose Data Source combo box, click SqlDataSource1.
d) Select Specify Table Name, and in the field type "Customers".
7. Click OK.
8. At the bottom of the Default.aspx page, click Source.
9. Locate the CrystalReportSource tags.
10. Within the CrystalReportSource tags, locate the Report tag.
11. Within the Report tags (between the opening and closing tags), verify that the
following DataSources tagging information has been generated.
<DataSources>
<CR:DataSourceRef DataSourceID="SqlDataSource1"
TableName="Customers" />
</DataSources>
12. From the Build menu, click Build Solution.
13. If you have any build errors, go ahead and fix them now.
14. From the Debug menu, click Start.
The report is now successfully displayed with secure logon to the SQL Server
database.
Conclusion
In this reduced-code Web Site tutorial, you created and displayed a report that contained
information from a secure SQL Server database. You enabled and disabled a database
logon prompt, by configuring the Smart Task. You then added a SqlDataSource control to
the Web Form and configured it to access the secure SQL Server database. Then, to
connect the SqlDataSource to the report, you assigned the SqlDataSource ID to the
DataSource tag, within the Report tag.
Sample Code Information
Each tutorial comes with Visual Basic and C# sample code that show the completed
version of the project. Follow the instructions in this tutorial to create a new project or
open the sample code project to work from a completed version.
The sample code is stored in folders that are categorized by language and project type.
The folder names for each sample code version are as follows:
C# Web Site: CS_Web_ReducedCode_DBLogon
Walkthroughs
Copyright © 2004 Business Objects
Page 309
Visual Basic Web Site: VB_Web_ReducedCode_DBLogon
To locate the folders that contain these samples, see Appendix: Tutorials' Sample Code
Directory.
Walkthroughs
Copyright © 2004 Business Objects
Page 310
Crystal Reports
For Visual Studio 2005
Reduced-Code Tutorial:
Parameter Setting in a Web Site
Walkthroughs
Copyright © 2004 Business Objects
Page 311
Reduced-Code Parameter Setting in a Web
Site
Introduction
In this reduced-code Web Site tutorial, you learn how to display a report that contains
parameters, and how to pass parameter values to that report with the new Data
Parameters model.
Note A coding model of this tutorial is also available. See Reading and Setting
Discrete Parameters.
In this tutorial, you use the new tag-based application development model to connect the
key components:
Connect a CrystalReportViewer control to a CrystalReportSource control.
Connect the CrystalReportSource control to a report that contains a parameter.
Connect the report's Parameters tag to one of the parameter sources in the new Data
Parameters model, which is included with ASP.NET version 2.0.
All of this work is done without having to write code.
To begin, you add a CrystalReportViewer control to the Web Form. From Smart Tasks, you
create a CrystalReportSource control, and then build a Crystal report with the embedded
Crystal Reports Designer. This report includes a parameter that is applied to search
criteria for the report. The report is referenced within the CrystalReportSource control.
You then use the Enable Parameters Prompt option in Smart Tasks. When that option is
enabled, the exception that is thrown during a database logon failure is replaced with a
prompt that requests the user to supply a parameter.
However, you need a means to customize your parameter selection. To do that, you add
a DropDownList that contains a list of parameter values that can be selected for the
report.
Finally, you open the Parameter Collection Editor for the report, and configure a
connection between the report parameter and the DropDownList control that you have
added.
Note A ControlParameter is only one possible parameter source in the Data
Parameters model. Other possible parameter sources include the
QueryStringParameter, SessionParameter, FormParameter or CookieParameter. For
some of these parameter source types you edit the Parameters tag directly in HTML
view (source view).
Creating a Web Site with a
CrystalReportViewer control
Before you create a Web Site, verify that Crystal Reports for Visual Studio 2005 has been
installed on your system.
To set up a reduced-code Web Site in Crystal Reports for Visual Studio 2005
1. Start Visual Studio 2005.
2. From the File menu, select New, and then click Web Site.
Walkthroughs
Copyright © 2004 Business Objects
Page 312
3. In the New Web Site dialog box, click ASP.NET Web Site.
4. In the Location dropdown, select File System.
5. In the Language dropdown, select the coding language that you wish to use.
6. In the Location text field enter the directory path "C:\WebSites\", followed by the
name of your project.
C:\WebSites\MyProjectName
7. Click OK.
Your project is displayed in the Solution Explorer and contains a Default.aspx page.
8. Open the Default.aspx page (the Web Form).
9. From the View menu, click Designer.
Note You can also switch to design view by clicking the Design button at the
bottom of the form view.
10. From the Toolbox, open the Crystal Reports node to locate the
CrystalReportViewer control.
11. Drag the CrystalReportViewer control onto the Web Form.
The "CrystalReportViewer Tasks" Smart Task panel opens.
Configuring the CrystalReportSource in Smart
Tasks
Visual Studio 2005 has a new GUI feature for .NET controls, called Smart Tasks. For the
CrystalReportViewer control in Web Sites, the Smart Task panel is named
"CrystalReportViewer Tasks."
The "CrystalReportViewer Tasks" Smart Task panel enables you to configure several
features of the CrystalReportViewer control, without having to write code. Any selections
that you make in Smart Tasks are generated as tag-based settings within the ASPX page.
In this section, you configure the main feature that is available from the
"CrystalReportViewer Tasks" Smart Task: the CrystalReportSource control. Later in these
reduced-code tutorials, you examine other features of Smart Tasks.
To begin, you learn how to close and re-open Smart Tasks.
To configure the CrystalReportSource using Smart Tasks
1. If the Smart Task panel is currently open, click on the Web Form to close the Smart
Task panel.
2. On the upper-right corner of the CrystalReportViewer control, click on the small
triangular button.
The named "CrystalReportViewer Tasks" re-opens. In the Choose Report Source list,
<None> is displayed.
3. Click the Choose Report Source list and select <New report source…>.
The Create ReportSource dialog box opens.
4. In the Specify a name for the control textbox, leave the default entry as
CrystalReportSource1.
5. Click the Specify a report for the ReportSource control drop- down list and select
<New Report>.
Walkthroughs
Copyright © 2004 Business Objects
Page 313
Your alternative selection is <Browse…>. That option allows you to select an existing
Crystal report from the file directory. However, later you will create a new report that
is required for this tutorial.
6. In the Create a New Crystal Report dialog box, enter the name
"XtremeCustomers.rpt" and click OK, and then click OK again within the Create
ReportSource dialog box.
Creating the Report with Parameters
To begin, create a report that draws its information from the sample Microsoft Access
database that ships with Crystal Reports.
Note Xtreme.mdb is the sample database that is provided with Crystal Reports. To
locate xtreme.mdb on your hard drive for your version of Crystal Reports, see
Appendix: Location of Xtreme Sample Database. You need to connect to the database
through its ODBC DSN entry. To learn the name of this entry for your version of Crystal
Reports, see Appendix: ODBC DSN Entry for Xtreme Sample Database.
To create the report with parameters
1. If the Registration Wizard dialog box appears, you need to register your copy of
Crystal Reports. You have two choices:
Click Next to register now.
Click Register Later to register later.
After registering or choosing to register later, proceed to the next step.
2. In the Create New Crystal Report Document panel of the Crystal Reports
Gallery dialog box, select Using a Report Wizard.
3. In the Choose an Expert panel, select Standard, and then click OK.
The Standard Report Creation Wizard window appears.
4. In the Available Data Sources panel of the Standard Report Creation Wizard
window, expand the Create New Connection folder.
5. From the subfolder that opens, expand the ODBC (RDO) folder.
6. In the ODBC (RDO) dialog box, select the correct ODBC DSN entry for your version of
Crystal Reports, as explained in Appendix: ODBC DSN Entry for Xtreme Sample
Database, and then click Next.
7. Leave the User ID and Password blank, and then click Finish.
The ODBC (RDO) folder expands and shows the Xtreme Sample Database.
8. Expand the Tables node and select the Customer table.
9. Double-click the Customer table to move the table into the Selected Tables panel,
and then click Next.
10. Expand the Customer table, then CTRL-click Customer Name, Contact Title,
Address1, Contact Last Name and City.
11. Click the > symbol to move these fields into the Fields to Display panel, and then
click Next.
12. In the Available Fields panel, under Report Fields, select Customer.City, click the
> symbol to move the field into the Group By panel, and then click Finish.
Walkthroughs
Copyright © 2004 Business Objects
Page 314
The CustomersByCity report is created and loaded into the main window of Visual
Studio.
You are now ready to add a parameter named City and populate it with default values.
To add a City parameter
The Field Explorer must be visible, because it provides access to the various features of
the report, including parameters.
1. If the Field Explorer is not visible, on the Crystal Reports toolbar, click Toggle Field
View.
Note Another way to display the Field Explorer is to go to the Crystal Reports
menu, and then click Field Explorer.
2. In the Field Explorer, right-click Parameter Fields and select New
3. In the Create Parameter Field dialog box:
Set the Name to "City."
Set the Prompting Text to "Select one or more cities."
Set Value Type to String
Select Allow multiple values.
Select Discrete value(s).
Click Default Values
Note In Visual Studio .NET 2002 or 2003 where Crystal Reports has not been
upgraded to Crystal Reports Developer, this button is named Set Default
Values.
4. In the Set Default Values dialog box:
Set the Browse table to "Customer."
Set the Browse field to "City."
Click >> (the double-right arrow) to move the entire cities list into the Default
Values list.
5. Click OK to close the Set Default Values dialog box.
6. Click OK to close the Create Parameter Field dialog box.
You now use the Select Expert to set a formula that connects the City database column to
your newly created City parameter field.
To connect the City parameter to the City database column
1. On the Crystal Reports toolbar, click Select Expert.
2. In the Choose Field dialog box, under Report Fields, select Customer.City, and
then click OK.
3. In the Select Expert dialog box, within the Customer.City tab, set the list to "is
equal to."
4. In the new list that appears to the right, select the first choice in the list, {?City}, and
then click OK.
Note This selection, {?City}, is the City parameter that you created earlier.
5. From the File menu, select Save All.
At this point, it is advisable to view the report in full-screen mode.
Walkthroughs
Copyright © 2004 Business Objects
Page 315
6. To switch to full-screen mode, press Alt-Shift-Enter.
7. At the bottom of the window, click Main Report Preview.
8. In the Enter Parameter Values dialog box, select at least one city from the Discrete
Values list, click Add, and then click OK.
The report is displayed in preview mode, with the city parameter value that you
selected.
Note The Preview button is a new feature of the embedded Crystal Reports
Designer that ships with Crystal Reports for Visual Studio 2005.
9. At the bottom of the window, click Main Report to exit Preview mode.
10. Press Alt-Shift-Enter to exit full-screen mode.
11. Open the Web Form.
12. From the View menu, click Designer.
The report is displayed in Design Time Preview mode and shows the report's graphic
layout on the Web Form.
13. From the File menu, click Save All.
Your report is created and is now the designated report for the CrystalReportSource
control. You are now ready to build and run your project.
To test the reduced-code Web Site
1. From the Build menu, select Build Solution.
2. If you have any build errors, go ahead and fix them now.
3. From the Debug menu, click Start.
Note If you are developing a Web Site in Visual Studio 2005, and this is the first
time you have started debugging, a dialog box appears and states that the
Web.config file must be modified. Click the OK button to enable debugging.
4. A parameters prompt page appears, asking you to select a prompt from a
DropDownList.
This is the expected result, for two reasons:
You have not yet configured the Parameters tag in the report.
In Smart Tasks for the CrystalReportViewer control, the "Enable report parameter
prompting" checkbox is selected by default.
5. Select a parameter and click Submit.
6. The CustomersByCity report is displayed in the Web browser, showing the city you
have selected.
7. Return to Visual Studio and click Stop to exit from debug mode.
Configuring Parameter Prompting in Smart
Tasks
In this procedure, you examine the effect of turning off "Enable Report Parameter
Prompting" in Smart Tasks.
Walkthroughs
Copyright © 2004 Business Objects
Page 316
To configure Report Parameter Prompting in Smart Tasks
1. Open the Default.aspx page (the Web Form).
2. From the View menu, click Designer.
3. On the upper-right corner of the CrystalReportViewer control, click on the small
triangular button.
The Smart Task panel named "CrystalReportViewer Tasks" opens.
4. Clear the Enable Report Parameter Prompting checkbox.
5. Click on the Web Form to close Smart Tasks.
6. From the Build menu, select Build Solution.
7. If you have any build errors, go ahead and fix them now.
8. From the Debug menu, click Start.
Because report parameter prompting is no longer enabled, a "Missing Parameter
Values" exception is thrown in the Web application window.
9. Return to Visual Studio and click Stop to exit from debug mode.
10. Return to the Smart Task panel for the CrystalReportViewer control.
11. Select the Enable Report Parameters Prompting checkbox.
12. Close Smart Tasks.
13. From the File menu, click Save All.
Preparing a Control with Parameter Values
In this section you prepare a DropDownList control with city values. In the next section,
the city values are passed to the report parameters.
To prepare a control with parameter values
1. Open the Default.aspx page (the Web Form).
2. From the View menu, click Designer.
3. Click once on the CrystalReportViewer control to select it.
4. Press the LEFT ARROW.
The flashing cursor appears at the lower-left of the CrystalReportViewer control.
5. Press Enter twice, then press the UP ARROW twice.
The flashing cursor moves to the top of the Web Form, above the
CrystalReportViewer control.
6. Type "Select a city:"
7. From the Toolbox, drag a DropDownList control to the right of the text.
The Smart Task panel named "Common DropDownList Tasks" opens.
8. In the Smart Task panel, click Edit Items.
9. In the List Item Collection Editor dialog box, click Add.
In the Members panel, a new ListItem entry is created.
10. In the List Item Properties panel, click into the Text field, and type "Paris."
11. Click Add again.
In the Members panel, a second ListItem entry is created.
Walkthroughs
Copyright © 2004 Business Objects
Page 317
12. In the List Item Properties panel, click into the Text field, and type "Tokyo."
13. Click OK.
14. Click on the Web Form to close Smart Tasks for the DropDownList control.
15. Click DropDownList to select it.
16. From the Properties window, set the ID field to "cityList."
17. From the Toolbox, drag a Button control to the right of the DropDownList control.
18. From the Properties window,
Set the Text field to "Redisplay Report."
Set the ID field to "redisplay".
19. From the File menu, click Save All.
You now have a DropDownList control, with two city parameter values and a button to
post values from this control. However, the report is not yet aware of this control and the
values that it contains. In the next section, you connect the DropDownList control to the
<Parameters> tag of the report.
Configuring Parameters for the
CrystalReportSource Control
The CrystalReportSource control that you created in this tutorial implements the new
Parameters model that is included with ASP.NET 2.0. Any parameter type that is part of
the Data Parameters model can be passed as a parameter to the CrystalReportSource,
including the following parameters:
ControlParameter
QueryStringParameter
SessionParameter
FormParameter
CookieParameter
In this tutorial, a ControlParameter is used. The DropDownList control that you created
and populated with a list of cities in the previous section is configured as the parameter
source for the report parameter contained in the CrystalReportSource control.
To configure the parameters for the CrystalReportSource control
1. Open the Default.aspx page (the Web form).
2. From the View menu, click Designer.
3. Select the CrystalReportSource control.
4. From Properties, expand Report.
5. Within the Report property, click the ellipsis ( ) on the far right of Parameters
(Collection).
6. In the Parameters Collection Editor dialog box, do the following:
a) Click Add.
b) In the Report panel, select Main report.
c) In the Parameter Name combo box, click City.
d) Select Specify Control ID, and in the combo box click cityList.
Walkthroughs
Copyright © 2004 Business Objects
Page 318
7. Click OK.
8. At the bottom of the Default.aspx page, click Source.
9. Locate the CrystalReportSource control tagging information.
10. Within the CrystalReportSource tags, locate the Report tag.
11. Within the Report tags (between the opening and closing tags), verify the following
Parameters tagging information.
<Parameters>
<CR:controlparameter name="City" propertyname="SelectedValue"
controlid="cityList"></CR:controlparameter>
</Parameters>
12. From the Build menu select Build Solution.
13. If you have any build errors, go ahead and fix them now.
14. From the Debug menu, click Start.
The report is now successfully displayed with the parameter value from the default
(first) selection in your list.
15. Change the parameter value to another value and click the Redisplay Report button.
The report shows the city value you have selected in the DropDownList control.
Note If you want to populate the DropDownList control with the default values
for the City parameter from the CustomersByCity report, see the tutorial Reading
and Setting Discrete Parameters.
Conclusion
In this reduced-code Web Site tutorial, you created and displayed a report that contained
a City parameter. You enabled and disabled a report parameter prompt by configuring
Smart Tasks. You also added a DropDownList control to the Web Form and added city
values to the control. Then, you connected the DropDownList control to the report through
the assignment of the control ID to the Parameters tag within the Report tag.
Sample Code Information
Each tutorial comes with Visual Basic and C# sample code that show the completed
version of the project. Follow the instructions in this tutorial to create a new project or
open the sample code project to work from a completed version.
The sample code is stored in folders that are categorized by language and project type.
The folder names for each sample code version are as follows:
C# Web Site: CS_Web_ReducedCode_Parameters
Visual Basic Web Site: VB_Web_ReducedCode_Parameters
To locate the folders that contain these samples, see Appendix: Tutorials' Sample Code
Directory.
Walkthroughs
Copyright © 2004 Business Objects
Page 319
Crystal Reports
For Visual Studio 2005
Reduced-Code Tutorial:
Exposing Report Data to Other Controls in a Web Site
Walkthroughs
Copyright © 2004 Business Objects
Page 320
Reduced-Code Exposing Report Data to Other
Controls in a Web Site
Introduction
In this reduced-code Web Site tutorial, you learn how to expose report data from the
CrystalReportViewer control to other controls in the Web Site.
In this tutorial, you learn to expose Crystal report data from the CrystalReportViewer
control to a label control in the Web Site.
To begin, you create an ASP.NET Web Site in Visual Studio and you add a
CrystalReportViewer control to the Web Form. Then you add a label to the Web Form to
display report data. From Smart Tasks, you create a CrystalReportSource control, and
then add a sample report to it. You add a drill-down event to the CrystalReportViewer
control. Finally, you expose the drill-down event's report data to the label control.
Creating a Web Site with a
CrystalReportViewer control
Before you create a Web Site, verify that Crystal Reports for Visual Studio 2005 has been
installed on your system.
To set up a reduced-code Web Site in Crystal Reports for Visual Studio 2005
1. Start Visual Studio 2005.
2. From the File menu, select New, and then click Web Site.
3. In the New Web Site dialog box, click ASP.NET Web Site.
4. In the Location dropdown, select File System.
5. In the Language dropdown, select the coding language that you wish to use.
6. In the Location text field enter the directory path "C:\WebSites\", followed by the
name of your project.
C:\WebSites\MyProjectName
7. Click OK.
Your project is displayed in the Solution Explorer and contains a Default.aspx page.
8. Open the Default.aspx page (the Web Form).
9. From the View menu, click Designer.
Note You can also switch to design view by clicking the Design button at the
bottom of the form view.
10. Click on the Web Form and press Enter on your keyboard three times to create space
for the Label control and for the CrystalReportViewer control.
11. From the Toolbox, open the Crystal Reports node to locate the
CrystalReportViewer control.
12. Drag the CrystalReportViewer control onto the Web Form, to the bottommost
space.
The "CrystalReportViewer Tasks" Smart Task panel opens.
13. Press Esc on your keyboard to close the Smart Task panel.