Beginning C# 2005 Databases PHẦN 5 pdf
Bạn đang xem bản rút gọn của tài liệu. Xem và tải ngay bản đầy đủ của tài liệu tại đây (596.24 KB, 53 trang )
How It Works
The configuration and formatting of the controls in this example hardly needs much comment — the
procedure was nearly identical to that used in list views in the preceding section. It is, however, worth
scrutinizing the result in a little more detail.
First, note the field specification for the
DetailsView control:
<asp:DetailsView >
<Fields>
<asp:BoundField DataField=”Species” HeaderText=”Species”
SortExpression=”Species” />
<asp:BoundField DataField=”Description” HeaderText=”Description”
SortExpression=”Description” />
<asp:CheckBoxField DataField=”Immortal” HeaderText=”Immortal”
SortExpression=”Immortal” />
<asp:CommandField ShowDeleteButton=”True” ShowEditButton=”True”
ShowInsertButton=”True” />
</Fields>
</asp:DetailsView>
The code used here is similar indeed to the column specification for the GridView control. As with that
control, it isn’t necessary to specify template details for editing items — the controls required are instead
inferred from the controls used in the field specification section. In addition, you can see where the com-
mand buttons are specified, in the
CommandField control. You can change the text displayed for these
commands (or use images instead) by modifying this specification.
Also, examine the code in the templates specified for the
FormView control — for example,
EditItemTemplate:
<EditItemTemplate>
Species:
<asp:TextBox ID=”SpeciesTextBox” runat=”server” Text=’<%# Bind(“Species”) %>’>
</asp:TextBox><br />
Description:
<asp:TextBox ID=”DescriptionTextBox” runat=”server”
Text=’<%# Bind(“Description”) %>’>
</asp:TextBox><br />
Immortal:
<asp:CheckBox ID=”ImmortalCheckBox” runat=”server”
Checked=’<%# Bind(“Immortal”) %>’ /><br />
<asp:LinkButton ID=”UpdateButton” runat=”server” CausesValidation=”True”
CommandName=”Update” Text=”Update”>
</asp:LinkButton>
<asp:LinkButton ID=”UpdateCancelButton” runat=”server” CausesValidation=”False”
CommandName=”Cancel” Text=”Cancel”>
</asp:LinkButton>
</EditItemTemplate>
This also looks familiar — the code is almost identical to that used in the analogous DataList control
template used in the previous Try It Out — apart from a few minor cosmetic differences.
186
Chapter 5
44063c05.qxd:WroxBeg 9/12/06 10:36 PM Page 186
The other thing you did in this example was handle the ItemInserting event for both detail view con-
trols. This provides for the GUID primary key field in the
Species table, which must be generated from
code — as you saw in the chapters on Windows data binding. The
ItemInserting event fires when the
user clicks the Update button but before data is added to the database. In both cases, simple code was
used to generate a primary key GUID value:
e.Values.Add(“SpeciesId”, Guid.NewGuid());
Both the DetailsViewInsertEventArgs and FormViewInsertEventArgs argument types allow you
to do this by exposing the about-to-be-added item though a
Values property that is a dictionary collec-
tion of name/value pairs.
Master/Detail Views
The last topic to cover in this chapter is how to deal with master/detail views — an extremely common
scenario that uses a list view and a detail view in combination. Selecting an item in the list view causes it
to be displayed in the detail view, where it can be edited. In this situation, you don’t need pagination
functionality in the detail view because the list view fulfils that purpose.
The data-binding framework in ASP.NET has been designed with this situation in mind and makes it
surprisingly easy to implement. In fact, you’ve seen pretty much everything that you need to do to
implement this. However, in the Try It Out that follows, a few tips and tricks are introduced to stream-
line matters.
Try It Out Master/Detail Views
1.
Copy the C:\BegVC#Databases\Chapter05\Ex0503 - Modifying List Data example
directory from the earlier Try It Out to a new directory,
C:\BegVC#Databases\Chapter05\
Ex0505 - Master-Detail View
.
2. Open Visual Web Developer Express.
3. Select the File ➪ Open Web Site menu item and open the web site C:\BegVC#Databases\
Chapter05\Ex0505 - Master-Detail View
.
4. Remove the DataList control from Default.aspx.
5. Remove all the code behind from Default.aspx.cs that you added in the earlier Try It Out
example except the code for
addButton_Click. In this event handler, remove the following line
of code:
DataList1.DataBind();
6. In the Source view for Default.aspx, modify the column specification for the GridView con-
trol as follows:
<Columns>
<asp:TemplateField HeaderText=”Species” SortExpression=”Species”>
<ItemTemplate>
187
Databases and the Internet
44063c05.qxd:WroxBeg 9/12/06 10:36 PM Page 187
<asp:LinkButton ID=”speciesLabel” runat=”server”
Text=’<%# Bind(“Species”) %>’ CommandName=”Select” />
</ItemTemplate>
</asp:TemplateField>
</Columns>
7. Refresh the schema for SqlDataSource1 as in earlier examples, and then add a new
SqlDataSource control to the page after the existing SqlDataSource1 control.
8. For the new data source, use the existing FolktaleDBConnectionString, and configure the
select command to obtain all columns from the
Species table.
9. Add the following where clause specification:
10. Choose to generate data modification SQL statements for the data source.
11. Complete the Data Source Configuration Wizard.
12. Add a DetailsView control to the page and select the SqlDataSource2 data source.
13. Remove the SpeciesId field from the DetailsView control.
14. Auto-format the control using Classic scheme, and enable editing and deleting.
15. Add event handlers for the ItemDeleted and ItemUpdated events for the DetailsView con-
trol with code as follows:
protected void DetailsView1_ItemDeleted(object sender,
DetailsViewDeletedEventArgs e)
{
GridView1.DataBind();
}
protected void DetailsView1_ItemUpdated(object sender,
DetailsViewUpdatedEventArgs e)
{
GridView1.DataBind();
}
16. In the Source view for Default.aspx, wrap the controls in the following HTML:
</asp:SqlDataSource>
<hr />
<div style=”float: left;”>
<asp:GridView >
</asp:GridView>
</div>
<div>
Column
SpeciesId
Operator
=
Source
Control
Control ID
GridView1
188
Chapter 5
44063c05.qxd:WroxBeg 9/12/06 10:36 PM Page 188
<asp:DetailsView >
</asp:DetailsView>
</div>
<br style=”clear: left;”/>
<hr />
<asp:LinkButton ID=”addButton” runat=”server”
OnClick=”addButton_Click”>Add Species</asp:LinkButton>
<br />
</div>
</form>
</body>
</html>
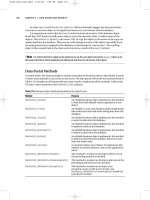
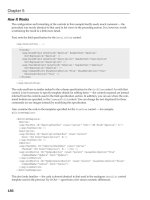
17. Execute the application, and note that items selected in the master control are displayed in the
detail view and can be modified there. Figure 5-24 shows the application in action.
Figure 5-24: Master/detail view
How It Works
In this example you have used the data source from earlier in the chapter along with a second, filtered
data source to create a master/detail view. You started by clearing out an old control and its associated
code behind, including a reference to the control in the code for the Add Species button. Next you refor-
matted the
GridView control to show a single row from the Species table — the title field also called
Species. In doing so you used a new type of bound column specification: TemplateField.
The
TemplateField column specification allows you to override the default layout of columns in a
GridView control and provide the HTML to use for a column using familiar templates. You can use
ItemTemplate, EditItemTemplate, and InsertItemTemplate templates in this control, as well as
189
Databases and the Internet
44063c05.qxd:WroxBeg 9/12/06 10:36 PM Page 189
HeaderTemplate and FooterTemplate, if desired. You use this control in this example to remove the
necessity of having a second column whose only function is to supply a link button to select items.
Instead, the
Species field is rendered as the text of a link button and allows the user to select items by
clicking their title:
<asp:TemplateField HeaderText=”Species” SortExpression=”Species”>
<ItemTemplate>
<asp:LinkButton ID=”speciesLabel” runat=”server”
Text=’<%# Bind(“Species”) %>’ CommandName=”Select” />
</ItemTemplate>
</asp:TemplateField>
Next, you added a second SqlDataSource control. It uses an advanced filter mechanism, as described
earlier in the chapter, to choose items according to the selected item in another control — namely, the
ListView control. ASP.NET makes this easy — you simply specify the ID of the control to use for filtering
and the field to filter by, and it connects everything up without your having to worry about it any further.
The new data source control returns only a single result, filtered according to the
SpeciesId field.
This could be extended to filter-related data. A table using
SpeciesId as a foreign key, such as
Character, could be filtered using the same master selection control. This would result in a filtered set
of results, which might number more that one, which you could then page through and navigate using
techniques already encountered in this chapter.
One further modification was necessary (apart from the cosmetic changes) — the
ItemDeleted and
ItemUpdated events for the DetailsView control were handled. That’s necessary because changing the
underlying data will cause the master list view to go out of date unless you manually refresh it by call-
ing its
DataBind() method:
GridView1.DataBind();
With this in place, the master/detail view is complete — with a minimum of effort, and just a few
tweaks required to get everything working properly. In general, remember the following when creating
master/detail views:
❑ Use two data sources, where one is filtered by the master view.
❑ The detail view may not appear if no data is available after filtering, so controls making up this
control may not always be visible, which can affect layout and functionality.
❑ When data changes are made, both data sources need refreshing.
Summary
In this chapter, you extended your knowledge of data-binding techniques to cover web applications. You
saw how things differ from Windows applications, but also how many of the techniques used are similar
or analogous to those required to implement data binding in Windows applications.
You were introduced to all of the controls in ASP.NET that are responsible for data binding — both those
that work as data sources and those that display data — and saw how they interrelate. You also put theory
190
Chapter 5
44063c05.qxd:WroxBeg 9/12/06 10:36 PM Page 190
into practice and saw these controls in action, and you learned a few helpful tips and tricks along
the way.
Specifically, you learned:
❑ How web and Windows applications differ. You saw that there are many similarities, especially
when dealing with data access, but also some major differences. For example, Windows applica-
tions are typically used by only one person at a time, while web applications may have to deal
with thousands of simultaneous users.
❑ How to configure SQL Server 2005 Express for remote connections by enabling the named pipes
protocol (and/or the TCP/IP protocol).
❑ How to configure connections in web applications — including remote connections.
❑ How the
SqlDataSource control is used for data access, and how to configure it to connect to
your data.
❑ How to sort, filter, and update data using a
SqlDataSource. You saw how parameters can be
used by
SqlDataSource controls and how these parameters can be obtained from a number
of sources. You can, for example, use
querystring parameters from URLs, values stored in
session state, and so on.
❑ What the data-bound controls in ASP.NET are and key features about them.
❑ How to use the data-bound controls to display list and detail data. You saw how the
GridView
and DataList controls can be configured to display data exposed by a SqlDataSource control,
and you customized the display by changing the columns shown and the schemes used for
HTML rendering.
❑ How to get around an ASP.NET problem that makes dealing with GUID data more difficult than it
need be, noting how the parameters used by data source controls fail to recognize the GUID data
type, and instead use
object. By removing this type specification, you avoid data update errors.
❑ How to edit data in list and detail views by using the other templates that are included in the
data-bound controls.
❑ How to visualize and edit data in master/detail relationships. You used a combination of a
GridView and a DetailsView control to implement this scheme, and saw why it is necessary
to use a second, filtered data source for the detail view.
The next chapter delves deeper into the realm of ADO.NET and you learn to perform data access
programmatically.
Exercises
1. Which of the following are valid reasons to use remote database connections in ASP.NET rather
than local database files?
a. Security
b. Convenience
c. Performance
191
Databases and the Internet
44063c05.qxd:WroxBeg 9/12/06 10:36 PM Page 191
d. Data caching
e. Flexibility
f. Functionality
2. How would you configure a data source filter to remember filter settings for a user between
sessions?
3. Which of the following data-bound controls are available in ASP.NET?
a. Repeater
b. DataGrid
c. DataView
d. DataList
e. ItemView
f. FormView
g. DetailsForm
4. Copy the project C:\BegVC#Databases\Chapter05\Ex0505 - Master-Detail View to a
new project,
C:\BegVC#Databases\Chapter05\Q0504 - List Filtering. Modify this proj-
ect by replacing the
DetailsView control with a DataList control that displays entries from
the
Character table filtered by the existing GridView control. Display data in a three-column
horizontal table layout and use the Classic auto-format scheme. None of the GUID data in the
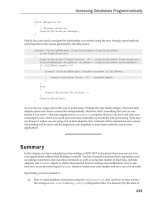
Character table should be displayed. The width of each item should be 200 pixels. Figure 5-25
shows the expected result.
Figure 5-25: Exercise 4 goal
192
Chapter 5
44063c05.qxd:WroxBeg 9/12/06 10:36 PM Page 192
6
Accessing Databases
Programmatically
As you have seen throughout this book, ADO.NET is the technology used to access databases.
Until now, however, you’ve almost exclusively used declarative data-binding techniques to access
data — using controls and wizards to do a lot of the hard work for you rather than coding data-
base access by hand.
However, data binding often doesn’t give you quite the degree of control that you need in your
applications, or might not do things as efficiently as you like. Also, data binding is geared toward
applications with a visual interface, which doesn’t include many application types, such as
Windows services. Or you might want to provide a completely custom-built user interface that
doesn’t use the data-bound controls you’ve encountered in this book.
In any of these circumstances you can use the ADO.NET classes independently of other database
access techniques. From your code you can make connections, execute SQL statements, manage
database objects, and manipulate data — all without any data binding whatsoever. The downside
is that you have to remember to do everything properly, without missing important steps, and
often without the help of wizards. The upside is that you obtain an almost limitless flexibility to
make your applications work exactly the way you want them to, without having to deal with
some of the quirks of data-bound controls.
In this chapter you look at how you can achieve this flexibility. You learn to:
❑ Configure and use ADO.NET database connections
❑ Execute commands through a database connection
❑ Read data with data readers
❑ Use data adapters to exchange data with a database
❑ Use
DataSet and DataTable objects
For the most part, in this chapter you experiment with code in console applications. The techniques
you learn will apply equally to web and Windows applications, but by using console applications
44063c06.qxd:WroxBeg 9/12/06 3:52 PM Page 193
there’s less extraneous code, so the database access code is clearer. The ADO.NET classes that enable you
to access databases, as well as the relationships between these classes, were introduced in Chapter 2. In
this chapter, you formalize that information and learn to manipulate these classes in your C# code.
Database Connections
The first step in accessing databases programmatically is to configure a connection object. Then you can
execute commands against it, obtain data readers, exchange data with a data set using data adapters,
and otherwise manipulate database data.
As you have seen in previous chapters, the ADO.NET class used to connect to databases is
SqlConnection. In this section you learn to create, configure, and use instances of this class, and
explore connection pooling in the .NET Framework.
Creating Connections
SqlConnection objects are simple to use, and can be instantiated in the usual way:
SqlConnection conn = new SqlConnection();
Once instantiated, you can configure the connection with a connection string using the
SqlConnection.ConnectionString property:
conn.ConnectionString = “<connection string>“;
Alternatively, you can combine these steps into one by using a constructor:
SqlConnection conn = new SqlConnection(“<connection string>“);
In both these code fragments, “<connection string>” is the connection string used to connect to the
database. As you saw in Chapter 3, connection strings consist of properties in the form of name/value
combinations that define the connection. Those properties include the DBMS to connect to, the name of
the database (or database file location), and security information.
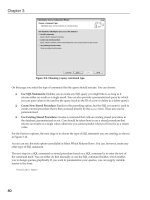
Rather than writing connection strings manually, you can use the Database Connection window that
you’ve seen in previous chapters, which means that you can use the connection configuration wizard.
Once you have done so, you can see the connection string in the properties for the connection, as shown
in Figure 6-1.
Figure 6-1: Obtaining connection strings from database connections
194
Chapter 6
44063c06.qxd:WroxBeg 9/12/06 3:52 PM Page 194
You cannot edit the connection string via the Properties window, but you can select the text displayed
and copy it to your application. You can modify the connection string manually or by using the Modify
Connection command to reconfigure the connection using the standard wizard. You can access this com-
mand by right-clicking on the connection in the Database Explorer.
This technique has another advantage — it means that you can edit the database through the Database
Explorer window, making use of standard visual techniques to do so, without having to rely on code.
Once you have a connection string, either created by hand or using the Database Connection window,
you have to decide where to store it. There is nothing to stop you from hard-coding the string in your
application wherever it is required by your code, but that isn’t an ideal solution — the string may be
used multiple times, so changing it would mean changing it wherever it appears. Alternatively, you can
use a variable or constant to define the connection string, centralizing it. That’s an improvement, but still
requires a recompile to change the connection string if it needs changing. You can also use external stor-
age, such as registry settings or a data file. One frequently used way, which you examine in more detail
in a moment, is to use an application configuration file (
app.config in Windows/console applications
or
web.config for web applications).
Using a configuration file means that no recompiling is necessary to change the string, and you can
change it either in a text editor or programmatically without much effort. However, it does mean that you
are exposing the connection string in plain text format, which may be an issue in some security-critical
uses (especially if username and password information is stored in the connection string). Typically, con-
figuration files are the best option. The final choice of which method to use, however, is up to you.
In a configuration file, connection strings can be stored wherever you like, but there is a location that’s
already configured for this purpose — the
<connectionStrings> element. It is a child element of the
root
<configuration> element, and contains a number of <add> elements defining connection strings.
The following code is an example of a configuration file for a Windows or console application with a
connection string in place:
<?xml version=”1.0” encoding=”utf-8” ?>
<configuration>
<connectionStrings>
<add name=”MyConnectionString” connectionString=”
Data Source=.\SQLEXPRESS;
AttachDbFilename=C:\BegVC#Databases\FolktaleDB.mdf;
Integrated Security=True;
Connect Timeout=30;
User Instance=True”/>
</connectionStrings>
</configuration>
To access this information from your code, use the System.Configuration.ConfigurationManager
class, which is included in the System.Configuration.dll library (not included by default to console
applications). The preceding connection string could be accessed as follows:
SqlConnection conn = new SqlConnection(
ConfigurationManager.ConnectionStrings[“MyConnectionString”].ConnectionString);
With this code in place, changes to connection strings stored in the application configuration file will
automatically be utilized in your code.
195
Accessing Databases Programmatically
44063c06.qxd:WroxBeg 9/12/06 3:52 PM Page 195
Once a connection is configured with a connection string, some connection string properties become
accessible through properties on the
SqlConnection object. For example, you can obtain the name of
the database through the
SqlConnection.Database property, or the name of the SQL Server instance
in use through the
SqlConnection.DataSource property. Properties such as these aren’t used fre-
quently, but can be used for example to display connection information in a Windows application.
Connection State
At any one time, a connection can be said to be open or closed. Databases are only accessible through
connections when they are open. However, database connections consume resources, and so they should
be open for only as long as the database is being used by your code. They should be closed the rest of the
time, or you may introduce a memory leak in your application as well as potentially blocking other
applications from accessing the database. The state of a connection can be determined by using the
SqlConnection.State property, which contains a value from the ConnectionState enumeration. The
enumeration includes the values
ConnectionState.Open and ConnectionState.Closed, as well as
some other values that are not currently used in the SQL Server provider implementation.
You open a connection with the
SqlConnection.Open() method. When you are finished with it, you can
close it using the
SqlConnection.Close() method. It is extremely important to remember that connec-
tions are not closed automatically when they go out of scope — you must perform this operation manually.
It’s also possible to close connections through data reader objects, as you will see shortly, or to use a
using block to close the connection automatically:
using (SqlConnection conn = new SqlConnection(
ConfigurationManager.ConnectionStrings[“MyConnectionString”].ConnectionString))
{
conn.Open();
}
Once the last line of code in the using block completes, the connection closes. That’s because the using
block causes the Dispose() method of the SqlConnection object to be called, which closes the connection.
Another common way to close connections is to use a
try catch finally structure:
SqlConnection conn = new SqlConnection(
ConfigurationManager.ConnectionStrings[“MyConnectionString”].ConnectionString);
try
{
conn.Open();
}
catch (Exception ex)
{
// Handle exception.
}
finally
{
conn.Close();
}
196
Chapter 6
44063c06.qxd:WroxBeg 9/12/06 3:52 PM Page 196
There is no need to test the SqlConnection.State property in the finally block because attempting
to close a connection that is already closed does not generate an exception (although there may be a tiny
processing overhead in closing a connection more than once).
Connection Pooling
Making a connection to a database takes time and processor cycles. Under the hood, the provider must
open channels, allocate resources, and authenticate to the database. If the process is repeated each and
every time you want to manipulate a database, noticeable delays can occur in your applications. For that
reason, the .NET Framework uses connection pooling to make things work more efficiently. That means the
provider maintains a number of connections to your database, which are available to your code when
requested. When you close a connection in your code, the underlying connection in the connection pool
does not close — instead, it is released and remains open and ready for subsequent code to use. When you
open a new connection, the framework first looks in the pool to see if there are any open connections that
aren’t currently in use. If there is one, you are passed a reference to the pooled connection, and the process
of physically opening a new connection is not necessary. If no pooled connection is available, a new con-
nection is created and opened, and added to the pool for future recycling. Pools have a maximum number
of connections, and if that number is exceeded, either a new pool is created, or application execution
pauses until a connection becomes available.
Connection pooling makes for a highly optimized, extremely scalable system. The exact mechanism dif-
fers according to the provider in use, and often you don’t have to do anything to enable it. For the SQL
Server provider, connection pooling is enabled by default, with a maximum of 100 concurrent connec-
tions supported in the pool.
Connection pooling can be controlled by modifying the connection string or programmatically manipu-
lating the provider. Both of these are advanced topics and won’t be covered in this book. However, it is
well worth knowing what connection pooling is, and how it optimizes your applications, which is why
it’s mentioned here. It also explains why, when you first run an application, there is a slight delay before
a connection is opened, while subsequent data access is much faster — because the connection used to
access the database is created and opened on first use, and then recycled for later use.
Database Commands
SqlCommand objects are used to execute commands against a database through SqlConnection objects.
There are a number of ways that the
SqlCommand class can be used, and a number of different possible
return values. In this section you examine the various usages of this class, as well as how to use parame-
ters and what SQL injection attacks are and how to protect against them.
Creating Commands
The SqlCommand object has four constructors that allow varying degrees of control over the properties
of the instantiated command object. The simplest of these is the default constructor:
SqlCommand cmd = new SqlCommand();
197
Accessing Databases Programmatically
44063c06.qxd:WroxBeg 9/12/06 3:52 PM Page 197
The most complicated constructor takes three parameters as follows:
SqlCommand cmd = new SqlCommand(“<command string>”, <connection>, <transaction>);
Here <command string> is a string that defines the command, such as a SQL statement. The form of the
string depends on the command type, as detailed in the next section. If this is not set in the constructor,
you can set it later using the
SqlCommand.CommandText property. <connection> is a reference to the
SqlConnection object that will be used to transmit the command to the database. You have to supply
one of these or you can’t execute the command (and, of course, the connection must be open before the
command can execute). Again, you can either set this in the constructor, or you can set it later using the
SqlCommand.Connection property. Finally, <transaction> is used to enlist the command in a transac-
tion, a subject that is covered in Chapter 9.
The other two constructors for
SqlCommand take as their parameters either a single string for the com-
mand text, or the command text string and a connection object respectively:
SqlCommand cmd = new SqlCommand(“<command string>”);
SqlCommand cmd = new SqlCommand(“<command string>”, <connection>);
Command Types
Three types of commands are supported by the SQL Server client, and the type of command represented
by a
SqlCommand instance is determined by its SqlCommand.CommandType property. The type of the
command influences how the test in the
CommandText property is interpreted. The CommandType prop-
erty takes a value from the
CommandType enumeration, which has three values as follows:
❑
CommandType.Text: The default value for the CommandType property, specifying that the
CommandText property is a SQL command. This command may be parameterized, as discussed
later in this section.
❑
CommandType.TableDirect: With this value, CommandText should be the name of a table or
view. When the command is executed, all rows and all columns are returned from the specified
table.
❑
CommandType.StoredProcedure: This value means that CommandText contains the name of a
stored procedure. If the specified stored procedure requires parameters, they must be specified
in the manner described later in this section.
For example, you might create a table direct command as follows:
SqlCommand cmd = new SqlCommand(“MyTable”, conn);
cmd.CommandType = CommandType.TableDirect;
Command Execution Methods
Depending on the type and text of the command, different results are to be expected. Many commands
will return rows from a table, but there are also commands that don’t return any result, or a different
type of result. Rather than having a single
Execute() method, SqlCommand objects have several meth-
ods for executing a command, and you must choose the one that will provide the result you want.
198
Chapter 6
44063c06.qxd:WroxBeg 9/12/06 3:52 PM Page 198
The available methods for executing commands are as follows:
❑
ExecuteNonQuery(): Use this when no result is expected from the command. This applies to
insert, update, and delete commands. In actual fact, this method does have a return value, of
type
int, which informs you of the number of rows that have been affected by the command.
You don’t have to use this return value, but it can be helpful — after a delete command to verify
that a row was actually been deleted, for example. The name of this method is a little mislead-
ing because all types of SQL commands can be termed queries; it stems from the fact that an
alternative use of the word “query” refers only to SQL commands that return data.
❑
ExecuteReader(): Use this when the command is expected to return row data. This includes
most select commands as well as table direct commands and many stored procedures, and is
probably the most frequently used command execution method. It is overloaded, and includes
an optional parameter that you can use to set the command behavior. (Command behavior is
discussed in a moment.) The return value of this method is a
SqlDataReader object.
❑
ExecuteScalar(): Use when you are expecting a single result of whatever type. This applies
when, for example, you are obtaining an aggregate function result such as the sum of values in a
single column, or a count of rows matching certain criteria. It isn’t appropriate for select commands
that return single rows of data — in such circumstances you should use
ExecuteReader(). If the
query in fact returns row data, the first column of the first row obtained will be returned by this
method. The return value of this method is of type
object.
❑
ExecuteXmlReader(): If the command you are executing returns XML data (for example, a
SQL query using the
FOR XML clause), you can use this method to obtain an XmlReader object
that you can use to access the data. It works only for single rows of data — if the command
returns more than one row, any rows after the first are not accessible though the
XmlReader.
There are also asynchronous versions of
ExecuteNonQuery(), ExecuteReader(), and
ExecuteXmlReader() that you can use where appropriate. For example, to obtain a data reader
object using asynchronous methods, you would call
BeginExecuteReader() and then either poll
the
IAsynchResult interface returned for the result or wait for a callback function to be called and
obtain the result using
EndExecuteReader(). This model follows the standard pattern for calling
methods asynchronously in the .NET Framework — a subject that is beyond the scope of this book.
There are, however, plenty of good references around, both in books and on the Internet, should you
require this behavior.
As noted, for
ExecuteReader() you can specify a command behavior to be used by the command
object. To do this, specify one or more values from the
CommandBehavior enumeration (you can com-
bine values using bitwise logic — that is, by using the
| operator). The enumeration has the following
values:
❑
CommandBehavior.Default: No affect; this results in the default behavior.
❑
CommandBehavior.CloseConnection: When you use this behavior the connection will be
closed when you close the data reader. This can be a useful way to ensure that connections are
closed when, for example, you call a method that performs data access and returns a data reader
object. In this situation you might not have access to the underlying connection, which may
have gone out of scope. However, you can rest assured that the connection will be closed when
you close the data reader that you have obtained.
199
Accessing Databases Programmatically
44063c06.qxd:WroxBeg 9/12/06 3:52 PM Page 199
❑ CommandBehavior.KeyInfo: This option means that additional information, including infor-
mation regarding the primary key of the table, is obtained as part of the query. If you intend to
use the result of the command to examine the schema of the table, use this option. There are
some (advanced) considerations to take into account when using it because of the SQL state-
ment that is generated (see MSDN documentation for details), although they won’t affect you in
most situations.
❑
CommandBehavior.SchemaOnly: With this option only schema information is returned, not
actual data. This option is often used in combination with
CommandBehavior.KeyInfo to
obtain full schema information.
❑
CommandBehavior.SequentialAccess: Ensures that data is only readable in a sequential
fashion, meaning that you must read column data in the order in which it is returned. Once a
column is read through a
SqlDataReader that uses this option, you cannot read it again, nor
can you read columns that precede it in result order. With this option enabled, it is possible to
read large binary data fields using
GetChars() and GetBytes() methods.
❑
CommandBehavior.SingleResult: Notifies the SQL provider that only a single result should
be returned by the command, enabling optimization to take place. When a single result is to be
returned, however, it makes more sense to use the
ExecuteScalar() method, making this
option somewhat redundant in most situations.
❑
CommandBehavior.SingleRow: Notifies the SQL provider that only a single row will be
returned by the command. Again, this enables additional optimization to take place. Having
said that, the implementation of this option is optional by providers, and it is unclear whether
the SQL Server provider performs any such optimization.
Parameterized Commands
When you execute SQL statements, there is nothing to stop you from including all of the information in
the statement in the
CommandText property of the command. However, it can often be useful to parame-
terize some parts of the SQL statement. That both aids in protecting against SQL injection attacks (see the
next section for details), and enables you to reuse commands. In addition, this technique is necessary for
stored procedures that use parameters because these parameters cannot be included in the command
text if you use the
CommandType.StoredProcedure command type.
To use parameters in SQL statements, you provide placeholders (variable names) in the command text.
The placeholders take the form of a variable name preceded by an
@ character. For example:
SELECT * FROM MyTable WHERE MyId = @MyId
Here, @MyId represents a parameter.
Similarly, the definition of a stored procedure that uses parameters includes one or more parameters
using the same syntax. The main difference with stored procedures is that parameters may be in or out
parameters, in much the same way that you can exchange data with methods by passing parameters
using the
ref or out keywords.
To use parameterized commands, either queries or stored procedures, you must add corre -
sponding parameters to the
SqlCommand.Parameters collection, which is an instance of the
SqlParametersCollection class and contains SqlParameter objects. Add parameters by using
200
Chapter 6
44063c06.qxd:WroxBeg 9/12/06 3:52 PM Page 200
the SqlParametersCollection.Add() method, either by passing a pre-configured parameter or
(more normally) by specifying the properties of the parameter to add. You can either specify simply the
name of the parameter to add; the name and data type of the parameter; the name, data type, and col-
umn length of the parameter; or the name, data type, column length, and source column of the parame-
ter. The last of these, which includes a source column name, enables the value of the parameter to be
obtained from existing data, and is not commonly used. In all cases where a data type is specified, a
value from the
SqlDbType enumeration is used. It generally isn’t necessary to specify the column
length for a parameter.
Once a parameter is configured, you can set its value using the
SqlParameter.Value property. Because
the
SqlParametersCollection.Add() method returns a reference to the added parameter, it is com-
mon practice to set the value of a parameter in the same line of code — despite the fact that this leads to
slightly odd-looking syntax, as this example shows:
SqlCommand cmd = new SqlCommand(“SELECT * FROM MyTable WHERE MyId = @MyId”, conn);
cmd.Parameters.Add(“@MyId”, SqlDbType.UniqueIdentifier).Value = MyGuidVar;
When you use this technique, parameters are added as an input parameter. Should you want to use an
output (or bidirectional) parameter, you can instantiate the parameter independently, like this:
SqlParameter myParam = new SqlParameter(“@MyOutputParam”, SqlDbType.Int);
myParam.Direction = ParameterDirection.Output;
The default direction is ParameterDirection.Input, and you can also use ParameterDirection
.InputOutput
for bidirectional values and ParameterDirection.ReturnValue if the parameter is the
return value of, for example, a stored procedure.
Protecting Against SQL Injection
When executing SQL statements that are in part configured by users, you have to beware of SQL injec-
tion attacks (sometimes referred to as SQL insertion attacks). For example, let’s say that you assemble a
SQL statement using user input where the user enters a value for a string valued
ItemName field of a
record, that is:
SELECT * FROM MyTable WHERE ItemName = ‘<user input>‘
In code this might be assembled using the following:
Console.WriteLine(“Enter Id:”);
string userInput = Console.ReadLine();
string query = “SELECT * FROM MyTable WHERE MyTableId = ‘“ + userInput + “‘“;
At first glance there doesn’t seem to be anything wrong with this. However, malicious users might enter
something like this:
Take this!’;DELETE FROM MyTable;
201
Accessing Databases Programmatically
44063c06.qxd:WroxBeg 9/12/06 3:52 PM Page 201
making the combined SQL statement(s):
SELECT * FROM MyTable WHERE ItemName = ‘Take this!’;DELETE FROM MyTable; ‘
This is actually three SQL commands. The first is a select statement, the second is a dangerous delete
statement, and the third is a comment. If you were to execute this command you’d be in for a nasty sur-
prise — the data in
MyTable would be deleted.
Obviously that isn’t a good thing, and you should take steps to prevent it. You can validate user input,
perhaps replacing
‘ characters with ‘’ as follows:
userInput = userInput.Replace(“‘“, “‘’“);
This is a useful first line of defense, and also prevents more minor problems, say, when the string in
the parameter includes an apostrophe. You can also ensure that the account used to access your data-
base doesn’t have permission to perform such a destructive SQL query by configuring your database
accordingly.
A better way to deal with this, however, is to use parameterized queries to assemble SQL statements.
Parameters are automatically escaped in that way, and are also validated in other ways to ensure that
this type of attack is impossible.
While this protection is extremely easy to implement, it’s surprising how many people forget to do it —
and risk losing an awful lot of data to this sort of attack. Some people have estimated that up to 50 per-
cent of large-scale e-commerce web sites — and up to 75 percent of smaller sites — may be vulnerable to
SQL injection attacks.
In the following Try It Out, you configure a connection and execute a command through it.
Try It Out Executing Commands
1.
Open Visual C# Express and create a new Console application called Ex0601 - Executing
Commands
. Save the project in the C:\BegVC#Databases\Chapter06 directory, with the Create
Directory For Solution option unchecked.
2. Add the FolktaleDB.mdf database file to the project by selecting Project ➪ Add Existing Item.
If the Datasource Configuration Wizard appears, click Cancel.
3. Add an application configuration file to the project selecting Project ➪ Add New Item. Use the
default filename
App.config.
4. Obtain the connection string to the database using the Database Explorer window (which
should automatically have added a connection to the database you added), and use it to add a
connection string to the
App.config file called FolktaleDBConnectionString, as follows:
<?xml version=”1.0” encoding=”utf-8” ?>
<configuration>
<connectionStrings>
<add name=”FolktaleDBConnectionString”
connectionString=”Data Source=.\SQLEXPRESS;
AttachDbFilename=
C:\BegVC#Databases\Chapter06\Ex0601 - Executing Commands\FolktaleDB.mdf;
Integrated Security=True;
202
Chapter 6
44063c06.qxd:WroxBeg 9/12/06 3:52 PM Page 202
User Instance=True”/>
</connectionStrings>
</configuration>
5. Add a project reference to System.Configuration by selecting Project ➪ Add Reference.
6. In Program.cs, add using statements at the top of the file as follows:
using System.Data;
using System.Data.SqlClient;
using System.Configuration;
7. Add the following code in Program.cs:
static void Main(string[] args)
{
// Configure connection.
SqlConnection conn = new SqlConnection(ConfigurationManager
.ConnectionStrings[“FolktaleDBConnectionString”].ConnectionString);
// Get user input table name.
Console.WriteLine(“Enter table to count records for:”);
string tableName = Console.ReadLine();
if (tableName.IndexOf(‘;’) != -1)
{
Console.WriteLine(“SQL injection attack detected. Press ENTER to close.”);
Console.ReadLine();
return;
}
tableName = tableName.Replace(“‘“, “‘’“);
// Create command.
string query = “SELECT COUNT(*) FROM “ + tableName;
SqlCommand cmd = new SqlCommand(query, conn);
int rowCount = -1;
// try catch finally for command execution.
try
{
// Open connection.
conn.Open();
// Execute command.
rowCount = (int)cmd.ExecuteScalar();
}
catch (Exception ex)
{
// Process exception.
Console.WriteLine(ex.Message);
}
finally
{
// Close connection.
conn.Close();
}
203
Accessing Databases Programmatically
44063c06.qxd:WroxBeg 9/12/06 3:52 PM Page 203
// Output result.
Console.WriteLine(“There are {0} rows in table [{1}].”, rowCount, tableName);
// Close application.
Console.WriteLine(“Press ENTER to close.”);
Console.ReadLine();
}
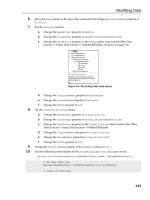
8. Execute the application and type the name of a table in the FolktaleDB database (for example
Character). The result is shown in Figure 6-2.
Figure 6-2: Obtaining a table row count
9. Execute the application again and try a SQL injection attack with the string Character;
DELETE FROM Story;
. The result is shown in Figure 6-3.
Figure 6-3: Stopping a SQL injection attack
10. Close the application and Visual C# Express.
How It Works
In this example you made a connection to the FolktaleDB database (with a connection string stored in
an application configuration file) and executed a command against it. The command is a simple one that
uses the aggregate
COUNT() function to count the rows in a database table, where that table is specified
by the user. For example:
SELECT COUNT(*) FROM Character
The table name entered by the user first passes through a basic SQL injection attack protection routine —
the code searches for the semicolon character used to separate commands. You could be a lot more
advanced here, perhaps checking the entries against a list of table names, or even (and this is the prefer-
able way of doing things) making the user choose from a list of tables rather than using free text entry.
This way there is no possibility of SQL injection because none of the SQL statements used come directly
from user input.
Once a valid table name is entered (or at least one that doesn’t appear to be a SQL injection attack), the
application assembles a SQL statement, executes it, and displays the result. Because the result is a single
value, the
SqlCommand.ExecuteScalar() method is used, and the result is cast to an int value.
204
Chapter 6
44063c06.qxd:WroxBeg 9/12/06 3:52 PM Page 204
The database access code uses exception handling as discussed earlier in the chapter. If something goes
wrong, the exception message is simply output to the user, although you could easily replace that code
with something more advanced.
Data Reader Objects
The SqlDataReader class is used to read data obtained by executing a command. As you saw in
Chapter 2, it provides a forward-only cursor on data, where after reading data from a row, you can move
on to the next row, but not back to rows that have already been read. In most cases, however, you can
read columns in any order — unless the command used to generate the reader specifies sequential
access as described in the previous section.
The
SqlDataReader class provides an extremely fast, optimized way to read data from a database. In
this section you learn how to use it and what it is capable of.
Creating Data Reader Objects
SqlDataReader objects can be obtained only by executing commands using the
SqlCommand.ExecuteReader() method. There is, therefore, no public constructor for creating
instances of the
SqlDataReader class.
Creating a data reader consists of the following tasks:
1. Configure a connection.
2. Configure a command that obtains row data.
3. Execute the command using the ExecuteReader() method.
Typically, you keep the connection open for the minimum amount of time, which means opening the
connection just before Step 3, and closing it once you have finished using the data reader. If the com-
mand uses
CommandBehavior.CloseConnection, you can close the connection at the same time you
close the data reader.
You can see this in action with an extension of the earlier code for opening a connection:
SqlConnection conn = new SqlConnection(
ConfigurationManager.ConnectionStrings[“MyConnectionString”].ConnectionString);
try
{
SqlCommand cmd = new SqlCommand(“SELECT * FROM MyTable”, conn);
conn.Open();
SqlDataReader reader = cmd.ExecuteReader();
}
catch (Exception ex)
{
205
Accessing Databases Programmatically
44063c06.qxd:WroxBeg 9/12/06 3:52 PM Page 205
// Handle exception.
}
finally
{
conn.Close();
}
Reading Data
Once you’ve got a SqlDataReader instance, the next thing to do is to read data with it. You will want to
do one or more of the following:
❑ Read schema data.
❑ Read row data.
❑ Read other properties of the data reader, such as whether any rows are contained in it, and if so
how many.
When you have finished reading data through a data reader, close it using the
SqlDataReader.Close()
method to avoid memory leaks.
Schema Data
You can obtain schema information for the data contained in a SqlDataReader object in two ways:
one column at a time (ignoring any columns that you don’t require), or in a single step, populating a
DataTable with schema information. The latter technique uses the SqlDataReader.GetSchemaTable()
method, which takes no parameters and returns a DataTable instance.
When using
GetSchemaTable(), the DataTable object returned will contain a row for each column in the
data in the data reader. Each row contains 30 columns with information about a column in the data reader,
including column indexes, names, types, sizes, key information, and so on, as well as the name of the SQL
Server instance used to obtain the data, and names of base database columns used to obtain the data.
Using this method enables you to perform advanced tasks, such as dynamically transforming the data in
the data reader, because you have access to all the information about the data that you could possibly
want. Although it provides you with all the basic information about columns, and as such serves a num-
ber of uses, in most cases it’s much more information than you need. The fact that it is likely to get more
information than you want, however, means that you usually want to get information for individual
columns as and when you need to.
The other way to obtain schema information, column by column, is often more suitable (and can be
much faster). It involves using the following property and methods:
❑
SqlDataReader.FieldCount: Obtains the number of columns in the rows in the data reader as
an
int value.
❑
SqlDataReader.GetName(): Obtains the name of a specified row (where the row is specified
using its
int index).
❑
SqlDataReader.GetDataTypeName(): Obtains the name of the data type of a specified row
(where the row is specified using its
int index) in the form of a string.
206
Chapter 6
44063c06.qxd:WroxBeg 9/12/06 3:52 PM Page 206
If you know the name of a column and want to find out what index to use to access values from it, you
can use
SqlDataReader.GetOrdinal(), passing the string name of the column, and get the index of
the column in the form of an
int value.
You can also get column type information from the values returned when you read data from a data
reader.
All of the information detailed here is available as soon as you obtain a
SqlDataReader instance.
There’s no need to load a row into the reader as described in the next section. However, the underlying
connection must be open to use the schema properties and methods.
Row Data
When you first obtain a SqlDataReader object, it does not allow data access to any row in the result set.
Think of a data reader as needing to have a row “loaded” for you to access it, and until you tell it to load
a row, there won’t be any data for you to look at. In fact, if you try to read data before you load a row,
you get an
InvalidOperationException with the message “Invalid attempt to read when no data is
present.”
Use the
Read() method to load a row. It attempts to load the next row in the result set (the first row if
this is the first time the method is called) and returns a Boolean value to let you know whether it has
been successful. If there are no rows in the result set, or if all the rows have already been read, you
receive a value of
false. It is usual to call this method as part of a while loop as follows:
// Obtain data reader.
while (reader.Read)
{
// Process row.
}
// No more rows to process.
With this code structure, you process every row in the result set in turn. You can use SqlDataReader
.HasRows
, a Boolean property, to find out if there are any rows before you use the loop. You cannot,
however, use the data reader to find out how many rows are accessible. If you wanted to do this you’d
have to use the
COUNT(*) aggregate function in a separate query, or keep a running count as you
process rows, and then find out how many there were after you’ve finished with them.
One common mistake people make when first using the
SqlDataReader class is to confuse the Read()
method with the NextResult() method. After all, NextResult() does sound as if it would do exactly
what has been described here. But that is not the case. The
NextResult() method actually moves to the
next set of results, which can occur if the SQL query or stored procedure used in the command returns
multiple result sets. The following code sample illustrates this:
SqlConnection conn = new SqlConnection(
ConfigurationManager.ConnectionStrings[“MyConnectionString”].ConnectionString);
try
{
SqlCommand cmd =
new SqlCommand(“SELECT * FROM MyTable1; SELECT * FROM MyTable2;”, conn);
conn.Open();
SqlDataReader reader = cmd.ExecuteReader();
207
Accessing Databases Programmatically
44063c06.qxd:WroxBeg 9/12/06 3:52 PM Page 207
do
{
while (reader.Read())
{
// Process row.
}
} while (reader.NextResult());
reader.Close();
}
catch (Exception ex)
{
// Handle exception.
}
finally
{
conn.Close();
}
Unlike with Read(), there is no need to call NextResult() to load the first result set, hence the use of a
do while loop. Of course, because the code you use to process rows from each result set may be dif-
ferent, you may not use this kind of structure at all, and simply process each result set in turn using dif-
ferent code.
Typically, however, it is much less of a headache to use separate commands and readers to process indi-
vidual result sets, and will make things a lot easier if you have to return to your code at a later date.
The key thing to take away from this discussion is not to call
NextResult() when you actually mean
to call
Read().
Once a row is loaded, you want to process it by extracting column information. As you know, there are a
large number of methods you can use to extract column data as specific data types, each of which takes
an integer column index value and returns a result of the specified type. For integer data you could use
SqlDataReader.GetInt32(), for example. There are also methods that use native SQL Server types as
well, such as
SqlDataReader.GetSqlInt32(). And you can obtain values in the form of object refer-
ences using
SqlDataReader.GetValue(), or simply by using the indexer for the data reader. The fol-
lowing lines of code are equivalent:
object columnVal1 = reader.GetValue(0);
object columnVal2 = reader[0];
In most cases, you will use the indexer because it involves less code, although it requires you to cast val-
ues to their proper types. Note that the SQL types, from the
System.Data.SqlTypes namespace, can
only be obtained using the
GetSqlXXX() methods.
Besides involving less typing, the indexer of
SqlDataReader has another advantage — it is overloaded
to enable you to access columns by name. For example:
object columnVal = reader[“MyColumn”];
Admittedly, this has the disadvantage of being slower because the index of the specified column must be
obtained by the data reader before it can return a value, but that’s relatively minor, and it certainly
makes your code look readable.
208
Chapter 6
44063c06.qxd:WroxBeg 9/12/06 3:52 PM Page 208
When using the typed methods to obtain column values, you should be aware of what happens in the
case of null values. When dealing with value types, null values are not permitted. Calling
GetGuid()
when there is a null result in the data row, for example, causes an exception to be raised. You can handle
the exception and act accordingly, or use the
SqlDataReader.IsDBNull() method, which tells you if
the column at the specified index contains a null value. If you detect a null value, you can avoid calling a
typed method to obtain the value, knowing that doing so would result in an exception. However, using
GetSqlGuid() in the same situation does not raise an exception. Instead, the value returned is an
instance of the correct SQL data type (in this case
SqlGuid). Attempting to access the value of this object
using its
Value property (for example SqlGuid.Value) raises an exception. Instead, check the Boolean
IsNull property of the object (SqlGuid.IsNull in this case) before using the Value property. Finally,
when using
GetValue() or an indexer to access data, null values result in a return value of type
System.DBNull, and no exception.
Another way of getting at row data is to use the
SqlDataReader.GetValues() or SqlDataReader
.GetSqlValues()
methods. Both have a single parameter, a reference to an array of object type
objects. The result is that the array is filled with values from the row, one for each column, in column
order. It doesn’t matter if the size of the array you pass doesn’t match the number of columns — if the
array is too small, only the first columns are filled; if it is too big, then some members of the array aren’t
affected by the method call.
These methods don’t raise exceptions for null values but, as discussed earlier, using the SQL type ver-
sion of the method (
GetSqlValues()) may obtain items that generate exceptions if you access their
Value property and they contain null values.
To optimize performance, only a single object reference is generated by the data reader when you obtain
object references to column values. Obtaining two objects by calling the same method of the reader actu-
ally means that you have two references to the same object. This is worth being aware of if you change
column values for any reason.
Finally, you can also use
SqlDataReader objects to obtain the values of large amounts of binary or text
data using the
GetBytes(), GetSqlBytes(), GetChars(), and GetSqlChars() methods. This is pos-
sible only if the
CommandBehavior.Sequential access behavior is specified for the command that gen-
erates the data reader.
Other Properties
There are a few other properties that you might want to access for SqlDataReader objects. Two of these,
FieldCount and HasRows, you’ve already looked at — they’re used to obtain the number of columns in
a row and whether the reader contains any rows respectively. There is also
IsClosed, a Boolean prop-
erty telling you if the reader is closed, and
RecordsAffected, which tells you how many rows have
been affected (if any) by the command that generated the data reader, or the value
-1 if it is not applica-
ble to the current command. These two properties are the only ones that are available for a closed data
reader, and you should close the reader before using
RecordsAffected to ensure a correct value for it.
In more advanced situations, you can use the
VisibleFieldCount property to obtain the amount of
non-hidden columns. For example, if a table uses a primary key consisting of a combination of more
than one column, but only some of these columns are returned by a query, the data reader must obtain
additional columns to have a valid primary key reference, despite not being asked for them, and those
columns will be hidden.
209
Accessing Databases Programmatically
44063c06.qxd:WroxBeg 9/12/06 3:52 PM Page 209
Finally, there is a Depth property, intended to give you a “nesting level” for the currently loaded row.
However, this property is meaningless when using the SQL Server data provider, and as such is not
implemented by the
SqlDataReader class.
Connections for Data Reader Objects
While a data reader is in use, its underlying SqlConnection object is unavailable for any other use. You
can access the underlying connection through the
SqlDataReader.Connection property should you
need to, but all you’ll be able to do is close the connection by calling its
Close() method. You can’t, for
example, execute another command through the connection.
In the following Try It Out, you use a data reader to obtain table data.
Try It Out Data Readers
1.
Copy the project C:\BegVC#Databases\Chapter06\Ex0601 - Executing Commands to a
new project,
C:\BegVC#Databases\Chapter06\Ex0602 - Data Readers. (Copy and
rename the directory, open it in Visual C# Express, and rename the solution and project.)
2. Open app.config and change the path to the local database file to include the new project
directory rather than
Ex0601 - Executing Commands.
3. Modify the code in Program.cs as follows:
static void Main(string[] args)
{
// Configure connection.
SqlConnection conn = new SqlConnection(ConfigurationManager
.ConnectionStrings[“FolktaleDBConnectionString”].ConnectionString);
// Get user input table name.
Console.WriteLine(“Enter table from which to output data:”);
string tableName = Console.ReadLine();
if (tableName.IndexOf(‘;’) != -1)
{
Console.WriteLine(“SQL injection attack detected. Press ENTER to
close.”);
Console.ReadLine();
return;
}
tableName = tableName.Replace(“‘“, “‘’“);
// Create command.
string query = “SELECT * FROM “ + tableName;
SqlCommand cmd = new SqlCommand(query, conn);
// Line removed.
// try catch finally for command execution.
try
{
// Open connection.
conn.Open();
210
Chapter 6
44063c06.qxd:WroxBeg 9/12/06 3:52 PM Page 210