Beginning C# 2005 Databases PHẦN 4 ppt
Bạn đang xem bản rút gọn của tài liệu. Xem và tải ngay bản đầy đủ của tài liệu tại đây (765.77 KB, 53 trang )
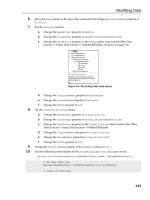
6. Move the Name column to the top of the column list and change its AutoSizeMode property to
AllCells.
7. For the EndingId column:
a. Change the HeaderText property to Ending.
b. Change the ColumnType property to DataGridViewComboBoxColumn.
c. Change the DataSource property to the Ending table, found under Other Data
Sources ➪ Project Data Sources ➪ FolktaleDBDataSet, as shown in Figure 4-6.
Figure 4-6: The Ending table data source
d. Change the DisplayMember property to EndingType.
e. Change the ValueMember property to EndingId.
f. Change the Width property to 120.
8. For the ClassificationId column:
a. Change the HeaderText property to Classification.
b. Change the ColumnType property to DataGridViewComboBoxColumn.
c. Change the DataSource property to the Classification table, found under Other
Data Sources ➪ Project Data Sources ➪ FolktaleDBDataSet.
d. Change the DisplayMember property to Classification.
e. Change the ValueMember property to ClassificationId.
f. Change the Width property to 120.
9. Change the AutoSizeMode property of the Summary column to Fill.
10. Add the following event handler for the storyBindingSource.AddingNew event:
private void storyBindingSource_AddingNew(object sender, AddingNewEventArgs e)
{
// Get data table view
DataView dataTableView = storyBindingSource.List as DataView;
// Create row from view
133
Modifying Data
44063c046.5.qxd 9/15/06 12:46 PM Page 133
DataRowView rowView = dataTableView.AddNew();
// Configure defaults
rowView[“StoryId”] = Guid.NewGuid();
rowView[“SourceId”] = (sourceBindingSource.Current as DataRowView)[“SourceId”];
rowView[“EndingId”] = (endingBindingSource[0] as DataRowView)[“EndingId”];
rowView[“ClassificationId”] =
(classificationBindingSource[0] as DataRowView)[“ClassificationId”];
rowView[“Name”] = “New story”;
rowView[“Summary”] = “Story summary”;
// Set new row
e.NewObject = rowView;
// Navigate to new row
storyBindingSource.MoveLast();
}
11. In the design view for Form1, add a CharacterStoryTableAdapter component to the form
called
characterStoryTableAdapter, and a StoryLocationTableAdapter component called
storyLocationTableAdapter. If these components do not appear in the Toolbox, then com-
pile the project first.
12. Modify Form1_Load() as follows:
private void Form1_Load(object sender, EventArgs e)
{
this.classificationTableAdapter.Fill(this.folktaleDBDataSet.Classification);
this.endingTableAdapter.Fill(this.folktaleDBDataSet.Ending);
this.storyTableAdapter.Fill(this.folktaleDBDataSet.Story);
this.sourceTableAdapter.Fill(this.folktaleDBDataSet.Source);
this.characterStoryTableAdapter.Fill(this.folktaleDBDataSet.CharacterStory);
this.storyLocationTableAdapter.Fill(this.folktaleDBDataSet.StoryLocation);
}
13. In the design view for Form1, set the DeleteItem property of the sourceBindingNavigator
control to (none).
14. Add a new event handler for the Delete button as follows:
private void bindingNavigatorDeleteItem_Click(object sender, EventArgs e)
{
if (Validate() && (sourceBindingSource != null))
{
// Flag
bool deleteRow = true;
// Get row to be deleted
DataRowView rowView = sourceBindingSource.Current as DataRowView;
if (rowView == null)
{
return;
}
134
Chapter 4
44063c046.5.qxd 9/15/06 12:46 PM Page 134
FolktaleDBDataSet.SourceRow row =
rowView.Row as FolktaleDBDataSet.SourceRow;
// Check for child rows
FolktaleDBDataSet.StoryRow[] childRows = row.GetStoryRows();
if (childRows.Length > 0)
{
DialogResult userChoice = MessageBox.Show(“If you delete this source “
+ “row you will also delete its child story rows. Continue?”,
“Warning”, MessageBoxButtons.YesNo, MessageBoxIcon.Warning);
if (userChoice == DialogResult.Yes)
{
// Delete row and child rows
foreach (FolktaleDBDataSet.StoryRow childStory in childRows)
{
// Delete child CharacterStory rows
FolktaleDBDataSet.CharacterStoryRow[] characterStoryRows =
childStory.GetCharacterStoryRows();
foreach (FolktaleDBDataSet.CharacterStoryRow
childCharacterStory in characterStoryRows)
{
childCharacterStory.Delete();
}
// Delete child StoryLocation rows
FolktaleDBDataSet.StoryLocationRow[] storyLocationRows =
childStory.GetStoryLocationRows();
foreach (FolktaleDBDataSet.StoryLocationRow
childStoryLocation in storyLocationRows)
{
childStoryLocation.Delete();
}
// Delete Story row
childStory.Delete();
}
}
else
{
deleteRow = false;
}
}
// Delete row?
if (deleteRow)
{
sourceBindingSource.RemoveCurrent();
sourceBindingSource.EndEdit();
}
}
}
135
Modifying Data
44063c046.5.qxd 9/15/06 12:46 PM Page 135
15. Modify the event handler for the Save Data button as follows:
private void sourceBindingNavigatorSaveItem_Click(object sender, EventArgs e)
{
this.Validate();
this.sourceBindingSource.EndEdit();
this.storyBindingSource.EndEdit();
// Save added / edited parent rows
FolktaleDBDataSet.SourceDataTable tableChanges =
folktaleDBDataSet.Source.GetChanges(
DataRowState.Added | DataRowState.Modified)
as FolktaleDBDataSet.SourceDataTable;
if (tableChanges != null)
{
sourceTableAdapter.Update(tableChanges);
}
// Save child row modifications
characterStoryTableAdapter.Update(folktaleDBDataSet.CharacterStory);
storyLocationTableAdapter.Update(folktaleDBDataSet.StoryLocation);
storyTableAdapter.Update(folktaleDBDataSet.Story);
// Save deleted parent rows
FolktaleDBDataSet.SourceDataTable tableDeletes =
folktaleDBDataSet.Source.GetChanges(DataRowState.Deleted)
as FolktaleDBDataSet.SourceDataTable;
if (tableChanges != tableDeletes)
{
sourceTableAdapter.Update(tableDeletes);
}
// Accept changes
folktaleDBDataSet.AcceptChanges();
}
16. Run the application and modify some data. The interface should look similar to Figure 4-7.
Figure 4-7: The Story editing interface
136
Chapter 4
44063c046.5.qxd 9/15/06 12:46 PM Page 136
17. Test the functionality of adding and removing data. Remove a source with story rows (and
accepting the confirmation) and then add a new source and add a story to the source before sav-
ing all changes. The operation should be successful.
18. Close the application and Visual C# Express.
How It Works
In this example, you first added a related table to the form by using a nested item in the Data Sources
window. Doing this means that you automatically bind a filtered view of the data to the control, so with
no additional code whatsoever you get a list of child rows in a
DataGridView, where the Story rows
displayed are determined by the selected item in the
Source table. If you use the top-level version of the
Story table as displayed in the Data Sources window, this filtering is not automatic, and you’d have to
write your own code to achieve that functionality.
The Data Sources window is far from perfect in this respect. For more complex relationships, you will
have to write your own code. Hierarchical relationships also cause problems — and have even been
known to confuse Visual C# Express to the point of crashing. In the FolktaleDB database, the
Character
table is hierarchical — it has MotherId and FatherId foreign key fields that refer to other rows in the
same table. You might like to experiment with data binding to this table in your own applications, but
beware the results! For this table you really need to write custom code, which is something you’ll see
later in the book.
Back to the current example, the next thing you did was format the columns used in the
DataGridView.
You hid the primary key field (there is no real need to display GUID values to users, after all) and
replaced two of the three foreign keys with drop-down selectors. The third primary key,
SourceId, was
removed because it was redundant (the parent source row is already displayed on the form). You also
formatted the layout of the remaining columns to fill the available area, keeping enough space for each
to display all information — with the exception of the
Summary column, which you deal with properly
in the next section.
Then you added the custom functionality required to add new
Story rows, delete rows from multiple
tables, and save data to multiple tables in the right order. Adding rows to the
Story table uses much
the same code as adding rows to the
Source table. Apart from adding the code as an event handler
for the
AddingNew event of a different BindingSource control, the only real change was in the default
values used:
// Configure defaults
rowView[“StoryId”] = Guid.NewGuid();
rowView[“SourceId”] = (sourceBindingSource.Current as DataRowView)[“SourceId”];
rowView[“EndingId”] = (endingBindingSource[0] as DataRowView)[“EndingId”];
rowView[“ClassificationId”] =
(classificationBindingSource[0] as DataRowView)[“ClassificationId”];
rowView[“Name”] = “New story”;
rowView[“Summary”] = “Story summary”;
Note that the foreign keys are configured here to give initial values. The SourceId field comes from the
parent row, and the other two foreign keys (
EndingId and ClassificationId) are set to the first row
in the respective parent tables.
137
Modifying Data
44063c046.5.qxd 9/15/06 12:46 PM Page 137
Next, you added the additional code required to delete items. The first step here was to include the
related information in the
CharacterStory and StoryLocation tables. Because those tables were not
bound to anything, you had to add the table adapters manually, and added code in
Form1_Load() to
populate them. With that data in place, it is possible to remove child rows in these tables when
Story
rows are deleted, as you will see shortly.
To implement a custom scheme for deleting
Source table rows, you first had to replace the existing
code for deleting items from the
Source table. You disabled the existing code by clearing the
sourceBindingNavigator.DeleteItem property, which was initially set to the id of the Delete
button. This property hooks up the specified button to internal deletion code, which you wanted to
replace so that you could add additional validation and functionality. The code you added started with
some basic checks to see that deletion was possible, and then obtained the row to be deleted (exiting
immediately if no row is found):
private void bindingNavigatorDeleteItem_Click(object sender, EventArgs e)
{
if (Validate() && (sourceBindingSource != null))
{
// Flag
bool deleteRow = true;
// Get row to be deleted
DataRowView rowView = sourceBindingSource.Current as DataRowView;
if (rowView == null)
{
return;
}
Next comes the important bit — the code checks to see if the row to be deleted from the Source table
has child rows in the
Story table:
FolktaleDBDataSet.SourceRow row =
rowView.Row as FolktaleDBDataSet.SourceRow;
// Check for child rows
FolktaleDBDataSet.StoryRow[] childRows = row.GetStoryRows();
if (childRows.Length > 0)
{
If rows exist, a dialog box is displayed to confirm the deletion of child rows:
DialogResult userChoice = MessageBox.Show(“If you delete this source “
+ “row you will also delete its child story rows. Continue?”,
“Warning”, MessageBoxButtons.YesNo, MessageBoxIcon.Warning);
If the user clicks Yes, the child rows are deleted (as well as child rows for the Story row in the
CharacterStory and StoryLocation tables, if any exist):
if (userChoice == DialogResult.Yes)
{
// Delete row and child rows
138
Chapter 4
44063c046.5.qxd 9/15/06 12:46 PM Page 138
foreach (FolktaleDBDataSet.StoryRow childStory in childRows)
{
// Delete child CharacterStory rows
FolktaleDBDataSet.CharacterStoryRow[] characterStoryRows =
childStory.GetCharacterStoryRows();
foreach (FolktaleDBDataSet.CharacterStoryRow
childCharacterStory in characterStoryRows)
{
childCharacterStory.Delete();
}
// Delete child StoryLocation rows
FolktaleDBDataSet.StoryLocationRow[] storyLocationRows =
childStory.GetStoryLocationRows();
foreach (FolktaleDBDataSet.StoryLocationRow
childStoryLocation in storyLocationRows)
{
childStoryLocation.Delete();
}
// Delete Story row
childStory.Delete();
}
}
Alternatively, a flag is set to prevent deletion of the parent row if the user clicks No:
else
{
deleteRow = false;
}
}
Finally, the parent row is deleted if necessary:
// Delete row?
if (deleteRow)
{
sourceBindingSource.RemoveCurrent();
sourceBindingSource.EndEdit();
}
}
}
The last code modification was the code for updating the database, which followed the scheme laid out
prior to this example. First the form is validated, and pending changes to the underlying data set are
committed:
private void sourceBindingNavigatorSaveItem_Click(object sender, EventArgs e)
{
this.Validate();
this.sourceBindingSource.EndEdit();
this.storyBindingSource.EndEdit();
139
Modifying Data
44063c046.5.qxd 9/15/06 12:46 PM Page 139
Next, parent row additions and modifications are committed to the database:
// Save added / edited parent rows
FolktaleDBDataSet.SourceDataTable tableChanges =
folktaleDBDataSet.Source.GetChanges(
DataRowState.Added | DataRowState.Modified)
as FolktaleDBDataSet.SourceDataTable;
if (tableChanges != null)
{
sourceTableAdapter.Update(tableChanges);
}
That’s followed by all child row modifications:
// Save child row modifications
characterStoryTableAdapter.Update(folktaleDBDataSet.CharacterStory);
storyLocationTableAdapter.Update(folktaleDBDataSet.StoryLocation);
storyTableAdapter.Update(folktaleDBDataSet.Story);
There’s no need here to worry about rows being added to the CharacterStory or StoryLocation
tables, because that functionality does not exist in the application. Instead, you only have to worry about
deleting a
Story row with child rows in these tables, so performing updates in this order is enough to
avoid errors.
Finally, you make the parent row deletions:
// Save deleted parent rows
FolktaleDBDataSet.SourceDataTable tableDeletes =
folktaleDBDataSet.Source.GetChanges(DataRowState.Deleted)
as FolktaleDBDataSet.SourceDataTable;
if (tableChanges != tableDeletes)
{
sourceTableAdapter.Update(tableDeletes);
}
Then it’s necessary to clear all the changes in the data set so that no attempt is made to commit them a
second time:
// Accept changes
folktaleDBDataSet.AcceptChanges();
}
And that completes the code for this example. Now you can modify data in a far more user-friendly way
and have the capability to automatically delete child rows if required.
140
Chapter 4
44063c046.5.qxd 9/15/06 12:46 PM Page 140
Updating Long Text Data for DataGridView Displays
In Chapter 3 you saw how to view long text data in a DataGridView control by using a pop-up dialog.
It is possible to write similar code to ease the editing of long text data in a pop-up window. There isn’t a
lot to say about this because the code should mostly be familiar to you, so the best way to see what to do
is through another Try It Out.
Try It Out Text Modification
1.
Copy the project C:\BegVC#Databases\Chapter04\Ex0403 - Multi-Table
Modification
to a new project, C:\BegVC#Databases\Chapter04\Ex0404 - Text
Modification
, and then open the new project.
2. Open Form1 in design mode, and then open the Edit Columns dialog box for the
storyDataGridView control.
3. Add a new unbound column called EditSummaryButton of type
DataGridViewButtonColumn, with the header text Edit Summary, as shown in Figure 4-8.
Figure 4-8: The EditSummaryButton column
4. Move the new column to a position just before the Summary column, change its Text property
to
Edit Summary, and change its UseColumnTextForButtonValue property to True.
5. Set the ReadOnly property of the Summary column to True.
6. Accept the column changes, and add a new form to the project called SummaryEditor.
7. Change the Text property of the new form to Edit Summary.
8. Add a multiline TextBox and two Button controls to the form called summaryBox, okButton,
and
cancelButton. Set the Text property for okButton and cancelButton to OK and Cancel,
respectively. Set the
Anchor properties of the controls to Top, Bottom, Left, Right for the
text box and
Bottom, Left for the buttons. Finally, set the ScrollBars property of the text box
to
Vertical. The layout of the controls appears in Figure 4-9.
9. Set the AcceptButton property of the SummaryEditor form to okButton and the
CancelButton property to cancelButton.
141
Modifying Data
44063c046.5.qxd 9/15/06 12:46 PM Page 141
Figure 4-9: The SummaryEditor form
10. Add event handlers for the two buttons as follows:
private void okButton_Click(object sender, EventArgs e)
{
this.DialogResult = DialogResult.OK;
}
private void cancelButton_Click(object sender, EventArgs e)
{
this.DialogResult = DialogResult.Cancel;
}
11. Add the following public property to the SummaryEditor form by editing the code for the form
directly:
public string SummaryText
{
get
{
return summaryBox.Text;
}
set
{
summaryBox.Text = value;
}
}
12. Switch back to Form1, and add an event handler for the CellContentClick event by double-
clicking the
storyDataGridView control. Add code as follows:
private void storyDataGridView_CellContentClick(
object sender, DataGridViewCellEventArgs e)
{
// Check for summary column
if (storyDataGridView.CurrentCell.OwningColumn.HeaderText == “Edit Summary”)
{
// Check for nulls
if (storyDataGridView.CurrentRow.DataBoundItem == null)
142
Chapter 4
44063c046.5.qxd 9/15/06 12:46 PM Page 142
{
return;
}
// Get row
FolktaleDBDataSet.StoryRow dataRow =
(storyDataGridView.CurrentRow.DataBoundItem as DataRowView).Row
as FolktaleDBDataSet.StoryRow;
// Get summary text
string summaryText = “”;
if (!dataRow.IsNull(“Summary”))
{
summaryText = dataRow.Summary;
}
// Use dialog to display / edit text
SummaryEditor editor = new SummaryEditor();
editor.SummaryText = summaryText;
DialogResult result = editor.ShowDialog();
if (result == DialogResult.OK)
{
// Update data
dataRow.Summary = editor.SummaryText;
}
}
}
13. Run the application and edit the content of a Summary column for a Story using the new editor
button. Figure 4-10 shows a typically convoluted tale from Greek mythology.
Figure 4-10: The SummaryEditor form
14. Close the application and Visual C# Express.
How It Works
As noted earlier, none of the code here is particularly complicated. The form you added to edit data from
the
Summary column is simply a standard text editing form that you’ve probably used many times in
applications. The only thing to remark on it is how the text displayed is exposed as a public property.
143
Modifying Data
44063c046.5.qxd 9/15/06 12:46 PM Page 143
The text property is accessed in the event handler that is called when a cell of the DataGridView is
clicked. The event handler starts by checking the column that was clicked:
private void storyDataGridView_CellContentClick(
object sender, DataGridViewCellEventArgs e)
{
// Check for summary column
if (storyDataGridView.CurrentCell.OwningColumn.HeaderText == “Edit Summary”)
{
A check is made for null data (for example, if the cell that was clicked is the cell for a nonexistent row,
such as the one that appears at the bottom of the
DataGridView row before a new row is added).
// Check for nulls
if (storyDataGridView.CurrentRow.DataBoundItem == null)
{
return;
}
If a row is available, it’s obtained and its Summary column data is extracted:
// Get row
FolktaleDBDataSet.StoryRow dataRow =
(storyDataGridView.CurrentRow.DataBoundItem as DataRowView).Row
as FolktaleDBDataSet.StoryRow;
// Get summary text
string summaryText = “”;
if (!dataRow.IsNull(“Summary”))
{
summaryText = dataRow.Summary;
}
That’s then displayed in the SummaryEditor form:
// Use dialog to display / edit text
SummaryEditor editor = new SummaryEditor();
editor.SummaryText = summaryText;
DialogResult result = editor.ShowDialog();
And, if the user clicks OK, the text is used to update the column:
if (result == DialogResult.OK)
{
// Update data
dataRow.Summary = editor.SummaryText;
}
}
}
144
Chapter 4
44063c046.5.qxd 9/15/06 12:46 PM Page 144
All in all, there’s nothing that complicated about this example. However, it provides a user-friendly way
for users to edit long text information, and it is well worth building in this sort of functionality should
you need it in your applications. Your users will thank you.
Saving Data When the Application Closes
One more thing that data modification applications should do — purely from a usability point of
view — is warn users if they attempt to quit the application without saving data. That simply means
handling the
FormClosing event, as demonstrated in the following Try It Out.
Try It Out Saving Data on Application Termination
1.
Copy the project C:\BegVC#Databases\Chapter04\Ex0404 - Text Modification to a
new project,
C:\BegVC#Databases\Chapter04\Ex0405 - Handling FormClosing.
2. Open the code for the Form1 form and copy the code from the
sourceBindingNavigatorSaveItem_Click() event hander into a new private void
method called SaveData(). Replace the code in the event handler as follows:
private void sourceBindingNavigatorSaveItem_Click(object sender, EventArgs e)
{
SaveData();
}
3. Open Form1 in design mode, and add an event handler to the form for the FormClosing event
as follows:
private void Form1_FormClosing(object sender, FormClosingEventArgs e)
{
// Check for changes
if (folktaleDBDataSet.HasChanges())
{
DialogResult result = MessageBox.Show(“Do you want to save the changes “
+ “you have made to the database before closing?”, “Save changes?”,
MessageBoxButtons.YesNoCancel, MessageBoxIcon.Warning);
if (result == DialogResult.Cancel)
{
// Return to application
e.Cancel = true;
}
else if (result == DialogResult.Yes)
{
// Save data before quitting
SaveData();
}
}
}
145
Modifying Data
44063c046.5.qxd 9/15/06 12:46 PM Page 145
4. Run the application, make some changes, and then close the application. The dialog box shown
in Figure 4-11 should appear.
Figure 4-11: The SummaryEditor form in action
5. Select No to abort changes, and then close Visual C# Express.
How It Works
The two things you did in this example were to encapsulate the code for saving data to the database in a
method of its own, and to add a new event handler to monitor attempts to close the application. If the
application is closed and changes have been made (as detected by the
folktaleDBDataSet.HasChanges()
method), the user is prompted to take action. If the user clicks Yes, data is saved and the application ter-
minated. If the user clicks No, the application terminates without saving changes. Cancel aborts the
close operation and returns to the data editing form.
This simple code should really be included in all your data modification applications — just in case!
Summary
In this chapter you have seen how to make data-bound controls in Windows applications capable of sav-
ing data. This involved mostly declarative techniques, although some code customization was necessary
to deal with a few quirks that exist in database editing. You also saw how to perform some more compli-
cated tasks, such as what to do in the situation when related rows are deleted. Finally, you looked at
ways to improve the usability of data access applications.
Specifically, you have learned:
❑ That databases are not always updatable. Database security may prevent you from accessing a
database, or may limit you to accessing certain tables, or even certain columns in certain tables,
depending on the security configuration. You also saw how views can restrict data modification
and how data sources may need additional configuration to enable you to modify data through
them.
❑ How Visual C# Express deals with “master” copies of local database files. Depending on the
value of the Copy to Output Directory property of the local database file, Visual C# Express may
copy a fresh version of the database to the output directory of your project each time the project
is executed. You learned how this can be advantageous in testing, but how it can be useful to
disable that functionality to persist changes.
146
Chapter 4
44063c046.5.qxd 9/15/06 12:46 PM Page 146
❑ How to modify simple database data in DataGridView controls. You used data-bound
DataGridView controls to modify data using the data structures created for data binding and
saw how to use the control to modify data.
❑ How to set column default values for adding new data using various techniques — including
dynamically setting column data values programmatically. This technique is often required,
such as when generating GUID primary key values, as you saw in the example.
❑ How to cancel data modifications.
❑ How to update data from detail views.
❑ Techniques for dealing with multiple related tables, including the order of execution required to
update the database when using related data. You saw how it is often necessary to apply subsets
of changes to individual tables in a specific order to avoid foreign key reference problems in
your databases. Specifically, it is necessary to add and update rows in a parent table before
applying changes to child tables, before finally deleting rows from a parent table.
❑ How to create a more user-friendly interface, including dialog boxes for the modification of long
text data and prompts to ensure that changes are not lost when applications are closed down.
The next chapter covers a lot of the same ground as in this and the previous chapter but in the context of
web applications. Web applications can do the same things as Windows applications but in a slightly
differently way, as you will see.
Exercises
1. What are the two ways in which you can initialize data adapters?
2. During development, which Copy to Output Directory property value should you use if you
want to be sure that your application is modifying data when you want it to?
3. You have four tables:
❑
TableA, which has a one-to-many relationship with TableB.
❑
TableB, which has a one-to-many relationship with TableC.
❑
TableC, which has a one-to-many relationship with TableD.
❑
TableD.
If you want to make changes to all of these tables at the same time, in what order would you
apply the changes?
4. Copy the project C:\BegVC#Databases\Chapter04\Ex0401 - Simple Data Modification
to a new project, C:\BegVC#Databases\Chapter04\Q0404 - Canceling Edits. Modify the
project by adding a button to the
BindingNavigator control to cancel edits.
5. What event would you handle in a Windows application if you want to prevent data from being
lost when the application is terminated?
147
Modifying Data
44063c046.5.qxd 9/15/06 12:46 PM Page 147
44063c046.5.qxd 9/15/06 12:46 PM Page 148
5
Databases and the Internet
Data binding in web applications is a little different than the data binding in Windows applica-
tions that you’ve looked at in previous chapters. Because the underlying technology you use for
database access — ADO.NET — is the same for both web and Windows applications, much of
what you do in this chapter will seem familiar. However, web applications do work in a slightly
different way, so there are other techniques to learn. In addition, you’ll use Visual Web Developer
Express rather than Visual C# 2005 Express.
In the first part of this chapter you explore the differences between web and Windows applications
and the implications of their differences when databases enter the picture. The rest of the chapter
tackles database access in ASP.NET, the environment for writing web applications in the .NET
Framework. You’ll learn how to connect to databases in ASP.NET, which is one area where you
have more flexibility than in Windows applications — at least those created in Visual C# 2005
Express. You’ll also examine data sources, which are used to access data through connections in
the same way that data sources are used in Windows applications, and the ASP.NET controls that
you can use to bind data to. Additionally, you’ll learn the differences between the controls, how
templates are used to format data as HTML, and how to view and edit data in both list and
detail views.
Specifically, in this chapter you learn:
❑ How web and Windows applications differ, and what this means when dealing with
databases
❑ How to connect to data from ASP.NET web applications
❑ How to configure ASP.NET data sources
❑ What controls are available for data binding in ASP.NET
❑ How to format data as HTML
❑ How to view and edit data in list and detail views
44063c05.qxd:WroxBeg 9/12/06 10:36 PM Page 149
Web versus Windows Applications
There are many differences between web and Windows applications, some obvious and some not so
obvious. Before .NET you could think of these applications as two different creatures. Now, however,
with the .NET Framework used for all types of applications, that isn’t the case. The presentation layer
may be as different as ever, but business and data layer code may well be identical, and even shared,
when considering these types of applications. Most important in the context of this book, ADO.NET is
used for data access in both cases.
It is possible that Windows applications will at some point cease to exist in the form that you know them
today. The current direction of development suggests that a common language will be used to design
both web and Windows applications, with extensive use of remote web services to provide functionality
in both cases. For now, however, you still have to approach them differently, and in this section you con-
sider the key differences.
Perhaps the most obvious disparity is the manner in which you use the application types. Windows appli-
cations are executed as applications in their own right. Web applications are accessed via a browser appli-
cation. There are many of these browsers available (Internet Explorer, Firefox, Netscape, and others) and
multiple platforms to consider (Windows, Macintosh, Linux, portable devices, and so on). This immedi-
ately introduces additional complexity because you will probably want to cater to as many browsers and
platforms as possible.
You can design your Windows applications with a user interface over which you have complete control.
That’s not the case for web applications. While the user interface ends up as “platform-neutral” HTML
and script code, various browsers are notoriously bad at rendering that information in the same way.
Proprietary implementations abound, and what works great in one browser may not work at all — or
generate errors — in others.
Rendering web applications on portable devices requires yet another approach to cope with small
screens, limited display capabilities, and so on. Many web applications are simply not suitable for
display on such devices, and in many cases you may need to supply alternative gateways to your
information.
The upshot is that if you want your web applications to work on as many browsers as possible, you
will need to test, test, and test again. You may also have to think carefully about what functionality to
include — especially if such functionality is critical to your applications. To maximize compatibility, you
may need to make do with applications that aren’t as fully featured as you’d like. Of course, that’s only
the case if you need this interoperability. For a corporate, nonpublic web site, you can limit the browser
used to view the site to, say, Internet Explorer, and make use of the available features freely.
To some extent, this difference between web and Windows applications isn’t important from the point of
view of this book, although you certainly shouldn’t disregard it completely if web applications are your
main area of interest.
Far more significant is the essentially disconnected nature of web applications. From the point of view of
the server on which the web application runs, users exist only when an exchange of information takes
place between the browser (client) and the application (server). Because of some clever tricks that go on
behind the scenes, this is often completely transparent to users. In ASP.NET, view state and session state
are used to provide a fluid environment for web applications to run in so that the server can keep track
150
Chapter 5
44063c05.qxd:WroxBeg 9/12/06 10:36 PM Page 150
of application state between requests for information. This enables users to interact with the server as if
permanently connected to it, even if that is not the case. In many cases you, the developer, can also for-
get about this because ASP.NET is designed to make this as easy as possible. Still, there are times when
you will need to have a greater degree of control over such things, which is something you never have to
worry about in Windows applications.
The other main difference between web and Windows applications is that you will, more than likely,
have to cater to more than one user accessing your data at the same time. For popular web sites you may
have to deal with many users — thousands or even hundreds of thousands. For editable data, then, con-
currency is much more of an issue and, of course, security becomes more important. Performance is also
something to take into account in such circumstances, and there are a number of ways to improve that.
You can, for example, cache requests for data such that information is exchanged with the database
much less frequently than it is exchanged with users.
It is worth reiterating here that SQL Server Express is not suitable for large-scale applications. Instead,
you’re much better off using something akin to the full version of SQL Server. That doesn’t mean that
you can’t use SQL Server Express for development. As has already been noted in this book, Microsoft
has made it relatively easy to transfer databases between these DBMSes.
Depending on your application requirements and projected usage, there are a number of architectural
solutions in web application design. You may, for example, choose to host the database remote from the
web application, on a different server located elsewhere on the same LAN as the web application or at
a more remote location using web services to exchange data between the web server and a remote data-
base server. In most cases, you do not want to use a local database file as you’ve seen being used for
Windows applications in previous chapters. There are many reasons for this, but perhaps the most com-
pelling is that hosting your database on a web server will affect the performance of web applications,
whereas using a remote database enables you to streamline things by having a specialized database
server. For this reason, in this chapter you will use a database hosted by SQL Server Express and access
it remotely from your web application. This architecture is more likely to mirror the real-world situa-
tions you will encounter, although here the “remote” database will exist on the same machine as the
web application.
To summarize, writing web applications that include database access code is in some ways exactly the
same as writing Windows applications that do the same thing (by virtue of a common underlying tech-
nology), and in some ways different (because of the architecture and cross-platform interoperability
requirements). The remainder of this chapter takes these similarities and differences into account, and
highlights key points as and when they come up.
Data Binding in ASP.NET
As with Windows applications, data binding in ASP.NET relies on the combination of a connection, a
data source, and a data-bound control. Unlike Windows applications, there is no
BindingNavigator
control mediating between data sources and data-bound controls, and data binding typically does not
use typed data sets. You can use typed data sets if you want, although that requires programmatic data
access rather than declarative data binding.
In previous chapters you saw how controls could be made to communicate with each other by, for exam-
ple, using the selection in one control to filter the results of another. This is also possible in ASP.NET, but
151
Databases and the Internet
44063c05.qxd:WroxBeg 9/12/06 10:36 PM Page 151
the mechanism is different and involves configuring multiple, filtered data sources. You’ll see how this is
achievable later in this chapter.
In the following sections you’ll work through ASP.NET data binding from the bottom up. You’ll start by
looking at data connections, and then move on to data sources before being introduced to the data-
bound controls that are available for you. After that, you learn about templates, which control the HTML
output for data-bound controls in various modes (display, item selection, and editing items). Finally, you
round things off with some more extensive examples demonstrating how to view and edit data in list
and detail views using the data-bound controls.
ASP.NET Data Connections
When data binding in ASP.NET, data connections are defined with connection strings in the application
configuration file
web.config. Behind the scenes, as you might expect, ADO.NET connection objects
are used, but that implementation is shielded from you.
Most of the time you configure data connections as part of the configuration of data sources. However, it’s
possible to configure connections independently, using the Database Explorer window (as you did in the
example in Chapter 2). Whichever way you do it, the interface for creating a new connection is the same.
The main difference is that when you add a connection as part of data source configuration you have the
option of storing the connection string in
web.config. Connection strings aren’t stored in a shared location
until you do this; instead, they are hard-coded into the data source, as you will see a later in this chapter.
When you add a connection, you choose the data source and provider, as shown in Figure 5-1. The
Change Data Source dialog box displays when you click the Change button in the Add Connection win-
dow that appears when you add a new connection.
Figure 5-1: Selecting a data provider
Be careful not to confuse “data source” as it appears in Figure 5-1 with the notion of a “data source con-
trol” in ASP.NET. In Figure 5-1, the term “data source” is used in its literal sense — the source from
which to obtain data. Data source controls, on the other hand, are used to bind data to controls on an
ASP.NET page — and you’ll learn a lot more about this subject shortly.
The two types of data sources you are looking at in this section are Microsoft SQL Server (for databases
hosted in an instance of Microsoft SQL Server or SQL Server Express) and Microsoft SQL Server
Database File (for local database files). For Microsoft SQL Server data sources, you have the option of
152
Chapter 5
44063c05.qxd:WroxBeg 9/12/06 10:36 PM Page 152
choosing either the .NET Framework Data Provider for SQL Server data provider or .NET Framework
Data Provider for OLE DB. The latter offers an alternative, less specialized access mode for databases,
and should be used only in circumstances where you are having trouble with the default provider or
where you are accessing a non-SQL Server database that supports this type of access. In practice, when
using SQL Server or SQL Server Express, there should never be a reason to use this provider type. No
alternative provider is available for local database files.
Local Database File Connections
Local database file connections in ASP.NET work the same way as in Windows applications, although
things are simplified because Visual Web Developer Express doesn’t prompt you to copy database files
locally when you add a connection to them. Instead, it simply opens a connection to the database file in
the location that you specify. Be careful when you do this because you may want to provide a unique
instance of the database to your application, which is really the main reason why you’d want to use a
local database file rather than having a remote connection.
In addition, there are authorization issues associated with using a local database file that isn’t part of the
web application directory structure. By default, web servers typically aren’t configured to allow web appli-
cations to access locations such as these. This may not be a problem — for example, if you are able to per-
form additional configuration of your web server to allow such access, or if you are using Windows
authentication where user accounts have the privileges required to access the database file in the location
where it resides. However, you should certainly think carefully about implementing such schemes because
changes to security can result in problems down the line. Those problems might include the introduction of
potential security vulnerabilities and the additional configuration requirement that may have to be dupli-
cated later, such as if you move your web site to an alternative web server.
Generally, a better option is to include the local database files in the directory structure of your project —
specifically, putting the database files in the
App_Data folder of your web application. You aren’t forced to
use this folder, but it’s a good idea to do so because content in that folder is not served in response to web
requests (from browsers, for example). This basic security feature is a good one and means that you can
be more certain that no unauthorized access to your database is permitted. Instead, only code in your web
application can directly access the database, so users get indirect access only through the application.
You can add an existing database to a web application project either by dragging it to the
App_Data
folder from Windows Explorer or by right-clicking the folder, selecting Add Existing Item, and navigat-
ing to the current location of the database
.mdf file. You can add a new database file in a similar way. In
both cases, a connection to the database file is automatically created, and you can view the database con-
tents using the Database Explorer window.
Remote Connections
More often than not, web applications access databases remotely, either using a local SQL Server
instance or (more likely in a production environment) a remote SQL Server instance. By default, SQL
Server 2005 Express does not allow remote connections. However, you can enable that functionality
using the SQL Server Configuration Manager configuration application that is installed with SQL Server
2005 Express. You can find this through the Start menu via All Programs ➪ Microsoft SQL Server 2005 ➪
Configuration Tools ➪ SQL Server Configuration Manager. Open it, expand SQL Server 2005 Network
Configuration, select Protocols for SQLEXPRESS, right-click Named Pipes, and click Enable — as shown
in Figure 5-2.
153
Databases and the Internet
44063c05.qxd:WroxBeg 9/12/06 10:36 PM Page 153
Figure 5-2: Enabling remote access for SQL Server 2005 Express
You can also use the TCP/IP protocol for remote connections, and depending on the architecture of your
system, that may be preferable. For remote connections as discussed in this chapter, where the database
server still resides on the same computer as the web application, named pipes is fine.
You will receive a warning that the change won’t take effect until the service is stopped and restarted.
The quickest way to do that is to open a command prompt window and type the following commands:
net stop “SQL Server (SQLEXPRESS)“
net start “SQL Server (SQLEXPRESS)“
Alternatively you can use the Computer Management tool and restart the service using the Services
page, as shown in Figure 5-3.
Figure 5-3: Restarting the SQL Server 2005 Express service
With this functionality enabled, you can connect to any database hosted in SQL Server Express. To see
these databases, you can use Microsoft’s SQL Server Management Studio Express (SSMSE), which you
were introduced to in Chapter 2. Among other things, SSMSE (see Figure 5-4) enables you to create and
edit databases, as well as connect to existing database files.
154
Chapter 5
44063c05.qxd:WroxBeg 9/12/06 10:36 PM Page 154
Figure 5-4: Databases in Microsoft SQL Server Management Studio Express
The Databases folder in your version of SSMSE may be empty. In the Try It Out section coming up shortly
you’ll add the FolktaleDB database you see in Figure 5-4 to SQL Server Express for use in later examples.
To connect to a remote database in Visual Web Developer Express, you must first select the Microsoft
SQL Server data source, as discussed in the introduction to this section. Then you can select a database
to connect to using the dialog box shown in Figure 5-5.
Figure 5-5: Connecting to a remote database
155
Databases and the Internet
44063c05.qxd:WroxBeg 9/12/06 10:36 PM Page 155
In the following Try It Out, you add the FolktaleDB database to Microsoft SQL Server and connect to it
from a web application.
Try It Out Connecting to a Remote Database
1.
If you haven’t already done so, enable remote connections in SQL Server 2005 Express, as dis-
cussed in the previous section.
2. Copy the FolktaleDB.mdf and FolktaleDB_log.ldf files in the downloadable code for
this book to the data directory for SQL Server Express — which by default is
C:\Program
Files\Microsoft SQL Server\MSSQL.1\MSSQL\Data
.
3. Open All Programs ➪ Microsoft SQL Server 2005 ➪ SQL Server Management Studio Express CTP.
4. Connect to your local SQL Server 2005 Express instance (<computer name>\SQLEXPRESS)
using Windows authentication.
5. In the Object Explorer window, right-click the Databases folder and then click Attach.
6. Click the Add button, navigate to the location where you copied FolktaleDB.mdf, select
FolktaleDB.mdf, and click OK; then click OK again.
7. Close SQL Server Management Studio Express.
8. Open Visual Web Developer Express.
9. If the Database Explorer window is not visible, display it by selecting the View ➪ Database
Explorer menu option.
10. In the Database Explorer window, click the Connect To Database icon.
11. Change the data source for the connection to Microsoft SQL Server, and connect to the
FolktaleDB database, as discussed earlier (and shown in Figure 5-5).
Your SQL Server Instance may not appear in the Server name drop-down list. If that’s the case, you can
type it in manually (
<computer name>\SQLEXPRESS).
12. Click OK to add the connection.
13. Close Visual Web Developer Express.
How It Works
In this example, you added a database to SQL Server 2005 Express and created a connection to it in
Visual Web Developer Express. There are a few points to note.
First, this process of attaching a database is an excellent way to copy databases from one location to
another. As well as attaching databases through SQL Server Management Studio Express, you can also
detach them, then copy the files to a new location and reattach them. This procedure does mean that
there will be some “downtime” when the database is unavailable, but that can be kept to a minimum if
you work fast. Never copy database files to another location and attach them if they haven’t already
been detached from their original location, because that may cause errors.
Second, note that the name of the database wasn’t preserved — to simplify access to the database the
name was manually added. This isn’t essential, but it does make sense to avoid excessively long database
names. After all, once the database is hosted in this way, the file location is to a large extent irrelevant.
156
Chapter 5
44063c05.qxd:WroxBeg 9/12/06 10:36 PM Page 156
Third, and possibly most important, never attempt to host a database file that is also accessed as a local
database file, either by a Windows application, as in previous chapters, or by web applications. Owing
to the way things work with SQL Server 2005 Express, this leads to all sorts of trouble and may result in
the database file becoming unusable.
Finally, in this example you didn’t actually add a connection to a web application. Instead, you added it
to the collection of connections stored in the Visual Web Developer Express environment. Connections
added this way are available for use in any applications you develop, as you see in the Try It Out in the
next section.
ASP.NET Data Source Controls
Several data source controls are available to you in ASP.NET, all of which expose data that can be bound
to other controls. In this chapter you use
SqlDataSource, which, as its name suggests, exchanges data
with a SQL Server database. It is worth being aware of the other data source controls, however, because
ASP.NET data-binding techniques can also be applied to them. In other words, you can apply the tech-
niques you learn in this chapter to those controls as and when you need to. They are:
❑
AccessDataSource: Connects to data stored in Microsoft Access databases.
❑
ObjectDataSource: Exposes data stored in objects for data binding. This can be used to great
effect to bind your own objects to display controls, and in fact has its place in the context of
databases. Later in the book you see how to populate objects with data and manipulate this data
using advanced techniques. This data source type can be used in combination with those tech-
niques to display such data.
❑
XmlDataSource: Enables you to bind to data stored in XML files. It also allows you to trans-
form the XML using XSLT to customize the data that other controls bind to.
❑
SiteMapDataSource: Exposes data from the site map for your web application so that you can
display dynamically generated navigation controls, bread-crumb trails, and so on.
When you add a
SqlDataSource control to an ASP.NET page from the Visual Web Developer Toolbox,
the following code is added:
<asp:SqlDataSource ID=”SqlDataSource1” runat=”server”></asp:SqlDataSource>
Further configuration can be applied to the control either by manually adding attributes to it or by using
the Configure Data Source Wizard. The wizard is available in the SqlDataSource Tasks window when in
Design view, as shown in Figure 5-6.
In this section you concentrate on using the wizard but also look at the effects in the code for the data
source control, should you want to do things manually in the future.
Figure 5-6: Accessing the Configure Data Source Wizard
157
Databases and the Internet
44063c05.qxd:WroxBeg 9/12/06 10:36 PM Page 157