Microsoft ® Office 2010 Simply Phần 5 pptx
Bạn đang xem bản rút gọn của tài liệu. Xem và tải ngay bản đầy đủ của tài liệu tại đây (5.67 MB, 42 trang )
155
Building Spreadsheets
CHAPTER
9
EXCEL
22
33
44
11
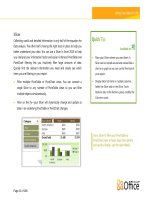
Can I insert multiple columns and
rows?
Yes. First, select two or more columns
and rows in the worksheet; then
activate the Insert command as
described in this section. Excel adds the
same number of new columns and rows
as the number you originally selected.
Add a Row
1 Click the heading of the row
below where you want to
insert a new row.
2 Click the Home tab on the
Ribbon.
3 Click the Insert .
4 Click Insert Sheet Rows.
You can also right-click a row
heading and click Insert.
Can I insert columns or rows using
the Insert dialog box?
Yes. Click a cell, click the Insert on
the Home tab, and click Insert Cells to
open the Insert dialog box. Then click
Entire Row or Entire Column and
click OK. Excel adds a row or column
above or to the left of the active cell.
•
Excel adds a row.
•
A smart tag icon ( ) may
appear, and you can click the
icon to view a list of options
that you can assign.
14_571941-ch09.indd 15514_571941-ch09.indd 155 4/9/10 7:51 PM4/9/10 7:51 PM
156
11
22
2 Click and drag the border to
the desired size.
•
A dotted line marks the new
border of the column or row
as you drag.
3 Release the mouse button.
Excel resizes the column or row.
•
You can also click the Format
button on the Home tab, and
then click AutoFit Selection to
quickly resize a highlighted
column to fit existing text.
1 Position the mouse pointer
over the border of the heading
of the column or row that you
want to resize.
The pointer changes to .
Resize Columns and Rows
By default, long lines of data that you type
into a cell remain on one line or are truncated if
you type additional data into adjoining cells.
One way to remedy this is to enable the text-
wrapping (refer to the section “Turn On Text
Wrapping” for details). Another option is to
resize the column to fit the data. In addition to
resizing your worksheet’s columns to
accommodate text, you can also resize columns
to make the worksheet more aesthetically
appealing. Note that just as you can resize
columns in your worksheet, so, too, can you
resize worksheet rows.
Resize Columns
and Rows
14_571941-ch09.indd 15614_571941-ch09.indd 156 4/9/10 7:51 PM4/9/10 7:51 PM
157
CHAPTER
9
22
33
44
11
•
Excel freezes the areas above
or to the left of the selected
cell (depending on whether
you are scrolling up and down
or left and right).
•
To unlock the columns and
rows, click the Freeze Panes
, and then click Unfreeze
Panes.
1 Click the cell to the right of the
column or below the row that
you want to freeze.
2 Click the View tab on the
Ribbon.
3 Click the Freeze Panes .
4 Click Freeze Panes.
You can also choose to freeze
a row of column headings or a
column of row titles.
Freeze a Column or Row
You can freeze portions of your worksheet
to keep them visible as you scroll to view
other data. This is especially handy in large
worksheets. For example, you might freeze a
column or row to keep the labels in view as you
scroll to other areas of your worksheet to view
the data in that column or row. You cannot
scroll the area that you freeze, but you can
scroll the unfrozen areas of the worksheet.
When you are finished viewing these other
areas of your worksheet, you can quickly
unfreeze the column or row you froze.
Freeze a Column
or Row
14_571941-ch09.indd 15714_571941-ch09.indd 157 4/9/10 7:51 PM4/9/10 7:51 PM
158
22
33
44
11
55
Assign a Range Name
1 Select the cells comprising the
range that you want to name.
2 Click the Formulas tab on the
Ribbon.
3 Click the Define Name button.
The New Name dialog box
opens.
4 Type a name for the selected
range in the Name field.
•
You can add a comment or
note about the range here. For
example, you might indicate
what data the range contains.
5 Click OK.
Note: Another way to name a
range is to select the cells in the
range, click in the Name field to
the left of the Formula bar, type
the desired name, and press
.
•
Excel assigns the name to the
cells.
Name a Range
You can assign distinctive names to the cells
and ranges of cells that you work with in a
worksheet. (A range is simply a rectangular
group of related cells; a range can also consist
of a single cell.) Assigning names to cells and
ranges makes it easier to identify their contents.
Naming ranges can also help you when
deciphering formulas. (Formulas are discussed
later in this book.) Note that when it comes to
naming ranges, you must follow some rules, as
discussed in the tip at the end of this section.
Name a
Range
14_571941-ch09.indd 15814_571941-ch09.indd 158 4/9/10 7:51 PM4/9/10 7:51 PM
159
Building Spreadsheets
CHAPTER
9
EXCEL
11
22
What are the rules for naming ranges?
Range names must start with a letter, an
underscore (_), or a backslash (\). Apart
from that, you can use any character,
uppercase or lowercase, or any punctuation
or keyboard symbol except a hyphen or
space. (You can substitute these with a
period or underscore.)
•
Excel selects the cells in the
range.
Go to a Range
1 Click the Name .
2 Click the name of the range
of cells to which you want
to move.
How do I edit a range name?
Use the Name Manager feature to
edit existing range names, change
the cells referenced by a range, and
so on. To open the Name Manager,
click the Name Manager button
on the Formulas tab.
14_571941-ch09.indd 15914_571941-ch09.indd 159 4/9/10 7:51 PM4/9/10 7:51 PM
160
33
11
44
22
•
Excel deletes the data from the
cell, but the cell remains.
Delete Cells
1 Select the cell or cells that you
want to remove.
2 Click the Home tab.
3 Click the Delete .
4 Click Delete Cells.
You can also right-click the
selected cells and then click
the Delete command.
Delete Data
1 Select the cell or cells
containing the data that you
want to remove.
2 Press
Delete
.
Delete Data or Cells
You can delete Excel data that you no longer
need. When you decide to delete data, you
can choose whether you want to remove the
data from the cells but keep the cells in place
or delete the cells entirely. When you delete
a cell’s contents, Excel removes only the data.
When you delete a cell entirely, Excel removes
the cell as well as its contents, with the existing
cells in your worksheet shifting over to fill any
gap in the worksheet structure. In addition to
deleting single cells, you can delete whole rows
or columns.
Delete Data
or Cells
14_571941-ch09.indd 16014_571941-ch09.indd 160 4/9/10 7:51 PM4/9/10 7:51 PM
161
Building Spreadsheets
CHAPTER
9
EXCEL
55
66
How do I delete a whole column or row?
To delete a column or row, click the
column’s or row’s heading to select it; then
click the Delete button in the Home tab.
When you do, Excel deletes any existing
data within the selected column or row and
moves subsequent columns or rows to fill
the space left by the deletion.
•
Excel removes the cells
and their content from the
worksheet.
Other cells shift over or up
to fill the void of any cells
that you remove from your
worksheet.
The Delete dialog box appears.
5 Click a deletion option.
6 Click OK.
Can I remove a cell’s formatting
without removing the content?
Yes. Select the cell you want to
edit, click the Home tab, click the
Clear button (
), and choose
Clear Formats to remove the cell’s
formatting.
14_571941-ch09.indd 16114_571941-ch09.indd 161 4/9/10 7:51 PM4/9/10 7:51 PM
162
11
•
Excel adds a new worksheet
and gives it a default
worksheet name.
1 Click the Insert Worksheet
button (
).
You can also right-click a
worksheet tab and click Insert
to open the Insert dialog box,
where you can choose to insert
a worksheet.
Add a Worksheet
By default, when you create a new workbook in
Excel, it contains three worksheets. This may be
adequate in some cases, but if your workbook
requires additional worksheets in which to enter
more data, you can easily add them. For
example, if your workbook contains data about
products your company sells, you might add
worksheets for each product category.
When you add a new worksheet, Excel gives it
a default name. To help you better keep track
of your data, you can rename your new
worksheet. For help, see the next section,
“Name a Worksheet.”
Add a
Worksheet
15_571941-ch10.indd 16215_571941-ch10.indd 162 4/9/10 7:47 PM4/9/10 7:47 PM
163
CHAPTER
10
11
22
2 Type a new name for the
worksheet.
3 Press .
Excel assigns the new
worksheet name.
1 Double-click the worksheet tab
that you want to rename.
Excel highlights the current
name.
You can also right-click the
worksheet name and click
Rename.
Name a Worksheet
When you create a new workbook, Excel
assigns default names to each worksheet in the
workbook. Likewise, Excel assigns a default
name to each worksheet you add to an existing
workbook. (For more information about adding
worksheets to a workbook, refer to the
preceding section, “Add a Worksheet.”)
To help you identify their content, you can
change the names of your Excel worksheets to
something more descriptive. For example, if
your workbook contains four worksheets, each
detailing a different sales quarter, then you can
give each worksheet a unique name, such as
Quarter 1, Quarter 2, and so on.
Name a
Worksheet
15_571941-ch10.indd 16315_571941-ch10.indd 163 4/9/10 7:47 PM4/9/10 7:47 PM
164
11
22
33
Excel applies the new
orientation. This example
applies Landscape.
•
Excel marks the edge of the
page with a dotted line.
•
You can click the Margins
button to set up page margins.
Change the Page Orientation
1 Click the Page Layout tab on
the Ribbon.
2 Click the Orientation button.
3 Click Portrait or Landscape.
Change Page Setup Options
You can assign various settings related to page
setup settings to your Excel worksheets. These
include settings for changing the worksheet’s
orientation, margins, paper size, and more. For
example, if your workbook data is too wide to
fit on a standard sheet of paper, you might
change the page orientation from Portrait,
which is the default in Excel, to Landscape in
order to fit more data on the page horizontally.
You can also use Excel’s page-setup settings to
insert your own page breaks to control the
placement of data on a printed page.
Change Page
Setup Options
15_571941-ch10.indd 16415_571941-ch10.indd 164 4/9/10 7:47 PM4/9/10 7:47 PM
165
Worksheet Basics
CHAPTER
10
EXCEL
22
33
44
11
How do I print just a portion of a
worksheet?
To print only a portion of a worksheet,
select the cells that you want to print, click
the Page Layout tab on the Ribbon, click
the Print Area button, and click Set Print
Area. Then print as normal.
How do I print a spreadsheet with
gridlines?
By default, the gridlines that you see on a
worksheet do not print with the cell data.
To turn on gridlines for printing, select
the Print check box under Gridlines on
the Page Layout tab. A check mark in the
check box indicates that the feature is on.
Excel inserts a page break.
•
Excel marks the edge of the
page with a dotted line.
Insert a Page Break
1 Select the row above which
you want to insert a page
break.
2 Click the Page Layout tab
on the Ribbon.
3 Click the Breaks button.
4 Click Insert Page Break.
15_571941-ch10.indd 16515_571941-ch10.indd 165 4/9/10 7:47 PM4/9/10 7:47 PM
166
22
11
1 Click the tab of the worksheet
that you want to move or
copy.
2 Move or copy the worksheet to
the desired spot.
To move the worksheet, drag
it to a new position in the list
of worksheets. (The
changes
to
.)
To copy the worksheet, press
and hold
and drag the
worksheet copy to a new
position in the list of worksheets.
(The
changes to .)
•
A small black triangle icon
keeps track of the worksheet’s
location in the group while
you drag.
3 Release the mouse button.
•
Excel moves or copies the
worksheet. (Here, the
worksheet was moved.)
Move and Copy Worksheets
You can move a worksheet within a workbook
to rearrange the worksheet order. For example,
you may want to position the worksheet that
you use most often as the first worksheet in the
workbook, or you might move a worksheet you
rarely view to be the last worksheet in the
workbook.
In addition to moving worksheets within a
workbook, you can copy them. You might copy
a worksheet to use it as a starting point for
data that is new, yet similar. When you copy a
worksheet, Excel assigns it a default name: the
original worksheet’s name followed by a
number, starting with (2).
Move and Copy
Worksheets
15_571941-ch10.indd 16615_571941-ch10.indd 166 4/9/10 7:47 PM4/9/10 7:47 PM
167
CHAPTER
10
If the worksheet contains any
data, Excel prompts you to
confirm the deletion.
3 Click Delete.
Excel deletes the worksheet.
1 Right-click the worksheet tab.
2 Click Delete.
Note: You can also click the
Delete
on the Home tab
and then click Delete.
Delete a Worksheet
You can delete a worksheet that you no longer
need in your workbook. For example, you
might delete a worksheet that contains
outdated data or information about a product
that your company no longer sells.
When you delete a worksheet, Excel prompts
you to confirm the deletion unless the
worksheet is blank, in which case it simply
deletes the worksheet.
You should always check the worksheet’s
contents before deleting it to avoid removing
any important data. As soon as you delete a
worksheet, Excel permanently removes it from
the workbook file.
Delete a
Worksheet
22
33
11
15_571941-ch10.indd 16715_571941-ch10.indd 167 4/9/10 7:47 PM4/9/10 7:47 PM
168
11
11
44
33
22
22
33
55 66
Find Data
1 Click the Home tab on the
Ribbon.
2 Click the Find & Select button.
3 Click Find.
The Find and Replace dialog
box appears, displaying the
Find tab.
4 Type the data that you want
to find.
5 Click Find Next.
•
Excel searches the worksheet
and finds the first occurrence
of the data.
You can click Find Next again to
search for the next occurrence.
6 When finished, click Close to
close the dialog box.
Note: Excel may display a
prompt box when the last
occurrence is found. Click OK.
Replace Data
1 Click the Home tab on the
Ribbon.
2 Click the Find & Select button.
3 Click Replace.
Find and Replace Data
Suppose you want to locate a particular
number, formula, word, or phrase in your Excel
worksheet. Rather than using the scroll bars in
the Excel program window to scroll through
your worksheet and locate that information,
you can use Word’s Find tool.
In addition to using the Find tool to find data,
you can use the Replace tool to replace instances
of text or numbers with other data. For
example, suppose you discover that you have
consistently misspelled the name of a product in
your worksheet; you can use the Replace tool to
locate and correct the misspellings.
Find and
Replace Data
15_571941-ch10.indd 16815_571941-ch10.indd 168 4/9/10 7:47 PM4/9/10 7:47 PM
169
Worksheet Basics
CHAPTER
10
EXCEL
44
55
77
66
88
Where can I find detailed search
options?
Click the Options button in the Find
and Replace dialog box to reveal
additional search options. For example,
you can search by rows or columns,
matching data, and more. You can also
search for specific formatting or special
characters using Format options.
How can I search for and delete
data?
Start by typing the text in the Find
what field; then leave the Replace
with field empty. When you activate
the search, Excel looks for the data and
deletes it without adding new data to
the worksheet.
The Find and Replace dialog
box appears, displaying the
Replace tab.
4 Type the data that you want
to find.
5 Type the replacement data.
6 Click Find Next.
•
Excel locates the first
occurrence of the data.
7 Click Replace to replace it.
•
You can click Replace All to
replace every occurrence in the
worksheet.
•
Excel replaces the data with
the text you typed.
•
Excel selects the next instance
of the data.
8 When finished, click Close.
Note: Excel may display a
prompt box when the last
occurrence is found. Click OK.
15_571941-ch10.indd 16915_571941-ch10.indd 169 4/9/10 7:47 PM4/9/10 7:47 PM
170
22
11
33
44
•
Excel sorts the records.
Perform a Quick Sort
1 Click in the field name, or
heading, that you want to sort.
2 Click the Home tab on the
Ribbon.
3 Click the Sort & Filter button.
4 Click an ascending or
descending sort command.
Sort Data
You can sort your Excel data to reorganize the
information. This technique is particularly useful
when using Excel to create database tables. A
database table is a list of related information.
Tables contain fields — typically columns — to
break the list into manageable pieces. Rows
contain each record in your list of data. Each
entry in the list is called a record.
For example, you might want to sort a client
table to list the names alphabetically.
Ascending sorts list records from A to Z or from
lowest number to highest number; descending
sorts list records from Z to A or from highest
number to lowest number.
Sort
Data
15_571941-ch10.indd 17015_571941-ch10.indd 170 4/9/10 7:47 PM4/9/10 7:47 PM
171
Worksheet Basics
CHAPTER
10
EXCEL
22
11
33
44
77
55 66
Can I sort data in rows?
Yes. Although most database tables place related data in columns, some place
this data in rows. If the data in your table that you want to sort is across a row
rather than down a column, you can activate the Sort Left to Right option. To do
so, click in the worksheet you want to sort, click the Home tab, click the Sort &
Filter button, and choose Custom Sort to open the Sort dialog box. Then click
the Options button. In the Sort Options dialog box that appears, click Sort Left
to Right.
Perform a Custom Sort
1 Click in the worksheet you
want to sort.
2 Click the Home tab on the
Ribbon.
3 Click the Sort & Filter button.
4 Click Custom Sort.
The Sort dialog box appears.
5 Click the first Sort by and
select the primary field to
sort by.
•
By default, the Sort On field is
set to Values. To sort on
another setting, you can click
the Sort On
and choose a
setting.
6 Click the Order to sort the
field in ascending or
descending order.
•
To specify additional sort
fields, click Add Level and
repeat Steps 5 and 6.
7 Click OK.
•
Excel sorts the data.
15_571941-ch10.indd 17115_571941-ch10.indd 171 4/9/10 7:47 PM4/9/10 7:47 PM
172
22
33
44
11
55
•
Excel adds drop-down arrow
buttons (
) to your field
names.
5 Click a field’s .
1 Select the field names for the
data you want to filter.
2 Click the Home tab on the
Ribbon.
3 Click the Sort & Filter button.
4 Click Filter.
Filter Data
If you are using Excel as a database, you can
use an AutoFilter to view only portions of your
data. When you sort data, the entire table is
sorted. (Refer to the previous section, “Sort
Data,” to learn how to sort data in Excel.) In
contrast, when you apply an AutoFilter, only
certain records are shown based on criteria you
set. Any records that do not match the criteria
are hidden. For example, you might set up an
AutoFilter to display only those data records
containing a particular value in the ZIP code
field.
Filter
Data
15_571941-ch10.indd 17215_571941-ch10.indd 172 4/9/10 7:47 PM4/9/10 7:47 PM
173
Worksheet Basics
CHAPTER
10
EXCEL
66
77
Can I customize a filter?
Yes. To customize a filter, click next
to the field by which you want to filter,
click Text Filters or Number Filters,
and then click Custom Filter to open
the Custom AutoFilter dialog box. In this
dialog box, you can customize the filter
by selecting operators and values to
apply on the filtered data. In this case, a
custom filter has been set to display all
records whose Contact field contains the
value Francois Boisson or Fred Garvin.
To learn more about customizing
AutoFilters, see Excel’s help files.
•
Excel filters the table.
To view all the records again,
click the Sort & Filter button
in the Home tab and choose
Clear.
6 Click the data you want to use
as a filter.
7 Click OK.
15_571941-ch10.indd 17315_571941-ch10.indd 173 4/9/10 7:47 PM4/9/10 7:47 PM
174
11
22
33
55
44
Turn On Tracking
1 Click the Review tab on the
Ribbon.
2 Click the Track Changes .
3 Click Highlight Changes.
The Highlight Changes dialog
box appears.
4 Select the Track changes
while editing check box.
This option automatically
creates a shared workbook file
if you have not already
activated the Share Workbook
feature.
•
You can select options to
choose when, by whom, or
where you track changes.
•
You can leave this check box
selected to view changes in
the file.
5 Click OK.
Track and Review Worksheet Changes
If you share your Excel workbooks with others,
you can use the program’s Track Changes
feature to help you keep track of what edits
others have made, including formatting
changes and data additions or deletions.
The Track Changes feature uses different colors
for each person’s edits, making it easy to see
who changed what in the workbook. If you
want, you can change the color used for
your edits.
When you review the workbook, you can
specify whose edits you want to review, what
types of edits you want to see, and whether
to accept or reject the changes.
Track and Review
Worksheet Changes
15_571941-ch10.indd 17415_571941-ch10.indd 174 4/9/10 7:47 PM4/9/10 7:47 PM
175
Worksheet Basics
CHAPTER
10
EXCEL
66
77
What does the Share Workbook feature do?
The Share Workbook feature enables multiple
users to work in a workbook at the same time.
You use the Advanced tab of the Share
Workbook dialog box to change various Share
Workbook settings, such as when files are
updated to reflect one user’s changes and what
should happen when changes made by two or
more users conflict. You can also use this dialog
box to remove a user from the shared workbook
(click the Editing tab to access this option). To
open this dialog box, click the Share Workbook
button on the Ribbon.
Excel prompts you to save
the workbook.
6 Click OK.
Excel activates the tracking
feature.
7 Edit your worksheet.
•
Excel highlights any cells that
contain changes.
•
To view details about a
change, position the mouse
pointer over the highlighted
cell.
continued
continued
15_571941-ch10.indd 17515_571941-ch10.indd 175 4/9/10 7:47 PM4/9/10 7:47 PM
176
11
22
44
33
Excel prompts you to save
the file.
4 Click OK.
Review Changes
1 Click the Review tab on the
Ribbon.
2 Click Track Changes.
3 Click Accept/Reject Changes.
Track and Review Workbook Changes (continued)
Reviewing edits made to a worksheet is simple.
When you start the reviewing process, Excel
automatically locates and highlights the first
edit in the worksheet and gives you the option
to accept or reject the edit. After you make
your selection, Excel automatically locates and
selects the next edit, and so on. You can accept
or reject edits one at a time or accept or reject
all edits in the worksheet at once.
When the review is complete, you can turn the
tracking feature off if you want to. Subsequent
edits made to the worksheet are not tracked.
Track and Review Workbook
Changes (continued)
15_571941-ch10.indd 17615_571941-ch10.indd 176 4/9/10 7:47 PM4/9/10 7:47 PM
177
Worksheet Basics
CHAPTER
10
EXCEL
55
77
66
6
6
66
Can I password-protect shared workbooks?
Yes. First, however, you must disable sharing; deselect Allow Changes by More Than One
User at a Time in the Share Workbook dialog box’s Editing tab (see the preceding tip for help
opening this dialog box). Next, click the
Review tab, click Protect Workbook, and
set a password in the dialog boxes that
appear. Then re-share the workbook by
reselecting Allow Changes by More Than
One User at a Time in the Share Workbook
dialog box. Finally, click Protect Shared
Workbook in the Review tab, select Sharing
with track changes, and enter the password
you set.
The Accept or Reject Changes
dialog box appears.
7 Specify an action for each edit.
•
You can click Accept to add
the change to the final
worksheet.
•
To reject the change, you can
click Reject.
•
You can click one of these
options to accept or reject all
of the changes at the same
time.
Note: To turn off Track
Changes, click the Review
tab, click the Track Changes
button, and choose Highlight
Changes. In the Highlight
Changes dialog box, deselect
the Track changes while
editing check box and
click OK.
The Select Changes to Accept
or Reject dialog box appears.
5 Click options for which
changes you want to view.
6 Click OK.
15_571941-ch10.indd 17715_571941-ch10.indd 177 4/9/10 7:47 PM4/9/10 7:47 PM
178
22
33
44
55
11
A comment balloon appears.
4 Type your comment text.
5 Click anywhere outside the
comment balloon to deselect
the comment.
Add a Comment
1 Click the cell to which you
want to add a comment.
2 Click the Review tab on the
Ribbon.
3 Click the New Comment
button.
You can also right-click the cell
and choose Insert Comment.
Insert a Comment
You can add comments to your worksheets.
You might add a comment to make a note to
yourself about a particular cell’s contents, or
you might include a comment as a note for
other users to see. For example, if you share
your workbooks with other users, you can use
comments to leave feedback about the data
without typing directly in the worksheet.
When you add a comment to a cell, Excel
displays a small red triangle in the upper right
corner of the cell until you choose to view it.
Comments you add are identified with your
user name.
Insert a
Comment
15_571941-ch10.indd 17815_571941-ch10.indd 178 4/9/10 7:48 PM4/9/10 7:48 PM
179
Worksheet Basics
CHAPTER
10
EXCEL
11
View a Comment
1 Position the mouse pointer
over the cell.
•
The comment balloon appears,
displaying the comment.
•
Cells that contain comments
display a tiny red triangle in
the corner.
How do I remove a comment?
To remove a comment, right-click
the cell containing the comment
and choose Delete Comment from
the shortcut menu that appears.
Alternatively, click the comment to
select it and click the Delete button
in the Review tab’s Comments area.
How do I view all the comments in a
worksheet?
If a worksheet contains several comments, you can
view them one after another by clicking the Next
button in the Review tab’s Comments area. To view a
comment you have already seen, click the Previous
button. Alternatively, display all comments at once
by clicking the Show All Comments button.
15_571941-ch10.indd 17915_571941-ch10.indd 179 4/9/10 7:48 PM4/9/10 7:48 PM