Web Application Developer’s Guide phần 5 doc
Bạn đang xem bản rút gọn của tài liệu. Xem và tải ngay bản đầy đủ của tài liệu tại đây (228.13 KB, 26 trang )
Tutorial: Creating a servlet that updates a guestbook
8-11
Step 6: Creating the data connection to the DBServlet
7
Click the Test Query button to test the query. If the query is successful,
the word
Success
displays to the right of the button. If the query cannot
be executed, an error message attempts to explain why the query failed.
8
Click OK to close the Query dialog box.
9
Click the Source tab to switch back to the editor.
Note
You may see the following message displayed in the Designer tab of the
message pane:
Failed to create live instance for variable 'myDM' guestbookservlet.DataModule1
For now, you can ignore this message. You’ll fix this in a later step.
Right-click the Designer tab at the bottom of the AppBrowser and
choose Remove “Designer” Tab to remove the tab.
10
Click the Save All icon on the toolbar to save your work.
JBuilder adds the
queryDataSet1.setQuery()
method to the
jbInit()
method.
In the next step, you’ll set up the data connection to the
DBServlet.
Step 6: Creating the data connection to the DBServlet
In this step, you’ll create a data connection to the
DBServlet.
The
connection allows the servlet to pass data to the data module.
1
Double-click
DBServlet.java
in the project pane to open it in the editor.
2
Find the line of code in the class definition that reads:
private static final String CONTENT_TYPE="text/html"
3
Position the cursor after this line of code and add the following line of
code:
DataModule1 dm = guestbookservlet.DataModule1.getDataModule();
4
Click the Save All icon on the toolbar to save your work.
Now that the servlet is connected to the data module, you need to make
both servlets and the data module do something. From this point on in our
tutorial, you’ll be entering code directly into the editor. The first step will
be to create an input form in
FormServlet.
Step 7: Adding an input form to FormServlet
In this step, you’ll add code to the
doGet()
method of
FormServlet.
This
code creates a form using the HTML
<form>
tag. The form reads in two
values -
UserName
and
UserComment
- entered by the user. This data is posted
to
DBServlet,
the servlet that communicates with the data module.
8-12
Web Application Developer’ s Guide
Step 8: Adding code to connect DBServlet to the data module
A
<form>
tag is a standard HTML tag that creates an input form to gather
data from and display information to a user. The tag contains
action
and
method
attributes. These attributes tell the servlet what to do when the
form’s Submit button is pressed. In our tutorial, the
action
attribute calls
DBServlet.
The
method
attribute posts the
UserName
and
UserComment
parameters to
DBServlet
.
To add code to
FormServlet,
1
Double-click
FormServlet
in the project pane to open it in the editor. (It
may already be open.)
2
Find the
doGet
method near the top of the file.
Tip
You can search by positioning the cursor in the structure pane and
typing
doGet.
3
Remove the following line of code from the
doGet()
method:
out.println("<p>The servlet has received a GET. This is the reply.</p>");
4
Add the following lines of code to the
doGet()
method, between the
open and close <body> tags:
out.println("<h1>Sign the guestbook</h1>");
out.println("<strong>Enter your name and comment in the input fields
below.</strong>");
out.println("<br><br>");
out.println("<form action=table method=POST>");
out.println("Name<br>");
out.println("<input type=text name=UserName value=\"\" size=20 maxlength=150>");
out.println("<br><br>");
out.println("Comment<br>");
out.print("<input type=text name=UserComment value=\"\" size=50 maxlength=150>");
out.println("<br><br><br><br>");
out.print("<input type=submit value=Submit>");
out.println("</form>");
Tip
You can copy and paste this code directly in the editor, or copy it from
the sample in the
samples/WebApps/GuestbookServlet
folder of your
JBuilder installation.
5
Click the Save All icon on the toolbar to save your work.
In the next step, you’ll add code that connects
DBServlet
to the data
module.
Step 8: Adding code to connect DBServlet to the data module
In this step, you’ll add code to the
DBServlet’s
doPost()
method that:
• Reads in the
UserName
and
UserComment
parameters from
FormServlet.
• Calls the
DataModule
method that updates the Guestbook JDataStore,
passing
UserName
and
UserComment
parameter values.
• Calls the data module method that saves changes to the JDataStore.
Tutorial: Creating a servlet that updates a guestbook
8-13
Step 9: Adding code to render the Guestbook SIGNATURES table
To do this,
1
Double-click
DBServlet
in the project pane to open it in the editor. (It
may already be open.)
2
Find the
doPost()
method.
3
Remove the following line of code from the
doPost()
method:
out.println("<p>The servlet has received a POST. This is the reply.</p>");
4
Insert the following lines of code, keeping the cursor at the location
where you just removed code:
String userName = request.getParameter("UserName");
String userComment = request.getParameter("UserComment");
dm.insertNewRow(userName, userComment);
dm.saveNewRow();
doGet(request, response);
Tip
You can copy and paste this code directly in the editor, or copy it from
the sample in the
samples/WebApps/GuestbookServlet
folder of your
JBuilder installation.
The first two lines of code get the values in the
UserName
and
UserComment
parameters that are passed in from
FormServlet
. The next lines call two
methods in the data module:
•
insertNewRow()
- inserts the new Name and Comment values into the
last row of the table.
•
saveNewRow()
- saves the changes in the Guestbook JDataStore.
The last line calls the servlet’s
doGet()
method which renders the
Guestbook table in HTML.
5
Click the Save All icon on the toolbar to save your work.
In the next step, you’ll add code to
DBServlet
that renders the Guestbook
table, including the newly added row, in HTML.
Step 9: Adding code to render the Guestbook SIGNATURES table
In this step, you’ll add a
doGet()
method to
DBServlet
that renders the
Guestbook SIGNATURES table in HTML. Both existing rows and the new
row are displayed.
1
Insert the following code after the servlet’s
doPost()
method:
public void doGet(HttpServletRequest request, HttpServletResponse response)
throws ServletException, IOException {
response.setContentType(CONTENT_TYPE);
PrintWriter out = response.getWriter();
out.println("<html>");
out.println("<body>");
8-14
Web Application Developer’ s Guide
Step 9: Adding code to render the Guestbook SIGNATURES table
out.println("<h2>" + dm.queryDataSet1.getTableName() + "</h2>");
Column[] columns = dm.queryDataSet1.getColumns();
out.println ("<table border = 1><tr>");
for (int i=1; i < columns.length; i++) {
out.print("<th>" + columns[i].getCaption() + "</th>");
}
out.println("</tr>");
dm.queryDataSet1.first();
while (dm.queryDataSet1.inBounds()) {
out.print("<tr>");
for (int i = 1; i < columns.length; i++) {
out.print ("<td>" + dm.queryDataSet1.format(i) + "</td>");
}
out.println("</tr>");
dm.queryDataSet1.next();
}
out.println("</table>");
out.println("</body>");
out.println("</html>");
}
Tip
You can copy and paste this code directly in the editor, or copy it from
the sample in the
samples/WebApps/GuestbookServlet
folder of your
JBuilder installation.
2
Add the following packages to the list of
import
statements at the top of
the file. This ensures that the servlet will compile.
import com.borland.dx.dataset.*;
import com.borland.dx.sql.dataset.*;
import com.borland.datastore.*;
Tip
You can use MemberInsight (
Ctrl+H
) to assist you in completing your
import
statements.
3
Click Save All on the toolbar to save your work.
What the doGet() method does
The
doGet()
method you just added renders the Guestbook SIGNATURES
table in HTML. It cycles through the rows in the JDataStore table and
displays them in the web browser.
The following lines of code contain the standard method declaration:
public void doGet(HttpServletRequest request, HttpServletResponse response)
throws ServletException, IOException {
response.setContentType(CONTENT_TYPE);
PrintWriter out = response.getWriter();
The next two lines of code set up the output as HTML and start the HTML
page.
out.println("<html>");
out.println("<body>");
Tutorial: Creating a servlet that updates a guestbook
8-15
Step 9: Adding code to render the Guestbook SIGNATURES table
The following line of code prints the name of the JDataStore table,
SIGNATURES, at the top of the HTML page. The code uses the
queryDataSet1.getTableName()
method to get the table name.
out.println("<h2>" + dm.queryDataSet1.getTableName() + "</h2>");
The next line calls the
queryDataSet1.getColumns()
method to get the column
names, and return them as an array.
Column[] columns = dm.queryDataSet1.getColumns();
The following line creates the table with the
<table>
tag and creates the
first row of the table.
out.println ("<table border = 1><tr>");
Then, the code uses a
for
loop to cycle through the column names in the
array of columns, retrieve the column captions, and display each caption
in a table row. In this tutorial, the program is only displaying the second
and third columns of the JDataStore. It is not displaying the first column,
the internal row number.
for (int i = 1; i < columns.length; i++) {
out.print ("<th>" + columns[i].getCaption() + "</th>");
}
The line following the
for
block closes the table row.
out.println("</tr>");
The next line positions the cursor on the first row of the JDataStore.
dm.queryDataSet1.first();
The
while
loop cycles through the JDataStore and displays data in the
second and third columns of the table. The first time through, it displays
the data in the first row. Then, the
next()
method positions the cursor on
the next row of the JDataStore. The
while
loop continues displaying data
while the cursor is in bounds, that is while the
inBounds()
method reports
that the navigation falls between the first and last record visible to the
cursor. When this condition is not met, the table and the HTML page are
closed.
while (dm.queryDataSet1.inBounds()) {
out.print("<tr>");
for (int i = 1; i < columns.length; i++) {
out.print ("<td>" + dm.queryDataSet1.format(i) + "</td>");
out.println("</tr>");
dm.queryDataSet1.next();
}
out.println("</table>");
out.println("</body>");
out.println("</html>");
8-16
Web Application Developer’ s Guide
Step 10: Adding business logic to the data module
Step 10: Adding business logic to the data module
You’re almost done. Right now, the program doesn’t do anything because
there’s still no code to write the newly added data to the Guestbook
JDataStore and save it. That code will be added to
DataModule1.
This code will
open the data set, insert the new row (using the
userName
and
userComment
strings passed in from
DBServlet
), and save the new row to the JDataStore.
Follow these steps to add business logic to the data module:
1
Double-click
DataModule1.java
in the project pane to open it in the
editor.(It may already be open.)
2
Find the
jbInit()
method, using the Search|Find command. Add the
following code before the method’s closing curly brace:
queryDataSet1.open();
This code opens the dataset. The dataset must be open before you can
insert or save data. In the data module, the dataset is opened right after
the code that connects to the database and sets up the query.
3
Add code for the method that inserts a new row. To add a row, you
need to create a
DataRow
object, then pass data from the
userName
and
userComment
parameters into the
DataRow.
You’ll add this method after
the
jbInit()
method. Simply move the cursor down a line, past the
method’s closing curly brace, and press
Enter
a few times. Add the
following method:
public void insertNewRow(String userName, String userComment) {
try {
DataRow dataRow1 = new DataRow(queryDataSet1, new String[] { "Name", "Comment"});
dataRow1.setString("Name", userName);
dataRow1.setString("Comment", userComment);
queryDataSet1.addRow(dataRow1);
}
catch (DataSetException ex) {
ex.printStackTrace();
}
}
The first line of the method creates a new
DataRow
object that holds the
new Name and Comment values. The second and third rows pass the
values in the
userName
and
userComment
parameters into the Name and
Comment fields. The last row adds the
DataRow
object to the dataset.
4
Add the following method to save the new row to the dataset after the
insertNewRow()
method:
public void saveNewRow() {
try {
database1.saveChanges(queryDataSet1);
}
catch (DataSetException ex) {
ex.printStackTrace();
}
}
Tutorial: Creating a servlet that updates a guestbook
8-17
Step 11: Compiling and running your project
5
Click the Save All icon on the toolbar to save your work.
You have now added all the code to the program. In the next step, you’ll
compile and run it.
Step 11: Compiling and running your project
To set run properties for the project,
1
Choose Project|Project Properties. Click the Run tab and then click
JSP/Servlet tab of the Run page.
2
Click the ellipsis button to the right of the Launch URI button to display
the Type Or Choose URI To Launch dialog box where you choose the
name of the servlet to launch.
3
Choose
/inputform
in the Servlet Mapping directory tree in the middle
of the dialog box. The URI field at the top of the dialog box now
contains:
/guestbook/inputform.
This is the name of the WebApp you
created in the Web Application wizard, followed by the servlet’s name.
The Type Or Choose URI To Launch dialog box should look like this:
4
Click OK to close the Type Or Choose URI To Launch dialog box, then
OK again to close the Project Properties dialog box.
5
Click the Save All icon on the toolbar to save your work.
To compile and run your project,
1
Choose Project|Make Project “GuestbookServlet.jpx.”
2
Choose Run|Run Project.
The Tomcat web server is displayed in the message pane.
8-18
Web Application Developer’ s Guide
Step 11: Compiling and running your project
3
FormServlet's
input form is displayed in the web view. The URI is
/guestbook/inputform/
and matches what you selected in the URI Launch
dialog box.
4
Type
MyName
in the Name field and
MyComment
in the Comment field.
5
Click the Submit button.
The Guestbook SIGNATURES table is rendered in HTML.
MyName
and
MyComment
are displayed in the last row of the table. Note that the URI
has changed to
http://localhost:8080/guestbook/table
, indicating that
the program is running
DBServlet
.
For more information on URLs, URIs, and servlets, see “How URLs run
servlets” on page 15-3.
6
You can click the back arrow to the left of the URL Location field to
return to the input form and enter another name and comment.
Tutorial: Creating a servlet that updates a guestbook
8-19
Step 11: Compiling and running your project
7
Click the Reset Program button directly above the web server tab to
stop the web server. You must stop the web server before you compile
and run the servlet again, after making changes.
Note
You can open the Guestbook JDataStore in the JDataStore Explorer
(Tools|JDataStore Explorer) to verify that the new data was saved to the
table.
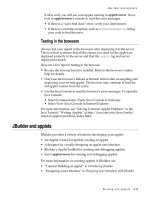
You have completed the tutorial. You now know how to create an HTML
input form for use in a servlet, pass a parameter from one servlet to
another, connect a servlet to a data module, pass parameters from a
servlet to a data module, and use a data module to update a JDataStore.
8-20
Web Application Developer’ s Guide
Developing JavaServer Pages
9-1
Chapter
9
Chapter9
Developing JavaServer Pages
Web Development is a
feature of JBuilder
Professional and
Enterprise.
JavaServer Pages (JSP) technology allows web developers and designers
to rapidly develop and easily maintain information-rich, dynamic web
pages that leverage existing business systems. As part of the Java family,
the JSP technology enables rapid development of web-based applications
that are platform independent.
In theory, JavaServer Pages technology separates the user interface from
content generation, enabling designers to change the overall page layout
without altering the underlying dynamic content. In practice, it takes a
little planning and some coding standards to ensure that the HTML is
cleanly separated from the Java code in the JSP, since they both reside in
the same file. Web designers handling the HTML portion should have a
minimal understanding of which tags denote embedded Java code to
avoid causing problems when designing the UI.
JSP technology uses XML-like tags and scriptlets written in the Java
programming language to encapsulate the logic that generates the content
for the page. Additionally, the application logic can reside in server-based
resources (such as JavaBeans component architecture) that the page
accesses with these tags and scriptlets. Any and all formatting (HTML or
XML) tags are passed directly back to the response page. By separating the
page logic from its design and display and supporting a reusable
component-based design, JSP technology makes it faster and easier than
ever to build web-based applications.
JSP technology is an extension of the Java Servlet API. JSP technology
essentially provides a simplified way of writing servlets. Servlets are
platform-independent, 100% pure Java server-side modules that fit
seamlessly into a web server framework and can be used to extend the
capabilities of a web server with minimal overhead, maintenance, and
support. Unlike other scripting languages, servlets involve no platform-
specific consideration or modifications. Together, JSP technology and
9-2
Web Application Developer’ s Guide
The JSP API
servlets provide an attractive alternative to other types of dynamic web
scripting/programming. JSP technology and servlets offer platform
independence, enhanced performance, separation of logic from display,
ease of administration, extensibility into the enterprise and most
importantly, ease of use.
JSPs are very similar to ASPs (Active Server Pages) on the Microsoft
platform. The main difference between JSPs and ASPs is that the objects
being manipulated by the JSP are JavaBeans, which are platform
independent. Objects being manipulated by the ASP are COM objects,
which ties ASPs completely to the Microsoft platform.
All that is required for a JSP is a JSP technology-based page. A JSP
technology-based page is a page that includes JSP technology-specific
tags, declarations, and possibly scriptlets, in combination with other static
content (HTML or XML). A JSP technology-based page has the extension
.jsp
; this signals to the web server that the JSP technology-enabled engine
will process elements on this page. A JSP can also optionally use one or
more JavaBeans in separate
.java
files.
When a JSP is compiled by the JSP engine on the web server, it gets
compiled into a servlet. As a developer, you usually won’t see the code in
the generated servlet. This means that when compiling JSPs in the JBuilder
IDE, you may see error messages that refer directly to code in the
generated servlet, and only indirectly to the JSP code. Keep in mind that if
you get error messages when compiling your JSP, they could refer to lines
of code in the generated servlet. It’s easier to determine the problem in
your JSP if you have an understanding of how JSPs get translated into
servlets. To achieve this, you need to understand The JSP API.
Chapter 10, “Tutorial: Creating a JSP using the JSP wizard” shows you
how to create a JSP using the JSP wizard as a starting point.
For links to web pages that contain more information on JavaServer Pages
technology, see the topic “Additional JSP resources” on page 9-5.
The JSP API
A JSP usually includes a number of specialized tags which contain Java code
or Java code fragments. Here is a list of a few of the most important JSP tags:
tag syntax description
<%
code fragment
%>
Scriptlet tag. Contains a code fragment, which is one or
more lines of code that would normally appear within the
body of a method in a Java application. No method needs
to be declared, because these code fragments become part
of the
service()
method of the servlet when the JSP is
compiled.
Developing JavaServer Pages
9-3
JSPs in JBuilder
The JSP specification also includes standard tags for bean use and
manipulation. The
useBean
tag creates an instance of a specific JavaBeans
class. If the instance already exists, it is retrieved. Otherwise, it is created.
The
setProperty
and
getProperty
tags let you manipulate properties of the
given bean. These tags and others are described in more detail in the JSP
specification and user guide, which can be found at />products/jsp/techinfo.html.
It’s important to realize that most Java code contained within JSP tags
becomes part of the servlet’s
service()
method when the JSP is compiled
into a servlet. This doesn’t include code contained in declaration tags,
which become complete method or variable declarations in their own
right. The
service()
method is called whenever the client does a
GET
or a
POST
.
JSPs in JBuilder
JBuilder provides a complete development system for JSPs, including a
JSP wizard for creating a new JSP, CodeInsight for completing JSP-specific
tags, debugging within the JSP file, and testing and running the JSP on the
Tomcat servlet engine from within the JBuilder development
environment.
<%!
declaration
%>
Method or variable declaration. When declaring a method
in this tag, the complete method must be contained in the
tag. Gets compiled into a method or variable declaration
in the servlet.
<%
comment
%>
Comment. This is a JSP style comment that doesn’t get
passed to the client browser. (You could also use HTML
comments, but these do get passed to the client browser.)
<%=
expression
%>
Expression. Contains any valid Java expression. The
result is displayed at that point on the page.
<%@ page
[attributes]
%>
Page directive. Specifies attributes of the JSP page.
Directives like this and the taglib directive should be the
first lines in the JSP. One of the most common attributes
to specify in the page directive is an import statement.
Example:
<%@ page import="com.borland.internetbeans.*" %>
<%@ taglib uri="
path to
tag library
" prefix="
tag
prefix
" %>
Taglib directive. Makes a tag library available for use in
the JSP by specifying the location of the tag library and
the prefix to use in its associated tags. Directives like this
and the page directive should be the first lines in the JSP.
tag syntax description
9-4
Web Application Developer’ s Guide
JSPs in JBuilder
The JSP wizard
JBuilder provides a JSP wizard. This is a logical starting point when
developing a JSP. To find this wizard, click on the Web tab of the object
gallery.
The JSP wizard generates the skeleton of a JSP. It creates the basic files for
your JSP, then you fill in the details later.
In the JSP wizard, you can specify which WebApp your JSP is a part of,
whether to set the JSP up to use the InternetBeans tag library, and whether
your JSP uses any JavaBeans. For more information on the features of the
JSP wizard, see the topic on the JSP wizard in the online help.
Chapter 10, “Tutorial: Creating a JSP using the JSP wizard” shows you
how to create a JSP using the JSP wizard as a starting point.
Developing a JSP
The JSP wizard is an optional starting point for developing a JSP.
JBuilder’s editor provides syntax highlighting for JSPs. JBuilder also
provides CodeInsight and ErrorInsight for Java code embedded in a JSP
page.
The structure pane in the JBuilder IDE shows the tag structure within the
JSP, and it also shows any HTML and Java errors in your code. These
errors are very useful, for instance, they can often remind you to finish a
tag that was incomplete.
Compiling a JSP
See “Compiling your servlet or JSP” on page 15-2 for information on
compiling your JSP.
Running a JSP
See “Running your servlet or JSP” on page 15-5 for information on
running your JSP.
Debugging a JSP
See “Debugging your servlet or JSP” on page 15-13 for information on
debugging your JSP.
Developing JavaServer Pages
9-5
Additional JSP resources
Deploying a JSP
See Chapter 16, “Deploying your web application” for tips on deploying
your JSP.
Additional JSP resources
For assistance with developing JSPs in JBuilder, visit the Borland
newsgroup borland.public.jbuilder.servlets-jsp. All JBuilder newsgroups
can be accessed from the Borland web site at />newsgroups/#jbuilder.
For more information on developing JavaServer Pages, point your
browser to the following web sites. These web addresses and links were
valid as of this printing. Borland doesn’t maintain these web sites and isn’t
responsible for their content or longevity.
• Get a JSP syntax card in HTML format, from
/>• Get a JSP syntax card in PDF format, viewable with Adobe Acrobat
Reader, from
This page also contains other technical resources for JSP technology.
• Get all the FAQs on JavaServer Pages at java.sun.com. Point your
browser to />• The current JSP specification can be viewed from the JavaSoft web site,
at />• GNUJSP is a free implementation of Sun’s JavaServer Pages. To learn
more about the GNUJSP compiler, visit />• A web site with many links to JSP topics, entitled “Web Development
with JavaServer Pages,” is />• A JSP list server is maintained at To
subscribe to the mailing list, send a message to
with the following message body:
subscribe jsp-interest Your Full Name
or visit the JavaSoft web site for information.
9-6
Web Application Developer’ s Guide
Tutorial: Creating a JSP using the JSP wizard
10-1
Chapter
10
Chapter10
Tutorial: Creating a JSP using
the JSP wizard
Web Development is a
feature of JBuilder
Professional and
Enterprise.
This tutorial walks you through developing a JSP using JBuilder’s JSP
wizard. This JSP takes text input, displays the text as output when the
Submit button is clicked, and uses a JavaBean to count the number of
times the web page is visited.
The JSP wizard is a good starting point for developing JSPs. It doesn’t
generate a complete application, but it does take care of all the tedious
details required to get your application up and running. You get to this
wizard by selecting New from the File menu, clicking the Web tab, then
selecting JavaServer Page. For complete information on the options in the
JSP wizard, see the topic on the JSP wizard in the online help.
For development testing purposes, JBuilder uses Tomcat. Tomcat is the
reference implementation of the Java Servlet and JavaServer Pages
Specifications. This implementation can be used in the Apache Web
Server as well as in other web servers and development tools. For more
information about Tomcat, check out .
This tutorial assumes you are familiar with Java and with the JBuilder
IDE. For more information on Java, see
Getting Started with Java
. For more
information on the JBuilder IDE, see “The JBuilder environment” in
Introducing JBuilder
.
Step 1: Creating a new project
1
Select File|New Project to display the Project wizard.
2
In the Name field, enter a project name, such as
jsptutorial
.
10-2
Web Application Developer’ s Guide
Step 2: Creating a new WebApp
3
Check the Generate Project Notes File option.
4
Click Next to go to Step 2.
5
Click Finish to close the Project wizard and create the project. You do not
need to make any changes to the defaults on Steps 2 and 3 of the wizard.
A new project is created, containing an HTML file for describing the
project.
Step 2: Creating a new WebApp
This step is optional, but advisable. You can use the default WebApp, but
it’s often less confusing to create a WebApp with a custom name. For
more information on WebApps and WAR files, see Chapter 3, “Working
with WebApps and WAR files.”
1
Select File|New.
2
Click the Web tab. Select Web Application.
3
Click OK. The WebApp wizard appears.
4
Enter a name for the WebApp, such as
jspwebapp
.
5
Click the ellipsis button to the right of the Directory field.
6
Enter a directory name for the WebApp’s root directory, such as
jspwebapp
.
7
Click OK.
8
Click Yes to create the directory.
9
Leave Generate WAR unchecked, since you probably won’t want to
actually deploy this tutorial application. The wizard should look
something like this:
Tutorial: Creating a JSP using the JSP wizard
10-3
Step 3: Using the JSP wizard
10
Click OK to close the wizard.
A WebApp node,
jspwebapp
is displayed in the project pane. Expand the
node to see the Root Directory and Deployment Descriptors nodes.
Figure 10.1 WebApp node in project pane
Step 3: Using the JSP wizard
1
Select File|New.
2
Click the Web tab. Select JavaServer Page.
3
Click OK. The JSP wizard appears.
4
Make sure the WebApp for the JSP is selected in the WebApp drop-
down list. If you created
jspwebapp
in step 2 it is already selected.
5
Enter a name for the JSP:
JSPWithCounter
6
Click Finish to accept all the default settings.
A
JSPWithCounter.jsp
file is added to the root directory of your WebApp.
Expand the Root Directory node in the project pane to see it. A
JSPWithCounterBean.java
sample bean is also added to your project. This
bean is called by the JSP.
10-4
Web Application Developer’ s Guide
Step 4: Adding functionality to the JavaBean
Step 4: Adding functionality to the JavaBean
At this point, a JSP and a JavaBean that can be used by the JSP have been
created.
The next step in this tutorial is to create a method to count the number of
hits to a web page.
1
Double-click
JSPWithCounterBean.java
in the project pane.
2
Modify the source code as follows, adding the code in
bold
to the
existing code:
package jsptutorial;
public class JSPWithCounterBean {
/**initialize variable here*/
private int myCount=0;
private String sample = "Start value";
/**Access sample property*/
public String getSample() {
return sample;
}
/**Access sample property*/
public void setSample(String newValue) {
if (newValue!=null) {
sample = newValue;
}
}
/**New method for counting number of hits*/
public int count() {
return ++myCount;
}
}
Step 5: Modifying the JSP code
1
Double-click
JSPWithCounter.jsp
in the project pane to open it in the
editor. Remember it is in the Root Directory node of the WebApp.
2
Select the Source tab. You can use CodeInsight and JSP source
highlighting to help with coding.
Tutorial: Creating a JSP using the JSP wizard
10-5
Step 6: Running the JSP
3
Modify the generated file as follows, adding the code in
bold
.
JBuilder’s CodeInsight activates to help with the syntax.
<html>
<head>
<jsp:useBean id="JSPWithCounterBeanId" scope="session"
class="jsptutorial.JSPWithCounterBean" />
<jsp:setProperty name="JSPWithCounterBeanId" property="*" />
<title>
JspWithCounter
</title>
</head>
<body>
<h1>
JBuilder Generated JSP
</h1>
<form method="post">
<br>Enter new value: <input name="sample"><br>
<br><br>
<input type="submit" name="Submit" value="Submit">
<input type="reset" value="Reset">
<br>
Value of Bean property is: <jsp:getProperty name="JSPWithCounterBeanId"
property="sample" />
<p>This page has been visited :<%= JSPWithCounterBeanId.count() %> times.</p>
</form>
</body>
</html>
The line of code you just added uses a JSP expression tag to call the count()
method of the JSPWithCounterBean class and insert the returned value in the
generated HTML. For more information on JSP tags, see “The JSP API” on
page 9-2.
Notice the <jsp:useBean/>, <jsp:setProperty/>, and <jsp:getProperty/> tags in
the code above. These were added by the JSP wizard. The useBean tag
creates an instance of the JSPWithCounterBean class. If the instance already
exists, it is retrieved. Otherwise, it is created. The setProperty and
getProperty tags let you manipulate properties of the bean.
The rest of the code that was generated by the JSP wizard is just standard
HTML.
Select File|Save All to save your work.
Step 6: Running the JSP
In order to run the JSP, the runtime properties for the project must be set
correctly in Project|Project Properties|Run. In this tutorial, the runtime
properties were already set by the JSP wizard, so you can go ahead and
run the JSP.
1
Right-click the JSP file and select Web Run from the menu.
10-6
Web Application Developer’ s Guide
Step 6: Running the JSP
The project compiles and runs. Compilation errors are displayed in the
message pane. If there are errors, refer to the topic “Debugging your
servlet or JSP” on page 15-13.
If there are no errors, the web server is started and two new tabs, the Web
View and Web View Source, appear in the content pane. JBuilder’s default
web server is Tomcat, a servlet engine that supports servlets and JSP files.
The web view is a web browser which displays output from the running
JSP. The Web View Source tab displays the actual HTML code which has
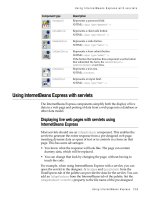
been dynamically generated by the JSP. If successful, the running JSP
looks like this:
Figure 10.2
JSP in web view
The web view of the content pane displays the JSP. For local testing, the
URL points to localhost:8080, which is where Tomcat is running. To test
the JSP:
1
Enter a value in the text field.
2
Click the Submit button. The value you entered is displayed below the
buttons and the page counter is incremented.
The output/log data from Tomcat appears on a new tab in the message
pane. Output from servlets or beans, as well as HTTP commands and
parameter values, are echoed to the message pane. Run time properties of
the web server may be set by selecting Project|Project Properties, and
selecting JSP/Servlet on the Run page. The port number is the port on
Tutorial: Creating a JSP using the JSP wizard
10-7
Step 6: Running the JSP
which the web server will run. The default is 8080. If port 8080 is in use, by
default JBuilder will search for an unused port.
For more information on setting run parameters for your servlet or JSP,
see “Setting run parameters for your servlet or JSP” on page 15-9.
Using the Web View
The web view of the content pane displays the JSP file after it has been
processed by the JSP engine. In this case the JSP engine is Tomcat. The
web view behaves differently than the View tab. In the web view, there
may be a delay between when the JSP file is edited and when the change is
shown in the web view. To see the most recent changes to a JSP file, select
the Refresh button in the web view’s toolbar, just as you would in any web
browser.
If you were debugging the JSP, you could press F9 to return the display to
the web view.
Debugging the JSP
JSP’s are compiled to servlets. In JBuilder, you can debug Java code
snippets in the original JSP file, as opposed to debugging the
corresponding generated Java servlet. For more information on
debugging your JSP, see “Debugging your servlet or JSP” on page 15-13.
Deploying the JSP
For deployment onto a production web server, consult the documentation
for that web server for information on how to deploy JSPs to it. For
general information on deploying JSPs, see Chapter 16, “Deploying your
web application.”
According to the JSP FAQ at />faq.html, there are a number of JSP technology implementations for
different web servers. The latest information on officially-announced
support can be found at www.java.sun.com.
10-8
Web Application Developer’ s Guide
Using InternetBeans Express
11-1
Chapter
11
Chapter11
Using InternetBeans Express
Web Development is a
feature of JBuilder
Professional and
Enterprise.
InternetBeans Express technology integrates with servlet and JSP
technology to add value to your application and simplify servlet and JSP
development tasks. InternetBeans Express is a set of components and a
JSP tag library for generating and responding to the presentation layer of a
web application. It takes static template pages, inserts dynamic content
from a live data model, and presents them to the client; then it writes any
changes that are posted from the client back into the data model. This
makes it easier to create data-aware servlets and JSPs. For example, you
can use InternetBeans Express components to create a servlet that
provides a form for a new user to register for site access or a JSP that
displays the results of a search in a table.
InternetBeans Express contains built-in support for DataExpress DataSets
and DataModules. It can also be used with generic data models and EJBs.
The classes and interfaces fall into three categories:
• InternetBeans are components that deal directly with the dynamic
generation of markup and the handling of HTTP request/response
semantics.
• JSP tag handlers, which invoke InternetBeans internally, and their
supporting infrastructure. These are used by the JSP tag extensions in
the InternetBeans tag library.
• Data model support.
There is also a JSP tag library which contains JSP tag extensions used to
support InternetBeans in a JSP.