Programming Linux Games phần 3 ppsx
Bạn đang xem bản rút gọn của tài liệu. Xem và tải ngay bản đầy đủ của tài liệu tại đây (439.08 KB, 44 trang )
70 CHAPTER 4
Computer Graphics Hardware
Every personal computer is equipped with a video controller of some sort. This
set of chips is responsible for producing images on the screen, based on the data
contained in a certain area of memory (the framebuffer). In addition to this
basic drudgery, the video controller often assists software by providing
hardware-accelerated drawing functions. Video controllers usually reside on
replaceable video cards that can be easily upgraded as video technology
progresses.
Video cards contain a unit called a CRTC, an acronym for cathode ray tube
controller. This device (either a separate chip or part of another chip) instructs
the monitor to redraw its picture at regular intervals. The image on a computer
screen is composed of horizontal lines on a fluorescent surface, and the monitor’s
hardware updates these from top to bottom. Each completed image is called a
refresh. The CRTC instructs the monitor to perform a new refresh at least 60
times each second. The brief pause between refreshes is known as the vertical
retrace, because this is when the monitor’s electron beam returns to the top of
the screen. No matter how quickly the data in the framebuffer changes, the
monitor is not updated until the next refresh. The video hardware’s refresh rate
is therefore of great interest to a game developer.
The image on a computer screen is divided into discrete colored areas called
pixels (short for pictorial elements). Each pixel can be individually controlled by
the video card. The resolution of a display specifies the number of pixels across
and down; for instance, a screen with a resolution of 640 by 480 is a matrix of
640 columns and 480 rows. The video card uses a device called a RAMDAC
(random access memory digital-analog converter) to pump these individual
pixels from the framebuffer memory to the monitor. Video card manufacturers
like to brag about the speed of their RAMDAC components.
Since there are a lot of pixels on the screen (anywhere from 64,000 to more than
a million), producing complete images can be an intensive process, especially if a
program needs to change the entire contents of the screen several times every
second. Video chip manufacturers have invested a large amount of research in
this problem and have created video accelerator chips to help with this work.
Video accelerators can speed up graphical applications (such as games) by
performing time-consuming updates with dedicated hardware. For instance,
video accelerators can often help out by performing high-speed copying between
MASTERING SDL 71
the framebuffer and other areas of memory. Computer memory is fast, but
today’s video games need every bit of performance they can get.
The Framebuffer
The framebuffer is an area of memory that describes the image on the screen,
with each on-screen pixel corresponding to one memory location. The exact
format of the framebuffer is determined by the video chipset, but it is most
commonly a simple array (this is known as a linear framebuffer). To change the
color of a pixel on the screen, a program must calculate the location of the pixel
in the array (with the formula width × y + x), determine the correct
representation of the desired color, and store the color representation in the
framebuffer. The video card then sends the new pixel color to the monitor
during its next screen refresh.
Pixels are almost always represented by one- to four-byte values, but the exact
format of these values depends on the current video mode. The following
schemes are used to specify pixel colors in the framebuffer:
Indexing Pixel values are indices into a preset table of color values, which is
called the colormap or palette. Each entry in this table consists of
a red, green, and blue intensity level. The video card converts the
indices into actual color intensities (signals for the monitor’s
electron guns) as it goes. These video modes generally use one
byte per pixel, allowing for a meager 256 colors on the screen at
once. The palette can usually be changed at will (but updates to
the palette will not show up until the next refresh). Clever
programmers occasionally use the palette to implement animation
tricks and special effects. Indexed modes offer extremely fast
performance but relatively few simultaneous colors.
Hicolor Pixel values are 16 bits (2 bytes) each. These bits are divided into
red, green, and blue fields. It is common for hicolor modes to
allocate 5 bits to red, 6 bits to green, and 5 bits to blue, but you
cannot assume that this will be the case. Hicolor offers excellent
performance potential and a decent representation of the color
spectrum, and it is frequently used for game programming.
72 CHAPTER 4
However, it lacks the color depth necessary for professional
graphics. This is currently the most important pixel format for
game programming. Hicolor is also known as High Color, but
most people use the shorter term.
True Color Pixel values are 24 bits each, allotting 1 byte to each color
channel. True Color modes are extremely easy to program (since
they do not require bit shifting or masking), but they tend to be
rather slow due to the increased amount of video data. Some True
Color modes use 32 bits for each pixel, simply wasting the 4th
byte. This improves performance in many cases, because 32-bit
processors are usually more efficient at accessing data aligned on
4-byte boundaries.
Direct Color
Pixel values are divided into three bit fields, each of which is an
index into a palette for a particular color channel. That is, Direct
Color provides a separate palette for red, green, and blue. This
scheme combines the advantages of indexing with the excellent
color depth of True Color. Direct Color is rarely used for game
programming (it is mainly a feature of high-end graphics
workstations) and is mentioned here only for the sake of
completeness.
Although the variety of video modes may appear to be a serious programming
nightmare, many games simply pick one mode to support (such as hicolor), and
inform the video card of that mode when they start. If a video card does not
allow a certain mode, it is often possible to perform on-the-fly conversion
between pixel formats with only a minor performance loss. It is sometimes
possible to write programs in a depth-independent manner.
The SDL Video API
SDL uses structures called surfaces for manipulating graphical data. A surface is
simply a block of memory for storing a rectangular region of pixels. You can
think of a surface as a generic chunk of video data. Surfaces have widths,
heights, and specific pixel formats, just as framebuffers do. In fact, SDL
MASTERING SDL 73
represents the video card’s framebuffer as a special surface. The rectangular
regions of data stored in surfaces are often called bitmaps or pixmaps.
The most important property of surfaces is that they can be copied onto each
other very quickly. That is, one surface’s pixels can be transferred to an
identically sized rectangular area of another surface. This operation is called a
blit, or block image transfer. Blits are a fundamental part of game programming
because they allow complete images to be composed out of predrawn graphics
(generally created by artists with image-processing software). Since the
framebuffer is a surface, entire images can be sent to the screen with a single
blitting operation. SDL provides a function for performing fast blits between
surfaces, and it can even convert between surfaces of different pixel formats on
the fly.
Most games rely almost exclusively on surface blits for their drawing (as opposed
to drawing with individual pixels). For example, consider the game Civilization:
Call To Power (which was ported to Linux using SDL). Other than the lines
used to indicate paths and gridpoints, every character and building that you can
see is stored in memory with surfaces, and they are drawn on the screen with
blits. All of the game’s artwork was created by artists and stored in files. The
game assembles its screen images almost entirely out of these predrawn graphics.
We will now examine a series of SDL video-programming examples. It would be
a good idea to compile and run each of these examples and to tweak them until
you understand how they work. Don’t worry about typing in all of the examples;
they are available on the book’s Web page. Throughout the rest of the chapter
(and throughout chapters to come) we’ll make note of important structures and
functions with references like this:
Function PrepNuke(kilotons, target)
Synopsis Sets up a tactical nuke and aims it at target.
Parameters kilotons—Power rating of the desired nuke.
target—Target of the nuke. 0 picks a random
destination. Be careful.
Don’t worry if you don’t understand the relevance of a particular function or
member of a structure at first; some are presented as a reference for advanced
SDL users. Most of them should make sense by the end of the chapter.
74 CHAPTER 4
Setting Up the Display
Before we can begin writing to the framebuffer, we need to tell the video card
what we expect of it. It needs to know the screen resolution we want, as well as
the pixel format to expect in the framebuffer. SDL can handle this for us with
the SDL SetVideoMode function. The following example demonstrates how to set
the display to a particular video mode and prepare the framebuffer for drawing:
Code Listing 4–1 (initializing-sdl.c)
/* Example of initializing SDL. */
#include <SDL/SDL.h>
#include <stdio.h>
#include <stdlib.h>
int main()
{
SDL_Surface *screen;
/* Initialize SDL’s video system and check for errors */
if (SDL_Init(SDL_INIT_VIDEO) != 0) {
printf("Unable to initialize SDL: %s\n", SDL_GetError());
return 1;
}
/* Make sure SDL_Quit gets called when the program exits! */
atexit(SDL_Quit);
/* Attempt to set a 640x480 hicolor video mode */
screen = SDL_SetVideoMode(640, 480, 16, SDL_FULLSCREEN);
if (screen == NULL) {
printf("Unable to set video mode: %s\n", SDL_GetError());
return 1;
}
/* If we got this far, everything worked */
printf("Success!\n");
return 0;
}
MASTERING SDL 75
This program includes the SDL.h header file, in the SDL subdirectory. This is
the master header file for SDL; it should be included in all SDL applications. It
also includes two standard headers, for the printf and atexit functions.
We begin by calling SDL Init to initialize SDL. This function takes an ORed list
of arguments to indicate which subsystems should be initialized; we are
interested only in the video subsystem, so we pass SDL INIT VIDEO. Unless an
error occurs, this function should return zero to indicate success. We also use C’s
atexit facility to request that SDL Quit be called before the program exits. This
function makes sure that SDL shuts down properly.
Function SDL Init(flags)
Synopsis Initializes one or more subsystems of SDL.
Returns Zero on success, a negative number on failure.
Parameters flags—Subsystems to initialize. This is an ORed list
of flags. Possible flags are SDL INIT VIDEO and
SDL INIT AUDIO, among others.
Next, we use the SDL SetVideoMode function to inform the display of our desired
resolution and color depth. There is a catch here: SDL will try to set up the
display as requested, but it might fail. If this happens, SDL won’t tell us;
instead it will emulate the requested mode internally. This is usually acceptable,
since the emulation code is relatively fast and we would usually rather not deal
with multiple modes ourselves. SDL SetVideoMode returns a pointer to the
surface that represents the framebuffer. If something goes wrong, this function
returns NULL.
Function SDL SetVideoMode(width, height, bpp, flags)
Synopsis Creates a window or initializes the video adapter to
prepare for SDL video output.
Returns Pointer to a valid SDL Surface structure on success,
NULL on failure.
Parameters width—Width (x-resolution) of the desired video
mode.
76 CHAPTER 4
height—Height (y-resolution) of the desired video
mode.
bpp—Desired color depth. Likely values are 8, 15, 16,
24, or 32. 0 lets SDL pick any supported mode.
flags—Mode flags. Possible values are
SDL FULLSCREEN (requests a fullscreen video mode),
SDL DOUBLEBUF (requests a double buffered video
setup), SDL HWSURFACE (requests a hardware
framebuffer for fast updates), SDL OPENGL (requests an
OpenGL context), and others. We’ll discuss most of
these later.
Finally, we report success and exit. The C library calls SDL Quit automatically
(since we registered it with atexit), and SDL returns the video display to its
original mode.
Function SDL Quit()
Synopsis Shuts down SDL cleanly, regardless of its present
state.
Function SDL QuitSubSystem()
Synopsis Shuts down a particular component of SDL, leaving
the others untouched. It is safe to shut a subsystem
down twice; SDL keeps track of its state internally.
Parameters flags—ORed bitmask of subsystems to shut down.
These are the same flags you would pass to SDL Init.
To shut down the audio subsystem without touching
the video subsystem, you would use
SDL QuitSubSystem(SDL INIT AUDIO).
Now that we’ve created an SDL application, we need to compile it. SDL
applications are easy to compile; assuming a proper installation of SDL, they
require just a few flags and libraries. The standard SDL distribution includes a
MASTERING SDL 77
program called sdl-config (similar to the gtk-config and glib-config scripts
that ship with the GTK+ toolkit) for supplying the appropriate command-line
arguments to gcc. The command sdl-config cflags produces a list of the
options that should be passed to the compiler, and sdl-config libs
produces a list of libraries that should be linked in. These options allow SDL
applications to compile correctly regardless of the location or version of the
library. The following command will correctly build an SDL application:
$ gcc sdltest.c -o sdltest `sdl-config cflags libs`
Or, to separately compile and link multiple source files that use the SDL library,
$ gcc -c file1.c `sdl-config cflags`
$ gcc -c file2.c `sdl-config cflags`
$ gcc file1.o file2.o -o mygame `sdl-config libs`
Note the use of backtick substitution (a standard shell feature) to insert the
output of sdl-config into the command line. Of course, it is also possible to run
sdl-config yourself and insert its output into the command line by hand, but
this would reduce the portability of your makefile. sdl-config produces the
following output on one particular Linux installation:
$ sdl-config cflags
-I/usr/include/SDL -D_REENTRANT
$ sdl-config libs
-L/usr/lib -lSDL -lpthread
Direct Surface Drawing
Putting data into an SDL surface is simple. Each SDL Surface structure
contains a pixels member. This is a void * to the raw image, and we can write
to it directly if we know the type of pixel that the surface is set up for. We must
call the SDL LockSurface function before accessing this data (because some
surfaces reside in special memory areas and require special handling). When we
are finished with the surface, we must call SDL UnlockSurface to release it. The
78 CHAPTER 4
width and the height of the image are given by the w and h members of the
structure, and the pixel format is specified by the format member (which is of
type SDL PixelFormat). SDL often emulates nonstandard screen resolutions
with higher resolutions, and the pitch member of the pixel format structure
indicates the actual width of the framebuffer. You should always use pitch
instead of w for calculating offsets into the pixels buffer, or else your
application might not work on some configurations.
Structure SDL Surface
Synopsis Represents a video surface.
Members flags—ORed bitmask of surface flags. For instance,
the SDL HWSURFACE bit of flags will be set if this is a
hardware (video memory) surface. Read-only.
format—Pointer to this surface’s pixel format
information (a SDL PixelFormat structure).
Read-only.
w—Width of this surface (in pixels). Read-only.
h—Height of this surface (in pixels). Read-only.
pitch—Number of pixels per scanline in memory. This
is often different from the surface’s width – beware!
Always use pitch for pixel offset calculations.
Read-only.
pixels—void pointer to the actual data that makes up
this image. Read-write only after you call
SDL LockSurface.
Function SDL LockSurface(surf)
Synopsis “Locks” a surface, making its pixels available for
direct access. You can use SDL MUSTLOCK(surf) to
determine whether a particular surface requires
locking; some surfaces don’t. Do not call
SDL BlitSurface on a locked surface.
Returns Non-NULL on success, NULL on failure.
Parameters surf—Surface to lock.
MASTERING SDL 79
Function SDL UnlockSurface(surf)
Synopsis “Unlocks” a surface. Use this as soon as you have
finished drawing on a locked surface.
Parameters surf—Surface to unlock.
Our next example uses the SDL pixel format information to draw individual
pixels on the screen. We have chosen to use a 16-bit (hicolor) mode for
demonstration purposes, but other modes are equally simple to program. Bear in
mind that plotting pixels in this way is invariably slow—don’t even think of
using this code for any substantial amount of drawing in a real program!
Code Listing 4–2 (direct-pixel-drawing-sdl.c)
/* Example of direct pixel access with SDL. */
#include <SDL/SDL.h>
#include <stdio.h>
#include <stdlib.h>
Uint16 CreateHicolorPixel(SDL_PixelFormat * fmt, Uint8 red,
Uint8 green, Uint8 blue)
{
Uint16 value;
/* This series of bit shifts uses the information from the
SDL_Format structure to correctly compose a 16-bit pixel
value from 8-bit red, green, and blue data. */
value = ((red >> fmt->Rloss) << fmt->Rshift) +
((green >> fmt->Gloss) << fmt->Gshift) +
((blue >> fmt->Bloss) << fmt->Bshift);
return value;
}
int main()
{
SDL_Surface *screen;
Uint16 *raw_pixels;
int x, y;
80 CHAPTER 4
/* Initialize SDL’s video system and check for errors. */
if (SDL_Init(SDL_INIT_VIDEO) != 0) {
printf("Unable to initialize SDL: %s\n", SDL_GetError());
return 1;
}
/* Make sure SDL_Quit gets called when the program exits! */
atexit(SDL_Quit);
/* Attempt to set a 256x256 hicolor (16-bit) video mode.
This will set some type of 16-bit mode, but we won’t
know which particular pixel format ahead of time. If
the video card can’t handle hicolor modes, SDL will
emulate it. */
screen = SDL_SetVideoMode(256, 256, 16, 0);
if (screen == NULL) {
printf("Unable to set video mode: %s\n", SDL_GetError());
return 1;
}
/* Video memory can be strange, and it’s sometimes necessary to
"lock" it before it can be modified. SDL abstracts this with
the SDL_LockSurface function. */
SDL_LockSurface(screen);
/* Get a pointer to the video surface’s memory. */
raw_pixels = (Uint16 *) screen->pixels;
/* We can now safely write to the video surface. We’ll draw a
nice gradient pattern by varying our red and blue components
along the X and Y axes. Notice the formula used to calculate
the offset into the framebuffer for each pixel.
(The pitch is the number of bytes per scanline in memory.) */
for (x = 0; x < 256; x++) {
for (y = 0; y < 256; y++) {
Uint16 pixel_color;
int offset;
pixel_color = CreateHicolorPixel(screen->format,
x, 0, y);
offset = (screen->pitch / 2 * y + x);
raw_pixels[offset] = pixel_color;
MASTERING SDL 81
}
}
/* We’re finished drawing, so unlock the surface. */
SDL_UnlockSurface(screen);
/* Inform SDL that the screen has been changed. This is
necessary because SDL’s screen surface is not always the real
framebuffer; it is sometimes emulated behind the scenes. */
SDL_UpdateRect(screen, 0, 0, 0, 0);
/* Pause for a few seconds as the viewer gasps in awe. */
SDL_Delay(3000);
return 0;
}
The code’s comments give the play-by-play, but a few points should be clarified.
This program employs a very general routine for constructing hicolor pixel
values; this routine will work with any hicolor format that SDL recognizes.
Although we could write a separate (faster) routine for each possible hicolor data
layout, doing so would require a lot of work and would only marginally improve
performance. The 565 (5 red bits, 6 green bits, and 5 blue bits) pixel format is
perhaps the most widely used format and could be reasonably optimized, but 556
and 555 are not uncommon. In addition, there is no guarantee that the bit fields
will be in the red-green-blue order. Our CreateHicolorPixel routine solves this
problem by referring to the data in the SDL PixelFormat structure. For instance,
the routine uses the Rloss member of the structure to determine how many bits
to drop from the 8-bit red component, and it then uses the Rshift member to
determine where the red bits should be located within the 16-bit pixel value. For
an interesting experiment, have the program print out these fields, and
determine which particular hicolor layout your video card has given to SDL. My
video card (a Matrox G400 under XFree86 3.3.6) happens to use the 565 format.
82 CHAPTER 4
Structure SDL PixelFormat
Synopsis Contains information about a surface’s pixel
composition.
Members palette—Pointer to this surface’s palette (of type
SDL Palette, if this is a paletted image.
BitsPerPixel—Color depth of this surface. Possible
values are 8, 15, 16, 24, or 32.
BytesPerPixel—Number of bytes needed for each
pixel. This is usually BitsPerPixel / 8, rounded up
to the nearest integer.
Rloss—Number of bits to remove from an 8-bit red
color value in order for it to fit in the allotted space.
For instance, a 565 video mode allows for 5 bits of red
color data, so the Rloss would be 3. SDL PixelFormat
also contains Gloss, Bloss, and Aloss members for
the green, blue, and alpha channels.
Rshift—Number of bits to shift the red value in order
to position it in the correct bit field. There are similar
Gshift, Bshift, and Ashift members.
Rmask—Bitmask for extracting the red component
from a pixel value. There are similar Gmask, Bmask,
and Amask members.
colorkey—Color value for colorkey blitting. Set this
with SDL SetColorKey. More on colorkey blitting
later.
alpha—Transparency value for the surface associated
with this SDL PixelFormat structure. Set this with
SDL SetAlpha. More on alpha blitting later.
Another important issue involves the SDL UpdateRect function. As we
mentioned earlier, SDL sometimes emulates video modes if the video card is
unable to provide a certain mode itself. If the video card does not support a
requested 24-bit mode, for instance, SDL might select a 16-bit mode instead and
return a fake framebuffer set up for 24-bit pixels. This would allow your program
MASTERING SDL 83
to continue normally, and SDL would handle the conversion from 24 bits to 16
bits on the fly (with a slight performance loss). The SDL UpdateRect function
informs SDL that a portion of the screen has been updated and that it should
perform the appropriate conversions to display that area. If a program does not
use this function, it may still work. It is better to be on the safe side, however,
and call this function whenever the framebuffer surface has been changed.
Function SDL UpdateRect(surface, left, top, right,
bottom)
Synopsis Updates a specific region of a surface. Normally used
to make changes appear on the screen (see text above).
Parameters surface—Surface to update. Usually the screen.
left—Starting x coordinate of the region to update.
If all coordinates are zero, SDL UpdateRect will
update the entire surface.
top—Starting y coordinate of the region to update.
right—Ending x coordinate of the region to update.
bottom—Ending y coordinate of the region to update.
Finally, if you run the program, you might notice that it runs in a window
instead of taking over the entire screen. To change this, replace the zero in the
SDL SetVideoMode call with the constant SDL FULLSCREEN. Be careful, though;
full-screen applications are harder to debug, and they tend to mess things up
badly when they crash. It’s a good idea to use normal windowed mode until
you’re pretty sure your app isn’t going to crash.
Drawing with Blits
You’ve seen how to draw pixels directly to a surface, and there’s no reason you
couldn’t create an entire game with this technique alone. However, there is a
much better way to draw large amounts of data to the screen. Our next example
will load an entire surface from a file and draw it with a single SDL
surface-copying function. Without further ado, here is the code.
84 CHAPTER 4
Code Listing 4–3 (blitting-surfaces-sdl.c)
/* Example of simple blitting with SDL. */
#include <SDL/SDL.h>
#include <stdio.h>
#include <stdlib.h>
int main()
{
SDL_Surface *screen;
SDL_Surface *image;
SDL_Rect src, dest;
/* Initialize SDL’s video system and check for errors. */
if (SDL_Init(SDL_INIT_VIDEO) != 0) {
printf("Unable to initialize SDL: %s\n", SDL_GetError());
return 1;
}
/* Make sure SDL_Quit gets called when the program exits! */
atexit(SDL_Quit);
/* Attempt to set a 256x256 hicolor (16-bit) video mode.
Since 256x256 is rarely a valid video mode, SDL will
most likely emulate this resolution with a different
video mode. */
screen = SDL_SetVideoMode(256, 256, 16, 0);
if (screen == NULL) {
printf("Unable to set video mode: %s\n", SDL_GetError());
return 1;
}
/* Load the bitmap file. SDL_LoadBMP returns a pointer to a
new surface containing the loaded image. */
image = SDL_LoadBMP("test-image.bmp");
if (image == NULL) {
printf("Unable to load bitmap.\n");
return 1;
}
MASTERING SDL 85
/* The SDL blitting function needs to know how much data
to copy. We provide this with SDL_Rect structures, which
define the source and destination rectangles. The areas
should be the same; SDL does not currently handle image
stretching. */
src.x = 0;
src.y = 0;
src.w = image->w; /* copy the entire image */
src.h = image->h;
dest.x = 0;
dest.y = 0;
dest.w = image->w;
dest.h = image->h;
/* Draw the bitmap to the screen. We are using a hicolor video
mode, so we don’t have to worry about colormap silliness.
It is not necessary to lock surfaces before blitting; SDL
will handle that. */
SDL_BlitSurface(image, &src, screen, &dest);
/* Ask SDL to update the entire screen. */
SDL_UpdateRect(screen, 0, 0, 0, 0);
/* Pause for a few seconds as the viewer gasps in awe. */
SDL_Delay(3000);
/* Free the memory that was allocated to the bitmap. */
SDL_FreeSurface(image);
return 0;
}
As you can see, the bitmap file is loaded into memory with the SDL
LoadBMP
function. This function returns a pointer to an SDL Surface structure containing
the image, or a NULL pointer if the image cannot be loaded. Once this file has
been successfully loaded, the bitmap is represented as an ordinary SDL surface,
and a program can draw it onto the screen or any other surface. Bitmaps use
dynamically allocated memory, and they should be freed when they are no longer
needed. The SDL FreeSurface function frees the memory allocated to a bitmap.
86 CHAPTER 4
Function SDL LoadBMP(filename)
Synopsis Loads a .bmp image file from disk into an SDL
surface.
Returns Pointer to a newly allocated SDL Surface containing
the loaded image.
Parameters filename—Name of the bitmap file to load.
The SDL BlitSurface function performs a blit of one surface onto another,
converting between pixel formats as necessary. This function takes four
arguments: a source surface (the image to copy from), an SDL Rect structure
defining the rectangular region of the source surface to copy, a destination
surface (the image to copy to), and another SDL Rect structure indicating the
coordinates on the destination to which the image should be drawn. These two
rectangles must be of the same width and height (SDL does not currently
perform stretching), but the x and y starting coordinates of the regions can be
different.
Function SDL BlitSurface(src, srcrect, dest, destrect)
Synopsis Blits all or part of one surface (the source) onto
another (the destination).
Parameters src—Source surface. Pointer to a valid SDL Surface
structure.
srcrect—Region of the source surface to copy. This
is a pointer to an SDL Rect structure. If this is NULL,
SDL will try to copy the entire surface.
dest—Destination surface.
destrect—Region of the destination surface to
replace with the source surface. The width and height
of the destination surface don’t matter; SDL only
cares about the x and y coordinates.
MASTERING SDL 87
Structure SDL Rect
Synopsis Specifies regions of pixels. Used for clipping and
blitting.
Members x—Starting x coordinate.
y—Starting y coordinate.
w—Width of the region, in pixels.
h—Height of the region, in pixels.
There is really nothing complicated about producing graphics with SDL, once
you understand the basics of working with surfaces. If you don’t feel comfortable
with the SDL BlitSurface function yet, you might want to work with the
previous example a bit before moving on. For instance, load several bitmaps and
draw them onto each other before blitting them to the screen.
Colorkeys and Transparency
Games often need to simulate transparency. For instance, suppose that you have
a bitmap of a game character against a solid background, and you want to draw
the character in a game level. The character would look silly drawn as is; the
background would be drawn too, and the character would be surrounded by a
block of solid color. It would be much better to draw only the pixels that are
actually part of the character, and not its solid background. You can do this
with a colorkey blit. SDL provides support for this technique, and it even
provides support for run-length colorkey acceleration (a nice trick for speeding
up drawing). RLE (run-length encoding) provides an enormous performance
boost for blitting colorkeyed images, but it is practical only for bitmaps that will
not be modified during the course of the program (since modifying an RLE
image necessitates unpacking and repacking the image).
A colorkey is a particular pixel value that a program declares to be transparent.
(In SDL, this is done with the SDL SetColorKey function.) Pixels that match an
image’s colorkey are not copied when the image is blitted. In our example of a
game character, you could set the colorkey to the color of the solid background,
and it would not be drawn. Colorkeys therefore make it simple to combine
rectangular images of nonrectangular objects.
88 CHAPTER 4
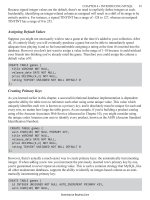
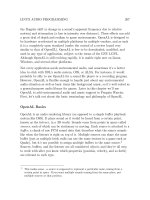
Tuxedo T. Penguin, hero of the Linux world
Function SDL SetColorKey(surface, flags, colorkey)
Synopsis Adjusts the colorkey information for an SDL Surface.
Parameters surface—Surface to modify.
flags—ORed bitmask of colorkey flags.
SDL SRCCOLORKEY enables colorkey blitting for this
surface. SDL RLEACCEL enables run-length
acceleration, which can speed up colorkey operations
(but can also slow down SDL LockSurface
significantly).
colorkey—If SDL SRCCOLORKEY is set, this specifies
the pixel value to use as a colorkey.
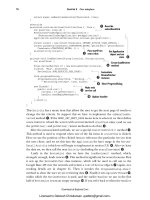
The following example uses a colorkey blit to draw an image of Tux, the Linux
penguin, against another image. Tux is stored against a solid blue background,
and so we will use blue (RGB 0, 0, 255) as our colorkey. For comparison, we will
also draw the same penguin image without a colorkey.
MASTERING SDL 89
Code Listing 4–4 (colorkeys-sdl.c)
/* Example of blitting with colorkeys in SDL. */
#include <SDL/SDL.h>
#include <stdio.h>
#include <stdlib.h>
int main()
{
SDL_Surface *screen;
SDL_Surface *background;
SDL_Surface *image;
SDL_Rect src, dest;
Uint32 colorkey;
/* Initialize SDL’s video system and check for errors. */
if (SDL_Init(SDL_INIT_VIDEO) != 0) {
printf("Unable to initialize SDL: %s\n", SDL_GetError());
return 1;
}
/* Make sure SDL_Quit gets called when the program exits! */
atexit(SDL_Quit);
/* Attempt to set a 640x480 hicolor (16-bit) video mode. */
screen = SDL_SetVideoMode(640, 480, 16, 0);
if (screen == NULL) {
printf("Unable to set video mode: %s\n", SDL_GetError());
return 1;
}
/* Load the bitmap files. */
background = SDL_LoadBMP("background.bmp");
if (background == NULL) {
printf("Unable to load bitmap.\n");
return 1;
}
image = SDL_LoadBMP("penguin.bmp");
if (image == NULL) {
printf("Unable to load bitmap.\n");
90 CHAPTER 4
return 1;
}
/* Draw the background. */
src.x = 0;
src.y = 0;
src.w = background->w;
src.h = background->h;
dest.x = 0;
dest.y = 0;
dest.w = background->w;
dest.h = background->h;
SDL_BlitSurface(background, &src, screen, &dest);
/* Draw the penguin without a colorkey. */
src.x = 0;
src.y = 0;
src.w = image->w;
src.h = image->h;
dest.x = 30;
dest.y = 90;
dest.w = image->w;
dest.h = image->h;
SDL_BlitSurface(image, &src, screen, &dest);
/* The penguin is stored on a blue background. We
can use the SDL_MapRGB function to obtain the
correct pixel value for pure blue. */
colorkey = SDL_MapRGB(image->format, 0, 0, 255);
/* We’ll now enable this surface’s colorkey and draw
it again. To turn off the colorkey again, we would
replace the SDL_SRCCOLORKEY flag with zero. */
SDL_SetColorKey(image, SDL_SRCCOLORKEY, colorkey);
src.x = 0;
src.y = 0;
src.w = image->w;
src.h = image->h;
dest.x = screen->w - image->w - 30;
dest.y = 90;
dest.w = image->w;
dest.h = image->h;
MASTERING SDL 91
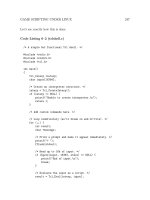
Tux, with and without a colorkey
SDL_BlitSurface(image, &src, screen, &dest);
/* Ask SDL to update the entire screen. */
SDL_UpdateRect(screen, 0, 0, 0, 0);
/* Pause for a few seconds as the viewer gasps in awe. */
SDL_Delay(10000);
/* Free the memory that was allocated to the bitmaps. */
SDL_FreeSurface(background);
SDL_FreeSurface(image);
return 0;
}
92 CHAPTER 4
Loading Other Image Formats
SDL provides built-in support for loading .bmp files, but this is a fairly limited
file format. In particular, it supports only minimal compression and does not
provide an alpha channel. (See the next section.) The SDL image add-on library
adds to SDL support for several different formats, including the popular .png,
.jpg, and .gif formats.
SDL image is extremely simple to use. Once you have installed the library on
your system, your program should include SDL/SDL image.h and link with
-lSDL image. Assuming this is successful, your programs can use the IMG Load
function to load any supported image file format. The next section demonstrates
this function.
$ gcc program.c -o program `sdl-config libs cflags` -lSDL image
Several other SDL add-on libraries are available, and it is worthwhile to become
familiar with them. They can save you a lot of coding footwork in many cases.
There are currently libraries for processing TrueType fonts, accessing the
network, mixing sound effects, playing music (including MIDI), and managing
graphical user interfaces. Most of these libraries are portable, but a few are
OS-specific. More information on these libraries is available at
.
Alpha Blending
Although graphics and sound are only part of what goes into a successful game,
visually impressive games do tend to be more fun than games with lackluster
graphics. Game programmers often add special effects to make their graphics
stand out. Alpha blending is a special effect that adds varying degrees of
translucency to surfaces.
Most images use three color channels (red, green, and blue) to describe each
pixel. Alpha blending adds a fourth, the alpha channel. For this reason,
alpha-enabled images are often called RGBA images. The alpha value of each
pixel is an indication of that pixel’s opacity. An alpha value of zero indicates
that a pixel is completely transparent, and higher alpha values indicate
MASTERING SDL 93
increasing opacity. The alpha channel can be created on the fly according to a
program’s needs, or it can be stored with an image created in a graphics package.
To draw an RGBA pixel onto another, the alpha function simply performs a
weighted average of the two pixels, processing each color channel separately.
Suppose that a pixel has RGB values (50,20,30) with an alpha value of 50. This
alpha value corresponds to approximately 20 percent opacity (80 percent
transparency), since the scale is 0 to 255. If this pixel is drawn on top of a pixel
with RGB values (60,80,100), the resulting pixel will take 20 percent of its color
from the first pixel and 80 percent of its color from the second, and so its final
RGB values will be (58,68,86). This weighted average can be computed with
simple arithmetic. Unfortunately, multiplication and division are comparatively
slow operations for most processors, so alpha blending generally involves a
significant performance hit unless it is supported by a video accelerator.
SDL provides full support for alpha blending. If an image already contains alpha
data (from an image-processing program), the SDL SetAlpha function can be
used to enable alpha blending (as you will see in the next example). If the image
does not contain an alpha channel, it can still be blended, but the entire surface
will have the same opacity value. This is called per-surface alpha blending.
Per-surface alpha blending is also set with SDL SetAlpha.
Function SDL SetAlpha(surface, flags, alpha)
Synopsis Enables alpha blending on a particular surface.
Parameters surface—The surface to modify.
flags—ORed list of alpha blending flags.
SDL SRCALPHA enables alpha blending, and
SDL RLEACCEL enables RLE acceleration (with the
same ramifications described under
SDL SetColorKey).
alpha—Per-surface alpha value. 255 represents
complete opacity, and 0 represents complete
transparency.
94 CHAPTER 4
The Great Alpha Flip
SDL used to interpret alpha values as transparency, not opacity (in
other words, alpha values now mean exactly the opposite of what they
used to – they now work like the alpha values in nearly every other
graphics system). The old style was fine within SDL circles, but it made
porting applications that depended on proper alpha support a serious
hassle. This idiosyncrasy has been fixed, and it was announced on the
SDL development mailing list as the Great Alpha Flip.
This reversal really shouldn’t matter, unless you intend to work with
truly ancient SDL code that isn’t aware of the change.
The next example demonstrates these two types of alpha blending. Since .bmp
files do not support an alpha channel,
1
we will use the SDL image library to read
our images from .png (Portable Network Graphic) files instead. Our example
will require three image files: one 640 by 480 background image, one 100 by 100
image with an alpha channel, and one 100 by 100 image with no alpha channel.
2
You can get these images from the book’s Web site, or make your own.
Code Listing 4–5 (alpha-sdl.c)
/* Example of alpha blending with SDL. */
#include <SDL/SDL.h>
#include <SDL/SDL_image.h>
#include <stdio.h>
#include <stdlib.h>
int main()
{
SDL_Surface *screen;
1
Some variants of .bmp do support an alpha channel, but most image manipulation
programs do not write this format. SDL may or may not eventually support bitmap files
with alpha data.
2
I created these images with the GNU Image Manipulation Program (The GIMP,
). This is a worthwhile program to learn, even if you’re not an artist.