Tài liệu công nghệ thông tin - giới thiệu MantisBT pptx
Bạn đang xem bản rút gọn của tài liệu. Xem và tải ngay bản đầy đủ của tài liệu tại đây (746.54 KB, 90 trang )
Mantis Bug Tracker Administration Guide
Mantis Bug Tracker Administration Guide
Copyright © 2010 The MantisBT Team
Reference manual for the Mantis Bug Tracker.
Build Date: 27 August 2010
THIS SOFTWARE IS PROVIDED BY THE COPYRIGHT HOLDERS AND CONTRIBUTORS "AS IS" AND ANY
EXPRESS OR IMPLIED WARRANTIES, INCLUDING, BUT NOT LIMITED TO, THE IMPLIED WARRANTIES OF
MERCHANTABILITY AND FITNESS FOR A PARTICULAR PURPOSE ARE DISCLAIMED. IN NO EVENT SHALL
THE COPYRIGHT OWNER OR CONTRIBUTORS BE LIABLE FOR ANY DIRECT, INDIRECT, INCIDENTAL,
SPECIAL, EXEMPLARY, OR CONSEQUENTIAL DAMAGES (INCLUDING, BUT NOT LIMITED TO,
PROCUREMENT OF SUBSTITUTE GOODS OR SERVICES; LOSS OF USE, DATA, OR PROFITS; OR BUSINESS
INTERRUPTION) HOWEVER CAUSED AND ON ANY THEORY OF LIABILITY, WHETHER IN CONTRACT,
STRICT LIABILITY, OR TORT (INCLUDING NEGLIGENCE OR OTHERWISE) ARISING IN ANY WAY OUT OF THE
USE OF THIS SOFTWARE, EVEN IF ADVISED OF THE POSSIBILITY OF SUCH DAMAGE.
Table of Contents
1. About MantisBT 1
What is MantisBT? 1
Who should read this manual? 1
License 1
Minimum Requirements 1
How to get it? 1
About the Name 2
History 2
Support 2
MantisBT News 3
Versioning 3
2. Installation 5
Summary 5
New Installations 5
Requirements 6
Backups 6
Uninstall 7
3. User Management 9
Creating User Accounts 9
Enabling/Disabling User Accounts 9
Deleting User Accounts 10
User Signup 10
Forgot Password and Reset Password 10
Changing Password 10
Pruning User Accounts 11
Authorization and Access Levels 11
Auto Creation of Accounts on Login 12
User Preferences 12
User Profiles 13
4. Issue Lifecycle and Workflow 15
Issue Creation 15
Issue Statuses 15
Workflow 16
Workflow Transitions 16
Workflow Thresholds 16
5. Configuration 19
Database 19
Path 19
Webserver 20
Configuration Settings 20
Security and Cryptography 20
Signup and Lost Password 21
Email 22
Version 24
Language 25
Display 25
Time 28
Date 28
News 28
Default Preferences 29
Summary 31
Bugnote 32
File Upload 32
HTML 34
Authentication 34
Status Settings 36
iii
Filters 38
Misc 38
Cookies 41
Database Tables 41
Speed Optimisation 41
Reminders 42
Bug History 42
Sponsorship 43
Custom Fields 43
My View Settings 43
Relationship Graphs 44
Sub-Projects 45
Field Visibility 45
System Logging 46
6. Page descriptions 49
Login page 49
Main page 49
View Issues page 49
Issue View page 50
Issue Change Status page 50
Issue Edit page 51
My Account Page 51
Preferences 51
Profiles 51
System Management Pages 51
Manage Users 51
Manage Projects Page 52
Manage Custom Fields 52
Manage Global Profiles 54
Manage Configuration 54
Monitor Issue 58
Reopen Issue 58
Delete Issue 58
Close Issue 58
Assign to Me 58
Resolve Issue 58
News Syndication 58
7. Customizing MantisBT 61
Custom Fields 61
Overview 61
Custom Field Definition 61
Adding/Editing Custom Fields 62
Linking/Unlinking/Ordering Existing Custom Fields in Projects 63
Localizing Custom Field Names 63
Dynamic default values 64
Dynamic values for Enumeration Custom Fields 64
Enumerations 66
Email Notifications 67
Customizing Status Values 68
Custom Functions 69
Defined Functions 70
Example Custom Function 70
8. Authentication 73
Standard Authentication 73
HTTP_AUTH 73
BASIC_AUTH 73
LDAP 73
Microsoft Active Directory 74
iv
9. Project Management 75
Change Log 75
Roadmap 76
Time Tracking 78
Graphs 79
Summary Page 79
10. Contributing to MantisBT 81
Talent and Time 81
Recommend MantisBT to Others 81
Blog about MantisBT 81
Integrate with MantisBT 81
Registered in MantisBT Users Directory 81
Donate Money 81
Sponsor MantisBT 81
Colophon 83
v
vi
Chapter 1. About MantisBT
What is MantisBT?
MantisBT is a web based bug tracking system that was first made available to the public
in November 2000. Over time it has matured and gained a lot of popularity, and now it
has become one of the most popular open source bug/issue tracking systems. MantisBT
is developed in PHP, with support to multiple database backends including MySQL, MS
SQL, PostgreSQL and DB2.
MantisBT, as a PHP script, can run on any operating system that is supported by PHP
and has support for one of the DBMSes that are supported. MantisBT is known to run fine
on Windows, Linux, OS/2, Mac OS X, System i and a variety of Unix operating systems.
Who should read this manual?
This manual is targeted for the person responsible for evaluating, installing and maintaing
MantisBT in a company. Typically we refer to this person as the MantisBT administrator.
License
MantisBT is released under the terms of GNU General Public License (GPL)
1
. MantisBT is
free to use and modify. It is free to redistribute as long as you abide by the distribution
terms of the GPL
2
.
Minimum Requirements
MantisBT has modest software and hardware requirements. It requires a computer that is
able to run the server software. All of the required software is free for commercial or non-
commercial use. The server can be a shared public web server or a dedicated co-located
box. The disk space required will depend on the size of the database, however, it is typi-
cally driven by the expected number and size of the attachments.
• Operating System: MantisBT runs on Windows, MacOS, OS/2, Linux, Solaris, the BSDs,
and just about anything that supports the required server software.
• Web Server: MantisBT is mainly tested with Microsoft IIS
3
and Apache
4
. However, it is
expected to work with any decent web server software.
• PHP
5
: The web server must have PHP installed on it. It can be installed as CGI or what-
ever other integration technology that is supported by PHP and the web server. Re-
quired version is PHP 5.1.x or higher. Recommended version is PHP 5.2.x.
• Database: MantisBT requires a database to store its data. The supported DBMSes include
MySQL (4.1.x or higher), MS SQL, PostgreSQL and DB2.
• Browser: MantisBT aims to support most of the browsers in the market. The mainly sup-
ported ones are Internet Explorer and Firefox. However, browsers like Safari, Chrome
and Opera should also work fine although they are not used by most developers during
development and testing.
How to get it?
MantisBT is available in several Linux distributions including: Debian, Ubuntu, Fedora,
Gentoo, Frugalware and others. Hence, if you are running Linux, start by checking if your
1
Chapter 1. About MantisBT
distribution has a package for MantisBT. If not, or if the package is not up-to-date with the
latest MantisBT version, then you may want to download it directly from here
6
.
For Windows, Mac OS X and other operating systems, use the link provided above to
download MantisBT. The download is compressed in tar.gz or zip format. Both formats
can be unpacked using tools like 7-Zip
7
(in case of Windows).
Note that at any point in time there are typically two "latest" MantisBT releases that are
available for download. The latest production release (stable), and the latest development
release which can be an alpha or a release candidate. It is not recommended to use develop-
ment releases in production specially if it is still in the alpha stage unless the administrator
is familiar with PHP and is able to troubleshoot and fix any issues that may arise.
About the Name
When initially seeking to name this project Ken ran into a problem every programmer
encounters. What is a good name? It has to be descriptive, unique, and not too verbose.
Additionally having multiple meanings would be a nice touch. Quickly ruled out were
php*Something* names which, incidentally, although popular, do not seem to be con-
doned by the PHP Group developers. Drawing inspiration from Open Source projects
like Apache, Mozilla, Gnome, and so forth resulted in two eventual choices: Dragonfly
and Mantis. Dragonfly was already the name of a webmail package. So the name became
Mantis.
Praying Mantis are insects that feed primarily on other insects and bugs. They are ex-
tremely desirable in agriculture as they devour insects that feed on crops. They are also
extremely elegant looking creatures. So, we have a name that is fairly distinctive and de-
scriptive in multiple ways. The BT suffix stands for "Bug Tracker" and distinguishes this
project from general usage of the word Mantis. However, over time the project was typi-
cally referred to as Mantis.
History
Kenzaburo Ito and a friend originally created a bug tracker as an internal tool for their pet
project. A search for good, free packages came up with nothing suitable so they wrote their
own. After a rewrite and cleanup it was made available to the public via the GNU General
Public License (GPL). The GPL was chosen partly because of his belief that development
tools should be cheap or free. In 2002, Ken was joined by Jeroen Latour, Victor Boctor and
Julian Fitzell to be the administrators and the core development team of MantisBT. This
marks a new era in MantisBT lifetime where it is now a team project.
Support
There are plenty of resources to help answer support queries. Following are the main ones:
• Forums
8
- The forums are one of the most popular destinations for getting MantisBT
support. Start off by searching the forums for your questions, if not found, then go ahead
and submit a question.
• Mailing lists
9
- Available mailing lists are "mantisbt-announce" for announcements,
"mantisbt-dev" for development issues, mantisbt-lang for localization and
"mantisbt-help" for general help/support questions. There are public archives for such
mailing lists. Note that only members of the mailing lists can post to them, hence,
subscribe to the lists before you attempt to email them.
• IRC
10
- The IRC channel is mainly used by developers to engage in in-person discussion.
The recommended tool for IRC is XChat (for Linux), XChat 2 (for Windows). However,
you can also use Web Chat
11
to connect to IRC via your web browser. This is also useful
2
Chapter 1. About MantisBT
when your work firewall blocks the IRC port (although there are other workarounds
involving tunneling to fix this issue). Many people prefer to use IRC to ask questions to
the developers and other users who are in the IRC channel. The IRC channel logs are
archived and made available on the web. (TODO: add irc logs link)
• Wiki
12
- The MantisBT Wiki has information related to "How To (recipes)", FAQ, feature
requirements, etc.
• Search - A good way for locating an answer for your question or finding more informa-
tion about a topic is to search across all MantisBT website and the Internet via Google
13
or Bing
14
.
It is important to note that support questions should not be sent directly to MantisBT de-
velopers or through the MantisBT contact us pages. Use of "Contact Us" page or emailing
the developer directly is available if you are after a paid support or consulting service.
MantisBT News
There are several ways to keep up to date with MantisBT news. These include:
• mantisbt-announce mailing list is a very low traffic list that is used for major announce-
ments, typically announcements about releases. All MantisBT users are encouraged to
subscribe to this mailing list. The average traffic should be no more than one to two posts
per month.
• MantisBT Blog
15
is used to communicate announcements about new releases, topics re-
lating to MantisBT, etc. Users are encouraged to subscribe to the RSS feed to know when
new posts are posted there.
16
is used to notify users about up-to-date details about what is happening with
MantisBT development. For example, a Twitter update is automatically posted by the
official bug tracker whenever an issue is resolved. Twitter users are encouraged to follow
"mantisbt".
Versioning
The release numbering convention we use is major.minor.micro (eg. 1.2.0rc1).
• Major - Indicates a very large change in the core package. Rewrites or major milestones.
• Minor - Significant amount of feature addition/modification.
• Micro - Mostly bug fixes and maintenance releases.
• Suffix - rc1 for first release candidate, a1 for alpha 1, etc.
Notes
1. />2. />3. />4. />5. />6. />7. />8. />9. />3
Chapter 1. About MantisBT
10. />11. />12.
13.
14.
15. />16. />4
Chapter 2. Installation
Following are the steps for a new MantisBT installation:
• Download Mantis
• Go through MantisBT Configuration and set the database options + whatever options
where you need to override the default values.
• Test your configuration through the admin folder
• Create a new administrator account and remove the standard user ’administrator’
Summary
1. Tranfer files
2. Uncompress files
3. Generate database tables
4. Edit configuration file, if needed
5. PHP File extensions
6. Login
7. Add projects and users
New Installations
1. First, transfer the file to your webserver using whatever method you likebest (ftp,
scp, etc). You will need to telnet/ssh into the server machine forthe next steps.
2. Next, untar/gunzip it to the directory that you want.The usual command is (1
step): tar zxvf <filename.tar.gz> OR (2 steps): gunzip <filename.tar.gz> tar
xvf <filename.tar> Winzip, Stuffit, and other programs should also be able to
handledecompression of the archive.At this point you may want to rename the
directory to something simpler like ’mantisbt’. You will use the mv command to
rename a directory (Windows users substitute the "ren" command or use explorer).
mv <directoryname> mantisbt
3. Next we will create the necessary database tables and a basic configurationfile.From
your web server, access http://yoursite/mantisbt/admin/install.php. This page will
walk through the following steps:
a. check basic parameters for the web server
b. prompt for the database type and location, and a database user/passwordpair.
For installion, an administrative user/password pair can also be provided. The
operating user requires SELECT, INSERT, UPDATE, and DELETE privileges.
For installation, INDEX, CREATE, ALTER, and DROP privileges arealso re-
quired.
c. create the database and tables. WARNING: A DEFAULT ADMINISTRATOR
level account is created. The account name and password are administrator /
root. Use this when you first login to MantisBT. Immediately go to Manage and
create at least one administrator level account. Immediately after that DISABLE
or DELETE the administrator account. You can recreate it but you should delete
the account to prevent the cookie_string from being used to trick the package. It
would be even better to rename the account or delete it permanently. REMEM-
BER: After setting up the package, REMOVE the default administrator account.
5
Chapter 2. Installation
d. write a basic "config_inc.php file to define the database.
e. perform some post installation checks on the system.
4. The next part involves configuring the installation to work with yourspecific
setup.Open the file in an editor and add anyother values that are required. There
aremany more that you can use to customize your MantisBT installation. See
Configuration for in depth explanations.The file will overwrite the default
values with those necessary for setup.You can load up admin/check.php to see
if you set things up correctly. NOTE: check.php sometimes reports the value of
register_globalsincorrectly. Create a page with this line in it: <? phpinfo() ?>,
save itwith a .php extension and load it up in your web browser. It will, among
amultitude of other things, have the correct value of register_globals that youare
using.
5. MantisBT now uses only .php files.If your webserver is configured for other exten-
sions (.PHP3, .PHTML) then youwill have to have the administrator add support
for .PHP files. This shouldbe a trivial modification.Documentation can be found at:
/>6. Login to your bugtracker and go to the manage section. Click on the projects link. You
will need to ADD a new project. Then EDIT the new project and remember to ADD
at least one category. Otherwise you won’t be able to add any issues. That should be
it. You’re off and running.
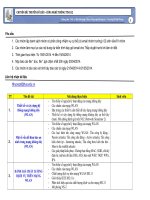
Requirements
The following versions are required for proper operation:
Package Minimum Version Tested with
MySQL 4.1.x 5.0.x, 6.0.x
PostgreSQL (experimental) 7.0 8.0
PHP 5.1.2 5.2.x
Web Server Apache 1.3.x, Apache 2.2.x,
lighttpd 1.4.x, IIS 6.0
MantisBT is designed in a way to work in as many environments as possible. Hence the
required extensions are minimal and many of them are optional affecting only one feature.
The following PHP extensions are used:
• Mysqli or PostgreSQL or another vendor specific database extension that matches the
type of database you are using with MantisBT - mandatory.
• Hash - mandatory. This extension is available and enabled by default in PHP >= 5.1.2.
For earlier versions of PHP you will need to install the PECL Hash extension manually.
• Curl - if the Twitter integration feature is required.
• GD - if the captcha and/or graphing features are required.
• Fileinfo - Guesses the MIME type of attachments. This extension is included by default
from version 5.3.x of PHP. For older versions of PHP you will need to install the fileinfo
PECL extension (this requires root access to the server you’re using). Without this ex-
tension, file attachment previews and downloads may not work correctly as MantisBT
won’t be able to send the Content-Type header to a browser requesting an attachment.
6
Chapter 2. Installation
Backups
It is recommended to backup your MantisBT database on a regular basis. This is easy to
accomplish using the mysqldump command: mysqldump -u<username> -p<password>
<database name> > <output file> To restore a backup you will need to have a clean
database. Then run: mysql -u<username> -p<password> <database name> < <input
file> You can also perform both of these tasks using phpMyAdmin
1
A good idea is to
make a backup script and run it regularly through cron or a task scheduler (for Windows
see WinCron
2
). Using the current date in the filename can prevent overwriting and make
cataloguing easier. !!! Backups should always be performed before an upgrade !!! Make
sure to backup MantisBT code (which includes your configs + possibly customization),
issue attachments / project documents, and database contents.
Uninstall
It is recommended that you make an backup in case you wish to use your data in the
future. See the
Backups page for details. To uninstall MantisBT:
• Delete the MantisBT directory and all files and subdirectories.
• Drop all MantisBT tables from the database, these can be identified by the configured
prefix for the installation. The default prefix is ’mantis’.
• Remove any customizations or additions that you may have made.
If you have the permissions to create/drop databases and you have a specific database for
MantisBT that does not contain any other data, you can drop the whole database.
Notes
1. />2. />7
Chapter 2. Installation
8
Chapter 3. User Management
Creating User Accounts
In MantisBT, there is no limit on the number of user accounts that can be created. Typically,
installations with thousands of users tend to have a limited number of users that have
access level above REPORTER.
By default users with ADMINISTRATOR access level have access to create new user
accounts. The steps to do that are:
• Click "Manage" on Main Menu.
• Click "Manage Users" (if not selected by default).
• Click "Create New Account" button just below the alphabet key.
• Enter user name, email address, global access level (more details about access levels
later). Other fields are optional.
• Click "Create Users".
Creating a user triggers the following actions:
• Creating a user in the database.
• If email notifications ($g_enable_email_notification) is set to ON, then the user will re-
ceive an email allowing them to activate their account and set their password. Other-
wise, the account will be created with a blank password.
• If email notifications ($g_enable_email_notification) is set to ON, users with access level
about $g_notify_new_user_created_threshold_min will get a notification that a user ac-
count has been created. Information about the user like user name and email address are
provided. The IP of the user that created the account is also included.
When the ’Protected’ flag is set on a user account, it indicates that the account is a shared
account (e.g. demo account) and hence users logged using such account will not be allowed
to change account preferences and profile information.
The anonymous user account specified with the $g_anonymous_account option will al-
ways be treated as a protected user account. When you are creating the anonymous user
account, the ’Protected’ flag is essentially ignored because the anonymous user is always
treated as a protected user.
Enabling/Disabling User Accounts
The recommended way of retiring user accounts is to disable them. Scenarios where this
is useful is when a person leaves the team and it is necessary to retire their account.
Once an account is disabled the following will be enforced:
• All currently active sessions for the account will be invalidated (i.e. automatically logged
out).
• It will no longer be possible login using this account.
• No further email notifications will be sent to the account once it is disabled.
• The user account will not show anymore in lists like "assign to", "send reminder to", etc.
9
Chapter 3. User Management
The disabling process is totally reversible. Hence, the account can be re-enabled and all
the account history will remain intact. For example, the user will still have issues reported
by them, assigned to them, monitored by them, etc.
Deleting User Accounts
Another way to retire user accounts is by deleting them. This approach is only recom-
mended for accounts that have not been active (i.e. haven’t reported issues). Once the
account is deleted, any issues or actions associated with such account, will be associated
with user123 (where 123 is the code of the account that was deleted). Note that associated
issues or actions are not deleted.
As far as the underlying database, after the deletion of a user, records with the user id
as a foreign key will have a value that no longer exists in the users table. Hence, any tools
that operate directly on the database must take this into consideration.
By default administrators are the only users who can delete user accounts. They can
delete accounts by clicking Manage, Manage Users, locating the user to be deleted and
opening it details page, then clicking on the "Delete User" button which deletes the user.
Note that "Deleting Users" is not a reversible process. Hence, if it is required to re-add the
user account, it is not possible to recreate the user account so that it gets the same ID and
hence retains its history. However, manually creating a record in the users table with the
same id, can possibly do that. However, this approach is not recommended or supported.
User Signup
For open source and freeware projects, it is very common to setup MantisBT so that users
can signup for an account and get a REPORTER access by default (configurable by the
$g_default_new_account_access_level configuration option). The signup process can be
enabled / disabled using the $g_allow_signup configuration option, which is enabled by
default.
If email notifications ($g_enable_email_notification) is set to ON, users with access level
about $g_notify_new_user_created_threshold_min will get a notification that a user ac-
count has been created. Information about the user like user name, email address, IP ad-
dress are included in the email notification.
Forgot Password and Reset Password
It is pretty common for users to forget their password. MantisBT provides two ways to
handle such scenario: "Forgot Password" and "Reset Password".
"Forgot Password" is a self service scenario where users go to the login page, figure out
they don’t remember their password, and then click the "Lost your password?" link. Users
are then asked for their user name and email address. If correct, then they are sent an email
with a link which allows them to login to MantisBT and change their password.
"Reset Password" scenario is where a user reports to the administrator that they are not
able to login into MantisBT anymore. This can be due to forgetting their password and
possibly user name or email address that they used when signing up. The administrator
then goes to Manage, Manage Users, locates the user account and opens its details. Under
the user account details, there is a "Reset Password" button which the administrator can
click to reset the password and trigger an email to the user to allow them to get into Man-
tisBT and set their password. In the case where email notifications are disabled, resetting
password will set the password to an empty string.
10
Chapter 3. User Management
Changing Password
Users are able to change their own passwords (unless their account is "protected"). This
can be done by clicking on "My Account", and then typing the new password in the "Pass-
word" and "Confirm Password" fields, then clicking "Update User". Changing the pass-
word automatically invalidates all logged in sessions and hence the user will be required
to re-login. Invalidating existing sessions is very useful in the case where a user going onto
a computer, logs into MantisBT and leaves the computer without logging out. By changing
the password from another computer, the session on the original computer automatically
becomes invalidated.
Pruning User Accounts
The pruning function allows deleting of user accounts for accounts that have been created
more than a week ago, and they never logged in. This is particulary useful for users who
signed up with an invalid email or with a typo in their email address address.
The account pruning can be done by administrators by going to "Manage", "Manage
Users", and clicking the "Prune Accounts" button inside the "Never Logged In" box.
Authorization and Access Levels
MantisBT uses access levels to define what a user can do. Each user account has a
global or default access level that is associated with it. This access level is used as the
access level for such users for all actions associated with public projects as well as
actions that are not related to a specific project. Users with global access level less than
$g_private_project_threshold will not have access to private projects by default.
The default access levels shipped with MantisBT out of the box are VIEWER,
REPORTER, UPDATER, DEVELOPER, MANAGER and ADMINISTRATOR. Each
features has several configuration options associated with it and identifies the required
access level to do certain actions. For example, viewing an issue, reporting an issue,
updating an issue, adding a note, etc.
For example, in the case of reporting issues, the required access level is configurable us-
ing the $g_report_bug_threshold configuration option (which is defaulted to REPORTER).
So for a user to be able to report an issue against a public project, the user must have a
project-specific or a global access level that is greater than or equal to REPORTER. How-
ever, in the case of reporting an issue against a private project, the user must have project
specific access level (that is explicitly granted against the project) that is higher than RE-
PORTER or have a global access level that is higher than both $g_private_project_threshold
and $g_report_bug_threshold.
Note that project specific access levels override the global access levels. For example,
a user may have REPORTER as the global access level, but have a MANAGER access
level to a specific project. Or a user may have MANAGER as the global access level by
VIEWER access to a specific project. Access levels can be overriden for both public and
private projects. However, overriding access level is not allowed for users with global ac-
cess ADMINISTRATOR.
Each feature typically has multiple access control configuration options to defines what
access level can do certain operations. For example, adding a note may require REPORTER
access level, updating a note my require DEVELOPER access level, unless the own was
owned by the same user and in this case REPORTER access level. Such threshold config-
uration options can be set to a single access level, which means users with such threshold
and above are authorized to do such action. The other option is to specify an array of ac-
cess level which indicates that users with the explicitly specific thresholds are allowed to
do such actions.
It is also worth mentioning that the access levels are defined by the
$g_access_levels_enum_string configuration option, and it is possible to customize such
11
Chapter 3. User Management
list. The default value for the available access levels is ’10:viewer, 25:reporter, 40:updater,
55:developer, 70:manager, 90:administrator’. The instructions about how to customize the
list of access levels will be covered in the customization section.
Auto Creation of Accounts on Login
In some cases MantisBT is setup in a way, where it allows users that already exists in a di-
rectory or another application to be automatically authenticated and added to MantisBT.
For example, a company may setup their MantisBT installation in a way, where its staff
members that are already registered in their LDAP directory, should be allowed to login
into MantisBT with the same user name and password. Another example, is where Man-
tisBT is integrated into some content management system, where it is desired to have a
single registration and single sign-on experience. In such scenarios, once a user logs in
for the first time, a user account is automatically created for them, although the password
verification is still done against LDAP or the main users repository.
User Preferences
Users can fine tune they way MantisBT interacts with them via modifying their user pref-
erences. User preferences can only be managed by users and are not available for the ad-
ministrators to tweak. The administrators can only tweak the default value for such pref-
erences. However, once a user account is created, it is then the responsibility of the user to
manage their own preferences. The user preferences include the following:
• Default Project: A user can choose the default project that is selected when the user first
logs in. This can be a specific project or "All Projects". For users that only work on one
project, it would make sense to set such project as the default project (rather than "All
Projects"). The active project is part of the filter applied on the issues listed in the "View
Issues" page. Also any newly reported issues will be associated with the active project.
• Refresh Delay: The refresh delay is used to specify the number of seconds between auto-
refreshes of the View Issues page.
• Redirect Delay: The redirect delay is the number of seconds to wait after displaying flash
messages like "Issue created successfully", and before the user gets redirected to the next
page.
• Notes Sort Order: The preference relating to how notes should be ordered on an issue is
viewed or in email notifications. The ascending order is where notes are ordered so that
ordered notes appear before newer notes, the descending order is the reverse.
• Email on New: If unticked, then email notifications relating to creation of a new issue
would be disabled. Note that the preference is only used to disabled notifications that as
per the administrator’s configuration, this user would have qualified to receive them.
• Email on Change of Handler: TODO - is this preference used?
• Email on Feedback: TODO - is this preference used?
• Email on Resolved: TODO
• Email on Closed: TODO
• Email on Reopened: TODO
• Email on Note Added: TODO
• Email on Status Change: TODO
• Email on Priority Change: TODO - is this preference used?
12
Chapter 3. User Management
• Email Notes Limit: This preference can be used to limit the number of issue notes to
view or to be included in an email notifications. Specifying N here means that the latest
N notes will be included. The value 0 causes all notes to be included.
• Language: The preferred language of the user. This language is used by the GUI and in
email notifications. Note that MantisBT uses UTF8 for encoding the data, and hence, the
user can be interacting with MantisBT user interface in Chinese while logging issue data
in German.
User Profiles
A user profile describes an environment that the user uses to run the software for which
issues are being tracked. The profile information include "Platform", "Operating System",
"OS Version", and "Additional Description". Each user has access to profiles that they create
(can be multiple), in addition to global ones that are shared created by other users. When
reporting issues, users can elect to enter information like platform, operating system, ver-
sion manually, or they can choose from the list of profiles that are already defined.
Global profiles are typically used by the administrator to define a set of standard profiles
that are typically used by the MantisBT users. This makes it easier for the users to use
such profiles without having to define create them. The access level required for users to
be able to create global profiles is configured by the $g_manage_global_profile_threshold
configuration option and it is defaulted to MANAGER.
13
Chapter 3. User Management
14
Chapter 4. Issue Lifecycle and Workflow
Issue Creation
The life cycle of an issue starts with its creation. An issue can be created via one of the
following channels:
• MantisBT Web Interface - This is where a user logs into MantisBT and reports a new
issue.
• SOAP API - Where an application automatically reports an issue into MantisBT using
the SOAP API web services interfaces. For example, the nighlty build script can auto-
matically report an issue if the build fails.
• Email - This is not supported out of the box, but there are existing MantisBT patches
that would listen to emails on pre-configured email addresses and adds them to the
MantisBT database.
• Others - There can be several other ways to report issues. For example, applications /
scripts that directly injects issues into MantisBT database (not recommended, except for
one-off migration scripts), or PHP scripts that use the core MantisBT API to create new
issues.
Issue Statuses
An important part of issue tracking is to classify issues as per their status. Each team may
decide to have a different set of categorization for the status of the issues, and hence, Man-
tisBT provides the ability to customize the list of statuses. MantisBT assumes that an issue
can be in one of three stages: opened, resolved and closed. Hence, the customized statuses
list will be mapped to these three stages. For example, MantisBT comes out of the box with
the following statuses: new, feedback, acknowledged, confirmed, assigned, resolved and
closed. In this case "new" -> "assigned" map to opened, "resolved" means resolved and
"closed" means closed.
Following is the explanation of what the standard statuses that are shipped with Man-
tisBT means.
• New - This is the landing status for new issues. Issues stay in this status until they are
assigned, acknowledged, confirmed or resolved. The next status can be "acknowledged",
"confirmed", "assigned" or "resolved".
• Acknowledged - This status is used by the development team to reflect their agreement
to the suggested feature request. Or to agree with what the reporter is suggesting in an
issue report, although they didn’t yet attempt to reproduce what the reporter is referring
to. The next status is typically "assigned" or "confirmed".
• Confirmed - This status is typically used by the development team to mention that they
agree with what the reporter is suggesting in the issue and that they have confirmed and
reproduced the issue. The next status is typically "assigned".
• Assigned - This status is used to reflect that the issue has been assigned to one of the
team members and that such team member is actively working on the issue. The next
status is typically "resolved".
• Resolved - This status is used to reflect that the issue has been resolved. An issue can
be resolved with one of many resolutions (customizable). For example, an issue can be
resolved as "fixed", "duplicate", "won’t fix", "no change required", etc. The next statuses
are typically "closed" or in case of the issue being re-opened, then it would be "feedback".
15
Chapter 4. Issue Lifecycle and Workflow
• Closed - This status reflects that the issue is completely closed and no further actions are
required on it. It also typically hides the issue from the View Issues page. Some teams
use "closed" to reflect sign-off by the reporter and others use it to reflect the fact that the
fix has been released to customers.
Workflow
Now that we have covered how an issue gets created, and what are the different statuses
during the life cycle of such issues, the next step is to define the workflow. In other words,
how issues move from one status to another and who has access to trigger such transitions.
MantisBT provides the ability for teams to define their own custom workflow which works
on top of their custom status. The workflow dictates the valid transitions between statuses
and the user access level required of the user who triggers such transition.
Workflow Transitions
This "Manage > Manage Configuration > Workflow Transitions" page allows users with
ADMINISTRATOR access level to do the following tasks.
• Define the valid next statuses for each status.
• Define the default next status for each status.
• Define the minimum access level required for a user to transition to each status.
• Define the default status for newly created issues.
• Define the status at which the issue is considered resolved. Any issues with this status
code greater than or equal to the specified status will be considered resolved.
• Define the status which is assigned to issues that are re-opened.
• Define the required access level to change the workflow.
Note that the scope of the applied change is dependent on the selected project. If "All
Projects" is selected, then the configuration is to be used as the default for all projects,
unless overidden by a specific project. To configure for a specific project, switch to the
project via the combobox at the top right corner of the screen.
Workflow Thresholds
This "Manage > Manage Configuration > Workflow Thresholds" page allows users with
ADMINISTRATOR access level to define the thresholds required to do certain actions.
Following is a list of such actions and what they mean:
• Report an issue - The access levels that are allowed to report an issue.
• Update an issue - The access levels that are allowed to update the header information of
an issue.
• Allow issue to be closed on resolved - The access levels that are allow to resolve and
close an issue in one step.
• Allow reporter to close issue - Indicates if reporters should be allowed to close issues
reported by them.
• Monitor an issue - The access levels required for a user to be able to monitor an issue.
Once a user monitors an issue, the user will be included in all future email notifications
relating to changes in the issue.
16
Chapter 4. Issue Lifecycle and Workflow
• Handle an issue - The access levels required for a user to be shown in the list of users
that can handle an issue.
• Assign an issue - The access levels required for a user to be able to change the handler
(i.e. assign / unassign) an issue.
• Move an issue - The access levels required for a user to be able to move an issue from one
project to another. (TODO: are these access levels evaluated against source or destination
project?).
• Delete an issue - The access levels required for a user to be able to delete an issue.
• Reopen an issue - The access levels required for a user to be able to re-open a resolved
or closed issue.
• Allow Reporter to re-open Issue - Whether the reporter of an issue can re-open a resolved
or closed issue, independent of their access level.
• Status to which a reopened issue is set - This is the status to which an issue is set after it
is re-opened.
• Resolution to which a reopen issue is set - The resolution to set on issues that are re-
opened.
• Status where an issue is considered resolved - The status at which an issue is considered
resolved.
• Status where an issue becomes readonly - Issues with such status and above are consid-
ered read-only. Read-only issues can only be modified by users with a configured access
level. Read-only applies to the issue header information as well as other issue related
information like relationships, attachments, notes, etc.
• Update readonly issues - The access levels required for a user to be able to modify a
readonly issue.
• Update issue status - The access levels required for a user to be able to modify the status
of an issue.
• View private issues - The access levels for a user to be able to view a private issue.
• Set view status (public vs. private) - The access level for a user to be able to set whether
an issue is private or public, when reporting the issue. If the user reporting the issues
doesn’t have the required access, then the issue will be created with the default view
state.
• Update view status (public vs private) - The access level required for a user to be able to
update the view status (i.e. public vs. private).
• Show list of users monitoring issue - The access level required for a user to be able to
view the list of users monitoring an issue.
• Set status on assignment of handler - The access levels required for a user to be able to
re-assign an issue when changing its status.
• Status to set auto-assigned issues to - The status - This is the status that is set on issues
that are auto assigned to users that are associated with the category that the issuer is
reported under.
• Limit reporter’s access to their own issues - When set, reporters are only allow to view
issues that they have reported.
• Add notes - The access levels required for users to be able to add notes.
• Update notes - The access levels required for users to be able to update issue notes.
• Allow user to edit their own issue notes - A flag that indicates the ability for users to edit
issue notes report by them.
• Delete note - The access levels required for a user to delete a note that they may or may
not have reported themselves.
17
Chapter 4. Issue Lifecycle and Workflow
• View private notes - The access levels required for a user to be able to view private notes
associated with an issue that they have access to view.
• View Change Log - The access levels required for a user to be able to view the change
log.
• View Assigned To - The access levels required for a user to be able to know the handler
of an issue that they have access to.
• View Issue History - The access levels required for a user to be able to view the history
of changes of an issue.
• Send reminders - The access levels required for a user to be able to send reminders to
other users relating to an issue that they have access to.
18
Chapter 5. Configuration
Database
The database settings must be set in order for the package to work properly. These settings
should be provided to you by your system administrator or your hosting company.
$g_hostname
Host name or connection string for Database server. The default value is localhost. For
MySql, this should be hostname or hostname:port (e.g. localhost:3306).
$g_db_username
User name to use for connecting to the database. The user needs to have read/write
access to the MantisBT database. The default user name is "root".
$g_db_password
Password for the specified user name. The default password is empty.
$g_database_name
Name of database that contains MantisBT tables. The default name is ’bugtracker’.
$g_db_schema
The database schema (used in case of DB2), otherwise should be left blank.
$g_db_type
The supported database types include: ’mysql’ or ’mysqli’ for MySQL, ’pgsql’ for Post-
greSQL, ’mssql’ for MS SQL Server, ’oci8’ for Oracle, and ’db2’ for DB2. It is important
to make sure that the PHP extension corresponding to the database type is enabled.
Path
These path settings are important for proper linking within MantisBT. In most scenarios
the default values should work fine, and you should not need to override them.
$g_path
URL to your installation as seen from the web browser; this is what
you type into the URL field. Requires trailing ’/’ character. eg.
’ In the following example https protocol is
used: eg. ’ MantisBT will default this to the
correct value. However, in some cases it might be necessary to override the default.
This is typically needed when an installation can be accessed by multiple URLs
(internal vs external).
$g_icon_path
This is the URL to the icons (images) directory as seen from the web browser. All
MantisBT images/icons are loaded from this URL. The default value for this URL is
based on $g_path (i.e. ’%path%images/’). Note that a trailing ’/’ is required.
$g_short_path
Short web path without the domain name. This requires the trailing ’/’.
19