Netframwork 2.0 (phần 7) doc
Bạn đang xem bản rút gọn của tài liệu. Xem và tải ngay bản đầy đủ của tài liệu tại đây (403.08 KB, 50 trang )
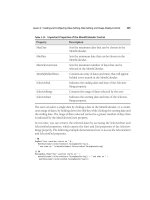
Lesson 2: Working with Parameters in SQL Commands 275
The following code creates an Output parameter:
' VB
Dim TotalCostParameter As New SqlParameter("@TotalCost", SqlDbType.Money)
TotalCostParameter.Direction = ParameterDirection.Output
// C#
SqlParameter TotalCostParameter = new SqlParameter("@TotalCost", SqlDbType.Money);
TotalCostParameter.Direction = ParameterDirection.Output;
Adding Parameters to Command Objects
Command objects have a Parameters property that represents a collection of parame-
ters for that command (for example, the SqlParameter.Parameters property). After you
create a parameter, you must add it to the Parameters collection of the Command object
that will execute the SQL statement or stored procedure that uses the parameter.
The following code illustrates how to add a parameter to a Command object (assuming
the GetCostCommand already exists):
' VB
GetCostCommand.Parameters.Add(TotalCostParameter)
// C#
GetCostCommand.Parameters.Add(TotalCostParameter);
Lab: Working with Parameters
In this lab you practice using parameters in Command objects. You will pass parame-
ters to stored procedures as well as SQL statements.
� Exercise 1: Creating and Executing a Parameterized SQL Statement
For this exercise, create a form that executes a parameterized query by allowing the
user to enter a value into a TextBox that will be passed to the database as the param-
eter in a query.
1. Create a new Windows application and name it ParameterizedQueries.
2. Add a TextBox to the form and set the following properties:
❑ Name = CityTextBox
❑ Text = London
3. Add a second TextBox and set the following properties:
❑ Name = ResultsTextBox
❑ MultiLine = True
276 Chapter 6 Working with Data in a Connected Environment
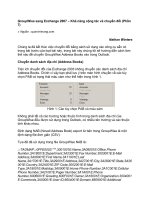
4. Add a button and set the following properties. Now, the form should resemble
Figure 6-3:
❑ Name = ExecuteSqlButton
❑ Text = Execute SQL
Figure 6-3 Form with controls in preparation for executing the parameterized SQL statement
5. Double-click the Execute SQL button to create the button-click event handler
and switch the form to code view.
6. Add references to the System.Data and System.Data.SqlClient namespaces.
7. Add code to create a connection on the form.
At this point, your form code should look like the following (substitute a valid
connection string for the NorthwindConnection):
' VB
Imports System.Data
Imports System.Data.SqlClient
Public Class Form1
Private NorthwindConnection As New SqlConnection _
("Data Source=<ValidServerName>;Initial Catalog=Northwind;Integrated
Security=True")
Private Sub ExecuteSqlButton_Click _
(ByVal sender As System.Object, ByVal e As System.EventArgs) _
Handles ExecuteSqlButton.Click
End Sub
End Class
// C#
using System;
using System.Collections.Generic;
Lesson 2: Working with Parameters in SQL Commands 277
using System.ComponentModel;
using System.Data;
using System.Drawing;
using System.Text;
using System.Windows.Forms;
using System.Data.SqlClient;
namespace ParameterizedQueries
{
public partial class Form1 : Form
{
private SqlConnection NorthwindConnection = new SqlConnection
("Data Source=.\\sqlexpress;Initial Catalog=Northwind;Integrated Security=True");
public Form1()
{
InitializeComponent();
}
private void ExecuteSqlButton_Click(object sender, EventArgs e)
{
}
}
}
8. Add the following code to the ExecuteSqlButton_Click method to create a new
command object and set it to the parameterized query:
' VB
' Create a new Command object
Dim CustomersByCityCommand As New SqlCommand
' Set the command properties
CustomersByCityCommand.Connection = NorthwindConnection
CustomersByCityCommand.CommandType = CommandType.Text
CustomersByCityCommand.CommandText = & _
"SELECT CustomerID, CompanyName, City " & _
"FROM Customers " & _
"WHERE City = @City"
// C#
// Create a new Command object
SqlCommand CustomersByCityCommand = new SqlCommand();
// Set the command properties
CustomersByCityCommand.Connection = NorthwindConnection;
CustomersByCityCommand.CommandType = CommandType.Text;
CustomersByCityCommand.CommandText = "SELECT CustomerID, CompanyName, City " +
"FROM Customers " +
"WHERE City = @City";
278 Chapter 6 Working with Data in a Connected Environment
9. Add the following code below the previous code (but still within the event han-
dler) to create the parameter and assign it to the command:
' VB
' Create the @City parameter
Dim CityParameter As New SqlParameter
' Set its name and data type
CityParameter.ParameterName = "@City"
CityParameter.SqlDbType = SqlDbType.NVarChar
' Since the city column in the database allows
' null values we can set the IsNullable property
' to allow null values.
CityParameter.IsNullable = True
' Add the parameter to the Commmand object
CustomersByCityCommand.Parameters.Add(CityParameter)
// C#
// Create the @City parameter
SqlParameter CityParameter = new SqlParameter();
// Set its name and data type
CityParameter.ParameterName = "@City";
CityParameter.SqlDbType = SqlDbType.NVarChar;
// Since the city column in the database allows
// null values we can set the IsNullable property
// to allow null values.
CityParameter.IsNullable = true;
// Add the parameter to the Commmand object
CustomersByCityCommand.Parameters.Add(CityParameter);
10. Now add the following code that will set the value of the parameter to whatever
is typed into the text box, set the code to run the query, and display the results
in the ResultsTextBox. (Add this code below the previously added code but con-
tinue to keep it within the event handler.)
' VB
' Set the parameters value to the
' the text in the CityTextBox
CityParameter.Value = CityTextBox.Text
' Create a StringBuilder to store the results of the query
Dim results As New System.Text.StringBuilder
' You must open the connection before executing the command
CustomersByCityCommand.Connection.Open()
Lesson 2: Working with Parameters in SQL Commands 279
' Assign the results of the SQL statement to a data reader
Dim reader As SqlDataReader = CustomersByCityCommand.ExecuteReader
While reader.Read
For i As Integer = 0 To reader.FieldCount - 1
results.Append(reader(i).ToString & vbTab)
Next
results.Append(Environment.NewLine)
End While
' Close the data reader and the connection
reader.Close()
CustomersByCityCommand.Connection.Close()
ResultsTextBox.Text = results.ToString
// C#
// Set the parameters value to the
// text in the CityTextBox
CityParameter.Value = CityTextBox.Text;
// Create a StringBuilder to store the results of the query
System.Text.StringBuilder results =new System.Text.StringBuilder();
// You must open the connection before executing the command
CustomersByCityCommand.Connection.Open();
// Assign the results of the SQL statement to a data reader
SqlDataReader reader = CustomersByCityCommand.ExecuteReader();
while (reader.Read())
{
for (int i=0; i< reader.FieldCount; i++)
{
results.Append(reader[i].ToString() + "\t");
}
results.Append(Environment.NewLine);
}
// Close the data reader and the connection
reader.Close();
CustomersByCityCommand.Connection.Close();
ResultsTextBox.Text = results.ToString();
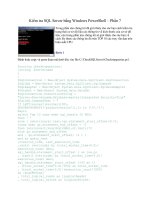
11. Run the application and click the Execute SQL button. As shown in Figure 6-4,
the application displays the command results.
280 Chapter 6 Working with Data in a Connected Environment
Figure 6-4 Form displaying data after executing the parameterized SQL statement
12. Type Madrid and rerun the query (click the Execute SQL button).
13. Verify that the results show only customers from the City value passed in to the
parameter.
� Exercise 2: Creating and Executing a Parameterized Stored Procedure
1. Create a new Windows application and name it ParameterizedStoredProcedure.
2. Add a TextBox to the form and set the following properties:
❑ Name = CategoryNameTextBox
❑ Text = Beverages
3. Add a second TextBox and set the following properties:
❑ Name = OrdYearTextBox
❑ Text = 1997
4. Add a third TextBox and set the following properties:
❑ Name = ResultsTextBox
❑ MultiLine = True
❑ ScrollBars = Both
5. Add a button and set the following properties. The form should now resemble
Figure 6-5:
❑ Name = ExecuteStoredProcedureButton
❑ Text = Execute Stored Procedure
Lesson 2: Working with Parameters in SQL Commands 281
Figure 6-5 Form with controls in preparation for executing the parameterized stored procedure
6. Double-click the Execute Stored Procedure button to create the button-click event
handler and switch the form to code view.
7. Add references to the System.Data and System.Data.SqlClient namespaces.
8. Add code to create a connection on the form.
At this point, your form code should look like the following (substitute a valid
connection string for the NorthwindConnection):
' VB
Imports System.Data
Imports System.Data.SqlClient
Public Class Form1
Private NorthwindConnection As New SqlConnection _
("Data Source=<ValidServerName>;Initial Catalog=Northwind;Integrated
Security=True")
Private Sub ExecuteStoredProcedureButton_Click _
(ByVal sender As System.Object, ByVal e As System.EventArgs) _
Handles ExecuteStoredProcedureButton.Click
End Sub
End Class
// C#
using System;
using System.Collections.Generic;
using System.ComponentModel;
using System.Data;
using System.Drawing;
using System.Text;
using System.Windows.Forms;
282 Chapter 6 Working with Data in a Connected Environment
using System.Data.SqlClient;
namespace ParameterizedStoredProcedureCS
{
public partial class Form1 : Form
{
public Form1()
{
InitializeComponent();
}
private SqlConnection NorthwindConnection = new SqlConnection
("Data Source=<ValidServerName>;Initial Catalog=Northwind;" +
"Integrated Security=True");
private void ExecuteStoredProcedureButton_Click(object sender, EventArgs e)
{
}
}
}
9. Add the following code to the ExecuteStoredProcedureButton_Click method to cre-
ate a new Command object and set it to the SalesByCategory stored procedure:
' VB
' Create a new Command object
Dim SalesByCategoryCommand As New SqlCommand
' Set the command properties
SalesByCategoryCommand.Connection = NorthwindConnection
SalesByCategoryCommand.CommandType = CommandType.StoredProcedure
SalesByCategoryCommand.CommandText = "SalesByCategory"
// C#
// Create a new Command object
SqlCommand SalesByCategoryCommand = new SqlCommand();
// Set the command properties
SalesByCategoryCommand.Connection = NorthwindConnection;
SalesByCategoryCommand.CommandType = CommandType.StoredProcedure;
SalesByCategoryCommand.CommandText = "SalesByCategory";
10. This stored procedure takes two parameters, so add the following code below
the previous code to create the parameters and assign them to the command:
' VB
' Create the @CategoryName parameter
Dim CategoryNameParameter As New SqlParameter
' Set its name and data type
CategoryNameParameter.ParameterName = "@CategoryName"
CategoryNameParameter.SqlDbType = SqlDbType.NVarChar
Lesson 2: Working with Parameters in SQL Commands 283
' Create the OrdYear parameter
Dim OrdYearParameter As New SqlParameter("@OrdYear", SqlDbType.NVarChar)
' Add the parameters to the Commmand object
SalesByCategoryCommand.Parameters.Add(CategoryNameParameter)
SalesByCategoryCommand.Parameters.Add(OrdYearParameter)
// C#
// Create the @CategoryName parameter
SqlParameter CategoryNameParameter = new SqlParameter();
// Set its name and data type
CategoryNameParameter.ParameterName = "@CategoryName";
CategoryNameParameter.SqlDbType = SqlDbType.NVarChar;
// Create the OrdYear parameter
SqlParameter OrdYearParameter =new SqlParameter("@OrdYear", SqlDbType.NVarChar);
// Add the parameters to the Commmand object
SalesByCategoryCommand.Parameters.Add(CategoryNameParameter);
SalesByCategoryCommand.Parameters.Add(OrdYearParameter);
11. Now add the code that will set the value of the parameters to whatever is typed
into the two text boxes, set the code to run the query, and display the results in
the ResultsTextBox.
' VB
' Set the parameter values to the
' text in the CategoryNameTextBox
' and the OrdYearTextBox
CategoryNameParameter.Value = CategoryNameTextBox.Text
OrdYearParameter.Value = OrdYearTextBox.Text
' Create a StringBuilder to store the results of the query
Dim results As New System.Text.StringBuilder
' Open the connection before executing the command
SalesByCategoryCommand.Connection.Open()
' Assign the results of the SQL statement to a data reader
Dim reader As SqlDataReader = SalesByCategoryCommand.ExecuteReader
While reader.Read
For i As Integer = 0 To reader.FieldCount - 1
results.Append(reader(i).ToString & vbTab)
Next
results.Append(Environment.NewLine)
End While
' Close the data reader and the connection
reader.Close()
SalesByCategoryCommand.Connection.Close()
284 Chapter 6 Working with Data in a Connected Environment
ResultsTextBox.Text = results.ToString
// C#
// Set the parameter values to the
// text in the CategoryNameTextBox
// and the OrdYearTextBox
CategoryNameParameter.Value = CategoryNameTextBox.Text;
OrdYearParameter.Value = OrdYearTextBox.Text;
// Create a StringBuilder to store the results of the query
System.Text.StringBuilder results = new System.Text.StringBuilder();
// Open the connection before executing the command
SalesByCategoryCommand.Connection.Open();
// Assign the results of the SQL statement to a data reader
SqlDataReader reader = SalesByCategoryCommand.ExecuteReader();
while (reader.Read())
{
for(int i = 0; i< reader.FieldCount; i++)
{
results.Append(reader[i].ToString() + "\t");
}
results.Append(Environment.NewLine);
}
// Close the data reader and the connection
reader.Close();
SalesByCategoryCommand.Connection.Close();
ResultsTextBox.Text = results.ToString();
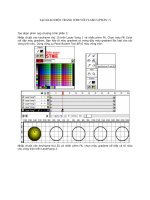
12. Run the application and click the Execute Stored Procedure button (see Figure
6-6).
Figure 6-6 Form displaying data after executing the parameterized stored procedure
Lesson 2: Working with Parameters in SQL Commands 285
13. Now try typing another category name and executing the stored procedure, ver-
ifying that the results are now displaying a list of products from the selected cat-
egory. (For example, type
Condiments, Seafood, or Produce.)
� Exercise 3: Using InputOutput and Output Parameters
1. Create a new Windows application and name it InputOutputParameters.
2. Add a TextBox to the form and set the following properties:
❑ Name = OrderIDTextBox
❑ Text = 10250
3. Add a second TextBox and set its Name property to FreightCostTextBox.
4. Add a button and set the following properties:
❑ Name = GetFreightCostButton
❑ Text = Get Freight Cost
Below the button, add a second set of controls.
5. Add a TextBox and set the following properties:
❑ Name = CompanyNameTextBox
❑ Text = Alfreds Futterkiste
6. Add another TextBox and set its Name property to ContactNameTextBox.
7. Add a button and set the following properties. The form should now resemble
Figure 6-7:
❑ Name = GetContactNameButton
❑ Text = Get Contact Name
Figure 6-7 Form with controls in preparation for demonstrating InputOutput parameters
8. Double-click the Get Freight Cost button to create an event handler.
286 Chapter 6 Working with Data in a Connected Environment
9. Add references to the System.Data and System.Data.SqlClient namespaces.
10. Add code to create a connection on the form.
At this point, your form code should look like the following (substitute a valid
connection string for the NorthwindConnection):
' VB
Imports System.Data
Imports System.Data.SqlClient
Public Class Form1
Private NorthwindConnection As New SqlConnection _
("Data Source=<ValidServerName>;Initial Catalog=Northwind;Integrated
Security=True")
Private Sub GetFreightCostButton_Click _
(ByVal sender As System.Object, ByVal e As System.EventArgs) _
Handles GetFreightCostButton.Click
End Sub
End Class
// C#
using System;
using System.Collections.Generic;
using System.ComponentModel;
using System.Data;
using System.Drawing;
using System.Text;
using System.Windows.Forms;
using System.Data.SqlClient;
namespace InputOutputParametersCS
{
public partial class Form1 : Form
{
public Form1()
{
InitializeComponent();
}
private SqlConnection NorthwindConnection = new SqlConnection
("Data Source=<ValidServerName>;Initial Catalog=Northwind;" +
"Integrated Security=True");
private void GetFreightCostButton_Click(object sender, EventArgs e)
{
}
}
}
Lesson 2: Working with Parameters in SQL Commands 287
11. Add the following code to the GetFreightCostButton event handler:
' VB
' Create a new Command object
Dim GetFreightCost As New SqlCommand
' Set the command properties
GetFreightCost.Connection = NorthwindConnection
GetFreightCost.CommandType = CommandType.StoredProcedure
GetFreightCost.CommandText = "GetFreightCost"
' Create the Output parameter to receive the freight cost
Dim FreightCostParameter As New SqlParameter
FreightCostParameter.Direction = ParameterDirection.Output
' Set its name and data type
FreightCostParameter.ParameterName = "@Freight"
FreightCostParameter.SqlDbType = SqlDbType.Money
' Create the OrderID parameter and set its value
Dim OrderIDParameter As New SqlParameter("@OrderID", SqlDbType.Int)
OrderIDParameter.Value = OrderIDTextBox.Text
' Add both parameters to the Commmand object
GetFreightCost.Parameters.Add(FreightCostParameter)
GetFreightCost.Parameters.Add(OrderIDParameter)
' open the connection before executing the command
GetFreightCost.Connection.Open()
' Execute the sproc; because we are using parameters
' to access the data we call ExecuteNonQuery instead of
' ExecuteReader.
GetFreightCost.ExecuteNonQuery()
GetFreightCost.Connection.Close()
FreightCostTextBox.Text = Format(FreightCostParameter.Value, "c")
// C#
// Create a new Command object
SqlCommand GetFreightCost = new SqlCommand();
// Set the command properties
GetFreightCost.Connection = NorthwindConnection;
GetFreightCost.CommandType = CommandType.StoredProcedure;
GetFreightCost.CommandText = "GetFreightCost";
// Create the Output parameter to receive the freight cost
SqlParameter FreightCostParameter = new SqlParameter();
FreightCostParameter.Direction = ParameterDirection.Output;
// Set its name and data type
FreightCostParameter.ParameterName = "@Freight";
FreightCostParameter.SqlDbType = SqlDbType.Money;
288 Chapter 6 Working with Data in a Connected Environment
// Create the OrderID parameter and set its value
SqlParameter OrderIDParameter =new SqlParameter("@OrderID", SqlDbType.Int);
OrderIDParameter.Value = OrderIDTextBox.Text;
// Add both parameters to the Commmand object
GetFreightCost.Parameters.Add(FreightCostParameter);
GetFreightCost.Parameters.Add(OrderIDParameter);
// open the connection before executing the command
GetFreightCost.Connection.Open();
// Execute the sproc; because we are using parameters
// to access the data we call ExecuteNonQuery instead of
// ExecuteReader.
GetFreightCost.ExecuteNonQuery();
GetFreightCost.Connection.Close();
FreightCostTextBox.Text = FreightCostParameter.Value.ToString();
12. Run the application and click the Get Freight Cost button.
The Freight Cost TextBox displays 65.83, the cost of freight for order number
10250. Type other valid OrderID numbers into the Order Id TextBox and run
the stored procedure to verify that the output parameter contains the correct
freight cost for those orders.
Now that you’ve seen how to use output parameters that return data from the
database, let’s implement the Get Contact name functionality and see how to use
InputOutput parameters to both send data into the database as well as return
data from the database.
13. Double-click the GetContactName button to create an event handler.
14. Add the following code to the GetContactName handler:
' VB
' Create a new Command object
Dim GetContactNameCommand As New SqlCommand
' Set the command properties
GetContactNameCommand.Connection = NorthwindConnection
GetContactNameCommand.CommandType = CommandType.StoredProcedure
GetContactNameCommand.CommandText = "GetContactName"
' Create the InputOutput parameter to send and receive data
Dim NameParameter As New SqlParameter
NameParameter.Direction = ParameterDirection.InputOutput
' Set its name, data type, and value
NameParameter.ParameterName = "@Name"
NameParameter.SqlDbType = SqlDbType.NVarChar
NameParameter.Value = CompanyNameTextBox.Text
' Add the parameters to the Commmand object
Lesson 2: Working with Parameters in SQL Commands 289
GetContactNameCommand.Parameters.Add(NameParameter)
' Open the connection before executing the command
GetContactNameCommand.Connection.Open()
' Execute the sproc
GetContactNameCommand.ExecuteNonQuery()
GetContactNameCommand.Connection.Close()
ContactNameTextBox.Text = NameParameter.Value.ToString
// C#
// Create a new Command object
SqlCommand GetContactNameCommand = new SqlCommand();
// Set the command properties
GetContactNameCommand.Connection = NorthwindConnection;
GetContactNameCommand.CommandType = CommandType.StoredProcedure;
GetContactNameCommand.CommandText = "GetContactName";
// Create the InputOutput parameter to send and receive data
SqlParameter NameParameter = new SqlParameter();
NameParameter.Direction = ParameterDirection.InputOutput;
// Set its name, data type, and value
NameParameter.ParameterName = "@Name";
NameParameter.SqlDbType = SqlDbType.NVarChar;
NameParameter.Value = CompanyNameTextBox.Text;
// Add the parameters to the Commmand object
GetContactNameCommand.Parameters.Add(NameParameter);
// Open the connection before executing the command
GetContactNameCommand.Connection.Open();
// Execute the sproc
GetContactNameCommand.ExecuteNonQuery();
GetContactNameCommand.Connection.Close();
ContactNameTextBox.Text = NameParameter.Value.ToString();
15. Run the application and click the Get Contact Name button.
The Contact name TextBox displays the contact name record for Alfreds Fut-
terkiste, Maria Anders. Type other valid company names from the Customers
table and the Contact name TextBox will display their contacts.
Lesson Summary
■ Command objects contain collections of Parameter objects that move data back
and forth between the application and the database.
■ Parameters can be Input parameters, Output parameters, or Input/Output
parameters.
290 Chapter 6 Working with Data in a Connected Environment
■ Parameters are assigned data types consistent with the database data types (as
opposed to the .NET Framework data types).
■ To facilitate passing user input to a SQL statement using parameters, a parame-
ter can be assigned the value in a control at run time, such as a TextBox.
Lesson Review
The following questions are intended to reinforce key information presented in this
lesson. The questions are also available on the companion CD if you prefer to review
them in electronic form.
NOTE Answers
Answers to these questions and explanations of why each choice is correct or incorrect are located
in the “Answers” section at the end of the book.
1. When would you typically use an Input parameter? (Choose all that apply.)
A. When the parameter value is created based on user input
B. When the parameter is used to send data from the application to the database
C. When the command is set to execute a statement with a Where clause
D. When the parameter value is passed to an Insert statement
2. Where are the three primary kinds of parameters?
A. Input, Integer, String
B. Integer, String, DateTime
C. int, varchar, nvarchar
D. Input, Output, InputOutput
3. How do you determine the actual SQL datatype of a SqlParameter (the type
expected by the SQL Server)?
A. It is the .NET Framework data type in your application that the parameter
represents.
B. It is the type of column or data in SQL Server that the command expects.
C. It is the type of column in a DataTable that it represents.
D. It is any type defined in the SqlDbDataType enumeration.
Lesson 3: Saving and Retrieving BLOB Values in a Database 291
Lesson 3: Saving and Retrieving BLOB Values in a
Database
This lesson describes how to work with BLOBs (binary large objects) using Command
objects. BLOBs in a database are more complex than simple strings containing names
and addresses or numeric values containing integers or money values. BLOBs are
things like graphics and photos, documents saved in binary formats, and even com-
plete assemblies or executables that you want to store in a database. Unlike running
queries or stored procedures that return “simple” data types, working with binary
objects is a little more complex.
After this lesson, you will be able to:
■ Obtain BLOB values from a database using a DataReader object.
Estimated lesson time: 45 minutes
Working with BLOBs
Saving and fetching binary data presents interesting problems that are typically not
encountered when querying standard rows of data. The problems arise because you
will probably not want to move the entire BLOB in one piece but will likely need to
break it up into smaller portions. For example, consider having to move a large binary
that is several megabytes in size. Loading the entire BLOB into a variable consumes a
lot of memory and can seriously affect the performance of your application. Having to
work with a table of these BLOBs, you can quickly see the dilemma.
The good thing is that the .NET Framework provides classes that are specifically
designed for moving large amounts of binary data. Specifically, access to these
classes—for example, the BinaryReader and BinaryWriter classes, the FileStream and
MemoryStream classes, and so on—is enabled in the System.IO namespace. Although
this lesson does not use all the available stream objects, it should provide enough of
a starting point to understand the basics of saving and fetching binary data from a
database.
BLOBs and the DataReader
In previous lessons, you have seen that the main ADO.NET object for accessing
retrieved data is the DataReader. Although the DataReader provides an easy model for
working with records where the number of columns and layout of the data are known,
292 Chapter 6 Working with Data in a Connected Environment
(meaning you have been able to easily iterate through the reader and display the data),
it also provides a means for returning BLOB data. By setting its CommandBehavior to
SequentialAccess, you can then call the GetBytes method, which allows you to read the
data in smaller, user-definable amounts. The bytes that make up a BLOB are trans-
ported in and out of the database to your application using byte arrays.
The following exercise demonstrates how to read and write binary data to the data-
base, providing two distinctly different models. In the first model, you know how big
your data is and you save it in one action. This is illustrated in the SaveBlobToDatabase
method. In the FetchBlobFromDatabase method, you read the bits into a file, but you
do it in small chunks defined by the BufferSize variable.
� Exercise 1: Saving and Retrieving BLOB Values
This sample application demonstrates several of the concepts explained in this chap-
ter. In addition to just saving and fetching BLOB values, it also sets up some infra-
structure for the application that uses Command objects to create a new table in the
database (to hold the BLOB values) and executes parameterized queries to populate
the list of available BLOBs and retrieve the BLOB value. The code has been compart-
mentalized, so it should be very easy to parse the routines that are important to you.
1. Create a new Windows application and name it BLOBSample.
2. Add a ComboBox to the form and set its Name property to BlobList.
3. Add a button below the ComboBox and set the following properties:
❑ Name = RefreshBlobListButton
❑ Text = Refresh List
4. Add a second button and set the following properties:
❑ Name = SaveBlobButton
❑ Text = Save BLOB to Database
5. Add a third button and set the following properties (see Figure 6-8):
❑ Name = FetchBlobButton
❑ Text = Fetch BLOB from Database
Lesson 3: Saving and Retrieving BLOB Values in a Database 293
Figure 6-8 Form with controls in preparation for manipulating BLOB data
6. Double-click the form to create a Form_Load event handler.
Because this lesson’s objective is to explain working with BLOB values, let’s just
add all the infrastructure code at once and get the form set up. You can analyze
this code at your leisure!
7. Replace the Form1 code with the following:
' VB
Imports System.Data
Imports System.Data.SqlClient
Imports System.IO
Public Class Form1
Private NorthwindConnection As New SqlConnection _
("Data Source=.\sqlexpress;Initial Catalog=Northwind;Integrated Security=True")
Private CompleteFilePath As String = ""
Private SavePath As String = ""
Private Sub GetCompleteFilePath()
Dim OpenDialog As New OpenFileDialog
OpenDialog.Title = "Select Document File to Save"
OpenDialog.ShowDialog()
CompleteFilePath = OpenDialog.FileName
End Sub
Private Sub GetSavePath()
Dim SavePathDialog As New FolderBrowserDialog
SavePathDialog.Description = "Select a folder to restore BLOB file to"
SavePathDialog.ShowDialog()
SavePath = SavePathDialog.SelectedPath
End Sub
' Create a table to hold our BLOB values
Private Sub CreateDocumentStorageTable()
Dim CreateTableCommand As New SqlCommand
CreateTableCommand.Connection = NorthwindConnection
CreateTableCommand.CommandType = CommandType.Text
294 Chapter 6 Working with Data in a Connected Environment
CreateTableCommand.CommandText = "IF OBJECT_ID ( 'DocumentStorage' ) IS NOT NULL " & _
"DROP TABLE DocumentStorage; " & _
"CREATE TABLE DocumentStorage(" & _
"DocumentID int IDENTITY(1,1) NOT NULL, " & _
"FileName nvarchar(255) NOT NULL, " & _
"DocumentFile varbinary(max) NOT NULL)"
CreateTableCommand.Connection.Open()
CreateTableCommand.ExecuteNonQuery()
CreateTableCommand.Connection.Close()
End Sub
Private Sub Form1_Load(ByVal sender As System.Object, ByVal e As System.EventArgs)
Handles MyBase.Load
Dim response As DialogResult = MessageBox.Show("Create the Document Storage Table?"
& _
Environment.NewLine & "Click Yes to create a new DocumentStorage table. Click No
if you already have one!", _
"Create DocumentStorage table", MessageBoxButtons.YesNo, _
MessageBoxIcon.Question, MessageBoxDefaultButton.Button2)
Select Case response
Case Is = Windows.Forms.DialogResult.Yes
CreateDocumentStorageTable()
Case Is = Windows.Forms.DialogResult.No
refreshBlobList()
End Select
End Sub
Private Sub refreshBlobList()
Dim GetBlobListCommand As New SqlCommand _
("SELECT FileName FROM DocumentStorage", NorthwindConnection)
Dim reader As SqlDataReader
GetBlobListCommand.Connection.Open()
reader = GetBlobListCommand.ExecuteReader
While reader.Read
BlobList.Items.Add(reader(0))
End While
reader.Close()
GetBlobListCommand.Connection.Close()
BlobList.SelectedIndex = 0
End Sub
End Class
// C#
using System;
using System.Collections.Generic;
using System.ComponentModel;
using System.Data;
using System.Drawing;
using System.Text;
Lesson 3: Saving and Retrieving BLOB Values in a Database 295
using System.Windows.Forms;
using System.Data.SqlClient;
using System.IO;
namespace BlobSampleCS
{
public partial class Form1 : Form
{
public Form1()
{
InitializeComponent();
}
private SqlConnection NorthwindConnection = new SqlConnection
("Data Source=.\\sqlexpress;Initial Catalog=Northwind;Integrated Security=True");
private String CompleteFilePath = "";
private String SavePath = "";
private void GetCompleteFilePath()
{
OpenFileDialog OpenDialog = new OpenFileDialog();
OpenDialog.Title = "Select Document to Save";
OpenDialog.ShowDialog();
CompleteFilePath = OpenDialog.FileName;
}
private void GetSavePath()
{
FolderBrowserDialog SavePathDialog = new FolderBrowserDialog();
SavePathDialog.Description = "Select a folder to restore BLOB file to";
SavePathDialog.ShowDialog();
SavePath = SavePathDialog.SelectedPath;
}
// Create a table to hold our BLOB values.
private void CreateDocumentStorageTable()
{
SqlCommand CreateTableCommand = new SqlCommand();
CreateTableCommand.Connection = NorthwindConnection;
CreateTableCommand.CommandType = CommandType.Text;
CreateTableCommand.CommandText =
"IF OBJECT_ID ( 'DocumentStorage' ) IS NOT NULL " +
"DROP TABLE DocumentStorage; " +
"CREATE TABLE DocumentStorage(" +
"DocumentID int IDENTITY(1,1) NOT NULL, " +
"FileName nvarchar(255) NOT NULL, " +
"DocumentFile varbinary(max) NOT NULL)";
CreateTableCommand.Connection.Open();
CreateTableCommand.ExecuteNonQuery();
CreateTableCommand.Connection.Close();
}
296 Chapter 6 Working with Data in a Connected Environment
private void Form1_Load(object sender, EventArgs e)
{
DialogResult response = MessageBox.Show("Create the Document Storage Table?" +
Environment.NewLine +
"Click Yes to create a new DocumentStorage table." +
"Click No if you already have one!",
"Create DocumentStorage table", MessageBoxButtons.YesNo,
MessageBoxIcon.Question,
MessageBoxDefaultButton.Button2);
switch (response)
{
case DialogResult.Yes:
CreateDocumentStorageTable();
break;
case DialogResult.No:
RefreshBlobList();
break;
}
}
private void RefreshBlobList()
{
SqlCommand GetBlobListCommand = new SqlCommand
("SELECT FileName FROM DocumentStorage", NorthwindConnection);
SqlDataReader reader;
GetBlobListCommand.Connection.Open();
reader = GetBlobListCommand.ExecuteReader();
while (reader.Read())
{
BlobList.Items.Add(reader[0]);
}
reader.Close();
GetBlobListCommand.Connection.Close();
BlobList.SelectedIndex = 0;
}
}
}
8. Add the following code to save the BLOB to the database:
' VB
Private Sub SaveBlobToDatabase()
' This call lets you select the
' binary file to save As a BLOB
' in the database.
GetCompleteFilePath()
' The BLOB holds the byte array to save.
Dim BLOB() As Byte
Lesson 3: Saving and Retrieving BLOB Values in a Database 297
' The FileStream is the stream of bytes
' that represent the binary file.
Dim FileStream As New IO.FileStream _
(CompleteFilePath, IO.FileMode.Open, IO.FileAccess.Read)
' The reader reads the binary data from the FileStream.
Dim reader As New IO.BinaryReader(FileStream)
' The BLOB is asigned the bytes from the reader.
' The file length is passed to the ReadBytes method
' telling it how many bytes to read.
BLOB=
reader.ReadBytes(CInt(My.Computer.FileSystem.GetFileInfo(CompleteFilePath).Length))
FileStream.Close()
reader.Close()
' Create a command object to save
' the BLOB value.
Dim SaveDocCommand As New SqlCommand
SaveDocCommand.Connection = NorthwindConnection
SaveDocCommand.CommandText = "INSERT INTO DocumentStorage" & _
"(FileName, DocumentFile)" & _
"VALUES (@FileName, @DocumentFile)"
' Create parameters to store the filename and BLOB data.
Dim FileNameParameter As New SqlParameter("@FileName", SqlDbType.NChar)
Dim DocumentFileParameter As New SqlParameter("@DocumentFile", SqlDbType.Binary)
SaveDocCommand.Parameters.Add(FileNameParameter)
SaveDocCommand.Parameters.Add(DocumentFileParameter)
' Parse the filename out of the complete path
' and assign it to the parameter.
FileNameParameter.Value = _
CompleteFilePath.Substring(CompleteFilePath.LastIndexOf("\") + 1)
' Set the DocumentFile parameteter to the BLOB Value.
DocumentFileParameter.Value = BLOB
' Execute the command and save the BLOB to the database.
Try
SaveDocCommand.Connection.Open()
SaveDocCommand.ExecuteNonQuery()
MessageBox.Show(FileNameParameter.Value.ToString & _
" saved to database.", "BLOB Saved!", MessageBoxButtons.OK, _
MessageBoxIcon.Information)
Catch ex As Exception
MessageBox.Show(ex.Message, "Save Failed", _
MessageBoxButtons.OK, MessageBoxIcon.Error)
Finally
SaveDocCommand.Connection.Close()
End Try
End Sub
298 Chapter 6 Working with Data in a Connected Environment
// C#
private void SaveBlobToDatabase()
{
// This call lets you select the
// binary file to save As a BLOB
// in the database.
GetCompleteFilePath();
// The BLOB holds the byte array to save.
byte[] BLOB;
// The FileStream is the stream of bytes
// that represent the binary file.
System.IO.FileStream FileStream = new System.IO.FileStream _
(CompleteFilePath, System.IO.FileMode.Open, System.IO.FileAccess.Read);
// The reader reads the binary data from the FileStream.
System.IO.BinaryReader reader = new System.IO.BinaryReader(FileStream);
// The BLOB is asigned the bytes from the reader.
// The file length is passed to the ReadBytes method
// telling it how many bytes to read.
System.IO.FileInfo file = new FileInfo(CompleteFilePath);
BLOB = reader.ReadBytes((int)(file.Length));
FileStream.Close();
reader.Close();
// Create a command object to save
// the BLOB value.
SqlCommand SaveDocCommand = new SqlCommand();
SaveDocCommand.Connection = NorthwindConnection;
SaveDocCommand.CommandText = "INSERT INTO DocumentStorage" +
"(FileName, DocumentFile)" +
"VALUES (@FileName, @DocumentFile)";
// Create parameters to store the filename and BLOB data.
SqlParameter FileNameParameter = new SqlParameter("@FileName", SqlDbType.NChar);
SqlParameter DocumentFileParameter = new SqlParameter _
("@DocumentFile", SqlDbType.Binary);
SaveDocCommand.Parameters.Add(FileNameParameter);
SaveDocCommand.Parameters.Add(DocumentFileParameter);
// Parse the filename out of the complete path
// and assign it to the parameter.
FileNameParameter.Value = CompleteFilePath.Substring _
(CompleteFilePath.LastIndexOf("\\")+ 1);
// Set the DocumentFile parameteter to the BLOB Value.
DocumentFileParameter.Value = BLOB;
Lesson 3: Saving and Retrieving BLOB Values in a Database 299
// Execute the command and save the BLOB to the database.
try
{
SaveDocCommand.Connection.Open();
SaveDocCommand.ExecuteNonQuery();
MessageBox.Show(FileNameParameter.Value.ToString() + " saved to database.", _
"BLOB Saved!", MessageBoxButtons.OK, MessageBoxIcon.Information);
}
catch (Exception ex)
{
MessageBox.Show(ex.Message, "Save Failed", MessageBoxButtons.OK, _
MessageBoxIcon.Error);
}
finally
{
SaveDocCommand.Connection.Close();
}
}
9. Add the following code to retrieve the BLOB from the database and write it back
out as a file:
' VB
Private Sub FetchBlobFromDatabase()
' Verify there is a BLOB selected to retrieve.
If BlobList.Text = "" Then
MessageBox.Show("Select a BLOB to fetch from the ComboBox")
Exit Sub
End If
' Get the path to save the BLOB to.
GetSavePath()
' Create the Command object to fetch the selected BLOB.
Dim GetBlobCommand As New SqlCommand("SELECT FileName, DocumentFile " & _
"FROM DocumentStorage " & _
"WHERE FileName = @DocName", NorthwindConnection)
GetBlobCommand.Parameters.Add("@DocName", SqlDbType.NVarChar).Value = _
BlobList.Text
' Current index to write the bytes to
Dim CurrentIndex As Long = 0
' number of bytes to store in the BLOB.
Dim BufferSize As Integer = 100
' Actual number of bytes returned when calling GetBytes.
Dim BytesReturned As Long
' The Byte array used to hold the buffer.
Dim Blob(BufferSize - 1) As Byte