Bắt đầu với IBM Websphere smash - p 23 pps
Bạn đang xem bản rút gọn của tài liệu. Xem và tải ngay bản đầy đủ của tài liệu tại đây (607.33 KB, 10 trang )
ptg
202 Chapter 8 Database Access
case Types.BIGINT: case Types.INTEGER:
case Types.NUMERIC: case Types.SMALLINT:
case Types.TINYINT: case Types.DECIMAL:
case Types.DOUBLE: case Types.FLOAT:
type = "number"
break;
case Types.BINARY: case Types.BIT:
case Types.BOOLEAN:
type = "boolean"
break;
default:
type = "string"
break;
}
headers << [
name : rsMetaData.getColumnLabel(x),
field : 'C'+x, 'type':type
]
}
map.put( 'headers', headers )
// Process result set
def content = [
'identifier' : '_id_',
'label' : 'C1',
'items' : []
]
def rowCntr = 1
while (rs.next()) {
def row = [ '_id_': rowCntr ]
for( int c = 1; c <= rsMetaData.getColumnCount(); c++ ) {
def cellData = zero.util.XMLEncoder.escapeXML(
rs.getString(c) );
row.put( [ ('C'+c), cellData ] )
}
content.items << row
// Sanity check!
if ( rowCntr++ >= 10000 ) {
break
}
}
Download from www.wowebook.com
ptg
Database Access with pureQuery 203
map.put('content', content)
if ( rowCntr > 1 ) {
map.put('message', "Successfully retrieved ${rowCntr}
records")
} else {
map.put('message', "No records found")
}
} else {
// Assume an "update" (insert, update, delete)
def cnt = stmt.getUpdateCount()
map.put('message', "${cnt} records processed.")
}
} catch ( Exception e ) {
logger.INFO {'processSql: Error on SQL processing' + e}
map.put('message', "Error during SQL processing: ${e}")
} finally {
try { stmt.close() } catch (Exception e) {}
try { con.close() } catch (Exception e) {}
}
return map
}
The extra processing performed on the ResultsetMetaData is to build up a header sec-
tion so that when we return the results back to the browser, we can build a nicely formatted table.
WebSphere sMash DBA—The Database Administrator Application
If you have not guessed by now, we have all the makings of a DBA-style application. We can get
a list of data sources with connection details, obtain the schemas and tables for each data source,
get the columns for a table, and then enable a user to execute SQL based on all the information
we’ve provided. All that’s needed is to front these methods with REST accessors.
To support the DBA application, the JDBC scripts defined previously need to be made
available as REST services. Start by creating a new WebSphere sMash application called
Book.Database.DBA and then create a single file. Because all the database access logic is
encapsulated in the /app/scripts are of the application, the only logic needed by the REST ser-
vices is to parse any parameters, pass them to the appropriate method, and format the results into
a usable response. To make it easy on the WebSphere sMash DBA application, all responses are
formatted in a Dojo-specific DataStore JSON layout, which consists of a list of rows called items.
Within each item is a map of all the field-value pairs. There are a couple meta-fields that define
the ID member and the fields to be used as a label for presentation. Listing 8.39 provides a sample
Download from www.wowebook.com
ptg
204 Chapter 8 Database Access
Table 8.4 REST Resources for Database Access
REST Service Call Type Site Specific
/resources/ds GET (list) Get list of all available DataSources
/resources/ds/{ds} GET (singular) Get Schema details for a DataSource
/resources/dbInfo/{ds} GET (singular) Get Driver details for a given DataSource
/resources/ds/{ds}/table/{table} GET (singular) Get columns for Table within DataSource
/resources/ds/{ds}/sql POST Execute SQL within a DataSource
GET call for the list of DataSources for this application. This entry is located in /app/resources/
ds.groovy. All the other database functions are also configured with appropriate resource defini-
tions, as shown in Table 8.4. Because several services are dependent on a specific DataSource,
binding files (.bnd) are also defined as needed.
Listing 8.39 REST Resource to Obtain All DataSources
/*
* Obtain all available DataSources
* Returns:
* ItemFileReadStore Json object, with hierarchical format
* {"label":"uid","identifier":"uid","items":}
*/
def onList() {
logger.INFO {'onList called'};
def dbs = invokeMethod("dba", "getDataSources", null)
def map = ['label':'uid', 'identifier':'uid']
def items = []
dbs.each { items << ['uid': it] }
map.put('items', items)
invokeMethod('sendResponse', 'json', map)
logger.INFO {'onList finished'}
}
In Chapter 12, “Client-Side Programming with the Dojo Toolkit,” we’ll be creating a front
end that will take advantage of all these database-related REST services. Feel free to skip ahead,
or wait to savor the goodness.
Download from www.wowebook.com
ptg
Database Access with pureQuery 205
Command-Line Database Management
WebSphere sMash comes with several commands that can be accessed from the console or com-
mand line. These lend themselves particularly well to testing and building scripts. Let’s go over
each command and see how they work.
validatedb {dbKey}
This command is used to verify a database’s configuration. The CLI attempts to establish a con-
nection to the database manager defined in the first argument. If everything is OK, the command
says so; otherwise, it displays an appropriate error message. As an example, Listing 8.40 shows
two calls to validatedb. The first is to our properly defined bookmark configuration, and the
second is to another configuration called bad, which has an improper driver defined.
Listing 8.40 Two Runs of validatedb Command: One Good and One Bad
command> zero validatedb bookmark
CWPZT0600I: Command validatedb was successful
command> zero validatedb bad
[pdq][0][1.3.110] CWPZC9044E: Manager create failed for
/config/db/bad -> [pdq][0][1.3.110] com.mysql.InvalidDataSource;
Caused by: java.lang.ClassNotFoundException:
com.mysql.InvalidDataSource ;
Caused by: com.ibm.pdq.runtime.exception.DataRuntimeException:
[pdq][0][1.3.110] com.mysql.InvalidDataSource
runsql {dbKey} {sqlFile}
The runsql command is rather self-explanatory. You pass in a filename relative to the applica-
tion home directory, and the CLI will execute it. The SQL commands in the file can be any com-
bination of the following:
• Table data modifier queries, such as INSERT, UPDATE, and DELETE (but not
SELECT)
• Database alter methods, such as CREATE, DROP, and ALTER
• Database vendor-specific SQL commands to define databases, tables, indexes, and so on
You ma y op t to pla ce a ll a ct io ns i nt o a si ng le S QL fi le o r brea k th em u p in to lo gi ca l un it s.
Typically, you want a script that will reinitialize or create from scratch an entire database.
Because all actions within a SQL file are run under a single database transaction, a failure any-
where in the chain of statements will result in a rollback of the entire transaction.
Download from www.wowebook.com
ptg
206 Chapter 8 Database Access
By convention, you should place these SQL files into vendor-specific directories. These
files should be located within your project as follows:
{app_home}/config/sql/{db_vendor}/{app_name}_{action}.sql
As an example, we may have SQL files to create, drop, and populate the MySQL-based
bookmark table. We would end up with three files like those shown in Listing 8.41.
Listing 8.41 Database Manipulation Scripts
/config/sql/mysql/bookmark_create.sql
/config/sql/mysql/bookmark_populate.sql
/config/sql/mysql/bookmark_drop.sql
Now you can script your build process to run each of the SQL files in the proper order. This
sample assumes that your current directory is the application’s root folder (see Listing 8.42).
Listing 8.42 Running Database Scripts
zero runsql bookmark config/sql/mysql/bookmark_drop.sql
zero runsql bookmark config/sql/mysql/bookmark_create.sql
zero runsql bookmark config/sql/mysql/bookmark_populate.sql
Conclusion
This chapter has explored the various ways you can easily back your WebSphere sMash applica-
tions with relational databases. The Zero Resource Manager can deftly handle the process of
designing and populating databases, as well as handling all the standard database access and
modifier REST patterns, with literally a single line of code. When your needs grow beyond the
design simplicity of ZRM, using pureQuery to access your data provides a powerful and stream-
lined API for data processing. Low-level database access and manipulation is always available
through normal JDBC calls.
We hope that you can recognize the power and development efficiencies that come with
using ZRM and pureQuery to empower your applications with WebSphere sMash. When com-
pared with standard JDBC and other data access APIs, WebSphere sMash ranks right up there
with popcorn and cotton candy. So, you’ve been able to deliver that marketing request to gain
insight into the company’s data by the end of the day, and its not even lunch time! Take the rest of
the day off, and take your kids to the circus. Just stay clear of those creepy clowns.
Download from www.wowebook.com
ptg
207
Web application security is an obvious requirement in essentially any corporate project, but one
that is often underestimated or forgotten. WebSphere sMash provides a rich set of features to
assist in hardening your projects to meet today’s stringent requirements. In this chapter, we dis-
cuss the different areas where WebSphere sMash security is used to prevent the bad guys from
running roughshod over your site and accessing your company’s private data. There are several
facets of the security model that we need to cover, as shown in Figure 9.1.
Secure messaging consists of the following four characteristics:
• Confidentiality—Only the authorized party can access defined content. This is also
referred to as authorization.
• Integrity—Only the authorized party can modify the data content, and those changes
can be detected.
• Authentication—The identities of the sender and receivers of the content cannot be
disguised.
• Non-repudiation—The sender cannot deny a message’s origination. This is managed
through the digital signing of the data content.
Authentication is addressed in several different ways later in the chapter. The first two of
these security entities can be managed effectively through the transport layer using Secure Socket
Layer (SSL) encryption. SSL is the standard solution for web application security. For web appli-
cations, we simply request the https protocol over the basic non-encrypted http protocol. SSL is
built-in in all browsers, so there are no setup requirements on the client side. Another benefit of
SSL is the ease of configuration for firewalls.
C
H A P T E R
9
Security Model
Download from www.wowebook.com
ptg
208 Chapter 9 Security Model
SSL works by encrypting all data that passes between the client and the server. Only these
two endpoints are capable of decrypting each other’s data content. As we said earlier, SSL pro-
vides confidentiality, integrity, and authentication through the use of certificates. SSL has no pro-
vision to prove the authenticity of the originator of a message. Just because a message says it
came from the expected server, there is no way to prove that it actually did. The other limiting
factor with SSL is intermediary sites. There may be a secure link from the browser to the main
server, but there are no guarantees that connections from the server to other sites (such as in a
proxy situation) are secure, or that the data content was not corrupted in one of these secondary
connections.
Digital signing of content between the browser and server(s) is possible, but there are no
real cross-browser solutions available. Because most web application activity is defined as a
point-to-point connection between the browser and the server, you have to trust that server any-
way. As a client, you have to trust the server to be responsible to handle any sensitive data appro-
priately when communicating with other systems.
As you can see, we’ve been somewhat non-specific on the actual content that we want to
secure. That’s because it applies across the board, in that it can be static assets such as HTML and
JavaScript files, or it can be dynamic data being accessed through a browser AJAX call to a REST
resource, or the server making external calls to other systems.
Do you need to protect everything with SSL? Well, no, not if you are building an applica-
tion that does not contain sensitive information and does not require any user authentication. In
these applications, keep it simple, and let your anonymous users have a good time.
In the business space, and even within the confines of a company intranet, encryption and
authentication are frequently needed for authorization and accounting needs. Let’s go through the
ways in which WebSphere sMash can assist in securing your application.
Confidentiality
Integrity
Authentication
Non-Repudiation
Figure 9.1 Security characteristics
Download from www.wowebook.com
ptg
SSL Configuration 209
To properly configure a WebSphere sMash application to use user authentication, we need
to make some changes to the zero configuration file. These settings include the following:
• Enabling SSL
• Defining a secret key for encryption
• Turning on security
• Defining the authentication type
• Defining the resources to protect
We need to assemble together all the pieces of our security puzzle before we can appreciate
the final solution.
SSL Configuration
As stated at the beginning of this chapter, SSL encryption of the connection solved two of the four
security concerns: confidentiality and integrity. Security and SSL go hand in hand in all web-based
connections. Setting up SSL within WebSphere sMash is rather trivial when you have a keystore
file. In a real-world environment, you would normally purchase an SSL key from a trusted author-
ity, such as VeriSign or a similar entity. By obtaining your key in this manner, the key provider is
vouching that you are a reputable party. For our purposes, we’ll create a self-signed certificate for
enabling SSL connections to our application. As its name suggests, a self-signed certificate should
not be trusted outside your immediate sphere of influence, because you are simply stating that you
created your own key, and you are only as good as your word. In a business sense, production
servers should always be backed by legitimate certificates provided by a trusted authority.
Let’s get into the meat of creating a certificate and configuring our application to use SSL
encryption. We’re just going to go through the bare minimum on key creation, as it can be a rather
intricate subject. If you need more details, read up on Java Secure Socket Extensions (JSSE) for
your particular Java provider. Your company’s network administrators may also be able to pro-
vide you with custom certification keys for your application; otherwise, just follow these steps,
and we’ll get things going rather quickly.
First, it is assumed that you have already created a new WebSphere sMash application or
have an existing application that you want to secure. Go to a command line and change to the
application’s config directory. When there, assuming you are using IBM’s Java, run IBM’s ikey-
man utility to create the keystore. If you are using an alternative Java runtime, such as Oracle’s
Sun Java, use the appropriate keytool utility, as described in the vendor’s documentation. Execute
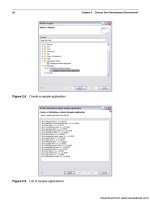
the ikeyman command, and click the Create icon, as shown in Figure 9.2. Verify or correct the
Location field to point toward your application’s config directory. Click OK, enter your preferred
password, and click OK again to create the store. Remember this password, as we’ll be using it
again shortly.
Download from www.wowebook.com
ptg
210 Chapter 9 Security Model
Figure 9.2 IBM ikeyman utility: Create self-signed cert.
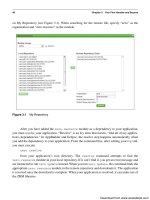
Next, click the New Self-Signed button to create the certificate. In the dialog, enter in the
Key Label field and Common Name field, as shown in Figure 9.3. All the other fields can be left
blank or filled in as you see fit. Click OK to close this dialog. Exit out of the ikeyman utility. The
result will be a new keystore file called key.jks located in the application’s config directory.
The next task is to set up the SSL configuration for the application. Open the zero.config
file and add the following stanza, as shown in Listing 9.1, somewhere in the file. The first non-
comment lines define our HTTP and HTTPS (SSL) ports we’ll be using—in this case, 8443. You
may optionally disable the normal HTTP port by setting it to a value of 0. The second block
defines the SSL configuration. We set the keystore to point to our newly created keystore file
(key.jks). The keystore password must be the same one you used to create the keystore itself.
Although not required, it’s a good practice to enter this (and all passwords) as an XOR-encoded
string. This is done by running the zero encode mypassword command from within your
application’s directory tree. Copy the resulting XOR string as the value of the keystore password.
The final entry is the type of store we are using, which in this case is JKS (Java Key System). The
final stanza is required because we have an insecure self-signed certificate. Set the trust value to
false while using this cert; when you obtain a real certificate, you can set it to false or simply
remove this stanza altogether.
Download from www.wowebook.com
ptg
SSL Configuration 211
Figure 9.3 Create a self-signed certificate.
Listing 9.1 SSL Configuration Settings
#
# SSL Config
#
/config/http/port = 0
/config/https/port = 8443
/config/https/sslconfig = {
"keyStore": "keystore.jks",
"keyStorePassword": "<xor>Lz4sLCgwLTs=",
"keyStoreType": "JKS"
}
# Add this for any self-signed certs.
# Remove/comment out for production certs
/config/connection/https/defaultConfig +={
"disableTrustVerification" : true
}
Download from www.wowebook.com
