Tự học iLife - p 9 pptx
Bạn đang xem bản rút gọn của tài liệu. Xem và tải ngay bản đầy đủ của tài liệu tại đây (4.39 MB, 10 trang )
63
22
33
WORKING WITH iPHOTO ‘09
Organizing Photos
chapter
4
88
66
77
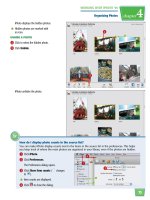
How can I create a smart album based on places?
You can use the map to define geographic criteria for your
smart album.
1 Click Places.
2 Zoom the map to display the locations that you want to
include in your smart album.
●
Alternatively, to include a single location, you can select a
pin by clicking it. The pin turns blue.
3 Click Smart Album.
iPhoto creates a new location-based smart album.
6 Click .
A second criterion is added.
7 Set the conditions.
In this example, the date must be
in the year 2008.
You can click to set additional
criteria.
8 Click OK.
iPhoto creates the smart album.
●
The album name is displayed in
the source list.
●
Photos that meet the album
criteria are displayed.
64
KEYWORDS:
Covered bridge, wagon, festival,
country, landscape, September
33
11
11
22
44
The Keywords dialog opens.
4 Click a keyword.
●
iPhoto adds the keywords to the
photo.
●
You can click the keyword again
to remove it from the photos.
USE THE KEYWORD DIALOG
1 -click to select the photos to
label.
2 Click Window.
3 Click Show Keywords.
Add a Keyword to a Photo
You can add a keyword to a photo to associate
the photo with a subject. You might add
keywords that describe objects in the photo or
the event at which the photo was taken.
See “Find Photos” to learn how to use keywords to find specific
photos.
Add a Keyword
to a Photo
65
33
33
44
22
WORKING WITH iPHOTO ‘09
Organizing Photos
chapter
4
11
33
22
How do I add and remove keywords
listed in the Keywords dialog?
Follow these steps:
1 In the Keywords dialog, click Edit
Keywords.
A list of keywords appears.
2 Click to add a new keyword.
3 To remove a keyword, click to select it and
then click .
4 Click OK when you are finished editing.
An edit box appears.
3 Type a keyword.
4 Press .
iPhoto adds the keyword to the
photo.
iPhoto also adds the keyword to
the list in the Keywords dialog.
5 Press again to close the
edit box.
Note: To use keywords to filter photos, see “Find
Photos.”
TYPE KEYWORDS
1 Position the cursor over the photo
to label.
2 Click add keywords below the
photo.
If a photo already has keywords
listed below it, click the keywords.
66
22
66
55
33
11
44
iPhoto displays ratings for photos
that have them.
3 Click to select the photo to rate.
4 Click Photos.
5 Click My Rating.
6 Click a rating.
1 Click View.
2 Click Rating.
Rate a Photo
You can rate a photo to label the photo with one
to five stars. This can help you pinpoint which
photos in your library are worth adding to
slideshows, Web galleries, and other projects.
See “Find Photos” to learn how to use ratings to find specific photos.
Rate a
Photo
67
33
22
55
44
WORKING WITH iPHOTO ‘09
Organizing Photos
chapter
4
77
How do I easily create an album made up of my five-star photos?
You can create a smart album with a five-star rating as the album’s criterion.
1 Create a new smart album.
Note: For details, see “Create a Smart Album.”
2 Type a name for the album.
3 Select My Rating.
4 Select is.
5 Select five stars.
6 Click OK (not shown).
iPhoto creates the album and automatically adds photos that have five-star ratings.
●
iPhoto assigns the rating to the
photo.
●
iPhoto assigns the rating to the
photo.
7 You can also assign or edit a
rating by clicking a star or dot.
68
EDIT
11
22
2 Click Flag.
1 Click to select the photo to flag.
Flag a Photo
You can flag a photo to mark it for editing or
adding to an event or album. iPhoto adds a flag
icon to flagged photos.
Flag a
Photo
69
22
33
11
WORKING WITH iPHOTO ‘09
Organizing Photos
chapter
4
33
How do I create an event out of
flagged photos?
Follow these steps:
1 Flag the photos you want to add to the
event.
2 Click Events.
3 Click Create Event From Flagged
Photos.
iPhoto creates a new event and adds
the photos to it.
iPhoto displays your flagged
photos.
iPhoto flags the photo.
●
An icon is added to the photo
thumbnail.
●
You can click Unflag to remove
the flag.
3 Click Flagged.
70
t
o
M
a
y
2
5
f
r
o
m
M
a
y
1
5
t
o
M
a
y
2
5
f
r
o
m
M
a
y
1
5
11
33
22
SEARCH BY KEYWORD
3 Click Keyword.
SEARCH BY TEXT
1 Type one or more terms into the
search box.
iPhoto searches for photos as you
type.
●
iPhoto displays the photos whose
title or description contains the
search terms.
2 Click here to open the search
menu.
Find Photos
As the number of photos in your library grows,
being able to find photos quickly can become
challenging. The search tool in iPhoto allows
you to search for photos by text, date, rating,
and more.
Find
Photos
71
2211
WORKING WITH iPHOTO ‘09
Organizing Photos
chapter
4
55
44
How do I search by rating?
Follow these steps:
1 Click here and select Rating.
iPhoto displays five dots.
2 Click a dot.
●
The corresponding dots change to stars.
iPhoto searches for photos with that star rating.
●
The matching photos are displayed.
5 Click to clear your search.
●
iPhoto displays all the photos in
the library.
●
You can also click here and select
Date to search by a time range.
iPhoto displays a keyword panel.
4 Click one or more keywords.
●
iPhoto displays photos with the
keywords.
Note: To add keywords to a photo, see “Add a
Keyword to a Photo.”
72
P
h
o
t
o
L
i
b
r
a
r
y
11
33
22
iPhoto hides the photo.
3 Click the Show text.
HIDE A PHOTO
1 Click to select a photo to hide.
2 Click Hide.
Hide and Unhide Photos
You can hide a photo so that it does not appear
in your photo library. This is helpful if you do
not want to use the photo but are unsure about
deleting it.
Hide and
Unhide Photos