ASP.NET 4 Unleased - p 15 potx
Bạn đang xem bản rút gọn của tài liệu. Xem và tải ngay bản đầy đủ của tài liệu tại đây (731.81 KB, 10 trang )
ptg
114
CHAPTER 2 Using the Standard Controls
The Panel control supports the following properties (this is not a complete list):
. DefaultButton—Enables you to specify the default button in a Panel. The default
button is invoked when you press the Enter button.
. Direction—Enables you to get or set the direction in which controls that display
text are rendered. Possible values are NotSet, LeftToRight, and RightToLeft.
. GroupingText—Enables you to render the Panel control as a fieldset with a particular
legend.
. HorizontalAlign—Enables you to specify the horizontal alignment of the contents
of the Panel. Possible values are Center, Justify, Left, NotSet, and Right.
. ScrollBars—Enables you to display scrollbars around the panel’s contents. Possible
values are Auto, Both, Horizontal, None, and Vertical.
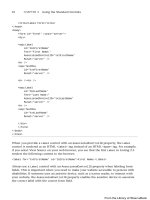
By default, a Panel control renders a <div> tag around its contents. If you set the
GroupingText property, however, the Panel control renders a <fieldset> tag. The
value that you assign to the GroupingText property appears in the <fieldset> tag’s
<legend> tag. Listing 2.30 demonstrates how you can use the GroupingText property (see
Figure 2.19).
LISTING 2.30 PanelGroupingText.aspx
<%@ Page Language=”C#” %>
<!DOCTYPE html PUBLIC “-//W3C//DTD XHTML 1.0 Transitional//EN”
“
<html xmlns=” >
<head id=”Head1” runat=”server”>
<title>Panel Grouping Text</title>
</head>
<body>
<form id=”form1” runat=”server”>
<div>
<asp:Panel
id=”pnlContact”
GroupingText=”Contact Information”
Runat=”server”>
<asp:Label
id=”lblFirstName”
Text=”First Name:”
AssociatedControlID=”txtFirstName”
Runat=”server” />
<br />
<asp:TextBox
id=”txtFirstName”
From the Library of Wow! eBook
ptg
115
Using the Panel Control
2
AutoCompleteType=”FirstName”
Runat=”server” />
<br /><br />
<asp:Label
id=”lblLastname”
Text=”Last Name:”
AssociatedControlID=”txtLastName”
Runat=”server” />
<br />
<asp:TextBox
id=”txtLastName”
AutoCompleteType=”LastName”
Runat=”server” />
<br /><br />
<asp:Button
id=”btnSubmit”
Text=”Submit”
Runat=”server” />
</asp:Panel>
</div>
</form>
</body>
</html>
FIGURE 2.19 Setting the GroupingText property.
From the Library of Wow! eBook
ptg
116
CHAPTER 2 Using the Standard Controls
WEB STANDARDS NOTE
According to the accessibility guidelines, you should use <fieldset> tags when group-
ing related form fields in long forms.
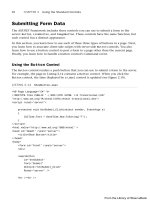
The ScrollBars property enables you to display scrollbars around a panel’s contents. For
example, the page in Listing 2.31 contains a Panel control that contains a BulletedList
control that displays 100 items. The panel is configured to scroll when its contents over-
flow its width or height (see Figure 2.20).
LISTING 2.31 PanelScrollBars.aspx
<%@ Page Language=”C#” %>
<!DOCTYPE html PUBLIC “-//W3C//DTD XHTML 1.0 Transitional//EN”
“
<script runat=”server”>
void Page_Load()
{
for (int i = 0; i < 100; i++)
bltList.Items.Add(“Item “ + i.ToString());
}
</script>
<html xmlns=” >
<head id=”Head1” runat=”server”>
<style type=”text/css”>
html
{
background-color:silver;
}
.contents
{
background-color:white;
width:200px;
height:200px;
}
</style>
<title>Panel ScrollBars</title>
</head>
<body>
<form id=”form1” runat=”server”>
<div>
From the Library of Wow! eBook
ptg
117
Using the Panel Control
2
<asp:Panel
id=”pnlContent”
ScrollBars=”Auto”
CssClass=”contents”
Runat=”server”>
<asp:BulletedList
id=”bltList”
Runat=”server” />
</asp:Panel>
</div>
</form>
</body>
</html>
FIGURE 2.20 Displaying scrollbars with a Panel control.
WEB STANDARDS NOTE
Don’t use the values Horizontal or Vertical with the ScrollBars property when you
want the scrollbars to appear in browsers other than Microsoft Internet Explorer. If you
want the scrollbars to appear in FireFox and Opera, use either the value Auto or Both.
From the Library of Wow! eBook
ptg
118
CHAPTER 2 Using the Standard Controls
When enabling scrollbars with the Panel control, you must specify a particular width and
height to display the scrollbars. In Listing 2.31, the width and height are specified in a
Cascading Style Sheet class. Alternatively, you can specify the width and height with the
Panel control’s Width and Height properties.
Using the HyperLink Control
The HyperLink control enables you to create a link to a page. Unlike the LinkButton
control, the HyperLink control does not submit a form to a server.
For example, the page in Listing 2.32 displays a hyperlink that randomly links to a page in
your application.
LISTING 2.32 ShowHyperLink.aspx
<%@ Page Language=”C#” %>
<%@ Import Namespace=”System.IO” %>
<!DOCTYPE html PUBLIC “-//W3C//DTD XHTML 1.0 Transitional//EN”
“
<script runat=”server”>
void Page_Load()
{
lnkRandom.NavigateUrl = GetRandomFile();
}
string GetRandomFile()
{
string[] files = Directory.GetFiles(MapPath(Request.ApplicationPath),
➥
“*.aspx”);
Random rnd = new Random();
string rndFile = files[rnd.Next(files.Length)];
return Path.GetFileName(rndFile);
}
</script>
<html xmlns=” >
<head id=”Head1” runat=”server”>
<title>Show HyperLink</title>
</head>
<body>
<form id=”form1” runat=”server”>
<div>
<asp:HyperLink
From the Library of Wow! eBook
ptg
119
Summary
2
id=”lnkRandom”
Text=”Random Link”
Runat=”server” />
</div>
</form>
</body>
</html>
In the Page_Load event handler in Listing 2.32, a random filename from the current appli-
cation is assigned to the NavigateUrl property of the HyperLink control.
The HyperLink control supports the following properties (this is not a complete list):
. Enabled—Enables you to disable the hyperlink.
. ImageUrl—Enables you to specify an image for the hyperlink.
. NavigateUrl—Enables you to specify the URL represented by the hyperlink.
. Target—Enables you to open a new window.
. Text—Enables you to label the hyperlink.
Notice that you can specify an image for the HyperLink control by setting the ImageUrl
property. If you set both the Text and ImageUrl properties, the ImageUrl property takes
precedence.
Summary
In this chapter, you were introduced to the core controls of ASP.NET 4 Framework. You
learned how to display information using the Label and Literal controls. You also
learned how to accept user input using the TextBox, CheckBox, and RadioButton controls.
In the second part of this chapter, you learned how to use the different button controls—
Button, LinkButton, and ImageButton—to submit a form. You learned how to post forms
between pages. You also learned how to set a default button.
Finally, we discussed the Panel and HyperLink controls. You learned how to hide and
display a group of controls with the Panel control. You also learned how to create
dynamic links with the HyperLink control.
From the Library of Wow! eBook
ptg
This page intentionally left blank
From the Library of Wow! eBook
ptg
CHAPTER 3
Using the Validation
Controls
IN THIS CHAPTER
. Overview of the Validation
Controls
. Using the
RequiredFieldValidator
Control
. Using the RangeValidator
Control
. Using the CompareValidator
Control
. Using the
RegularExpressionValidator
Control
. Using the CustomValidator
Control
. Using the ValidationSummary
Control
. Creating Custom Validation
Controls
. Summary
In this chapter, you learn how to validate form fields when
a form is submitted to the web server. You can use the vali-
dation controls to prevent users from submitting the wrong
type of data into a database table. For example, you can use
validation controls to prevent a user from submitting the
value “Apple” for a birth date field.
In the first part of this chapter, you are provided with an
overview of the standard validation controls included in the
ASP.NET 4 Framework. You learn how to control how vali-
dation errors display, how to highlight validation error
messages, and how to use validation groups. You are
provided with sample code for using each of the standard
validation controls.
Next, we extend the basic validation controls with our own
custom validation controls. For example, you learn how to
create an
AjaxValidator control that enables you to call a
server-side validation function from the client.
Overview of the Validation Controls
ASP.NET 4 includes six validation controls:
. RequiredFieldValidator—Enables you to require a
user to enter a value in a form field.
. RangeValidator—Enables you to check whether a
value falls between a certain minimum and maximum
value.
. CompareValidator—Enables you to compare a value
against another value or perform a data type check.
From the Library of Wow! eBook
ptg
122
CHAPTER 3 Using the Validation Controls
. RegularExpressionValidator—Enables you to compare a value against a regular
expression.
. CustomValidator—Enables you to perform custom validation.
. ValidationSummary—Enables you to display a summary of all validation errors in a
page.
You can associate the validation controls with any form controls included in ASP.NET
Framework. For example, if you want to require a user to enter a value into a TextBox
control, you can associate a RequiredFieldValidator control with the TextBox control.
NOTE
Technic ally, you can use the validation controls with any control decorate d with the
ValidationProperty attribute.
Listing 3.1 contains a simple order entry form. It contains three TextBox controls that
enable you to enter a product name, product price, and product quantity. The validation
controls validate each of the form fields.
LISTING 3.1 OrderForm.aspx
<%@ Page Language=”C#” %>
<!DOCTYPE html PUBLIC “-//W3C//DTD XHTML 1.0 Transitional//EN”
“
<script runat=”server”>
void btnSubmit_Click(Object sender, EventArgs e)
{
if (Page.IsValid)
{
lblResult.Text = @”<br />Product: “ + txtProductName.Text
+ “<br />Price: “ + txtProductPrice.Text
+ “<br />Quantity: “ + txtProductQuantity.Text;
}
}
</script>
<html xmlns=” >
<head id=”Head1” runat=”server”>
<title>Order Form</title>
</head>
<body>
<form id=”form1” runat=”server”>
<div>
From the Library of Wow! eBook
ptg
123
Overview of the Validation Controls
<fieldset>
<legend>Product Order Form</legend>
<asp:Label
id=”lblProductName”
Text=”Product Name:”
AssociatedControlID=”txtProductName”
Runat=”server” />
<br />
<asp:TextBox
id=”txtProductName”
Runat=”server” />
<asp:RequiredFieldValidator
id=”reqProductName”
ControlToValidate=”txtProductName”
Text=”(Required)”
Runat=”server” />
<br /><br />
<asp:Label
id=”lblProductPrice”
Text=”Product Price:”
AssociatedControlID=”txtProductPrice”
Runat=”server” />
<br />
<asp:TextBox
id=”txtProductPrice”
Columns=”5”
Runat=”server” />
<asp:RequiredFieldValidator
id=”reqProductPrice”
ControlToValidate=”txtProductPrice”
Text=”(Required)”
Display=”Dynamic”
Runat=”server” />
<asp:CompareValidator
id=”cmpProductPrice”
ControlToValidate=”txtProductPrice”
Text=”(Invalid Price)”
Operator=”DataTypeCheck”
Type=”Currency”
Runat=”server” />
<br /><br />
3
From the Library of Wow! eBook