Apress Expert C sharp 2005 (Phần 13) pptx
Bạn đang xem bản rút gọn của tài liệu. Xem và tải ngay bản đầy đủ của tài liệu tại đây (1.18 MB, 50 trang )
Second, make careful note of the fact that only the public, read-write properties and public
fields are exposed. Non-public properties aren’t exposed. Read-only properties (such as
Id on the
Project and Resource objects) aren’t exposed. This is because the Web Services implementation
in ASP.NET relies on the
XmlSerializer object to convert objects into and out of XML, and the
XmlSerializer has limitations on what it will and won’t serialize. Unless you’re willing to compro-
mise your object model’s design specifically to accommodate the requirements of web service
design, you won’t be able to expose the data you choose via Web Services.
Beyond this, Web Services requires that objects to be converted to and from XML expose a public
default constructor. If the class doesn’t provide a public default constructor, you’ll get a runtime excep-
tion when attempting to access the web service. The design of CSLA .NET business objects specifically
precludes the use of public default constructors, as they always use static factory methods to create
instances of the business objects.
Due to these drawbacks, directly exposing the business objects isn’t a good practice. The answer
instead is to create a facade around the business objects that can separate the public interface of the
web service from the interface of the business objects. This facade can be constructed so that its prop-
erties and fields are always available for serialization into XML.
Returning Formal Data Structures
You can easily create a formal data structure to define the external interface of a web service by using
a class. The data structure of the class will define the public interface of the web service, meaning that
the web service interface is separate from the business object interface. The web service and this for-
mal definition form a facade so that consumers of the web service don’t know or care about the specific
interface of the business object.
For instance, you can define a class that describes the data for a project like this:
public class ProjectData
{
private Guid _id;
private string _name;
private string _started;
private string _ended;
private string _description;
public Guid Id
{
get { return _id; }
set { _id = value; }
}
// remaining properties…
}
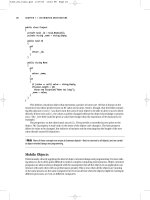
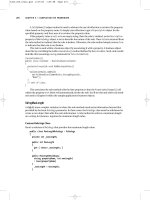
Then you can have the project-related web methods return a result of this type—or even an
array of results of this type. When this is returned as a result from a web method, its data will be
converted into SOAP-formatted XML that’s returned to the consumer. Figure 11-6 illustrates what
I’m talking about doing here.
When consumers reference the web service, they will gain access to the definition of this type
via the WSDL data that’s associated with the service. This means that the consumer will have infor-
mation about the data being returned in a very clear and concise format.
■Tip When creating a consumer for the web service, Visual Studio uses this information to create a proxy class
that mirrors the data structure. This gives consumer developers the benefits of IntelliSense, so that they can easily
understand what data is required or returned from the web methods.
CHAPTER 11 ■ WEB SERVICES INTERFACE574
6323_c11_final.qxd 2/27/06 1:35 PM Page 574
Authentication
The final consideration is authentication and security. Of course, there are many types and layers of
security, but what I’m focusing on here is how to use either CSLA .NET or Windows integrated secu-
rity to identify the users and their roles.
Even though the “user” in this case is a remote application, that application must still identify
itself so that the business objects can apply their authorization rules. In short, a valid principal and
identity object must be established to identify the calling application in some way.
The remote consumer may use a hard-coded username and password, or prompt its actual
user for credentials. What that application does is entirely its business, and really has nothing to do
with the web service. All the web service can do is ensure that the consumer provides valid creden-
tials so a principal and identity can be created. The business objects contain the authentication
rules to do the rest.
If you opt to use Windows integrated security, you’ll need to configure IIS to disallow
anonymous access to the virtual root containing the web service. You’ll also add an
<identity
impersonate="true" />
element into the <system.web> section of the site’s web.config file so that
ASP.NET knows to impersonate the user account of the calling application. This will force the
consumer to provide valid Windows credentials in order to interact with the web service.
No extra work is required in the web service or business object code, other than ensuring that
the
web.config file in the web service virtual root has the <appSettings> entry to configure CSLA .NET
to use Windows security.
■Tip Windows integrated security is probably not a viable option in most cases. It’s relatively unlikely that
unknown clients on unknown platforms will be authenticated within your Windows domain. While the CSLA .NET
architecture does support this option, using it would mean that consumers must start out with valid Windows
domain accounts with which they can authenticate to your web server.
CSLA .NET security requires a bit more work, but avoids any necessity for the remote con-
sumer (or its users) to have Windows domain user accounts in your environment. To implement
CSLA .NET security, IIS should be left with the default configuration that allows anonymous users
to access the virtual root. You must then include code in the web service to ensure that the calling
CHAPTER 11 ■ WEB SERVICES INTERFACE 575
Figure 11-6. Using a facade to define the data returned to the consumer
6323_c11_final.qxd 2/27/06 1:35 PM Page 575
code provides a username and password, which can be validated using the PTPrincipal class in the
ProjectTracker.Library—just like in the Windows Forms and Web Forms interfaces.
The harder question is how to get the username and password from the consumer, and there
are two basic approaches to an answer. The first of these is to have each web method include user-
name and password parameters. Each time the consumer calls a web method, it would need to
provide values for these two parameters (along with any other parameters the method requires).
Within the web method, those two parameters could be passed to
PTPrincipal.Login() to see if
the credentials are valid.
Although this can work, it pollutes the parameter lists of all the web methods. Each method
ends up with these two extra parameters that really have nothing to do with the method itself. This
is far from ideal.
The other approach is to use the SOAP header to pass the information from consumer to server
out-
side
the context of the method, but as part of the same exchange of data. In other words, the username
and password information will piggyback on the method call, but won’t be part of the method call.
■Tip Web Services Extensions (WSE) offers a more advanced implementation of this concept. WSE includes the
ability to encrypt the credentials over the network. In the future,Windows Communication Foundation (WCF, or
Indigo) will provide a similar advanced implementation. If you are going to pass credentials to web services, it
is best to use one of these technologies that already provide the implementation.
This is a standard technique for passing extra information along with method calls. It’s sup-
ported by the SOAP standard, and therefore by all SOAP-compliant client development tools. What
this means is that it’s a perfectly acceptable approach—in fact, it’s the preferred approach. I’ll use
it in the sample interface in this chapter.
One thing you need to keep in mind with this implementation is that the user’s credentials are
authenticated on every web service call. This could cause substantial load on your security database.
Technologies such as WSE and WCF offer more advanced authentication options that may be more
appropriate in many cases.
Web Service Implementation
The web service implementation can be found in the ProjectTracker solution. It is named
PTWebService. As with the Windows Forms and Web Forms interfaces, I won’t go through every
method in detail. Instead I’ll pick out some representative methods that highlight the concepts
and you can examine the rest at your leisure.
Application Configuration
The website hosting the web service needs to provide some basic configuration information through
the
web.config file. In the web.config file, you can either provide connection strings so that the site
can interact with the database directly, or you can configure the data portal to communicate with
a remote application server.
The basic concept here was discussed in Chapter 4 when the channel adapter implementation
was covered. Recall that the data portal supports four possible channels: Local, Remoting, Enterprise
Services, and Web Services. You can create your own channels as well if none of these meet your
needs.
In Chapter 1 I discussed the trade-offs between performance, scalability, fault tolerance, and
security that come with various physical n-tier configurations. In most cases, the optimal solution
for a web UI is to run the data portal locally in the client process. However, for security reasons,
CHAPTER 11 ■ WEB SERVICES INTERFACE576
6323_c11_final.qxd 2/27/06 1:35 PM Page 576
it may be desirable to run the data portal remotely on an application server. Chapter 12 will demon-
strate how to create the three types of remote data portal hosts for use by the
PTWeb application.
The
web.config file is an XML file that contains settings to configure the website. You use differ-
ent XML depending on how you want the site configured.
Authentication
The way authentication is handled by CSLA .NET is controlled through web.config:
<?xml version="1.0" encoding="utf-8" ?>
<configuration>
<appSettings>
<add key="CslaAuthentication" value="Csla" />
</appSettings>
</configuration>
The CslaAuthentication key shown here specifies the use of custom authentication. Chapter 8
implemented the
PTPrincipal and PTIdentity classes specifically to support custom authentication,
and the UI code in this chapter will use custom authentication as well.
If you want to use Windows authentication, change the configuration to this:
<add key="CslaAuthentication" value="Windows" />
Of course, that change would require coding changes. To start, the PTPrincipal and PTIdentity
classes should be removed from ProjectTracker.Library as they would no longer be needed. Also,
the virtual root would need to disallow anonymous users, and ASP.NET would need to be configured
to impersonate the caller. Beyond that, the
CslaCredentials custom SOAP header and related code
discussed in this chapter would not be used.
Local Data Portal
To have the web service interact directly with the database, use the following (with your connection
string
changed to the connection string for your database):
<?xml version="1.0" encoding="utf-8" ?>
<configuration>
<appSettings>
<add key="CslaAuthentication" value="Csla" />
</appSettings>
<connectionStrings>
<add name="PTracker" connectionString="your connection string"
providerName="System.Data.SqlClient" />
<add name="Security" connectionString="your connection string"
providerName="System.Data.SqlClient" />
</connectionStrings>
Because LocalProxy is the default for the data portal, no actual data portal configuration is
required, so the only settings in the configuration file are to control authentication and to provide
the database connection strings.
■Tip In the code download for this book (available at www.apress.com), the PTracker and Security database
files are in the solution directory, not in the website’s
App_Data directory. This means that you can’t use a local
data portal from the website without first copying the database files into the
App_Data directory and changing
the connection strings accordingly.
CHAPTER 11 ■ WEB SERVICES INTERFACE 577
6323_c11_final.qxd 2/27/06 1:35 PM Page 577
Remote Data Portal (with Remoting)
To have the data portal use an application server and communicate using the remoting channel,
the configuration would look like this:
<?xml version="1.0" encoding="utf-8" ?>
<configuration>
<appSettings>
<add key="CslaAuthentication" value="Csla" />
<add key="CslaDataPortalProxy"
value="Csla.DataPortalClient.RemotingProxy, Csla"/>
<add key="CslaDataPortalUrl"
value="http://localhost/RemotingHost/RemotingPortal.rem"/>
</appSettings>
<connectionStrings>
</connectionStrings>
The key lines for remoting configuration are in bold. Of course, you need to change localhost to
the name of your application server on which the data portal host is installed, and the
RemotingHost
text needs to be replaced with the name of your virtual root on that server.
Before using this configuration, the remoting host virtual root must be created and configured.
I’ll show how this is done in Chapter 12.
Remote Data Portal (with Enterprise Services)
Similarly, the configuration for using the Enterprise Services channel would look like this:
<?xml version="1.0" encoding="utf-8" ?>
<configuration>
<appSettings>
<add key="CslaAuthentication" value="Csla" />
<add key="CslaDataPortalProxy"
value="EnterpriseServicesHost.EnterpriseServicesProxy,
EnterpriseServicesHostcs"/>
</appSettings>
<connectionStrings>
</connectionStrings>
Before using this configuration, an Enterprise Services host must be created and registered with
COM+. The resulting COM+ application must be registered with COM on each client workstation. The
basic steps were discussed in Chapter 4, and I’ll show how this is done in Chapter 12.
Remote Data Portal (with Web Services)
Finally, the configuration for using Web Services would look like this:
<?xml version="1.0" encoding="utf-8" ?>
<configuration>
<appSettings>
<add key="CslaAuthentication" value="Csla" />
<add key="CslaDataPortalProxy"
value="Csla.DataPortalClient.WebServicesProxy, Csla"/>
<add key="CslaDataPortalUrl"
value="http://localhost/WebServicesHost/WebServicePortal.asmx"/>
</appSettings>
<connectionStrings>
</connectionStrings>
CHAPTER 11 ■ WEB SERVICES INTERFACE578
6323_c11_final.qxd 2/27/06 1:35 PM Page 578
As with remoting, you need to change localhost and WebServicesHost to the actual server name
and virtual root name used by your application. Also, the virtual root and web service
asmx file must
be created and configured. I’ll show how this is done in Chapter 12.
The most important thing to realize about the site configuration is that the data portal can be
changed from local to remote (using any of the network channels) with no need to change any UI
or business object code.
PTWebService Site Setup
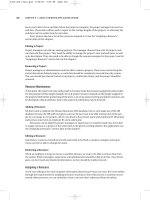
The website references the ProjectTracker.Library project as shown in Figure 11-7. This causes
Visual Studio to automatically put the associated
Csla.dll files into the Bin directory as well, because
Csla.dll is referenced by ProjectTracker.Library.
Hosting in IIS
The PTWebService website will only run within IIS, not within ASP.NET Development Server (com-
monly known as Cassini or VS Host).
ASP.NET Development Server (provided with Visual Studio) has various limitations—among them
are the inability to load custom security objects from assemblies in the
Bin directory. This means you
can’t use ASP.NET Development Server to test or debug custom principal objects, custom membership
providers, or other custom security objects if they are in an assembly referenced from the project.
Though this is an unfortunate limitation, it can be argued that ASP.NET Development Server is
not intended for anything beyond hobbyist or casual usage, and that IIS should be used for any seri-
ous business development.
CHAPTER 11 ■ WEB SERVICES INTERFACE 579
Figure 11-7. Referencing ProjectTracker.Library
6323_c11_final.qxd 2/27/06 1:35 PM Page 579
■Note An alternative solution is to install the assembly containing your custom principal and identity classes into
the .NET Global Assembly Cache (GAC). For
PTWebService, this would mean giving ProjectTracker.Library
a strong name and using the gacutil.exe command line utility to install the assembly into the GAC.
ProjectTracker.Library would need to be updated in the GAC after each time you build the assembly. I find
that using IIS is a far simpler solution than using the GAC.
To host a website in IIS during development, you need to take the following steps:
1. Set up a virtual root in IIS, pointing to the directory containing the PTWebService project files.
2. Set the virtual root to use ASP.NET 2.0 using the ASP.NET tab of the virtual root properties
dialog in the IIS management console.
3. Set the website’s start options using the project properties dialog in Visual Studio 2005. Change
the setting to use a custom server so it starts up using IIS with a URL such as
http://localhost/
PTWebService
.
Now let’s go through the creation of the web service interface. I’ll start by discussing the
authentication scheme, then move on to component-based web methods and wrap up by dis-
cussing service-oriented, message-based web methods. Once the web service has been covered,
I’ll briefly discuss the client application that calls the web service.
PTService
In .NET, a web service typically comes in two parts: the asmx file and an associated code file. The
PTService.asmx file is really just a pointer to the code file:
<%@ WebService Language="C#"
CodeBehind="~/App_Code/PTService.cs" Class="PTService" %>
All the interesting work happens in the code file, PTService.cs. This file can be found in the
App_Code folder beneath the virtual root, and it contains the web service class, within which are all
the web methods a consumer will use. I’ll cover many of those web methods later, but here I want
to show the declaration of the class itself:
[WebService(Namespace = " />[WebServiceBinding(ConformsTo = WsiProfiles.BasicProfile1_1)]
public class PTService : System.Web.Services.WebService
The class inherits from the WebService base class, and thus is a web service class.
The
[WebService()] attribute specifies the logical namespace for the web service. The domain
name of the namespace is a meaningful value that corresponds to a specific organization. (You should
use your organization’s domain here instead of
ws.lhotka.net.) This URI location doesn’t need to exist,
it just needs to be unique to your organization. Each web service needs a unique XML namespace to
identify it so that client applications can distinguish it from other services on the Web.
The
[WebServiceBinding()] attribute is placed here by Visual Studio when the web service is
added to the application. It can be used to provide advanced control over the public interface exposed
by the web service, and isn’t directly relevant to this chapter.
Authentication
Earlier in the chapter, I discussed the authorization options available. While in a production appli-
cation, you should probably use WSE or WCF, I’ll show you how to pass credentials in the SOAP
header using the web service support built into Visual Studio 2005.
CHAPTER 11 ■ WEB SERVICES INTERFACE580
6323_c11_final.qxd 2/27/06 1:35 PM Page 580
To use custom authentication, include the following line in the <appSettings> element:
<add key="CslaAuthentication" value="Csla"/>
■Tip You could also use the Windows integrated security model, as described earlier. However, if you decide
to go down that route, you must not implement the security code shown here.
When using custom authentication, the Login() method of PTPrincipal will be called to vali-
date the username and password values provided by the consumer that’s calling the web service.
As discussed earlier, this could be done by putting username and password parameters on every
web method, but that would pollute the parameter lists of the methods. Instead, a SOAP header can
be used to transfer the values. This is a standard SOAP concept, and it’s easily implemented in .NET
code (on both the server and consumer).
■Tip Note that the username and password will be passed in clear text in the SOAP envelope. To encrypt this
data for additional security, you may want to use the .NET Framework’s cryptography support, expose the web
service over SSL, or use WSE.
The following three steps are required in order to set up and use the SOAP header for security
credentials:
1. Implement a SoapHeader class that defines the data required from the consumer.
2. Apply a [SoapHeader()] attribute to all web methods that require authentication, indicating
that the web method requires the custom SOAP header.
3. Implement a method that takes the username and password values and uses them to authen-
ticate the user, and set up the principal object on the current
Thread.
Let’s walk through the implementation of these steps.
CslaCredentials Class
SoapHeader is just a class that defines some fields of data that are to be included in the XML header
data of a SOAP message. In this case, two values are needed: username and password. These values
are passed in the SOAP header along with any method call requiring authentication. The
SoapHeader
class clearly defines this requirement:
public class CslaCredentials : SoapHeader
{
public string Username;
public string Password;
}
The class itself is very simple—it just defines the two required data fields, as shown here:
public string Username;
public string Password;
More important is the fact that it inherits from System.Web.Services.Protocols.SoapHeader.
This means that the
CslaCredentials object’s values will be automatically populated by the .NET
runtime, based on the data in the SOAP header that’s provided as part of the method call. To make
this happen, a
[SoapHeader()] attribute will be applied to each web method in the web service to
indicate that the SOAP header data should be loaded into a
CslaCredentials object.
CHAPTER 11 ■ WEB SERVICES INTERFACE 581
6323_c11_final.qxd 2/27/06 1:35 PM Page 581
Credentials Field
Within the PTService class, the code declares a CslaCredentials field, as follows:
public CslaCredentials Credentials = new CslaCredentials();
This step is required because the actual data values will be placed into this object. There’s no
magic here—each web method that needs access to the user’s credentials will have a
[SoapHeader()]
attribute that tells ASP.NET to load the SOAP header data into this specific object.
The use of this field, combined with the fact that the
CslaCredentials class is public in scope,
means that the
CslaCredentials type is included as part of the web service’s WSDL definition.
The result is that any consumers referencing the web service will have full access to the type
information, so they will clearly see the required username and password values.
■Tip When creating the consumer with Visual Studio, the consumer-side proxy class is created automatically for
CslaCredentials, thus dramatically simplifying the process of providing the data. You’ll see an example of this
later in the chapter.
SoapHeader Attribute
With the SoapHeader class and corresponding field defined, any consumer that references the web
service will have a clearly defined structure into which the username and password values can be
placed. By default, web methods don’t require SOAP headers. The
[SoapHeader()] attribute is
applied to a web method to indicate that it does require a specific SOAP header.
This attribute accepts a parameter that links the SOAP header to a specific
SoapHeader field
declared in the web service class; in this case, to the
Credentials field of type CslaCredentials.
This means that any web methods requiring authentication will be declared like this:
[WebMethod(Description="A sample method")]
[SoapHeader("Credentials")]
public void SampleMethod()
{
// Web method implementation code goes here
}
When this method is invoked by a consumer, the .NET runtime uses reflection to find a field
called
Credentials. It then uses reflection against that Credentials field to discover its type. Based
on that type information, it looks at the SOAP header data to find the SOAP header that matches
that type, and takes the appropriate data out of the SOAP header and uses it to populate the field.
This SOAP XML might look something like this (the
CslaCredentials header is displayed in bold):
POST /PTservice/projecttracker.asmx HTTP/1.1
Host: localhost
Content-Type: text/xml; charset=utf-8
Content-Length: 574
SOAPAction: " /><?xml version="1.0" encoding="utf-8"?>
<soap:Envelope xmlns:xsi= />xmlns:xsd="
xmlns:soap=" /><soap:Header>
<CslaCredentials xmlns=" /><Username>string</Username>
CHAPTER 11 ■ WEB SERVICES INTERFACE582
6323_c11_final.qxd 2/27/06 1:35 PM Page 582
<Password>string</Password>
</CslaCredentials>
</soap:Header>
<soap:Body>
<GetResourceList xmlns=" />
</soap:Body>
</soap:Envelope>
That data is used to create a CslaCredentials object, which is provided to PTService through
the
Credentials field. Then the web method itself is called.
■Note that the [SoapHeader()] attribute indicates a required SOAP header, so the web method can only be
called by a consumer that provides this information.
This means that by the time the web method code is running, the Credentials field will be
loaded with the username and password values provided by the consumer, via the SOAP header.
Validating the Credentials
At this point, you should understand how to require a consumer to provide a username and a pass-
word, and how to make those values available to your web service code through a field declared in
the web service class.
Given this information, it is now possible to use the username and password values to authen-
ticate the caller by using
PTPrincipal.Login(). This method was discussed in Chapter 8. It validates
the caller’s credentials and sets the current principal object to the resulting
PTPrincipal. Since this
code is running inside ASP.NET,
Csla.ApplicationContext sets the HttpContext.Current.User prop-
erty with this value.
As with the
PTWeb interface in Chapter 10, it is also important to set the User property from
the current
HttpContext. Though the business objects and most of the .NET Framework rely on the
Thread object to get the current principal, most web-related code relies on HttpContext.Current.
User
instead. Setting both values ensures that all code will use the same principal object.
The
Security class in the App_Code directory contains a Login() helper method to take care
of the details:
public static void Login(CslaCredentials credentials)
{
if (string.IsNullOrEmpty(credentials.Username))
throw new System.Security.SecurityException(
"Valid credentials not provided");
// set to unauthenticated principal
PTPrincipal.Logout();
PTPrincipal.Login(credentials.Username, credentials.Password);
if (!Csla.ApplicationContext.User.Identity.IsAuthenticated)
{
// the user is not valid, raise an error
throw
new System.Security.SecurityException(
"Invalid user or password");
}
}
CHAPTER 11 ■ WEB SERVICES INTERFACE 583
6323_c11_final.qxd 2/27/06 1:35 PM Page 583
This method accepts the CslaCredentials object created by .NET and uses its values to call
PTPrincipal.Login(). If the credentials are valid, then the current principal is set to use the new
principal object. Otherwise, an exception is thrown to notify the caller that their credentials were
invalid.
All of this work ensures that only valid, authenticated users gain access to the web methods,
provided that those methods have the following structure:
[WebMethod(Description="A sample method")]
[SoapHeader("Credentials")]
public void SampleMethod()
{
// user credentials required.
Security.Login(Credentials);
// Web method implementation code goes here
}
Web methods that don’t require authentication simply don’t use the [SoapHeader()] attribute
or call
Security.Login(). Instead they call a different method: Security.UseAnonymous():
public static void UseAnonymous()
{
ProjectTracker.Library.Security.PTPrincipal.Logout();
}
Remember from Chapter 8 that PTPrincipal.Logout() sets the current principal value to an
unauthenticated
PTPrincipal. A remote data portal will only accept a principal object that inherits
from
Csla.Security.BusinessPrincipalBase, and so this code ensures that the current principal is
such a principal object.
With the authentication scheme covered, let’s move on to discuss the implementation of actual
web methods.
Component-Based Web Methods
First, let’s look at how you can construct component-based or API-style web methods. These are
methods designed in much the same way you might have designed methods for MTS or COM+
components over the past decade or so. Each method accepts a set of strongly typed parameters
and returns a strongly typed result.
In the
PTWebService project, you’ll find several methods of this type, including the following:
•
AddProject()
• EditProject()
• ChangeResourceName()
• AssignResource()
All of these web methods follow the same basic structure, so I’ll just walk through one of them:
AddProject().
AddProject
The AddProject() web method allows a caller to add a new project to the system. To avoid breaking
encapsulation, the actual
Project class is never exposed to the consumer of the web service. Instead,
a set of detailed parameters are exposed, making it clear to the consumer what data is required when
adding a project:
CHAPTER 11 ■ WEB SERVICES INTERFACE584
6323_c11_final.qxd 2/27/06 1:35 PM Page 584
[WebMethod(Description="Add a project")]
[SoapHeader("Credentials")]
public ProjectData AddProject(
string name, string started, string ended, string description)
{
// user credentials required
Security.Login(Credentials);
try
{
Project proj = Project.NewProject();
proj.Name = name;
proj.Started = started;
proj.Ended = ended;
proj.Description = description;
proj = proj.Save();
ProjectData result = new ProjectData();
Csla.Data.DataMapper.Map(proj, result, "Resources");
return result;
}
catch (Csla.DataPortalException ex)
{
throw ex.BusinessException;
}
catch (Exception ex)
{
throw new Exception(ex.Message);
}
}
Since this method alters data, it requires that the caller provide credentials for authentication:
[SoapHeader("Credentials")]
The first thing the code does is validate these credentials:
Security.Login(Credentials);
If the credentials aren’t valid, the Login() method throws an exception, so any code subsequent
to this point can be assured that the credentials were valid.
However, it is important to realize that the
Project object will still apply its normal authorization
rules based on these credentials. In other words, the web method code is not responsible for prevent-
ing an unauthorized user from adding a new project, because the
Project object itself takes care of
those details.
Thanks to the fact that all validation and authorization is in the
Project object, the web method
code is very straightforward. It creates a new
Project, loads the parameter values from the caller into
the object’s properties and then calls the
Save() method to commit the change:
Project proj = Project.NewProject();
proj.Name = name;
proj.Started = started;
proj.Ended = ended;
proj.Description = description;
proj = proj.Save();
This is all within a try catch block. Notice that the catch blocks simply rethrow the excep-
tions. You could add logging code here if desired, but you should remember to rethrow the exception
CHAPTER 11 ■ WEB SERVICES INTERFACE 585
6323_c11_final.qxd 2/27/06 1:35 PM Page 585
as well. When exceptions are thrown from within the web service class itself, the message text from
the exception is automatically returned to the consumer so it gets some information about what
went wrong.
If no exception occurs and the
Save() call succeeds, then the updated project data is returned
to the caller. To do this, a
ProjectData object is created, loaded with the data from the Project object,
and returned as a result:
ProjectData result = new ProjectData();
Csla.Data.DataMapper.Map(proj, result, "Resources");
return result;
The DataMapper functionality discussed in Chapter 5 is used to copy the values from Project
into ProjectData. If you want to avoid that use of reflection, you can write code to manually copy
each property value.
The first question you might ask is why this code doesn’t simply return the
Project object itself.
But remember that this is problematic for three reasons. First,
Project has at least one read-only
property (
Id), and that value wouldn’t be returned, thanks to the way Web Services serializes objects
into XML. Second, that would break encapsulation by directly tying the internal implementation of
the web service to its external interface. Finally, the
Project class doesn’t have a default constructor,
which means the
XmlSerializer can’t serialize the object.
ProjectData Class
The ProjectData class offers a clear, abstract, and formal interface to the caller that is separate from
the interface of
Project itself. The ProjectData class is a data transfer object (DTO). This means that it
is composed purely of
public read-write properties, with no internal code. In other words, this class
should exactly match the code created by Visual Studio when it creates a proxy class for a web service.
In fact, if you are using XSD schemas to define the XML transferred to and from the caller, you
can generate this class using the
xsd.exe command line utility. In PTWebService, I wrote the class by
hand, and it looks like this:
public class ProjectData
{
private Guid _id;
private string _name;
private string _started;
private string _ended;
private string _description;
private List<ProjectResourceData>
_resources = new List<ProjectResourceData>();
public Guid Id
{
get { return _id; }
set { _id = value; }
}
// other properties go here
}
You can get the complete code from the download for this book.
Not only does this class include properties corresponding to those of
Project, but it also
includes a
List<ProjectResourceData> field. I’ll discuss this later, as this class will also be used by
GetProjectList() and GetProject().
As you can see, component-based methods like
AddProject() are relatively easy to implement.
They simply accept a set of strongly typed parameters, potentially call
Security.Login() and then
let the business objects do all the hard work. The code in
AddProject() relies on the fact that the
CHAPTER 11 ■ WEB SERVICES INTERFACE586
6323_c11_final.qxd 2/27/06 1:35 PM Page 586
Project object will throw exceptions for any authorization violations, and that its Save() method
will throw an exception if the object’s validation rules are violated by the data provided from the
consumer.
Now let’s move on to look at service-oriented, message-based web method implementations.
Service-Oriented Web Methods
As discussed earlier, the primary definition of a service-oriented web method is that it accepts and
returns messages. These messages are typically XML structures, but within .NET they are represented
as strongly typed classes. You can create these classes by hand, or generate them from an XSD schema
by using the
xsd.exe command line utility.
The service-oriented web methods in
PTWebService include the following:
•
GetProjectList()
• GetProject()
• GetResourceList()
• GetResource()
They all work essentially the same way, and so I’ll only walk through two of them in this chapter:
GetProjectList() and GetProject().
It is important to realize that even though my examples in this chapter focus on retrieving data,
you can use service-oriented techniques to implement methods like
AddProject() (described earlier).
AddProject() could just as easily have accepted a single message, rather than a long list of parameters,
as it does in this chapter. Similarly, the
GetProject() implementation shown following could accept
strongly typed parameters rather than a request message.
My point is that you can switch between models, and the code in this chapter is primarily
intended to show you how to implement each approach so you can choose which is appropriate
for your application.
GetProjectList
The GetProjectList() web method is intended to return a list of the projects in the ProjectTracker
application. A consumer application can use this data however it wishes, and this method will allow
anonymous access with no authentication. Recall that the
ProjectList business object applies no
authorization rules, and both the
PTWin and PTWeb interfaces allow anonymous users access to the
list of projects (and the list of resources through
ResourceList).
This method provides an opportunity to see the simplest message-based implementation, and
also demonstrates how to create a web method that doesn’t use the custom authentication mecha-
nism implemented earlier:
[WebMethod(Description="Get a list of projects")]
public ProjectData[] GetProjectList()
{
// anonymous access allowed
Security.UseAnonymous();
try
{
ProjectList list = ProjectList.GetProjectList();
List<ProjectData> result = new List<ProjectData>();
foreach (ProjectInfo item in list)
CHAPTER 11 ■ WEB SERVICES INTERFACE 587
6323_c11_final.qxd 2/27/06 1:35 PM Page 587
{
ProjectData info = new ProjectData();
Csla.Data.DataMapper.Map(item, info);
result.Add(info);
}
return result.ToArray();
}
catch (Csla.DataPortalException ex)
{
throw ex.BusinessException;
}
catch (Exception ex)
{
throw new Exception(ex.Message);
}
}
Notice that there’s no [SoapHeader()] attribute and no call to Security.Login(). Instead there’s
a call to
Security.UseAnonymous():
Security.UseAnonymous();
Thus, any consumer can call this web method and get back data.
■Tip If you are using Windows integrated security, then security is applied at the virtual root level by IIS and
always applies to all web services within that virtual root. In that case, you do not have the flexibility to allow
anonymous users for some methods and not for others.
The method accepts no parameters, because it always returns all the projects in the database.
The result is returned as an array of
ProjectData objects. The ProjectData class was discussed earlier,
during the implementation of
AddProject().
This array is populated by looping through all the items in a
ProjectList object and using
DataMapper to copy the properties from each ProjectTracker.Library.ProjectInfo child object
in the collection to a
List<ProjectData> object. That list is then converted to an array, which is
returned as a result:
ProjectList list = ProjectList.GetProjectList();
List<ProjectData> result = new List<ProjectData>();
foreach (ProjectInfo item in list)
{
ProjectData info = new ProjectData();
Csla.Data.DataMapper.Map(item, info);
result.Add(info);
}
return result.ToArray();
Web Services can’t serialize complex collection types into XML, but it can serialize arrays with-
out a problem. That is the reason for converting the
List<ProjectData> into an array before returning
it as a result.
GetProject
The GetProject() web method is a bit more interesting, because it returns the list of resources
assigned to the project along with the rest of the project’s information. Again, viewing project data
isn’t a restricted behavior, so no authentication is required, and
Security.UseAnonymous() is called:
CHAPTER 11 ■ WEB SERVICES INTERFACE588
6323_c11_final.qxd 2/27/06 1:35 PM Page 588
[WebMethod(Description="Get a project")]
public ProjectData GetProject(ProjectRequest request)
{
// anonymous access allowed
Security.UseAnonymous();
try
{
Project proj = Project.GetProject(request.Id);
ProjectData result = new ProjectData();
Csla.Data.DataMapper.Map(proj, result, "Resources");
foreach (ProjectResource resource in proj.Resources)
{
ProjectResourceData info = new ProjectResourceData();
Csla.Data.DataMapper.Map(resource, info, "FullName");
result.AddResource(info);
}
return result;
}
catch (Csla.DataPortalException ex)
{
throw ex.BusinessException;
}
catch (Exception ex)
{
throw new Exception(ex.Message);
}
}
The body of this method retrieves the Project object based on the information provided
through the
request parameter:
Project proj = Project.GetProject(request.Id);
ProjectRequest Class
The parameter is of type ProjectRequest:
public class ProjectRequest
{
private Guid _id;
public Guid Id
{
get { return _id; }
set { _id = value; }
}
}
You can think of this object in much the same way as you would a criteria object for the data
portal. By using a complex type for a parameter rather than a simpler type like
int or Guid, the
GetProject() method is easier to extend or change over time. Due to the way Web Services serializes
objects into and out of XML, you can add extra properties to
ProjectRequest over time without
breaking existing consumers
. This type of flexibility is powerful, as it means the GetProject() method
can evolve over time with less impact on consumers as compared to an API-style approach based
on individual strongly typed parameters.
CHAPTER 11 ■ WEB SERVICES INTERFACE 589
6323_c11_final.qxd 2/27/06 1:35 PM Page 589
Unfortunately, you can’t remove properties, rename them, or change their data types over time
without forcing changes in the code that consumes your web service. The rules for changing Web
Services interfaces are basically the same as the rules were for COM interfaces in Visual Basic 6; you
can add to an interface, but any change or removal of
existing interface elements will force consumers
of your web service to update their software to compensate.
Copying the Properties
Once the Project object is available, DataMapper is used to copy the properties from Project into
a
ProjectData object:
Csla.Data.DataMapper.Map(proj, result, "Resources");
The ProjectData class was discussed earlier when creating the AddProject() web method.
Once the
Project object’s data has been copied, the code loops through all the ProjectResource
objects in the Project object’s Resources collection. Each of these objects has its property values
mapped to a
ProjectResourceData object, which is added to the ProjectData object:
foreach (ProjectResource resource in proj.Resources)
{
ProjectResourceData info = new ProjectResourceData();
Csla.Data.DataMapper.Map(resource, info, "FullName");
result.AddResource(info);
}
You’ve seen the ProjectData class and how it contains a List<ProjectResourceData> field.
The
AddResource() method simply adds the item to this field:
public void AddResource(ProjectResourceData resource)
{
_resources.Add(resource);
}
Let’s look at the ProjectResourceData class and how it is used in ProjectData. This will make
it clear why the
AddResource() method is implemented as shown here.
ProjectResourceData Class
ProjectResourceData is also a simple DTO:
public class ProjectResourceData
{
private int _resourceId;
private string _firstName;
private string _lastName;
private string _assigned;
private int _role;
public int ResourceId
{
get { return _resourceId; }
set { _resourceId = value; }
}
// other properties declared here
}
You can see the complete code in the download for this book. Each ProjectResourceData object
contains the data to be returned to the consumer for each
ProjectResource business object.
CHAPTER 11 ■ WEB SERVICES INTERFACE590
6323_c11_final.qxd 2/27/06 1:35 PM Page 590
ProjectResources Property
The really interesting challenge, however, is that Web Services can’t serialize a List<T> into XML; so
back in
ProjectData, the List<ProjectResourceData> field is exposed as a property using the follow-
ing code:
public ProjectResourceData[] ProjectResources
{
get
{
if (_resources.Count > 0)
return _resources.ToArray();
return null;
}
set
{
_resources = new List<ProjectResourceData>(value);
}
}
Notice how this property exposes an array of type ProjectResourceData externally, but maintains
a
List<ProjectResourceData> internally. It is easier to deal with a List<T> than an array, which is why
the internal representation is a
List<T>.
This is also why the
AddResource() method is used to add elements to the
List<ProjectResourceData> field. Since that field is never exposed publicly as a List<T>, there’s
no way for the
GetProject() method to directly add items to the list.
Back in
GetProject(), the resulting ProjectData, along with its list of ProjectResourceData
objects, is returned to the consumer as a result:
return result;
As with all the other web methods, this one implements exception handling to rethrow any
exceptions so the exception message text is provided to the consumer for its use.
At this point, you should understand how to create component-based or API-style web methods.
And you should understand how to create service-oriented, message-based web methods. You can
look at the rest of the code in the code download for this book.
The result is that you now have a web service interface to some of the
ProjectTracker function-
ality. Consumers can now call these web methods to interact with the application’s business logic
and data. These consumers may be running on any hardware platform or OS, and may be written
in virtually any programming language. Those details don’t matter in any meaningful way.
The important thing is that any consumers will interact with the
ProjectTracker data through
the business logic in the business objects, including validation, authentication, and authorization—
thereby making it difficult for a consumer to misuse the data or functionality.
Web Service Consumer Implementation
The thing about creating web services is that it’s not a very satisfying experience. There’s nothing
to see—no visual reinforcement that you’ve accomplished anything.
While ASP.NET includes functionality to generate a test page for web services automatically,
that isn’t of much use with
PTWebService. The test page created by ASP.NET is only useful for testing
web services that accept simple data types as parameters, and it doesn’t have any provision for han-
dling custom SOAP headers. This means the test page can only be used to call the
GetProjectList(),
GetResourceList(), and GetRoles() web methods.
CHAPTER 11 ■ WEB SERVICES INTERFACE 591
6323_c11_final.qxd 2/27/06 1:35 PM Page 591
■Note Remember that PTWebService uses custom authentication, and so you must host the website in IIS, not
in ASP.NET Development Server. To do this, set up a virtual root in IIS pointing to the
PTWebService directory in
order to run the web service code.
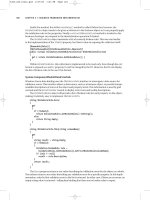
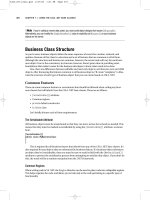
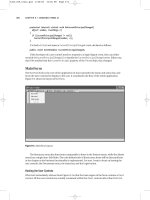
Still, there is value in that, since you can use this capability to quickly determine whether your
web service works at all. Simply use the browser to navigate to the web service
asmx file. Enter http://
localhost/PTWebService/PTService.asmx
, for example, into the address box, and you’ll get an infor-
mational display about the web service and its capabilities, similar to what’s shown in Figure 11-8.
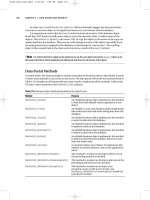
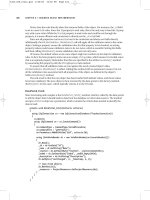
If you then click one of the links for a web method, you’ll get details about that method.
For instance, clicking the
GetResourceList() method brings up a display similar to the one in
Figure 11-9.
CHAPTER 11 ■ WEB SERVICES INTERFACE592
Figure 11-8. Example output from the PTWebService test web page
6323_c11_final.qxd 2/27/06 1:35 PM Page 592
With simple web methods, this display includes the ability to invoke the method from within
the browser. For example, Figure 11-10 shows the result of clicking the Invoke button to execute the
GetResourceList() web method.
CHAPTER 11 ■ WEB SERVICES INTERFACE 593
Figure 11-9. WSDL for the GetResourceList web method
6323_c11_final.qxd 2/27/06 1:35 PM Page 593
Your results may vary, of course, depending on the data in your database.
A Simple Smart Client
To further illustrate how to call PTWebService, and in particular to show how you deal with the
custom SOAP header for authentication, the
ProjectTracker solution contains a PTServiceClient
project. This is a bare-bones smart client application that acts as a consumer for PTWebService.
Figure 11-11 shows what the application looks like when running.
CHAPTER 11 ■ WEB SERVICES INTERFACE594
Figure 11-10. Results of invoking the GetResourceList method
6323_c11_final.qxd 2/27/06 1:35 PM Page 594
My goal with this application isn’t to create a complete consumer. I want to use this application
to show how to consume a basic web service, and how to set up and pass credentials through the
custom SOAP header.
As shown in Figure 11-12,
PTServiceClient has a web reference to PTService.
CHAPTER 11 ■ WEB SERVICES INTERFACE 595
Figure 11-11. The PTWebService client application
Figure 11-12. Web reference to PTService
6323_c11_final.qxd 2/27/06 1:35 PM Page 595
The URL behavior for this reference is set to Dynamic in the Properties window. This means that
the URL for the web service is maintained in the
app.config file:
<applicationSettings>
<PTServiceClient.Properties.Settings>
<setting name="PTServiceClient_PTService_PTService"
serializeAs="String">
<value>
http://localhost/PTWebServicecs/PTService.asmx
</value>
</setting>
</PTServiceClient.Properties.Settings>
</applicationSettings>
The <applicationSettings> element is part of the configuration functionality provided by
System.Configuration in .NET 2.0, and it is automatically used by Visual Studio when you set the
URL behavior property to
Dynamic for a web reference.
When you add a web reference to your project, Visual Studio uses the WSDL description for the
web service to determine all the types it exposes; including
CslaCredentials, ProjectData, and the
other types accepted as parameters or returned as results from the web methods. Visual Studio uses
this information to create proxy classes for all these types, so they can be used in the consumer code
as though they were local classes.
Calling a Web Method
The data binding support in Windows Forms works against the proxy classes generated for a web
service. This means you can add a type like
ProjectData to the Data Sources window much like
Project was added in Chapter 9. Figure 11-13 shows the Data Source Configuration Wizard listing
all the types from the
PTService web reference.
When you go to add a data source to the Data Sources window, the first step in the wizard
includes the option to add a web service as a data source, as shown in Figure 11-14.
While you can use this option, it gets you exactly the same result as if you manually add the
web reference and then add the proxy objects as object data sources. In other words, web service
proxy objects are always object data sources, regardless of whether you add them using the Web
Service or Object options in the Data Source Configuration Wizard.
Once the proxy types are in the Data Sources window, you can drag-and-drop them onto a
form just like you would with any business object. This is how the
PTServiceClient UI was built.
For each type you drag onto the form, Visual Studio creates a corresponding
BindingSource
object in the form’s component tray. The UI controls are bound to the BindingSource control, and
that
BindingSource control is bound to your data.
Just like in Chapter 9, you need to write a bit of code to set the
DataSource property of each
BindingSource object. For instance, when the client’s form loads, the following code is run:
private void MainForm_Load(object sender, EventArgs e)
{
using (PTService.PTService svc = new PTService.PTService())
{
this.ProjectDataBindingSource.DataSource =
svc.GetProjectList();
this.ResourceDataBindingSource.DataSource =
svc.GetResourceList();
this.RoleDataBindingSource.DataSource =
svc.GetRoles();
}
}
CHAPTER 11 ■ WEB SERVICES INTERFACE596
6323_c11_final.qxd 2/27/06 1:35 PM Page 596
CHAPTER 11 ■ WEB SERVICES INTERFACE 597
Figure 11-13. Types available from the PTService web reference
Figure 11-14. Adding a web service as a data source
6323_c11_final.qxd 2/27/06 1:35 PM Page 597
First, an instance of PTService is created:
using (PTService.PTService svc = new PTService.PTService())
Notice that it is within a using block, so the object is properly disposed when the code is
through with it. Then the project, resource, and role data are retrieved from the web service. Each
resulting object is used to set a
DataSource property, ultimately populating the three DataGridView
controls across the top of the form shown in Figure 11-11.
Of course, this is the simple case, since these three web methods don’t require authentication.
Let’s look at the case in which a method
does require authentication using the custom SOAP header.
Providing Credentials for Authentication
To supply a SOAP header, the consumer needs to create an instance of the SoapHeader class; in this
case, that means
CslaCredentials. This object has its properties loaded with appropriate username
and password values, and it is then attached to the consumer-side proxy for the web service.
To streamline this process throughout the client application, the code is centralized in a
SetCredentials() helper method:
private void SetCredentials(PTService.PTService svc)
{
PTService.CslaCredentials credentials =
new PTService.CslaCredentials();
credentials.Username = usernameTextBox.Text;
credentials.Password = passwordTextBox.Text;
svc.CslaCredentialsValue = credentials;
}
First, a CslaCredentials object is created and loaded with values:
PTService.CslaCredentials credentials =
new PTService.CslaCredentials();
credentials.Username = "rocky";
credentials.Password = "lhotka";
Because the CslaCredentials class was exposed by the web service, Visual Studio automatically
created a consumer-side proxy class for it, used here.
The WSDL definition for the web service also indicated that there are web methods that require
this as a SOAP header, so Visual Studio automatically added a
CslaCredentialsValue property to the
consumer-side proxy. To pass a
CslaCredentials object to the server as a SOAP header, all you need
to do is set this
CslaCredentialsValue property!
svc.CslaCredentialsValue = credentials;
With that done, it becomes relatively easy to call a web method that requires authentication.
For instance, the following code is called to assign a resource to a project:
using (PTService.PTService svc = new PTService.PTService())
{
SetCredentials(svc);
try
{
// do the assignment
svc.AssignResource(
int.Parse(this.ResourceIdLabel.Text),
new Guid(this.ProjectIdLabel.Text));
CHAPTER 11 ■ WEB SERVICES INTERFACE598
6323_c11_final.qxd 2/27/06 1:35 PM Page 598