Tự học HTML và CSS trong 1 giờ - part 51 doc
Bạn đang xem bản rút gọn của tài liệu. Xem và tải ngay bản đầy đủ của tài liệu tại đây (681.54 KB, 10 trang )
ptg
the closing tag for the elements that match the selector. In this case, I put the value in the
text field, which I obtain using the val() method that you’ve already seen, inside an
opening and closing <li> tag, and pass that to the append() method. I also remove the
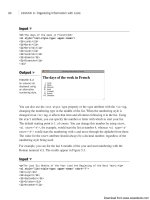
content from the text field because it has been appended to the list. Figure 16.13 shows
the list once a few elements have been added.
476
LESSON 16:Using JavaScript Libraries
FIGURE 16.13
A page that allows
you to add and
remove content
on-the-fly.
Finally, I allow users to remove items from the list by clicking them. There’s one trick
here. As you’ve seen, to do so I’ll need to use the click handler for the <li> elements in
the list. In this case, there’s a catch. When the page loads and the document.ready event
for the page initially fires, there are no elements in the list to bind events to. Fortunately,
jQuery provides a way to set up an event handler so that it’s automatically bound to
newly created elements on the page. Here’s the code:
$(“#editable li”).live(‘click’, function () {
$(this).remove();
});
As you can see, the event binding is slightly different here. Instead of using the click()
method, I’ve used the live() method. This indicates that I want to monitor changes to
the page and perform the event binding that follows any time an element matching the
selector is added. The first argument is the name of the event to bind—it’s the name of
the event to be bound, placed in quotation marks. The second is the event handler as it
would normally be written. The live() method is one of the most powerful features of
jQuery because it enables you to automatically treat dynamically generated content the
same way you’d treat content that’s on the page at the time that it loads.
Here’s the full source for the page:
<!DOCTYPE html>
<html>
Download from www.wowebook.com
ptg
<head>
<title>Altering Classes on the Fly</title>
<script src=”jquery-1.4.2.min.js” type=”text/javascript” charset=”utf-
8”></script>
<script type=”text/javascript” charset=”utf-8”>
$(function () {
$(“#editable li”).live(‘click’, function () {
$(this).remove();
});
$(“#clearList”).click(function (event) {
event.preventDefault();
$(“#editable”).empty();
});
$(“#addElement”).submit(function (event) {
event.preventDefault();
$(“#editable”).append(“<li>” + $(“#addElement
input[name=’liContent’]”).val() + “</li>”);
$(“#addElement input[name=’liContent’]”).val(“”);
});
});
</script>
</head>
<body>
<ul id=”editable”>
</ul>
<p>Click on an item in the list to remove it.</p>
<p><a id=”clearList” href=”#”>Clear List</a></p>
<form id=”addElement”>
<label>New list item: <input name=”liContent” size=”60” /></label>
<input type=”submit” value=”Add Item” />
</form>
</body>
</html>
There are other methods for adding content in different locations in relation to a selected
element. For example, if I change the append() call to prepend(), new items will be
added to the top of the list rather than the bottom. You can also use the before() method
to add content before another element and the after() element to add it after. The differ-
ence is that when you use those methods, the content is placed outside the tags matched
by the selector, rather than inside those tags.
Modifying Content on the Page
477
16
Download from www.wowebook.com
ptg
Special Effects
It can be a little jarring when elements just appear or disappear instantly. Most JavaScript
libraries, including jQuery, provide a library of effects that enable you to animate transi-
tions on the page when items appear, disappear, or move. jQuery has a few basic effects
built in to the core library. Supplemental effects are also available as part of jQuery UI,
which you can obtain at
The four effects that are part of jQuery are fade in, fade out, slide up, and slide down.
I’m going to build on the previous example to show you how they can be used to soften
the transitions when you add items to the page or remove items from it. Adding the
effects to the page just requires a few small tweaks to the event handlers that I already
created.
The first effect I added applies the fade-out effect when users click a list item to remove
it. To cause an element to fade out, you call the
fadeOut() method on the results of a
selector that matches that element. Here’s the code:
$(“#editable li”).live(‘click’, function () {
$(this).fadeOut(‘slow’, function() { $(this).remove() });
});
When you call fadeOut(), it sets the display property for the element to none—essen-
tially, it’s a fancy replacement for hide(). Figure 16.14 shows a list item that’s in the
process of fading out.
478
LESSON 16:Using JavaScript Libraries
FIGURE 16.14
The jQuery fade-
out effect in
progress.
In this case, I want to actually remove the element from the page entirely. To do so, I
need a callback, which is included as the second argument to fadeOut(). The callback is
run whenever the animation is complete, and in this case, removes the element from the
page. The first argument is used to specify the speed of the animation. Setting it to slow
Download from www.wowebook.com
ptg
means that it will take 600 milliseconds to complete. By default, the animation takes
400 milliseconds. You can also set it to fast (200 milliseconds), or you can enter a
number of milliseconds yourself.
I’ve also updated the event handler for the Clear List link. In this case, I use the slide-up
effect, shown in Figure 16.15, when the list is cleared. Here’s the updated event handler:
$(“#clearList”).click(function (event) {
event.preventDefault();
$(“#editable”).slideUp(‘slow’, function () {
$(“#editable”).empty()
$(“#editable”).show();
});
});
Special Effects
479
16
FIGURE 16.15
The jQuery slide-up
effect.
The changes here are similar to those for the previous event handler. After the animation
is complete and the list is hidden, I call the empty() method to remove the contents of
the list and then call show() on the now hidden list so that when the user adds new ele-
ments to it, the list will be visible.
Finally, I want the new items I add to the list to fade in rather than just appearing. Here’s
the updated event handler with the fadeIn() call included:
$(“#addElement”).submit(function (event) {
event.preventDefault();
var content = “<li>” + $(“#addElement input[name=’liContent’]”).val() +
“</li>”;
$(content).hide().appendTo(“#editable”).fadeIn(‘slow’).css(“display”,
“list-item”);
});
This event handler is a little bit more complex. First, I initialize a new variable with the
content to add to the page, just to make the code a little more readable. Then, I go
Download from www.wowebook.com
ptg
through all the steps required to fade the new content in. At this point, I should explain
one of the other nifty features of jQuery—method chaining. Nearly all jQuery methods
return the object of the method. So, if I use hide() to hide something, the method
returns whatever it was that I hid. This makes it convenient to call multiple methods on
the same object in succession.
In this case, I call hide(), appendTo(), fadeIn(), and css() on the jQuery object repre-
senting the new content that I created. First, I pass the content variable to $(); this allows
me to call jQuery’s methods on the content. Then, I call hide() on it so that it doesn’t
appear instantly when I append it to the list.
After that, I use appendTo() to append it to the list. The difference between append()
and appendTo() is that with append(), the object of the method is the selector that repre-
sents the container, and the method parameter is the content to be appended, whereas
with appendTo(), the content to be appended is the object and the selector for the con-
tainer is the method parameter. In this case, using appendTo() makes it easier to chain all
of these method calls.
After I’ve appended the hidden content to the list, I call fadeIn(‘slow’) to make it grad-
ually appear. Then, finally, I call css(“display”, “list-item”) on the new content,
because when fadeIn() is done, it sets the display property for the list item to block,
which causes the bullet for the list item not to appear in some browsers. Setting the
display property to list-item ensures that a bullet is displayed.
AJAX and jQuery
One of the primary reasons programmers started adopting JavaScript libraries was that
they made it much easier to use AJAX techniques on their websites and applications?
What’s AJAX? It’s a description for functionality that uses a JavaScript feature called
XmlHttpRequest to make requests to the server in the background and use the results
within the page.
The Web is based around the concept of pages. When you click a link or submit a form,
usually you leave the page that you’re on and go to a new page with a different URL (or
refresh the current page). Frames added the ability to split a page into sections and
refresh each section independently. So, you could click a link in a navigation frame and
reload the main content while leaving the other sections alone. AJAX is about retrieving
content from the server and then placing it on the page using JavaScript.
In the previous example, you saw how you can enter information in a form and add it to
the current page. Using AJAX, you can use the same techniques to retrieve data from the
server and add it to the page. It’s possible to write the code necessary to do this sort of
thing from scratch, but jQuery and other libraries make it a whole lot easier.
480
LESSON 16:Using JavaScript Libraries
Download from www.wowebook.com
ptg
Usually, AJAX is associated with server-side applications. For example, you can create a
search engine and then use AJAX to retrieve search results and present them without ever
leaving the current page. Unfortunately, there’s not enough space in this book to teach
you how to create a search engine. jQuery provides the ability to retrieve information
from a different static page using AJAX and present it in the current page. I’m going to
present an example that takes advantage of that feature to show you how AJAX can be
used.
Using AJAX to Load External Data
I’ve created a simple page, shown in Figure 16.16, that allows users to look up informa-
tion about South American countries. When a user clicks one of the links, the informa-
tion about that country is retrieved from the server and displayed inline on the page.
AJAX and jQuery
481
16
Because of the way AJAX works, this example will work only if it’s
deployed on a web server. If you load the files directly in your
browser, the JavaScript code that retrieves the information won’t
work.
The sample consists of two files. The first is the page shown in Figure 16.16, which
loads the data from the second page.
NOTE
FIGURE 16.16
A page that loads
data from an exter-
nal source using
AJAX.
Download from www.wowebook.com
ptg
The second is the page containing the information about the countries. Here’s the source
for the second page, countries.html, which contains information about the countries:
<!DOCTYPE html>
<html>
<head>
<title>South American Countries</title>
</head>
<body>
<div id=”uruguay”>
<h2>Uruguay</h2>
<p>Uruguay, officially the Oriental Republic of Uruguay, is a country located
in the southeastern part of South America. It is home to some 3.5 million peo-
ple, of whom 1.4 million live in the capital Montevideo and its metropolitan
area. An estimated 88% of the population are of European descent.</p>
<p>Uruguay’s only land border is with Rio Grande do Sul, Brazil, to the north.
To the west lies the Uruguay River, to the southwest lies the estuary of Rio de
la Plata, with Argentina only a short commute across the banks of either of
these bodies of water, while to the southeast lies the southern part of the
Atlantic Ocean. Uruguay, with an area of approximately 176 thousand km2, is the
second smallest nation of South America in area after Suriname.</p>
</div>
<div id=”paraguay”>
<h2>Paraguay</h2>
<p>Paraguay, officially the Republic of Paraguay, is a landlocked country in
South America. It is bordered by Argentina to the south and southwest, Brazil to
the east and northeast, and Bolivia to the northwest. Paraguay lies on both
banks of the Paraguay River, which runs through the center of the country from
north to south. Because of its central location in South America, is sometimes
referred to as Corazon de America, or the Heart of America.</p>
<p>As of 2009 the population was estimated at 6.3 million. The capital and
largest city is Asuncion. The official languages are Spanish and Guarani, both
being widely spoken in the country. Most of the population are mestizos.</p>
</div>
</body>
</html>
For a real application, instead of this simple page, you’d have a more robust service that
could return lots of information about every country in South America on demand. This
example page illustrates the concept without requiring any knowledge of server-side
programming.
Now that the raw information is in place to be used on the page, I’ll explain how the
page works. When a link is clicked, the information is retrieved from countries.html
and displayed on the initial page, as shown in Figure 16.17.
482
LESSON 16:Using JavaScript Libraries
Download from www.wowebook.com
ptg
FIGURE 16.17
The information
about Uruguay was
loaded from an
external source.
AJAX and jQuery
483
16
First, let’s look at the two links:
<p class=”countryOption”><a href=”countries.html #uruguay”>Uruguay</a></p>
<p class=”countryOption”><a href=”countries.html #paraguay”>Paraguay</a></p>
They almost look like regular links. The one difference is that I’ve included a space
between the filename and the anchor in the URL. That’s because it’s not actually an
anchor, it’s the ID of a <div> on the countries.html page.
Here’s the event handler for the click event for the links:
$(“p.countryOption a”).click(function (event) {
event.preventDefault();
$(“p.countryOption”).fadeOut();
$(“#country”).load($(this).attr(‘href’));
$(“#country”).fadeIn();
});
You should be used to most of this by now. The first line prevents the link from actually
taking you to the link referenced in the href attribute. The second line fades out the
links, because they’ll be replaced by the country data.
The third line actually performs the AJAX request. It instructs jQuery to load whatever is
in the href of the link the user clicked on into the element with the ID “country.” In this
case, the links refer to jQuery selectors of sorts. Remember the URLs in the links? They
consist of two parts, the first being the file to load, and the second being a jQuery selec-
tor, in this case, the ID of the country that I’ll be displaying information about. jQuery
loads the entire page and then applies the selector to it to extract the information I care
about.
Download from www.wowebook.com
ptg
Here’s the full source code for the page:
<!DOCTYPE html>
<html>
<head>
<title>Learn More About South America</title>
<script src=”jquery-1.4.2.min.js” type=”text/javascript” charset=”utf-
8”></script>
<script type=”text/javascript” charset=”utf-8”>
$(function () {
$(“#country”).hide();
$(“p.countryOption a”).click(function (event) {
event.preventDefault();
$(“p.countryOption”).fadeOut();
$(“#country”).load($(this).attr(‘href’));
$(“#country”).fadeIn();
});
});
</script>
<style type=”text/css” media=”screen”>
#country { border: 1px solid black; padding: 15px; }
p.question { font-size: 200%; }
</style>
</head>
<body>
<p class=”question”>
Which country would you like to know more about?
</p>
<div id=”country”>Foo</div>
<p class=”countryOption”><a href=”countries.html #uruguay”>Uruguay</a></p>
<p class=”countryOption”><a href=”countries.html #paraguay”>Paraguay</a></p>
</body>
</html>
To read about other AJAX-related methods offered by jQuery, take a look at the jQuery
API documentation. Most of the other jQuery methods are more suitable to application
development, but they essentially work in a similar fashion to the load() method that
you saw here.
484
LESSON 16:Using JavaScript Libraries
Download from www.wowebook.com
ptg
Summary
In this lesson, I explored some of the powerful features common to most JavaScript
libraries using jQuery. You learned which JavaScript libraries are available and why you
might want to use them. You also learned how to include jQuery in a web page and take
advantage of its functionality through the document.ready() event. I explained how
event binding works with jQuery and how to dynamically modify the styles on a page as
well as the content of a page itself. Finally, I explained what AJAX is and how jQuery
and other JavaScript libraries enable you to make requests to external data sources from
within a web page.
Workshop
As always, we wrap up the lesson with a few questions, quizzes, and exercises. Here are
some questions and exercises that should refresh what you’ve learned about JavaScript
libraries and jQuery.
Q&A
Q Won’t adding a JavaScript library cause my pages to load more slowly?
A Yes, adding a JavaScript library will add to your overall page size. However, the
browser will cache the external JavaScript file, so it should only have to download
it once, when they get to the first page of your site. When they go to subsequent
pages, the JavaScript library will already be in the cache. Also, the libraries vary in
size. If you are concerned about download time, you might want to go with a
smaller library.
Q What about users who don’t have JavaScript enabled?
A It’s generally agreed that less than 5 percent of users have JavaScript disabled these
days. However, you’ll still want to make sure that essential functionality still works
for users who don’t have JavaScript access. That’s one of the big advantages of the
unobtrusive JavaScript approach that these libraries reinforce. The markup should
work fine without the JavaScript, which enhances the experience but is not essen-
tial to making the pages work.
Workshop
485
16
Download from www.wowebook.com