Tự học HTML và CSS trong 1 giờ - part 48 ppt
Bạn đang xem bản rút gọn của tài liệu. Xem và tải ngay bản đầy đủ của tài liệu tại đây (679.14 KB, 10 trang )
ptg
446
LESSON 15: Using JavaScript in Your Pages
, ,
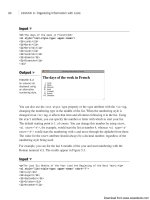
FIGURE 15.5
The FAQ page with
the JavaScript
included.
Here’s the JavaScript contained in the faq.js file:
window.onload = function() {
var faqList, answers, questionLinks, questions, currentNode, i, j;
faqList = document.getElementById(“faq”);
answers = faqList.getElementsByTagName(“dd”);
for (i = 0; i < answers.length; i++) {
answers[i].style.display = ‘none’;
}
questions = faqList.getElementsByTagName(“dt”);
for (i = 0; i < questions.length; i++) {
questions[i].onclick = function() {
currentNode = this.nextSibling;
while (currentNode) {
if (currentNode.nodeType == “1” && currentNode.tagName == “DD”) {
if (currentNode.style.display == ‘none’) {
currentNode.style.display = ‘block’;
}
else {
currentNode.style.display = ‘none’;
}
break;
}
currentNode = currentNode.nextSibling;
}
return false;
};
}
}
Download from www.wowebook.com
ptg
This JavaScript code is significantly more complex than any used previously in the book.
Take a look at the first line, which is repeated here:
window.onload = function() {
This is where the unobtrusiveness comes in. Instead of calling a function using the
onload attribute of the <body> tag to start up the JavaScript for the page, I assign an
anonymous function to the onload property of the window object. The code inside the
function will run when the onload event for the window is fired by the browser. Setting
up my JavaScript this way allows me to include this JavaScript on any page without
modifying the markup to bind it to an event. That’s handled here.
This is the method for binding functions to events programmatically. Each element has
properties for the events it supports, to bind an event handler to them, you assign the
function to that property. You can do so by declaring an anonymous function in the
assignment statement, as I did in this example, or you can assign the function by name,
like this:
function doStuff() {
// Does stuff
}
window.onload = doStuff;
In this case, I intentionally left the parentheses out when I used the function name. That’s
because I’m assigning the function itself to the onload property, as opposed to assigning
the value returned by doStuff() to that property.
Hiding and Showing Elements
447
15
, ,
When you declare an anonymous function in an assignment state-
ment, you must make sure to include the semicolon after the clos-
ing brace. Normally when you declare functions, a semicolon is
not needed, but because the function declaration is part of the
assignment statement, that statement has to be terminated with
a semicolon, or you’ll get a syntax error when the browser tries to
interpret the JavaScript.
On the next line, I declare all the variables I use in this function. JavaScript is a bit dif-
ferent from many other languages in that variables cannot have “block” scope. For exam-
ple, in most languages, if you declare a variable inside the body of an if statement, that
variable will go away once the if statement is finished. Not so in JavaScript. A variable
declared anywhere inside a function will be accessible from that point onward in the
function, regardless of where it was declared. For that reason, declaring all your variables
at the top of the function is one way to avoid confusing bugs.
NOTE
Download from www.wowebook.com
ptg
Looking Up Elements in the Document The preceding lesson discussed the
document object a little bit, and mentioned that it provides access to the full contents of
the web page. The representation of the page that is accessible via JavaScript is referred
to as the Document Object Model, or DOM. The entire page is represented as a tree,
starting at the root element, represented by the <html> tag. If you leave out the <html>
tag, the browser will add it to the DOM when it renders the page. The DOM for this
page is shown in Figure 15.6.
448
LESSON 15: Using JavaScript in Your Pages
FIGURE 15.6
The DOM for the
FAQ page, shown
in Firebug.
There are a number of ways to dig into the DOM. The browser provides access to the
parent of each element, as well as its siblings, and children, so you can reach any ele-
ment that way. However, navigating your way to elements in the page that way is
tedious, and there are some shortcuts available.
These shortcuts, methods that can be called on the document object, are listed in
Table 15.1.
TABLE 15.1 Methods for Accessing the DOM
Method Description
getElementsByTagName(name) Retrieves a list of elements with the supplied tag
name. This can also be called on a specific element,
and it will return a list of the descendants of that ele-
ment with the specified tag name.
, ,
Download from www.wowebook.com
ptg
Method Description
getElementById(id) Retrieves the element with the specified ID. IDs are
assigned using the
id attribute. This is one of the
areas where JavaScript intersects with CSS.
getElementByName(name) Retrieves elements with the specified value as their
name attribute. Usually used with forms or form fields,
both of which use the name attribute.
To set up the expanding and collapsing properly, I must hide the answers to the questions
and bind an event to the questions that expands them when users click them. First, I need
to look up the elements I want to modify in the DOM.
faqList = document.getElementById(“faq”);
answers = faqList.getElementsByTagName(“dd”);
The first line gets the element with the ID faq. That’s the ID I assigned to my definition
list in the markup. Then the next line returns a list of all the dd elements that are children
of the element now assigned to faqList. I could skip the step of looking up the faq list
first, but then if this page included multiple definition lists, the behavior would be
applied to all of them rather than just the faq. This is also a useful precaution in case this
JavaScript file is included on more than one page. In the end, I have a list of dd elements.
Changing Styles I grabbed the list of dd elements so that they can be hidden when
the page loads. I could have hidden them using a style sheet or the style attribute of each
of the dd elements, but that wouldn’t be unobtrusive. If a user without JavaScript visited
the page, the answers to the questions would be hidden, and there wouldn’t be any way
to reveal the answers. It’s better to hide them with JavaScript.
There are two ways to hide elements with CSS, you can set the display property to none
or the visibility property to hidden. Using the display property will hide the element
completely, the visibility property hides the content in the element but leaves the
space it takes up empty. So for this case, using the display property makes more sense.
Every element in the document has a style property, and that property has its own prop-
erties for each CSS property. Here’s the code that hides each of the dd elements:
for (i = 0; i < answers.length; i++) {
answers[i].style.display = ‘none’;
}
The for loop iterates over each of the elements, and inside the loop, I set the display
property to none. When the page loads, the answers will be hidden.
Hiding and Showing Elements
449
15
, ,
Download from www.wowebook.com
ptg
Traversing the Document The final step is to bind the event that toggles the display
of the answers to each of the questions. This is the most complex bit of code on the page.
First, let me explain how the event handler works:
function() {
currentNode = this.nextSibling;
while (currentNode) {
if (currentNode.nodeType == “1” && currentNode.tagName == “DD”) {
if (currentNode.style.display == ‘none’) {
currentNode.style.display = ‘block’;
}
else {
currentNode.style.display = ‘none’;
}
break;
}
currentNode = currentNode.nextSibling;
}
return false;
};
That’s the function that will be used as the onclick handler for each of the questions. As
you may remember, in the context of an event handler, this is the element associated
with the event. The main challenge in this function is locating the answer associated with
the question the user clicked on and displaying it.
To do so, the function will navigate through the DOM to find the next DD element in the
DOM tree following the DT element that the user clicked on. First, I use the
nextSibling property of this, and then I start a while loop that will iterate over each of
the siblings of that element. The while condition ensures that the loop will run until this
runs out of siblings.
The nextSibling property is a reference to the next node in the DOM tree. A node is
different from an element. HTML elements are nodes, but the whitespace between tags is
a node, as is the text inside a tag. So the nextSibling of a node might very well be the
return character at the end of the line following the tag. There are a number of other
properties associated with nodes as well that can be used to traverse the document. Some
are listed in Table 15.2.
TABLE 15.2 Node Properties for Navigating the DOM
Method Description
childNodes An array of all the children of a node.
firstChild The first child node of a node.
innertHTML The markup and content inside a node. You can set this property
to change the contents of a node.
450
LESSON 15: Using JavaScript in Your Pages
, ,
Download from www.wowebook.com
ptg
Method Description
lastChild The last child of a node.
nextSibling The next sibling of the node (at the same level of the DOM tree).
parentNode The parent of the current node.
previousSibling The node that precedes the current node at the same level of
the tree.
All the properties in the table are null if it’s not possible to traverse the DOM in that
direction. For example, if a node has no child nodes, its lastChild property will be
null.
Here’s what happens when a user clicks one of the questions. As mentioned, a while
loop will iterate over the siblings of the question. Inside the while loop, I check the
nodeType and tagName of the current node.
The nodeType property contains a number that identifies what type of node is being
processed. Element nodes have a node type of 1. Attributes are node type 2, and text
nodes are type 3. There are 12 total node types, but those three are the main ones you’ll
use. In this function, I’m searching for the <dd> tag that follows the DT tag that contains
the question. I have to check the node type before checking the tagName property,
because only elements (which have node type 1) support the tagName property. If I didn’t
check the node type first, other node types would cause errors.
Each sibling node that follows the original <dt> is tested, and as soon as a <dd> element
is found, the script toggles the visibility of that element. It then uses the break statement
to stop executing the loop. If the node is not a <dd> element, then the next sibling of
currentNode is assigned to the currentNode variable, and the loop is executed again. If
the <dd> element is never found, then when there are no more siblings, the currentNode
variable will be set to null, and execution of the loop will stop.
At the end, the function returns false:
questions = faqList.getElementsByTagName(“dt”);
for (i = 0; i < questions.length; i++) {
questions[i].onclick = function() {
// The actual event handling code goes here.
}
}
First, I use getElementsByTagName() to get a list of all the <dt> tags that are children of
faqList. Then I used a for loop to iterate over them and bind the function described
previously to their onclick event.
Hiding and Showing Elements
451
15
,
▲
Download from www.wowebook.com
ptg
▼
Adding New Content to a Page
The last example demonstrated how to modify styles on a page. In this example, I
explain how to modify the content on a page using JavaScript. You can create new ele-
ments in JavaScript and then attach them to the document in any location that you
choose. You can also modify elements that are already on the page or remove elements if
you need to do so.
Task: Exercise 15.3: Add an Expand All/Collapse All Link to
the FAQ
In this example, I add a new feature to the FAQ page presented in the previous example.
In that example, I illustrated how to add new features to a page using JavaScript without
modifying the markup in any way. This example will continue along those lines. I won’t
be making any changes at all to the markup on the page; all the changes will take place
inside the JavaScript file.
In this example, I add a link to the page that expands all the questions in the FAQ, or if
all the questions are already expanded, collapses all the questions. The label on the link
will change depending on its behavior, and the function of the link will also change if the
user individually collapses or expands all the questions.
Adding the Link to the Page Because the link functions only if the user has
JavaScript enabled, I am going to add it dynamically using JavaScript. I’ve added a new
function to the JavaScript file that takes care of adding the link, which I call from the
onload handler for the page. The function adds more than just a link to the page. It adds
a link, a <div> containing the link, and the onclick handler for the link. Here’s the func-
tion, which I’ve named addExpandAllLink():
function addExpandAllLink() {
var expandAllDiv, expandAllLink, faq;
expandAllDiv = document.createElement(“div”);
expandAllDiv.setAttribute(“id”, “expandAll”);
expandAllLink = document.createElement(“a”);
expandAllLink.setAttribute(“href”, “#”);
expandAllLink.setAttribute(“id”, “expandAllLink”);
expandAllLink.appendChild(document.createTextNode(“Expand All”));
expandAllDiv.appendChild(expandAllLink);
expandAllLink.onclick = function() {
var faqList, answers;
faqList = document.getElementById(“faq”);
answers = faqList.getElementsByTagName(“dd”);
452
LESSON 15: Using JavaScript in Your Pages
,
Download from www.wowebook.com
ptg
if (this.innerHTML == “Expand All”) {
for (i = 0; i < answers.length; i++) {
answers[i].style.display = ‘block’;
}
this.innerHTML = “Collapse All”;
}
else {
for (i = 0; i < answers.length; i++) {
answers[i].style.display = ‘none’;
}
this.innerHTML = “Expand All”;
}
return false;
};
faq = document.getElementById(“faq”);
faq.insertBefore(expandAllDiv, faq.firstChild);
}
First, I declare the variables I use in the function, and then I start creating the elements.
The createElement() method of the document object is used to create an element. It
accepts the element name as the argument. I create the <div> element and then call the
setAttribute() method to add the id attribute to that element. The setAttribute()
method takes two arguments, the attribute name and the value for that attribute. Then I
create the link by creating a new <a> element. I set the href attribute to #, because the
event handler for the link’s onclick event will return false anyway, and I add an id for
the link, too. To add the link text, I call the document.createTextNode() method:
expandAllLink.appendChild(document.createTextNode(“Expand All”));
I pass the results of that method call to the appendChild() method of expandAllLink,
which results in the text node being placed inside the <a> tag. Then on the next line I
append the link to the <div>, again using appendChild(). The last thing to do before
appending the <div> to an element that’s already on the page (causing it to appear) is to
add the onclick handler to the link.
I’m again attaching the onclick handler using an anonymous function, as I did in the
previous example. In this case, I use the same technique I used in the previous example,
obtaining a reference to the <div> with the ID faq and then retrieving a list of <dd> ele-
ments inside it.
At that point, I inspect the contents of this.innerHTML. In an event handler, this is a
reference to the element upon which the event was called, so in this case, it’s the link.
The innerHTML property contains whatever is inside that element, in this case, the link
text. If the link text is “Expand All,” I iterate over each of the answers and set their
Adding New Content to a Page
453
15
, ,
Download from www.wowebook.com
ptg
display property to block. Then I modify the this.innerHTML to read “Collapse All”.
That changes the link text to Collapse All, which not only alters the display, but also
causes the same function to hide all the answers when the user clicks on the link again.
Then the function returns false so that the link itself is not processed.
When the onclick handler is set up, I add the link to the document. I want to insert the
link immediately before the list of frequently asked questions. To do so, I get a reference
to its <div> using getElementById() and then use insertBefore() to put it in the right
place:
faq = document.getElementById(“faq”);
faq.insertBefore(expandAllDiv, faq.firstChild);
Table 15.3 contains a list of methods that can be used to modify the document. All of
them are methods of elements.
TABLE 15.3 Methods for Accessing the DOM
Method Description
appendChild(element) Adds the element to the page as a child of the
method’s target
insertBefore(new, ref) Inserts the element new before the element
ref on the list of children of the method’s
target.
removeAttribute(name) Removes the attribute with the supplied name
from the method’s target
removeChild(element) Removes the child of the method’s target
passed in as an argument
replaceChild(inserted, replaced) Replaces the child element of the method’s
target passed as the
inserted argument with
the element passed as the parameter
replaced
setAttribute(name, value) Sets an attribute on the method target with
the name and value passed in as arguments
There’s one other big change I made to the scripts for the page. I added a call to a new
function in the handler for the click event for the questions on the page:
updateExpandAllLink();
That’s a call to a new function I wrote, which switches the Expand All / Collapse All
link if the user manually collapses or expands all the questions. When the page is
opened, all the questions are collapsed, and the link expands them all. After the user has
454
LESSON 15: Using JavaScript in Your Pages
, ,
Download from www.wowebook.com
ptg
expanded them all one at a time, this function will switch the link to Collapse All. The
function is called every time the user clicks on a question. It inspects the answers to
determine whether they are all collapsed or all expanded, and adjusts the link text
accordingly. Here’s the source for that function:
function updateExpandAllLink() {
var faqList, answers, expandAllLink, switchLink;
faqList = document.getElementById(“faq”);
answers = faqList.getElementsByTagName(“dd”);
expandAllLink = document.getElementById(“expandAllLink”);
switchLink = true;
if (expandAllLink.innerHTML == “Expand All”) {
for (i = 0; i < answers.length; i++) {
if (answers[i].style.display == ‘none’) {
switchLink = false;
}
}
if (switchLink) {
expandAllLink.innerHTML = “Collapse All”;
}
}
else {
for (i = 0; i < answers.length; i++) {
if (answers[i].style.display == ‘block’) {
switchLink = false;
}
}
if (switchLink) {
expandAllLink.innerHTML = “Expand All”;
}
}
}
This function starts with some setup. I declare the variables I will be using, and retrieve
the elements I need to access from the DOM. I also set the variable switchLink to true.
This variable is used to track whether I need to switch the link text in the Expand All
link. When everything is set up, I use an if statement to test the state of the link. If the
link text is set to Expand All, it checks each of the answers. If any of them are hidden, it
leaves the link as is. If all of them are displayed, it changes the link text to Collapse
All. If the link text is already Collapse All, the test is the opposite. It switches the link
text to Expand All if all the questions are hidden.
Adding New Content to a Page
455
15
,
▲
Download from www.wowebook.com