SAS Data Integration Studio 3.3- P33 pdf
Bạn đang xem bản rút gọn của tài liệu. Xem và tải ngay bản đầy đủ của tài liệu tại đây (550.61 KB, 5 trang )
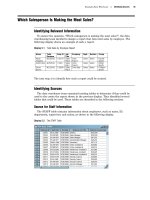
Example Process Flows Configure the SQL Join Transformation 155
The number that you specify in the OBS= option should be high enough so that
the transformations in the job will be able to execute successfully; that is, the
transformations will have enough data on which to perform their operations.
7
Click
OK
to save the OBS= option.
8 Click OK
to save your changes in the job properties window.
Note: All inputs in the current job will be limited to the number of data rows that
you specified in the OBS= option until you disable this option.
One way to disable a pre-processing option is to (a) deselect the
Pre Processing
check box on the
Pre and Post Process
tab, and (b) save the job and close the
Process Designer window. For more information about setting options on the
Pre and
Post Process
tab in the job properties window, see “Adding SAS Code to the Pre and
Post Processing Tab” on page 225.
Configure the SQL Join Transformation
Specify Column Mappings
In this section, you will map some columns from the source tables to columns in the
temporary output table for the SQL Join transformation. The goal is to map only the
columns that are required for the report that you want to create, as shown in Display
10.1 on page 150. The required columns are Employee_Name, Employee_ID, Job_Title,
Company, Department, Section, Org_Group, and Total_Retail_Price.
Follow these steps to specify column mappings for the SQL Join transformation:
1 In the Process Designer window, select the
SQL Join transformation object. Then
select
File
Properties from the menu bar. A properties window displays.
156 Configure the SQL Join Transformation Chapter 10
2 Click the Mapping
tab. By default, the SQL Join transformation maps all columns
in the source tables to the same columns in the temporary output table, as shown
in the following display.
Display 10.5 SQL Join Mapping Tab: Before Extra Columns Are Deleted
However, you need only some of these columns for the report that you want to
create. You can simplify the transformation by deleting the metadata for any
unneeded columns in the target table.
Example Process Flows Configure the SQL Join Transformation 157
3 In the Target Table
pane on the
Mapping tab, press the CTRL key, left-click the
name of each column to be deleted, and select
Delete from the pop-up menu.
When you are finished, the
Mapping
tab will resemble the following display.
Display 10.6 SQL Join Mapping Tab: After Extra Columns Are Deleted
4 Click Apply to save your changes without closing the properties window.
5 (Optional) To see how the SQL code is updated based on the contents of the
Mapping tab and other tabs in the SQL Join transformation, click the SQL tab.
The code on the
SQL tab should resemble the following sample:
SELECT ’ORGANIZATION_DIM’n.’Employee_ID’n,
’ORGANIZATION_DIM’n.’Company’n, ’ORGANIZATION_DIM’n.’Department’n,
’ORGANIZATION_DIM’n.’Section’n, ’ORGANIZATION_DIM’n.’Org_Group’n,
’ORGANIZATION_DIM’n.’Job_Title’n, ’ORGANIZATION_DIM’n.’Employee_Name’n,
’ORDER_FACT’n.’Total_Retail_Price’n
FROM ’orstar’n.’ORGANIZATION_DIM’n
INNER JOIN ’orstar’n.’ORDER_FACT’n
ON (’ORDER_FACT’n.’Employee_ID’n = ’ORGANIZATION_DIM’n.’Employee_ID’n)
The previous SQL statement selects the mapped columns from the
ORGANIZATION_DIM and ORDER_FACT tables and joins the result on the
Employee_ID column.
Change One Column to a Calculated Column
The Total_Retail_Price column from the ORDER_DETAIL table contains the price for
a particular item that was sold by an employee. However, the report that you want to
create shows the total sales for each employee. (See Display 10.1 on page 150.)
158 Configure the SQL Join Transformation Chapter 10
Perform these steps to change the Total_Retail_Price column into a derived column
(calculated column) that totals all sales for each employee:
1
In the
Target Table
pane on the right of the
Mapping
tab, scroll to the
Total_Retail_Price column.
2 Click twice in the
Expression attribute for Total_Retail_Price. Then click again in
the icon that appears on the right side of the field. This action displays the
Expression Builder, which will be used to enter the expression that will
summarize individual sales into a total revenue number for each salesperson.
3
In the Expression Builder window, on the
Functions
tab, select the
All
Functions
folder. A list of SAS functions is displayed.
4 Scroll to the
SUM(argument)
function, select it, and click
Insert. The
SUM(argument)
function appears in the
Expression Text
area of the Expression
Builder. The argument portion of the expression is selected. The next step is to
supply the argument: a column name whose contents are to be summed.
5
Click the
Data Sources
tab in the Expression Builder. A list of tables that are
inputs to the current transformation appears.
6
Expand the icon for the ORDER_FACT table, select the Total_Retail_Price column,
and click
Insert. The completed expression appears in the
Expression Text
pane in the Expression Builder, as shown in the following display.
Display 10.7 Completed SUM Expression
Example Process Flows Configure the SQL Join Transformation 159
7 Click OK
to save the expression. The Expression Builder window closes. The
expression appears in the
Expression
column on the
Mapping
tab, as shown in
the following display.
Display 10.8 SQL Join Mapping Tab With a SUM Expression
8 Click Apply to save your changes without closing the properties window.
9 (Optional) To see how the SQL code is changed by the expression that you just
defined, click the
SQL tab. The code on the SQL tab should resemble the following
sample:
SELECT ’ORGANIZATION_DIM’n.’Employee_ID’n,
’ORGANIZATION_DIM’n.’Company’n, ’ORGANIZATION_DIM’n.’Department’n,
’ORGANIZATION_DIM’n.’Section’n, ’ORGANIZATION_DIM’n.’Org_Group’n,
’ORGANIZATION_DIM’n.’Job_Title’n, ’ORGANIZATION_DIM’n.’Employee_Name’n,
SUM(’ORDER_FACT’n.’Total_Retail_Price’n) format=8. AS
’Total_Retail_Price’n
FROM ’orstar’n.’ORGANIZATION_DIM’n
INNER JOIN ’orstar’n.’ORDER_FACT’n
ON (’ORDER_FACT’n.’Employee_ID’n = ’ORGANIZATION_DIM’n.’Employee_ID’n)
The previous SQL statement selects the mapped columns from the
ORGANIZATION_DIM and ORDER_FACT tables, summarizes the contents of the
Total_Retail_Price column, and joins the result on the Employee_ID column.