SAS Data Integration Studio 3.3- P25 pdf
Bạn đang xem bản rút gọn của tài liệu. Xem và tải ngay bản đầy đủ của tài liệu tại đây (499.98 KB, 5 trang )
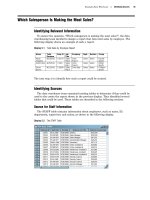
Main Tasks for Users Checking In Metadata 115
Task Summary
1 On the SAS Data Integration Studio desktop, click the Inventory
tab or the
Custom
tab. The appropriate tree displays.
2
Open the folder for the kind of metadata that you want to check out, such as the
Tables folder for tables in the Inventory tree.
3 Right-click the metadata that you want to check out and select
Change-Management
Check Out. You can also left-click the metadata that
you want to check out, then go the drop-down menu and select Project
Check
Out. The metadata is checked out and displays in the Project tree.
Next Tasks
After you have checked out metadata to the Project tree, you can update it. After you
have finished any updates, you can check in the metadata to the change-managed
repository.
Checking In Metadata
Preparation
When you are finished working with all of the metadata that is displayed in the
Project tree, use the check-in feature to store the objects in the change-managed
repository.
Note: A check-in operation checks in all metadata objects that are in the Project
tree. You cannot check in selected objects and leave other objects in the Project tree.
Accordingly, you might find it convenient to work with small sets of related objects in
the Project tree.
Task Summary
1
On the SAS Data Integration Studio desktop, click the
Project tab. The Project
tree displays.
2 Right-click the project repository icon and select
Check In Repository
. You can
also left-click the project repository icon, open the drop-down menu, and select
Project
Check In Repository. The Check In window displays.
3
Enter meaningful comments in the Name field (and perhaps in the
Description
field) about the changes that were made to all of the objects that you are about to
check in. The text entered here becomes part of the check in/check out history for
all objects that you are checking in. If you do not enter meaningful comments, the
check in/check out history is less useful.
4 When finished entering comments in the Check In window, click
OK. All metadata
objects that are in the project repository are checked into the change-managed
repository.
116 Additional Information About Change Management Chapter 7
Additional Information About Change Management
The Help for SAS Data Integration Studio provides more details about
change-management. To display the relevant Help topics, do the following:
1
From the SAS Data Integration Studio menu bar, select Help Contents. The
Help window displays.
2 In the left pane of the Help window, select Task Overviews
SAS Data
Integration Studio Task Reference
Using Change Management in SAS
Data Integration Studio.
Working with Impact Analysis and Reverse Impact Analysis (Data
Lineage)
Impact analysis displays information about how data is used. Reverse impact
analysis displays information about how data was developed. Analytical results are
derived from the current metadata repository and any parent repositories.
Impact analysis shows you the jobs, tables, and cubes that make use of a selected
table or column. This information is helpful before you modify or delete data. For
example, if you perform impact analysis on a column, the Impact Analysis window
might show that the selected column is used to build an OLAP cube. If you deleted that
column, you might also have to change the job that builds the cube. You can also track
the usage of generated transformations using impact analysis. In this case, the Impact
Analysis window shows all of the jobs that make use of the generated transformation.
Reverse impact analysis shows you the lineage of the data in a selected table,
column, or cube. This information is useful when you need to trace data errors or data
sources. For example, if you perform reverse impact analysis on a table, the results
might show that the data in the table was validated by a job that contains a Data
Validation transformation. The source for validation job might be an Oracle table. Data
errors might be present in the lookup table that provides valid values, or in the original
Oracle data.
Working with OLAP Cubes
Overview of OLAP Cubes
Online analytical processing (OLAP) cubes are logical sets of data that are structured
in a hierarchical, multidimensional arrangement. Cubes are valuable analytical tools
because they provide easily modified views of large data sets. Because of their size,
cubes are built and stored on servers and viewed, or queried, from client cube viewers.
To decrease the response time for commonly submitted queries, numeric data
summaries are calculated at build time and stored with the cube data.
OLAP Capabilities in SAS Data Integration Studio
In SAS Data Integration Studio, you can create and update OLAP cubes with the
Cube Designer, which is available in the Target Designer wizard. The Cube Designer
Main Tasks for Users Additional Information About User Tasks 117
walks you through the process of specifying an OLAP schema, source data, and any
other cube definitions such as calculated measures, drill-through tables, and
aggregations.
Another method of creating and updating cubes is to write SAS programs in the
Source Editor. The cubes are defined in OLAP procedures. When the programs are
ready to run, you can submit them for execution from the Source Editor or you can
include them in stored processes and run them at a later date.
In both the Cube Designer and in the OLAP procedure (PROC OLAP), you can
choose to define cube metadata only and create the physical cube at a later date.
Cubes can be defined as targets in jobs, though the data that is written to those
cubes is not available to cube viewers until the cube is updated.
Cubes that appear in the inventory of SAS Data Integration Studio are included in
impact analyses that involve cube data or cube source data.
Prerequisites for Cubes
Follow these general steps to begin building and querying cubes with the Cube
Designer:
1
Install a SAS OLAP Server.
2 Add metadata for the SAS OLAP Server. (You can specify the SAS OLAP Server
as one component of the default SAS application server for SAS Data Integration
Studio.)
3
Define an OLAP schema and assign the SAS OLAP Server to the schema.
4
Define cube source tables using the Source Designer.
5 Start the SAS OLAP Server.
For details about these tasks, see the
SAS OLAP Server: Administrator’s Guide and
the SAS Intelligence Platform: Administration Guide.
Additional Information About Cubes
Extensive information on building and maintain cubes is available in the Help for
SAS Data Integration Studio. To display a list of links to all cube-related Help topics,
including examples, open the Help browser and search for “Maintaining Cubes”.
The documentation for the SAS OLAP Server software provides complete coverage of
SAS OLAP Cube Studio, the OLAP procedure, and the SAS OLAP Server Monitor in
SAS Management Console. See the SAS OLAP Server: User’s Guide and the SAS OLAP
Server: Administrator’s Guide.
For information about the configuration of SAS OLAP Servers on SAS Workspace
Servers, see the SAS Intelligence Platform: Administration Guide.
Additional Information About User Tasks
The Help for SAS Data Integration Studio provides additional information about user
tasks. To display Help topics about the main user tasks, follow these steps:
1 From the SAS Data Integration Studio menu bar, select Help
Contents. The
Help window displays.
2 In the left pane of the Help window, select Task Overviews SAS Data
Integration Studio Task Reference.
3 See the section for user tasks.
118
119
CHAPTER
8
Registering Data Sources
Sources: Inputs to SAS Data Integration Studio Jobs
119
Example: Using a Source Designer to Register SAS Tables
120
Preparation 120
Start SAS Data Integration Studio and Open the Appropriate Metadata Profile
120
Select the SAS Source Designer
121
Select the Library That Contains the Tables 122
Select the Tables
123
Specify a Custom Tree Group
124
Save the Metadata for the Tables
125
Check In the Metadata
126
Example: Using a Source Designer to Register an External File
126
Preparation
126
About External File Source Designers 127
Start SAS Data Integration Studio and Open the Appropriate Metadata Profile 127
Select an External File Source Designer 128
Specify Location of the External File 129
Set Delimiters and Parameters 130
Define the Columns for the External File Metadata 131
View the External File Metadata 137
View the Data in the External File 138
Check In the Metadata 138
Next Tasks 138
Sources: Inputs to SAS Data Integration Studio Jobs
In general, a source is an input to an operation. In a SAS Data Integration Studio
job, a source is a data store from which information will be extracted, transformed, and
loaded into a target, which can be a data store in a data warehouse, a data mart, or
another data collection.
After you complete the tasks that are described in “Preliminary Tasks for Users” on
page 93, you can register the data sources that will be used in a job. To register a data
source, you will enter metadata about it and save the metadata to a SAS Metadata
Repository.
Your project plan should identify the data sources that are required for a particular
job. For example, the sources that are required to answer specific business questions in
the Orion Star Sports & Outdoors project are listed under each business question. See
the Identifying Sources section under each business question in Chapter 5, “Example
Data Warehouse,” on page 43. Use the examples in this chapter, together with general
methods that are described in “Registering Sources and Targets” on page 97, to register
the sources that will be used in a SAS Data Integration Studio job.