Microsoft SQL Server 2008 R2 Unleashed- P88 potx
Bạn đang xem bản rút gọn của tài liệu. Xem và tải ngay bản đầy đủ của tài liệu tại đây (280.07 KB, 10 trang )
ptg
814
CHAPTER 26 Implementing Data Integrity
FIGURE 26.1 A primary key example.
storage. This is particularly important when the primary key is CLUSTERED, as in the case of
PK_Employee_BusinessEntityID. The key values from the clustered index are used by all
nonclustered indexes as lookup keys. If the clustered key is large, this consumes more
space and affects performance.
Surrogate keys are often good choices for primary keys. The BusinessEnityID column in
the Person.BusinessEntity table is an example of a surrogate key. Surrogate keys consist
of a single column that automatically increments and is inherently unique, as in the case
of an identity column. Surrogate keys are good candidates for primary keys because they
are implicitly unique and relatively short in length. You should avoid using large, multi-
column indexes as primary keys. They can impede performance because fewer index rows
can be stored on each index page. The performance implications related to primary key
indexes and other indexes are discussed in more detail in Chapter 34, “Data Structures,
Indexes, and Performance.”
NOTE
Over the years, there has been much debate over the use of surrogate keys for primary
keys. One school of thought is to avoid surrogate keys because insertions always occur
at the end of the primary key index and are not distributed. This can lead to “hot
spots” in the index because the insert activity is always on the last page of the index.
In addition, surrogate keys have no real meaning and are less intuitive than primary
keys that have meaning, such as lastname and firstname.
Download from www.wowebook.com
ptg
815
Using Constraints
26
The other school of thought, in favor of using surrogate keys for primary keys, empha-
sizes the importance of defining primary keys that are not based on meaningful
columns. If meaningful columns are used and the definitions of those columns change,
this can have a significant impact on the table that contains the primary key and any
tables related to it. Those in favor of using surrogate keys as primary keys also focus
on the relatively small key size, which is good for performance and reduces pages
splits because the values are always inserted into the index sequentially.
The UNIQUE Constraint
The UNIQUE constraint is functionally similar to PRIMARY KEY. It also uses a unique index
to enforce uniqueness, but unlike PRIMARY KEY, it allows nulls in the columns that partici-
pate in the UNIQUE constraint. The definition of a UNIQUE constraint with columns that are
nulls is generally impractical. The value of NULL is considered a unique value, so you are
limited to the number of rows that can be inserted with NULL values. For example, only
one row with a NULL value in the constraint column can be inserted if the UNIQUE
constraint is based on a single column. UNIQUE constraints with multiple nullable columns
can have more than one row with null values in the constraint keys, but the number of
rows is limited to the combination of unique values across all the columns.
An alternate unique key on the SalesTaxRate table is a good example of a unique constraint
in the AdventureWorks2008 database. The AK_SalesTaxRate_StateProvinceID_TaxType
index contain the StateProvinceId and TaxType columns. Each of these columns is
defined as NOT NULL. In simple terms this means that TaxTypes must be unique within
each state or province. If, however, the StateProvinceID was nullable then you could have
one row for a given TaxType that is null then all other rows for that tax type must have
the StateProvinceID to make the combination of StateProvinceId and Tax Type unique.
You generally use a UNIQUE constraint when a column other than the primary key must be
guaranteed to be unique. For example, consider the Employee table example used in the
previous section. The primary key on the identity column EmployeeID ensures that a
unique value will be assigned to each employee row, but it does not prevent duplication
in any of the other columns. For example, every row in the Employee table could have the
same LoginID setting if no other UNIQUE constraints were found on this table. Generally,
each employee should have his or her own unique LoginID. You can enforce this policy by
adding a UNIQUE constraint on the LoginID column. The following example demonstrates
the creation of a UNIQUE constraint on the EmployeeID column:
ALTER TABLE [HumanResources].[Employee]
ADD CONSTRAINT AK_Employee_LoginID
UNIQUE NONCLUSTERED (LoginID ASC)
As with PRIMARY KEY constraints, a unique index is created whenever a UNIQUE constraint
is created. If you drop the UNIQUE constraint, you drop the unique index as well.
Download from www.wowebook.com
ptg
816
CHAPTER 26 Implementing Data Integrity
Conversely, if you drop the unique index, you indirectly drop the UNIQUE constraint, too.
You can implement a UNIQUE constraint as a constraint or an index. To illustrate this, the
following example shows the creation of the same UNIQUE constraint on Employee_LoginID
as before, this time using an index:
CREATE UNIQUE NONCLUSTERED INDEX [AK_Employee_LoginID]
ON [HumanResources].[Employee]
(LoginID ASC)
NOTE
Although UNIQUE constraints and unique indexes achieve the same goal, they must be
managed based on how they were created. In other words, if you create a UNIQUE con-
straint on a table, you cannot directly drop the associated unique index. If you try to
drop the unique index directly, you get a message stating that an explicit DROP INDEX is
not allowed and that it is being used for unique key constraint enforcement. To drop the
UNIQUE constraint, you must use the DROP CONSTRAINT syntax associated with the
ALTER TABLE statement. Similarly, if you create a unique index, you cannot drop that
index by using a DROP CONSTRAINT statement; you must use DROP INDEX instead.
You can have more than one unique constraint per table. When creating unique
constraints, you have all the standard index-creation options available. These options
include how the underlying index is clustered, the fill factor, and a myriad of other index
options.
The FOREIGN KEY Referential Integrity Constraint
The basic premise of a relational database is that tables are related. These relationships are
maintained and enforced via referential integrity. FOREIGN KEY constraints are the declara-
tive means for enforcing referential integrity in SQL Server. You implement FOREIGN KEY
constraints by relating one or more columns in a table to the columns in a primary key or
unique index. The columns in the referencing table can be referred to as foreign key
columns. The table with the primary key or unique index can be referred to as the primary
table. Figure 26.2 shows a relationship between the BusinessEntityAddress table and
BusinessEntityAddress table. The foreign key in this example is AddressTypeID on the
BusinessEntityAddress table. AddressTypeID on this table is related to the primary key
on the AddressTypeID table. The foreign key relationship in this diagram is denoted by
the line between these two tables.
Download from www.wowebook.com
ptg
817
FIGURE 26.2 A foreign key constraint on the BusinessEntityAddress table.
Using Constraints
26
Once defined, a foreign key, by default, enforces the relationship between the tables in the
following ways:
. Values in the foreign key columns must have a corresponding value in the primary
table. If the new values in the foreign key columns do not exist in the primary table,
the insert or update operation fails.
. Values in the primary key or unique index that are referenced by the foreign key
table cannot be deleted. If an attempt is made to delete a referenced value in the
primary table, the delete fails.
. Values in the primary key or unique index that are referenced by the foreign key
table cannot be modified. If an attempt is made to change a referenced value in the
primary table, the update fails.
In the case of the AddressType/BusinessEntityAddress relationship shown in Figure 26.2,
any AddressTypeID used in the BusinessEntityAddress table must have a corresponding
value in the AddressType table. Listing 26.1 shows an INSERT statement in the
BusinessEntityAddress table that does not have a valid AddressTypeID entry in the
AddressType table. The statement fails, and the resulting message is shown after the
INSERT statement. A similar error message is displayed if an attempt is made to delete or
update values in the primary key or unique index that does not satisfy the foreign key
contraint.
LISTING 26.1 A Foreign Key Conflict with INSERT
INSERT Person.BusinessEntityAddress
(BusinessEntityID,AddressID, AddressTypeID, rowguid, ModifiedDate)
VALUES (1,249, 9, NEWID(), GETDATE())
/* RESULTS OF INSERT FOLLOW
Msg 547, Level 16, State 0, Line 1
The INSERT statement conflicted with the FOREIGN KEY
constraint "FK_BusinessEntityAddress_AddressType_AddressTypeID".
The conflict occurred in database "AdventureWorks2008",
table "Person.AddressType", column 'AddressTypeID'.
The statement has been terminated.*/
Download from www.wowebook.com
ptg
818
CHAPTER 26 Implementing Data Integrity
The following example shows the T-SQL needed to create the foreign key relationship
between the AddressType and BusinessEntityAddress tables:
ALTER TABLE [Person].[BusinessEntityAddress]
ADD CONSTRAINT [FK_BusinessEntityAddress_AddressType_AddressTypeID]
FOREIGN KEY([AddressTypeID])
REFERENCES [Person].[AddressType]
([AddressTypeID])
When you create a FOREIGN KEY constraint, the related primary key or unique index must
exist first. In the case of the AddressType/BusinessEntityAddress relationship, the
AddressType table and primary key on AddressTypeID must exist before you can create the
FK_BusinessEntityAddress_AddressType_AddressTypeID foreign key. In addition, the data
types of the related columns must be the same. The related columns in the two tables can
actually have different names, but in practice the columns are usually named the same.
Naming the columns the same makes your database much more intuitive.
NOTE
In addition to relating two different tables with a foreign key, you can also relate a table
to itself. These self-referencing relationships are often found in organization tables or
employee tables. For example, you could have an Employee table with a primary key of
EmployeeID . This table could also have a ManagerID column. In this case, ManagerID
on the Employee table has a relationship to the primary key index on EmployeeID. The
manager is an employee, so it makes sense that they should have a valid EmployeeID.
A foreign key on the Employee table will enforce this relationship and ensure that any
ManagerID points to a different row in the table with a valid EmployeeID.
Cascading Referential Integrity
Cascading referential integrity has been around for some time and was introduced with
SQL Server 2000. This type of integrity allows for updates and deletions on the primary
table to be cascaded to the referencing foreign key tables. By default, a FOREIGN KEY
constraint prevents updates and deletions to any primary key or unique index values refer-
enced by a foreign key. With cascading referential integrity, you can bypass this restriction
and are able to define the type of action you want to occur when the updates and deletions
happen.
You define the cascading actions on the FOREIGN KEY constraint, using the ON DELETE and
ON UPDATE clauses. The ON DELETE clause defines the cascading action for deletions to the
primary table, and the ON UPDATE clause defines the actions for updates. These clauses are
used with the CREATE TABLE or ALTER TABLE statements and are part of the REFERENCES
clause of these statements.
You can specify the same cascading actions for updates and deletions:
. NO ACTION—This action, the default, causes deletions and updates to the primary
table to fail if the rows are referenced by a foreign key.
Download from www.wowebook.com
ptg
819
Using Constraints
26
. CASCADE—This option causes updates and deletions to cascade to any foreign key
records that refer to the affected rows in the primary table. If the CASCADE option is
used with the ON DELETE clause, any records in the foreign key table that refer to the
deleted rows in the primary table are also deleted. When CASCADE is used with the ON
UPDATE clause, any updates to the primary table records are also made in the related
rows of the foreign key table.
. SET NULL—This option was new in SQL Server 2005. It is similar to the CASCADE
option except that the affected rows in the foreign key table are set to NULL when
deletions or updates are performed on the related primary table. The value of NULL is
assigned to every column that is defined as part of the foreign key and requires that
each column in the foreign key allow null values.
. SET DEFAULT—This option also was new in SQL Server 2005. It is similar to the
CASCADE option except that the affected rows in the foreign key table are set to the
default values defined on the columns when deletions or updates are performed on
the related primary table. If you want to set this option, each column in the foreign
key must have a default definition assigned to it, or it must be defined as nullable. If
no default definition is assigned to the column, NULL is used as the default value. It
is imperative that the primary table have related records for the default or null
entries that can result from the cascading action. For example, if you have a two-col-
umn foreign key, and each column has a default of 1, a corresponding record with
the key values of 1 and 1 needs to exist in the primary table, or the cascade action
fails. The integrity of the relationship must be maintained.
To illustrate the power of cascading actions, consider the AddressType/BusinessEntity
Address relationship used in previous examples. Let’s say you want to remove the associ-
ated BusinessEntityAddress records when an AddressType record is deleted. The addition
of the ON DELETE CASCADE clause at the bottom of the following foreign key definition
achieves this result:
ALTER TABLE [Person].[BusinessEntityAddress]
ADD CONSTRAINT [FK_BusinessEntityAddress_AddressType_AddressTypeID]
FOREIGN KEY([AddressTypeID])
REFERENCES [Person].[AddressType]
([AddressTypeID])
ON DELETE CASCADE
Keep in mind that other factors affect the successful execution of a cascading deletion. If
other foreign keys exist on the table, and they do not have ON DELETE CASCADE specified,
the cascading actions do not succeed if a foreign key violation occurs on these tables. In
addition, you need to consider the existence of triggers that may prevent deletions from
occurring. Also, you need to consider that a series of cascading actions can be initiated by
a single DELETE statement. This happens when you have many related tables, each of
which has cascading actions defined. This approach works fine as long as there are no
circular references that cause one of the tables in the cascading tree to be affected by a
table lower in the tree.
Download from www.wowebook.com
ptg
820
CHAPTER 26 Implementing Data Integrity
If you want to specify the cascading action for updates, you can add an additional ON
UPDATE clause, along with the ON DELETE clause. For example, you can change the foreign
key in the previous example so that BusinessEntityAddress records are set to NULL when
an update is made to the related key on the primary table. This can be accomplished with
the following foreign key definition:
ALTER TABLE [Person].[BusinessEntityAddress]
ADD CONSTRAINT [FK_BusinessEntityAddress_AddressType_AddressTypeID]
FOREIGN KEY([AddressTypeID])
REFERENCES [Person].[AddressType]
([AddressTypeID])
ON DELETE CASCADE
ON UPDATE SET NULL
You can see that cascading referential integrity is a powerful tool. However, it must be
used with caution. Consider the fact that foreign keys without cascading actions may
prevent erroneous actions. For example, if a DELETE statement is mistakenly executed
against the entire AddressType table, the deletion would fail before the records could be
deleted because foreign key tables are referencing the AddressType table. This failure
would be a good thing. If, however, the ON DELETE CASCADE clause were used in the
foreign key definitions, the erroneous deletion would succeed, and all the foreign key
records would be deleted as well.
The CHECK Constraint
You can use the CHECK constraint to enforce domain integrity and to provide a means for
restricting the values that can be entered in a column. A CHECK constraint is implemented
as a Boolean expression, and it must not be FALSE if the insertion or update is to proceed.
The Boolean expression can reference other columns in the same table, but it cannot refer-
ence other tables. Foreign keys and triggers can be used to reference columns in other
tables, if needed. The expression can also include functions that do not return results. A
CHECK constraint that is defined on a specific column can reference only the values in the
column.
CHECK constraints are good for ensuring the format of data inserted in a column and for
defining a list of acceptable values. Columns with phone numbers or Social Security
numbers are good candidates for CHECK constraints that enforce formatting restrictions.
Columns that have the data types money or integer can use CHECK constraints to ensure
that the values are always greater than or equal to zero. A column that has a small fixed
number of valid values is also a good candidate for a CHECK constraint. A fixed number of
values can be defined in the CHECK constraint, and no additional table lookup or coding is
necessary to ensure that the valid values are inserted. The following example shows a
CHECK constraint on the Employee table that checks the values for the Gender column:
ALTER TABLE [HumanResources].[Employee] WITH CHECK
ADD CONSTRAINT [CK_Employee_Gender]
CHECK ((upper([Gender])=’F’ OR upper([Gender])=’M’))
Download from www.wowebook.com
ptg
821
Using Constraints
26
The CHECK constraint in this example ensures that only F or M is inserted in this column.
These types of CHECK constraints are relatively fast and are preferred over FOREIGN KEY
constraints when the values are fixed.
NOTE
Be careful with CHECK constraint expressions that can evaluate to NULL. CHECK con-
straints allow insertions and updates to the table to proceed when the CHECK con-
straint expression does not evaluate to FALSE. A NULL value is considered to be
unknown and does not evaluate to FALSE, so the insertion or update succeeds. For
example, if you have a nullable column that has a constraint specifying that the value
must be greater than or equal to zero, this constraint does not prevent a NULL value
from being inserted into the column.
Keep in mind that the creation of a CHECK constraint on a table that already has data in it
may fail. This is due to a validation performed when the constraint is created. If existing
data violates the constraint, the constraint is not created. The only exception is to create
the constraint by using the NOCHECK option. When this option is used, the existing data is
not checked, but any future updates or insertions are. The following example shows the
creation of a CHECK constraint on the Employee table:
ALTER TABLE [HumanResources].[Employee] WITH NOCHECK
ADD CONSTRAINT [CK_Employee_Gender_F]
CHECK ((upper([Gender])=’F’))
The constraint is on the Gender column that already has a check constraint on it, which
ensures that the data values are only F or M. The new constraint on the Gender column
specifies that the value must be F. The existing data has values of F and M, but the NOCHECK
option allows you to add the constraint anyway.
Any new rows added to the Employee table after the new CK_Employee_Gender_F CHECK
constraint has been added are then checked. With multiple CHECK constraints defined on a
column, the constraints are evaluated in the order in which they were added to the table.
In the preceding example, the CK_Employee_Gender constraint is evaluated first, and then
the new CK_Employee_Gender_F constraint is evaluated. If a Gender value of F is entered,
both constraints evaluate to TRUE, and the change is accepted. If a value of M is inserted in
the Gender column, the CK_Employee_Gender constraint succeeds, but the
CK_Employee_Gender_F constraint fails, and the change is rejected.
Creating Constraints
You can define constraints on a single column or on multiple columns. Single-column
constraints are referred to as column-level constraints. You can define this type of
constraint when you create the column on the table. Constraints that reference multiple
columns must be defined on the table and are considered table-level constraints. Table-
level constraints must be defined after all the referenced columns in the table are created.
Download from www.wowebook.com
ptg
822
CHAPTER 26 Implementing Data Integrity
Using T-SQL to Create Constraints
You can create constraints with T-SQL by using the CREATE TABLE or ALTER TABLE state-
ment. When you create a column-level constraint by using the CREATE TABLE statement,
the CONSTRAINT keyword and constraint definition are included immediately after the
column definition. Table-level constraints defined with the CREATE TABLE statement are
specified after the column list in the table definition.
The Customer table in the Adventureworks2008 database is a good example of a table that
has several different types of constraints. Listing 26.2 shows the CREATE TABLE command,
along with the constraint definitions for a table named Customer2 that is modeled after
the Customer table. All the constraints in this example have been included in the CREATE
TABLE statement. The constraints on this table include PRIMARY KEY, FOREIGN KEY, and
CHECK constraints. You can find all the constraints in the CREATE TABLE statement by
looking for the CONSTRAINT keyword.
LISTING 26.2 Creating Constraints by Using a CREATE TABLE Statement
CREATE TABLE [Sales].[Customer2](
[CustomerID] [int] IDENTITY(1,1) NOT FOR REPLICATION NOT NULL,
[TerritoryID] [int] NULL,
[AccountNumber] AS
(isnull(‘AW’+[dbo].[ufnLeadingZeros]([CustomerID]),’’)),
[CustomerType] [nchar](1) NOT NULL
CONSTRAINT CK_Customer_CustomerType2 CHECK
((upper([CustomerType])=’I’ OR upper([CustomerType])=’S’)),
[rowguid] [uniqueidentifier] ROWGUIDCOL NOT NULL
CONSTRAINT [DF_Customer_rowguid2] DEFAULT (newid()),
[ModifiedDate] [datetime] NOT NULL
CONSTRAINT [DF_Customer_ModifiedDate2] DEFAULT (getdate()),
CONSTRAINT [PK_Customer_CustomerID2] PRIMARY KEY CLUSTERED
([CustomerID] ASC),
CONSTRAINT FK_Customer_SalesTerritory_TerritoryID2 FOREIGN KEY
([TerritoryID])
REFERENCES [Sales].[SalesTerritory] ([TerritoryID])
)
GO
Generally, it is easier to manage constraints by using the ALTER TABLE statement than by
integrating them into the CREATE TABLE statement. One of the biggest reasons is that the
scripting capability in SQL Server Management Studio (SSMS) generates ALTER TABLE state-
ments for many of the constraints. You can easily script a table and its constraints by
using SSMS, and you will find that SSMS uses the ALTER TABLE statement extensively.
Listing 26.3 includes a statement to remove the Customer2 table and a subsequent set of
statements that re-creates the Customer2 table and utilizes the ALTER TABLE statement to
create several of the constraints. The statements to re-create the Customer2 table were
Download from www.wowebook.com
ptg
823
Using Constraints
26
generated using the Object Explorer in SSMS. Some of the constraints are created within
the initial CREATE TABLE statement, and some are created with the ALTER TABLE statement.
LISTING 26.3 Creating Constraints by Using ALTER TABLE
IF EXISTS (SELECT * FROM dbo.sysobjects WHERE id
= OBJECT_ID(N’[Sales].[Customer2]’) AND OBJECTPROPERTY(id, N’IsUserTable’) = 1)
DROP TABLE [Sales].[Customer2]
go
CREATE TABLE [Sales].[Customer2](
[CustomerID] [int] IDENTITY(1,1) NOT FOR REPLICATION NOT NULL,
[TerritoryID] [int] NULL,
[AccountNumber] AS (isnull(‘AW’+[dbo].[ufnLeadingZeros]([CustomerID]),’’)),
[CustomerType] [nchar](1) COLLATE SQL_Latin1_General_CP1_CI_AS NOT NULL,
[rowguid] [uniqueidentifier] ROWGUIDCOL NOT NULL
CONSTRAINT [DF_Customer_rowguid2] DEFAULT (newid()),
[ModifiedDate] [datetime] NOT NULL
CONSTRAINT [DF_Customer_ModifiedDate2] DEFAULT (getdate()),
CONSTRAINT [PK_Customer_CustomerID2] PRIMARY KEY CLUSTERED
(
[CustomerID] ASC
) ON [PRIMARY]
) ON [PRIMARY]
GO
ALTER TABLE [Sales].[Customer2] WITH CHECK
ADD CONSTRAINT [FK_Customer_SalesTerritory_TerritoryID2]
FOREIGN KEY( [TerritoryID])
REFERENCES [Sales].[SalesTerritory] ( [TerritoryID])
GO
ALTER TABLE [Sales].[Customer2] WITH CHECK
ADD CONSTRAINT [CK_Customer_CustomerType2]
CHECK ((upper([CustomerType])=’I’ OR upper([CustomerType])=’S’))
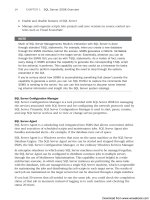
Using SSMS to Create Constraints
Most of the examples used so far in this chapter use T-SQL to demonstrate constraints.
SSMS simplifies the administration of constraints by providing a user-friendly interface
that allows you to view and manage constraints. The visual tools available for managing
constraints in SSMS include the Object Explorer, Database Diagram Editor, and Table
Designer.
Figure 26.3 shows the Object Explorer with the Constraints node expanded for the
Employee table and the New Constraint option selected. The Constraints node contains
the CHECK and DEFAULT constraints for the table. Notice in the Object Explorer that some
Download from www.wowebook.com