101 QUICK AND EASY SECRETS FOR USING YOUR DIGITAL PHOTOGRAPHS- P40 pdf
Bạn đang xem bản rút gọn của tài liệu. Xem và tải ngay bản đầy đủ của tài liệu tại đây (292.4 KB, 5 trang )
To add a title, click on Titles and Credits on the left side of the window. Then click on Title
at the beginning. Enter your title in the space provided. You can change the font and color by
clicking on Change the Text Font and Color below the space where you typed the title. Once
you’re finished, click Add Title.
Switch back to the timeline to finish your slideshow. If your music runs longer than your
images, click and drag it from the ending inward to where your images end. To get the music
to fade at the end, right-click on Song and click Fade Out.
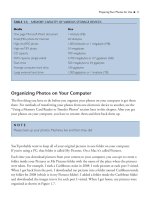
To save your show as a .wmv movie file, click on File > Publish Movie and then choose This
Computer. Click Next. Name your file. Click Browse and navigate to your desktop and then
click Next again. In the next window, save at high quality. Click Next again. Your movie will
be saved as a .wmv movie on your desktop, making it easy to upload to YouTube. (See the
upcoming “Putting Your Slideshow on YouTube” section.)
Making a Slideshow Using Picasa
You can create a slideshow in Picasa if you’ve downloaded the program from the Internet.
(Refer to the “Sharing Using Picasa and Picasa Web Albums” section in Chapter 2 for use and
download info.)
Open Picasa and choose a folder from the right frame of the window. Select Movie from the
Create menu. In the new window that comes up, you’ll see your images from the folder you
picked at the bottom of the window.
To choose an image for a slideshow, click on the one you want and then click on the green
thumbtack (Hold Selected Items icon). You’ll see the image appear in the lower-left corner of
the window. Repeat the step for each image you choose. To select multiple images, click and
drag over them and then click on the green thumbtack icon.
Working with Slideshows ■ 181
NOTE
If you want transitions in your movie, click on Storyboard in the drop-down menu in the
bottom frame of the window and then click Transitions in the middle of the window. Click
and drag your transitions between the pictures on the storyboard.
When you’re finished choosing images, click on the album icon (Add Selected Items to an
Album). In the drop-down menu that appears, click on New Album. In the dialog box
that comes up, name your album, click on Music, and then browse for an MP3 file on your
computer. Then click OK. Next, click on the album that you made in the left frame of the
window.
To make the movie, choose Create > Movie. A tab will come up with options for your movie.
Your audio selection should show up in green under where it says Audio Track. If it doesn’t,
click Load and navigate to an MP3 file on your computer. To experiment with the audio,
choose one of the three options from the drop-down menu (Truncate Audio, Fit Photos into
Audio, Loop Photos to Match Audio). Click on the drop-down menu to choose a transition.
Choose how much you want one slide to overlap another and then choose the dimensions you
want the video to appear on your screen. Last, click Create Movie. Then wait. It takes a few
minutes for Picasa to make the movie. To edit the movie, click on Edit Movie at the top of the
window. To save it, click on Export Clip. Your movie will be saved in Pictures > Picasa >
Exported Videos.
Putting Your Slideshow on YouTube
It’s easy to post your video on YouTube. All you do is click on that option when it comes time
to save your slideshow. After it’s uploaded, YouTube gives you a URL for your video. The URL
looks something like (This happens to be
the URL of the video slideshow I made using Picasa; see Figure 12.3.)
182 ■ Working with Slidehows
NOTE
To delete an item you’ve chosen, select the image from the icons and then click on the button
with the red circle on it (Clear Items from Selection Item) to remove it as a selection.
NOTE
Your movie filename will be the same name (with .mov added) as your Picasa album that
contains the images you chose for the movie.
From iMovie
To save to YouTube, navigate to Share > YouTube. (You have to be connected to the Internet
so iMovie can contact YouTube.) Then fill in the prompts in the next window (your account,
which is usually the e-mail address you have registered with Google, password, category from
drop-down menu, title, description, and tags). When you’re finished, click Next and then, in
the next window, click Publish. It will take some time for your movie to upload to YouTube.
When it’s finished, you can view it on there.
From Movie Maker
In Movie Maker, publish your file to your desktop. (Refer to the “Making a Movie from Your
Images Using Windows Movie Maker” section.) Go to YouTube and sign in with your Google
account. Scroll over your username and then click on My Videos from the drop-down menu.
In the window that comes up, scroll over Upload and click on Upload Video File. In the next
window (the Video File Upload window), click on Upload Video. Navigate to your desktop
and double-click on the .wmv file of your movie.
Working with Slideshows ■ 183
Figure 12.3 From most slideshow programs, your slideshow can automatically be uploaded
to YouTube with one click.
From Picasa
To upload a movie you made in Picasa, all you do is click on the Upload to YouTube button in
the window that appears after Picasa finishes making your movie. You can also navigate to that
button by double-clicking on the movie’s thumbnail in the Picasa Library. After you click
Upload to YouTube, a dialog box will come up in which you fill in the following prompts: title,
description, video category, and tags (same as the dialog box in iMovie). You also have an option
to make your movie public. Next, click on the Change User button at the top of the dialog box.
A prompt will come up, asking for your username and password.
Finally, click on Upload Video. After your video has been uploaded to YouTube, to view it, click
the tiny Click to View Online icon that appears on your computer screen.
Embedding a Slideshow on Your Blog
184 ■ Working with Slidehows
NOTE
Google owns YouTube, so use your Google username and password to log into YouTube.
Figure 12.4 You can embed YouTube videos into your blog posts.
Two free blog hosts, Blogger and WordPress, make it easy for you to put YouTube videos on
your blog.
On Blogger
Sign into YouTube with your Google account. Move the cursor over your username at the
top-left part of the window (User Name > My Videos). Click on Play for the video you want
to put on Blogger. In the frame on the right side of the window, you’ll see text boxes for URL
and Embed. The URL box gives you the URL of your YouTube video. You don’t want to use
that to get a YouTube video on your blog; you can only use that to provide a link to your video
(or someone else’s). What you do want, however, is the HTML code in the box next to where it
says Embed. Select and copy the code and sign into Blogger with your Google account. Click
on New Post for the blog where you want the YouTube video (slideshow) to go. In the next
window (the Posting tab), click on the Edit HTML tab (if it isn’t already selected). Paste in the
HTML code you copied from YouTube. Click on Publish Post.
After you’re finished, go ahead and type text, upload images, and create links as you would do
normally. It looks nicer if you have space between the video and your text, so leave a blank
space or two between your text/image code and the code for the video.
On WordPress
Follow the directions for signing into YouTube and getting the embedded code that’s described
in the previous section. Then sign into WordPress and navigate to your Dashboard. Click on
Posts and, in the next window, click on Add New under where it says Posts. In the next window
(the Posting tab), click on the HTML tab (if it isn’t already selected). Paste in the HTML code
you copied from YouTube. Click on Publish Post.
Working with Slideshows ■ 185
NOTE
You can put any video from YouTube on your blog in the same way as you put your own
on there—just copy and paste the HTML code into the HTML window of your blog.
NOTE
To embed a video on your blog, you have to choose to make the video public on YouTube.