101 QUICK AND EASY SECRETS FOR USING YOUR DIGITAL PHOTOGRAPHS- P31 pdf
Bạn đang xem bản rút gọn của tài liệu. Xem và tải ngay bản đầy đủ của tài liệu tại đây (286.51 KB, 5 trang )
CHAPTER 9
Personal
Accessories
I
f the sight of your photos pleases you, you have nearly limitless opportunities to view
them spontaneously during your daily activities. Look at one of your photos while
having a cup of coffee, flipping a business card to a client, sending a holiday greeting
card, and/or wearing a T-shirt. To create these pleasurable photo moments, just read this
chapter, and you’ll be able to set yourself up to have your photos presented on the spot at any
given moment. Other people will see your photos, too, which can create more than a Kodak
moment. When someone sees that you’re wearing your photo on a T-shirt, for example, it
could initiate a conversation that leads to a lifetime friendship. You just never know.
Putting Your Photos in a Traditional Photo Album
Displaying your photographs in a traditional photo album has changed from the days when
your photographs turned yellow inside plastic enclosures. Almost all materials nowadays are
acid free so that your photographs can last generations and stay relatively intact. Albums today
offer clear sheets (enclosures) that are archival, which means that they don’t contain acid, a
substance that deteriorates photos over time.
There are many websites where you can buy photo albums. AlbumSource.com is one site that
deals exclusively with photo albums (and portfolios for photographers). The site offers albums
with slip-in pockets, scrapbook-style albums, wedding albums, three-ring binders, portfolios,
and refills/accessories.
One popular album, Item A1 (click on Albums with Slip-in Pockets on the homepage, and it’s
the first album listed on the page), the Raika 102 leather double-page picture pocket album,
holds 120 4×6 photos and is offered in 53 cover finishes. This album contains 30 archival
sheets. The sheets are clear on one side and have a black background. This album is refillable,
so you can get a maximum of 240 photos into it provided you buy extra sheets.
Other albums for smaller photographs range from mahogany and wood albums, to bonded
leather albums, to the large leather oval-window album that holds 300 photos. They also have
wedding albums. Some of these include the gold oval-frame album, the silver-plated wedding
album, the Maude Asbury white silken fabric album, and European rose memory books.
Last are the portfolio offerings. Made by Prat, the outside cover is finished in black molded
polypropylene finish. The archival pages are clear with black mounting inserts. Each binder
comes with 10 sheets but will hold up to 30 sheets. The portfolios are offered in 8.5×11,
11×14, 14×17, 17×22, and 18×24. You can comparison shop for portfolios by going to
portfolios-and-art-cases.com, which I mentioned in the “What about Storing Prints?” sidebar
in Chapter 1.
Putting Your Photos on Coffee Mugs
You can design and then buy (as well as sell) your own mugs with your photos on them at
Zazzle.com (www.zazzle.com/custom/mugs). All you have to do is use the same procedure as
described for ordering printed postcards online in the “Selling Your Photos as Postcards” section
in Chapter 8. Figure 9.1 shows a photo on a cup in the Zazzle editing window. Coffee mugs
with your photo on them cost $12.95. If you want to sell a mug (or any other product on the
site) with your photo on it, you earn a minimum of 10 percent royalty of the standard price
($1.29 on the mug, for example). You can set the royalty rate higher, and Zazzle will add the
increase to its price. You earn all of the increase.
138 ■ Personal Accessories
You can also order mugs with your images on them at Shutterfly.com. If you go to
Shutterfly.com, click on Photo Gifts (at the top of the window, below the My Shutterfly, My
Pictures, Share, Community, and Store tabs), and then click on Mugs, you’ll get to the window
where you browse for the picture you want to be on your mug. When you click Browse, a
navigation window will appear on your computer. Pick the image you want (in JPEG format)
from your computer. After you click Next, your picture will appear on a page where you can edit
it. You click Next again, and you’re taken to a page where you can order the mug (from $11.19
to $12.79 depending on size and color). There is no feature where you can see your photo on
the cup, like there is on Zazzle.com.
Oh, let’s not forget Kodak. You can make mugs there in much the same way as you do on
Zazzle. Go to kodakgallery.com > Shop > Photo Gifts. Cups go for $12.99 and up.
Ironing Your Photos on T-Shirts
Putting one of your photos on a T-shirt is easy. The first thing you have to get (other than a
photo) is specialty iron-on printer paper. You’ll also need an iron, an ironing board (or other
flat surface), and a computer.
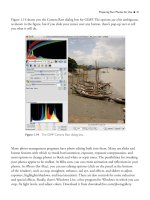
Personal Accessories ■ 139
Figure 9.1 At Zazzle.com, you view your photos on coffee mugs before you order them.
Then you just follow the directions on the box of specialty paper you are using. In a nutshell,
you print your image on iron-on transfer paper (print preview on regular paper first) and then
iron the image onto a T-shirt. Make sure you opt for T-shirt transfer paper (or photo paper if
that choice isn’t available) when choosing the paper for the printing process (usually under
Advanced Options/Media Type or Paper Type). When you iron, choose the highest temperature
your iron has (cotton setting), without steam, and press firmly on the iron so that the print
adheres to the fabric.
Finally, if you don’t feel like making your own T-shirts, you can order one with your photo on
it for $12.95 and up at Zazzle (www.zazzle.com/custom/tshirts). Zazzle handles PNG files.
(See the note after the “Getting Rid of Your Background” sidebar.)
You can also create a T-shirt for $19.99 with your photo on it at Snapfish (www.snapfish.com/
gifts/product=tshirt).
140 ■ Personal Accessories
NOTE
Iron-on specialty paper is called transfer paper.There is a transfer paper designed for both light
and dark T-shirts. Make sure you get the right transfer paper that’s compatible with the color
of the T-shirt upon which you are ironing an image.
GETTING RID OF YOUR BACKGROUND
If you want to get rid of the background of your image, and you are printing on a T-shirt from
an iron-on transfer, all you have to do is cut out the part of the image you want on the T-shirt.
If you’re ordering a T-shirt from an online seller, you have to upload a photo.
If you want to put an image on a T-shirt using an online interactive editing program, you’ll have
to cut out the background in Photoshop (or Elements) first.
To do this:
1. Open your image and save it with a new name. Figure 9.2 shows my original image.
2. In the Layers palette (Window > Layers), double-click the padlock, unlocking the
Background layer.
3. Select the Polygonal Lasso tool and type 2 px in the Feather field (in the Options bar).
4. Click the Polygonal Lasso tool around the part of the image you want cut out.