101 QUICK AND EASY SECRETS FOR USING YOUR DIGITAL PHOTOGRAPHS- P21 pdf
Bạn đang xem bản rút gọn của tài liệu. Xem và tải ngay bản đầy đủ của tài liệu tại đây (578.88 KB, 5 trang )
Organizing Your Scrapbook Album
There are many ways to organize your scrapbook. The way you organize it depends on what
you’re going to put in it. Your page organization depends on what kind of photos you are going
to put in an album. The way you scrapbook old family photos will be different than the way
you scrapbook current ones.
The easiest way to begin an organization scheme is to organize your scrapbook pages in the
same way you’ve organized your photos on the computer. Each folder of images could actually
make up an entire scrapbook. In Chapter 1 of this book, photos from a Caribbean cruise were
organized into folders by port. Scrapbook pages can be organized in the same way—by port.
If the computer is not your guide to scrapbooking organization, you can always organize your
scrapbook chronologically by year, highlighting the events of the year. If there are too many
pages for one year, you can make seasonal books.
If you just have too many pages to fit in one book, sort your pages by theme and make a separate
book for each theme (which you can then sort chronologically).
Another way you can organize your scrapbook pages is by the date you made them. If you do
this, you’ll see how your pages have gotten better (at least you hope) as time has passed.
86 ■ Scrapbooking Bug Gotcha?
JOINING AND UPLOADING IMAGES AT SCRAPBOOK.COM
Anybody who’s anybody in scrapbooking seems to be a member of scrapbook.com.Their
photos grace their scrapbook pages, each one an original creation both beautiful and revealing.
Members can upload their photography, too.
To join scrapbook.com, you just give an email address, login name, and password.When you
click on My Gallery on the site’s homepage, you’re taken to a place to upload your images.
Just click Browse and then navigate to the photo or photos you want to upload (up to 10 at
a time), then click Upload.After the photo uploads, a prompt will ask you what type of photo
it is—Layout (paper scrapbook page), Digital Layout (digital scrapbook page), Card, Scraproom
(image of the room you scrap in), Other Project, or Photo.Then input boxes will appear, asking
you for the Title, Description, and Keywords.There are also groups of categories that you
can click, which turn into drop-down menus of subcategories that you can check so that your
image shows up in the right place in the Gallery. Finally, you click Submit to place the image
in the Gallery.
If you have old photos you want to scrap, you can do it by decades—’60s, ’70s, ’80s—for a
retro feel. You can also arrange pages by people. You can scrapbook only photos that have
images of your mother (or yourself) to have a book about a person.
Finally, you can make books for life stages of your family, from your child’s toddler years to your
daughter’s years playing soccer or other sports.
Scrapbooking Bug Gotcha? ■ 87
NOTE
Sometimes you’ll find a great themed quick page for which you want to find a photo. If you
have many pages where that is the case, there will be no rhyme or reason to your scrapbook
pages. If this is the case, you probably can organize the scrapbook pages by the date you made
them.
KINDS OF SCRAPBOOK ALBUMS
The best bet for an album for your digital scrapbook pages is a spiral-bound notebook
(see Figure 5.7).The best are D-ring
notebooks for a couple of reasons.
It’s easy to take out and put back pages.
It isn’t the greatest setup, though, for
two-page spreads because of the large
white space and chrome rings in the
middle. If you’re into making two-page
spreads, post-bound albums are a good
choice because they have minimal
space between pages.
At scrapbook.com you can order
albums at />scrapbooks.html.You have choices of
albums by size, type, color, and brand.
Figure 5.7 A spiral-bound album is a good choice
for a scrapbook album.
Paper Scrapbookers’ Supplies Galore
So what’s available to decorate your photos to the max (see Figure 5.8)? Here are just a few
options to think about if you want to go all the way with your scrapbooking:
❈
Alphabets. Rub-on letters, letter stickers, download and print letters.
❈
Background sheets. Decorative sheets upon which you affix your scrapbook photos and
embellishments.
❈
Brads. Two-pronged fasteners with decorations on the top.
❈
Chalk. Rub-on chalk and chalk pencils.
❈
Chipboards. Cardboard (anything from a cereal box inside to the back of a legal pad).
You can also purchase chipboard with designs and a place for your photography drawn
onto it, as well as chipboard alphabets.
❈
Die cuts. Designs that you cut and/or punch out from a cardboard page.
❈
E-cuts. Designs that you can color in Photoshop and then print out as many times as you want.
❈
Embellishments. Any extras on your scrapbook page—ribbons, buttons, brads (see above),
stickers, and so on.
❈
Page protectors. Clear enclosures for scrapbook pages. (Archival is best to preserve pages.)
❈
Photo corners. Inserts that are placed on the four corners of the scrapbook page, into which
you place your photos. (Archival is best to prevent damage to the photo.)
❈
Paper punches. Hole punches with which you can punch out shapes and designs or
geometrical shapes (to make a frame on top of which you put your photo).
❈
Ribbons. Strips of decorative material from which you can make bows or that you can use
to frame your photos.
❈
Stamps. Devices that come in different designs that you press on an inkpad and apply to
paper.
❈
Stickers. Decorative material with adhesive on the back. (Use archival.)
88 ■ Scrapbooking Bug Gotcha?
NOTE
Along with your photos, you can include items such as invitations, concert and theater tickets,
and postcards.
Scrapbooking Bug Gotcha? ■ 89
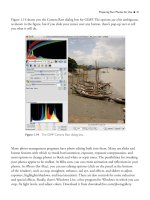
Figure 5.8 This page by Crystal Brothers has buttons, cardstock, patterned paper, chipboard letters, and
die-cut letters.