CCNA Wireless Official Exam Certification Guide part 35 pot
Bạn đang xem bản rút gọn của tài liệu. Xem và tải ngay bản đầy đủ của tài liệu tại đây (407.06 KB, 10 trang )
312 CCNA Wireless Official Exam Certification Guide
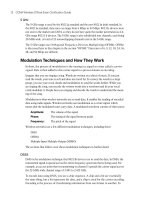
Figure 16-19 Profile Management in ADU
manually. To see what APs are nearby, select the Profile Management tab in ADU (see
Figure 16-19), and then click the Scan button.
To connect to an AP in the scan list, select it and click Activate. A Profile Management
window appears. Its three tabs—General, Security, and Advanced—allow any special AP
settings to be entered into the profile and saved. The General tab sets up options such as
the name of the connection and general parameters. The Security tab is where you
configure the security settings for the WLAN, and the Advanced tab is where you config-
ure advanced settings such as power levels and wireless modes for the WLAN.
Manually Creating a Profile
To create a profile, you can click the New button on the Profile Management tab of ADU.
A Profile Management window appears with three tabs—General, Security, and Ad-
vanced. Give the profile a name and enter up to three SSIDs. After you have named the
profile, select the Security tab. From the Security tab, you can choose from
WPA/WPA2/CCKM, WPA/WPA2 Passphrase, 802.1x, Pre-Shared Key (Static WEP), or
None, as shown in Figure 16-20.
Unsecure Profiles
By leaving the default option (None), you would essentially be creating an unsecure pro-
file. This is not a recommended practice.
802.1x Profiles
You can also create an 802.1x profile, but understand that it is authentication only. This
means that your data is not encrypted. It does, however, use a central authentication
server. To talk to this server, you must choose between Lightweight Extensible Authenti-
cation Protocol (LEAP), which is the default, Extensible Authentication Protocol Trans-
port Layer Security (EAP-TLS), Protected Extensible Authentication Protocol (PEAP),
Key
Topi
c
18_1587202115_ch16.qxp 9/29/08 2:42 PM Page 312
Chapter 16: Wireless Clients 313
Figure 16-20 Security Options
Extensible Authentication Protocol Generic Token Card (EAP-GTC), PEAP with EAP Mi-
crosoft Challenge Handshake Authentication Protocol Version 2 (EAP MS-CHAP V2),
EAP Flexible Authentication via Secure Tunneling (EAP-FAST), and Host-Based EAP.
Click Configure to add a temporary username and password or to use a saved username
and password.
WPA/WPA2/CCKM Profiles
WPA/WPA2/CCKM lets you select an EAP type, as shown in Figure 16-21.
This method performs encryption with a rotated encryption key and authentication with
802.1x.
WPA/WPA2 Passphrase Profiles
You can choose to use WPA/WPA2 Passphrase. This method uses encryption with a ro-
tated encryption key and a common authentication key, called a passphrase. To configure
the passphrase, click the Configure button and enter the ASCII or hexadecimal
passphrase, as shown in Figure 16-22.
By following the preceding steps, you can create any of the available profiles. Table 16-3
compares the different security options.
Key
Topi
c
18_1587202115_ch16.qxp 9/29/08 2:42 PM Page 313
314 CCNA Wireless Official Exam Certification Guide
Figure 16-22 WPA/WPA2 Passphrase
Table 16-3 Security Options Comparison
Security Option Encryption Authentication
WPA/WPA2/CCKM Rotating key EAP methods (see 802.1x)
WPA/WPA2 Passphrase Rotating key 8 to 63 ASCII or 64 hexadecimal passphrase
802.1x None EAP-TLS, PEAP, LEAP, EAP-FAST, host-
based EAP (host-based is not an option for
WPA/WPA2/CCKM)
Pre-Shared Key (Static
WEP)
Weak None
None None None
Figure 16-21 WPA/WPA2/CCKM
Key
Topi
c
Key
Topi
c
Key
Topi
c
18_1587202115_ch16.qxp 9/29/08 2:42 PM Page 314
Chapter 16: Wireless Clients 315
Figure 16-23 Adapter Information
Managing Profiles
You can manage profiles from the Profile Management tab in ADU. You can create a new
profile, as already discussed. You can also modify existing profiles. You can import exist-
ing profiles by clicking the Import button and browsing to the location of a .prf file. You
can also export profiles and move them to other computers. To do this, simply click the
Export button, define a name for the profile (if you want to change it), and browse to
where you want to save it. This might be an external USB drive or even the desktop. As
soon as you have the location where you want it, click Save.
As discussed previously in this chapter, you can scan for nearby networks. You also can
change the order of your profiles by clicking the Order Profiles button and moving them
up or down in the order you want.
Using Diagnostic Tools
After you have created a profile and it is in use, there are likely times when you will need
to troubleshoot connectivity issues. If this is the case, a number of tools are available in
the ADU. The following sections discuss options that you may find helpful in trou-
bleshooting.
Adapter Information
Begin by looking at the adapter information shown in Figure 16-23. You find this informa-
tion by clicking the Adapter Information button on the Diagnostics tab in the ADU inter-
face. Two important pieces of information that you get from this output are the driver
version and the card’s MAC address. These can be used in troubleshooting. On the con-
troller, you can enable a debug based on the client’s MAC address to get specific informa-
tion for that client. Also, the driver information can be used to look for bug reports in
Cisco’s support center.
18_1587202115_ch16.qxp 9/29/08 2:42 PM Page 315
316 CCNA Wireless Official Exam Certification Guide
Figure 16-24 Advanced Statistics
Advanced Statistics
The Advanced Statistics button gives information about the frames transmitted and re-
ceived, as demonstrated in the sample output shown in Figure 16-24.
If you note a high count of retries, it is probably due to a high number of collisions. High
numbers of RTS/CTS (provided in relation to the total number of frames transmitted) may
indicate frame errors and bad link quality. You can use the Advanced Statistics to trou-
bleshoot authentication issues as well as encryption problems. Authentication Rejects in-
dicates that you are in fact talking to a server that is rejecting the authentication attempt.
Authentication Time-Outs could indicate a connectivity issue with the AAA server.
Choose Options > Display Settings to change how the values appear, selecting either rel-
ative or cumulative values. For the most part, the default values (cumulative) are preferred.
Test Utility
An additional set of tools for troubleshooting includes a driver installation test, card inser-
tion test, card enable test, radio test, association test, authentication test, and network
test. You access these tests by selecting the Action menu in ADU and then choosing the
Client Managed Test link. Figure 16-25 shows the completed test output.
To begin the test, click the Start Test button. The following tests are run sequentially:
1. Driver Installation test
2. Card Insertion test
3. Card Enable test
4. Radio test
Key
Topi
c
18_1587202115_ch16.qxp 9/29/08 2:42 PM Page 316
Chapter 16: Wireless Clients 317
Figure 16-25 Client Managed Tests
5. Association test
6. Authentication test
7. Network test
The information gained from each of these tests can quickly point you in the direction of
the issue. If the driver is not installed, this could indicate that it was inadvertently re-
moved. If the driver is not installed, the ADU does not work. If the card is not inserted, it
does not work. If the card has been disabled, it does not work. Also, if the radio is dis-
abled, it does not function.
The Association test indicates if open association is functioning; the same goes for the
Authentication test. These two tests can indicate where the connection is failing.
Finally, the Network test helps determine if the issue lies with the network rather than the
wireless connection. Sometimes you get associated but still can’t send if the network itself
is having issues. Troubleshooting is discussed more in Chapter 20, “Troubleshooting Wire-
less Networks.”
Site Survey Utility
The Site Survey Utility (CSSU) is the optional software set that you select using a check-
box during installation. This can be a handy tool for troubleshooting. As stated earlier in
this chapter, it doesn’t link to a map; however, it can give you handy information about the
signal you are receiving.
To access the CSSU, choose Start > All Programs > Cisco Aironet > Aironet Site Survey
Utility.
The utility dynamically represents your connection to the wireless network. As shown in
Figure 16-26, it displays the AP MAC address, channel, signal strength (RSSI), noise level,
18_1587202115_ch16.qxp 9/29/08 2:42 PM Page 317
318 CCNA Wireless Official Exam Certification Guide
Figure 16-26 CSSU Display in dBm
Figure 16-27 CSSU Display in Percentage
SNR, and speed of the connection. The connection quality is represented with the follow-
ing colors:
■ Green = excellent
■ Yellow = good
■ Orange = fair
■ Red = poor
By default, the output is displayed in dB or dBm, as shown in Figure 16-26. You can
change this to display as a percentage, as shown in Figure 16-27. The decibels display unit
is recommended because it gives a much more precise view. You can also maximize the
window and increase the Time in seconds value (up to 60 seconds) to view more informa-
tion over a greater period of time. Also, Cisco’s TAC asks for the information in dB or
dBm.
Key
Topi
c
18_1587202115_ch16.qxp 9/29/08 2:42 PM Page 318
Chapter 16: Wireless Clients 319
Figure 16-28 ACAU Interface
You can configure the CSSU with thresholds that can trigger an alert or logging. You set
thresholds by choosing Thresholds > Configure Thresholds.
The AP scan list reports all the APs that your adapter detects. You don’t use this informa-
tion to associate with an AP. Instead, you would use this information to determine the
characteristics of the APS around you. Again, this is a troubleshooting utility, so it can
help you determine sources of interference.
Another neat feature of the CSSU is the ability to enable a proximity beeper. It beeps
more quickly as you get a better signal. To enable it, choose Action > enable proximity
beeper.
You can change what triggers the proximity beeper under the Action drop-down menu by
selecting Options.
The ACAU
The Aironet Configuration Administration Utility (ACAU) is designed to help automate
the process of deploying the ADU and client profiles. The main interface, shown in Figure
16-28, has four configuration families under the Global Settings tab. These configuration
families include Setup Settings, User Settings, Profile Settings, and ASTU Settings. If you
double-click these, they expand, allowing you to use radio buttons to control the capabili-
ties of the ADU and how it is installed.
On the Profile Management tab, you can add up to 16 new profiles, modify them, remove
them, import and export them, and reorder them. The profile configuration looks very
similar to that of the ADU profile configuration. The difference between the two is that
these profiles are not considered local. When you have the Global Settings arranged the
way you want them, and then the Profiles set up the way you want them, choose File >
Key
Topi
c
18_1587202115_ch16.qxp 9/29/08 2:42 PM Page 319
320 CCNA Wireless Official Exam Certification Guide
Save As. The default name for the file is CiscoAdminConfig.dat. Save this file and then
place it in the same directory as the ADU installation executable. When the ADU install
executes, it looks for a .dat file and uses it for its setup, automatically bringing in the pro-
files you configured in the ACAU.
The Cisco Secure Services Client
The Cisco Secure Services Client (SSC) is client software that provides 802.1x (Layer 2)
user and device authentication for access to both wired and wireless networks. The SSC
does not need a Cisco wireless card to operate the software. It’s really an alternative to the
WZC, with some major benefits. From the wired network side, it provides 802.1x capabili-
ties for user and device authentication, which is more extensive than the standard wired
LAN connection. On the wireless side, it provides all the security capabilities needed for
enterprise class connectivity. The interface is very simple, making it easy for customers
and guests to connect to a Cisco network.
The CSSC provides a unified wired and wireless supplicant that can provide services
across many different vendor network cards as well as provide the ability to centralize
management of client adapters. The CSSC also provides a tremendous amount of flexibil-
ity for authenticating to the wired and wireless network, not restricted to simply open,
WEP, PEAP, and EAP-TLS. One other key advantage is the client’s capability to disable
the wired interface automatically if the wireless adapter associates to a wireless network.
This ensures that IP address space is used efficiently and split tunneling is avoided.
There are three pieces of SSC software:
■ The SSC itself: Client software that provides 802.1x user and device authentication
for access to both wired and wireless networks.
■ The Cisco Secure Services Client Administration Utilities: Allow you to create
complex profiles.
■ The Cisco Secure Services Client Log Packager: Connects system information
for support. An administrator would create profiles using the Cisco Secure Services
Client Administration Utilities, which then generate an XML file that can be deployed
network-wide to all the client machines.
Licensing
There are three SSC license types:
■ 90-day trial
■ Nonexpiring wired only
■ Nonexpiring wired and wireless
The 90-day trial offers full features for wired and wireless. When the 90 days are up, you
must purchase a license, or it will automatically convert to a nonexpiring wired only. This
is a limited feature set. If you purchase a license for the wireless features, you will have the
full set of capabilities for both wired and wireless enabled.
18_1587202115_ch16.qxp 9/29/08 2:42 PM Page 320
Chapter 16: Wireless Clients 321
Figure 16-29 Installing the SSC
Figure 16-30 Right-Click Menu of SSC
Installation
The installation process uses a Microsoft Installer (MSI), which you can obtain from
Cisco.com. You must have administrative rights on the computer you are installing on.
Figure 16-29 shows the install wizard of the SSC.
Configuring Profiles
The SSC runs as a service and appears in the systray whether or not it is connected. You
can hover the mouse cursor over the systray icons to find out the status. Right-click to ac-
cess the menu. Any existing profiles or networks that have been detected appear, as
shown in Figure 16-30.
18_1587202115_ch16.qxp 9/29/08 2:42 PM Page 321