CCNA 1 and 2 Companion Guide, Revised (Cisco Networking Academy Program) part 98 pdf
Bạn đang xem bản rút gọn của tài liệu. Xem và tải ngay bản đầy đủ của tài liệu tại đây (480.48 KB, 10 trang )
Installation Process 939
The Trimout Phase
In the rough-in phase of cable installation, excess cable was left at both ends of the
cable run. These coils of cable, which are used to take up slack and facilitate later
changes, are known as service loops. Service loops are discouraged by EIA/TIA stan-
dards. It is not uncommon to have 1m (3 ft.) of ends hanging out of a wall jack at the
finish of the rough-in stage. In the telecommunications room (TR), where hundreds of
cables are terminated, it is not uncommon to have 2m to 3m (6 ft. to 10 ft.) of ends.
Although this practice appears to be wasteful, experienced installers know that an
excess of cable provides more flexibility in cable routing and provides greater access
to cables when toning (testing) individual cables. A common mistake of new installers
is to cut the cable short. Remember, excess can always be cut off, but a short cable can-
not be extended. If a cable is too short, the only alternative is to pull another cable,
and this is a costly alternative in terms of labor and time.
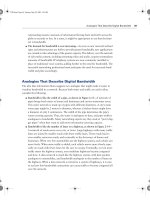
If there is 1m (3 ft.) of cable coming out of the wall at the jack location, it is best to cut
this back to about 25 cm (9.8 in.). A new label should be applied to the cable about 15 cm
(5.9 in.) from the end. The jacket then should be stripped back about 5 cm to 7 cm (2 in.
to 2.8 in.), exposing the individual twisted pairs. The completed jack termination should
have no more that 1.5 cm (.6 in.) of unjacketed conductor exposed and no more than
1.5 cm (.6 in.) of untwist in the cable pairs. Excess conductor length should be cut off
at the final termination (see Figure A-40).
Figure A-40 Cutting Cable to Length
Lab Activity Terminating Category 5e to a 110-Block
In this lab, you learn how to terminate Category 5e cable to a 110-type termi-
nation block, as well as how to properly use a 110 punchdown tool and a 110
multipunch tool.
appen_a.fm Page 939 Tuesday, May 20, 2003 4:54 PM
940 Appendix A: Structured Cabling
The jack is terminated with approximately 15 cm to 20 cm (6 in. to 8 in.) of cable still
protruding from the wall. This excess cable is coiled carefully into the wall or wall box
when the jack is installed. This excess cable can be used to reterminate the jack at a
later date or enable the removal of the faceplate and the addition of another jack to the
outlet. At workstation terminations, it is common for the wires in the jack to lose con-
tact with the pins because the patch cord to the work area often is pulled, kicked, or
stretched by the workstation users.
Terminate or Punchdown
The termination of communications cables at a TR is referred to as punching down.
Cables also are punched down on termination panels mounted on wall fields and at
the rear of cross-connect panels.
Wires are inserted into the appropriate locations on termination panels, and then the
punchdown tool is placed over the wires. Depending on the type of termination hard-
ware used, replaceable blades in the termination tool can changed out to accommodate
the termination type (see Figure A-41).
Figure A-41 Removable Termination Blade
As pressure is exerted on the tool, spring tension increases to a point at which a firing-
pin type mechanism releases the energy stored in the spring. The wire instantly is forced
between two insulation-displacement connections, and excess wire is cut off in the same
operation. The connection is referred to as insulation displacement because the insula-
tion is pushed out of the way by the contacting points on the terminal.
Insulation-displacement connections provide a secure, gas-tight connection, which
means that the actual connection is not exposed to the atmosphere because the dis-
placed insulation presses tightly against the block. This is necessary to provide long-term
corrosion-free connections. Patch panels typically are used for data networks, as are
110-blocks, which also are used for voice applications.
appen_a.fm Page 940 Tuesday, May 20, 2003 4:54 PM
Installation Process 941
Wire Management
Some termination systems come with a wire-management scheme built in. 110-blocks
use plastic troughs and spacers between blocks. Troughs can be used both horizontally
and vertically. Rack-mount installations incorporate a variety of wire-management
features (see Figure A-42). Some use a combination of D-rings and troughs.
Figure A-42 Panduit Wire Management
When purchasing cable-management systems, consider the following:
■ The system should protect the cable from pinching and should maintain the max-
imum bend radius.
■ The system is scalable, so when more cables are needed, it can handle them.
■ The system is flexible, so cables can come into it from all directions.
■ The system offers a smooth transition to horizontal pathways so that cable is not
damaged or exceeds maximum bend radius.
■ The system is durable, so it will last as long as the cables and equipment mounted
on it.
Careful Labeling
Labeling is another important part of a structured cabling system. If cables are not
labeled clearly on both ends, there can be confusion. TIA/EIA-606 specifies that each
hardware termination unit must have some kind of unique identifier. This identifier
must be marked on each termination hardware unit or on its label. When identifiers
are used at the work area, station terminations must have a label on the faceplate, the
housing, or the connector itself. Most Requests For Proposals and specifications require
that labels be computer generated so that they are permanent, legible, and more pro-
fessional in appearance.
appen_a.fm Page 941 Tuesday, May 20, 2003 4:54 PM
942 Appendix A: Structured Cabling
Use labels that will remain understandable to someone who might work on the system
many years in the future. Many network administrators incorporate room numbers in
the label information. They assign letters to each cable that leads to a room. Some label-
ing systems, particularly those in very large networks, also incorporate color-coding.
To ensure that the labels do not rub off or get cut off (the end) later, mark the cable
several times, approximately 60 cm (23.6 in.) apart, at the free end. After the cable
is run, repeat the procedure at the box or spool end. To keep all cables tied securely
together, use electrical tape. Bind the cable ends with the end of a pull string. Ensure
that the pull string does not come loose by tying some half-hitch knots around the
cables with the pull string before taping the ends. Do not skimp on the tape. If the
string or cables pull out later, it could cost time and money.
After pulling the cable along the selected route, bring it into the TR. Allow enough
cable for the ends to reach all the way to each jack location, plus enough excess or
slack to reach the floor and extend another 60 cm to 90 cm (23.6 in. to 35.4 in.).
Go back to the spools of cable at the central point or TR. Use the labels on each spool
as a reference, and then mark each cable with the appropriate room number and letter.
Do not cut the cables unless they have a label. If each of these steps is followed, the
networking media used for the horizontal cabling run should be labeled at both ends.
Finish Phase
The finish phase is the point at which installers test and, in some cases, certify their
work. Testing makes certain that all the wires route to their appointed destinations.
Certification is a statement of the quality of the wiring and connection.
Important aspects of the finish phase include these:
■ Cable testing
■ Time domain reflectometer (TDR)
■ Cable certification and documentation
■ Cutting over
Diagnostic tools are important in determining existing and potential problems or flaws
in a network cabling installation.
Cable Testing
Cable testers are used to test cables for opens, shorts, split pairs, and other wiring prob-
lems. After the cable installer has terminated a cable, the cable should be plugged into
the cable tester to verify that the termination was done correctly. If a wire accidentally
appen_a.fm Page 942 Tuesday, May 20, 2003 4:54 PM
Finish Phase 943
was mapped to the wrong pin, the cable tester will indicate the wiring mistake. Similarly,
it can test for problems with the cable, such as shorts or opens. A cable tester should be a
part of every cable installer’s toolbox. After the cable has been tested for continuity using
these cable testers, the cables can be certified by using certification meters.
Testing is the most important step in the finish phase of cable installation. Testing veri-
fies that all wires are working so that the customer does not find that there are problems
later. It is better to catch a problem before it becomes a major issue.
Tests relating to cable function are found in TIA/EIA-568-B.1. Common things to test
for include the following (see Figure A-43):
■ Opens—Wires in cables fail to make a continuous path from end to end. This is
usually the result or improper termination or breakage. Occasionally it is
because of faulty cable.
■ Shorts—Wires in cables touch each other, shorting the circuit.
■ Split pairs—Wires are mixed among pairs.
■ Wire-mapping errors—Wires in a multipair cable do not terminate at the appro-
priate contacts in the connector at the far end.
Figure A-43 Wiring Faults Caused by Improper Termination
1
2
3
6
5
4
7
8
1
2
3
6
5
4
7
8
1
2
3
6
5
4
7
8
1
2
3
6
5
4
7
8
1
2
3
6
5
4
7
8
1
2
3
6
5
4
7
8
Split
1
2
3
6
5
4
7
8
1
2
3
6
5
4
7
8
Wire-Mapping Errors
Correct Reversed Pair
G/W
G/W
G/W
G/W
O/W
O/W
O/W
O/W
B/W
B/W
B/W
B/W
B/W = Brown/White
O/W = Orange/White
G/W = Green/White
appen_a.fm Page 943 Wednesday, May 21, 2003 8:43 AM
944 Appendix A: Structured Cabling
In most cases, simple functional testing for opens, shorts, split pairs, and wire-mapping
errors are done from one end of the cable only.
Testing for Shorts
A short is formed when the two wires in a pair touch each other, providing an undesired
shortcut in the flow of signal (see Figure A-44). This shortcut is a completion of the
circuit before the voltage reaches the intended target.
Figure A-44 Wire Short
To determine whether there is a short, measure the continuity or resistance between
the wires. No continuity should be measured between them, and there should be an
infinite amount of resistance between them. Make these measurements with an ohm-
meter using a low-resistance scale. If a higher-resistance scale is used, the installer runs
the risk of inadvertently measuring the installer’s own body resistance when the wires
are held to the probes. Some installers find it useful to create a small test fixture to
avoid this problem. Many test probes can be fitted with slip-on alligator clips. They
can hold one of the wires that so both leads are not touched at the same time.
Testing for Reversals
A reversal occurs when the tip (or ring) side of a pair is terminated on the ring (or tip)
position at the opposite end of the wire (see Figure A-45).
Figure A-45 Reversal
appen_a.fm Page 944 Tuesday, May 20, 2003 4:54 PM
Finish Phase 945
To repair a reversed pair in a cable, the RJ-45 connector must be removed and the
cable end with the pair reversal must be terminated again.
Testing for Split Pairs
Split pairs happen when wires are mixed among pairs (see Figure A-46). One way to
test for splits is with an ohmmeter. First, test the pairs for shorts. If none is found,
place a short across each pair. When it is tested with an ohmmeter, finding a short is
the anticipated result. If an open is found, something is wrong. The pair is either split
or open. A tone generator then can be used to determine which is the case. Higher-end
testers detect split pairs by measuring crosstalk between pairs.
Figure A-46 Split Pairs
A simple cable tester can be used to check for split pairs as well. This type of tester
uses LEDs that immediately notify the installer if there is a problem with polarity or
continuity.
To repair a split, one or both of the connectors must be removed and the cable end
must be terminated again.
Time Domain Reflectometer
A time domain reflectometer (TDR) works by sending a pulse down the wire and then
monitoring the electronic echoes that occur on the cable because of cable problems.
TDRs determine whether there is a cable fault and, if so, whether it is an open or short;
they also determine the distance from the meter to the fault. The signal is reflected
back when it reaches the end of the cable, as well as anytime it encounters a defect in
the cable along the way. The speed at which the signal travels is known as the nominal
velocity of propagation. This is a known quantity for different cable types. When set,
appen_a.fm Page 945 Tuesday, May 20, 2003 4:54 PM
946 Appendix A: Structured Cabling
the tester knows how fast the signal travels and can measure the length of the cable by
measuring the amount of time that it takes for the signal to be sent and reflected back.
A TDR readout typically is calibrated in feet or meters. This is an extremely efficient
means of locating cable problems, although the instrument must be adjusted properly
and used with skill.
Cable Certification and Documentation
Testing is not the same as certification. Testing is for functionality—that is, it determines
whether the wire can carry the signal from end to end. Certification, or performance
testing, is a statement about cable performance. It answers these questions: How well
does the signal travel down the cable? Is the signal free from interference? Is the signal
of adequate strength at the other end of the cable?
Certification Tester
Certification goes beyond functionality testing. Performance testing also must be done.
Structured cabling systems that adhere to installation standards are required to be certi-
fied. Certification meters perform all of the required performance tests to adhere to the
ANSI/TIA/EIA-568-B standards (see Figure A-47). Meters have an autotest function,
so all required tests are performed with the touch of a single button. These tests include
near-end crosstalk (NEXT), wire map, impedance, length, DC loop resistance, propaga-
tion delay, return loss, delay skew, attenuation, and attenuation-to-crosstalk ratio. These
meters hold multiple test results in memory. Test results are downloaded to a computer
so that a test report can be generated and presented to the customer. In addition to cer-
tification, these meters include diagnostic features that not only identify problems, but
also actually show how far these problems are from the end of the cable being tested.
Figure A-47 Fluke Networks 4000 Cable Certification Meter
appen_a.fm Page 946 Tuesday, May 20, 2003 4:54 PM
Finish Phase 947
Performance testing usually takes place at a designated test frequency. The frequency is
selected to exercise the cable at a speed that will be part of its intended operation. For
example, Category 5e cable is tested at 100 MHz, and Category 6 cable is tested at
250 MHz. Performance testing is described in various addenda to TIA/EIA-568-B.
Modern testing hardware and software can provide both text and graphic output. This
allows ready comparisons as well as analysis at a glance.
The cable certification process forms a baseline measurement for the cabling system.
When the contract is established, the certification standard to which the resulting job
must conform usually is included as part of the contract. The installation must meet or
exceed the specifications for the wire grade that is being used. Detailed documentation
showing that the cabling has reached these standards is submitted to the customer.
The certification procedure is an important step in completing a cabling job. It enables
the installer to say unequivocally that at a certain day and time, the cables performed
to certain specifications. Any later change in cable performance must be attributable to
some cause, and it will be easier to figure out what that cause is if there is hard, fast
evidence of the cables’ condition at an earlier point. Different grades of cable require
different minimum test results to be acceptable. Generally, the higher the cable cate-
gory is, the tighter the manufacturing tolerances are, the higher the quality is, and the
better the performance is.
Certification Tests
To pass certification, cables must meet the minimum test results for their grade. Cables
must meet or exceed these specifications. Actual test results that outperform the mini-
mum often are encountered. The difference between the actual test results and the
minimum test results is known as headroom. If the results show lots of headroom, less
cable maintenance should be needed in the future, and the network should be more
tolerant of poor-grade patch cords and equipment cables.
The commonly used specifications include these:
■ Specified frequency range—Each cable is tested at a frequency range that it is
most likely to be used in daily service. The higher the grade is, the higher this
range is.
■ Attenuation—The amount of signal that a cable will absorb is a measure of its
attenuation. The lower the attenuation is, the more perfect the conductors are
and the higher quality the cable is.
■ Near-end crosstalk (NEXT)—Near-end crosstalk occurs when signals from one
pair interfere with another at the near end of the cable. Crosstalk can affect the
capability of the cable to carry data. The amount of NEXT that a cable must be
capable of tolerating is specified for each grade.
appen_a.fm Page 947 Tuesday, May 20, 2003 4:54 PM
948 Appendix A: Structured Cabling
■ Power Sum NEXT—In cables in which all the conductors are used (such as Giga-
bit Ethernet), the signals on one cable interfere with several pairs, not just one.
Calculating the effect of these disturbances requires that the interactions of all
pairs in the cable be taken into account. The power sum NEXT equation mea-
surement does this.
■ ACR—The attenuation-to-crosstalk ratio (ACR) is an indication of how much
stronger the received signal is when compared to the NEXT or noise on the same
cable. Sometimes this measurement is referred to as the signal-to-noise ratio
(SNR). Be aware that SNR takes into account external interference as well.
■ Power sum ACR—When all of the pairs in a cable are used, the interaction
between the pairs becomes more complicated. This is because more wires are
involved, meaning that there are more mutual interactions. The power sum
equations help take this greater mutual disturbance into account.
■ Equal-level far-end crosstalk (ELFEXT)—Equal-level far-end crosstalk is a calcu-
lated measurement of the amount of crosstalk that occurs at the far end of the
wire. If this characteristic is high, it means that the cable is not carrying the sig-
nals well and that the ACR (signal-to-noise) ratio is not well controlled.
■ Power sum ELFEXT—As with the other power sum measurements, interaction
among multiple pairs in the same cable increase the complexity of equal-level far-
end crosstalk characteristics. The power-sum version of the measurements takes
this into account.
■ Return loss—Some of the signal traveling down a wire bounces off imperfections
such as impedance mismatches in the wire. It can be reflected back toward the
sender and can form a source of interference. This is called return loss.
■ Propagation delay—The electrical properties of the cable can affect the speed
at which signals travel through it. The value of this delay must be known to
perform certain measurements, such as time domain reflectometry. Propagation
delay for cable usually is specified as a maximum allowable amount of delay, in
nanoseconds.
■ Delay skew—Because each pair in a cable has a different number of twists, signals
that enter the cable at the same time are bound to be slightly out-of-sync when
they get to the far end. This lagging and leading of signals on adjacent pairs is
called delay skew. This problem can be heightened by sloppy termination, in
which the cables are asymmetric with respect to the connector pins. Finally, if
there is a difference in propagation delay between the wires in a cable pair, it
could affect the signal because of delay skew.
appen_a.fm Page 948 Tuesday, May 20, 2003 4:54 PM